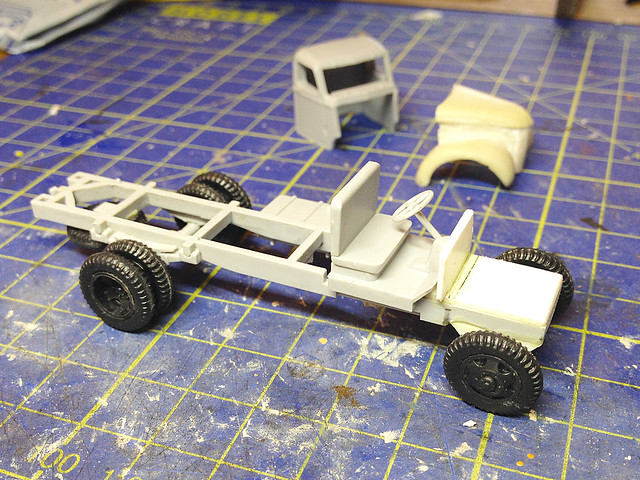
The main work was to re-centre the front axle so that the front wheels fitted correctly under the new mud-guards. This entailed me making a very rudimentary suspension onto which I could rest the axle, but this had to be exactly the right height.
[Note on the PST kit: There were a couple of problems with this kit itself I should mention. First of all, this kit is an amalgum of two sets of sprues; a set of sprues from PST's previous Studebaker US-6/GMC truck kits and a new sprue to combine with these to make it into the 1943 Ford truck. So some of the parts aren't purpose built for this new truck. Secondly, the PST instructions are a bit vague at times and I - in particular - had a hell of a time locating the correct position for the exhaust system. In the end I just had to make a guestimate about the exhaust position.]
I also made a simple engine 'fire wall' to sit between the (imaginary) engine block and the driver's cab. This was actually to support the cab so that it was in a nicely horizontal position so that it joined the new bonnet correctly...
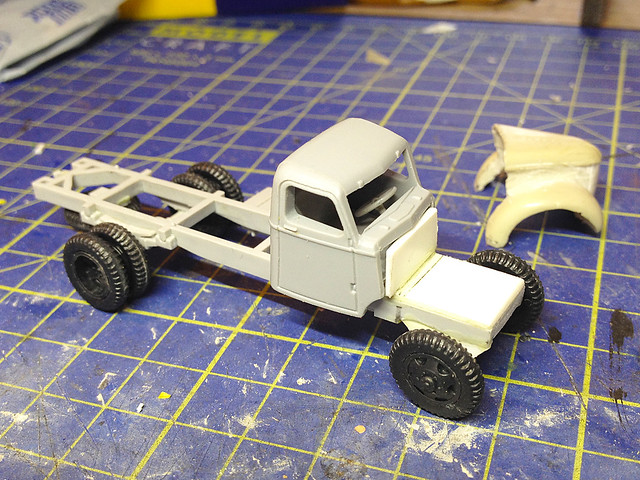
I could now check whether I had, indeed, done all my measurements on the axle and wheels correctly by test fitting the bonnet...Another moment of truth!

Yay! Not a snug fit, but everything looks like they are in the right place even if there are some gaps that need to be filled.
Making the grill and bonnet sides
OK, with the basic 'framework' in place here's how I intend to make the gill and bonnet sides...
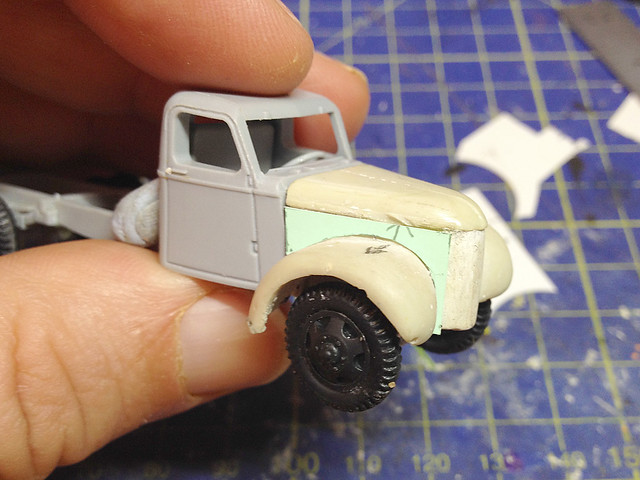
What I am going to do is make a shell out of thin plasticard which I will wrap around the grill and bonnet side to level everything up and make a nice flat foundation onto which I can glue the details. This is why I sanded away a recess around the lower bonnet (you can see how the hood is slightly larger than the bonnet beneath it).
So, first of all I have to make a paper template so that I can work out the exact shape of this plasticard 'shell'. Lots of test cutting will ensue until I have the right shape...
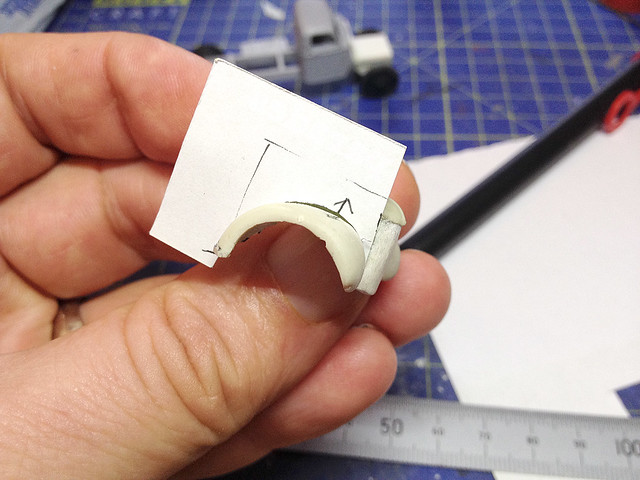
Plenty of trial and error here using paper templates. Initially I try and get the curve of the wheel arch right, the little arrow you see is my reference marker which lines up with a line I drew on the top of the mudguard itself. Once this bit is right I will start to sketch in the outline of the bonnet sides - up to where they meet the hood at the top and the cab at the back - and cut these out too.
Here's the first completed paper template (above), I now have to repeat this template for the left side of the bonnet and then join them together at the front by a doing a template for the grill. You'll notice that my panel template has filled the gap between the resin bonnet and the cab nicely.
Once all three templates are done in paper I have to copy the shapes out onto a thin sheet of plasticard and then stick these final panels onto the resin bonnet. Then it's a case of filling any remaining gaps with Milliput and cleaning up the hood before starting on the detail.
No comments:
Post a Comment