Saturday 18 July 2015

Getting rusty - corrosion experiment part 3

The Hairspray Technique
After Wednesday's marathon 'rust' session I had a little breather. And I promise to keep this blog entry short and sweet!

While both the chemical rusting and 'salt chipping' techniques were new to me I have used the 'hairspray technique' a couple of times and am fairly confident about applying this method for getting a flaking paint effect. Though, again, this will be the first time I have used it at this kind of scale.

But that's what this experimental project is all about, so without further ado...


I decided to apply this technique to a couple of specific places - the bonnet (hood) and the left side door - and so began by masking out some of the adjacent areas. I am using the cheapest hairspray I could find and spraying it from the can (rather than decanting it and using my airbrush).

It has been suggested that using a water-based hairspray - rather than this cheap stuff - works better, but I actually could only find one example of this locally and it was quite expensive. But I will try that out at some point, just to compare the results.


I airbrushed on a couple of bright colours which would contrast nicely with the rusty base coat. The choice was a bit random but I suppose it goes with the idea that this car is an old battered wreck.


Applying some warn water with a brush I then scratched at the surface with an old stiff toothbrush for the big areas of flaked paint I wanted. Then I changed to a sharpened toothpick for the smaller patches and to break up the areas around the bigger patches so they looked more natural.

Every so often I would stop and dry the area I was working on by pressing a piece of kitchen towel on it. This stopped too much paint flaking away and helped the patch you had just done to dry and adhere properly. I also cleaned away any small flakes that had come away and were sticking up or pushed then back down on the surface if I felt I had flaked off too much paint.

It is, by nature, a bit of a hit and miss effect and proceeding very slowly - and referring to some photographic reference as you go - is the best course.

Once done I did go back over a couple of the patches I felt were over-done with a small paint brush and re-applied spots of the top-coat colour. In this way you can achieve some sort of control and modify the finished look to your tastes.

Finally, once these paint is completely dry I went around certain areas very lightly with a small piece of fine 'wet & dry' Emery Paper to fade the top coat paint and gradiate the effect between the top coat and the rusty base coat. (You can probably see this on the bonnet where the blue paint fades to light blue at the edge of the large central patch.)

And that's that...

Next: Some small finishing tests, weathering effects and one last try with the DM rusting chemical.

Wednesday 15 July 2015

Getting rusty - corrosion experiment part 2

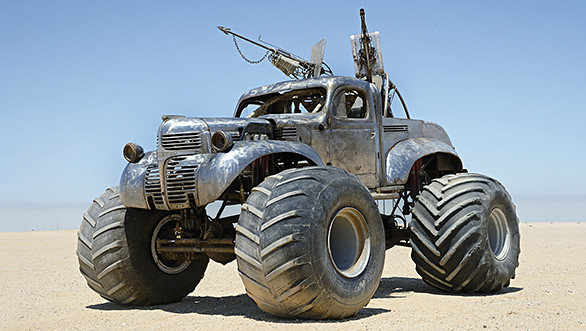
This time I'm looking into a new technique - chemical rusting. So far I have only practised effects using paint, powders and pastels so the idea of creating an effect using a little chemical kit is rather novel. The make of the kit I'm using is Deluxe Material's Scenic Rust Kit.

Love this photo! And it exemplifies the sort of look that I will be going for with my 'Mad Mad'
inspired car project, which is the reason why I'm doing this rust and corrosion experiment.
Photo credit: 'Car Wreck in Broken Hill, Australia' by Paul's Pictures
BUT...Before I start getting all scientific (even my secondary school Chemistry teaching wife showed some mild interest in the aforesaid kit) I want to do some more minor tinkering with the base coat colours that I laid down in Part One of this experiment.

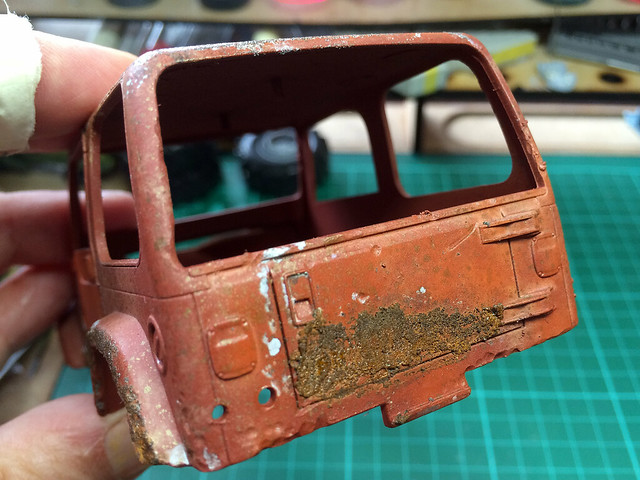
I was talking over the results of 'part one' with my brother and he made some very useful comments about the 'rust' colours and textures I chose and how I used them. We both agreed, I think, that the shades I used were a bit 'off' and the mottling effect too prominent so some toning down - or 'modulation' - was in order...

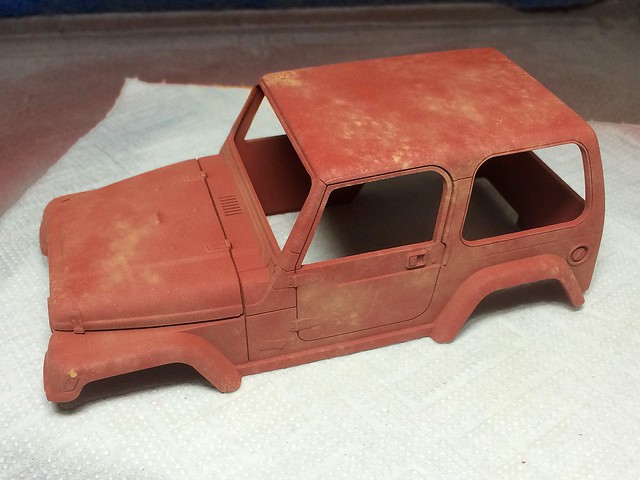
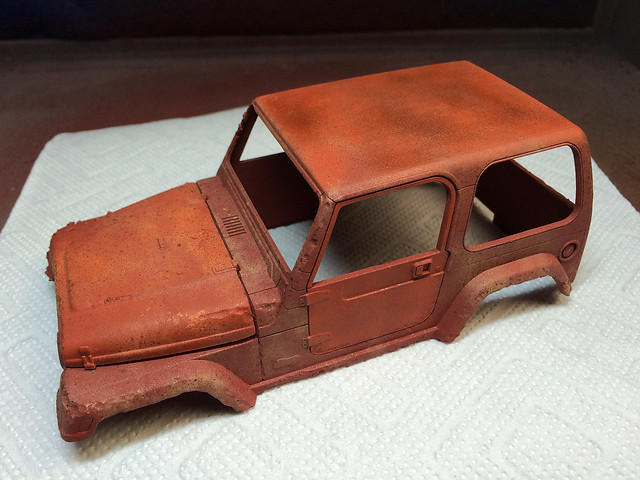
Before and after colour modulation using a light airbrushing of Vallejo's
'Amarantha Red'. This has toned down the rather unrealistic mottled effect.
After looking through the available Vallejo paints at my local hobby store my eye settled on their 'Amarantha Red' [829]. It's a wonderful soft coral red with an undertone of orange, and it was this oxidised red/orange tone that - I think - was missing from my first attempt at painting 'rust'.

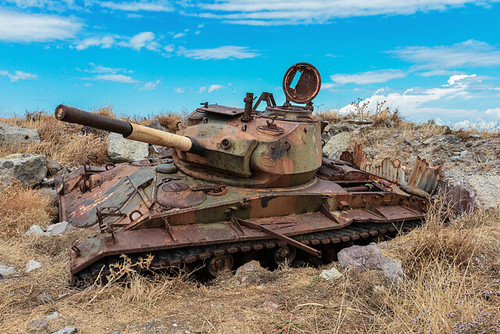
Some might say that this is 'obvious', but when I first painted my test jeep I was, in fact, quite pleased with my mottled browns. It only became apparent when I specifically checked reference photos from desert locations (on advise from my brother) that my 'rust' wasn't very rusty after all!

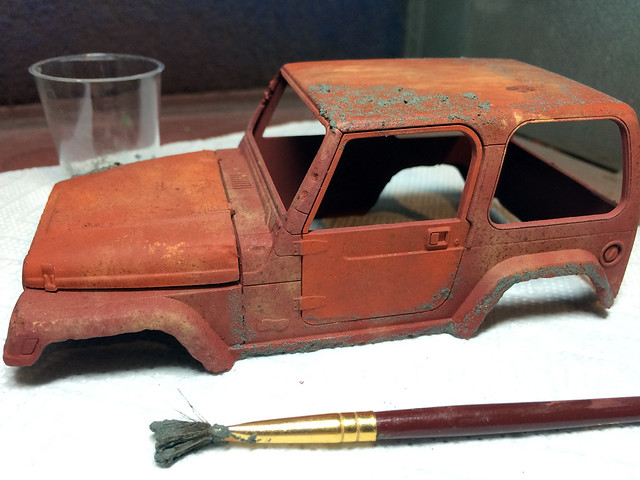
Another thing I did was to alternate degrees of redness on different panels of
the car's bodywork. Some I left browner while other I made more orange. I think
this gives it a more interesting look.
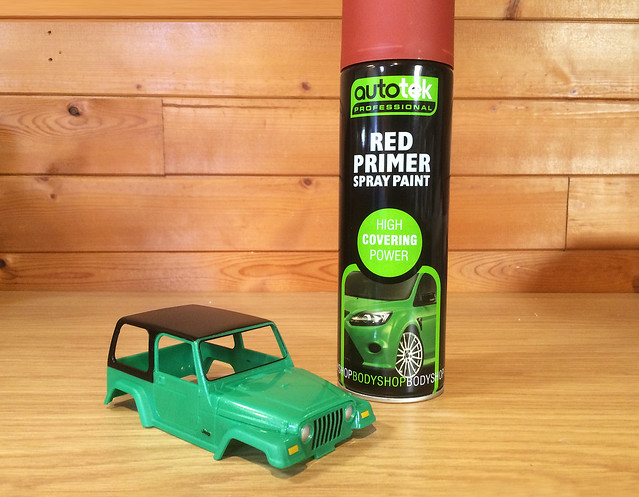
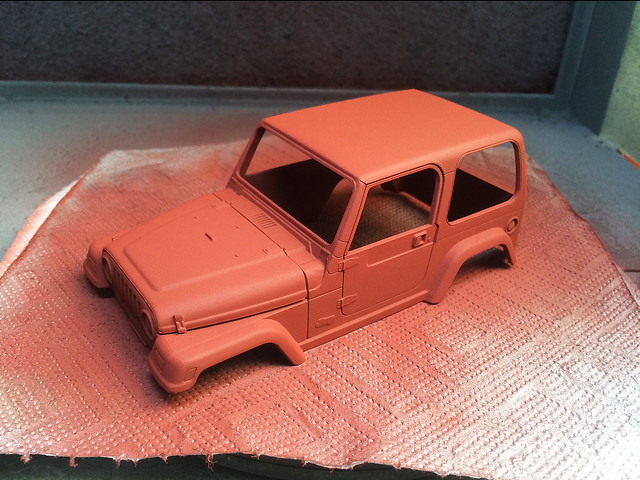
Deluxe Material's Scenic Rust Kit...
Right, having sorted out the basic paint layers - and 'yes' that does seem a lot of work for what is simply the underlaying paint coat - I now start thinking about how I will apply DM's rust kit.

Now I have seen tutorials that have used two slightly different ways of using the chemical rusting medium. The first is to apply the DM rust under the top paint coat and flake off the paint to reveal it and the other is to paint your top coat and then to add the DM chemicals.

The difference is that the DM rust effect adds texture as well as rust effect to the model so you might want to have your rust 'bubbling' up from under your top coat paint (as it would in real life) rather than being a more superficial effect. Neither method is right or wrong as far as I can see so I decided to try both approaches.

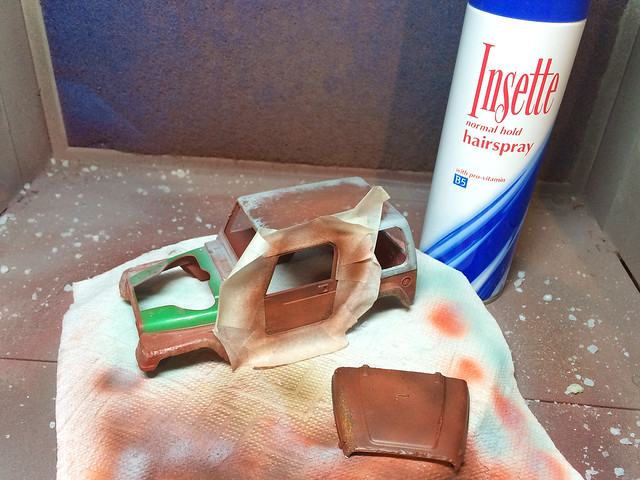
So, I added some of the DM solution to my jeep now and will apply the top coat after having sprayed on some hairspray in order to reveal the chemical rust - and rusty base colours - by means of the good old 'salt chipping technique'.

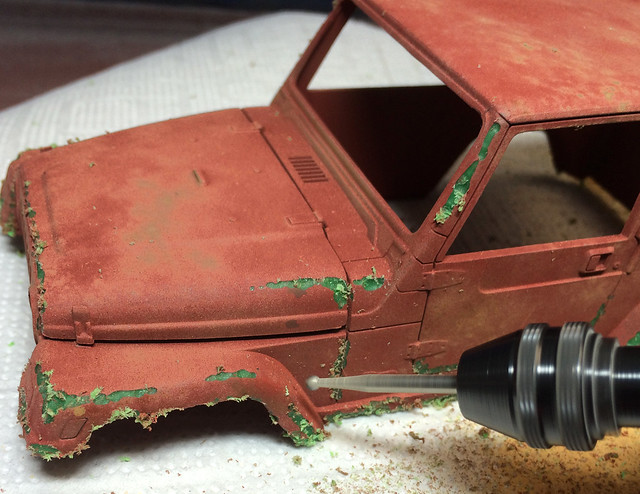
The dark grey 'paste' is the first part DM rusting method, which consists of an metal
based powder mixed with a 'binding' solution. I've tried painting it on in a light
coat and dabbing it on in a more clumpy texture to see what difference that makes.
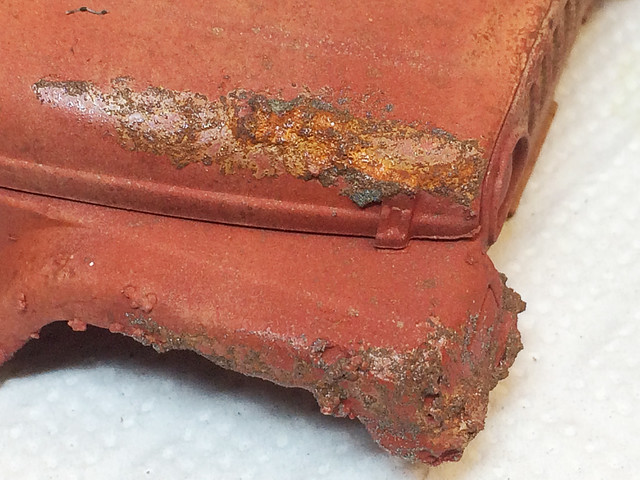
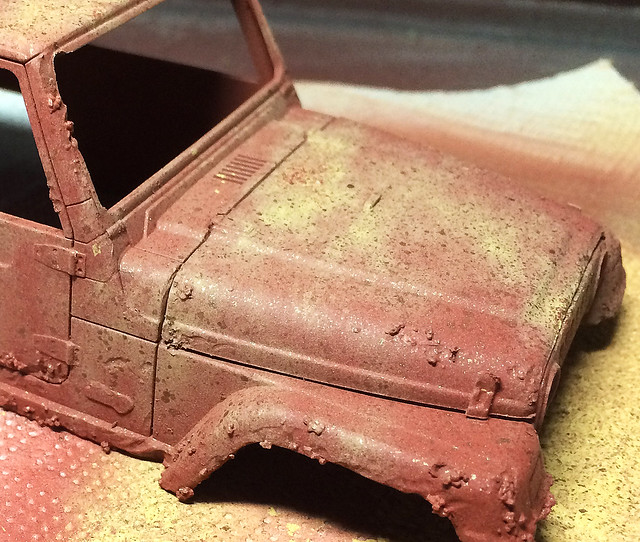
I wasn't over happy with my first attempt at using the DM rust, I think I was a little over cautious and treated it like a paint and applied it too thinly. I found that where it did work was where I had dabbed the mixture on...


It created a crusty texture effect - perhaps too textured, but I can shave off some of the excess 'clumps' to make it smoother if I want. But in any case, I decided to try again but this time go for a really think application just to see what this would do...


OK, a little OTT for a scale model but this is an experiment after all. Again, I figured I could sand back the amount of texture - but let's see how that looked after the 'developer' chemical was added (and a 8 hour wait)...


Well, rusty yes, but far too thick and too much texture...I'm beginning to have my doubts about this technique (so far I feel I could have achieved the same effect using - cheaper - oxide powders). Still, I am curious to see what this 'rust' looks like after the top coat paint has been airbrushed on.

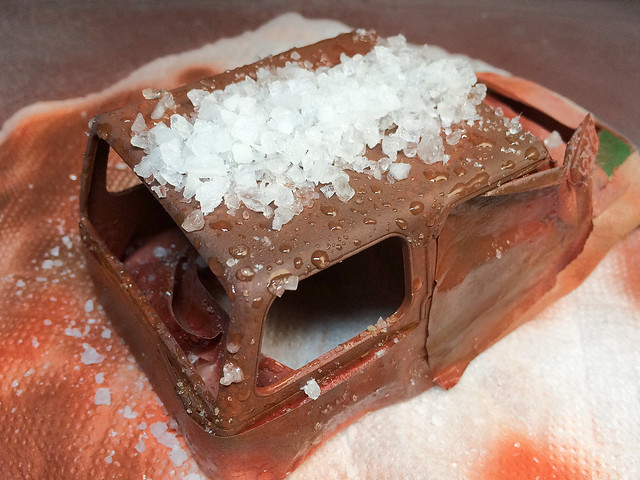
Salt Chipping Technique
Anyway, while not happy with the DM rust effect I continue to experiment with other rust effect techniques. I will be trying this effect out on the roof of my test vehicle and in preparation I have already masked that area off and applied a light gloss varnish coat to give the base colours a bit of protection (just in case)...

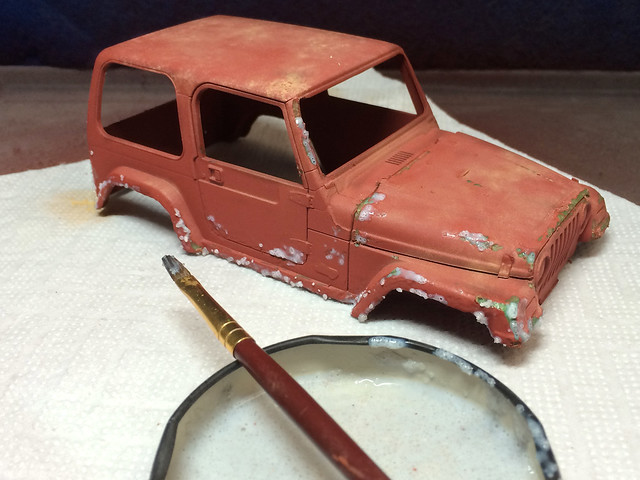
I have continually changed my mind about what makes a good rust colour effect,
but I think I have settles for a darker base now. I reapplied the mottled patches
in more subtle tones and I think I am happy with the colours...For now!
(Note: What you don't see here is that I have re-sprayed and re-painted this roof three times over the last week. It's been a bit of a Goldilocks approach as I have tried bright orange rust effects and medium brown rust effects, but finally I settled on a dark brown rust base effect.)

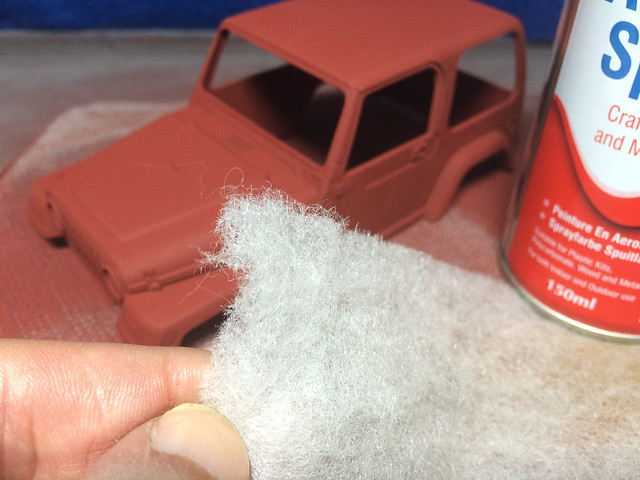
Getting a good 'mottled' paint effect: In part 1 of this experiment I tried using a airbrushing paint through a light dressmaking fabric gauze, which sort of worked but was a bit messy. Since then I have looked at several different materials which might be better suited to this purpose and I came across a synthetic filter material that seems to be ideal.

'Aqua safe' filter foam sheets.
 It's the sort of material you would use as a filter for aquariums and is quite cheap - I trimmed it to make it thinner as 5mm thickness seemed to be ideal for my purposes. It copes with airbrushing better than the more absorbent fabric gauze I was using (which became saturated with paint) and can be used again and again without blocking up, so a small piece goes a long way. It produces a very nice random mottled pattern which seems more subtly than trying to get the same effect by dabbing paint on with a sponge.

Ok, this is turning into a bit of a marathon, so onwards...

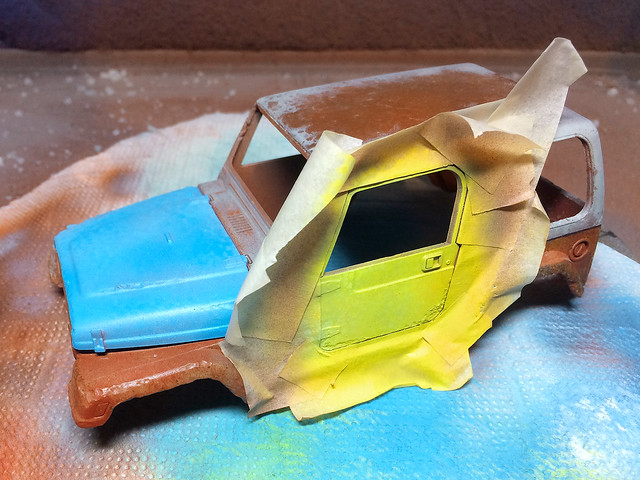
After the base colour I sprayed the roof with a light matt varnish coat. I like to apply a varnish layer between different paint effects as it give what I have done some level of protection in case I make a mess of the next effect I put on top. I felt this was particularly important because I was worried about what salt and water might do to my paintwork.

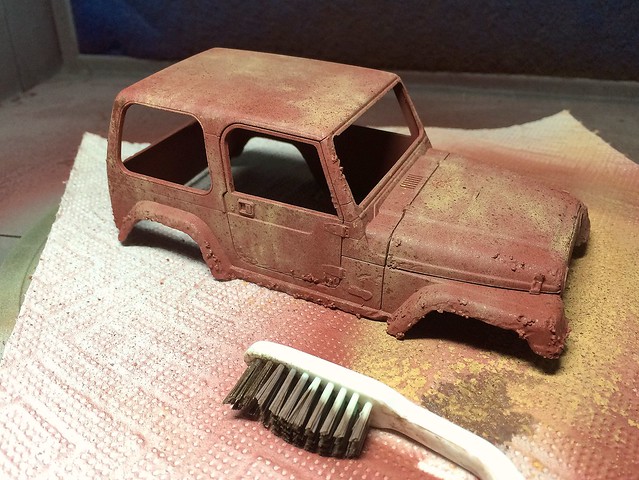
The salt is sprinkled onto the model, having sprayed the area which it will be applied with a misting of water. I used rock salt, but also ground down some to make smaller grains...


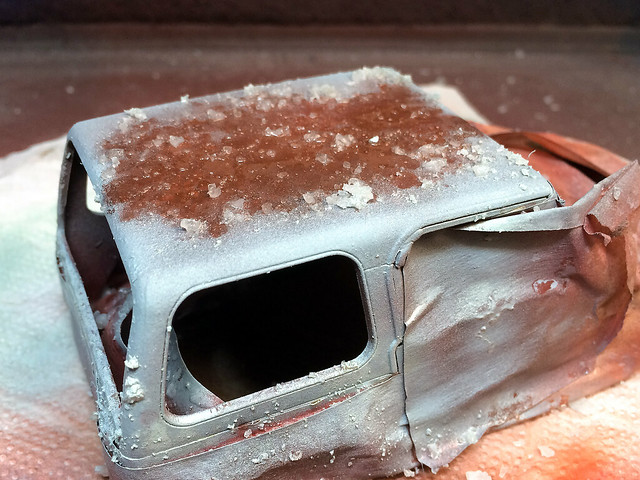
The water sticks the salt granules to the surface of the model temporarily. I found that when I moved on to the next stage - air brushing on my chosen top-coat colour (pale blue) - that the airbrush did blow off some of the salt grains, but I simple threw some salt back on and continued spraying. Once done I started to brush off the salt...


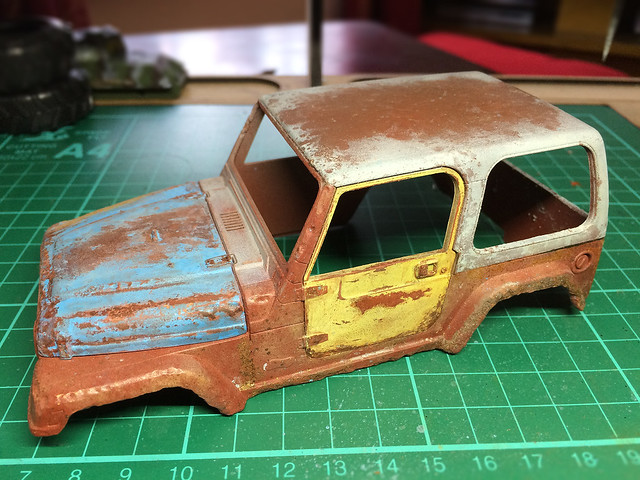
But you will find that you are better taking a fairly stiff toothbrush at the salted surface to get ride of all the salt grains. Some are quite stubborn due to being held in place by the airbrushed layer. After a good brushing this is what you end up with...


Phew! Finally got a rust effect that I'm happy with (I think)!

At this point I was going to also try the hairspray technique but in all honesty I'm losing the will to live after all that...So I'll leave that till next time!

Friday 10 July 2015

1/25 'Mad Max' Willy's Hot Rod - Part 4

It's all about the wheels in this blog entry. Just to quickly re-cap - I'm not using the Hot Rod style wheels that came with the Revel kit, I have found some nice big fat off-road wheels that I'm going to mount on the model instead. The catch is that I will have to modify the car's body to get them to fit.

So, first things first, I need to work out how much I need to trim off the existing wheel arches to get the fat wheels to attach to the axels.


Rather that trying to draw round the new tyres (with their knobbly tread) I decided to make a template disc - the same diameter as the new wheels - and fix it on a extension to the axel so I knew the disc was perfectly centred...


I could then attach the body shell onto the chassis and get a perfect idea about where and how much plastic I would have to remove from the wheel arches....


And finally, it was just a case of drawing around the template. This would provide me with an accurate guide indicating where I should trim off the excess wheel arch...


And now the scary part!
No matter how careful you think you are being you still have a nagging worry that you are going to mess up and cut too much or in the wrong place or slip and ruin the bodywork completely!

So, trying not to tremble, I carefully used my Dremmel (with a cutting disc) to slowly trim away the unwanted plastic up to within a couple on millimetres of my guide line. After that I will file and sand up to the line...


Well, nothing goes quite to plan...It turns out that my big new wheels are very big indeed and to get enough 'breathing space' around them I had to remove far more of the wheel arch than I expected. I also will have to think about raising the bodywork up off the chassis slightly (a minor job).


There was a lot more trial and error involved in this modification than I had imagined there would be. I had to keep checking the fit and then trim a bit more and a bit more off the body. But, finally, I managed to get an acceptable size and shape of wheel-arch that accommodated the big fat tyres!


It looks a bit mad...But that seems appropriate to the nature of the project. So, having done one wheel arch I now have three more to go. Phew!

Next: Finishing the chassis and mounting the engine.

Monday 6 July 2015

Getting rusty - corrosion experiment part 1

Rusty M24 Chaffee tank. Photo source: Peter Bromley
Scale modellers like rust - it's a lovely effect which goes hand in hand (in varying degrees) with war worn and neglected vehicles. From a few spots and surface rust to a knocked out and abandoned pile of corroding junk, rust colours compliment military paint schemes wonderfully and give a sense of chronology for the vehicle you are making.

I've dabbled with light rusting techniques in 1/72 but I've always hankered to attempt something a little more adventurous (like all military modellers I will undoubtedly take on the inevitable knocked out tank diorama at some point) and the chance arose when I recently started my 1/25 'Mad Max: Fury Road' themed project.


The larger scale gives me a bigger canvas to work with to try out larger areas of corrosion that is perhaps unachievable on Braille Scale models - unless you rust up a whole small scale vehicle.

I've decided that there will be two parts to my rust experiment; the base coat and preparatory paint effect stage and the second chemical treatment phase.

Stage 1 - Prep and base painting effects...
OK, without further ado, onto my experiment. The first job was to get a 'willing guinea pig' on which I can try out my basic rusting techniques. As usual eBay came up trumps and I found a nice and cheap 1/24 scale toy jeep (which incidentally supplied me with a nice set of off-road wheels which I could use for my Mad Max car project).


I began by giving the donor body a quick clear with soapy water and a then a light wipe with a tissue dampened with some thinners (to get ride of any lingering grease or finger marks). Then I applied a coat of AutoTek red primer (any car primer will do but the red seems a good base colour for this particular project)...


Note: Before you apply the primer... There is additional work you could do depending just how rusty and old you want your vehicle to look. Going straight for the primer is fine for light or surface rust effects, but if you want that 'junk yard' look you may wish to 'modify' the vehicles bodywork to show the effects of long term neglect!

Areas like wheel arches, door surrounds, wing panels, etc, are likely to rust right
through given the 'right conditions'. Depending how much of a 'junker' you
want your vehicle to be you can take your rusting to extremes!
Anyway, I decided to go one step back and add some heavy corrosion damaged just for the hell of it. So out came the trusty Dremmel and I drilled away at the edges of some of the bodywork panels...


Then, for extra texture, on one side of the car I added a PVA and sand mixture which I dabbed on with a paint brush around the damaged areas...(I only did one side as I am not entirely sure about this technique so I wanted to compare it with a side without the addition of the sand texture.)


Anyhoo, back to what I was doing before I backtracked and added some texture...I was about to add some paint effects to simulate an mottled rust pattern over the basic red primer. I used a piece of gauss-like fabric (old filter strips from my airbrush booth) and tried spraying paint through it to see what effect that would have...


It worked rather well and I got a nice random paint pattern...

This is what I was doing before I decided to add extra damage texture after all!
...Now this is where I backtracked and added the extra sand texture (sorry if this is confusing). I added some different shades of brown, one over another. And then I used the old toothbrush splatter technique to add a random pattern of dark brown spots on top of that...


This is the sand texture side of my test model, still not sure about it.

I think that's a pretty good base for my rust effects so it's on to the next stage in this project and to start working with the chemical treatment that I purchased. The product I will be using is Deluxe Material's Scenic Rust Kit.

This will be the first time I have used a chemical effect instead of simply painting an effect using acrylic or enamel paints. The advantage of Deluxe Material's method is that is produces real rust and from the examples I have seen the end result looks pretty impressive and realistic (well, it would be as it is real rust)!

The Deluxe Material's web site has a few very useful tutorials on using their products and they also have a pretty interesting video which illustrates their rusting technique...


Next: Deluxe Material's Scenic Rust. 

Sunday 5 July 2015

1/25 'Mad Max' Willy's Hot Rod - Part 3


Having completed the work on the V8 engine I decided to add some tiny 'improvements'. At this stage the engine is 'complete' as far as the Revell instructions is concerned, but a quick look at any reference photos will make it immediately clear there are some parts which are obviously missing.


Principal among these are the 'cables' (?) that go from the valve cases at the sides to the distributer at the rear of the engine...


All this means is a fairly simple job of adding a few wires to represent these cables. The above reference photo gives a very useful idea in which order the cables are arranged and how they go into the distributer itself.

Anyway, while I look for a suitable wire that I can connect to the distributer (I tried normal electrical wire but it was too thick) I will move onto the next big job - the car's chassis.

The chassis construction
Now...This is where things get a wee bit tricky. The Revell instructions suggest you to start on the car's interior 'bucket' next (the driving compartment) BUT I have a particular design in mind for my Mad Max themed conversion so I'll have to abandon the instructions at this point.

Ooooooow...Look at those chunky wheels! I like that idea.
I decided that I would like to give my hot rod a beach-buggy type of look, with nice fat off-road wheels. The problem being that the chassis is designed for a set of small 'skinny' wheels at the front and big fat 'slicks' at the back - so I'm having to play about a bit to make sure my big chunky off-road wheels don't screw up how the body and interior fit on the chassis frame.


Getting hold of the new chunky wheels was surprisingly easy - I found a appropriately sized toy car with big aggressive looking wheels in my local pound store! But, will they work with the chassis?

I made up the chassis as Revel recommended as I guess the only way I will know if my idea will work is to try it! From a point of view of 'realism' I am sure mating off-road chubby wheels to a hot road drag racing chassis frame is not correct. Done properly I should have a reinforced chassis with heavy duty suspension (like a 4x4) really or maybe even a raised suspension like a monster truck...But this is a fantasy build I suppose, so 'realism' is secondary.

The Revell Willy's 1941 Coupe chassis assembled.
In the end I only had to do a small amount of modification on the chassis to get
the new chunky wheels to fit. Just some minor trimming to raise the front axel.
Fitting the big chunkies to the chassis was the easy part, now comes the 'tricky' bit I mentioned at the beginning of this section - fitting the driving compartment and car body onto the chassis with it's new monster wheels!

This is a 'suck it and see' modelling moment - I'll drop the body on top of the chassis and try and work out what modification I would need to make to the bodywork in order to make it fit snugly onto the chassis...

I want the body to fit onto chassis, not sit high like this as if it was a monster
truck! This means I will have to enlarge the wheel arches...A lot!
Now, obviously, the cars wheel arches need to be dramatically enlarged to make room for the chunky tyres. So carefully does it - it's a case of draw a line where you think the modified wheel-arch should be then trim a bit and test for fit, then trim some more, then test, etc, etc...

So, hopefully, the next time you see this I will have the body on...Now, where's my Dremmel!

Next: Main bodywork modifications for 'Mad Max' them and painting the chassis and wheels.

Thursday 2 July 2015

Airfix 1/72 Standard 'Tilly' - Complete!


Phew! Finally, I managed to finish a kit. But - for once - I haven't any complaints about this build whatsoever. It's been an absolute pleasure, if all kits were of this quality I would have three times as many kits built as I have.

All credit to Airfix, it's a beautifully designed little model - everything fits exactly as one would expect. So, without further ado, here's the final slideshow of the construction...


And in case you missed them, here are parts one and two...

Part 1


Part 2