Wednesday 30 May 2012

Featured work - Erhan's T-34/76 Mod.1942

Maybe it's because I've been indulging in some over the top weathering of late that Erhan's straight forward (and some might say plain but I would say subtle) T-34 caught my eye. I guess when you try weathering techniques for the first time as I have been doing there is a temptation to get carried away, so this model is a nice reality check for me.


There's no mud, no rust and no heavy black pin washing, it's all very low-key. I like it!

Link: MiniAFV Blog - Dragon 1/72 T-34/76 Mod.1942 (by Erhan) 


Making a gun emplacement - Part 4

Scrapped across the final touch of Pollyfilla to make the actual gun pit itself.


I put in some support planks to place the gun on and then drew some wheel tracks through the wet Pollyfilla. Additionally I had a go at some tiny footprints in the mud of the pit - just a lot of random shallow impression in the plaster. Hope it shows up ok once painted.

[I had intended to use Vajello's Black Lava texturing material for the ground surface, but I think I will lose the subtle detail I've added in the wet Pollyfilla if I do. So I will save this for another project.]

Next: Painting the base colours in preparation for flocking.

Tuesday 29 May 2012

Making a gun emplacement - Part 3

Quick update on the gun emplacement, I built up the earth works using some thin strips of scrap foam packaging and Polyfilla. Over the top of this I will be applying the Black Lava texturing material.


I really like using Polyfilla for ground work, the texture you get just by slapping it on is an easy way to make realistic earth and mud.

Next: Black Lava!

Monday 28 May 2012

Making a gun emplacement - Part 2

Time to play with sticks! I'm using a mixture of wooden BBQ skewers and cocktail sticks for the different thickness of logs, the skewers have a nice wood grain in them that should paint up well.


Following the pattern set by Gunbird in his tutorial I made a wall using the skewers and then secured them upright by using the cocktail sticks as stakes. I have probably gone a bit over the top but it's a fun experiment and it'll be nice to see what I can do with this when I make the earth works to make this more 'bunkerish'.

My crew still have to be modified and painted and I am just using three, which isn't a lot but I believe this is the norm for war games. Besides space is a bit cramped for a full historical simulation of a real gun crew and all their associated nick-nacks.


Next: The earth work and gun weathering.

Sunday 27 May 2012

Making a gun emplacement - Part 1


Integral to my 105mm LeFH18 howitzer build - part of a group project on the Armourfast forum - was the intention of making a base for the model, a sort of mini-diorama. Although there is a train of thought that says artillery pieces for war games shouldn't have a base I was persuaded to the contrary by the argument that although not basing a gun means you can fit it 'anywhere' a gun shouldn't be able to go 'anywhere'.

Anyway, suffice to say that my interests in modelling still lay half-way between display modelling and war game modelling, so this is a hybrid project.

I have decided to model a make-shift gun emplacement made from logs, typical of the sort of quickly constructed emplacements that might have been found in the forest battlegrounds during the Finnish campaigns during the mid-late WW2 period. It will give me some much needed diorama practice and make a nice simple little display.

Luckily for me a modelling blogger called Gunbird has created a really informative tutorial on making log bunkers which is an ideal starting point for my project, you can find it here: 20mm and then some blog… Tutorial - Log MG Bunker

I've cut a 9cm x 9cm square piece of black plasticard to act as my base and, as it happens, I came across a pot of Vallejo's 'Black Lava' in a local store so we will see how that product works compared to Pollyfilla.

By the way, the crew you see are figures from HaT's WW1 Austrian artillery figures set, the closest figures I have found that will make do for a summer uniformed Finnish gun crew.

Next: Building the bunker

Saturday 26 May 2012

Featured work - Emmanuel Nouaillier's buildings


I think what puts this featured work into context is that when I brought this photo up on my screen even my wife - who has no interest in models whatsoever - was impressed and asked me whether they were models or real!

After my last visit to Bob Peyton's lair I started to put my mind to making scale buildings out of foam-board and Emmanuel Nouaillier's tutorial just happens to be one of the first search results that pops up in Google. Emmanuel's extreme level of detailing - where bricks and cobbles are scribed individually - is perhaps over the top for the average war gaming prop, but you have to admire this masterpiece of modelling.

See more wonderful finished photos and follow along with the excellent tutorial by clicking here: Emmanuel Nouaillier's 'Making buildings from foamboard'.

Thursday 24 May 2012

Featured work - Mark Davies' BT-42

If you have any sort of interest in WW2 Finnish armour it won't be long before you come across the BT-42. This home-spun stop-gap tank was based on captured Soviet BT-7 chassis with a obsolete British 4.5 inch (114mm) field gun shoe-horned into a big boxy turret. Only 18 of these - largely unsuccessful - AFVs were built but despite this they remain of great interest to the modelling fraternity.

Above: Mark's model as featured on the missing-lynx.com site.

Mark's model is based on the UM 1/72 kit and I found it particularly interesting to see that his camo pattern - particularly the buff colour - seems to match the one I am using on my current Finnish T-34/85 project. Interpretations of this three colour pattern seem to vary quite a lot, chiefly with the grey being substituted for a light buff and the buff becoming a deep hazel brown. I personally lean more to the more subdued scheme Mark has produced here.

[Oh, incidentally. Mark used the blue Finnish Hakenkreuz that come with the UM kit, these are wrong. The Finns used the black version of this swastika on their armour at this time.]

On a historical note this stop-gap hybrid tank-to-SPG was quite common in WW2 and produced some very successful AFVs (one immediately thinks of some of the German SPGs in particular) but the Finns seem to have gotten it completely wrong in that they used the BT-42 - disastrously - in the direct fire AT role. The obsolete gun just was not up to the job and there are reports that multiple shots from it simply bounced off the sloped armour of the Soviet T-34 tanks.

The BT-42 was eventually replaced by the more adept German Stug III.

You can see more about Mark's BT-42 by visiting his review at missing-lynx.com

...Or you can read about the history of the BT-42 at Wikipeadia.

Tuesday 22 May 2012

Pegasus Hobbies KV-2 - Experiment 4 complete


Another experiment complete, this time I've been trying out 'chipping'. This is where corroded and chipped paintwork is added to the surfaces of a model (I'm sure you knew that), a form of weathering that is in principle the opposite of the hairspray technique.

Monday 21 May 2012

Featured Work - the massed armies of Bob Peyton

On Sunday I was lucky enough to be able to visit the secret modelling lair of veteran war gamer Bob Peyton and to see some more of his vast collection of military vehicles and war gaming props. Of course I took my camera and got a number of snaps which don't really do the enormity of his collection any justice, but I think you get a hint of his lunacy from the massed ranks of Churchill tank regiment...


Bob also gave me a view of his 'city' of war torn buildings - ideal for a Stalingrad or Battle of Berlin scenario. This is just one of his very detailed buildings, a bombed out factory...


Here's a slideshow compilation of photos from both my visits to Bob's den of war gaming lunacy, and let this be a warning to you...It never stops at 'just one more model'!


Friday 18 May 2012

Blog update

Dear friends, I've been very surprised to see that there are more and more people visiting my daft little blog every day. Honestly, many thanks for putting up with my moans and groans as I feel my way around in the world of small scale military modelling.

Because I never thought more than a couple people would be interested I have greatly neglected my blogs organisation, so some of my menu ideas and index of posts are not up to date. I hope to start updating and improving the blog over the next week, making it - hopefully - easier to find the posts you are after.

Again - a big thank you for visiting, I know who a few of you are because you have left comments and are following this site but to the rest of you I can only say that I really appreciate your patronage.

Have a great weekend and happy modelling!

Steve the Kitnoob

Steampunk tank by Rafa Maya

It's Friday! So it's time to relax with a bit of fun and as I'm a big fan of Steampunk that means looking at what's out there by way of models with lots of rivets, boilers and polished mahogany trim!


More of Rafa's wonderful creations can be found on his blog, it's in Spanish but you can still appreciate the fantastic photos (or you can run it through Google Translate).

Wednesday 16 May 2012

PSC 1/72 T-34/85 – Finnish camouflage


This is my second attempt at a camouflage paint scheme and as my first try went woefully wrong I have tried a few new ways of doing things to – hopefully – get the effect I am after.

Left: My first attempt at a Finnish camo scheme on my Pegasus KV-1e went a little pare shaped!

The main problems had to do with my choice of paints, the way I used the aerosol spray cans and the subsequent over-painting I had to do to rectify the mistake I made when spraying.

Would I do better with this second attempt?

Tuesday 15 May 2012

Keeping things in proportion

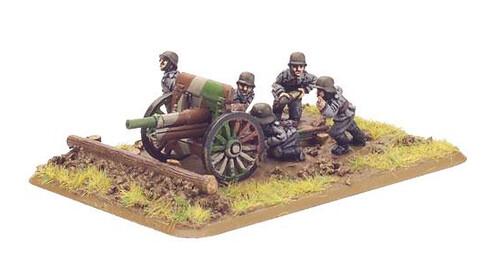
SHQ's white metal T20 Komsomolets, a very simple 11 piece model of the
WW2 Soviet light artillery tractor.

I have mentioned my slight confusion about what constitutes the 20mm scale and how I came to understand that it is actually closer to 1/76 than 1/72 (something which is easily confused as several online retailers seem to think all three scales are interchangeable). This issue came into focus when I wanted to add to my Finnish field guns project, first with the crew and now with the transport.

I wanted several models of the Soviet T-20 Komsomolets light armoured tractor - the Soviet equivalent of the Bren Carrier - to tow my light guns. A great many of these little machines were captured by the Finns during Winter War in 1941 and the Finns found them very useful for navigating the tight forested tracks. However, there aren't many options by way of models in Braille Scale.

The one model I was able to source was SHQ's white metal kit and although their web site is a little vague about the scale of their WWII range I think it's fair to say they are accepted to be of the 20mm or 1/76 range.

However, when my SHQ Komsomolt arrived and I checked it against the scale blueprints I had I found it was actually just a smidgen off 1/72. This poses a bit of a quandary for me - it's just a little off 1/72 so do I pretend that it is and just buy three more I need, or do I follow through my original idea and use the SHQ model as a template for a my first attempt at a 1/72 scratch build?

Above: The SHQ T20 tractor among a mix of 1/76 and 1/72 figures - does the
mixing of scales really matter?

Looking at the photo I took on the T20 along side some 1/76 and 1/72 figures you have to ask if the slight difference in size - particularly when dealing with such a small vehicle anyway - is going to really matter. I feel that because the SHQ T20 seems to lay somewhere between the two scales it can easily suit both.

The real clue that it is a little under-scale for 1/72 is the fact that I have placed a HaT 1/72 gun crewman on the rear seating and while - on his own - he doesn't look too out of place this seating was designed to accommodate three men on each side. Three 1/72 seated figures would not comfortably fit on these benches - three 1/76 figures would.

T-20 armored tractor Komsomolets. Source: Wikipedia
Still, the point here is - is it now worth me attempting to scratch build my own T20 when the SHQ one is a knat's whisker out of scale? The clincher might be that the SHQ model is just £6 so I have to balance the amount of my valuable free time against six quid.

Link to SHQ's 'Russian' (Soviet) WW2 vehicles section
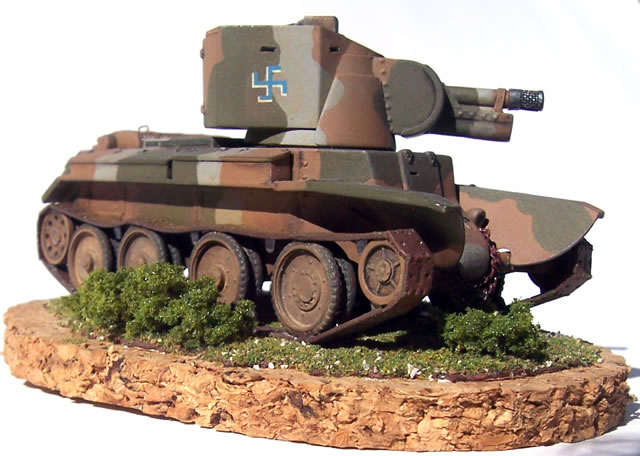
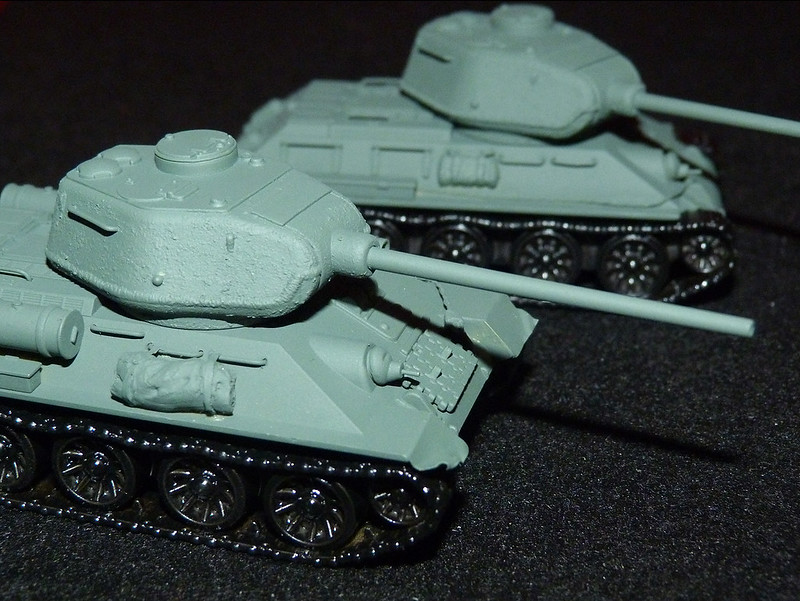
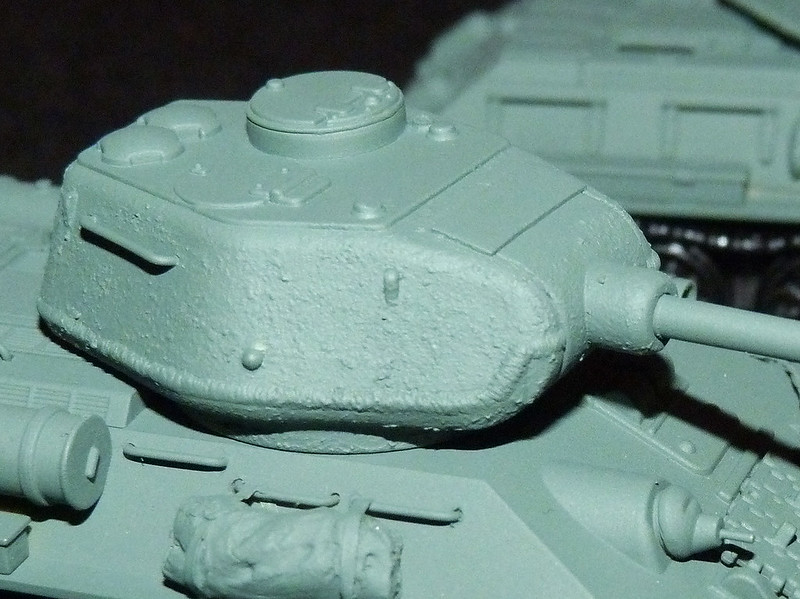
Monday 14 May 2012

Featured work - Pur-fect Cat

Tanner - over at the  World War II Central blog - has completed this wonderfully smooth Panther in 15mm! He has gone for a factory fresh look that is quite stunning, especially at this scale (I can't get close to this even at 20mm)!


It's well worth reading more on this story and have a look at the development photos - so whizz over to WWIICentral now!

Friday 11 May 2012

PSC T-34/85 basic paint coat

I'm almost reticent post my latest T-34/85 work after featuring that wonderful T-34/85 yesterday, but here's my feeble attempt at the same tank anyway...


Once again I have used Humbrol's 'Dark Green' spray as the base for this Finnish themed model. It's a bit of a funny colour to photograph as it always photos lighter than it seems to the naked eye. The other minor fubar I had was that I accidentally sprayed the tracks gloss black instead of matt black by mistake!

The track painting mis-hap isn't really serious as the back is only the base for my rusty weathering, but even so I was a bit annoyed with myself (never spray late at night when you are tired)!

On the plus side the cast metal turret effect looks OK now it has a coat of paint...


NEXT: Masking up for the camo scheme

Thursday 10 May 2012

Featured work - Roger Fabrocini T-34/85


Sometimes I see a picture of a model that just really depresses me. This is one of those - Roger's model illustrates exactly why this blog is called 'kitnoob'!

Would you like to guess what scale the model is? Looks 1/35 doesn't it? Well, of course, it's 1/72...

Just shoot me now!

You can torture yourself more if you want to by going to the Missing-lynx.com article on Roger's masterpiece Dragon T-34/85 Model 1944

Wednesday 9 May 2012

Finnish field guns - basic paint coat


It's nice to see a 'herd' of models together at one time and is what has swayed me more to the war gaming side of the hobby than the individual display side of things. There is a weird attraction to seeing a group of vehicles or weapons like this together.

Anyway, here's a group of my WW2 Finnish Army field guns. These include two of my light Putilov 76mm guns and three LeFH18 105mm medium howitzers (by Revell and Armourfast). This is just the field green base coat - Humbrol's Dark Green spray - but it does bring out the detail nicely.


I will be keeping these guns a plain field green with appropriate weathering and will resist the temptation to apply the pretty Finnish 3 colour camo pattern to them. I guess for war gaming there may be an argument to apply a standard camo across your army to aid easy identification of units, certainly the guys at the Flames of War site could not help themselves and use the 3 colour scheme on their Putilov guns...

Above: The Flames of War team could not help themselves but applied the
distinctive Finnish 3-colour camo scheme to this field gun. This despite the fact
that the Finnish Army actually used a rather more mundane field green.

A simple field green may not be the most attractive scheme but using this camo on ALL my Finnish models just wouldn't be authentic. One thing though, my flash has turned Humbrol's Dark Grey into something a lot more like mid-grey, I will have to adjust my lighting in my next snaps to get a truer reflection of the green coat I have applied.

Sunday 6 May 2012

T-34/85 cast turret mod


Thought I would try this simple technique for getting a rough cast metal effect on a T-34/85 turret. Here I am experimenting on a PSC T-34/85 before applying it to my Armourfast T-34/85. Here's the tools for the job...


It's a very simple - but effective - technique, you just apply a thin layer of the liquid cement and then allow it to melt the surface plastic for just a couple of seconds. Then you JAB (don't brush) the surface with and old stiff toothbrush. The harder you jab the deeper and more pronounced the effect.

Importantly I include a scrape PSC T-34 turret that I don't want to try out the technique before I use it on a live project. It's a good idea just so you can gauge just how rough you should go, on my practice turret I went a bit over the top and applied a little too much texture...


The good thing about this technique is that there is some wriggle room for reversing the effect if you do go too rough, a bit of sanding will smooth out things and then you can start again.

Here's a shot of one of my PSC T-34/85s showing just how smooth the turret looks before I apply the effect (the Armourfast turret is just as smooth)...


And the effect applied to tank No. 2...


As you can see, because of my earlier practice I knew just how much pressure to use with the toothbrush to get a more subtle effect. Here's a close up...


I'm quite pleased with this technique, especially as it isn't 'undo-able' in that you can reverse it a bit if you don't like what you have done. Of course this technique can be used on any cast turret (the Sherman springs to mind, or the earlier T-34). But do give it a practise first!

Friday 4 May 2012

Feature work - P. Brand's 100mm BS-3

As I'm going through a bit of a artillery phase at the moment this wonderful Soviet 100mm field gun by Piers Brand over at World War 20mm.


Although designated a 'field gun' the BS-3 was, of course, a very successful anti-tank gun and I guess you could put it in the same class as the British 17 Pounder.

Once again, despite this being a war gaming piece it is mounted on a mini-diorama base. I am coming round to this idea as while some war gamers don't base their guns so they can fit them into tight spaces on a table I was swayed by the line of thought that says such guns needed space to deploy so a base is just a realistic means of stopping people hiding guns in crazily small locations. Well, that's the theory - I just think they look nicer!

Wednesday 2 May 2012

Small things - Making a T-34 tow cable


Just how to make my own T-34 tow cables to go with my quick-build T-34/85s - as they don't come with them - has been on my mind for a while now. In fact it's actually held up production.

Now, I could just buy some - Eureka XXL do some nice ones which are available from Cove Models at £2.50 a set - but I am reluctant to spend the extra money on a quick-build. It seems somehow wrong!

I found a couple of online tutorials on how to make the cable itself and it's easy enough - you just weave together a few thin wires using a small hand drill:

> Cut three or four lengths of thin wire and tie them together at either end...
> Put one end into the chuck of the hand drill and secure the other to a vice or hook...
> Pull the wires quite taut and the turn the drill SLOWLY and the wires will begin to weave together..
> When you feel you have a nice looking scale cable glue off the end with superglue (so it doesn't unravel when you take it out the drill bit).

So far so good - but the problem for me was the actual towing loops that go on either end of the cable. These loops are quite distinctive and a simple loop of wire just wouldn't do it for me. In fact the Soviets had a particular design of loop which was quite different from the American one and I wanted to make something that at least looked a little like the real thing.

My simple bodge-it method to do this was to make a loop of some thicker wire and then wrap some thin masking tape around this to make a collar for the loop. I then applied some super glue to it to hold the collar together and make it more solid. Once dry I cut the masking tape collar into the distinctive Soviet 'V' shape with a scalpel and fitted the cable into the bottom (super gluing that in place).


OK - not display quality but it cost me next to nothing and once painted should make a passable impression of the real tow cable.

Featured work - little green monster

I love to look at other peoples' work, especially if it's something just a little different or if they do a technique I'm interested in trying out, or they use a attractive colour scheme that simply catches my eye. This 1/72 Hertzer (by Attack Hobbies) comes under the later, it's quite distinctive!


This was done by Pazar over at the MiniAFV blog and aside from the in your face basic colour I like the subtle weathering. Additionally the Hertzer is a interesting little tank destroyer, one might almost say cute!