Tuesday 30 July 2013

New tool - USB Hoover

Sounds daft, but keeping your workspace clean - especially when you sand, file and trim a lot - is quite essential. I spent a lot of time brushing away little bits and dust from my cutting mat - it really started to be a pain. But I've just bought a very cheap little tool that has solved this problem...


This little USB powered vacuum cleaner was just £1 from Poundland...And it works!

It collects all the dust and bits inside the front half of the gizmo - which detaches so you can empty it - and has a turbo overdrive button for stubborn bits.

I power it from my laptop, which I keep next to my worktray. It really is a no brainer purchase!

Thursday 25 July 2013

Muddy tracks - second go

I have already had a go at doing thickly muddied tank tracks, but the result wasn't altogether satisfactory...


You may have to take my word for it but the texture of the 'mud' I used - Tamiya's weathering sticks - wasn't quite right, especially for the 1/72 scale. I actually had one of my readers comment on this. But muddy tracks is such a basic technique in AFV modelling that I wanted to get this effect right, so I'm having a second go.

So, I did some research (referenced some YouTube videos) and plumped for a combination of tips on painting tracks supplied online and in a useful book I bought called 'Small-Scale Armour Modelling (Modelling Masterclass)' by Alex Clark..

A new product I am trying out - which I picked up in the ModelZone sale - is Vallejo's effects pigment. Normally I wouldn't buy this as it's expensive for what it is and a similar effect can be gotten cheaply by grinding up Conté crayons or pastels into dust. But this 'pre-potted' solution effectively saves me the messy grinding process!

Basically, my recipe for muddy tracks goes like this:

1. Start with a base coat of black on your tracks...
2. I then apply a very thinned wash of acrylic Khaki all over...
3. While the thinners is still slightly damp I dust the tracks down with a generous cloud of the pigment...


Alternating the effect
Now, I was going for a VERY muddy effect, but the 'mud' can be modulated to be less thick or a different colour mud to suit your chosen environment. I wanted a red clay type of mud so I used Vallejo's Natural Umber powder, but the powders come in a range of earth colours (likewise if you use the cheap Conté method you just choose the crayon colour you want).

What Scot's call 'clarted' in mud!
If you want a thinner layer of 'mud' you simply use less powder and you can also dust off any excess with a brush as the thinners dries off. 

Now remember, the powder is only held on by thinners, it is not fixed permanently. To do this you will have to give it a spray with something like matt varnish. At this point you can then add other track effects like metallic highlights or any additional washes that you might want...

A graphite pencil was used to give the metal tracks a metallic shine. Also, I
used some dark brown wash between the track links.
And there you go, heavily muddied tracks. A lot better effect this time than my first attempt with Tamiya weathering sticks. Importantly I think the effect matches the scale, and the 'clumps' of mud aren't too big.
You can review all the related posts in this project by clicking

Wednesday 24 July 2013

ISU-122 Russian Green

Well, here's the result of my pre-shading experiment...


There are faults, but I can just see the advantage of using pre-shading IF you want a display quality model (I would not go to this effort for a war gaming kit).

Now, hopefully what you will see is a darkening of the Russian Green top coat towards the edges of panels. A sort of graduation effect with lighter green at the centre of panels.

My mistake was banging down a thick layer of spray can white during the pre-shading stage (mainly because I have a couple of cans to use up). Now that I have used an airbrush I can tell the difference between the thickness of layers that the two methods produce - for a more subtle effect I will definitely airbrush the white pre-shading in future. Hopefully I will improve in my use of this technique as I get more practised in it.

One little success was the Russian Green paint I used for the top coat. This is Vallejo's Model Air Russian Green (71017) and as you can see it has that hint of yellow about it in the highlighted areas.

Next: Flat colour detailing (pick axe handel, etc) before glossing for decals.


You can review all the related posts in this project by clicking

Tuesday 23 July 2013

ISU-122 pre-shaded

Before spraying the pre-shading layer I did some very quick masking using BluTack...


I remain somewhat skeptical about the worth of the technique at 1/72 - I think there may be other ways to achieve tonal variations - but let's see shall we?

I didn't see the point at putting a lot of care into the white layer, just so long as there was clear differentiation between the panel highlights and the black edges. This is just a proof of concept - if the general theory shows promise I will take greater care in future use of the technique...


Ready to go! And now an even greater challenge - my very first use of my 'new' airbrush!

...Fingers crossed! (My next post may either be a embarrassing record of failure or, hopefully, an interesting example of new technique learned!)

Sunday 21 July 2013

ISU-122 pre-shading prep

Moving on with my 1/72 pre-shading experiment I have now primed my ISU-122 with a coat of cheap Halford's black primer...


Now, there is an alternative path when doing pre-shading. Instead of priming black and airbrushing highlight areas in white you could prime in white and airbrush panel edges and shadow areas in black. To be honest I don't quite know which method is best...Take your pick (the effect looks similar).

To illustrate, here is an example which was done by 'Mr Dyzio' from the Dyzio Scale Models blog. Can you tell which of the two methods mentioned above he has used?

Mr Dyzio's Trumpeter IS-3 pre-shading stage
You can nip over to his blog (link above) if you want to find the answer, but the fact that it's hard to tell says a lot about the possible merits of one method of pre-shading over the other I think!

Is it worth it?
Good question, dear reader! If you are a war gamer with a whole tank squadron to paint by tomorrow, well no. But if you are a display modeller trying to squeeze out a nice tonal variation in your top coat, then yes...

It's worth mentioning a half-way house alternative though. I have seen a war game model painter who does a 'poor man's pre-shading' method - he primes black, but then misses out the white highlight and instead airbrushed his green top coat on in varying degrees of thickness to achieve a dark/light variation in tone.

I guess the disadvantage of this 'poor man's' method might be that to get this tonal effect you have to spray the top green coat on a bit thinner than normal, so the effect is a slightly darker green top coat in the end. Still, I will be testing out this method when I do my companion ISU-152 and will compare the effects.

A final word on whether it is worth the bother. I think that this method is really best suited to 1/35 scale models and above where you have plenty of room on the model's panels to go to town with tonal variation. Take a look at this 1/35 ISU-152 by Yvan Garnier...


Because the model is bigger Yvan has been able to carefully and precisely pick out all panel surfaces with pre-shading (he uses the black on white method by the way). To understand how this effect works once the top coat of green has been applied here is a perfect example...


You can see how pre-shading has resulted in this nice tonal variation where the highlighted areas at the middle of panels becomes a darker shadow area towards the edges of the panels. The effect creates a 3-dimensional look.

Recreating this in 1/72 is harder, but not impossible. However, for a beginner like myself it will be a challenge as I have not used an airbrush before. Let's see how I get on!

Tuesday 16 July 2013

Featured work - Erhan's WoT Hertzer

Now I have mentioned World of Tanks and World of Warplanes recently on Kitnoob as sources of inspiration for kit (in fact watch out for my ISU-152 project with regards to this) and as it happens I found a perfect representation of how this might work over at the MiniAFV blog.

Erhan has featured a wonderful facsimile by Cenker Olur of his in-game Hertzer tank destroyer in 1/72...


MiniAFV Blog

Pegasus 1/72 ISU-122 assembley

The model with which I shall be experimenting with my airbrush is just about ready. The Pegasus ISU-122 is the ideal canvas for my experiments, as it's cheap and has lots of nice big surfaces on which to practice my spraying techniques.

There aren't a lot of major components - here I have assembled the major parts ready to for final assembly. Some of the smaller parts - like the MG and the fuel drums - will not be attached until the basic painting has been done...


My intention is to practise a panel shading technique where I start with a basic black coat and then spray a white highlight in the centre of the panel. When I spray the Russian Green over this in thin layers I should be able to discern a variation in tone from the undercoats. Well, that's the theory anyway!


I'm building this one pretty much 'out of the box' as it's just for experimentation, but I did scratch build the little hand rails around the upper hull. I dry assembled everything - as you can see - just to check fit and see if there were any noticeable gaps, as it turns out everything fits reasonably.

Next: Black undercoat and white panel shading.

You can review all posts in this ISU-122/152 project by clicking on this 'Complete Series Link'.

Monday 15 July 2013

World of Warplanes released (Open Beta)

I guess this computer game counts as 'inspiration'! And although you could say with some justification it's a bit off-topic for a kit blog it's worth looking at if only for some of the rather more obscure aircraft it features...

Typical of World of Warplanes' love f the obscure - this German 1930s era
AO 192 only ever existed as a production run of six aircraft and they were
transport aircraft. In this game it's cast in the 'what if?' role as a primitive
heavy fighter!
This is a Multi-player on-line combat 'sim' (I use the word 'sim' but it's a little more 'arcady' than 'simmy') that brings together players from around the world for a spot of no holds barred air combat.

As I said, one of the attractions with the game is getting to play some rarer aircraft, some of which only saw the light of day on the drawing board or as prototypes. But this taps in to the popular interest in semi-speculative themes like 'Luftwaffe 1946' and such like 'what if' scenarios. And I like it!

The game is hardly realistic in it's flight physics or sophistication but it's fun, and that's something that's missing in a lot of computer games these days.

My current mount, the diminutive Soviet  Polikarpov I-5

Monday 8 July 2013

Updating links to project series - find stuff easier

Hi there, bit of an update to the way the blog works which - hopefully - will make it easier for you to find all the posts in a particular project.

From now on I will be including a 'Complete Series' link in each project post, this will lead you to a automatically updating page showing all the posts in a project. So, for example (and as requested by one of my readers) to find all of the Finnish V3000 truck project you would click on this 'Complete Series' link.


I've tried several different ways to try and index my blog as I have found it frustrating when I find a post in other blogs that are obviously part of a series but then you can't find the other instalments  SO I hope you will find this helpful.

On my 'Blog Index' page I will also start to use this system (instead of the - frankly - confusing 'Part 1 Part 2...' system I have been using.

(Big thank you to Neil - of the excellent Braillebuilder blog - for bringing this issue to my attention.)

Steve


Friday 5 July 2013

Pegasus 1/72 ISU-122/152 unboxing

One thing I know about Pegasus model tanks is that I like their tracks! They are hard plastic tracks and not the floppy vinyl tracks you get in other kits (like the notorious Airfix ones). Pegasus models offer low cost quick build kits that are slightly simplified and are easy to put together, and their very competitive pricing for boxes of two models makes them very popular among the war gaming fraternity.

However, unlike their biggest British competitor - Armourfast - they are not so over-simplified that they are of no use whatsoever to the modeller who is looking to build a historic piece. In fact, they are - in my opinion - a terrific starter kit for beginners like myself as they offer great value for money and moderate detail.

Anyway, let's take a look at what you get in the box...

Admittedly, I started putting one of the hulls together already...
The vast majority of parts are dedicated to the tank drive train, the road
wheels, suspension and what-not. I have already made a similar track
system to this when I made Pegasus's KV-1/2 tanks. Not suprising as the
KV tanks was the predasessor to the IS series of tanks and tank destroyers.
The upper hull of the ISU. As you can see - or  not! - the panel line detail
is a bit weak in some areas. But it's not bad for a 'quick build'.

You are fooled into thinking there are more parts than there actually are because - remember - there are two tanks included in this kit. Additionally, one of the nice things about this set is that you can build either the ISU-122 or the ISU-152 - the difference being the calibre of the gun.

Reference material...
Historically this means you can build a tank destroyer representative of tanks which took part in campaigns from the later part of World War 2 to the Arab- Israeli wars and even a few were used by the Iraqi Army during the first Gulf War! That's quite a time span and a lot of options to be able to play with!

"Both Egypt and Syria had a battalion of ISU-152 in the 1973 war, although they
didn't see action particularly. [Apparently]...the Egyptian ones were dug-in on
their side of the Suez and may have been encountered in the latter
stages by roving IDF forces." [Source: Tank Net]
Reference material for colour schemes is a little thin, though - as always - there are plenty of examples knocking about on the internet. As it happens I have the Osprey book 'IS-2 Heavy Tanks 1944-73' which has some information about the history of the ISU tank destroyers. And it just so happens that it has a colour plate for one of the Egyptian ISU-152s on the Suez Canal defensive line as pictured in the photo above.

The example depicted in the Osprey book has a rather nice three-colour camouflage scheme in sand, dark-green and red-brown...Ideal for my airbrush practise!

This very nice model of the Egyptian ISU-152 is by Jari Hemilä  and is
featured over at the Missing-Lynx discussion group.

Thursday 4 July 2013

Hobby Boss MiG-15 - Finished!

As much as this was just a practise model it's worth posting up the final result...


There are a lot of rough edges, and I admit that the stick doesn't do much for it, but the weathering looks OK I think. This was done with powdered conte crayon, dusted over random panels (though I did reference some photographs of the real thing).


The main thing I have learned? ...That I hate bare metal finishes! :)

 > Link to the full series of this MiG-15 Build <

What next? Fun with airbrushing?

Well, I'd like to get back to vehicles again, I'm sort of 'planed out'! I did enjoy my little 1/144 aircraft projects but I think that was because they were small scale, both in terms of size and work. My Finnish Army project is on hold while my brother investigates moulding parts for me, so it's perhaps time I really sat down and took a look at my 'new' airbrush.

I have just dabbled a bit with my reserve airbrush - my cheap Revell starter brush - and I now fancy doing some more ambitious work with it's bigger brother. Naturally I want to try out a couple of ideas:

  • I want to see if I can finally get that illusive 'Russian Green'
  • Have another go at the 'pre-shading' technique
  • Also, I would like to try my hand at some airbrushed camouflage.


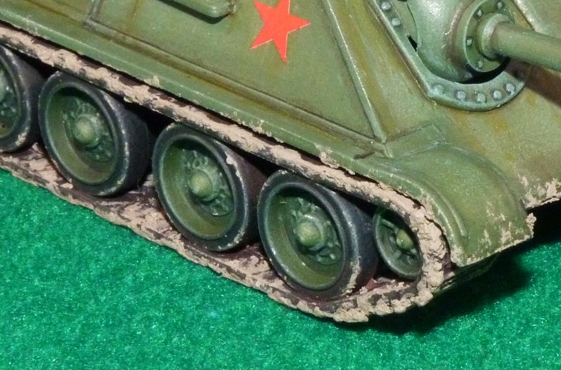
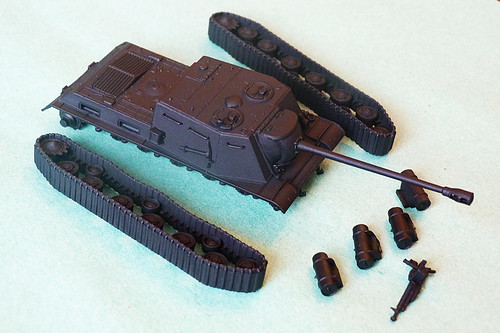
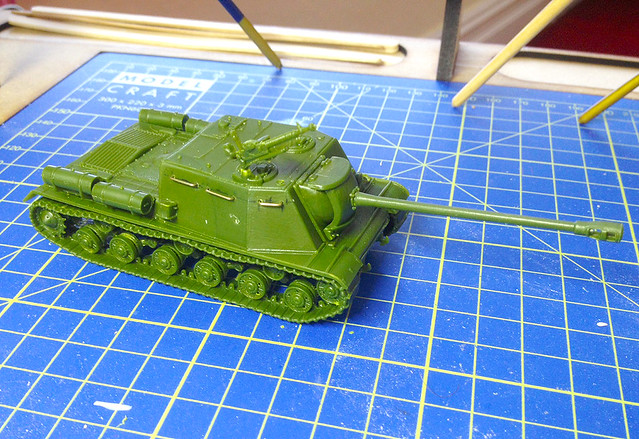
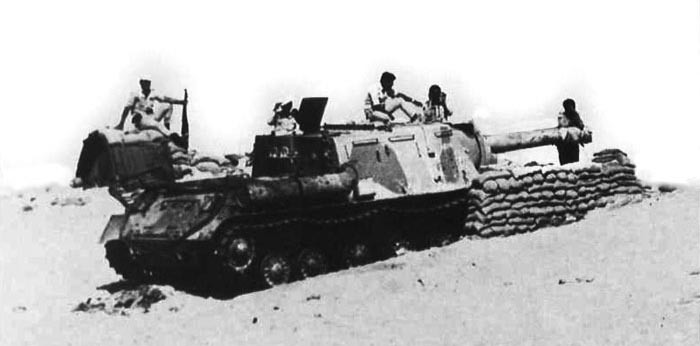
The Pegasus ISU-122/152 - a nice big canvas on which to try out new
techniques. The Finns capture two of these monstors during the
Continuation War in 1944, but neither saw use as far as I know.
The Pegasus ISU-122/152 was picked up very cheap indeed - a sale at ModelZone - and I have been saving it for just this occasion. It is simple enough to put together and I will be treating it - like my MiG-15 - as a experimental platform.

'Russian Green' - 4BO
The closest I have come to a satisfactory Russian Green was with the Flames of War Warpaint - a spray can which seems to have disappeared completely off the UK market.

It's funny how you can soon become geeky about 'the correct colours' as, in truth, while there was a designated recipe for 4BO - the official Soviet army green - really the Soviets tended to slap on whatever green happened to available as they just wanted the tanks out as quickly as possible. Others might spend a long time arguing the point!

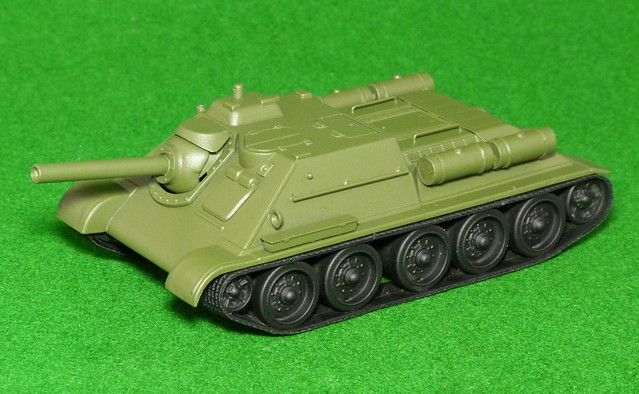
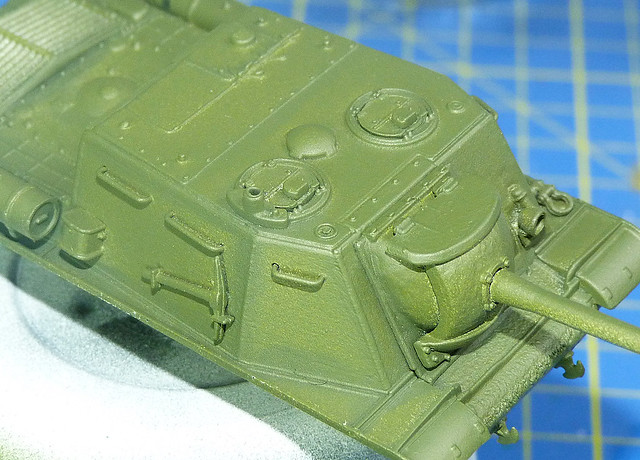
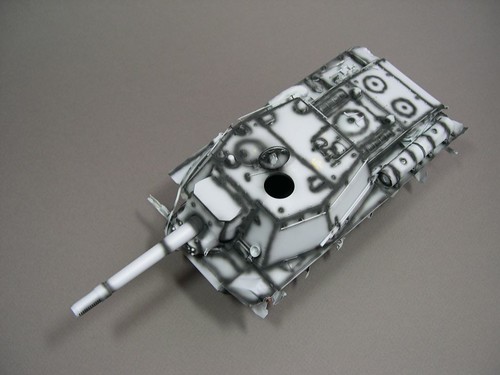
The best 'Russian Green' I have achieved - here as the base coat for my
SU-122M - was by using Flames of War War Paint spray. But supplies of
this in the UK have completely dried up.
Anyway, all I really wanted was a distinctive green with which to paint my Soviet vehicles so that they would be easily distinguishable from American or British 'green' vehicles in my collection. Think of Russian Green as   a slightly darker version of Humbrol's lovely 'Light Olive' with a smidgen of yellow in it...Does that help? (Possibly not!)
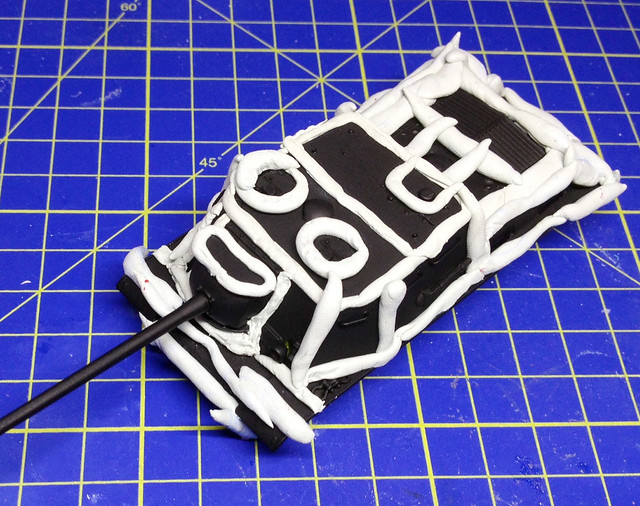
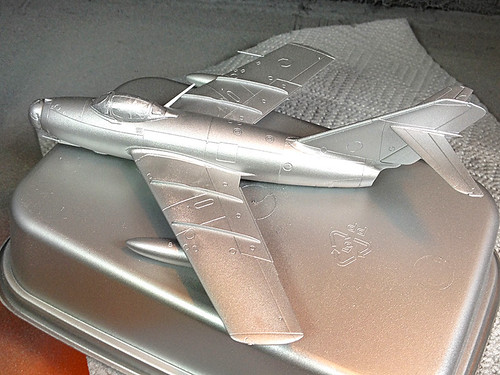
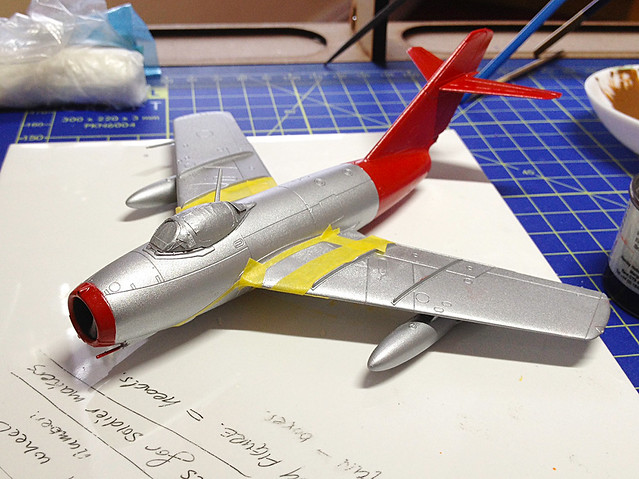
Pre-shading - done right
I have had a failed attempt at pre-shading a vehicle, but without a proper airbrush this technique is hard to achieve correctly. Basically you start by either a base of plain black or black with highlights shaded, on top of this you spray a light coat of your predominant base colour (e.g. olive green). The idea is that the pre-shading shows through the light coat of green to provide what hair dye adverts like to call 'tonal highlighting'.

My early failed attempt at 'pre-shading' a model. This version of pre-shading
involved spraying white highlighted areas in the middle of panels white to
contrast against the black edges. But my attempt with spray cans was a
too heavy-handed, only an airbrush can produce the fine layers I wanted.
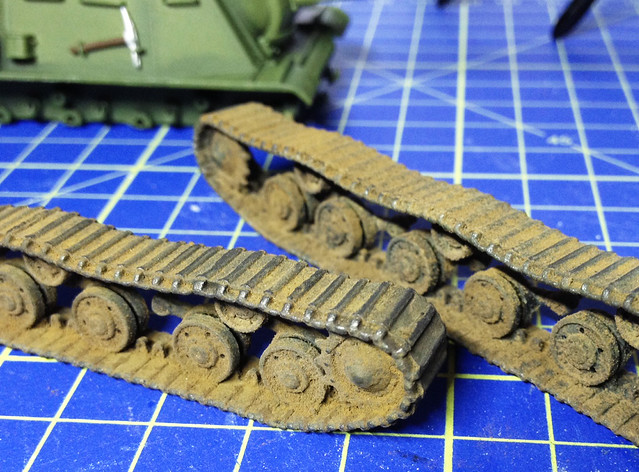
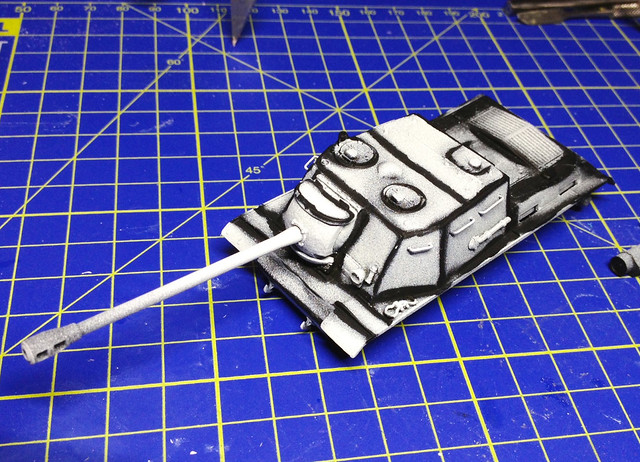
Camouflage
I had made some progress in my masked camouflage technique, but once again the use of spray cans resulted in an effect that wasn't as subtle as it could have been.

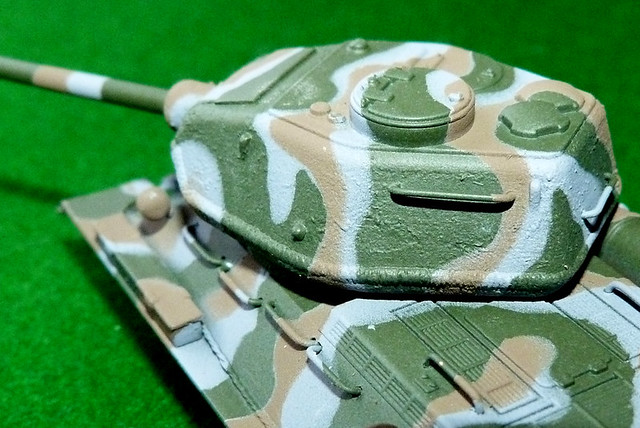
Oh so close! I was quite pleased with this...BUT...
The things make spray can painting inferior to using an airbrush - the size of the paint molecules sprayed shotgun fashion out of the can, the lack of control of the volume of paint which comes out and the restricted colour palettes available to you.

Believe me I have tried a great many brands in my hunt for the 'perfect' spray can paint - Humbrol, Tamiya, Plastikote, Flames of War (Vallejo) - but all suffer from the same basic problem, the plastic paint nozzle.

As for paint palette, well you will never have the range of spray can shades that you do with the vast variety of paints available in bottle form. Add to this the flexibility of being able to mix your own shades - precisely - for use with airbrushes and the advantage of airbrushes becomes glaringly apparent.

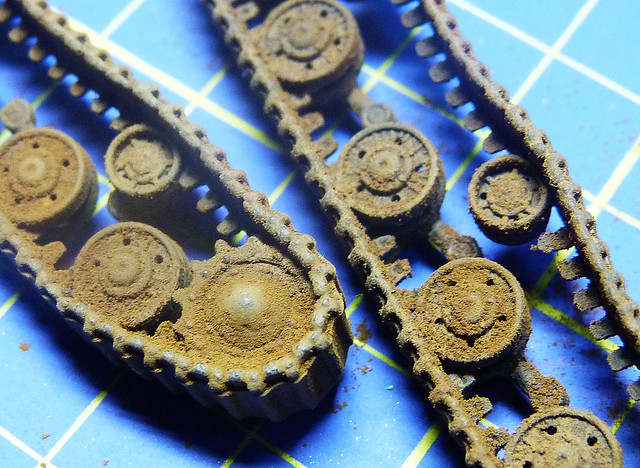
Take the photo above - I wanted a chestnut brown, but the closest I could find in a good quality spray can (Humbrol) was this buff brown. As much as I tried to convince myself that it could be a 'weathered' chestnut brown it just wasn't right!

Summery
So, I have a few things to practise with. I don't expect to get it right - as with my MiG-15 - but that is the thing about experimentation. I'd rather be practising of a £2.99 Pegasus kit than on a £20 Dragon kit!

Wednesday 3 July 2013

MiG-15 adding Klear and decals

Things are getting interesting now as I come to the parts of the painting and decoration where I test new techniques. You may remember that the whole reason I undertook this model was just to experiment with aircraft finishing techniques? There were two things I wanted to practise:

  • 1. Using Pledge Klear as both a base for decals and as a sealant, sprayed on with an airbrush, and...
  • 2. Weathering techniques for aircraft

Well, today I try out the first of these operation - using Klear and adding decals.


Now I have already played with Pledge Klear as a brushed on base layer on which to apply decals and I have also used Klear as a dip for my clear plastic parts. But I have not airbrushed on Klear as a decal base before, in fact this is my first use of an airbrush in any of my modelling!

I hope to start phasing out my use of 'rattle cans' but I was a bit unwilling to pour something so sticky as Klear into my good airbrush so I bought a cheaper spray gun to use specifically for varnishing products. This is Revell's Starter Airbrush Set at £12.99 from ModelZone and it runs off compressed air cans.

In the above photo you can see the two household products that I want to try out with this cheap airbrush - Pledge Klear and Windolene. Klear is the acrylic lacquer of course, but Windolene was recommended as the best product to run through my airbrush after using Klear to clean it out (something about ammonia content apparently).

I used Klear neat through my brush as it is pretty runny anyway and I just sprayed on a very light coat. My tests on some plastic yoghurt pots that I sprayed silver showed that if you sprayed too much it tended to bead on the surface and run.

Hobby Boss decals...
So, having sprayed on my base layer of Klear I started to ad my decals, and here's where I hit my first problem. The Hobby Boss decals are - like the kit - very cheap. They are the glossy variety that I have come across before in an Italieri kit, only thinner.

They come off very quicky when dunked in water, but when I laid them on to my MICRO SOL pre-treated surface they immediately began to stick and melt!

These cheap decals reacted very badly to the Micro Sol and I would warn you against using this product with Hobby Boss decals - just use normal water with them and they will retain their water slide property for placement. With Micro Sol they stuck to the surface almost immediately and didn't want to shift again!


Next: Well, on to exciting part - the weathering. I accept right from the start that this is where things might go terribly wrong and I am prepared to right off this kit as an experiment (which is the reason I bought this cheap kit in the first place). Fingers crossed!

Tuesday 2 July 2013

MiG-15 - first base coats

The base coats go on today, is it me of are base metal paint schemes a pig to work with?


The Humbrol spray silver started going all powdery on me, leaving a grainy residue. I'll be glad when I am confident enough with my airbrush to be able to dispense with rattle cans!

The next stage was to add the red accents, I have chosen to go with a Chinese air force MiG as it has a rather snazzy colour scheme...


This process is one dominated with a lot of masking. One of the things I have found very useful for masking odd shaped models is the kitchen product 'cling film'. It wraps round objects nicely and has a certain adhesion which means you can lay it down roughly where you want it. It's great for quickly covering large areas of the model...


Obviously this is an extreme example of my mad masking technique!

Monday 1 July 2013

MiG-15 - Ready to paint

I progress slowly as usual, but I now have all the additional parts on and the canopy masked out...


All ready for the first coat of Humbrol's metallic aluminium spray.