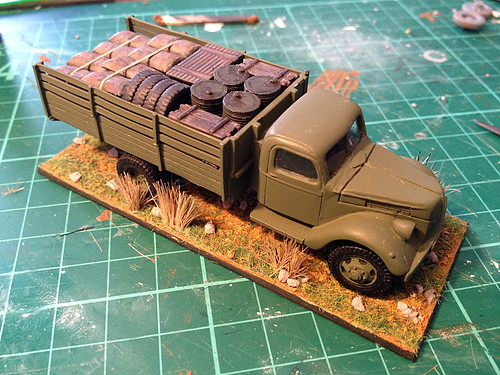
Showing posts with label diorama. Show all posts

Monday, 10 March 2014

Insert pun about grass here!

...Lazy I know (sorry Tim) but I couldn't think of a grass related pun for my post title today. Anyway, this post is about making scale grass for your bases...

As a beginner it is sometimes a little over-whelming the amount of things you seem to need to become adept at just to get a model finished. You need to be a bit of a sculptor, a bit of a painter, a bit of a make-up artist and a host of other things. This is evident when it comes to making bases or dioramas for your models.

Take grass. So far I have been the 'sprinkle it on' newbie, not paying that much attention to it and relying on the quality of the stuff I get 'out of the bag'. But in my latest project I wanted to push my grass-making skills just a little further. I wanted to make realistic 'multi-tonal' grass.

Now, so far I have used Citadels 'static grass', this is both multi-tonal (contains a range of coloured particles to add depth) and is a strand based scale grass medium...


In the above photo you can see my 'test palette' where I have daubed some of the mediums I want to use in my model bases before I started so I can visualise the kind of effects they will produce. The Citadel static grass is the medium on the bottom right. As you can see, unlike traditional model railway 'flocking' it is tiny strands of fake grass and so, in theory and when used properly, mimics the nature of real strands of grass.

I have had two problems with this sort of 'strand' medium. First of all I am dubious about it's scale - at 1/72 or lower it looks a little too big and fake (I think). For although wild grass can get long generally speaking it is shorter than this, particularly in farmed land where it might be grazed on by cattle. The other problem I have with it is that when it's just sprinkled on - as it is above - it just lays flat, like it has been cut, and again looks a bit silly.

So, I have reverted to the traditional - and very cheap - railway modeller flocking. The small granular and mossy medium does not have the realistic advantage of strand-based fake grass, but it's smaller size does - I think - compliment braille scale projects better.

The main problem with the type I bought is that it is one flat uniform colour which is not so realistic. Natural grass is a range of tones and shades, it can be dry grass in which case it can have a brown tone to it or it might be new grass in which case it might be a more vibrant green.

To add this effect to my granular flocking I decided to add some additional colouration by using some oil paints, artists chalks and washes...


The effect is quite subtle - hopefully - but adds some depth and shade to the grass. I daubed on some ochre and brown oil paint using an eye-shadow applicator (a small sponge) and I added highlights using a very light beige artists chalk. Either medium can then be blended into the grass using a fingertip or another eye-shadow applicator. The end result is a multi-tonal mossy effect...


As I said, I've gone for a very subtle variation in tone, but you can go in heavier if you wish adding more contrast and shadow tones. I could have - for example - added a dark brown wash to increase the three-dimensional look, but I decided that the dark muddy browns of my actual finished bases would suffice for the underlying shadow tones.

Postscript - using static grass properly
Looking about at other far more advanced scale modellers static grass (the strand type) seems to be a medium worth persevering with but only if it's applied properly! By 'properly' I mean getting the tiny strands of fake grass to stand up as real blades of grass do.

So I did some research and again railway modellers seem to have the solution to this, and the clue is in the name - 'static' grass!

Take a look at the following video about a device called the 'GrassMaster' made by a company called Noch...


I intend to revisit my grass-making techniques later, but in the mean time and in particular my current Finnish Army project I shall stick to my granular flock technique (particularly when the Noch Grassmaster is a whopping £129). But it's worth knowing how to apply static grass properly for future projects, and if I win the lottery!

In case you are still unconvinced about the use of static grass in Braille Scale (and I concede that if you are making a wargaming base static grass might be over-kill) just take a look at what a difference static grass done properly can make to a scene...


(The above scene is by Rato Marczak © 2013 - and more shots of this exquisite display model can be seen here: RPM Renault FT-17 in 1/72)

Sunday, 9 March 2014

Making a wargaming vehicle base

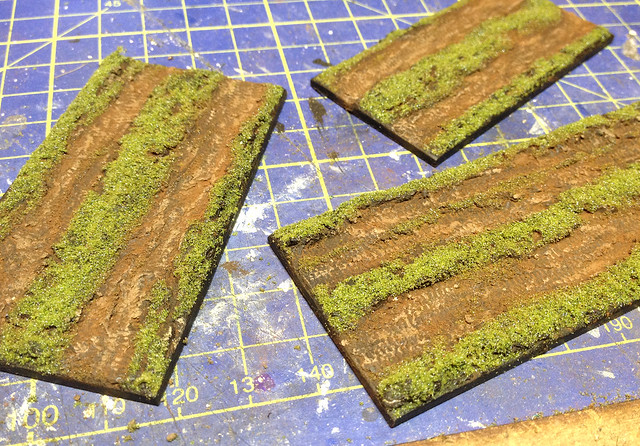
I have decided I want to have my vehicles on bases - I'm using the Rapid Fire! game rules as a guide for my collection - and although this isn't obligatory I personally like the look of bases models. So here's a quick wargaming base, done my way (...NOT the best probably...)
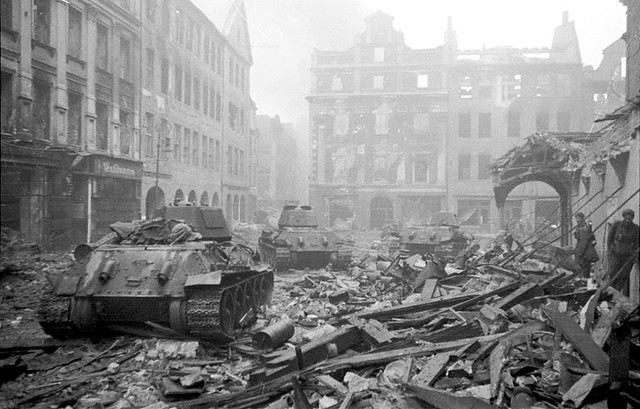
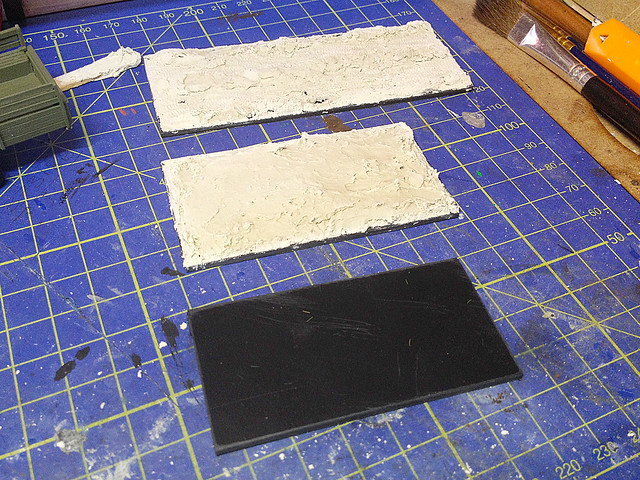
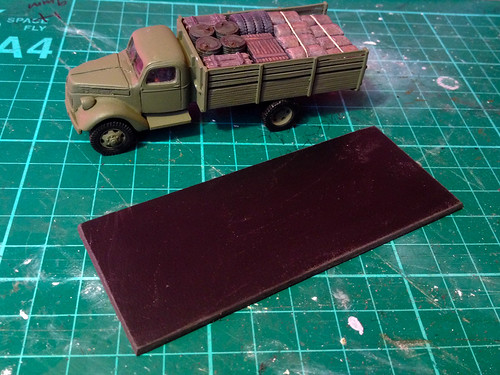
1. I cut a plastic sheet to size - roughly 5mm larger than the vehicle all around - then I smear on some good old Polyfilla! At first I just spread on a uniform 1mm layer, but as it begins to cure I start to work with it to imprint some of the mini-diorama details (like tank tracks or wheel furrows)...

[Update: It was suggested to me that you might want to roughen and score the surface of your plastic base so the Pollyfiller has something to adhere to.]


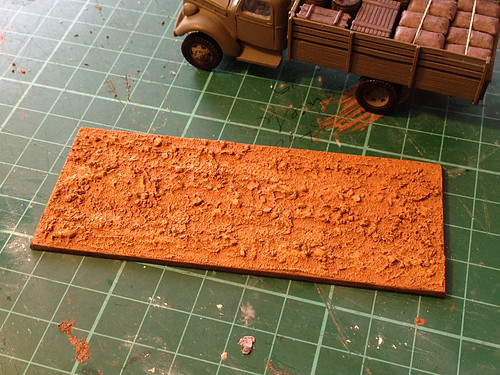
2. The polyfilla having 'cured' (hardened but not completely dry) it is easy to start applying some ground detail (I used some spare model truck wheels to print on tyre tracks)...


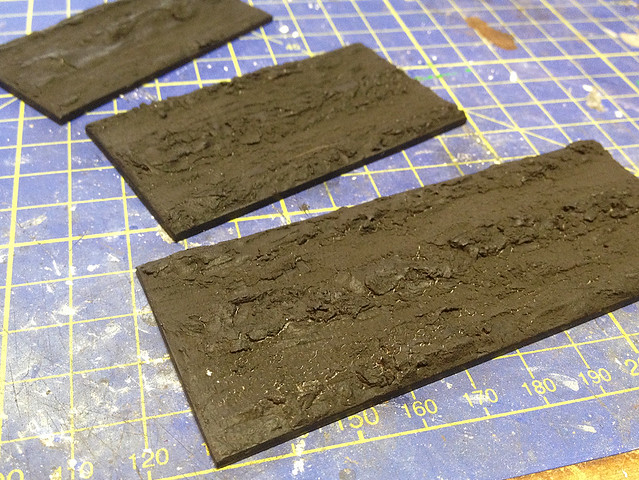
3. Once completely dry it's time to base-coat with black car-primer spray paint...


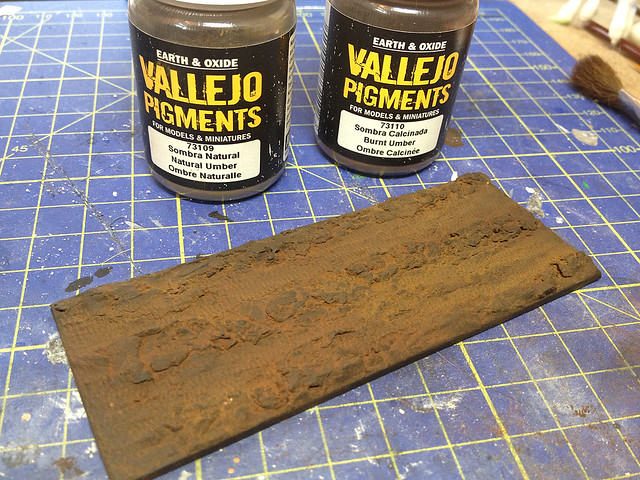
4. At this stage you could add a dark brown wash, but I really like powder colours (either AK Interactive or Humbrol powders, or the cheaper artists conte crayons ground up)...


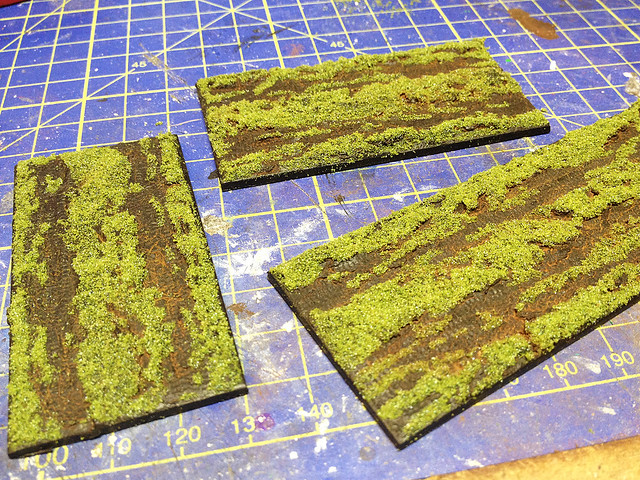
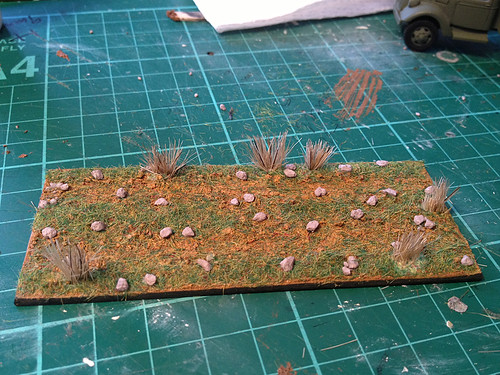
5. After a coat of spray varnish I slap on a generous sprinkle of static grass...


6. And then I work into the scene, giving it some highlight and shadow tones (were this a vehicle you might say that this was the 'weathering' stage)...


...I am now ready to base the vehicles and possibly add some final touches - like long grass or shrubs, or rocks and stones - so the next pictures you see will be the final finished models!

Friday, 22 November 2013

Featured work - Mr. Dyzio's Berlin diorama

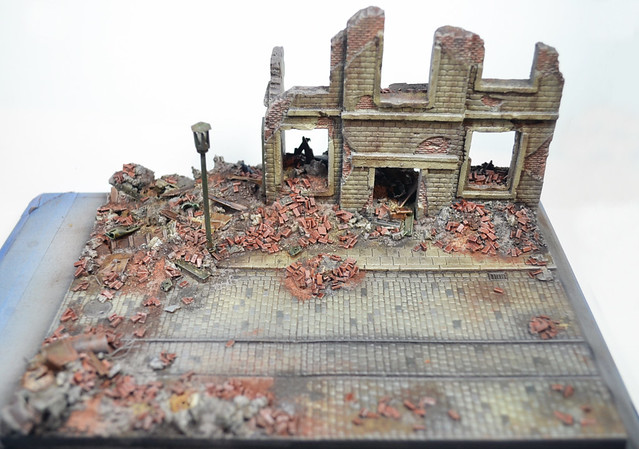
I seldom get a chance to feature a piece of work that is so relevant to a project that I am working on as - here - with Mr. Dyzio's 'city scene'. Mr Dyzio very kindly offered me so very useful advice about my own 'Battle of Berlin' vignette, but his own examples speak volumes about just how to go about tackling such a scenario...

Mr Dyzio's attention to detail is fantastic

Interestingly, the section of his scene that put's my novice efforts most to shame is the area of my back-drop which I knew from the start that I was skimping on with regards to planning and detail - the street.

You may remember, if you have had the endurance to have followed the progress of my project, that I mentioned how this first diorama was just an experiment with techniques and I wasn't going to get caught up with the fine detailing. Unfortunately it is exactly this attention to detail - the type of cobbles used, the manhole covers and drain gratings and the tram lines - that marks the level of quality between myself and an expert modeller like Mr Dyzio.

I'm being self-deprecating or negative when I say that, we are just at different stages in our modelling careers so it's actually interesting to compare how we both tackled a similar subject. It's very useful for me to acknowledge how I could have 'done things better' and have such a good example of how I might have improved my diorama - I will take these lessons forward to my next project.

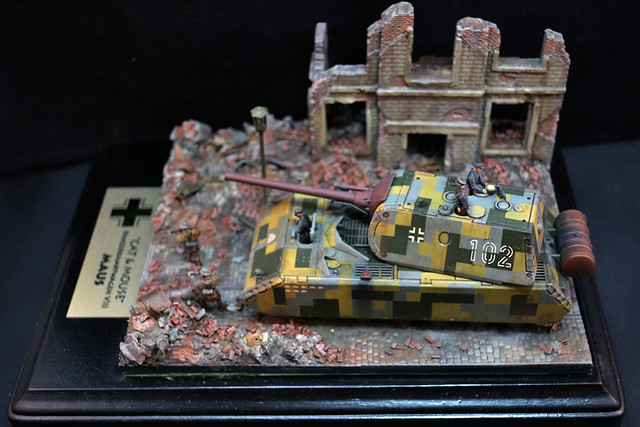
Mr Dyzio'z completed 'Mouse' vignette - wonderful!

So, many thanks to Mr Dyzio for the constructive assistance, it is very gratefully received. Please do check out his completed 'Cat & Mouse' diorama over at his blog: Dyzio Scale Models - 1/72 MAUS Dragon - Completed

Thursday, 21 November 2013

Battle of Berlin vignette, Part 9

I might as well post up this minor bit of progress. I've coloured the rubble...


All that's left to do on the back-drop now is to *maybe* add some dust around the piles of rubble spilling onto the street. It's a bit too 'clean' at the moment and I would imagine there would be a lot of dust from the falling masonry. I'm just trying to think of a subtle way of doing this - photo spray mount and talcum powder?

Wednesday, 20 November 2013

Battle of Berlin vignette, Part 8

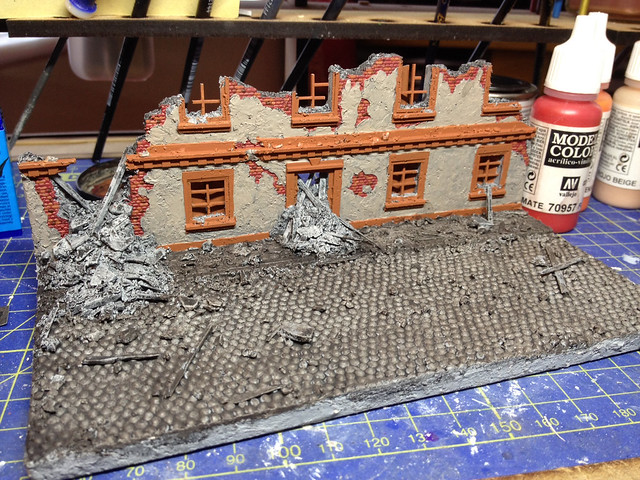
Back to making some forward progress (as opposed to whatever I was doing before)! Anyway, I feel I'm back on track again with my Battle of Berlin vignette and am continuing to work into the painted detailing now.

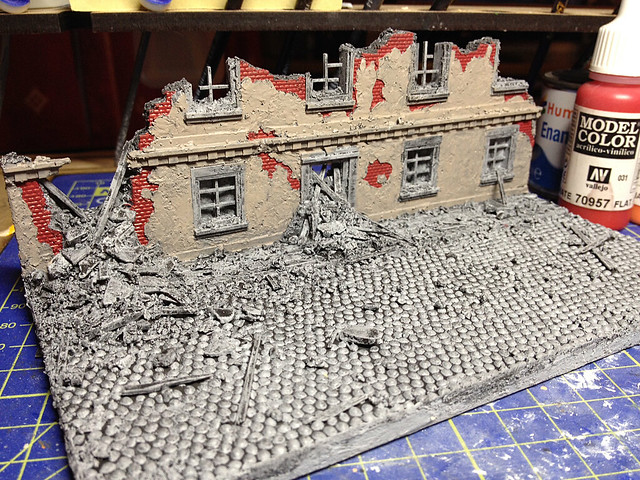
The first stage was to lay down my flat areas of colour ready for what you might call the 'weathering' effects to be applied. I finally decided on what colour to paint the lintels and window sills, based on a nice reference photo I found of a partially destroyed building from Dresden. I thought the red-brown colours would lift the diorama and compliment the brick-work (my alternative was to go with shades of mint-green to contrast with the terracotta bricks, but in the end I thought this would be a bit too much)...


Were I doing a vehicle I would say - as mentioned - that I was now on the 'weathering' effects stage. All the usual techniques are employed in the usual order - pin-washes, dry-brushing and some highlighting...


Dry-brushing tones down the bright re-brown paintwork a bit, which is good as it makes it look a bit faded and weather-worn. it also adds a little highlighting to the edges of the ornamentation which gives the detail some additional definition.

NOW...I begin to work into the painting and detailing of the rubble itself. I don't want it all being just a dirty grey - there would be bits of painted wall and wood and bricks in the rubble - but also I want the rubble to stand out against the pavement and the street.


I'm still a little unhappy with the street cobbles, I think they are still a little to light coloured - I really want a darker slate grey effect. So I had a go at darkening them down with some conte crayon dust.

Hopefully I am on the home straight now with this - some more little details and colouring and I can start thinking of mounting the ISU-122 in place!

Friday, 15 November 2013

Battle of Berlin vignette, Part 7

Sorry chaps, it's one of my 'one step forward, two steps back' posts...Well, one step back really...

Despite the rather nice effect I got with my black wash I decided it wouldn't produce the look that I was after. So I started again.

I have started painting flat base coats on the main sections of the vignette, and then I will repeat my black wash - lightly - on top of these.


I will be repainting the street cobbles a darker grey and then the lintels and window-sills a contrasting shade to make them stand out against the buff colour I have painted the walls.

Monday, 11 November 2013

Battle of Berlin vignette, Part 6

I decided to start the painting stage of my Battle of Berlin back-drop with a pretty heavy black wash. I wanted to get a lot of 'dirt' into all the nooks and crannies. For a change I used a Humbrol matt enamel and made a very thin wash using quite a lot of thinners.

My plan is to lay down dry brushed coats on top of this, so I wanted the darkest layer first - with all the little cracks and crevasses heavily shaded. To be honest - as usual - I am just playing this all by ear, but I figured it was best just to slap on the wash and see what happened...


I don't think it's too bad a start - I kinda want a 'dirty' looking vignette. The wash worked particularly well with the plaster wall...


Now, I think I will start by dry-brushing the building's wall, pavement and road and then I will start painting the detail with a little more care.

Saturday, 9 November 2013

Battle of Berlin vignette, Part 5

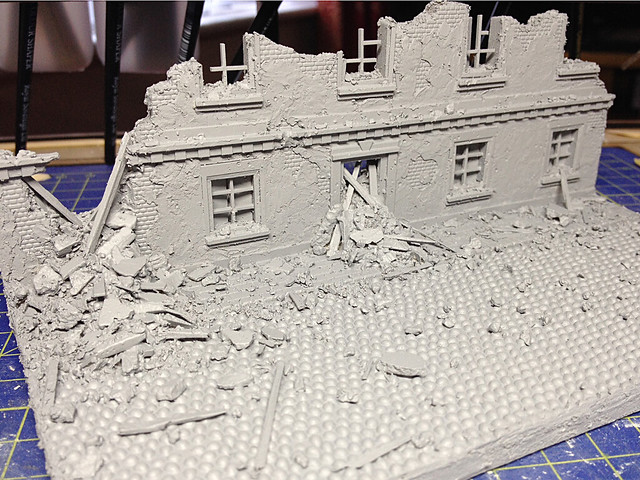
Unfortunately I had to back track a bit with this project. As I feared I had over-done the 'damage' to the facade, this became clear when I sprayed on the grey base coat. Just one of those things I'm afraid. However, the easy remedy for this was just to quickly skim some Pollyfilla over the surface which hid some of the superfluous marks...


...This actually turned out to be one of those fortuitous accidents as the Pollyfilla coat turned out to be a really nice touch. Being quick dry plaster it had a tendency to crack in places, adding to the impression of damaged masonry!

Once satisfied - this time - with my facade it was back to the spray booth again for another coat of mid-grey acrylic primer...


OK, now it's time to start planning my painting strategy! :)

Wednesday, 30 October 2013

Battle of Berlin vignette, Part 4

More trouble with rubble!

...Getting tired of this yet?  ;)

OK - for those of you who haven't lost the will to live I continue adding debris and damage to my street scene...

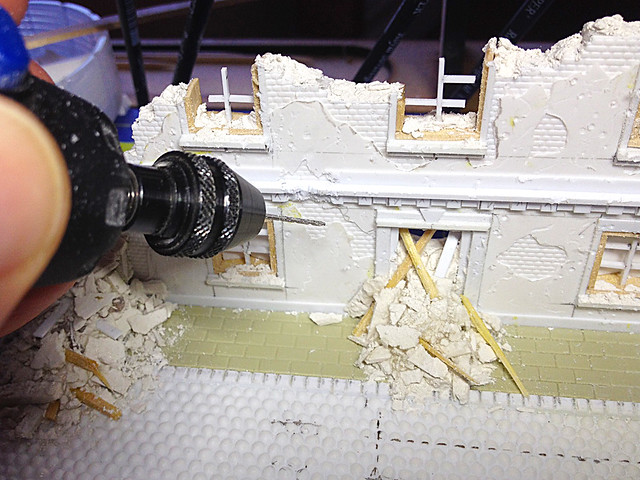
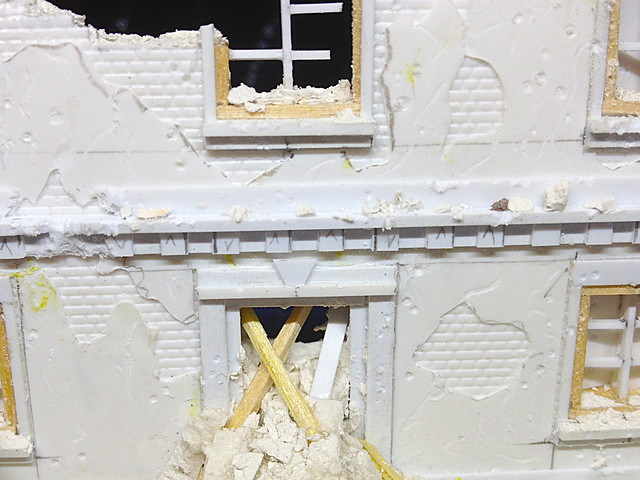
First of all I let my trusty Dremmel loose on my buildings facade. There are several things I want to do - add bullet holes, cracks in the plaster and damage to the frontage where falling masonry has broken lintels, etc...


As with everything else, it's sort of a case of knowing when to stop - hopefully I haven't over-done the damage.

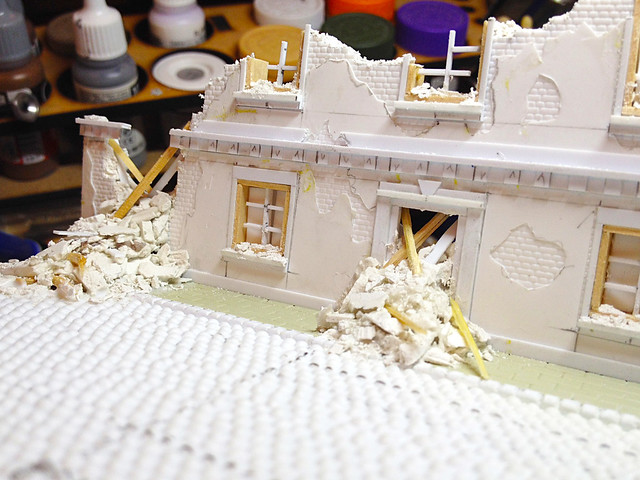
Now, the facade done I move onto the debris on the street itself. Doing random is quite hard I think - so fingers crossed my random debris doesn't look too unrealistic...


It all looks a bit funny, but I'm hoping that's because it's not painted yet - SO I better get on with the painting!

Monday, 28 October 2013

Battle of Berlin vignette, Part 3

Well here we go...Let's get ready to rubble!

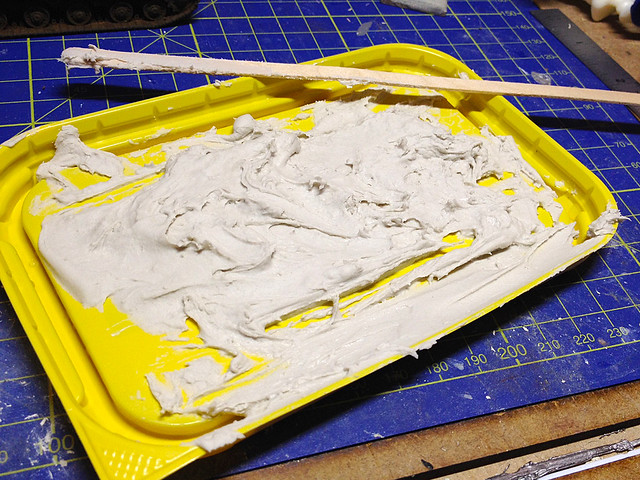
Just to recap, I started my 'rubble' off by squeezing a lump of quick dry Pollyfilla into a discarded margarine lid...


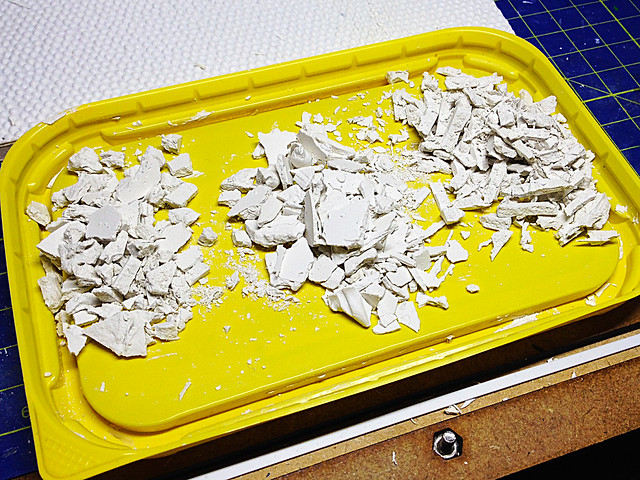
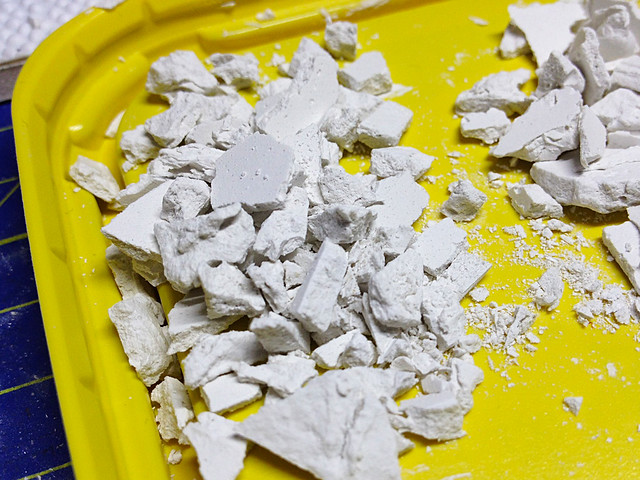
Once dry I started to break up the lump into smaller 1/72-looking lumps - one tip is not to make your layer of Pollyfilla too thick, try to imagine the scale size of a wall or a floor, that's the thickness you are aiming for. I tried to grade my 'lumps' into big, medium and small...


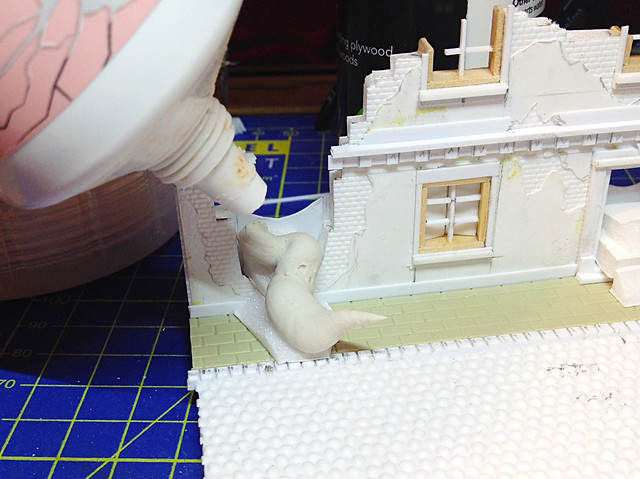
Now, rubble ready I now have to prepare my backdrop to make it ready to place the rubble on. The two main features will be masonry spilling through gaps in the wall - a hole blown in the wall and the main doorway. I began by building up some of the 'spills' with some foam-board off-cuts...


Pollyfilla time again! I'm using this as a medium with which I can stick my rubble to the backdrop...


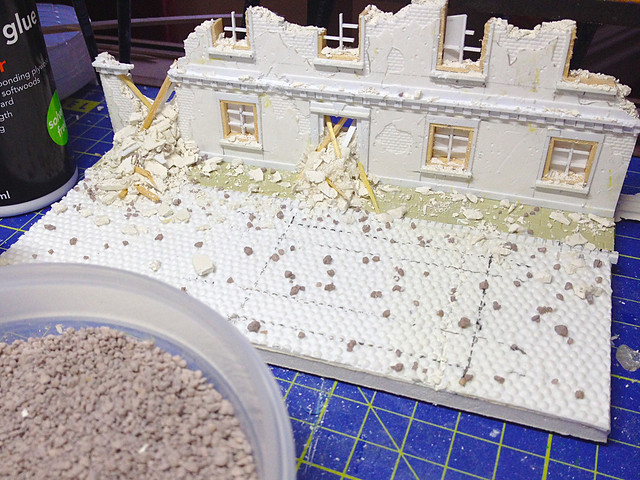
Then just sprinkle on the scale rubble, pressing it lightly into the still wet Pollyfilla. Just a little at first and then let the Pollyfilla dry, then add additional rubble on top of that using PVA glue, building the fallen masonry up in layers until you feel it looks realistic. I also added in some strips of plastic and wood to look like fallen interior planking...


Once I had the two main exterior mounds of masonry done I turned my attention to adding some rubble to the building facade itself. I applied some smaller pieces of the ground up plaster to the edges of the wall - sticking it in place with some Pollyfilla - and sprinkled some more dust and small lumps to window sills and lintels...


Nearly done. All that's left to do is to scatter some bits and pieces of my plaster rubble and wooden strips over the street. I've marked out where the tank tracks will be so I know where not to put any debris. I'll probably wash the street with a thin mixture of PVA and then sprinkle some of the smaller gritty pieces of plaster here and there and then glue in the larger lumps individually.

Well, that's that. Once all the rubble and detritus is on I'll spray on a grey base-coat before starting to paint the backdrop.

Saturday, 26 October 2013

Battle of Berlin vignette, Part 2

Right, time to start detailing the backdrop for my ISU-122 vignette. As said, I'm not going into a lot of research for this - I just want something that looks like a generic 'bombed out' building. I know I want it to look like it's the shell of a building, well just a wall really, and that I want rubble spilling through the gaps in the wall.

First thing was to start adding some of the architectural details, nothing fancy and everything was quick to apply. The bricks are from a HO/OO model railway texture sheet (dirt cheap)...


The lintels and window sills are all just off-cuts from some plastics strips I had - all pretty straight forward. BUT - at this stage I started to get a little ambitious (always a bad thing) and fancied peppering the walls with bullet holes, so I did go looking for some reference material and found this...


Having seen a few Berlin WW2 period building now I realised that they all seemed to have plaster cladding facades, not brick as I originally intended. This is bad and good, the down side is it will mean a little more work, the good side is that if I clad my wall I can jab holes in the cladding to make more realistic bullet holes.

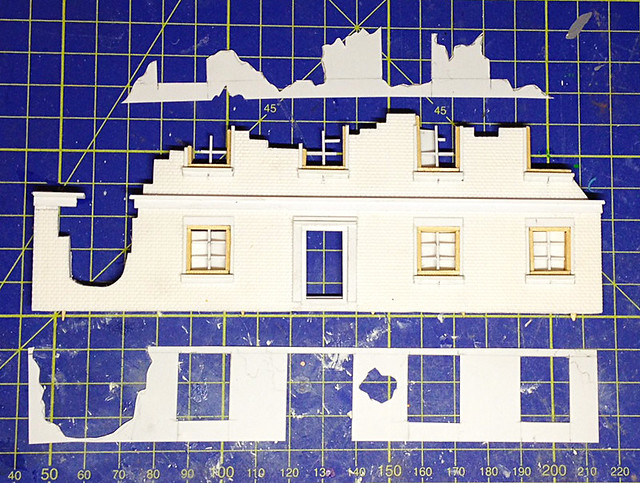
What I decided to do was this - I used some very thin sheets of plasticard to cut a top layer which will be glued onto my brickwork, BUT I have cut random holes in this layer so you can see the brickwork THROUGH this layer...

(You will notice that I added some broken window frames and some shutters behind the lower floor windows. Easy but adds extra realism.)

A bit messy, but that doesn't matter as it's supposed to be messy!


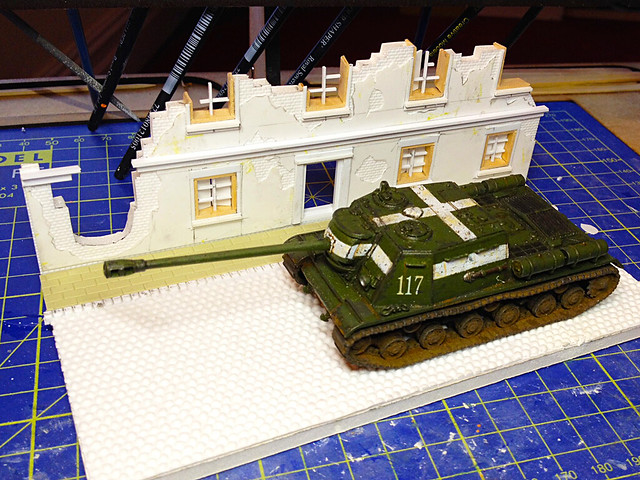
Now, I fix the wall to my diorama base and I'll just pop on my ISU-122 to check scale and placement...


Yep, that looks OK...And so, it's on to adding the rubble!

Tuesday, 22 October 2013

Battle of Berlin vignette, Part 1

ISU-122s roll into the German capital.
With my Pegasus ISU-122 nearing completion I began to think about a base for the model. Usually I would just make a small rectangular base with a minimal amount of terrain on which to base my models, but this time I thought it might be nice to experiment with something a little more creative.

Wouldn't it be nice to try out some sort of diorama? Well, as this is a war weary ISU the obvious environment for it might be a Battle of Berlin vignette.

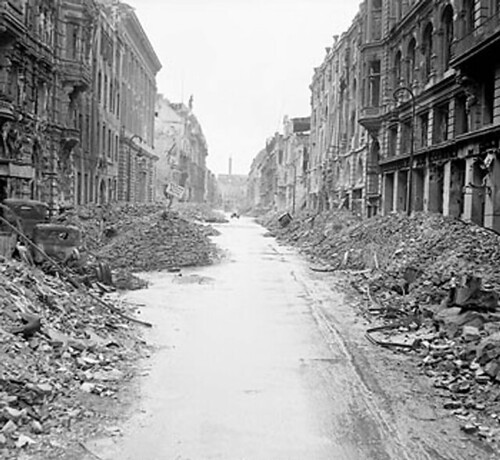
Really, all I want to do is practice some scenic techniques, I don't really want to get too hung up on authenticity - that will come later. But in any case it's always nice to start with some sort of reference material to get a feel for the subject...


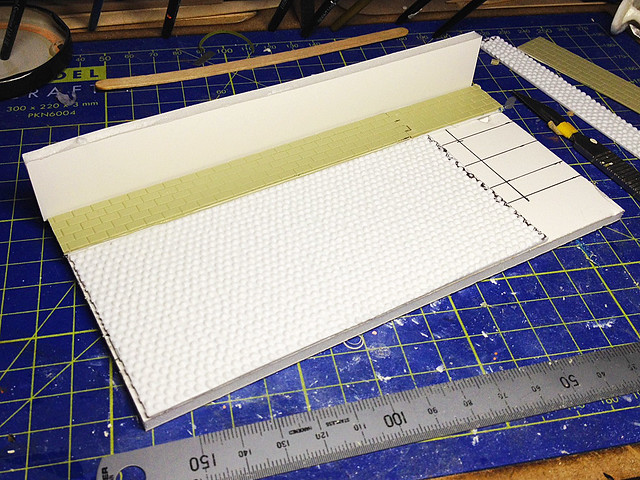
Hmmm, well obviously the key aspect to this mini-project will be rubble, and lots of it! But before that I will have to construct my 'street' - well, more of a theatrical backdrop really. Luckily for me my local model railway shop has a bargain bucket full of random HO/OO plasticard texture sheets, so I picked up some cobbled and paving sections...


Now, as mentioned, I am not going to be a stickler for historical authenticity here. I know these aren't the correct cobblestones and I'm not putting in pavement-side drainage grills or manhole covers (and I'm certainly not researching what types of street furniture existed in Berlin during WW2). I just want a street that looks roughly like those in the reference photos above.

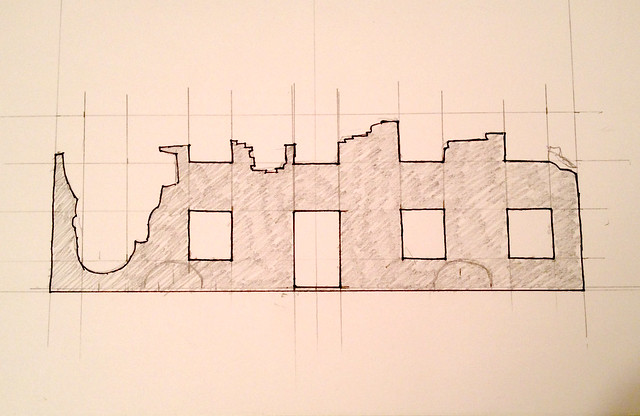
So, now I have my road and pavement I need to think about the building facade which will form the backdrop of my vignette. A very quick sketch is what's needed...


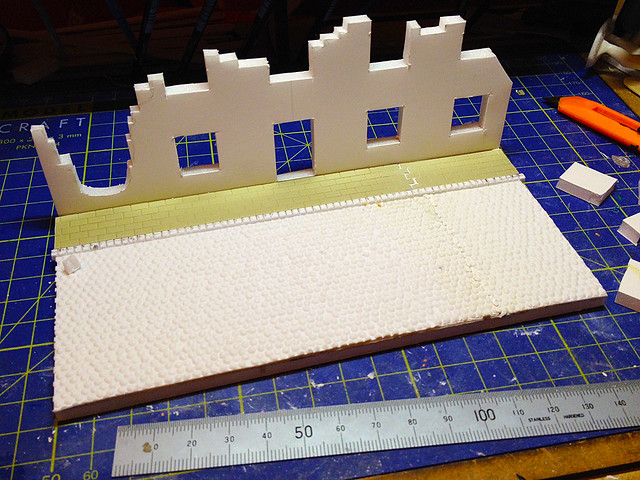
I am cutting this out of that foam-backed cardboard and I'm not thinking too much about ornamentation at this point. I will add the pretty bits in an ad-hoc way later. Let's get cutting!


Rubble...
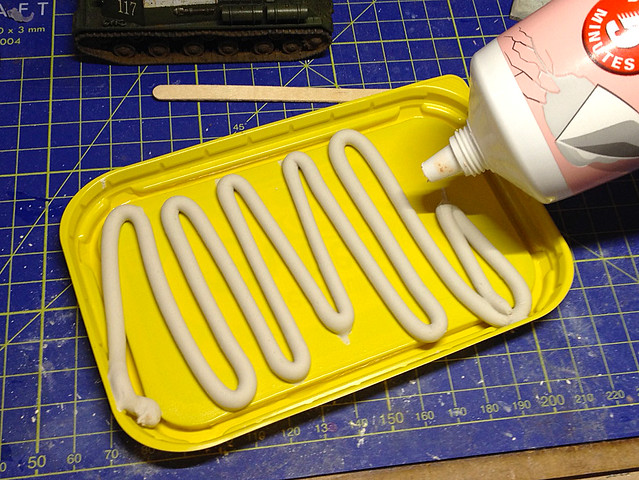
Obviously a lot of both the street and the facade will be covered in rubble so it's time to put some thought into how to make scale 'rubble'. An idea...What if I squeeze out a big blob of Pollyfilla quick dry plaster into a flat tray and allow it to dry - I could then crumble up the plaster to make simulated rubble. What do you think?


I used an old margarine tub lid and spread some of the Pollyfilla into the groves around the lid to see if I could mould some interesting shapes that might look like sections of felled concrete (just an idea). When dry the Pollyfilla should pop out the lid if I bend it, I can then break it up into big lumps and smaller rubble and also grind up some of it to make small stones and dust.

OK, I'll leave things there. In part two of this project I will start to add the detail to the building facade and crunch up my make-shift detritus. But so far so good.

Sunday, 21 April 2013

Making a war game (small) base

A basic skill (forgive the pun), I have dabbled with making bases before but these have been one-offs and I have never had to consider creating a constant format which I could replicate again and again. Why is this important? Because I am building a war game army and I want all the bases to look like they are part of a specific landscape.

As I am looking at bases for war game vehicles I want to keep the dimensions
pretty tight. Here I cut a base which only extends 5mm larger than my
example vehicle.
What sparked my interest in a pre-made product for making mud was an article over at the MiniAFV blog which looked at Tamiya's Soil Effect diorama texture. Getting your mud from a bottle seems to me to be a great way of ensuring the sort of consistency that I am after.

I am using a similar product to that of Tamiya's, it's Vallejo's Brown Earth texture material and it produces a gritty and red-brown earthy base-layer to which you can add further diorama effects.

Yes, it does look like the contents of a nappy! And it seems to be a bit sloppier
than the Tamiya product that you can see in the MiniAFV article.
Working with the Vallejo product is a messy process as it is quite sloppy. I think I would prefer something a little firmer as I had to wait for it to dry a bit before I could start to create the patterns in the 'mud' that I wanted. Still, the colour is good - if you are after a red clay type mud - and will save time.


While still tacky I sprinkled in some small stones (grit) and also impressed some tyre tracked into the mud. Once dry I will do a spot of dry brushing with a highlight tone to create some depth (I could work into the shadow areas first with a thin wash, we shall see).

Dry brushed with Yellow Ochre oil paint. Er, not that you can tell, but
it does make a nice contrast and picks out the detail.
So...Now to the static grass. I have been using Citadels Glade Grass, which I prefer to the ordinary sprinkle grass. I paint an area with PVA glue and then pour the static grass on, then shake off the excess. I leave gaps for the mud to show through and for decoration I glue some more small stones on randomly.


I finished off the base with some brush grass. I could have done this by buying some hobby brush grass but I decided to do do this more cheaply. I bought a natural hair brush from the local pound store, trimmed off small bunches of this and glued it to the base.


And there you go. I think my technique could be improved but the basic principal is sound. The main thing is that this a fairly quick and easily repeatable for a whole army of bases.

Here is a link to the original MiniAFV article which gave me the idea: How to make a simple base with Tamiya Texture Paint (by Erhan)