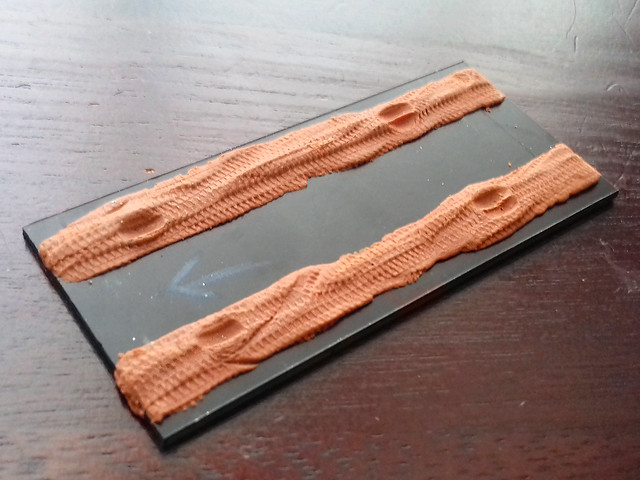
 |
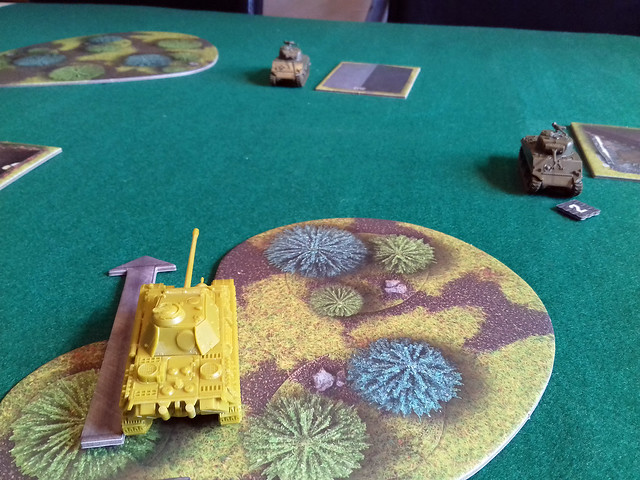
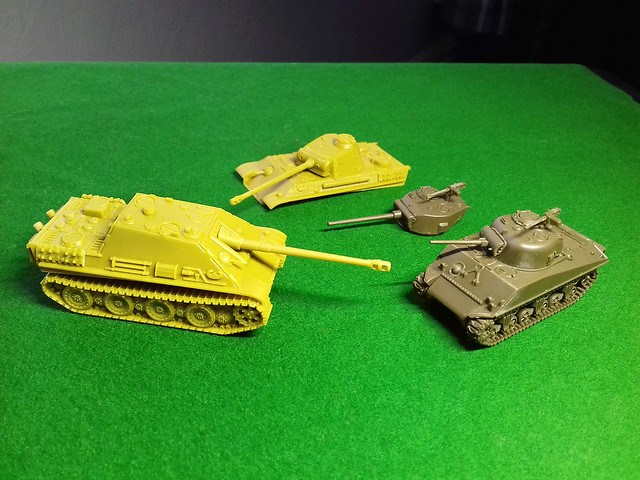
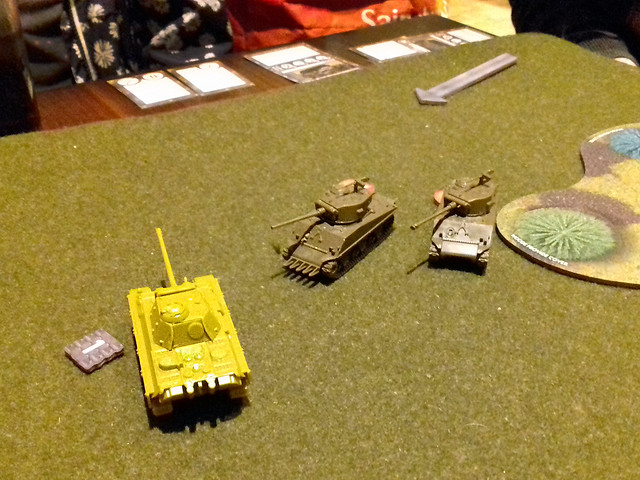
| Yes, that is a T-34 on the 'German' team (Red). It's standing in for a Panzer IV as I don't have a model of one of those tanks yet! |
Friday, 28 April 2017
Latest GF9 Tanks Game Report
I'm doing a lot of practise games of GF9 Tanks - the little 15mm scale tabletop skirmish game - so I'll be adding a few of these links to the full game reports which is over on my Milgeek gaming blog...
Link to the full game report: Milgeek - GF9 Tanks Practise Game 2 - 'Sherman's Revenge'!
Tuesday, 25 April 2017
Quick Citadel Project Box Mod
--- Warning! Major rant ahead! ---
Games Workshop has something of a reputation for being a little bit money grabbing (I think it's fair to say). I base this comment on what self-professed fans of Citadel/GW products have admitted to me and I have to say that when I look at the pricing of some of their modelling tools and accessories I have to agree...But, anyhoo...
I did take a shine to their plastic 'project box', a little laptop modelling/painting worktop which has an integral storage area (or rather, it's a storage box the lid of which become a work surface).
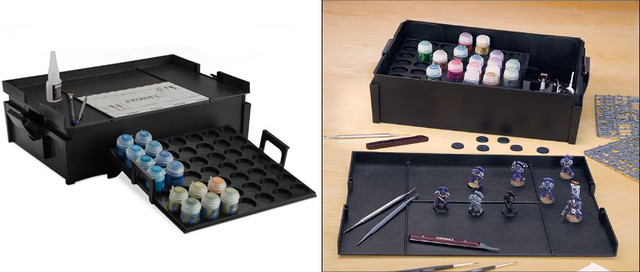
It seemed like a neat little mobile modelling solution, but I baulked at the £44 price tag (a plastic storage box and lid from Wilkos is just a quarter of the price)! However, I happened across a single example of it on sale at a much-reduced price at a local store and so though what the heck.
On getting it home I soon discovered some of the box's foibles. For a start, the paint pot holder tray - which sits neatly inside the box, but can be removed - is specifically designed to hold the dumpy little Citadel paint pots. I suppose that is understandable as it is a Citadel product after all...
But what REALLY annoyed me was the work surface itself. The lid of the box is reversible, the inside is intended to act as a compact workspace and is designed to hold a small cutting mat. Great - I thought - just right for my A5 mat...Ah, but no...
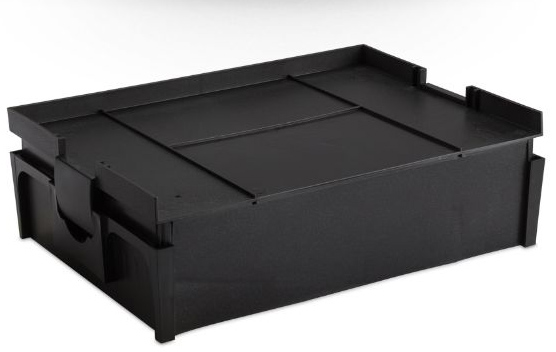
Citadel has designed the little ridges - intended to hold the mat in place - so that it only takes a proprietary Citadel cutting mat which does not conform to the universally accepted 'A' size cutting mat standard!
The bastards!
...I mean, it's quite deliberate and intended that you by their product and only their product. There is absolutely no logical reason not to adhere to the normal A-size format other than to make consumers pay over the odds for a far more expensive (but smaller) product!
 |
| The Citadel cutting mat, currently advertised as being $26 on their website! |
The Citadel cutting mat measures 210mm x 148mm and while the astute among you will say, 'but Steve, 210 x 148 is A5' the standard A size cutting mats are A size PLUS bleed (a little extra around the mat so you can cut something the size of A5). A standard 'A5' mat actually measures 230mm x 160mm.
 |
| A standard 'A5' format cutting mat - Amazon, £3.19 |
I'm sure Citadel marketing execs will say - in some smarmy voice - 'but our mat is A5'...Bollocks.
Anyway, (sorry, but that just really narks me) the real kicker is that the standard modellers 'A5' cutting mat can be had for about three quid from Amazon, while the Citadel mat - get this - costs a whopping £7 - and it's smaller!
I'm not having any of that...So I took a nice sharp chisel and pared off the work surface's little beading subdividers so that it is now perfectly flat. And now I can fit a proper A5 - or even a proper A4 - cutting mat on the top if I want to.
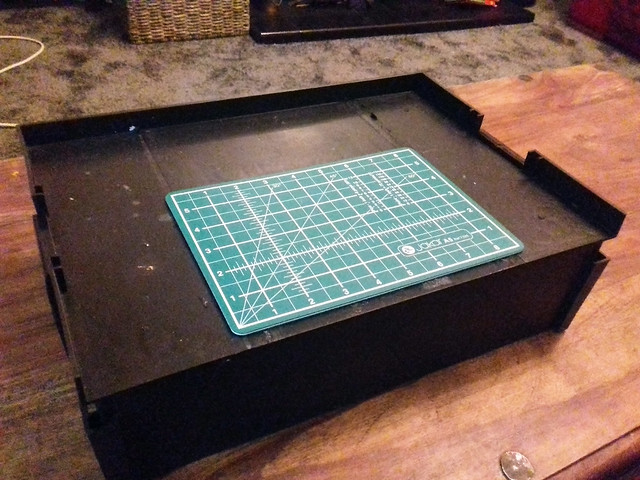
And there we go! Beading removed (I have a plan to glue my own beading dividers back on just so stuff doesn't roll around)...
Screw you Games Workshop!
Practise Game of GF9's Tanks
Just a quick note that I have a full game report on my GF9 Tanks practise game (learning the rules) over on my Milgeek Gaming Blog: GF9 Tanks - Test Game.
The 15mm scale models aren't painted yet, but that's on my 'To-Do' list!
Sunday, 23 April 2017
Thursday, 23 March 2017 MW 1/72 GAZ AA Truck - Part 5
Right, I am now at the stage now where I have to think about both the truck's base and the accompanying base for its Flak 38 tow!
As a wargame model, this truck will be representing a unit in two modes; static (gun deployed) and mobile (gun being towed). So, there will be two different models of the Flak 38 and one of these will be made so that it looks like it is attached to the tow hook of this Gaz truck.
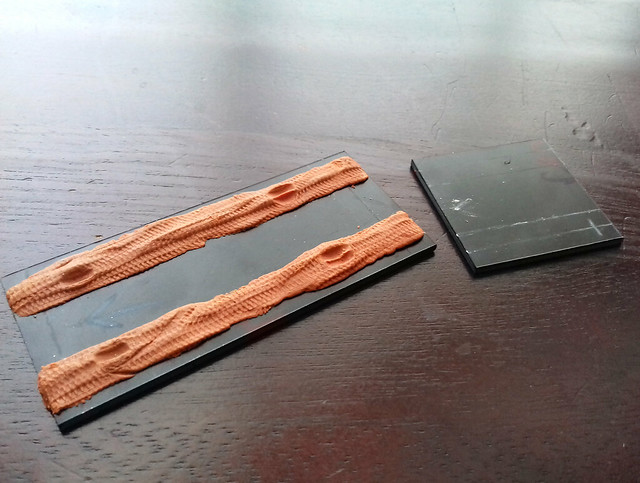
To begin with, though I start the truck's base in my usual manner...

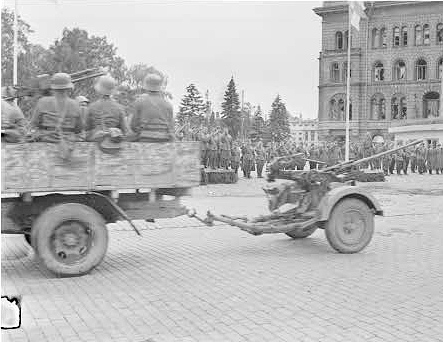
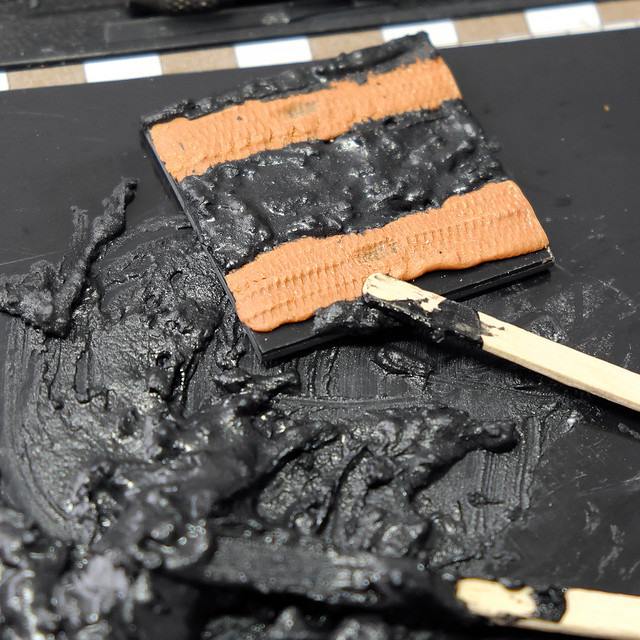
I'm pretty settled on my use of Milliput putty for the road tracks now. The putty takes the imprint of tire tracks very well. It also allows you to impress the wheels of your model into the putty for a better and more realistic placement. The tread was made by rolling a 1/72 diecast model truck back and forth over the putty...
 |
| I used a diecast model that I have which has a nice tire tread pattern to make the track patterns... |
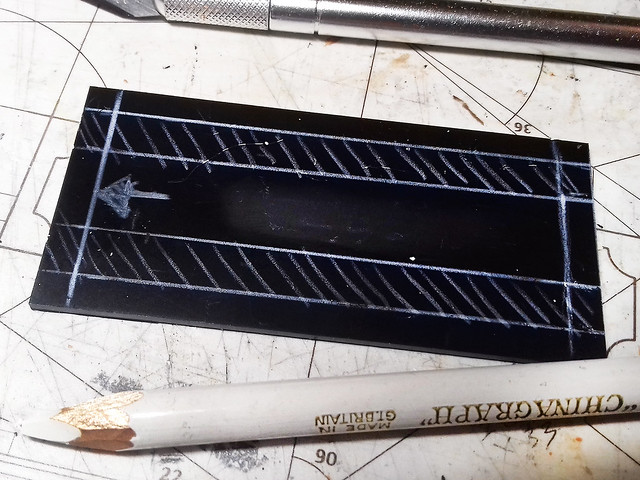
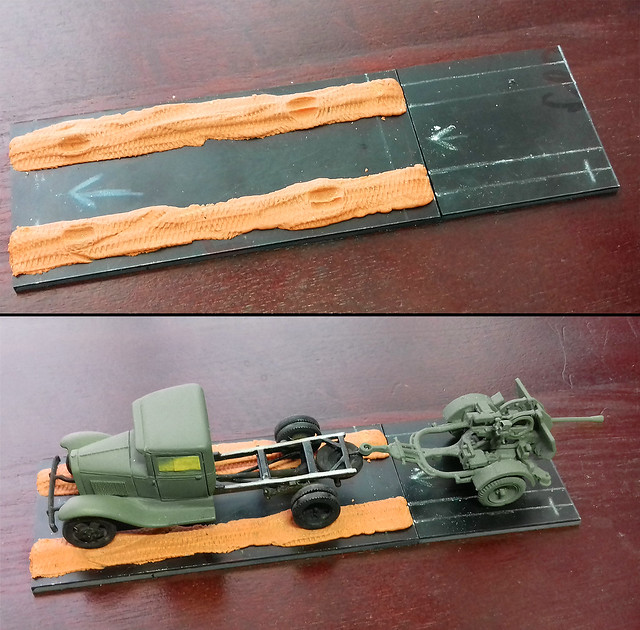
Next, I cut the second piece of plastic card to base the AA gun. You have to do a bit of measuring and working out of how big the base needs to be taking into consideration that the gun's tow bar will overhang the truck's base and attach to the truck's tow hook...
The idea is that when used in the 'mobile' (towing) configuration the two model bases will just be placed on the table immediately adjacent to each other (they aren't, however, connected in any way as I couldn't think of a way of doing that). So, when moving the models across the table you will have to move both parts in conjunction.
I suppose I could make a movement tray to put both parts in and then I can move them as one? Then, when the AA gun is deployed, I remove the mobile gun model off the table and replace it with the 'static' gun and its accompanying figures.
Anyway, on with the making of the base/s...
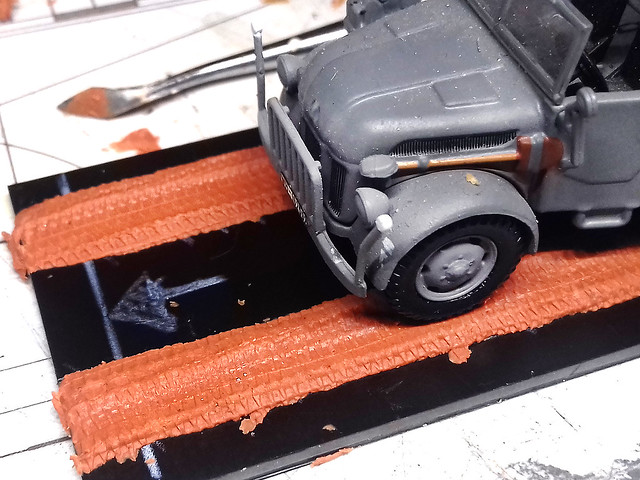
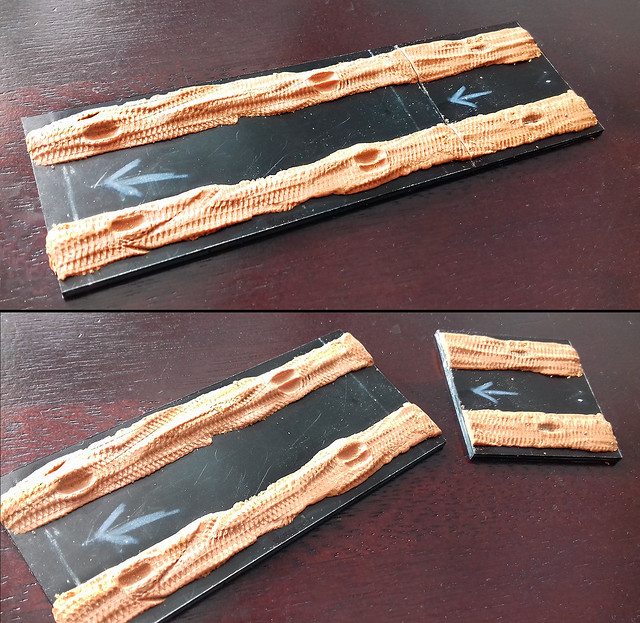
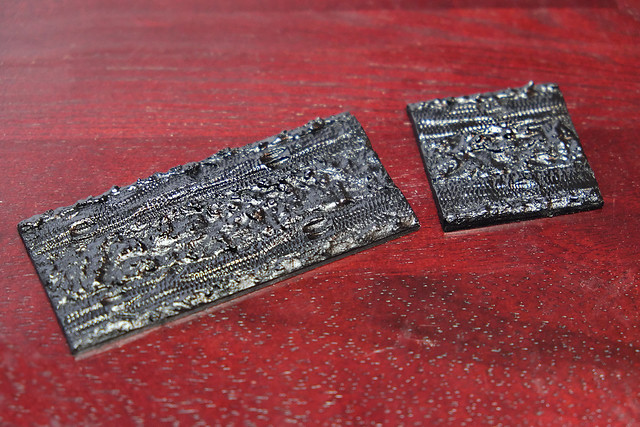
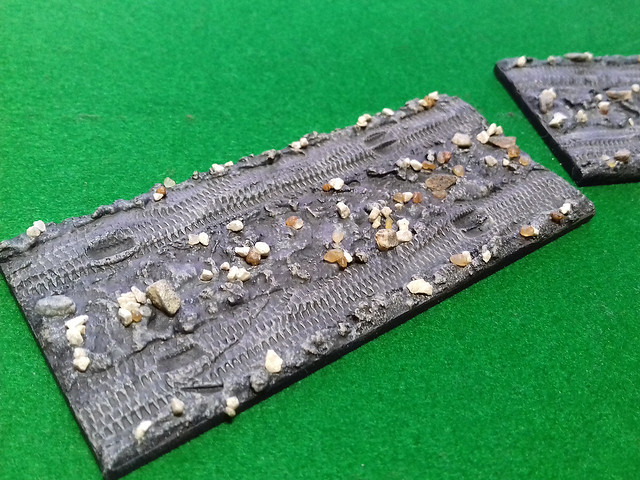
The two bases - now with their road tracks - should match and fit together as if one long section of road...
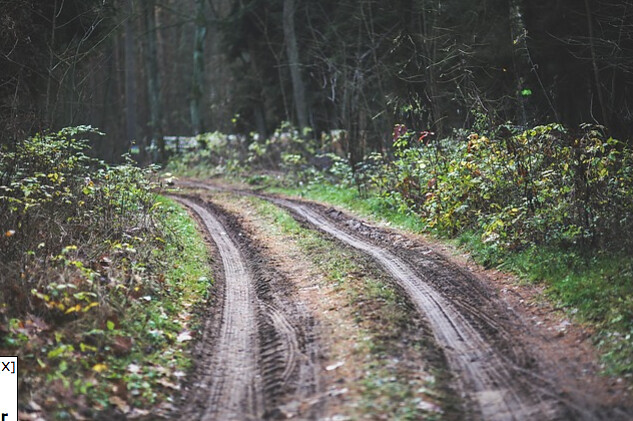
The next job is to and the rest of the ground terrain between and outside the road tracks. Now, obviously, I decided that all my Finnish models should be placed on a 'country road' base (my collection is based on the campaigns which took place between the summer of 1943 and late 1944 - part of the 'Continuation War' with the Soviets - which were conducted on the forested borderlands of Finland). And this look of rough earth and meadow will be created using coloured PollyFilla (quick drying plaster)...
I begin by mixing up my 'secret recipe'...Actually, it's quick-drying PollyFilla, fish tank gravel and a big blob of Vallejo's 'Black Lava'...
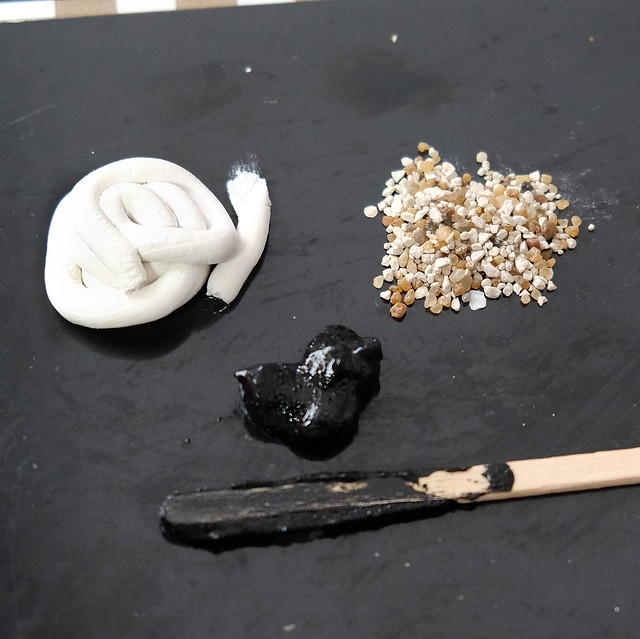
Mixed together the make a gooey, sticky, gritty substance that forms a lumpy uneven surface...It's a bit of a messy job, but someone has to do it!
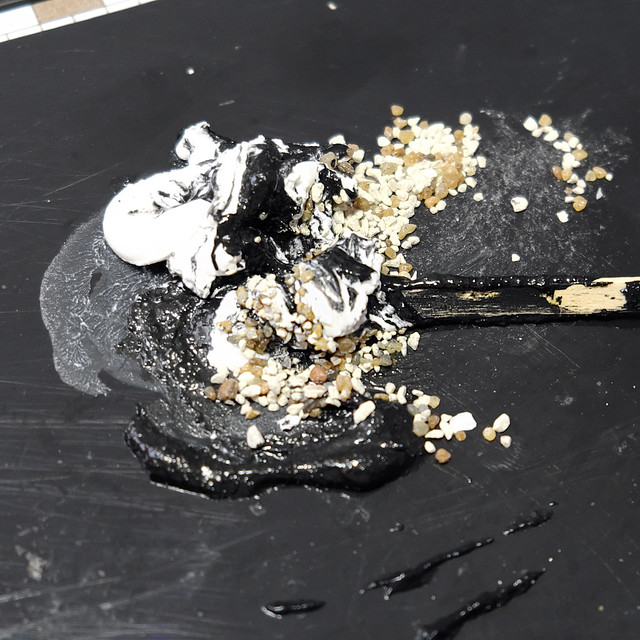
The resultant sticky mass is quite hard to work with, but - ironically - that's the very reason I like it because the resultant effect is always very random and organic (it sort of takes the heat out of trying to design something so that it does not look designed).

You just trowel the stuff on and it sort of just finds it's own 'look'. (Conversely, by the way, Vallejo's 'Black Lava' is great for creating nice flat and smooth Tarmac roads for dioramas and they also do a 'Sand' version for doing desert bases, too.)
It takes a wee while to dry - a couple of hours - but dries pretty hard...But, whatever you do, try hard not to get this goop on anything you don't want it on!

Once dry, it's time to apply the primer coat. I simply use Wilko's own Satin Black acrylic spray, because it's cheap. It's OK for this sort of work, but probably a little too thick for priming models...
Time to start painting! I begin by applying a diluted coat (a thick wash really) of Vallejo's lovely 'Black Brown', and then I build up the shading of the 'earth' from there - dry-brushing dark to light, ending with a light dry-brushing of Vallejo's Stone Grey...
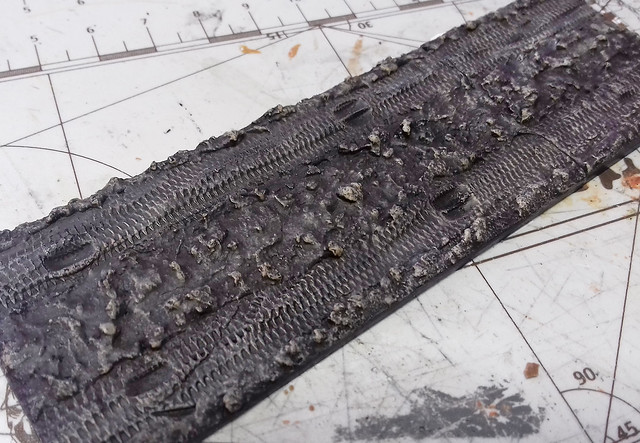
As you can see, I err on the dark side when laying down my ground colours. This is for two reasons, first of all, I want my 'earth' to be the black peaty type you find in northern coniferous forests, but, also, I want to get my 'grass' flocking on before I finalise my earth tones. I like an underlying dark base for my grass.
But, before I start to apply my flocking, I like to add some 'rocks' to my scene. These are just little chips of stones - I use fish tank grit and stones collected from the yard - which I glue on in random patterns across the ground-base...
With the stony ground done it's time to add some 'grass'. I still don't have a very sophisticated technique for applying scale model grass - I don't have one of those fancy electric static grass applicators. I just sprinkle on some basic 'flocking' material onto some PVA glue in patches.
Even my flocking is pretty 'no frills', as I go for a single colour material (mid-green) and prefer to discolour it myself with small amounts of diluted paint rather than buying 'multi-tonal' flocking...
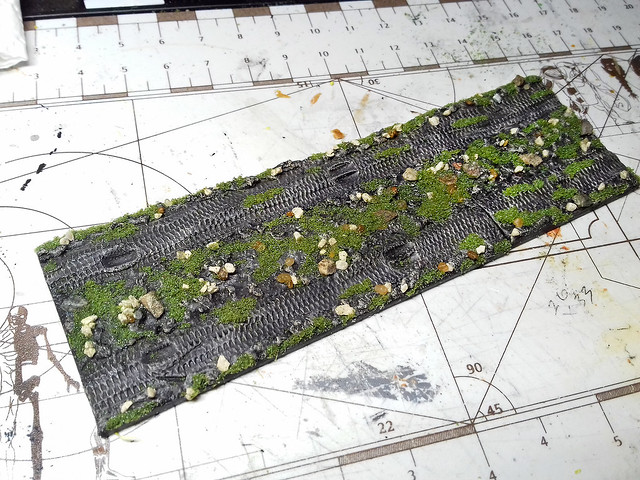
Well, nearly there...The final stage - before mounting the vehicle model and gun tow - is to 'weather' and add the last detail touches to the scene. I think it still needs some patches of more earth tones on both the muddy track and the grassy ground.

In Conclusion
The one caveat to this design - with its very dark colouring - is that I'm pretty much locked into this style for the project I'm doing (my Finnish project). Having done my first few like this when I was less experienced I now have to follow through with this same style for continuity sake.
I have learned a lot since I started modelling again and reckon I could make a better job of colouring the muddy earth now, even adding some 'wet mud'. But as a simple base for my models, it's fine (it's not a diorama).
15mm Smoke Marker...Quick!
Probably the quickest project I've ever done!
I was just about to bin a load of those annoying polystyrene packaging things (the squishy 'void chips') when I stopped and thought 'I wonder if they would make small smoke clouds for my Tanks game'?
In particular, I wanted some quick and easy smoke markers to indicate knocked out tanks. But I didn't want to spend loads of time sculpting and painting 'realistic' clouds of smoke, so I wondered if I could get away with a bit of a fudge.
Ten minutes later...(Literally, the black spray paint wasn't really dry!)

OK, it's a wee bit rubbish, but it'll do until I have more time to attend to these battlefield extras (I'd rather spend my time modelling vehicles and playing games at the moment, scenery will go on the backburner for now).
I also had a thought that these might make quick 15mm trees and bushes as well! :D
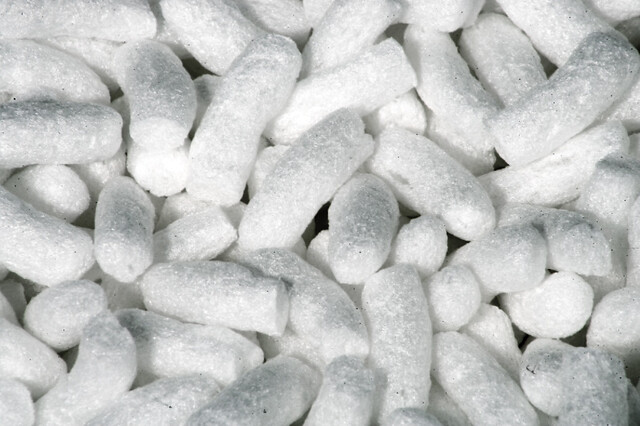 |
| Bloomin' things...I never know what to do with these packing chips I get in parcels! |
In particular, I wanted some quick and easy smoke markers to indicate knocked out tanks. But I didn't want to spend loads of time sculpting and painting 'realistic' clouds of smoke, so I wondered if I could get away with a bit of a fudge.
Ten minutes later...(Literally, the black spray paint wasn't really dry!)
OK, it's a wee bit rubbish, but it'll do until I have more time to attend to these battlefield extras (I'd rather spend my time modelling vehicles and playing games at the moment, scenery will go on the backburner for now).
I also had a thought that these might make quick 15mm trees and bushes as well! :D
Saturday, 22 April 2017
Nostalgic Model Making - Paper Houses
As I'm a bit skint at the moment but wanted some 3D house models for my new 15mm tank tabletop game. I also didn't want to get into building and painting scratch models as I have a sizable cue of projects on my workbench. So, what to do?
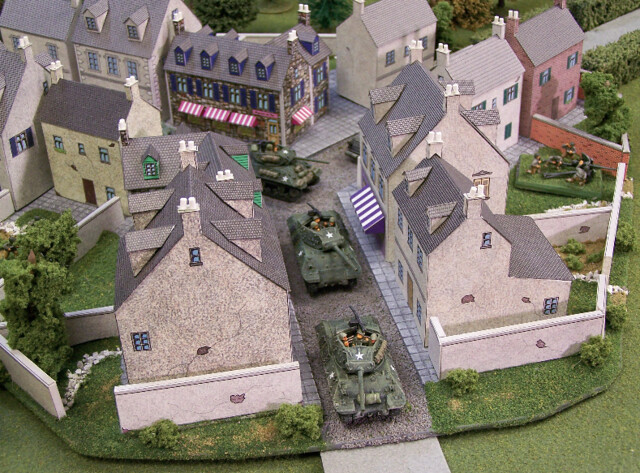
I had considered making plain featureless 'blocks' to represent buildings, the point being that these scenics provide obstacles to 'line of sight' in the game (I had a problem with the flat 2D scenery that the GF9 Tanks game provided as I felt they sometimes gave a false impression about what was and was not behind cover). This would have been very quick to make, but a bit lacking in 'realism'.
Then I remembered the printed paper models that my father used to make for his model railway layout, some of which were very good indeed. The advantages of these are; they are cheap (sometimes free), they are pre-textured so don't require painting and they are relatively quick to put together (though there are some very sophisticated paper models out there).
Downloading these type of paper designs seemed to be a more satisfying option, and with only a pack of card to buy from my local craft store they exactly suited my budget.
Sourcing The Models
This is one of those areas where the Internet shines after a short Googling session I found a few likely sources for free paper models, but I was most impressed by the range of buildings by Wordsworth Model Railway and their 'Townscene' collection.
The Townscene houses maybe ostensively 'British' but several of their more rural models - their cottages and stone buildings - are fairly generic and could pass for WW2 era French buildings...
Making the Paper Models
The only real issue is scale, the WMR models are in 'OO' railway scale (1/76), so I had to do a bit of math to work out the size reduction necessary to make these models suitable for a 15mm game (1/100-ish). In doing so I discovered that 15mm is actually an equivalent to the 'TT' railway scale which is about 1/120 scale, in the British way of calculating it (apparently it varies around the world).
My way of calculating was a bit more 'guestimate' as I happened to find an actual 15mm house model - a particularly badly drawn one which I couldn't use - which gave me the standard scale height for a doorway in this scale. I then used this measurement to determine that I needed to scale down the 'OO' models by 72% (so the doors were 19mm high by 10mm wide, roughly).
A couple of evening later I had these...
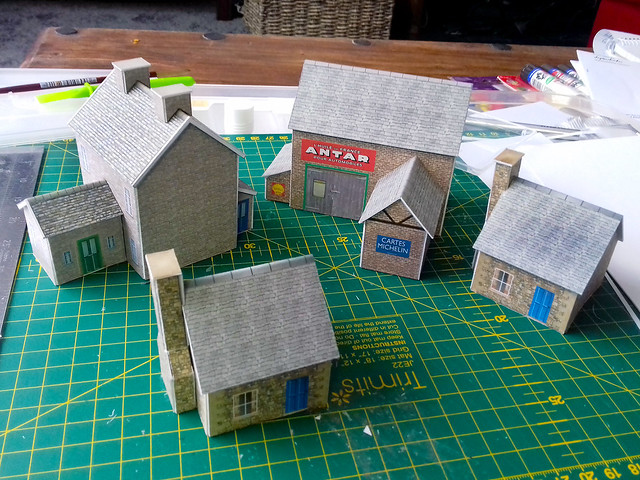
I was a little slow at making these as I have never put together a paper model before. But I did get a bit better as I went along and the lovely little garage building went together pretty quickly. There's a bit of a knack to building paper and card buildings and you soon find you own best technique for doing things.
One thing I would say is that your choice of glue and card thickness has a lot to do with how easy you will find these models and how good the end product will look. I tried ordinary 'school' PVA glue and this 'wet' glue soaked the paper and deformed the card, this is why WMR suggests that you use PRITT sticks. I used heavy 410gsm card stock, but this was probably overkill taking into consideration the rescaling I did, so I will try out a test using half that thickness for 15mm in future.
Finally, always use a sharp craft knife blade for your cutting out. A dull blade can drag and tear the paper which is glued onto the card, so you will have to change blades every so often. I used two craft knives, one with a new super sharp blade for cutting and the second with a used and duller blade for scoring the card for folding.
Sod's Law Strikes Again!
When I was searching for suitable buildings for my game I did really want authentic continental house models, but aside from PaperTerrain's costly WW2 French village models I couldn't seem to find any. Which is why I made do with WMR's more rural houses instead.
However, as thing always tend to happen, when I sat down to write this blog entry I was doing some additional web research and guess what? Yes, I found better examples of WW2 rustic building models!
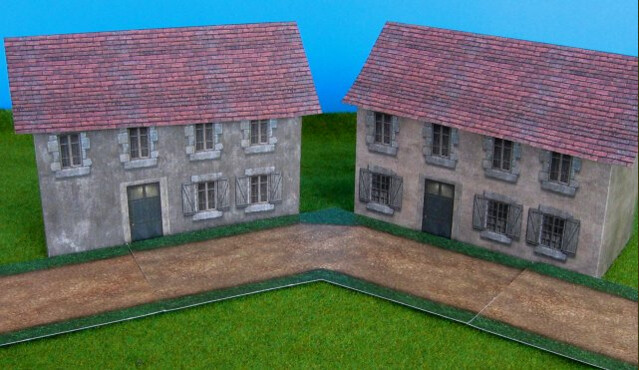
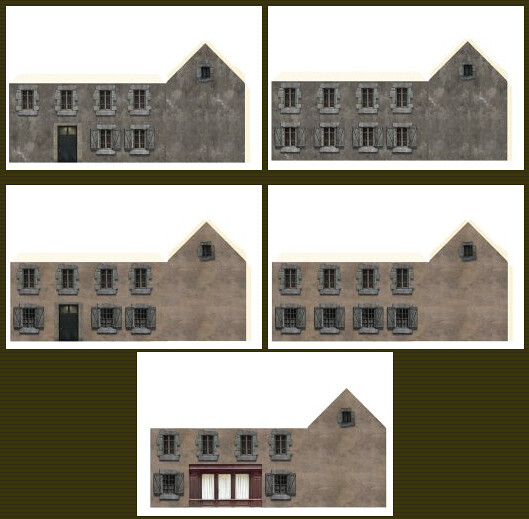
The Perry's Heroes website has a set of 'Western European Buildings' which fit the bill exactly, the only catch being that they seem to be in 28mm scale I think (so I ended up scaling these down in my print dialogue by 48%).
These are actually simpler - so quicker to put together - designs than WMR's, and I had the cafe example put together in about ten minutes (there are no fiddly chimneys, etc). That said, I did take the design into Adobe Photoshop and add some of the French cafe signs that I used for my earlier MDF French building project that I did a week or so back.
I did like the rather more grubby rustic look of these models and the fact that they only composed of two building sides (front and side and a back and side) plus a roof meant you could knock out a whole village in an evening if you want to!
Conclusion
I'm really happy with these little models, they fit my current needs exactly. They are cheap (free), simple and quick to put together and look OK from a tabletop distance. However, one caveat is that if you are playing a wargame like 'Flames of War' you might not find these models useful as the game requires that you be able to place figures inside your buildings!
This wasn't a problem for me, as GF9's 'Tanks' game does not include infantry units, so houses are no more than obstacles to the tanks movement and line of sight, so they can just be solid models.
And, one more thing, I actually found these little models very satisfying to make in of themselves! So I would be happy to look into using these again for when I gat more into 28mm Bolt Action gaming, I would just have to devise a method fro making the roofs removable for placing my little soldiers inside.
NEXT: I set up a test game of Tanks using my new houses!
 |
| GF9 supplies some flat scenery in its Tanks game to get you started, but the houses - in particular - just didn't feel right during my first game. |
Then I remembered the printed paper models that my father used to make for his model railway layout, some of which were very good indeed. The advantages of these are; they are cheap (sometimes free), they are pre-textured so don't require painting and they are relatively quick to put together (though there are some very sophisticated paper models out there).
 |
| An example of some nice historic paper models by PaperTerrain. Unfortunately, they charge $18 to download this set, so had to look elsewhere! |
Sourcing The Models
This is one of those areas where the Internet shines after a short Googling session I found a few likely sources for free paper models, but I was most impressed by the range of buildings by Wordsworth Model Railway and their 'Townscene' collection.
 |
| WMR's 'Townscene' series of paper models and well-designed models which represent standard British building types which suit most periods, from the 1930s to present day. |
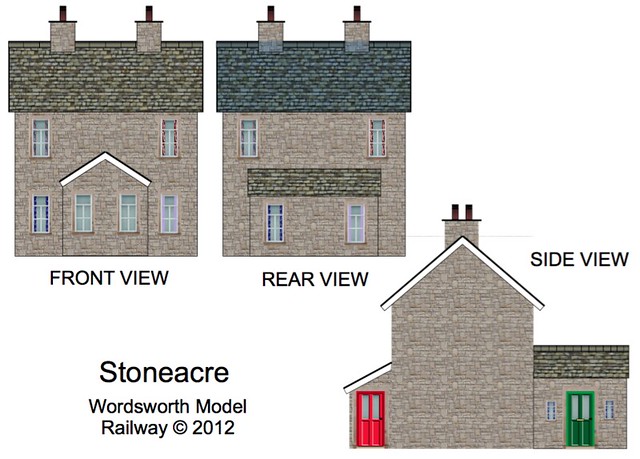 |
| WMR's 'Stoneacre' model is a nice 'two up' house model and was the first I downloaded and made. |
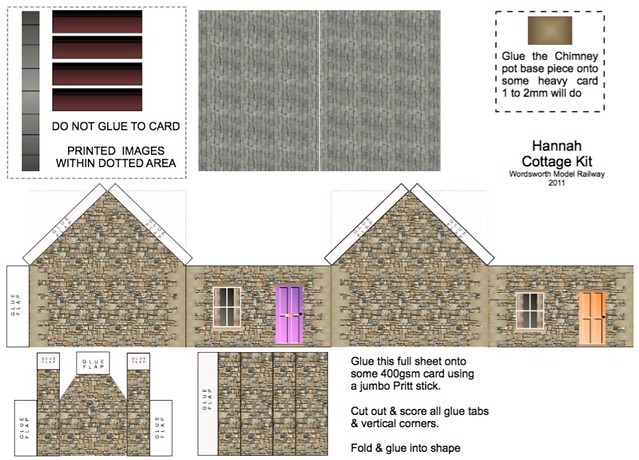 |
| The 'Hannah' cottage kit is their simplest of WMR's model and only takes minutes to put together! |
The only real issue is scale, the WMR models are in 'OO' railway scale (1/76), so I had to do a bit of math to work out the size reduction necessary to make these models suitable for a 15mm game (1/100-ish). In doing so I discovered that 15mm is actually an equivalent to the 'TT' railway scale which is about 1/120 scale, in the British way of calculating it (apparently it varies around the world).
My way of calculating was a bit more 'guestimate' as I happened to find an actual 15mm house model - a particularly badly drawn one which I couldn't use - which gave me the standard scale height for a doorway in this scale. I then used this measurement to determine that I needed to scale down the 'OO' models by 72% (so the doors were 19mm high by 10mm wide, roughly).
A couple of evening later I had these...
I was a little slow at making these as I have never put together a paper model before. But I did get a bit better as I went along and the lovely little garage building went together pretty quickly. There's a bit of a knack to building paper and card buildings and you soon find you own best technique for doing things.
One thing I would say is that your choice of glue and card thickness has a lot to do with how easy you will find these models and how good the end product will look. I tried ordinary 'school' PVA glue and this 'wet' glue soaked the paper and deformed the card, this is why WMR suggests that you use PRITT sticks. I used heavy 410gsm card stock, but this was probably overkill taking into consideration the rescaling I did, so I will try out a test using half that thickness for 15mm in future.
Finally, always use a sharp craft knife blade for your cutting out. A dull blade can drag and tear the paper which is glued onto the card, so you will have to change blades every so often. I used two craft knives, one with a new super sharp blade for cutting and the second with a used and duller blade for scoring the card for folding.
Sod's Law Strikes Again!
When I was searching for suitable buildings for my game I did really want authentic continental house models, but aside from PaperTerrain's costly WW2 French village models I couldn't seem to find any. Which is why I made do with WMR's more rural houses instead.
However, as thing always tend to happen, when I sat down to write this blog entry I was doing some additional web research and guess what? Yes, I found better examples of WW2 rustic building models!
The Perry's Heroes website has a set of 'Western European Buildings' which fit the bill exactly, the only catch being that they seem to be in 28mm scale I think (so I ended up scaling these down in my print dialogue by 48%).
These are actually simpler - so quicker to put together - designs than WMR's, and I had the cafe example put together in about ten minutes (there are no fiddly chimneys, etc). That said, I did take the design into Adobe Photoshop and add some of the French cafe signs that I used for my earlier MDF French building project that I did a week or so back.
I did like the rather more grubby rustic look of these models and the fact that they only composed of two building sides (front and side and a back and side) plus a roof meant you could knock out a whole village in an evening if you want to!
Conclusion
I'm really happy with these little models, they fit my current needs exactly. They are cheap (free), simple and quick to put together and look OK from a tabletop distance. However, one caveat is that if you are playing a wargame like 'Flames of War' you might not find these models useful as the game requires that you be able to place figures inside your buildings!
This wasn't a problem for me, as GF9's 'Tanks' game does not include infantry units, so houses are no more than obstacles to the tanks movement and line of sight, so they can just be solid models.
And, one more thing, I actually found these little models very satisfying to make in of themselves! So I would be happy to look into using these again for when I gat more into 28mm Bolt Action gaming, I would just have to devise a method fro making the roofs removable for placing my little soldiers inside.
NEXT: I set up a test game of Tanks using my new houses!
Sunday, 16 April 2017
GF9 Tanks Starter Set - Part 2
Magnetising tank models
I'm trying out something new, the addition of small magnets to my new 15mm tank models so I can swap out the various turrets (hopefully). On paper, it looks like a straightforward a job, but how many times have I said that on this blog!
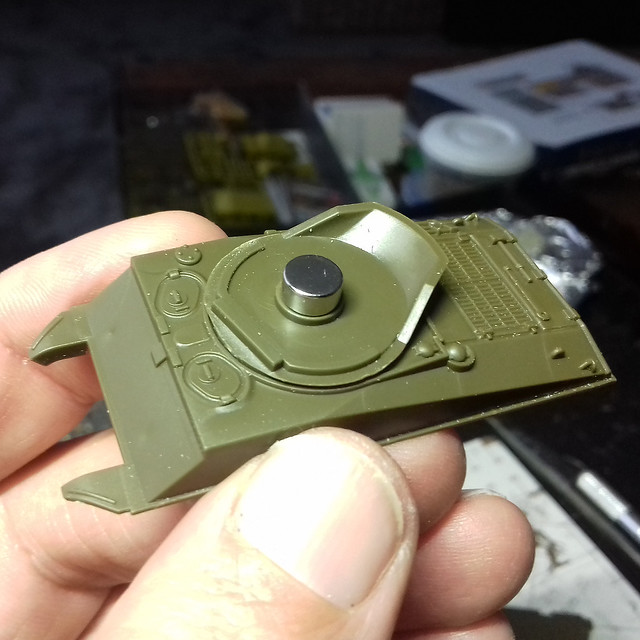
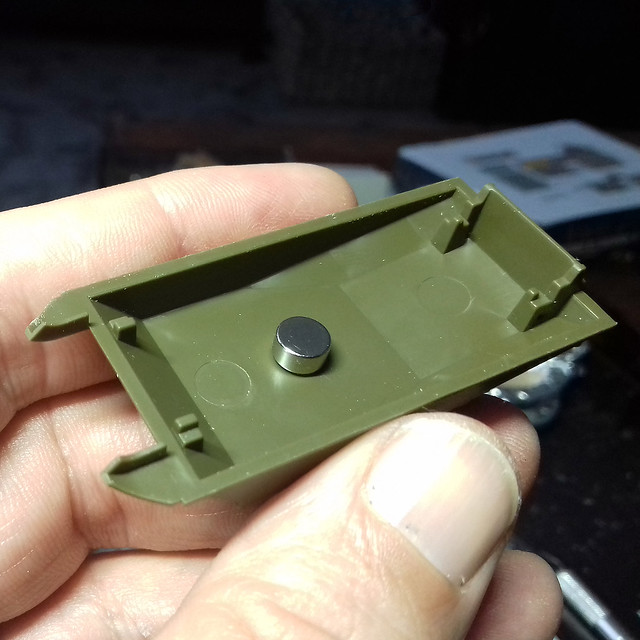
The first thing is to identify the polarity of the magnets so the two parts of the tank you are joining stick together as intended (easy enough). Then superglue the magnets - the correct way round, of course - to the inside of the turret and to the inside of the hull...
I'm using Vitalbond CA Medium super glue, this seems to work great with the metal magnets. I only mention this as I had been buying various makes of cheap DIY super glue from a household store and they've all been a bit rubbish. But this brand sticks rock solid.
And that's that really. It just works - I'm not sure why I thought it would be in any way difficult, except I wasn't sure how strong the mini-magnets might actually be and what effect on the magnetism the plastic between the magnets would have. You can tell I don't play with magnets much!
Notes on the construction of the GF9 Sherman kits
There were only about 11 components to make either version of the Sherman, so it wasn't worth me taking a load of pictures to illustrate the construction. Suffice to see it was very straight forward and very quick to do. There were no major problems, but it's worth mentioning that there does seem to be a lot of parts left over.
I'm not exactly clear on what the purpose of all the extra bits are BUT I *believe* there are parts on the sprue to make up the 105mm [M4A3(105)] gunned support Sherman. You would simply pop the appropriate gun mantlet and 105mm gun onto the 75mm Sherman turret.
There are also extra hatches, including open versions (but no commander figure), a .30 MG and some other random parts...I have a suspicion you might be able to construct an M4A3 'Jumbo' with some of these parts, but I am not sure.
As to quality, I'd say they are better than Armourfast but not quite as good as Plastic Soldier Company (to give you some reference point).
The Panther Hulls
OK, the Sherman's magnetisation was pretty simple, but what about attaching a complete upper tank hull using magnets? Well, let's see...
The challenge here is the totally different shape of the normal Panther hull and the raised hull of the Jagdpanther. I'm thinking that the magnets may have to be mounted on raised blocks and with different length of dropped blocks for mounting the magnets on the upper hulls?
I'll start with the standard Panther...
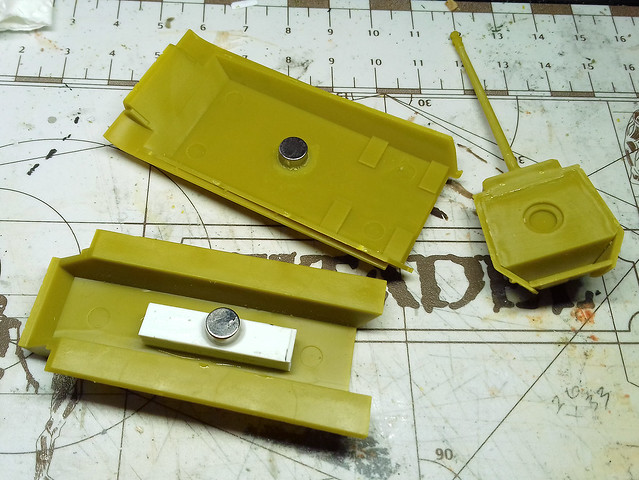
For the Panzer V I have used three magnets; one in the turret (as I did with the Shermans), one attached to the upper hull and another attached to the inside of the lower hull. This may seem overkill but because of the way I am thinking magnetising the optional Jagdpanther hull, I think this is the best arrangement.
One thing which may be a 'con' to magnetising tank hulls like this is that you may end up with a tiny gap space between the upper and lower hull. Though, this may be down to the precision of the way you attach the magnets (my measuring may have been a little 'loose')!
Bearing in mind the advantages of being able to swap the upper hulls for the purposes of the game, this slight misfit may be annoying (from a models point of view) but may be worth putting up with from a gamers point of view! Swings and roundabouts, but, in any case, this may be too small a flaw to notice at tabletop distance.
Now, onto the lovely Jagdpanther. Because of the way I arranged the magnet in the Panther's lower hull I should only one magnet to hold the tank destroyer's top on...
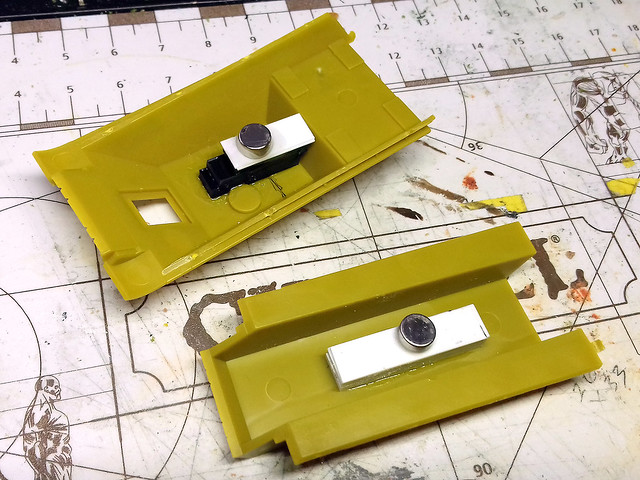
It's a bit of a fudged job, but getting the exact measurements right so the magnets connect precisely was a bit tricky, especially as the Jagdpanther has a sloped roof. I'm sure there are probably neater ways to do this. But, anyway, it works AND - this time - there wasn't a noticable gap where the hulls met...
...That poor Sherman 75mm!
In Summary
Well, it wasn't as complex a job as imagined, obviously. I just don't like doing 'new' things, I guess!
But this technique was worthwhile as it does give me a variety of tank options to play with while I learn the game's rules and tactics. In time, I will probably settle on a specific faction and particular tank models I will want to play and so will enlarge my pool of tanks.
From a modelling point of view, I may want to get something a bit more detailed than these basic kits, but I will have to look around to see what's available in 1/100...I'm not sure what manufacturers there are, aside from the wargame model manufacturers I have already mentioned. But Plastic Soldier Company's models look attractive.
Next: I will eventually paint these models, but I am aware I have a cue of other stuff on my workbench first!
I'm trying out something new, the addition of small magnets to my new 15mm tank models so I can swap out the various turrets (hopefully). On paper, it looks like a straightforward a job, but how many times have I said that on this blog!
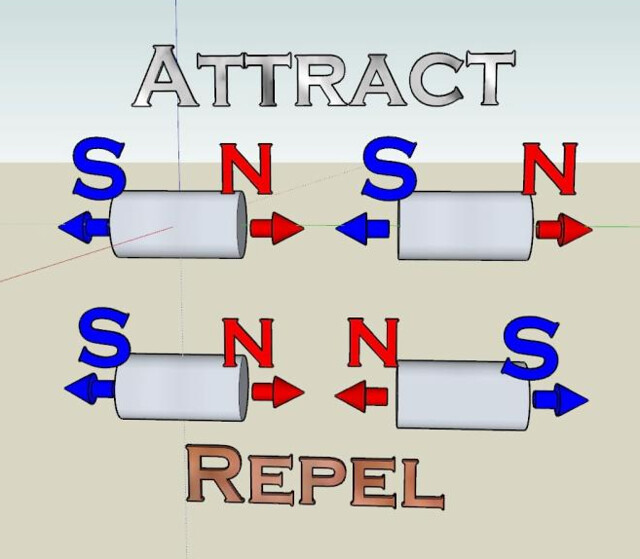 |
| The key to proper magnet placement...Polarity. |
I'm using Vitalbond CA Medium super glue, this seems to work great with the metal magnets. I only mention this as I had been buying various makes of cheap DIY super glue from a household store and they've all been a bit rubbish. But this brand sticks rock solid.
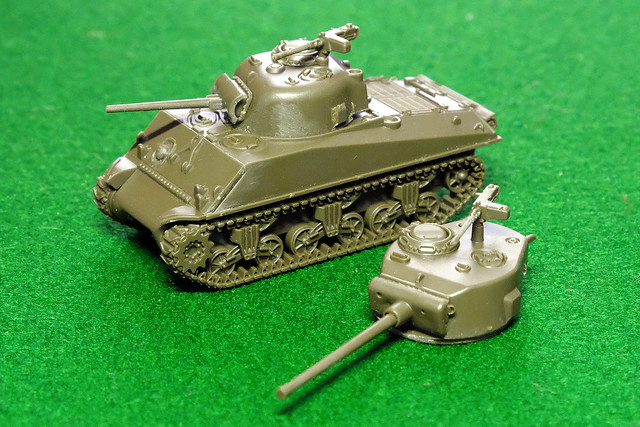 |
| GF9 Tanks - M4A3 Sherman, 75mm gun option. |
 |
| GF9 Tanks - M4A3 Sherman, 76mm gun option. |
Notes on the construction of the GF9 Sherman kits
There were only about 11 components to make either version of the Sherman, so it wasn't worth me taking a load of pictures to illustrate the construction. Suffice to see it was very straight forward and very quick to do. There were no major problems, but it's worth mentioning that there does seem to be a lot of parts left over.
I'm not exactly clear on what the purpose of all the extra bits are BUT I *believe* there are parts on the sprue to make up the 105mm [M4A3(105)] gunned support Sherman. You would simply pop the appropriate gun mantlet and 105mm gun onto the 75mm Sherman turret.
There are also extra hatches, including open versions (but no commander figure), a .30 MG and some other random parts...I have a suspicion you might be able to construct an M4A3 'Jumbo' with some of these parts, but I am not sure.
As to quality, I'd say they are better than Armourfast but not quite as good as Plastic Soldier Company (to give you some reference point).
The Panther Hulls
OK, the Sherman's magnetisation was pretty simple, but what about attaching a complete upper tank hull using magnets? Well, let's see...
 |
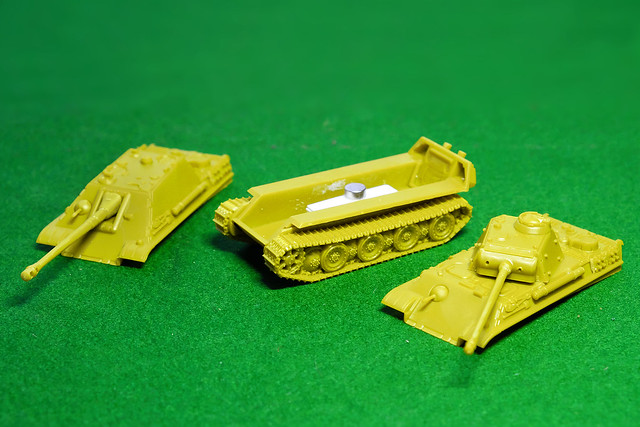
| From left to right: The Jagdpanther hull, then the universal lower hull and finally the standard Panther hull. |
I'll start with the standard Panther...
For the Panzer V I have used three magnets; one in the turret (as I did with the Shermans), one attached to the upper hull and another attached to the inside of the lower hull. This may seem overkill but because of the way I am thinking magnetising the optional Jagdpanther hull, I think this is the best arrangement.
One thing which may be a 'con' to magnetising tank hulls like this is that you may end up with a tiny gap space between the upper and lower hull. Though, this may be down to the precision of the way you attach the magnets (my measuring may have been a little 'loose')!
Bearing in mind the advantages of being able to swap the upper hulls for the purposes of the game, this slight misfit may be annoying (from a models point of view) but may be worth putting up with from a gamers point of view! Swings and roundabouts, but, in any case, this may be too small a flaw to notice at tabletop distance.
Now, onto the lovely Jagdpanther. Because of the way I arranged the magnet in the Panther's lower hull I should only one magnet to hold the tank destroyer's top on...
It's a bit of a fudged job, but getting the exact measurements right so the magnets connect precisely was a bit tricky, especially as the Jagdpanther has a sloped roof. I'm sure there are probably neater ways to do this. But, anyway, it works AND - this time - there wasn't a noticable gap where the hulls met...
...That poor Sherman 75mm!
In Summary
Well, it wasn't as complex a job as imagined, obviously. I just don't like doing 'new' things, I guess!
But this technique was worthwhile as it does give me a variety of tank options to play with while I learn the game's rules and tactics. In time, I will probably settle on a specific faction and particular tank models I will want to play and so will enlarge my pool of tanks.
From a modelling point of view, I may want to get something a bit more detailed than these basic kits, but I will have to look around to see what's available in 1/100...I'm not sure what manufacturers there are, aside from the wargame model manufacturers I have already mentioned. But Plastic Soldier Company's models look attractive.
Next: I will eventually paint these models, but I am aware I have a cue of other stuff on my workbench first!
Friday, 14 April 2017
15mm scale tanks
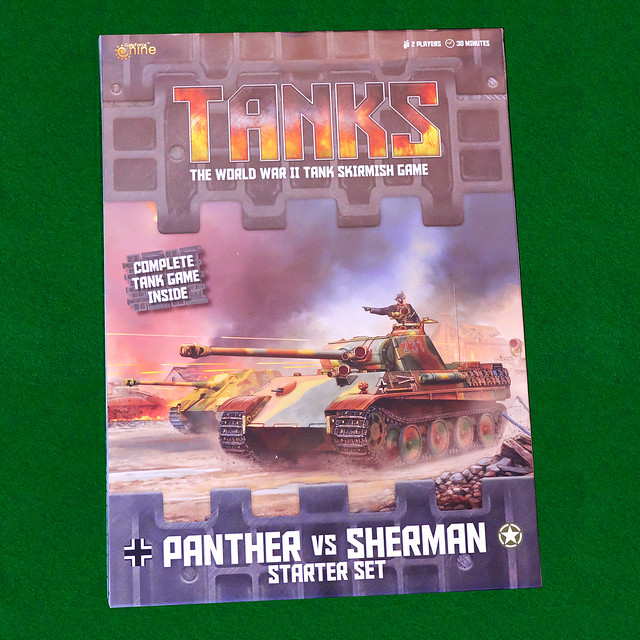
I've just bought GF9's 'Tanks' tabletop skirmish game, and that comes with some 15mm (1/100) plastic tanks which you have to build, so there's a bit of modelling/gaming crossover there.
Now, this isn't my first encounter with 1/100 tanks as I have used examples of Zvezda's range of WW2 armour in this scale as 'test' platforms for painting experiments before. I have to admit that enjoyed these simple little models and remember thinking that I would like to do more (particularly as they do a nice range of early-war British BEF tanks, like the Matilda).
 |
| A Zvezda 1/100 T-34/76 that I did as a painting test. It turned out quite nice. |
Cat and Mouse..Or Meeses!
The game comes with four sprue sets which allow you to build three tanks - two Shermans and one Panther. I should explain that, although this might seem a little unfair (depending on how much or little you know about these tanks) the game allows you to add upgrades to you tanks in the form of crew cards so the Panther - in theory - should be a match for two Shermans. (But I won't go into the game mechanics here, instead, you can pop over to my gaming blog to find out more: Milgeek - GF9 Tanks.)
Here's are the sprue sets...
- SHERMANS -

- PANTHER/S -
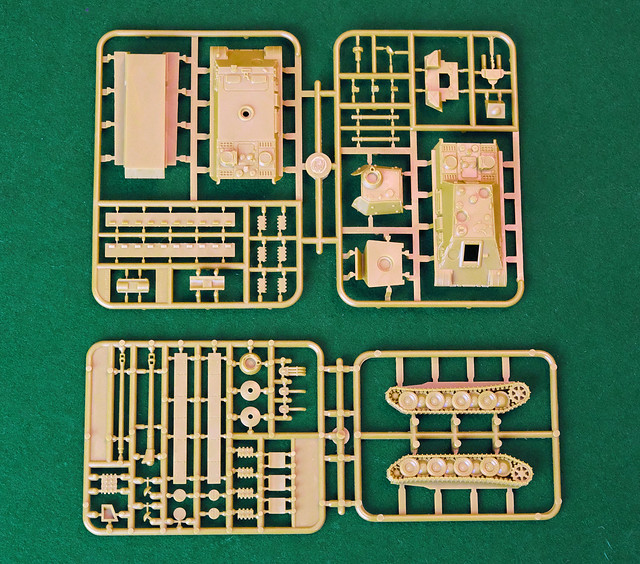
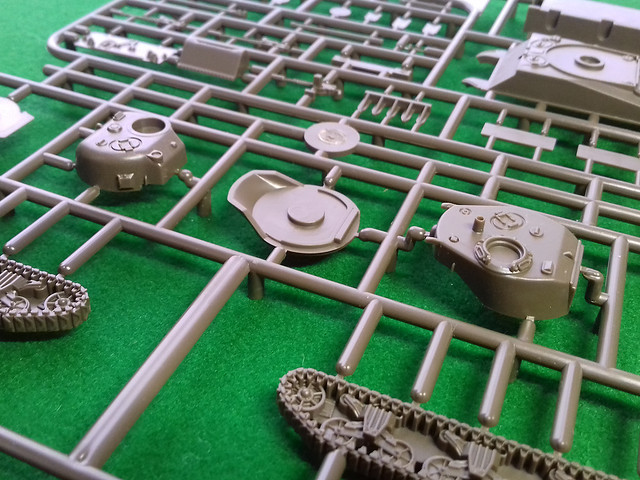
Now, although, for the game, the basic suggested set of tanks that you could make up are an M4A3 Sherman 75mm gun tanks, an M4A3 Sherman 76mm gun tank and a Panzer V Panther, the sprues do include a selection of optional parts for variations.
There are four Sherman turrets included so you can make two 75mm M4s or two 76mm gun versions, or - as suggested - a mix of one of each. And, on the Panther sprue, you have an extra upper hull with which you could build the Jagdpanther tank destroyer variant of the tank! Not bad value.
 |
| Although you can only make up one Panther tank model - the sprues only come with one set of tracks - you have the choice of 'turrets' to apply to the model - the standard Panther or the Jagdpanther tank destroyer version. |
Kit quality and detail
Now, I do not know who make these plastic kits for GF6, but they are quite nice little models. Obviously, they are the usual 'wargame' quality models - as they are intended for play - and so are somewhat simplified and have all the detail like tank furniture moulded directly onto the main hull...
This is on par with the simplified models done by Plastic Soldier Company or Armourfast, but is reasonably sharp and, of course, more than satisfactory for a game piece.
One thing that particularly impressed me - bearing in mind my experience with Armourfast models in the past - was the quality of the models' one-piece tracks...They have track tread detail...
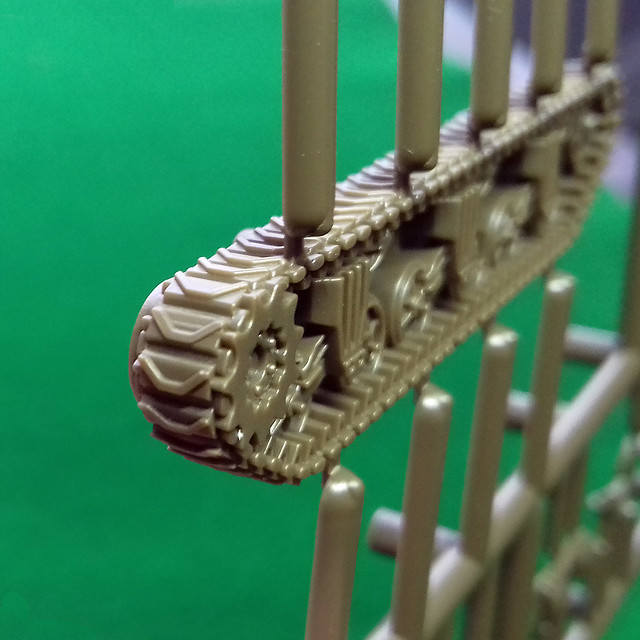 |
| Take note Armourfast...If these guys can do it so can you! |
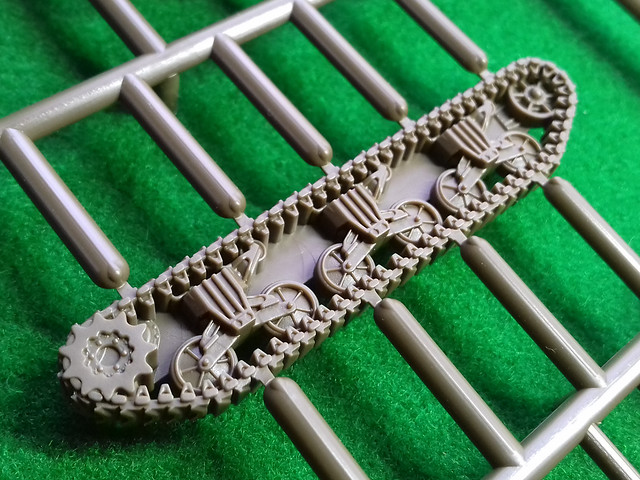 |
| Not the worst detail I've seen. |
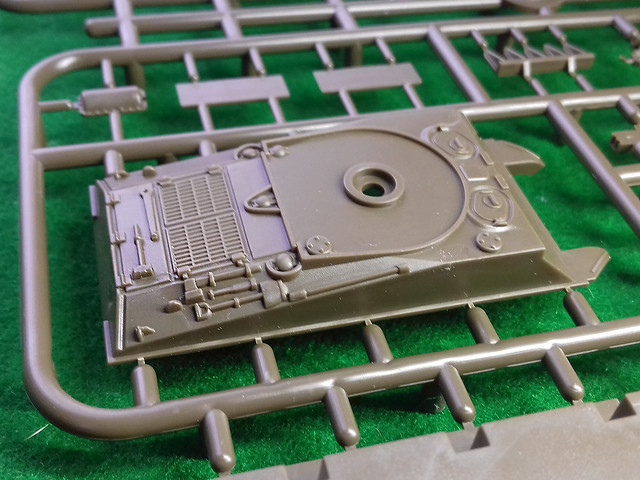
Anyway, moving on, the panther deck isn't quite as well done, in my opinion, but is certainly up to the standards of Plastic Soldier Company in its chunky style of detail...
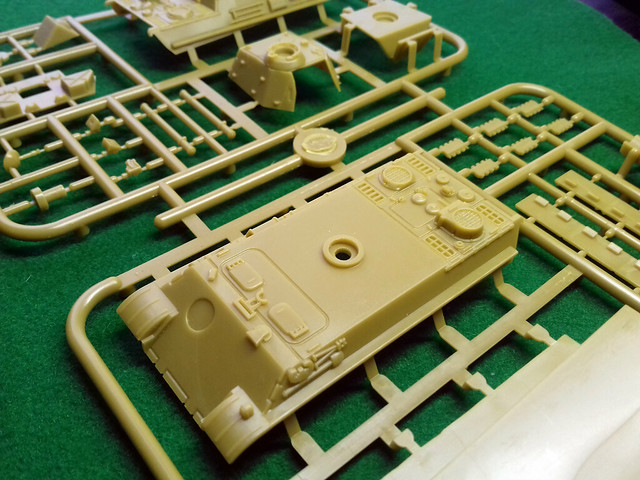
As I mentioned, you do get more options with the Sherman sprues which allow you to build two models of two different versions, because they have included the additional tracks and turrets.
The 'normal' rounded 75mm Sherman gun turret is accompanied by the more straight sided 76mm gun turret. Both types were used by several Allied armies, including - naturally- the Americans, but also the British (who used the 76mm version in Italy), the Polish, the French and via 'lend lease' the Soviets, so you have plenty of decal and painting options with these. (Incidentally, 1/100 decals are NOT included, so you will have to source these yourself, but here's one source: Minibits.net.)
This brings me to a bit of a quandary, with all these available build options which tanks do I make?
The 'stock' M4 75mm, M4 76mm and Panther Panzer V variants are the suggested combination to get started and learn the game, but what about after that...That Jagdpanther looks very tempting and having a duo of 76mm armed Shermans does give you a more formidable Allied combo.
I began to wonder if I could make the parts interchangeable, or swappable. I have read about the use of small magnets to attach turrets for wargames purposes but I have no experience with adding these to plastic models. But, I figured it was work a try, so I ordered some...
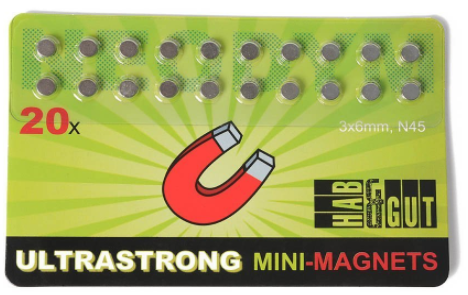
These tiny - but very strong magnets - measure 6mm diameter by 3mm thickness and are available from Amazon at a cost of £4.99 for 20 (I'm sure you can get a better deal if you shop around on eBay though).
What I will experiment with - which assembling my model tanks - is how to incorporate these magnets into the models so I can attach and detach the turrets and, in the case of the Panther, the complete upper hulls. Fingers crossed!
 |
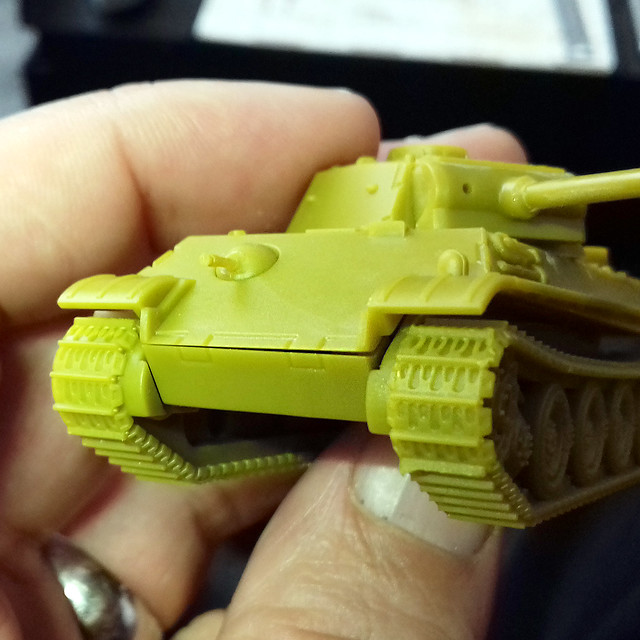
| While the models are designed so you can use them unpainted, naturally, a wargame miniature always performs better if it's been given a lick of paint! |
Next: 1/100 tank assembly!
Subscribe to:
Posts (Atom)