Showing posts with label transport. Show all posts

Sunday, 17 May 2020

On the wishlist... 1/72 ZIS-150 Truck

A truck that I would really like a model of for my 1/72 Finnish WW2 army war-gaming project would be an example of the American International Harvester K-7. This has been a kinda holy grail for me and it would nicely finish off my Finnish collection!

The original American International Harvester K-7 in the 'short' wheelbase
cargo configuration for military use.

Trouble is - nobody makes a IH K-7 in 1/72. This is probably due to the fact it was something of a rarity - there were many other US trucks that were made in greater numbers during the war - and also because it was mainly a civilian heavy mover, though it was used in modest numbers by the militaries of America, the United Kingdom, the Soviet Union (lend-lease) and, of course, Finland.

The IH K-7 short wheel base model being used by the Finns.

Examples of the International Harvester K-7 (long wheel base) being used by
the Finnish Army as a heavy artillery prime mover.

So, how to model a truck that doesn't exist as a production kit? Well, there is scratch-building if I were a real masochist, but - more easily - there is also a little 'cheat' where I could convert a truck that is similar in appearance...Very similar.

In fact, the Soviet Union was so impressed with it's imported American K-7s that in 1947 they outright copied the design for themselves and called it the ZIS-150! And models of the ZIS-150 do exist...Bingo!
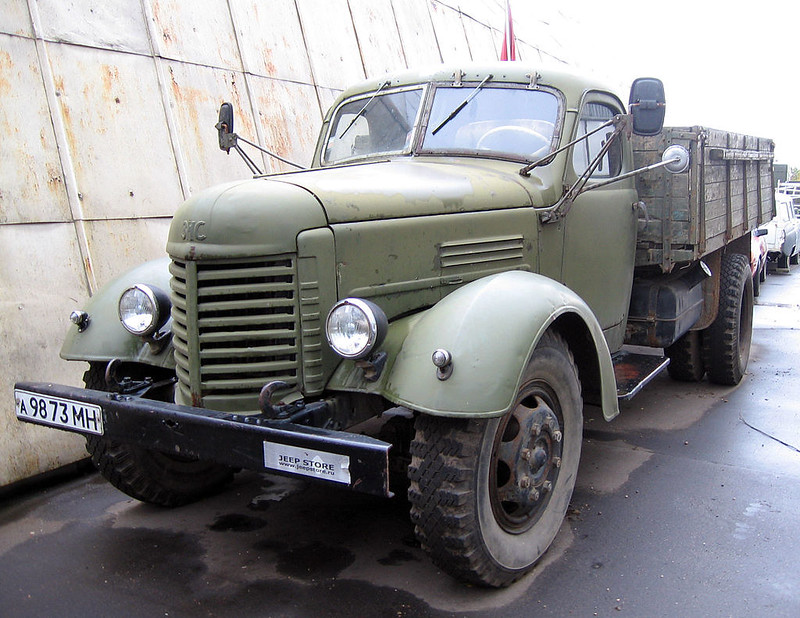
The Soviet made (copy) of the K-7, the ZIS-150.

As usual - with anything I set out to do - things aren't quite as simple as the initially seem to be. To begin with, the closest model I could find to the ZIS-150 in 1/72 was ICM's ZIL-157 which is a slightly later and modified truck developed from the ZIS-150. This would need some conversion to make it look like it's predecessor...


You can see the 'family resemblance' between the ZIL-157 and the earlier incarnations, the primary differences - from a modelling perspective - are the front grill (vertical instead of horizontal xxx), the fenders (the later truck had simplified 'flat' wheel arches) and the wheels (the Russians slapped on nice big chunky off-road friendly tyres). o, a fair amount of things to change if I want to make a 150 model truck.

Still, I have these models and they were a reasonable price! (They are pretty easy to source.)

On the other hand, there is a proper ZIS-150 kit that has come on to the market...


And again, there is a couple of flies in the ointment. For a start, this is the short wheel-base model and I want the long base version (for an artillery mover). Additionally, this is a short-run resin kit and I have had some very bad experiences with this form of kit (don't get me started) AND it is very expensive at 33 Euros (not including shipping)! Eeeek! 😲

So, what will I do. I could just stick to my original Plan A and scratch convert the ZIL-157 trucks - which I already have -  or I could take advantage of the Armada kit's correctly modelled grill, fenders and wheels, but then I would have to model a long wheel base! Swings and roundabouts.

There is a third way... I could buy one ZIS-150 and use it's parts to convert my ZIL-157 kits by making some mouldings from the Armada parts...

As usual - me being me - the slightly weird fudged 3rd way sorta appeals to me. After all, I can't do anything the easy way could I? 😂

Sunday, 23 April 2017

Thursday, 23 March 2017 MW 1/72 GAZ AA Truck - Part 5


Right, I am now at the stage now where I have to think about both the truck's base and the accompanying base for its Flak 38 tow!


As a wargame model, this truck will be representing a unit in two modes; static (gun deployed) and mobile (gun being towed). So, there will be two different models of the Flak 38 and one of these will be made so that it looks like it is attached to the tow hook of this Gaz truck.

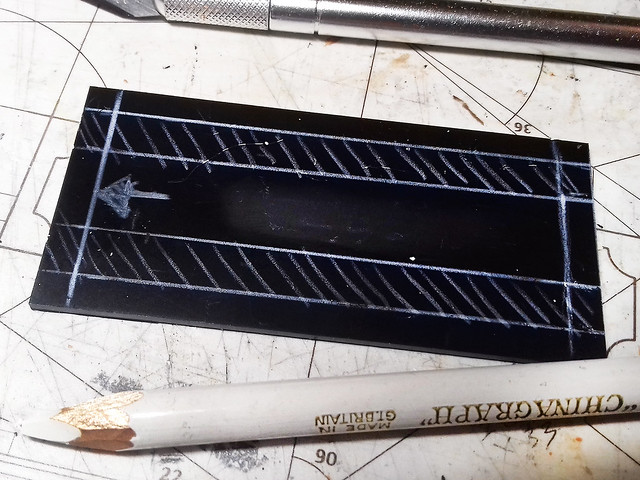
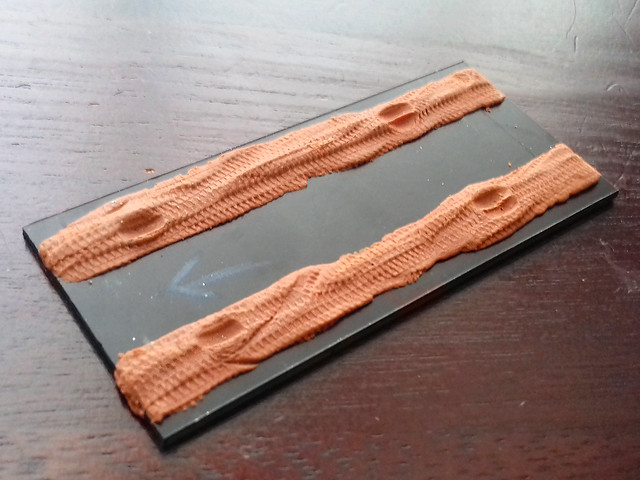
To begin with, though I start the truck's base in my usual manner...


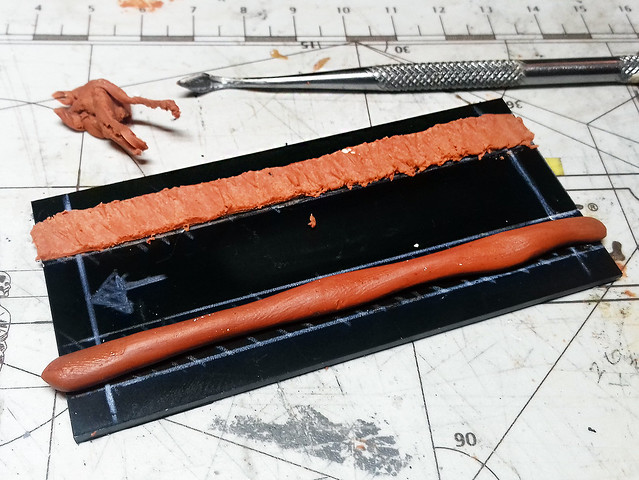
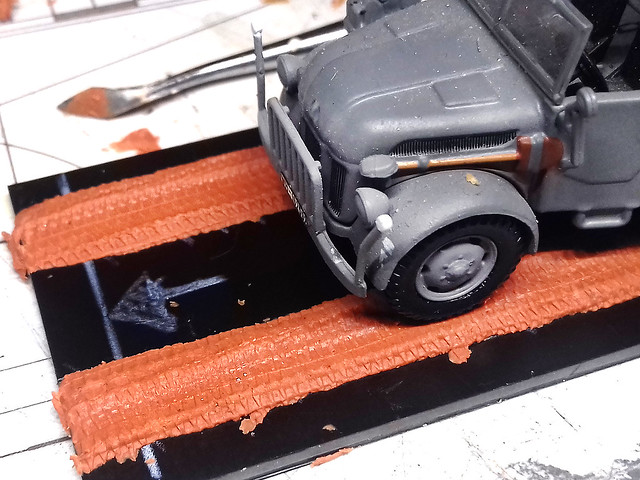
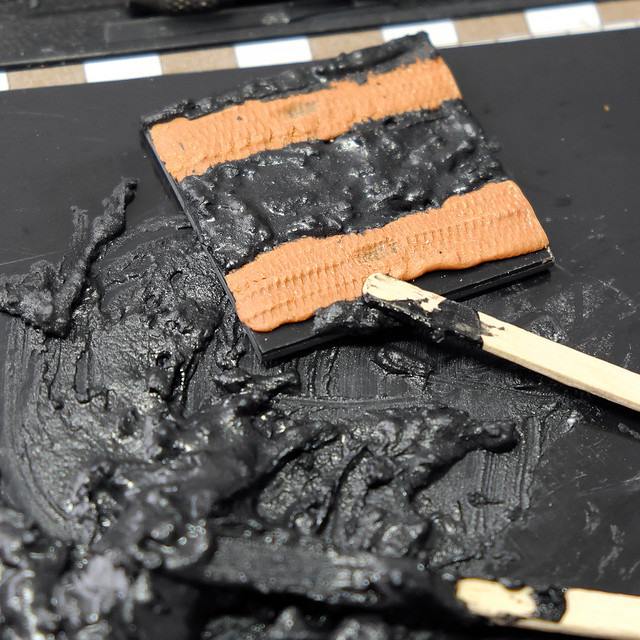
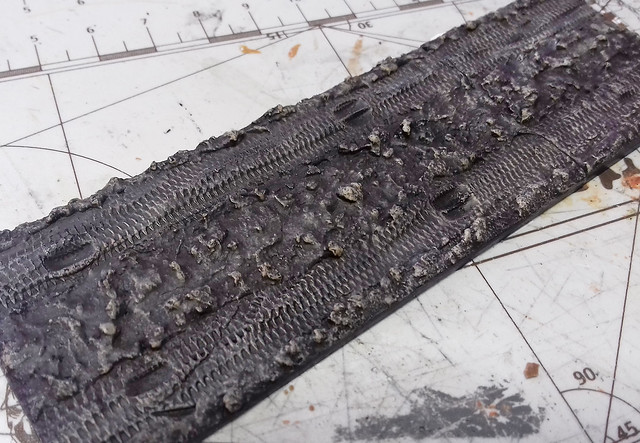
I'm pretty settled on my use of Milliput putty for the road tracks now. The putty takes the imprint of tire tracks very well. It also allows you to impress the wheels of your model into the putty for a better and more realistic placement. The tread was made by rolling a 1/72 diecast model truck back and forth over the putty...

I used a diecast model that I have which has a nice tire tread pattern to make
the track patterns...

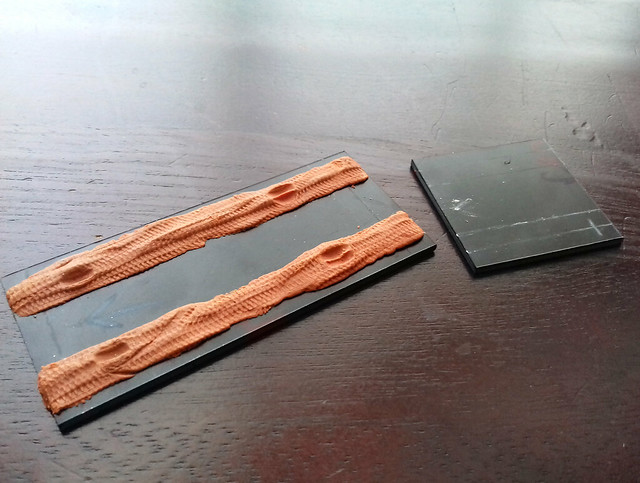
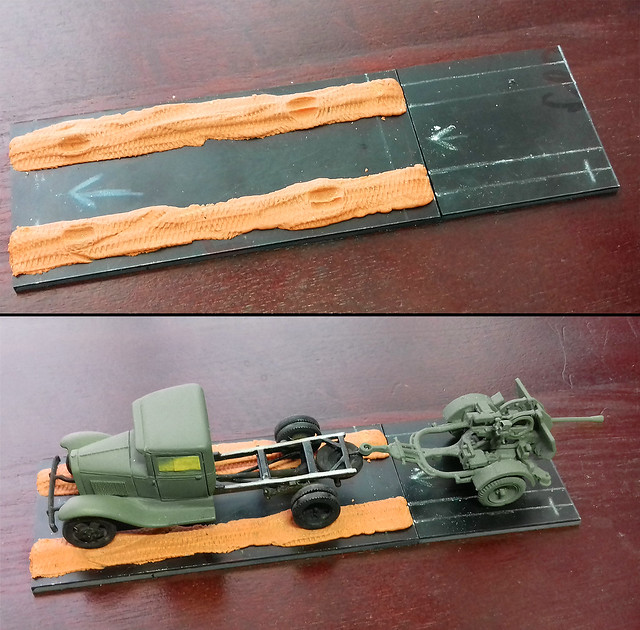
Next, I cut the second piece of plastic card to base the AA gun. You have to do a bit of measuring and working out of how big the base needs to be taking into consideration that the gun's tow bar will overhang the truck's base and attach to the truck's tow hook...


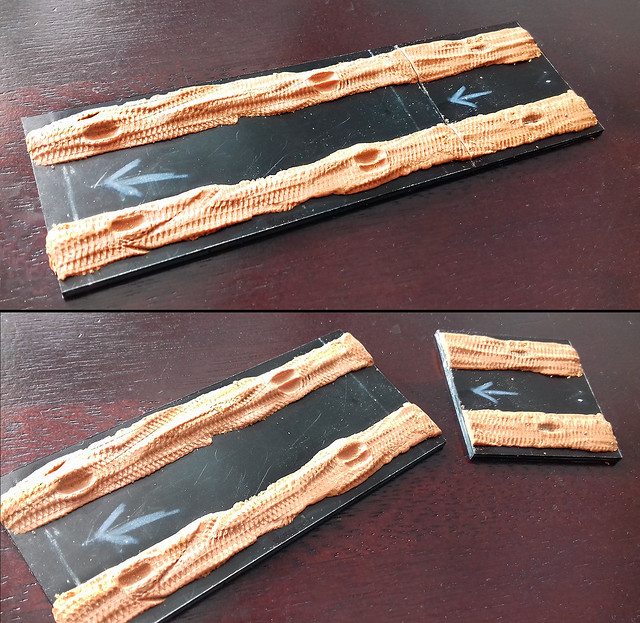
The idea is that when used in the 'mobile' (towing) configuration the two model bases will just be placed on the table immediately adjacent to each other (they aren't, however, connected in any way as I couldn't think of a way of doing that). So, when moving the models across the table you will have to move both parts in conjunction.


I suppose I could make a movement tray to put both parts in and then I can move them as one? Then, when the AA gun is deployed, I remove the mobile gun model off the table and replace it with the 'static' gun and its accompanying figures.

Anyway, on with the making of the base/s...

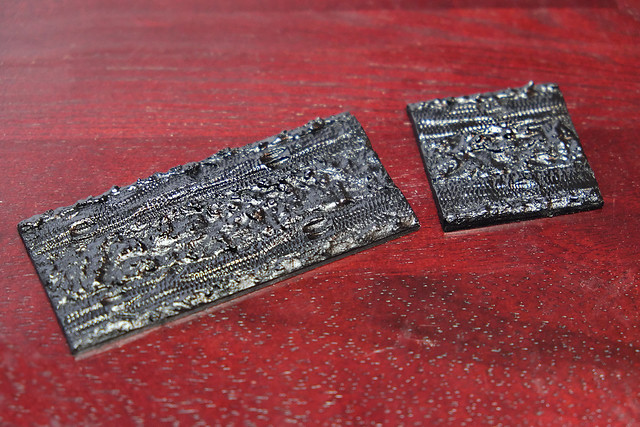
The two bases - now with their road tracks - should match and fit together as if one long section of road...


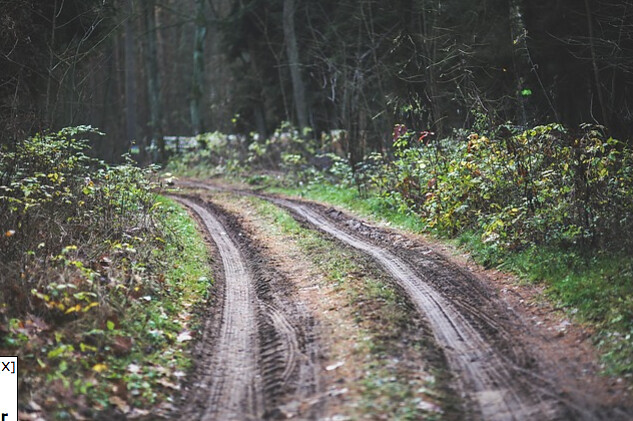
The next job is to and the rest of the ground terrain between and outside the road tracks. Now, obviously, I decided that all my Finnish models should be placed on a 'country road' base (my collection is based on the campaigns which took place between the summer of 1943 and late 1944 - part of the 'Continuation War' with the Soviets - which were conducted on the forested borderlands of Finland). And this look of rough earth and meadow will be created using coloured PollyFilla (quick drying plaster)...

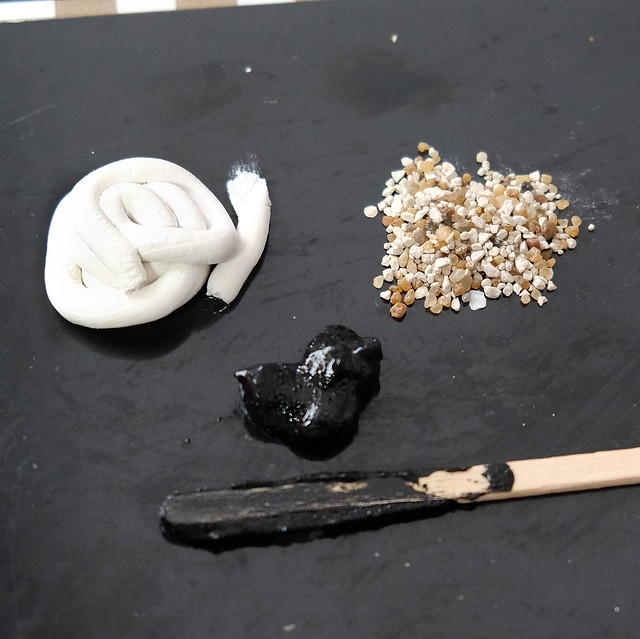
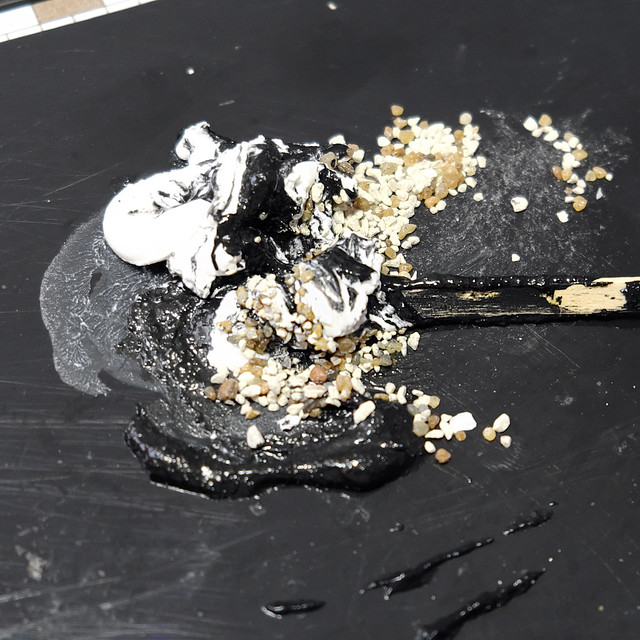
I begin by mixing up my 'secret recipe'...Actually, it's quick-drying PollyFilla, fish tank gravel and a big blob of Vallejo's 'Black Lava'...


Mixed together the make a gooey, sticky, gritty substance that forms a lumpy uneven surface...It's a bit of a messy job, but someone has to do it!


The resultant sticky mass is quite hard to work with, but - ironically - that's the very reason I like it because the resultant effect is always very random and organic (it sort of takes the heat out of trying to design something so that it does not look designed).


You just trowel the stuff on and it sort of just finds it's own 'look'. (Conversely, by the way, Vallejo's 'Black Lava' is great for creating nice flat and smooth Tarmac roads for dioramas and they also do a 'Sand' version for doing desert bases, too.)


It takes a wee while to dry - a couple of hours - but dries pretty hard...But, whatever you do, try hard not to get this goop on anything you don't want it on!


Once dry, it's time to apply the primer coat. I simply use Wilko's own Satin Black acrylic spray, because it's cheap. It's OK for this sort of work, but probably a little too thick for priming models...


Time to start painting! I begin by applying a diluted coat (a thick wash really) of Vallejo's lovely 'Black Brown', and then I build up the shading of the 'earth' from there - dry-brushing dark to light, ending with a light dry-brushing of Vallejo's Stone Grey...


As you can see, I err on the dark side when laying down my ground colours. This is for two reasons, first of all, I want my 'earth' to be the black peaty type you find in northern coniferous forests, but, also, I want to get my 'grass' flocking on before I finalise my earth tones. I like an underlying dark base for my grass.


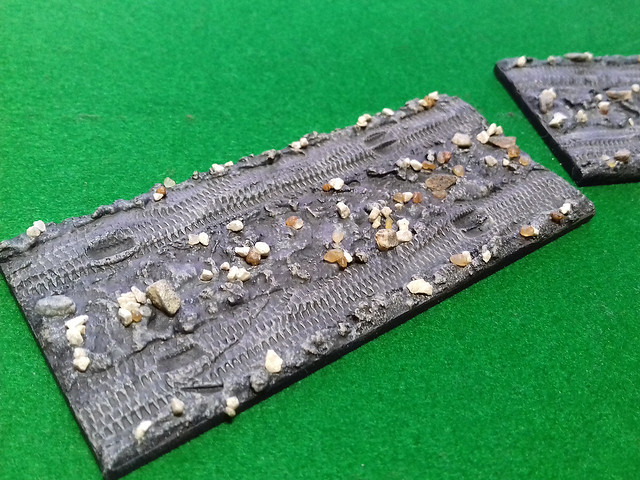
But, before I start to apply my flocking, I like to add some 'rocks' to my scene. These are just little chips of stones - I use fish tank grit and stones collected from the yard - which I glue on in random patterns across the ground-base...


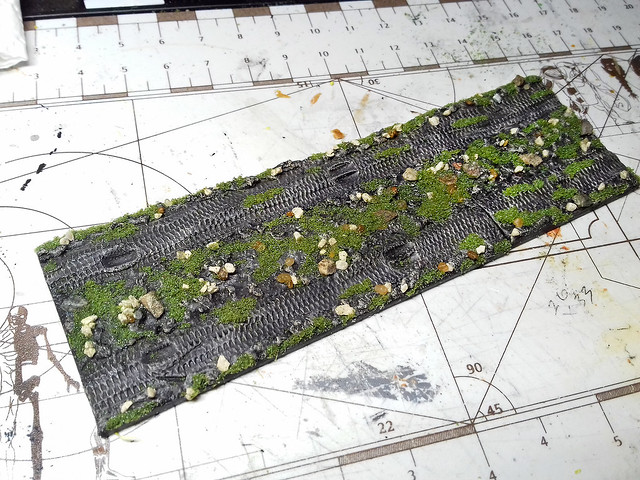
With the stony ground done it's time to add some 'grass'. I still don't have a very sophisticated technique for applying scale model grass - I don't have one of those fancy electric static grass applicators. I just sprinkle on some basic 'flocking' material onto some PVA glue in patches.

Even my flocking is pretty 'no frills', as I go for a single colour material (mid-green) and prefer to discolour it myself with small amounts of diluted paint rather than buying 'multi-tonal' flocking...


Well, nearly there...The final stage - before mounting the vehicle model and gun tow - is to 'weather' and add the last detail touches to the scene. I think it still needs some patches of more earth tones on both the muddy track and the grassy ground.


In Conclusion
The one caveat to this design - with its very dark colouring - is that I'm pretty much locked into this style for the project I'm doing (my Finnish project). Having done my first few like this when I was less experienced I now have to follow through with this same style for continuity sake.

I have learned a lot since I started modelling again and reckon I could make a better job of colouring the muddy earth now, even adding some 'wet mud'. But as a simple base for my models, it's fine (it's not a diorama).

Thursday, 23 March 2017

MW 1/72 GAZ AA Truck - Part 4.5

Apologies for the 'micro-posting', but just finished this (early morning start) and wanted to post it up as it will be a few days before I have time to do any more model stuff.

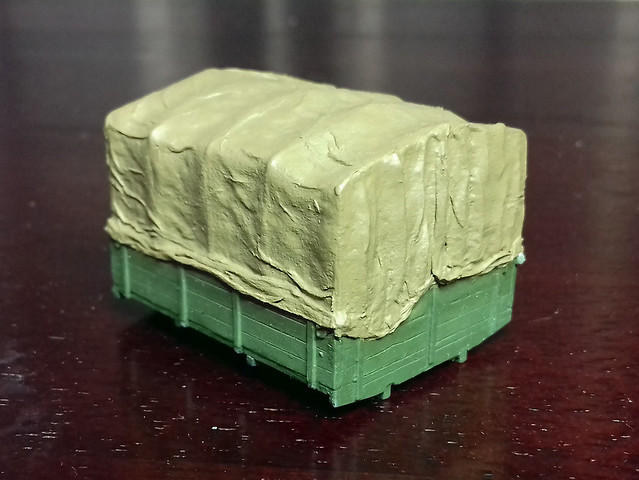
I got the base colours on my 'canvas tarp'...


I got lots of really good feedback and suggestions from the Facebook modelling groups I posted my progress on.This included a great idea for improving this method...

One of the problems with paper tissue is that it has a tendency to tear and even dissolve when it gets too wet (as I found with my first attempt) and it's not easy to handle and reposition. So, I've been advised to try out wet wipes (you know, the baby cleaning tissues) as they are made out of a plastic-based material (which is why you shouldn't flush them) and so don't tear as easily.

You just let the wet wipe dry out a little (stick it on top of a radiator) and then apply the diluted PVA as normal. Good tip (thanks GReg)!

Wednesday, 22 March 2017

MW 1/72 GAZ AA Truck - Part 4

Making a Canvas Tarpaulin
As mentioned in the previous post, I am going to make my actual canvas material using tissue soaked in PVA. However, to give this material a shape which looks like canvas draped over a frame - with all it's natural folds and wrinkles - I will be adding some texture to my 'frame' so that the wet tissue conforms to a tilt cover texture and shape.

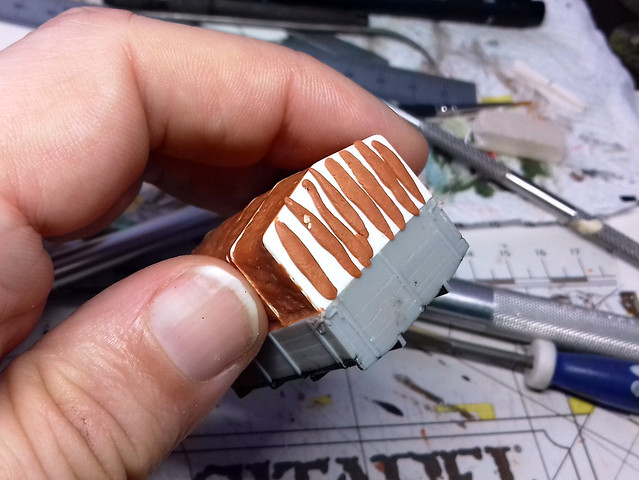
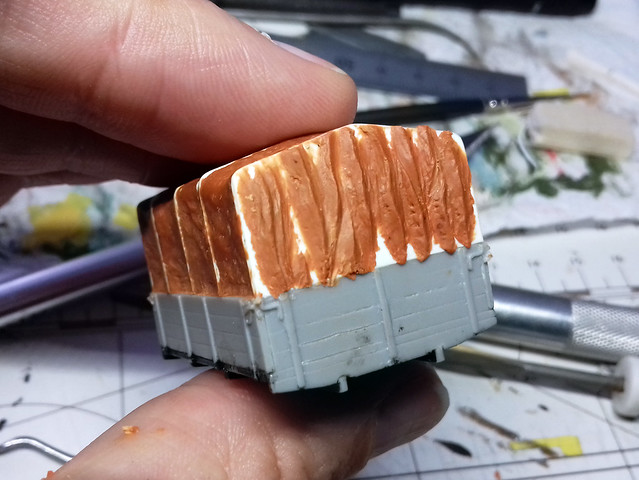
Here, I begin to add some underlaying 'fold' shapes to my framework using pieces of Milliput...


I then form these putty worms into - hopefully - waves...


Let's get sticky!
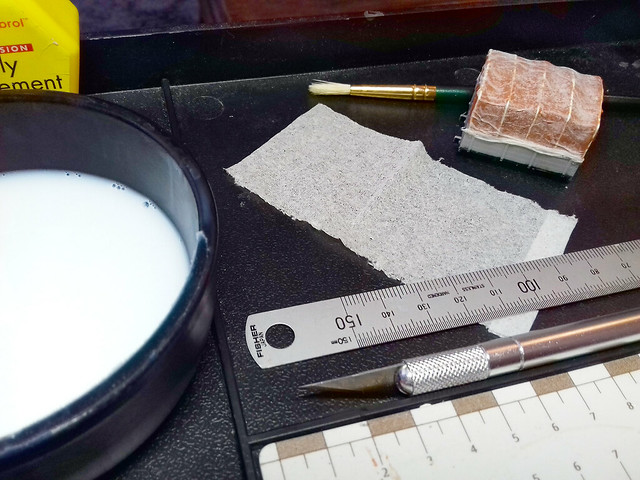
Never having done this before, I am playing this by ear! The premise is simple, soak some tissue paper - in this case a piece of Kleenex tissue - in watered down PVA glue and then wrap it over the frame I have made...Let the fun begin!


My first attempt was to dunk the tissue into the pot of glue and then try to lay it over my frame...WRONG! This was a complete disaster, as the soaked tissue started was a nightmare to handle and ended up becoming a soggy ball of mush...

So, second attempt, I laid a pre cut rectangle of tissue onto my frame and then dabbed on some of my PVA mix with a brush...Better. BUT, wet tissue stretches and I ended up with a larger 'canvas' than I needed AND wet tissue is a pig to trim, no matter how sharp your craft knife is...

Third attempt: So, what you do is carefully measure and cut your tissue to roughly the size and shape you want, taking into consideration the additional couple of millimetres that the material will stretch, then lay it on your frame, then apply the diluted PVA.

You can move the wet tissue around a bit to create little folds and wrinkles, and when you are happy with how it looks leave it to dry...


The wet tissue clings to the textured frame and so you benefit from any shapes you made with your Milliput. The tissue dries fairly solid so you don't have to worry about damaging it when handelling.

You can maybe just make out that you also get a nice texture from the paper itself, further adding to the look of canvas...Though, obviously, this will all look better when painted.

Getting the hang of it now...
By the time I applied the top and front canvas pieces and got to the rear 'flap' I began to get a feel for working with this stuff...


The trick is to wet the frame a little and then lay your tissue piece in place (the little wetness holds the tissue in place but you can still move it around to position it correctly). Then, when you are happy with the position you can then brush on extra diluted PVA over the tissue and start wrinkling it up a bit with the tip of your brush.

I suppose it's a bit like mini-wallpapering, but you are trying NOT to be neat! (Which is handy as I am rubbish at wallpapering.)

Another 'trick' I discovered is that you can add further pieces of tissue on top of tissue you have already laid if you want extra folds. This is how I made the rear flap.

Next: Well, I'll leave this to dry thoroughly now, then I'll prime it. Be interesting to see how 'realistic' the folds look with a bit of paint on them!

Tuesday, 21 March 2017

MW 1/72 GAZ AA Truck - Part 3

Constructing the Tilt Canvas
As mentioned, the MW kit does not come with a tilt canvas cover. For the most part, it seems to have been deemed either unnecessary or a bit of an inconvenience, but there are some instances where they were used. (I cannot find any reference which mentions whether the GAZ AA came supplied with a tilt cover from the factory, or whether it was a field modification or later upgrade.)

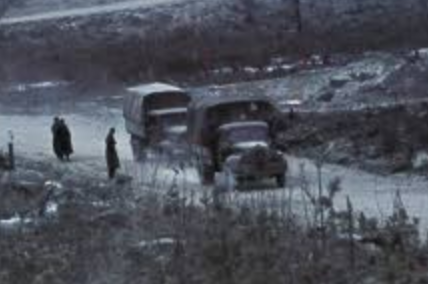
The only example of a Russian truck in Finnish service wth a tilt canvas fitted
(rearmost truck) that I could find. This may be a Zis 5 rather than a Gaz, I can't
quite tell. But it's all the reference I need to say that my Gaz *could* have had
one! Source: SA KUVA
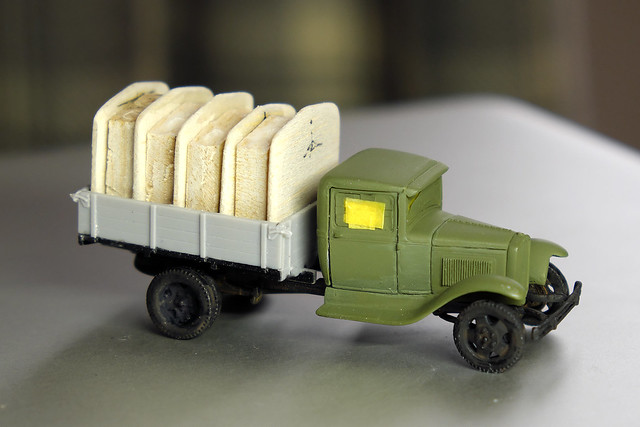
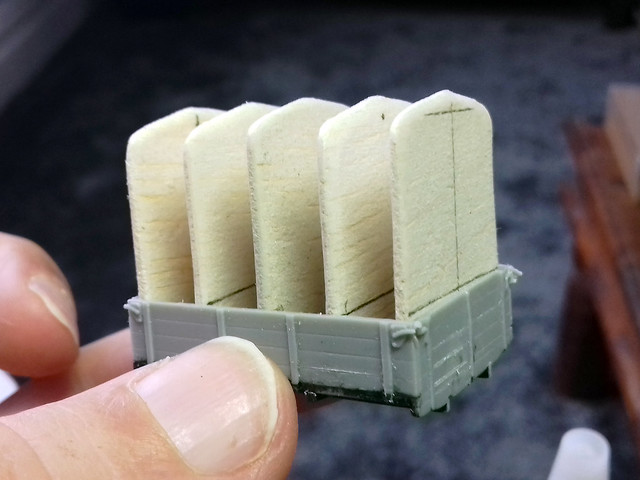
Anyway, I want my GAZ to be fitted with a canvas 'tilt', which means making one. I decided to try making a basic frame using balsa wood - as it's very easy to work with - and then to cover it with another material to make the canvas itself...


The five 'fins' are to represent the supporting frame rods and the four intervening balsa blocks are just fillers to support the overlaid 'canvas' - these are recessed so I can give the covers a loose and undulating look.

Making the Canvas Material
There are a couple of different ways I could create the canvas itself. I could wrap some tape or other paper-like material over the frame I made or I could build up a canvas using Milliput putty...

AND STOP! --->

...Not everything I do works out, and this is an example of something I did that didn't work!

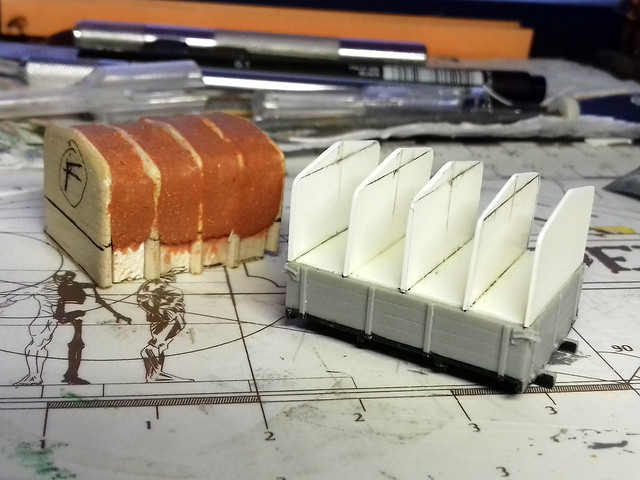
Basically, I made a bit of a faux pas in my measurement with my balsa frame and so I had to start all over and this time I made a plasticard frame (as I also wasn't happy with the thickness of the balsa I used in my first attempt) and mounted it on the outside edges of the cargo flatbed (instead of inside the cargo frame)...

My Mk. II frame (front) compared to my failed Mk. I version (rear).
I was happy with using the terracotta Milliput as the filler because I was getting some nice texture with it, but the balsa frames were far too thick. So, back to square one - I've rebuilt the frame using a thinner plasticard and I will use the brown Milliput again to fill the spaces in between...


Right...With the underlying 'frame' of the canvas done, it's time to think about the canvas cover material. My plan is to use PVA soaked tissue paper to cover the frame so it has more of a 'fabric' texture to the cover and also so I can add some believable folds and wrinkles in the trampoline.

I've never done this before, but it's a pretty common technique among military modellers so there lots of tutorials out there. However, I get the feeling it's one of those things you have to learn by doing!

...Fingers crossed!

Saturday, 18 March 2017

MW 1/72 GAZ AA Truck - Part 2

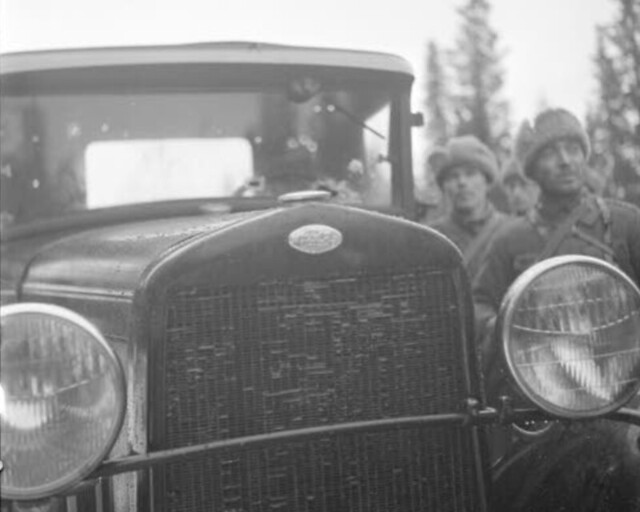
The Finns 'liberated' their Gaz trucks from the Red Army. In this case the
driver was persuaded to vacate his vehicle with the help of three bullets.
Source: SA KUVA
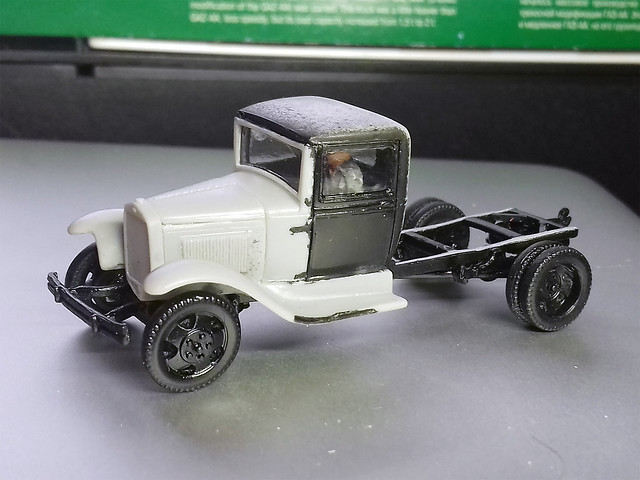
Although I kind of completed the basic construction of this kit along the lines of the instructions, there were some areas I was not happy with and so had to rectify these issues before I begun painting. They were just minor adjustments and some of them had to do with my preferred way of putting together a truck kit based on my experience with previous kits.

So let's go through them...

1. The Cab - Interior Painting
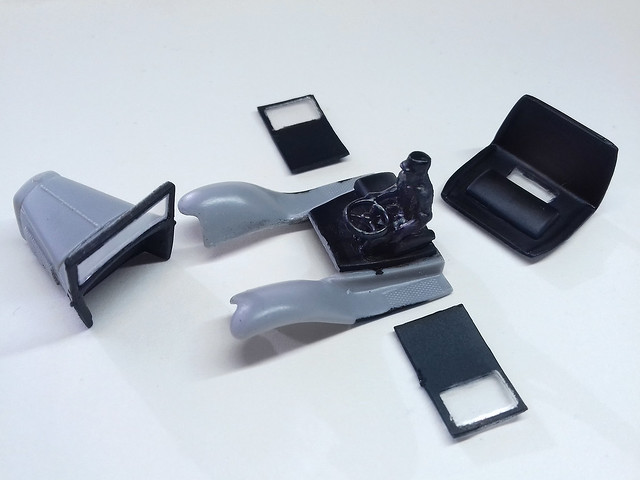
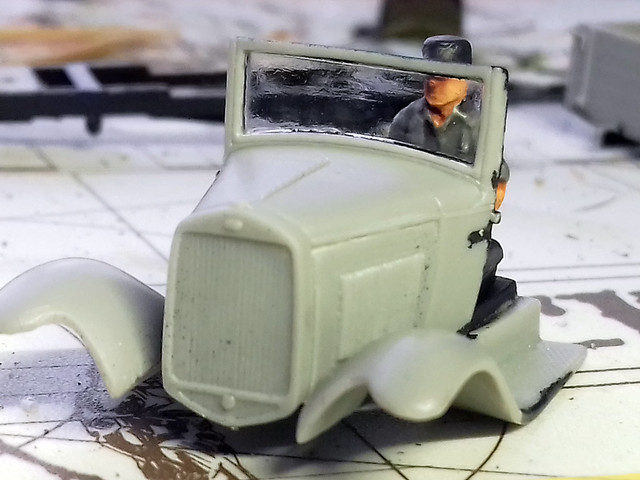
This is the one sub-assembly that I am 'doing my own way' principally because I am adding a driver figure. The MW kit cab was not designed with the inclusion of a driver in mind and that caused all sorts of fit problems.

The upshot is that my inclusion of a driver has pretty much mangled the cab interior - which does come with a certain amount of detail which I cannot now include. Therefore, to hide my ham-fisted modifications I am 'blacking out' the cab interior so it is less noticeable from the outside (once the cab is put together).


All I want is the faint impression of a driver to be just visible through the windshield. The black interior making the figure a shadowy one (in theory).

2. The Chassis - Bumper
As it was there was too little space between the wheels and the bumper in this kit (they were nearly touching each other). So, I extended the length of the bumpers 'braces' by adding a couple of millimetres of brass rod.


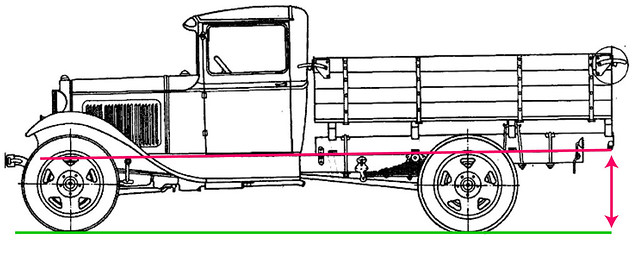
I used the 'Engines of the Red Army in WW2' website for reference, they have a page devoted to the Gaz AA and you can see the correct spacing for the bumper: ERAW2 - GAZ-AA, 1½-ton 4x2, Cargo Truck.

Also, note - when you look at this reference - that the back of the truck is raised slightly on its rear suspension. This is something that isn't clear in the instructions, and - as I did at first - you might think that the chassis should be level, but this isn't the case...

3. The Tilt Canvas Scratch Build
I've made canvas truck covers before and there are many different ways to do them, with many different kinds of materials. I'm tinkering with some balsa wood to make the canvas cover supports and will put something like masking tape over this to form the basis for the actual canvas itself...


Over the top of the masking tape I might (I haven't decided yet) wraps some PVA soaked tissue paper to get the canvas texture and wrinkles...We shall see.

4. Wheely Necessary?
The last sub-assembly/s are the wheels. As I mentioned in my first post on this project, the MW wheels aren't terrific. Not only is there no outer tire tread pattern, but the holes in the hubs on the rear wheels are filled in. I guess I could have tried to drill these out, but I am opting to paint the 'holes' black instead.

5. Note on 'Windows'
The inclusion of transparent plastic parts for the kit is a great idea and for the majority of modellers they may 'do'. However, the transparent plastic parts aren't altogether clear and there is some distortions and blemishes that come with cheap transparent plastic. The 'windows' are also quite thick.

The 'glass' is a little distorted and unclear in places, but I may camouflage this
by adding a layer of 'dust' and muck on the windscreen!
If you are a 'display modeller' you might want to replace these parts with - I'm sorry to say - acetate cut to size. They will be clearer and a better - more realistic - thickness. For me, the MW 'glass' will do fine.

The 'glass' in place and coated with Klear, it was now - finally - the time to close up the cab...


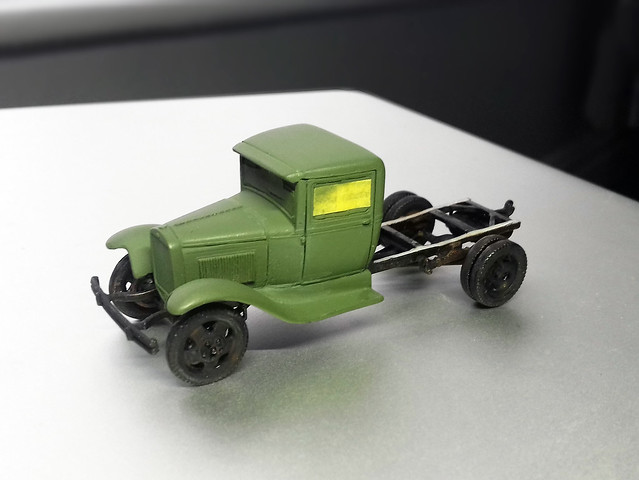
It looks a little messy as only parts of the model are primed, hopefully, it will all come together in the next stage when I apply the base coat of Light Olive (fingers crossed)!

Postscript: I actually made some progress on getting the base coat on the cab and some preparatory weathering on the chassis...

Thursday, 2 March 2017

MW 1/72 GAZ AA Truck


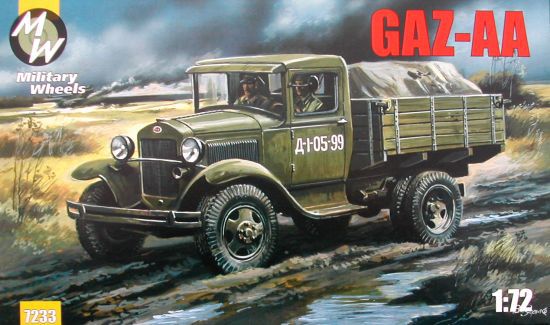
This follows on from my Flak 38 project, as I now need myself a towing vehicle! And, by sheer coincidence, my brother got me a Military Wheels GAZ-AA truck which will fit the bill nicely.

So, Military Wheels - 'Made in Ukraine'. My experience of Eastern Europian plastic kit manufacturers (PST, ACE and Zebrano) has been not altogether positive, though my current PST GAZ-55 has been quite enjoyable. My general view is that Eastern European kit manufacturers often overreach themselves - they supply a lot of parts, but this plethora of parts often don't fit well or they don't tell you exactly where all the additional parts go!


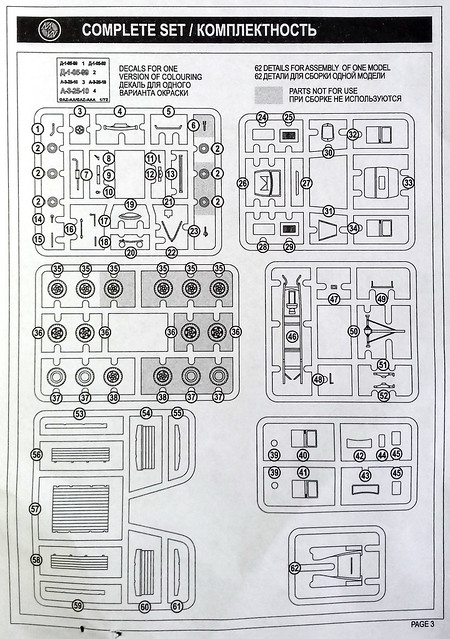
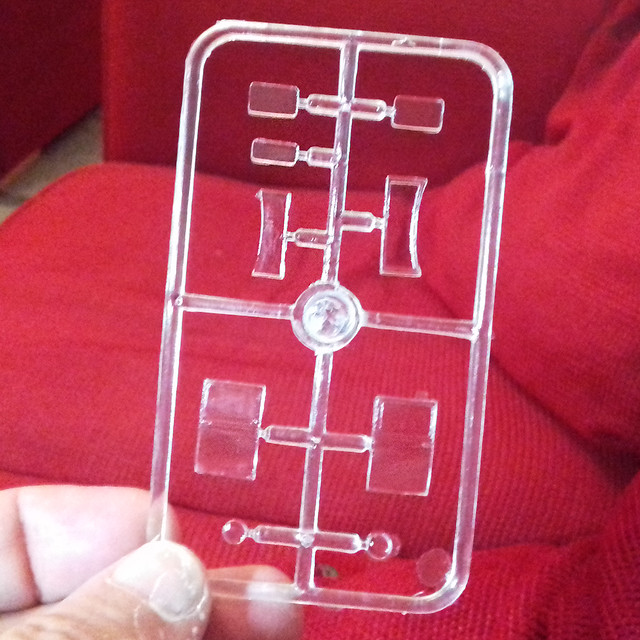
The MW GAZ-AA is a case in point as there is a total of seven sprues and a whopping 62 parts in all. This, just for a light truck. But, to be fair, I do like some of the extras they have included, such as the optional doors made out of transparent plastic so you don't have to fit windows...

MW include two options for doing the windows. You can either fit the individual
window pieces, or you can fit the one-piece doors with integral windows and
a one-piece windscreen and frame. Easier than glueing in windows!
The downside to this smorgasbord of plastic parts is that some of them are so tiny or fragile that they risk being damaged when you try and cut them off the sprue. Plus, as I alluded earlier, the instructions don't quite keep pace with the ambitions of the kit. You will have to do some Googling to work out where some things should go exactly (especially on the chassis).

OK, so warnings over, let's see how I put this together...

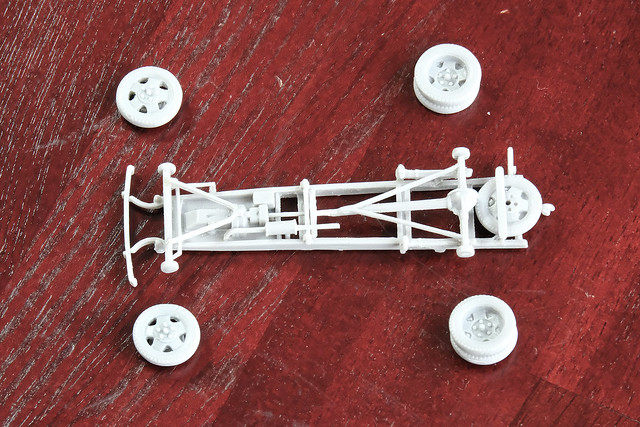
1. The Chassis...
Plenty of detail here, pity it won't be seen. The only problem I had here was that I am not a car owner or at all mechanically minded, so knowing exactly what do-dad goes where (bearing in mind the vague instructions) meant some Googling and a bit of guess work. But, I *think* my effort looks OK...


My only niggle is the tread on the tires, or rather the lack of any such thing. I would have liked some nice tred patterns, but I had to sand the outer edges down because of moulding seams.

I will be leaving the wheels off until I paint and weather the completed chassis/body assembly (so I can get some mud and dirty under the mud guards).

2. The Cab...
Because I want to add a driver figure - and the MW kit does not include one - I am having to deviate from the instructions somewhat. Despite my usual practice of making a 1/76 scale figure for a 1/72 vehicle cab (so it fits inside the model) I still had to do some tinkering to get the driver in, including cutting a hole in the seat!


I went for the option of using the transparent doors, but used the 'glass' components for the windshield and rear window. These fitted perfectly (well-done MW) and just needed a slight touch of super glue to stick them in place. I'm so glad not to be cutting out acetate for once!

Obviously, I haven't glued the cab together as I need to paint the interior (masking out the windows first) before closing the thing up.

3. The Cargo Flatbed...
Easy-peasy. Just four parts, which go together nicely. These have lots of nice planking detail and some latches and side-straps, but no rivets.


Now, there will be some additional scratch building to accompany this section of the truck, as I want to add a canvas tilt cover. Once again, this is perhaps not quite historically accurate - the Finns seem to prefer open cargo beds - but for the sake of war gaming aesthetics I prefer the bed covered. (It saves me from worrying about modeling the additional crew or cargo for when the truck is in transport mode. I'm a bit anal about such minutia.)

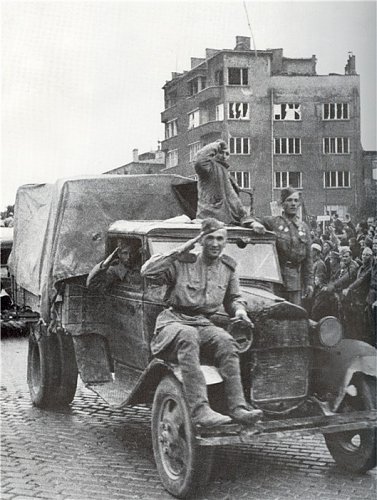
Though rare, the GAZ AA was occasionally
fitted with a canvas cover. This photo shows
a war weary AA entering Berlin in 1945.
Source: Unkown

Conclusions...

It's not a bad kit! I like MW's thinking behind the glass parts and appreciate the options provided. And you can't say that there aren't enough parts, and the surface detail is decent enough.

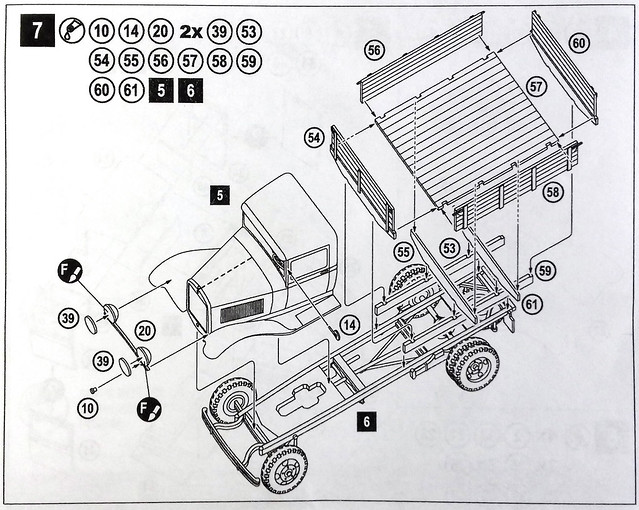
In theory, this is how all three major assemblies should go together.
I guess the only criticism I might make is regarding the fit of these parts. As with all Eastern European kits you are never quite sure what you will get in the end and you have to be ready to do some modifying along the way. For example, with this kit, if you fit the front bumper on and then try and fit the wheel on, you realize that there isn't enough space between the bumper and the tires so some tinkering has to be done.

It's just some niggles like this, nothing major. And to offset this, the parts do look smart and have some nice detail that should look great once the model is painted. So, all in all, it's a worthwhile kit.

I'm happy! :)

NEXT: Masking and Priming.