Showing posts with label tank. Show all posts

Wednesday, 19 August 2020

1/100 KV-1 Tanks Primed

 Yes, it really has taken me this long to get this job done - a whole month. There again a lot has been going on in my life this month, including a week in hospital! (All sorted now though.)

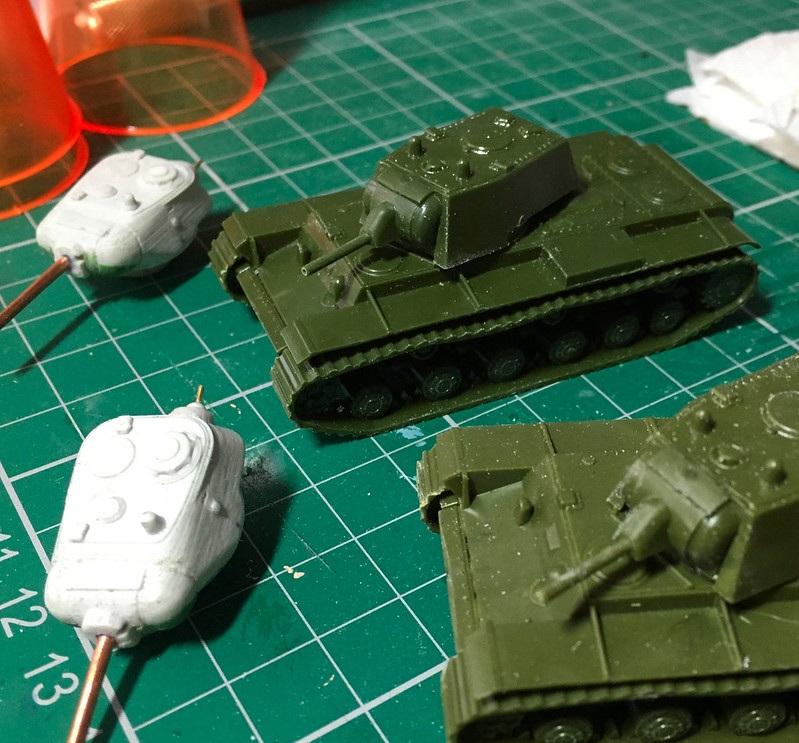
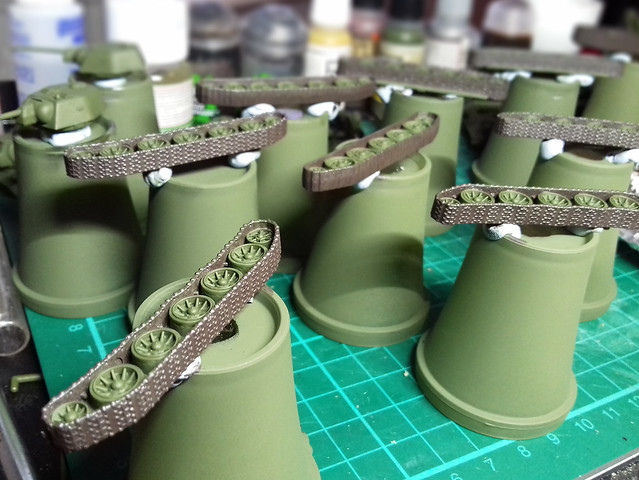
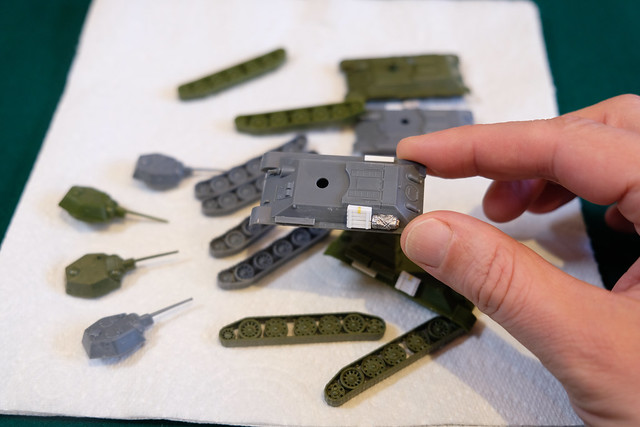
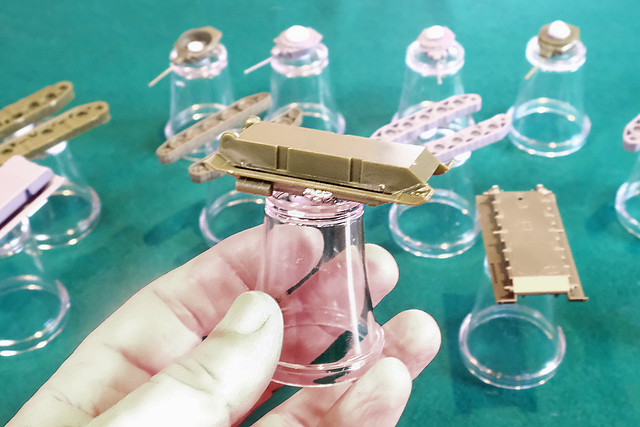
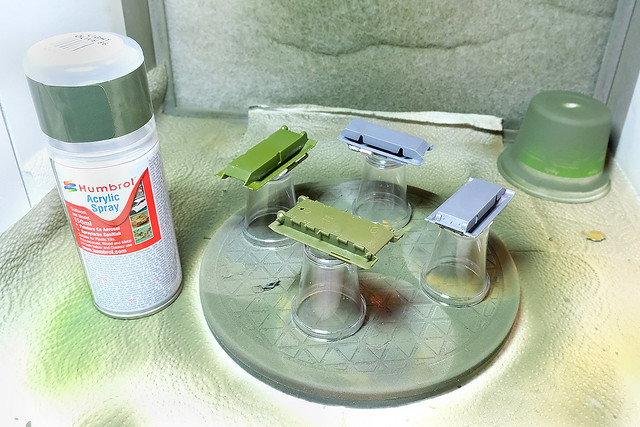
Anyway, my KV-1 tanks have progressed and I've finally got them primed. As usual I did this with a coat of Humbrol's Light Olive acrylic spray - my go to quick-prep for my 1/100 green tanks.

I've mentioned it before but it's worth repeating, I love this product. Not only does it go on very smoothly - giving a fine base coat - but it's an excellent jumping off green which you can then modulate into any of the greens used by the major armies in WW2; British Bronze Green, American Olive Drab or Soviet Russian Green.

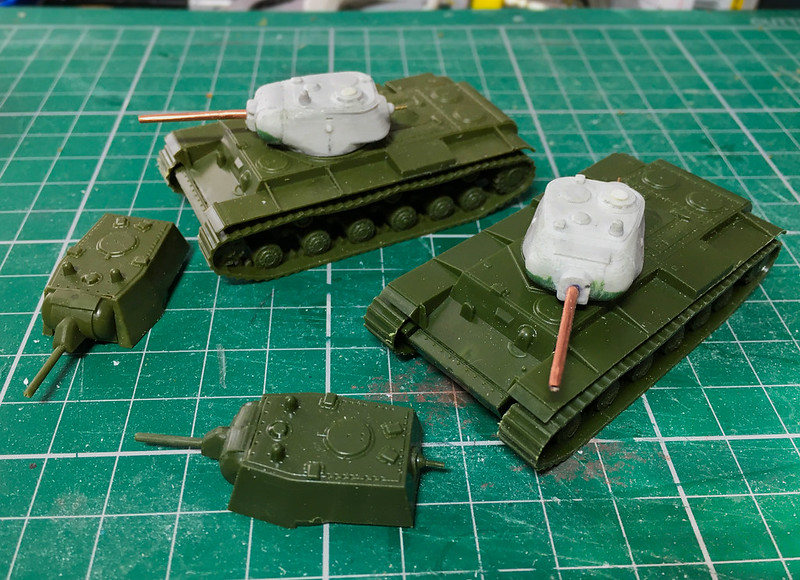
As you can see I am now have KV tanks suitable for early WW2 or mid-war, just by switching out the turrets. It is - in reality - a bit of a fudge as the chassis of these models of KV did actually differ slightly. But for 1/100 war gaming I think I can get away with it!

Now to plan the next stage - adding the decals.

Tuesday, 21 July 2020

...Just One More Thing! 1/100 KV-1.

Yes, I did say that I had completed the construction on my 1/100 KV-1S tanks... But... I hadn't! πŸ˜‚

While the main feature of this projects is the conversion process of making a couple of KV-1S tanks my tinkering left me with a couple of KV-1 variant turrets. It seemed a pity to waste these parts and even though I don't foresee me wanting to play an Operation Barbarossa scenario (the German invasion of the Soviet Union in 1941) you never know! 😏

And so...

Having converted the KV-1 model's turret rings to accommodate the 3D printed turret's larger 10mm 'plug' attachment I would now have to modify the original Zvesda turrets - with their little pin attachment post - so that they would work with the new 'socket' mods.

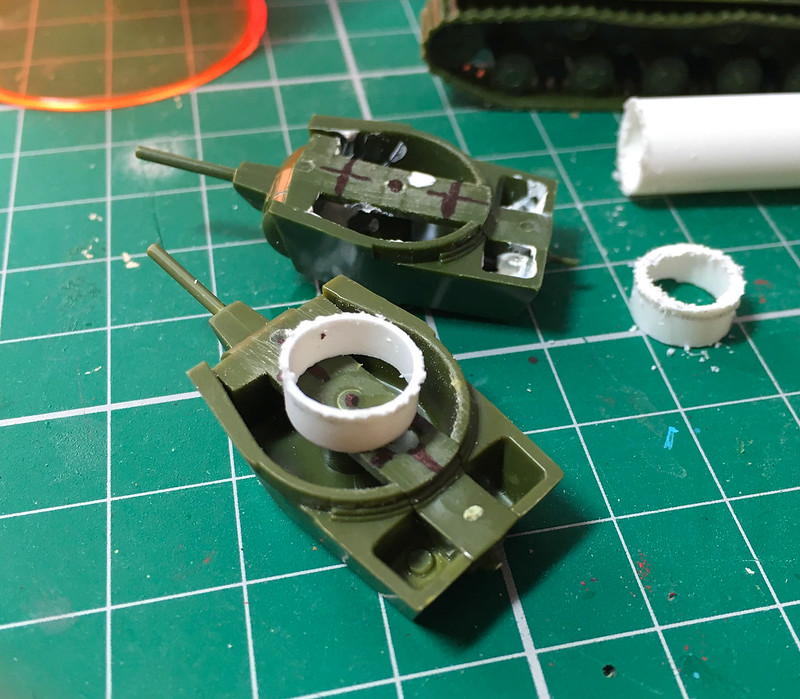
The principal of this upgrade is pretty straight forward. I now have to make two 10mm x 3.5mm cylindrical 'plugs' which I will glue onto the bottom of the KV-1 (Model 1940) turrets. However, I will also magnetising these turrets in a similar way to the way I did with my KV-1S turrets and hence the need for cylindrical 'plugs'. The magnet will be glued inside the tubular plugs.

I had to order in the 10mm diameter styrene tubes as my local craft store have a very limited range of styrene pieces. It took me a while to find exactly what I wanted online but I eventually tracked down the items to Dorsping Models of Cornwall, UK. Unfortunately, to keep costs down I opted for 2nd Class postage and so a annoyingly long wait ensued...


(I should add that I tested the uncut tube for size before I started sawing off 3.5mm rings. I was most satisfied when it slipped nicely into the hole in the hull I had cut for my turret plugs. I love it when a plan comes together!)

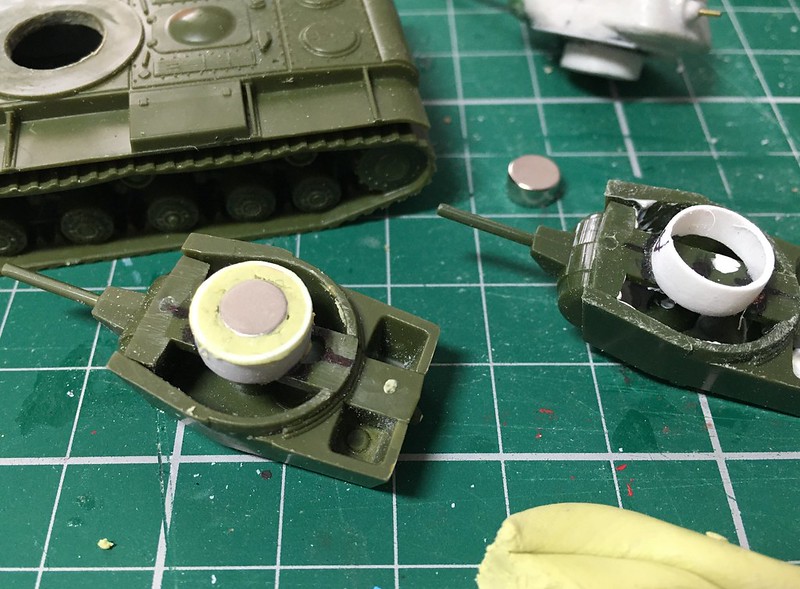
Anyway,  having created my new KV-1 attachment plugs I then had to stick a couple of the little button magnets I had into them. I did think about just super-gluing the magnets inside the cylinders but, in the end, I opted to secure the magnets to the turret floor and the plug ring by means of a nest of Milliput putty...


Now the annoying wait until the putty dries... 😫

And then...! Taa-daaaaah!


The new (old) KV-1 turrets snapped into place perfectly. I now have the ability to field a pair of KV heavy tank for scenarios fro 1940 to 1941 and another pair o KV variants to suit operations from late 1942 to mid-1943!

Job done... Now let's get 'em painted.

Sunday, 12 July 2020

KV-1S Conversions - Construction Complete

Well, finally I've gotten round to finishing off the conversion and construction of my 1/100 Soviet KV-1S tanks. It's been dragging a bit as I was trying to video the process but that turned out to be a complete shambles and so I decided to wait until I have my man-cave workbench sorted before I try vlogging my kit making.

Still, quite pleased with the end result of my Frankenstein shenanigans...


As you can see, I built the original Zvesda kit's KV-1 turrets as well as I want to convert these so I can swap out the two different types of turrets. I'll magnetise the kit turrets but will need some 10mm plastic tube to make the larger size 'plug' attachments to make them work. In this way I can field either the KV in it's early (1940 'Operation Barbarossa' period) configuration OR the later KV-1S 1943 variant.

NEXT: Priming and painting.

Monday, 6 July 2020

KV-1S - A Series of Unfortunate Events...

Part 4 of my KV-1S conversion started with a bit of a 'oh, crap' moment! 😑

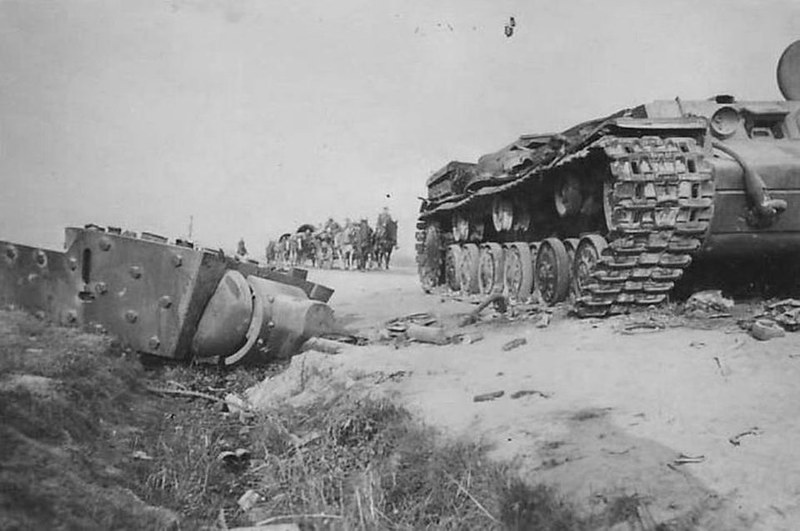
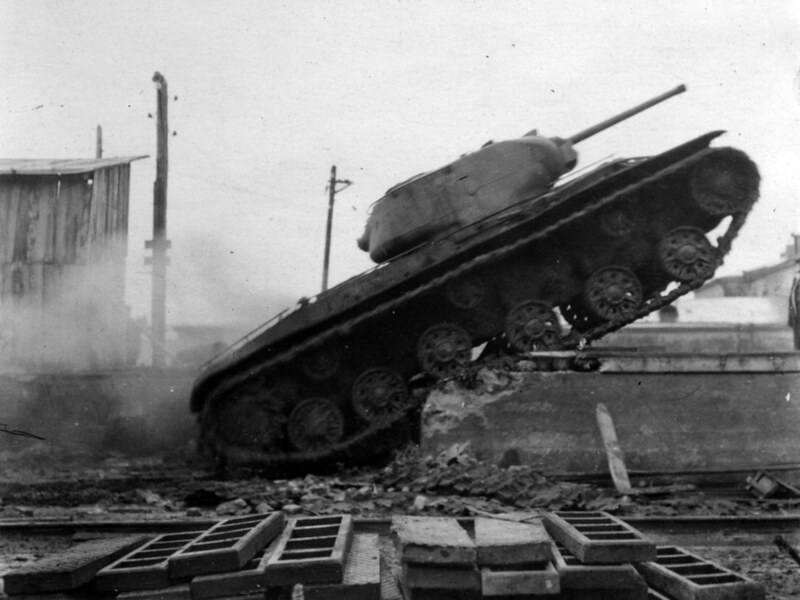
Turret blown off a KV-1E, Soletsky District, Novgorod Oblast - July 1941!
What is Russian for 'oh, crap'? πŸ˜„

In my last post on this project I had just cut the hole in the chassis for the turret 'plug' (for want of a better word) so I could fit the two together. The hole was 'snug'...Very snug. So snug, in fact that one in the turret didn't want to come back out or even turn!

Never mind, I thought, a couple of good twists with free it , I thought...And then...

...SNAP! πŸ˜– 😭

I forgot that a 3D printed component like my turret is a flimsy hollow part with quite thin walls. Twisting the turret wrenched the turret plug off the bottom completely off...


Oooopsie! BUT, after the initial shock I realise that this was actually a bit of fortuitous accident. I was still trying to decide the best way in which to add a small magnet to the turret and the separation of the plug element gave me a good idea how I might, now, achieve this.

After I tapped the snapped-off plug out of the turret ring it became obvious that I now had a nice neat little 'pocket' I could glue my magnet into...


That done I then super-glued the plug attachment back onto the base of the turret (I wisely did some sanding of the turret ring hole to make sure that the fit wasn't so snug this time)! πŸ˜‚

...All I had to do then was mount another magnet into the hull of the tank and the two parts should then snap together perfectly! (As long as I have the magnets' POLARITY correct!)

Some very rough measuring and mental arithmetic ensued and I worked out that I needed to raise the hull magnet up about 4mm so that it met with the turret plug and it's magnet. These little magnets are quite strong so they don't need to be directly connecting with each other, they just need to be very close to each other.

I glued together a couple of 2mm thick styrene pieces to act as my platform and glued them onto the floor of the hull and a magnet (ensuring it's polarity was correct) onto the plastic strips...


And then came the moment of truth! I placed the turret in the hole and with a  satisfying 'snap' (a good one this time) it popped into place, attracted by the hull's magnet! HOORAH!!! πŸ˜πŸ‘Œ


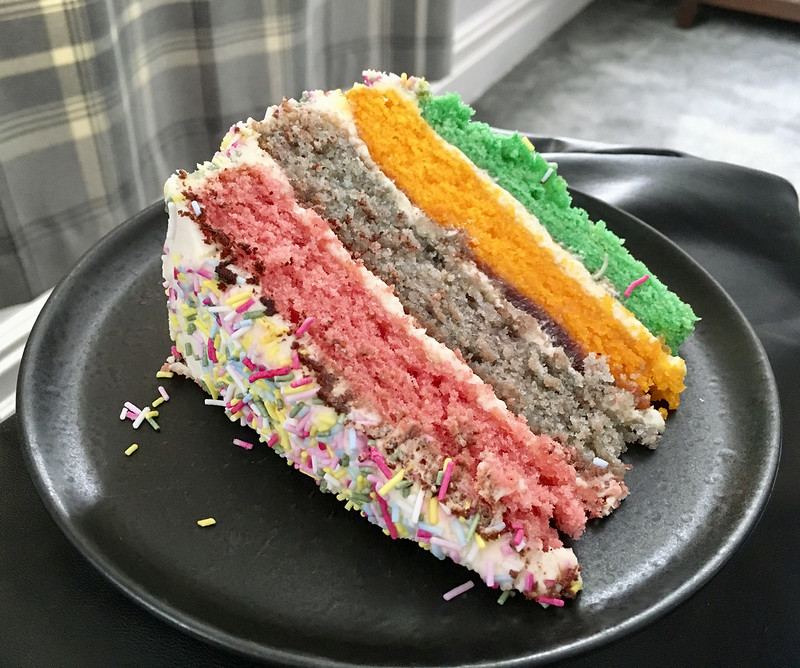
Phew! Time for a cakie... (Interlude music!)


Well, that's the majority of the construction of my KV-1S conversion (there were only 6 parts to the Zvesda KV-1 kit in total), all that remained were the tracks but they are of the one-piece type...


NOW...I could attach these now - a lot of war-game modellers would - but I prefer to prime and paint these parts separately as it's a bit awkward to get the top of the tracks done as there ain't a lot of space once they are fitted onto the chassis. But that's a personal preference.

NEXT: Priming and painting.

--------------------------------------------------------

πŸ‘‰ Link to the KV-1S Conversion Project Series of Posts.

Friday, 3 July 2020

1/100 KV-1S Conversion Pt.4

I've been a bit distracted with other things and have neglected my KV-1S conversion project, so it's time to get moving again!

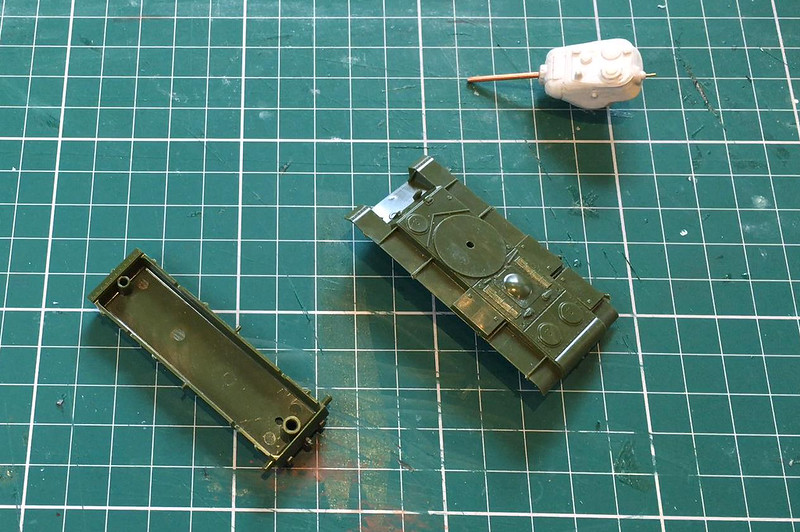
Here's the various parts I shall be working with in this next stage of this build.
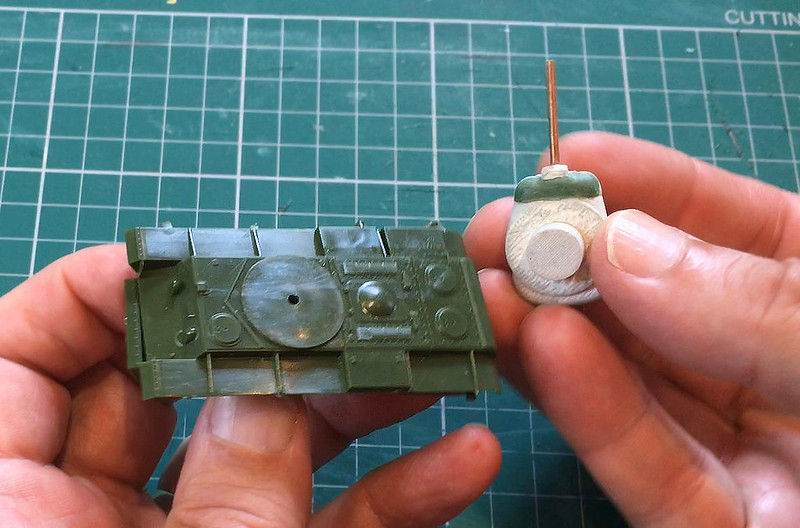
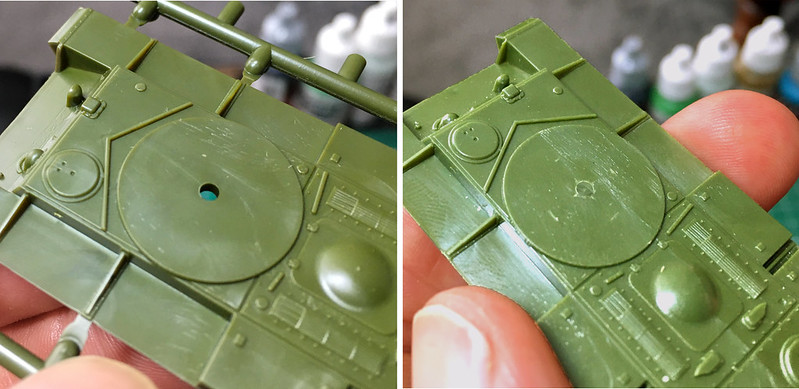
It's time to attach the 3D printed KV-1S turret to my Zvesda KV-1 hull, but there are a couple of things I need to do along the way. The first is to modify the hull's turret ring so I can attach the turrets plug into it...


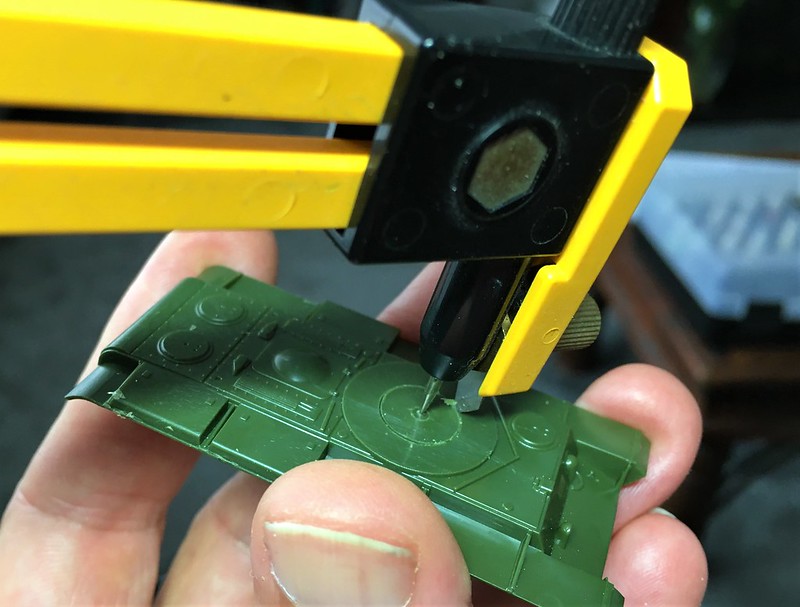
The Zvesda hull has a pin-type turret attachment hole, this is going to have to be considerably enlarged, to 10mm. But even before that I will have to cut a nice clean circular hole precisely in the centre. I do have a circle cutter tool - like a drawing compass but with a small blade instead of a pencil - but I will need to fill the existing hole so I can draw the circle using it...


The hole filled, I can now set the hole cutter pin firmly in the middle of the turret ring and draw the blade around in a circle. This will provide me with an accurate guide by which I can cut out the new attachment socket...


Using a small drill bit I drilled a pilot hole on the inner edge of the guide and then used a Dremmel cutting bit to cut all the way round the guide. Although the quick way of getting the hole the bit left the soft plastic a little rough, so I then neatened up the edge of the circle - right up to the guide line - using a file...


I kept trying the turret in the socket hole until I eventually got a snug fit. After a wee while in she popped and I had a tank with a turret!


Well, that's the first part of my turret attachment plans - next I want to add a couple of small magnets to the model so that the turret stays in place but is easily removed and exchanged (I'll explain why later - as I have a 'cunning plan')! πŸ˜‰

Next: Adding the magnets!

-----------------------------------------------

Link to the KV-1S Conversion Project series.

Thursday, 4 June 2020

1/100 KV-1S Conversion Pt.2

I'm very slowly getting back into modelling, but I'm finding it tricky. I am suffering from a bit of anxiety about getting down to it because - I think - after such a long break any modelling I do now may not be up to the standard that I managed to get to three years ago. It's frustrating and is causing me to procrastinate about putting craft knife or file to plastic.

However, today (finally) I took some baby steps towards actually doing something!

Having spent some time trimming the excess flash and support filaments from the turrets I got them in a state where I could look at them properly and decide what they needed doing to them ...


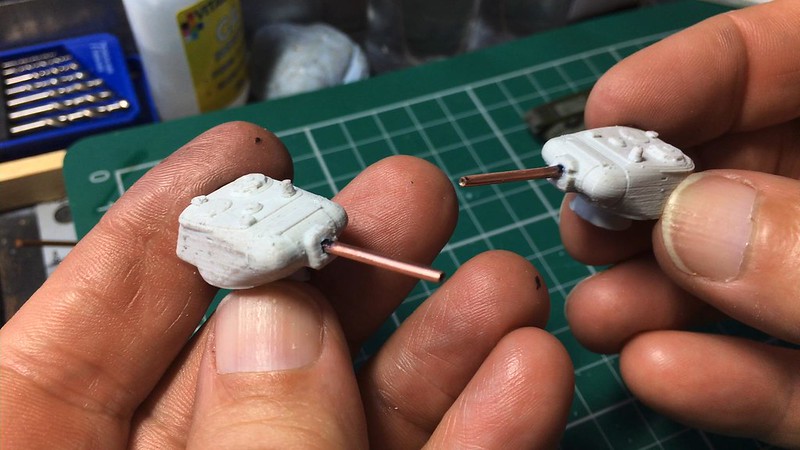
As you can see from the accompanying picture the 3D printed turrets are a little rough with the stepping effect of the 3D printing pretty obvious. I will have to do something about that, but - first of all - I really wanted to tackle the overly thin and fragile main guns.


I managed to find a piece of copper tubing that was approximately the right size for use as a replacement barrel. I checked these dimensions against one of the T-34/76 models I had already done as both the T-34 and the KV-1S were equipped with the same 76.2mm ZIS-5 gun.

I had to do a little bit of sanding and filing of the soft copper to get it close to the right diameter and then I trimmed the 3D printed gun off the turret. The new barrel needed socket to fit into so I drilled a hole in the mantlet to accommodate it...

Excuse the filthy hands but sanding and filing copper is a messy business!
I got a bit of a surprise when I drilled into the turret as I discovered that the 3D printing process produced a hollow part. I didn't know that - This is my first 3D model!

Anyway, I super glued the tube into place and checked it off against my T-34 model. It is still a tiny bit thicker but I reckon at 1/100 and it being a tabletop gaming piece nobody will complain too much!


I'm much happier with a metal barrel as - being game pieces - these models will be handled quite a lot and they will have to be sturdy enough to put up with use.

Next: Now onto smoothing out the turret and cleaning up the fine detail...
-----------------------------------------------------------

Link to this project series - 1/100 KV-1S Conversion

Saturday, 23 May 2020

1/100 KV-1S Turret Conversion

Following up my mention of a purchase (link here) of  couple of 3D printed model conversion parts (something new to me), I got a nice surprise in the post this morning...


After cleaning these parts up I will be mating these turrets to a couple of Zvezda KV-1 chassis. And voile! Two KV-1S tanks...


These 'heavy' Soviet tank models - as I pointed out in my original post - will not give me parity with the German Tiger 1 for my Kursk war-game. In fact, despite the fact that these were considered 'modernised' (at the time) versions of the original KV-1 tanks, the Russians had lightened the tank's armour to improve mobility, thus negating one of the few major advantages of the KV series.

Still, these monsters will look quite impressive on the game table and will provide a little variety in what might otherwise be a T-34 heavy force.

Next: I prep the 3D printed turrets and build the Zvezda plastic chassis.

Wednesday, 20 May 2020

And...I Change My Mind! 1/72 US Sherman.

As I mentioned, I am currently rummaging through the junk pile which is my old attic work area. It seems that every time I remove a layer of crap I find something new or something I had forgotten about underneath... I daren't even show you a photo, it's too embarrassing!

Now, I thought I had found all of my old projects and I carefully placed them in a separate box and had picked out a couple that seemed like good ones that would restart my model making with. But, no...

One more layer of random 'stuff' and I came across yet another oh-so-nearly completed model that had completely forgotten I had. And this one is another - like my Hurricane model - that is ready to have the final weathering phase to be applied...


Like my Hurricane model., this 1/72 M4 Sherman model (by Armourfast) was a 'fun' project totally unrelated to any of my main projects. So it's ideal to use as a (re-) starter activity, because I would hate to make a mess of one of the models I was making for, for example, my Finnish Army project where each model is a bit of a custom job with a lot of work put into them.

Also, I enjoy the weathering bit, it's the part of the modelling process where you most get to get creative and add your own personal 'style' (I think).

...So, quick change of plan. This Sherman replaces the Hurricane as my re-entry into the hobby.

Despite this model being, basically, a pretty simple Armourfast 'easy build' war-game kit I did do quite a bit of scratch upgrading to it (just to prove that you could make a bog-standard gaming model look a bit more realistic)...


To help get me re-started in making and painting scale models I have managed to find a very useful YouTube tutorial to guide me... (A bit of much needed 'hand-holding' as I'm a bit nervous!)

Saturday, 16 May 2020

1/100 Plastic T-34/76 Kits - Part 6

Preface: I'm back! Yes, after a two year hiatus I seem to have rekindles my modelling mojo! And luckily enough - when I checked - I conveniently had the following post still awaiting publication (written in 2018). This sets out exactly where I was with my models when I 'downed tools'. Enjoy...More to come. Milgeek.


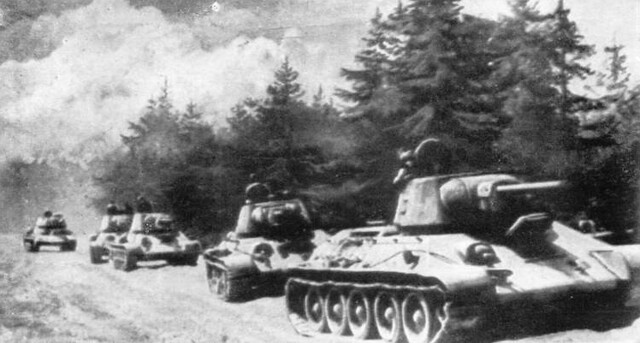
A column of T-34 Model 1943 Medium Tanks, with the hexagonal turret,
advancing through Poland. Source: Historyofwar.org

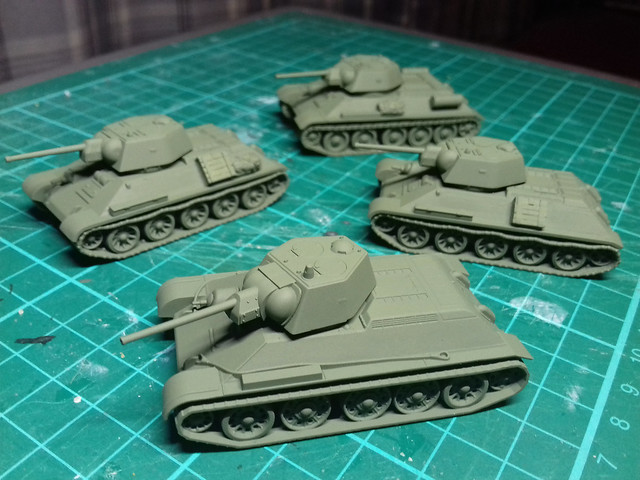
Phew! I'm probably making a real meal of doing what is - after all - a very simple kit. But, in my defence I am a slow modeller and I'm doing four vehicles at one time for the first time.

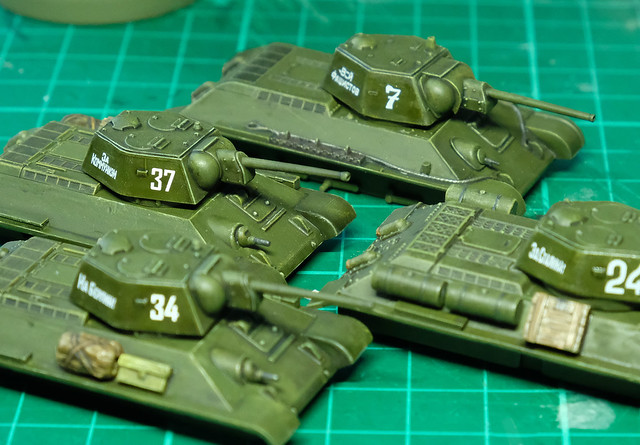
In any case, my little troop of T-34s trundles on (however ponderously) and I finally get around to adding the decals...


Now, to be fair, I had to order some of these especially for this project (which meant waiting for pay day, as I am now on a much reduced salary). It's one of the annoying aspects of modelling 1/100 war-game armour that - generally - the models do not come with decals, so you have to source your own if you want them.

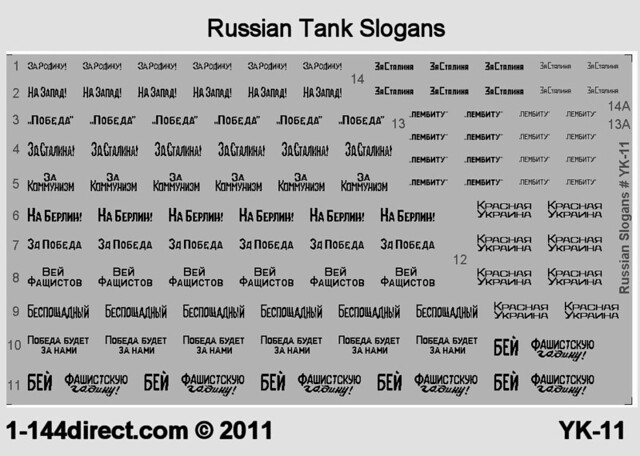
Luckily there are a few companies out there that take advantage of this gap in the market. I make a lot of use of I-94 Enterprise's 1/100 decals (available from Minibits in the UK), but I also found a rather nice set of Soviet tank slogans on eBay by 1-144direct.com...

These decals are really 1/144 scale but can be used on 1/100 at a pinch. They
are available in red, black or white at £3.25.
The eBay seller's page for these - click here - comes with a key translation for the slogans so you are sure that they are not requests for soup! Although a little small (at 1/144) they do actually fit nicely onto my T-34 turret facets quite nicely...


Warning: These are APL printed decals and not the kit manufactures film transfers you may be used to. They need special care in using and the sellers webpage (provided above) gives full instructions in their use - THEY ARE QUITE DELICATE! (I ruined one set during application.)

I sealed these decals - and my tank numbers - using acrylic gloss varnish (you could also use Johnson's Klear, I guess, but test first). Don't use enamels, as spirit based stuff melts the APL decals, as I found out to my annoyance (read the instructions - du-oh)!

Anyway, I was very happy with these as they give my otherwise generic looking green machines a bit of individual character.

Saturday, 10 February 2018

1/100 Plastic T-34/76 Kits - Part 5

It's taking some getting used to working on several similar models at one and the same time. I'm really not sure how people manage to do whole 'regiments' of vehicles for large scale games like Flames of War, I'm finding the repetition tiring with just a troop of four T-34s!

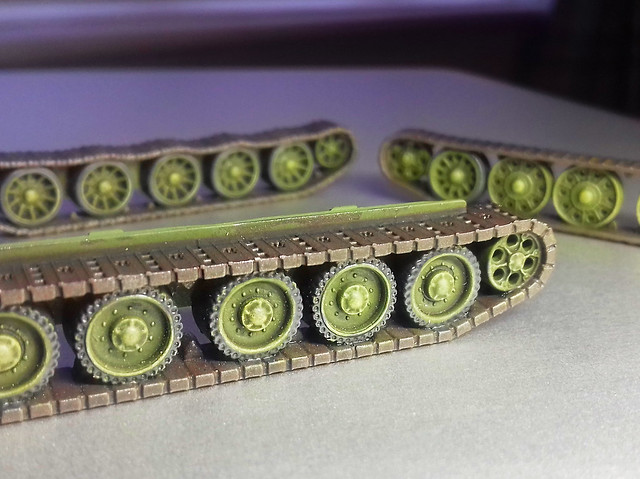
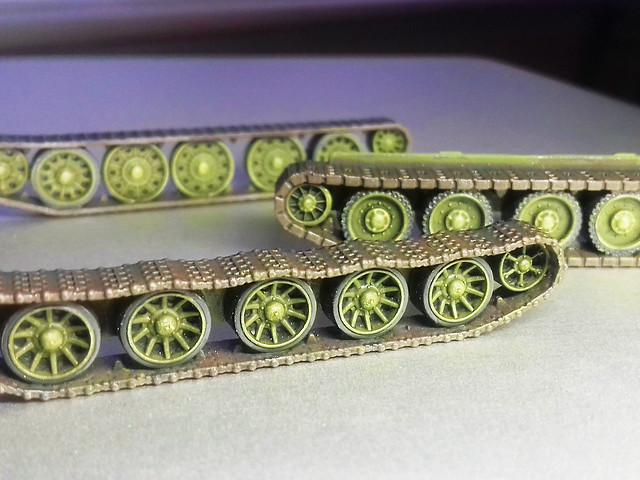
Anyway, gripe aside, all the track sets (4 sets, so 8 parts) went fairly well...


The dry-brushed highlighting is somewhat exaggerated for effect (nearly yellow, in fact). But, I'm beginning to get into this whole war-gaming style of painting, though I guess it might be very easy to get carried away.

In this case, however, I shall be toning the high contrast down a bit when I add an additional shading wash. Once that is done and I have pin-washed the shadow areas in the wheels I'll start to think about how much - if any - mud and weathering to apply to the tracks.

Now, onto the hull(s)...

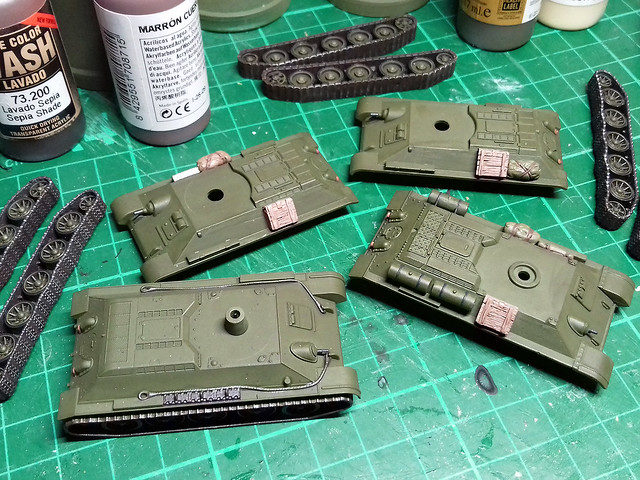
First job is to paint the base colours of all the stowage and gear. I tried out Vallejo's Model Color Cork Brown for the wooden storage crates, it gives a nice light wood tone. The tarpaulins are various shades of khaki-green and metal equipment is metallic-grey (silver mixed with panzer grey)...


I won't bore you by repeating photos that I've shown before as my 1/100 process is starting to become   pretty well 'set', so I'll just bullet-point the stages after priming and detail base painting:

• MODULATION WASH: A quick wash of Vallejo Model Air Russian Green (once I get my airbrush up and going again I will simply prime any Soviet vehicles with Vallejo's Russian Green Primer, thus eliminating a stage).

• HIGHLIGHTING: I've begun to highlight in two stages. First a general light dry brushing of a Russian Green/Ochre-Yellow mix to give some high-contrast highlights to raised detail and to give some lightening shade to the upper surfaces angels (tops of surfaces). This is followed by a more focused highlighting (near white) on the very most prominent edges and detail (I used a mix of Vallejo White and German Yellow [806] for this extreme highlighting).

• SHADOW SHADING/ PIN-WASHING: Application of Citadel's Agrax Earthshade (over-all wash) and Nuln Oil (focused pin-wash) shading tints to panel lines and any areas I want to deepen in tone.

• FINISHING WASH: This is something new I'm trying out. To *unify* all the previous wash effects I finish off with a wash of Citadel's Athenian Camoshade. Let me explain; using multiple layers of washes one onto of another - particularly dark washes - can get a little messy. You can end up with patches and streaks, and so - to smooth out and counter these unwanted blemishes - I apply an overall wash of Citadels darker green shade. It pulls everything together and adds a rich sheen to the Russian Green.

Lastly, some of these processes are repeated for effect. For example, I gently highlighted again after the shadow wash/finishing wash or, if a shadow in a panel is not deep enough, I might add an additional shadow wash to that specific area.

I know...This all sounds like a lot of work. But going down the route of multi-layer washes to build up effects seems to create a complicated tonal end product that suits me more than trying to subtly airbrush shading effects at this small scale. If you are more comfortable with airbrushing instead...Go for it! It's all down to personal taste. :)

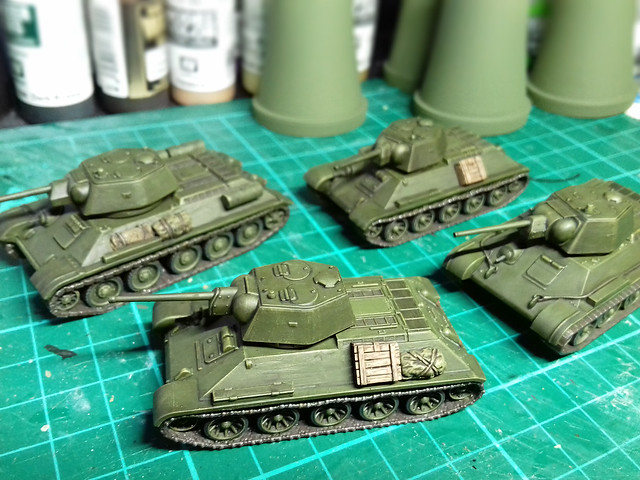
Ready for Weathering
And here we are, all ready to start the weathering and advanced detailing/effects stage of painting...


Next: Weathering & Completion

Sunday, 4 February 2018

1/100 Plastic T-34/76 Kits - Part 4

One Track Mind...
Er, make that 10 track mind! The downside of production line model making for war-game is; yes, you get a nice little army of models at the end, BUT this means that every stage in building and painting becomes a intimidating and repetitive chore...

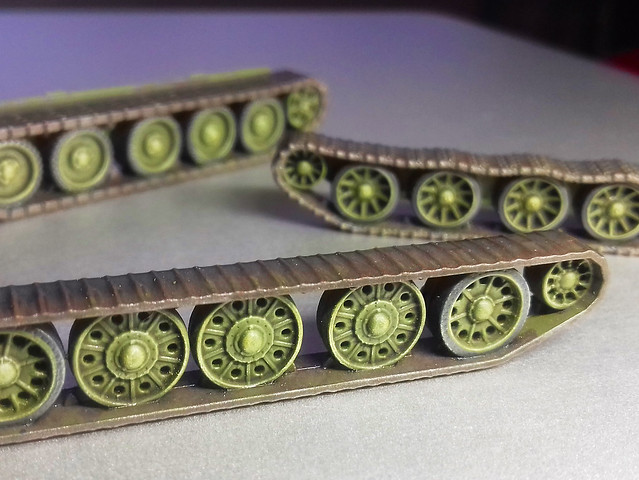
Tracks all-over primed and track links painted base colour.
I'll be discussing my exact paint process for these 1/100 scale tanks and their tracks in my next post (about my SU-152), but here's a quick overview in bullet-point form:

• Prime tracks (mine are all over light olive)...
• Paint tracks base colour - I've chosen a metallic dark-brown...
• Apply dark wash (Citadel Agrax Earthshade) all over...
• Dry-brush highlight green on road wheels...
• Highlight track tread with metallic colour or graphite pencil...
• Pin-wash road wheels and track treads with black (Citadel Nuln Oil)...
• Apply dust of mud effects (to your tastes)...
• Seal with varnish.

Next: Painting the hull and turret.

Thursday, 1 February 2018

1/100 Plastic T-34/76 Kits - Part 3

Cleaning, Priming & Base Colour Planning
A process I - and other modellers - do, and yet I have never mentioned it on this blog, is to wash the 'raw' plastic sub-assemblies before priming! I don't know why I have never mentioned this before as it is quite an important stage in the painting process.

It's also a very simple process (maybe that's why I have overlooked it before), but novice modellers tend to either not know about this process or chose to ignore it.


To be fair, I didn't clean my raw models before priming when I started, but when I did eventually try it I immediately understood why people do this. For example, I tend to file and sand my models a lot - either to remove sprue nubs or moulding seams or to correct details - and this causes microscopic particles of plastic dust to cling to the surface of your kit.

For some reason, you only seem to notice these small grains of plastic once you have primed, and then it's too late. Sometimes the tiny blemishes can be scraped off and the primer can be retouched, but there is nothing more annoying than discovering particles of dust spoiling you nice neat primer coat!

So, I bath my sub-assemblies in warm, soapy water. This gets rid of most particles and any surface grease left behind by your fingers (this can be just your natural skin oils, but can form a barrier to the primer paint).

Priming
Before spraying I mounted all of the sub-assemblies onto little plastic shot glasses that I got from a local thrift store. I like to mount parts for spraying and painting as I like a 'handle' to hold onto the part. It makes it easier to manipulate for painting details.

I have used cheap corks before, but I prefer these shot glasses as they can put down and stand on their own, which is great for when paint is drying. I stick the parts to the glasses using BluTac...


And from there it was onto the spray booth turntable. As usual, I'll be breaking out the Humbrol [86] Light Green Olive Acrylic Spray as a light base for my 'Russian Green' wash...


As much as I am enamoured by this particular make of rattle can, I'm starting to question the economics of aerosols as primers, more especially when you have several identical models to spray. I'm considering moving across to airbrush primers once I have gotten back to using an airbrush again.

But, in the meantime, I am still impressed with the nice smooth coat that the Humbrol spray gives me...


Planning the Colour Scheme
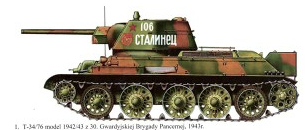
Being mid-war Soviet tanks you could get away with a very simple colour scheme, Russian Green. But I'd like to do something a little different, just to give some visual variety (I know some people like uniformity when it comes to war-game tank squadrons), so I looked around to find examples of those rare occasions that the Red Army used camouflage schemes.

While the Soviets made great use of winter schemes, summer multi-coloured camo patterns are relatively rare as far as I can see. But I found one example that looks interesting...


I've seen this two-tone green and tan/brown scheme a couple of times and quite like it. I'll probably just do one of my T-34s in this, just to imply that different regiments are involved in my game. Just for fun! :)

As for the other three, variously weathered plain green, I think.

Next: Painting.

Sunday, 28 January 2018

1/100 Plastic T-34/76 Kits - Part 2

A *very* slow Sunday on the workbench, due to having to babysit the daughter's very needy dog! ("No, don't make models, tickle me...Me, me, me!")

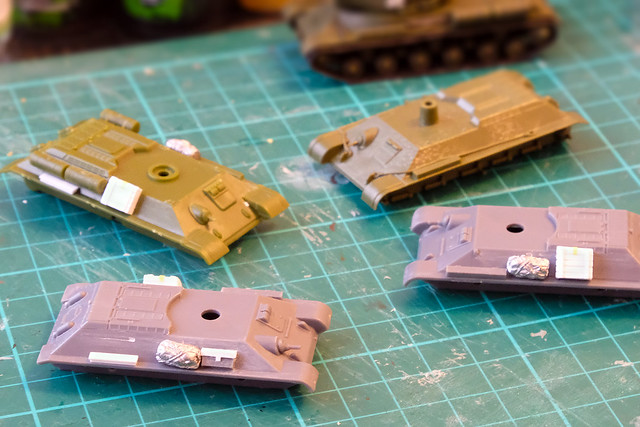
Anyway, got the stowage done for my T-34s - just a few extra tool boxes and what-not. I also trimmed off the horrible plastic 'bumps' that are supposed to represent the 'hand rails', so I'm a lot more satisfied now.
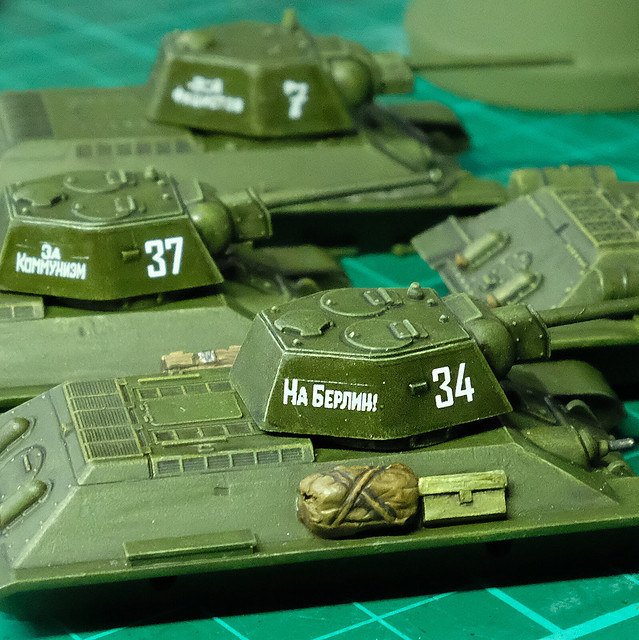

It seems to me that making accessories for 1/100 scale armour is a little anal, but I can't seem to kick the habit. But you can tell I'm more used to making such things in 1/72 scale as my attempts are a little on the big side. Still, they add variety onto otherwise very spartan Soviet tanks.

And that's it for today, I'm afraid. Not a big modelling weekend really and the time has flown.

Next: I'll clean the models with soapy water before applying the primer coat.

Thursday, 25 January 2018

Stash Update - More Bad Guys!

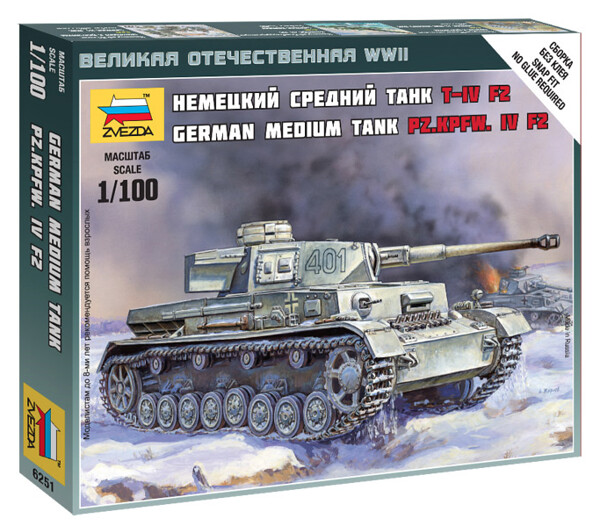
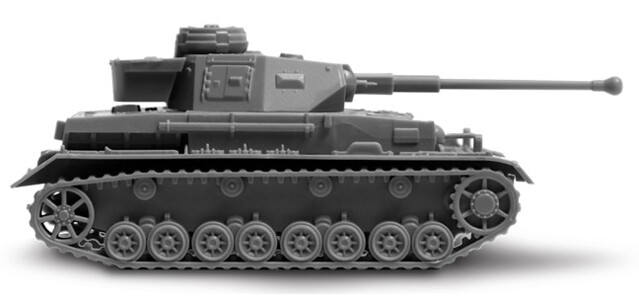
Continuing on with my 1/100 'Battle of Kursk' project for my forthcoming GF9 'TANKS!' game, I have added more 'bad guys' to the collection. These are the German's canon fodder for the battle, the venerable Panzer IV F2 - in this case, in model form by Zvezda...


Now, that may sound disparaging, but that's only because the main focus of anyone's attention when talking about the Battle of Kursk is always inevitably the 'new' German big cats - the Tiger and the Panther. It seems that the poor old Panzer IV gets a wee bit overlooked, and yet it was still the backbone of panzer formations at the time and was still a pretty good tank.


In fact, due to the Soviet's muddling about with the - by then - obviously outmoded 'KV' heavy tank line the Pzr. IV could still hold it's own with practically anything the Red Army could throw at it. It had no problem dealing with either of the Soviet's two main battle tanks, the sluggish KV-1S or even it's nippier little cousin, the T-34/76. [In fact, I have heard many people say that had the Germans churned out more Pzr. IVs instead of relying on the new heavy tank 'super cats' - which turned out to have a lot of technical and reliability problems - the outcome of the battle *might* have been different. But that's an easy thing to say and I'm sure it's not that simple.]


But, hypothetical meanderings aside, a German panzer force of 1943 still requires a base of Panzer IVs in it's mix, so I bought two. Once again, I have gone with the budget option and plumped for Zvezda kits. At £3.50 each they fit the bill as 'canon fodder' for my game and I can easily get the GF9 TANKS!' data cards offline.

The Zvezda model is specifically the F2 variant of the tank, which was really seeing it's last hurrah at the the Battle of Kursk (the 'G' variant beginning to come into prominence). But despite this, with it's KwK 40 L/43 75mm gun, the F2 was still superior to the KV-1 and T-34 in terms of ballistics.

As with Zvezda's T-34s - which I am just working on - both PSC and Battlefront do offer more options and the ability to model more variants of the tank with their Pzr. IV kits. But I just don't need this flexibility, so the cost savings was of the greatest importance to me.

Here's a rather nice YouTube review of the Zvezda Pzr. IV F2 by Modeldads...