So, today began by my watching several YouTube videos on cleaning and maintaining airbrushes. There are - as you can imagine - a lot of videos out there on this subject and as usual I filtered them out by means of watching the first few seconds and judging whether I could actually bear listening to whoever was doing the video! Maybe not the best way to watch 'how to videos' (some boring guys can be very knowledgable) but I do find is a guy is boring it doesn't matter if what he has to say i s very good I simply turn off halfway through, so better to find videos I can actually stomach! :)
I didn't just watch this video, I watched about three before I felt I had a handle on what I was doing. Certainly I felt confident enough to start unscrewing bits of my airbrush feeling I now had a good chance of being able to put them back together again and still have my airbrush work. :D
It was amazing how dirty my brush was! I thought I had at least done some preventative cleaning - but I found out what was just causing some of the splatter I was experiencing when I last used it...
So, note to myself, DO NOT use old paint brushes to clean inside your airbrush - use proper stiff airbrush cleaning brushes instead!
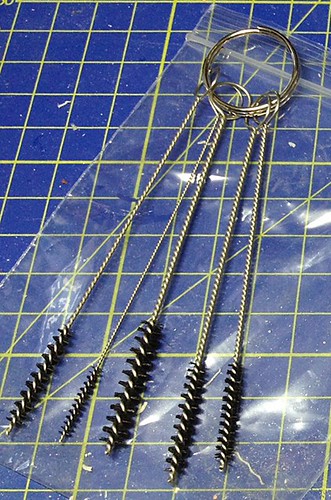
Left: These are the proper airbrush cleaning brushes I bought, great for pushing into the nozzles and channels inside the brush where all the old particles of paint build up.
It didn't actually take long to do a proper clean and in following the instructions in the videos I was able to disassemble and reassemble my airbrush properly (and understand what all the components did). I now feel more confident about doing things like removing the needle to wipe it clean after every spray to keep it smooth and free of what we Scots call 'clart' (tiny bits of dirt).
Sorry this is a bit of a wordy post - but it's just one of those jobs you have to do.
No comments:
Post a Comment