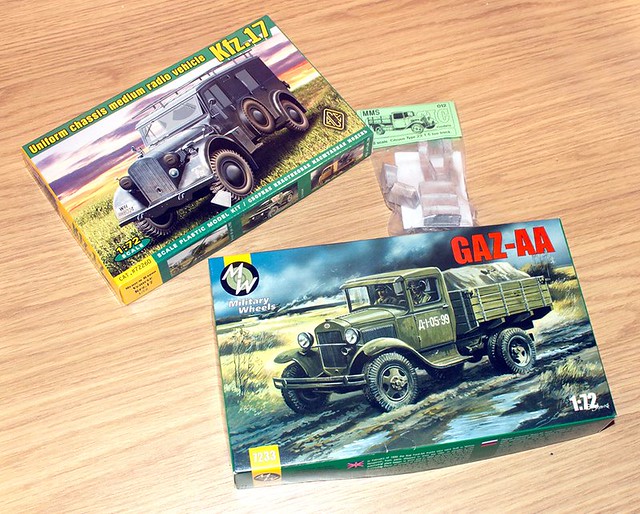
I realise that my 1/24 'Mad Max' project is a little 'off topic' for this blog really so I am looking at what I should do next that does continue the current project theme. Having rummaged about in my stash boxes I pulled out three interesting little light truck - all of which were used by the Finns during WW2...
From top to bottom; ACE Kfz. 17 Radio Car, MMS white metal Renault AGC 1.5ton G.S. Truck kit and finally a Military Wheels Gaz-AA.
OK, obviously I am continuing the truck theme, but it would be nice to do something 'small' compared to the big Yag-6 I have just finished. The Gaz and Renault would be intended as light artillery haulage (perhaps AA guns) but that Kfz.17 is a dedicated communications wagon.
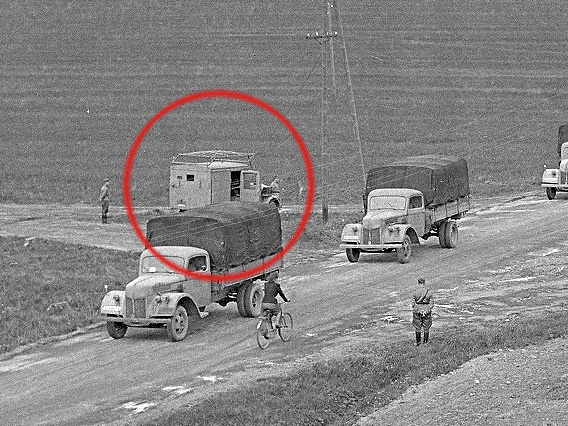
The Finns - I am informed - received two of these specialist German radio cars when they purchased some StuGs from their - then - allies. In fact I managed to find a photo of one of them...
Not a great photo, but I do like to have some photographic evidence of the vehicles I am building in actual use by the Finns as records are either a bit thin on the ground or only available in Finnish!
...I'm sort of leaning towards the Kfz. 17 as it's a bit more interesting than 'just another truck'!
I spent some time getting to know my new Canon 700D DSLR camera this morning. Although I've had it a month or so now I have still been using my trusty iPhone 5 for my blog entries as I am not completely confident about all the new control options on the Canon. Well, I made some progress and took a few snaps today that I'm fairly pleased with.
The lens used is the standard 18-55mm that comes with the Canon by default, so it's not specifically a macro lens but I think the results were OK?
I'm still not anywhere near a competent photographer, I still have to figure out so much but I'm quite pleased with these early shots and their clarity.
Not how my 'Mad Max' car will look exactly, but inspiration!
I was hoping to move quickly on to the next stage of this kit's construction - the interior cab - but I decided that the engine is going to be a lot more of a feature of the finished model than I first imagined. By default the Revell Willy's Coupe model has the engine mostly hidden away under a bonnet, but this seems such a shame - as it's such an attractive component of the kit - that I have decided that my design for this car shall do away with the bonnet (or hood) altogether.
I don't know anything about car engines and this is a major problem when you
take on the building of a car model, especially when it has a detailed engine. The
main problem I had was not knowing the proper names for all the parts, the Revell
instructions didn't include these - luckily I found some similar instructions that did.
The upshot of this is that I now have to give the engine extra attention as it will be on show. But this adds a new set of problems (typically) as I now feel obliged to at least have a go at doing some minor detailing and paint the engine somewhat more accurately than I was originally going to. This also entailed my learning the names of the various parts of the engine so I could more easily research the parts for photographic reference.
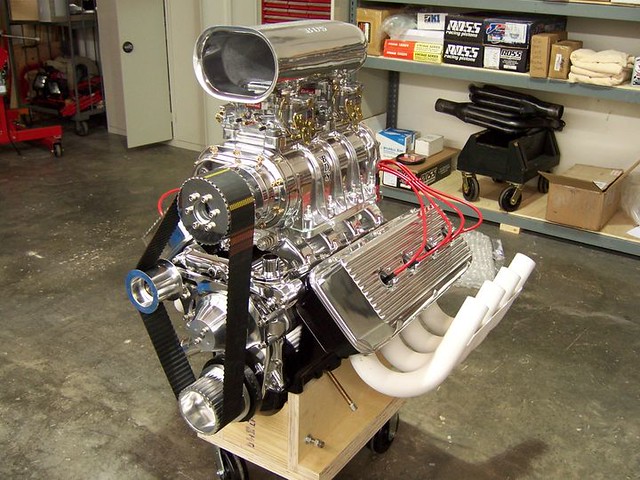
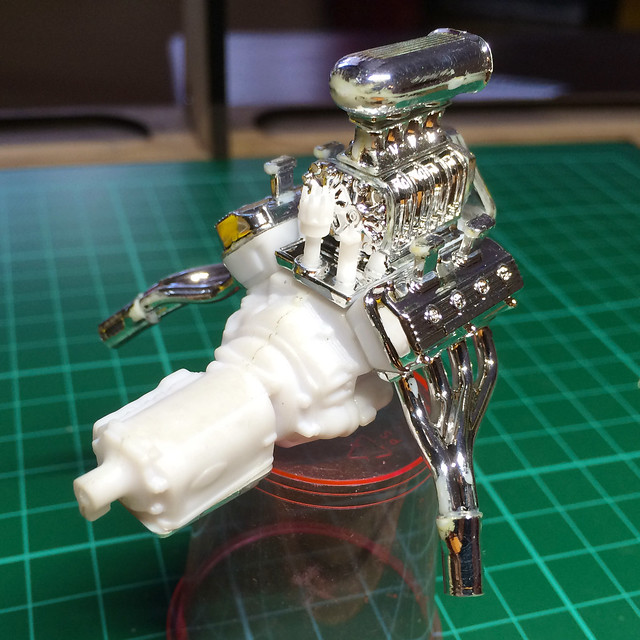
Thanks to Google I managed to actually find the actual engine that this model's power unit is based on. It turns out it is what is called a 'Blown 391 Hemi'...
Obviously, this has the same issue as my original kit parts - it's far to shiny and pristine! What I want is a photo of this engine, but one that shows a well used and less polished example. Luckily Google comes to my rescue once more...
This reference gives me a better idea about how I will treat the various parts of my engine (though I do want to keep a couple of chromed parts, but will weather them). So, ironically, I have to take a step back to move forward and I begin by disassembling the engine again...
I'm putting a lot of thought into how I will paint the engine now - as it will be on
show - so I am choosing a colour or effect for each individual part. I have already
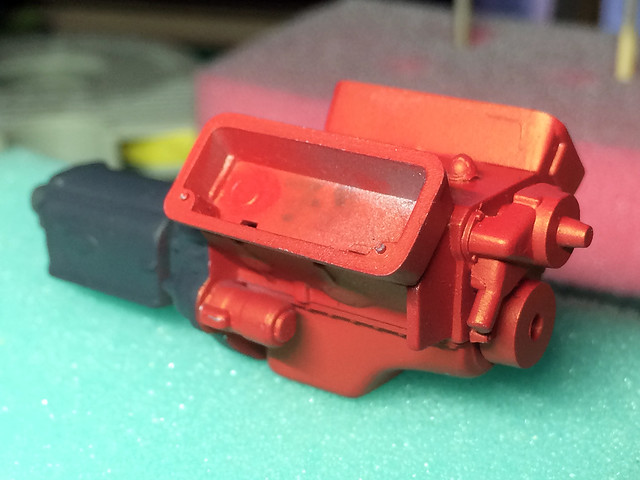
primed the engine block (top right) with a flat aluminium paint.
However, I had anticipated this and had used PVA glue to temporarily glue some of the parts together. This turned out to be such a good move that I will use this technique again to 'test fit' future models - a very useful thing to do so you can examine fit and see if there will be any construction problems before gluing the parts together permanently. (I used craft PVA this time, which isn't the stickiest available, so I will look for a PVA that is a little more instantly tacky.)
I started my painting by spraying the flat aluminium parts using a Humbrol acrylic aerosol. I hope to dull these down and weather them so they get a bit more grimy! (I gave the engine block another quick coat.)
Next I started work on the final colours for the engine block. The main block will be a nice red over the aluminium, the rear gearbox will be a dull mid grey (these seem to be quite popular colours for the Hemi engines). I'll be using the hairspray technique to chip and flake the top coat colours (red/grey) so that the dull aluminium base colour shows through in places where the engine would be worn...
A light coat - just a couple of quick passes- of an aerosol hair spray over the silver base and then allowed to dry for about 10 minutes or so. Then I airbrushed the top-colour over the dry hairspray - I used a fairly 'dry' (or undiluted) paint mix without too much thinners as I have found that if you spray paint that is too 'wet' (too thinned) then the paint tends to run or 'crack' because of the hairspray.
You don't want the paint to 'crack' until you reactivate it later when you apply water to the top coat with a small brush in order to get the flaked paint effect that the hairspray technique is designed to produce.
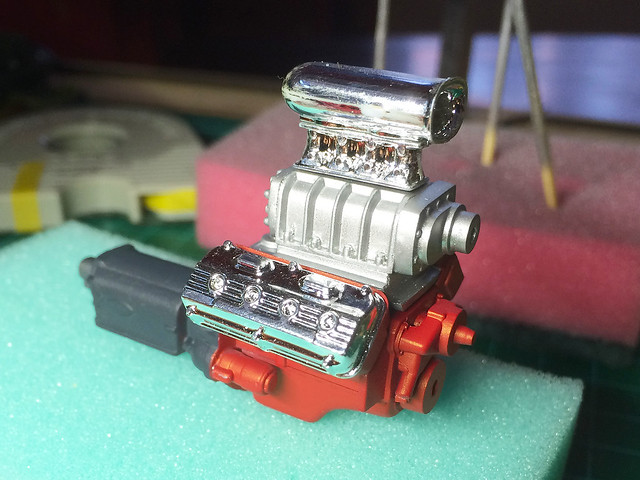
I couldn't resist popping together some of the parts to get an impression of what the finished engine would look like. The flat aluminium colour really contrasts nicely with the high shine chrome parts.
All the components of the engine are now in their base colours and ready to put back together again ready to shade and weather. And that's whats next...
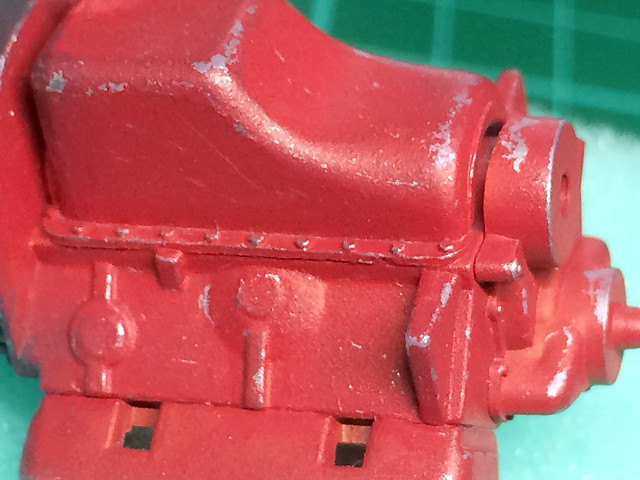
Update: Woke up this morning to find the progress I made before bed last night (either that or the 'hairspray technique' elves had visited in the night)! Quite pleased - having a smug mug of tea to celebrate - as I seem to have cracked this effect (excuse the pun)...
Now the first time I tried this effect I didn't have an airbrush and this seems to be the game changer if you want to do this effect properly. I wasn't happy with the result the first time I tried it using rattle-can spray paints but it seems that was because they spray on a layer of paint that is too thick. The airbrushed top-coat on this V8 engine really 'chipped' away just as the tutorials say it should - the thinner paint coat giving way with ease and far more subtly than with aerosol paints.
(I'm glad this worked as the hairspray technique is pretty fundamental to doing a rusty model car - so this was a useful test.)
Right...Now it's onto the usual weathering techniques - pin-washing and streaking with oils and washes - to finish off the weathering on the engine block.
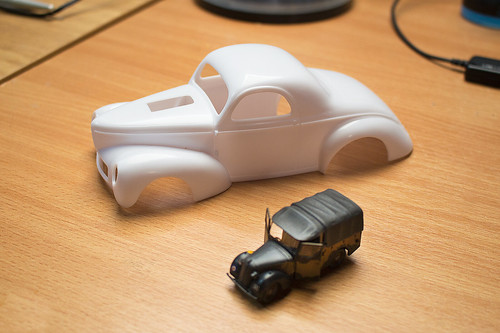
And so my biggest model to date begins. Inspired by the movie 'Mad Max: Fury Road' I decided to take part in a group build by the Hull Scale Model Club and build a 'Mad Max' car!
An example of a real Willy's 1941 Coupe Hot Rod, which my Revell 1/25 kit is
based upon. This one has a nice view of that lovely chromed engine and blower.
There are no rules - it doesn't have to be exactly one of the cars from the movie, just a car 'in the style of' the movies theme. So this is a chance for me to go a bit wild and use my imagination. But, also, this project gives me a chance to try out some new techniques which I might not otherwise get a chance to do making military vehicles.
So, today I am working on the first part of the construction instructions - the engine.
Despite the fictional/fantasy them of the project I couldn't resist doing some research into the Revel model and Willy's Couple car itself. The first thing I discovered was that the engine in the kit (which apparently is the wrong engine by the way) is a V8 Hemi engine with blower, which looks like this...
Beautiful stuff...But probably a bit too pristine for a Mad Max themed car.
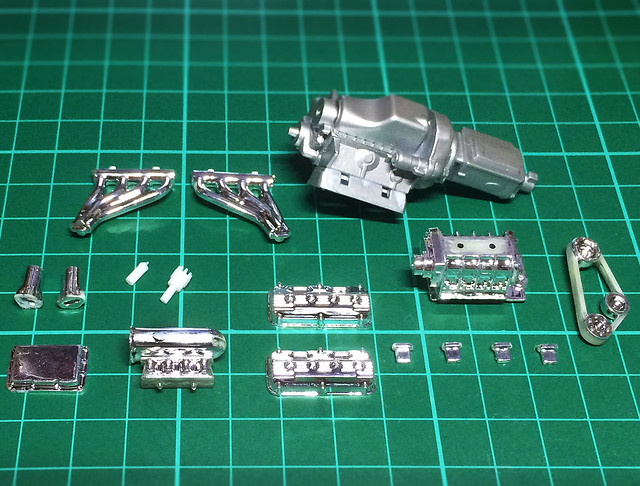
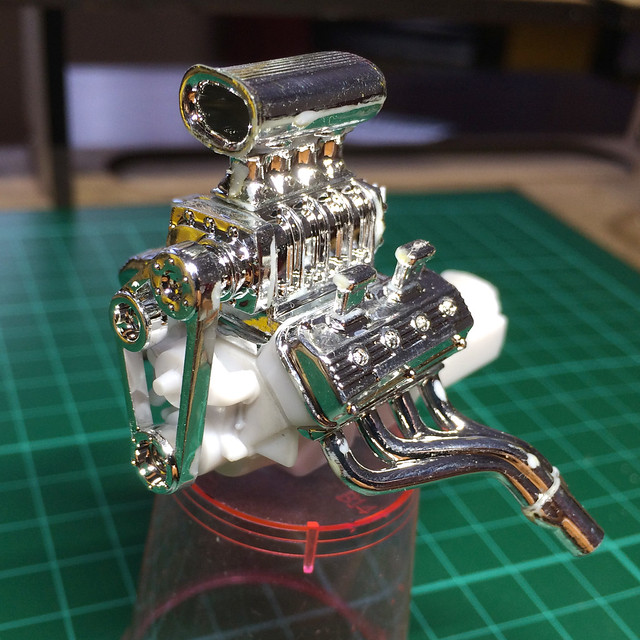
The Revell kits does - in my novice opinion - make a lovely job of recreating this engine in plastic, with moderate detail and some very impressive chromed parts...
I have already put together the two part main engine block (top of photo) and I have taken the precaution of numbering the other components before removing them from the sprue as I know noting about engines and don't want to get the assembly wrong! In truth I am not even sure what the correct name is for ten various parts...5 points off my 'Manly Man Score'. ;)
Now there are two points to take into consideration here; I could 'accurise' this engine by scratch making some of the smaller parts that Revell has not included (I'm thinking of all those wires or tubes in my reference picture) but also I am looking at those chromed parts and wondering if they suit the theme of my model?
If you take a look at one of the actual Mad Max: Fury Road car engines it certainly isn't as pristine a condition as the Revell model engine will be...
So, at some point soon I will have to decide what to do about those lovely chrome parts - 'weather them' or completely repaint them? It might be a shame to completely do away with the nice chrome job that's been done on these parts, s I've been having a look online at some real chrome parts that have suffered pitting and corrosion to see what they might look like...
Luckily, that legendary Hot Rod car model maker 'Doctor Cranky' has some tutorial videos specifically on weathering (pitting) chrome parts...
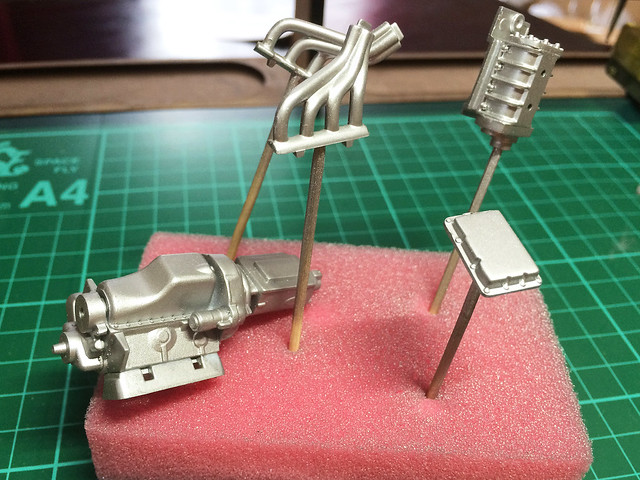
But while I let all that sink in - and do some planning - let's get on with the rest of the basic kit engine construction. It's a pretty simple and straight forward construction but with the issue of what effects I will eventually apply to the chromed parts I have only glued on these components using PVA glue.
In this way I can examine the finished engine and plane how to tackle the painting effects but still remove the chromed parts so I can paint the plain white plastic parts separately if I want (I will only glue the chrome parts on permanently when I decide on how I am painting the engine as a whole).
Well, that looks pretty neat doesn't it? Hope my painting can do this nice model engine justice.
One thing I noticed was that despite the nice chroming job done by Revell the small fly in the ointment is that when you cut these parts off the sprues you inevitably chip away at some of the chrome coating where you have to trim off the left over sprue. This is unavoidable and means that is you wanted the pristine chromed effect you would have to find a way to touch up these blemished with some sort of high shine metallic paint.
Luckily for me, if I do weather the chrome so it's pitted these slight imperfections can be easily camouflaged.
So that's it, stage one of the Willy's Coupe complete. Next I move onto what I believe the drag racers call the 'bucket' - the car's interior where the driver sits.
Hooray, the end is nigh! I am literally just putting the final touches to my troublesome Zebrano Yag-6 model. And that suits me just fine.
I still wanted to do some tinkering with the rust effects that I had applied. I had - until now - only used one rust weathering medium which was AK's 'Light Rust', which is very orange. It seemed to me to be a bit extreme on it's own as there was no variation in rust tones - no 'old rust' or metal about to rush - which I think would be subtler tones in darker or more restrained rust red colours.
A technique I had used in the past which I thought worked exceedingly well with Olive Green or Russian Green vehicles was a plum red colour...
A mixture of several Vallejo colours - purples and reds plus dark grey - make
this dark plum. I use this for chipping touches on green vehicles to give the
impression of mild surface rusting.
This replicated a dark surface rust colour where bare metal was just starting to discolour but wasn't quite a fully orange shade of rust yet. I first tried this out on a 1/72 Pegasus KV-2 practise model that I did some time ago...
Added in tiny spots over dark grey on this KV-2 the plum colour adds a very
subtle impression of metal which has been exposed to the elements.
I know this is a very small detail on which to linger but I guess this is the difference between a beginner and an intermediate scale model maker, the addition of these small touches which enhance basic painting effects.
Anyway, onto the base...
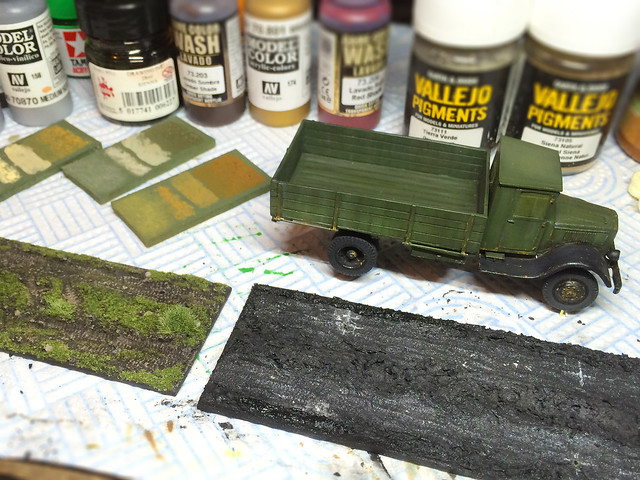
I've been through the description of just how I do my war gaming bases for my Finnish project vehicles so I won't elaborate, and I think I have perfected my technique for this element as much as I want to. I've maintained a fairly simple formula so that all the vehicle bases in the collection look similar...
On the left is one of my previously completed bases so I can check to make sure my
colouring of the new base is consistent which the ones I have already done.
I have a small selection of weathering powder colour swatches that I have made to help me maintain consistency of colours between models (and I also try to record colours that I use in these blog entries so I can refer back to them at a later date).
Well, that's about it - both the truck and it's base are just a few touches away from completion. The next time you see this Yag will be when I publish the final photographs...
I'm really sorry this has been a project of endless moaning - I'm not satisfied with this model on so many levels (and I certainly cannot recommend it to you). If I ever wanted another Yag-6 I am fairly certain that I could make as good a job - if not better - scratch building one. I certainly feel that I have done so much scratch work on this model to 'fix it' that I might as well as well as started from scratch from the beginning. What a shame - I was so looking forward to making this truck too. :(
I do like to research - sometimes I think I like and spend more time researching projects than I do building and painting my models (...No wonder I still only have about a dozen models completed after all this time)!
Anyway - I'm posting up some random 'prep' for my big Mad Max: Fury Road project, so I hope I won't bore you with the various items of research and techniques that I will be collecting together. (I like to keep this stuff on the blog as it makes it easy for me to find them again when I need them.)
Anyhoo, first piece of research - making a car look rusty...Kinda a big part of the Mad Max 'look' will be a heavily corroded effect on the bodywork of my kit, but I found these videos to help me out...
First off, as a brilliant introduction to get you in the mood, here's a bit of eye-candy from the legendary Doctor Cranky...
And how do I make the rust? Here's a couple of ideas...
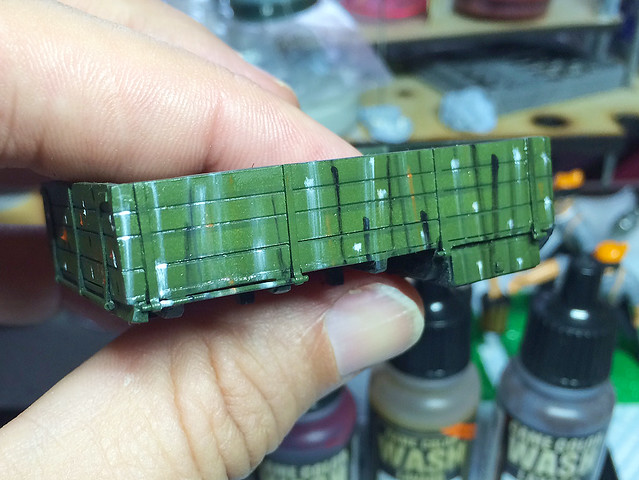
Well, nearing the final straight with my troublesome Yag. Today I did a lot of the weathering using some cheap artists oil paint. I stress cheap because I am finding the budget set I got from Rhyman office store (£3.99) perfectly adequate - they appear to be doing just what the tutorials on oil weathering models say they should be doing (no expensive Windsor & Newton oils for me).
The oil 'streaking' complete, a nicely 'aged' effect.
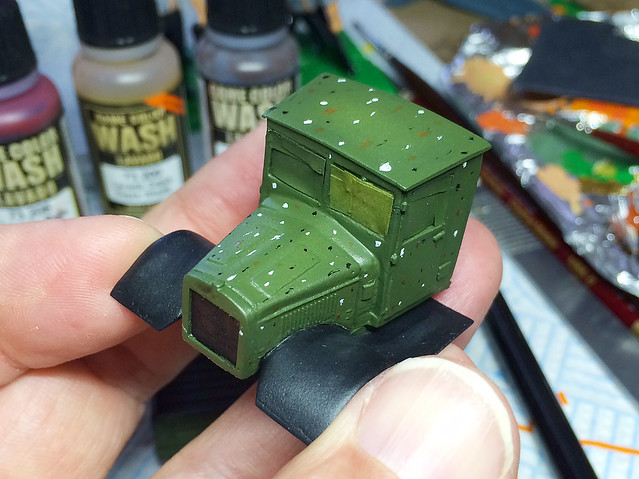
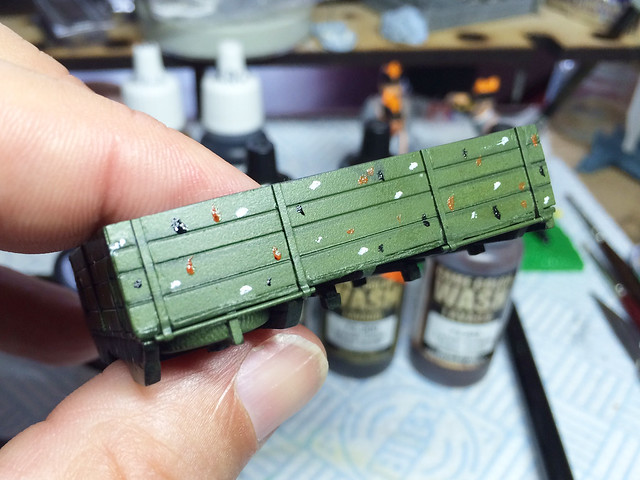
Although I describe the process that I am doing as 'weathering' I think it should be more correctly called 'steaking'. The kind of effects you are looking for are streaks of muck, dust and oil running down vertical surfaces and smeared across horizontal ones. Today I am using a mix of three different colours and am applying them in a random pattern across the various parts before beginning the actual smearing...
I use black for an aged or dirty patches, mid-brown for dust and oil smears and white for bleached patches (not very sophisticated I admit, but I will save the more complex subtleties for when I am a more advanced modeller).
One of the interesting things about oils is that they remain 'active' for a very long time (remember that and try to avoid touching or brushing your model accidentally until the oils have dried or have been sealed). Therefore I have developed a technique of dabbing on a pattern of oil dots all over the model before I start the real work. (When I say 'I' have developed a technique in this blog I merely mean I have just discovered it for myself - I am sure this sort of stuff is all 'old news' for experienced modellers).
What I have learned is that you need to lay down a satin of gloss varnish base coat and you do not need to use a brush loaded with too much thinners in order to streak your oils. The varnish - of course - protects the paintwork you have already done and also allows the oils to slide and smear across the surface of the model.
The slightly damp brush is critical to get the right effect - too wet and you risk washing away your oils completely (and then you have to start again). It's a bit trial and error but honestly I have been surprised with just how little thinners I need to have on the bristles to do this job.
However, the best thing about this 'streaking' technique is that you can play with it - it doesn't matter if you don't get it right the first time, just wipe it off and try again!
You can move the oil about, blend it and go back a bit later and change your mind and fix anything you don't like (because - remember - the oils stay wet). So it's a very forgiving technique - great for novices like myself.
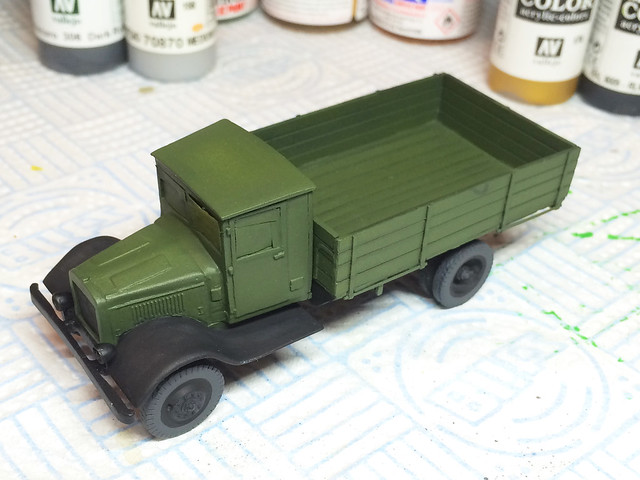
I finished off todays work by applying some pin-washing using AK's Enamel wash. This in itself added an extra touch of grim as well as the definition to the shadow areas and panel lines.
Amazing how a change of camera can effect the colour. My nice new Canon 700D gives a truer representation of Vallejo's 'Russian Green' than does the over-saturated green that the other - iPhone - snaps do on this page.
Next: On to the chipping, highlighting and mud - the last effects I will add to this model (hoorah)!
This is sort of a 'trailer' post for my next project. It's an exciting one as it's the first 'club project' I have ever undertaken and has a proper theme, deadline and set scale!
I'm not going to give away much before I do the first real project post BUT I just wanted you to be able to join in my worried shock at the immensity of this new model...
...Oh blimey! Kitnoob goes big, 1/24 scale big!
This model just (only just) fits onto my laptop work-tray! And, the wheels are taller than most of the 1/72 vehicles I have made so far!
Any guesses what the theme is? (Clue...Some of the guys from the Hull Scale Model Club recently went to the cinema!)
...This all seemed like such a fun idea when we talked about it - now I see the actual size of a 1/24 scale car I'm getting cold feet!
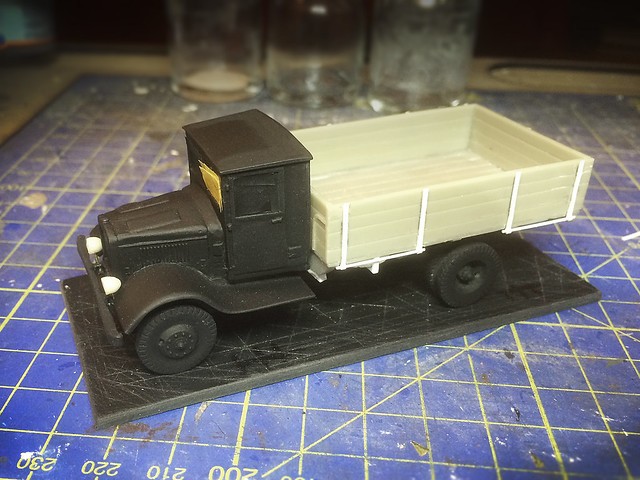
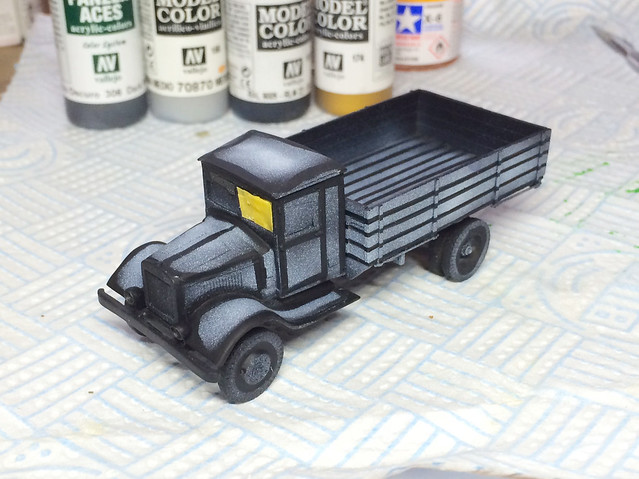
I hate Zebrano. That's what I've learnt from making this short run resin kit of the WW2 era Soviet heavy truck in 1/72. In fact this project was a gnat's hair from being a 'tactical withdrawal'!
This is where I left off my Zebrano nemesis! It took a long time and a great amount of modelling to get this kit to this state (where things actually looked like they fitted)!
However, having had a bit of time away - a 'cool down period' if you will - I now felt ready to dive back in and see if I could finish off this model without - hopefully - any more problems.
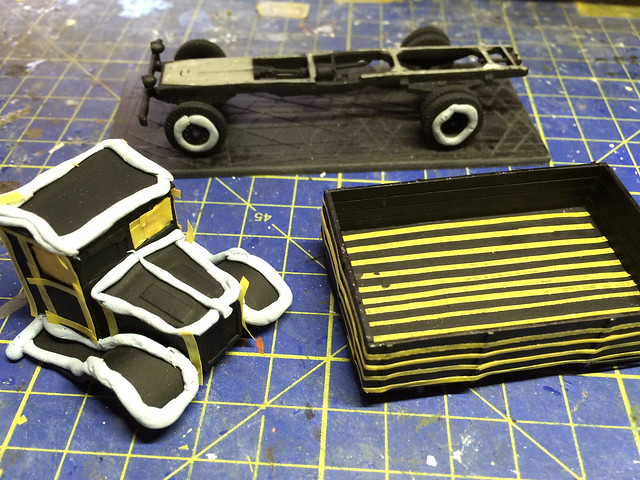
I decided - fool that I am - to experiment with some rudimentary 'pre-shading', nothing complex - but just a simple and elementary bit of preliminary highlighting before I apply the base coat of Russian Green. So I did some very rough and ready masking (as my beginner's airbrush is not fine enough to do pre-shading freehand at this scale)...
I protected the areas that I wanted to retain the flat black undercoat and left exposed those areas I wanted to treat with some light touches of matt white. The idea is that once the green is sprayed on over the top there should be some variation in the tone of the green that is intended to indicate a gradient of tones between the centre and edges of the vehicle's panels...
A bit sharper edged than I had intended, but I am hoping it should become more subtle after the top coat of green is applied. We shall see...
Well, things didn't go exactly to plan. Once again I have found that my attempts to pre-shade in 1/72 have been disappointing. The effect is so subtle as to be almost not worth the bother - I could have created variations in tone on the panels just as well and easier by 'post-shading' using powders and washes (or if I bought a better quality precision air-brush that would do as well).
I am beginning to come to the conclusion that pre-shading suites larger scale models with expansive flat panels. At least, it suits me to post-shade rather than pre-shade. Still if you don't try these things you don't know.
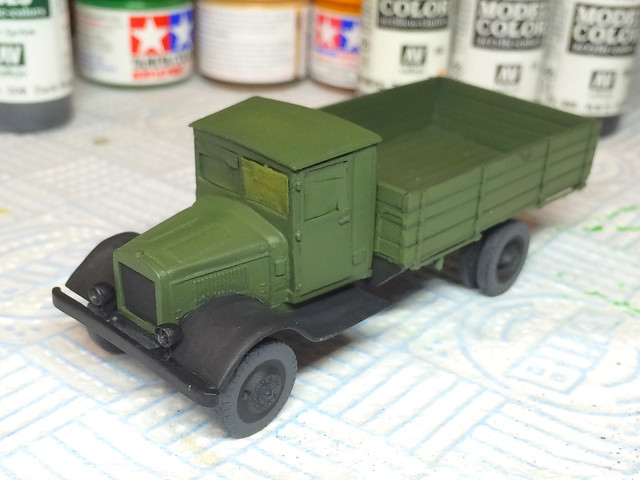
The one positive is that the Vallejo Russian Green is a lovely colour. It's very deep and rich. Unfortunately now the base colours are one you can see some of the flaws in Zebrano's design of this model - there are a lot of rough lines and edges.
Next: Satin varnish coat followed by some streaking and pin-washing.