Yesterday I discussed what would be my first re-starter assignment - my Armourfast M4, which is mainly a painting job - and today I'm going to reacquaint myself with the other models I have chosen to get me going in the hobby again. These will be a pair of Hunor 1/72 resin 1939 V8 Ford trucks...
Now these models must have been the very last thing that I was working on before I stopped model making in 2018. I didn't even stop construction at a obvious place (unusual for me) and I seem to have has some sort of 'cunning plan' in mind...But goodness knows what that was!
I checked back on my blog - thank goodness for my blog - and it seems like these models turned out to be a bit of a challenge (I don't think I have had a resin model yet that hasn't been). You can check out 'the story so far' by following this link: Kitnoob's Finnish m39 Ford V8 Truck Saga.
But here's just one little pic which will give you an idea of how painful this build was...
😣
...But, of course, it's me we are talking about so I was obviously loving this! 😂
This appears to be the last photo I took, but it gives a bit of a false impression about how far along I was as this was just a dry fitting test. There were still several issues I still had to resolve before putting the major parts together...
The good thing about this particular job is that it will definitely dust the cobwebs off my construction skills. That's if I can find all my modelling tools, which are mostly still under some of the junk in my attic dumping ground!
As I mentioned, I am currently rummaging through the junk pile which is my old attic work area. It seems that every time I remove a layer of crap I find something new or something I had forgotten about underneath... I daren't even show you a photo, it's too embarrassing!
Now, I thought I had found all of my old projects and I carefully placed them in a separate box and had picked out a couple that seemed like good ones that would restart my model making with. But, no...
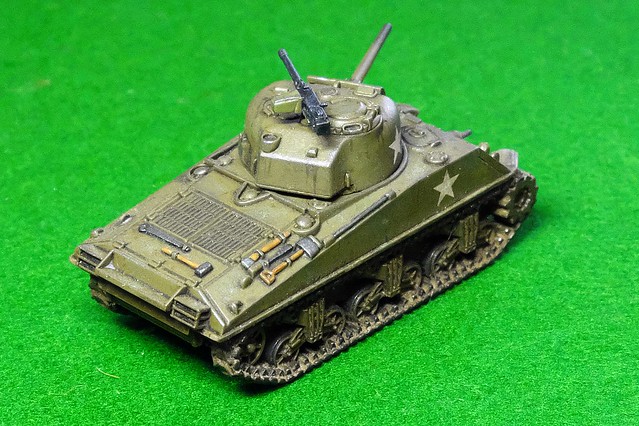
One more layer of random 'stuff' and I came across yet another oh-so-nearly completed model that had completely forgotten I had. And this one is another - like my Hurricane model - that is ready to have the final weathering phase to be applied...
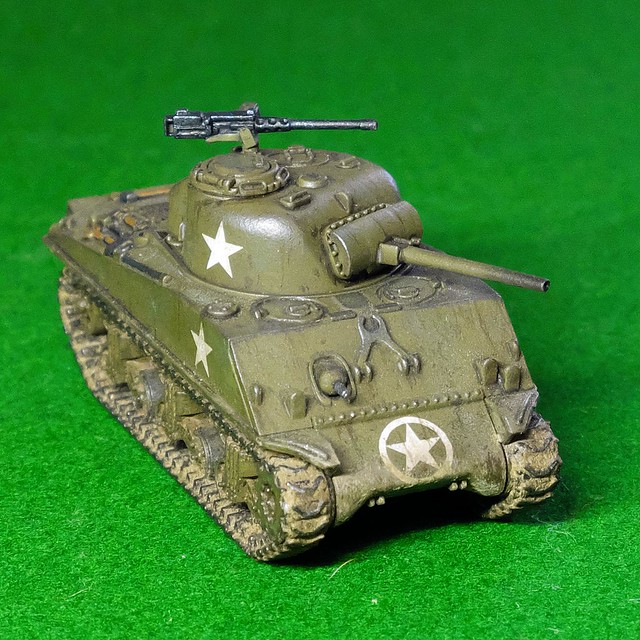
Like my Hurricane model., this 1/72 M4 Sherman model (by Armourfast) was a 'fun' project totally unrelated to any of my main projects. So it's ideal to use as a (re-) starter activity, because I would hate to make a mess of one of the models I was making for, for example, my Finnish Army project where each model is a bit of a custom job with a lot of work put into them.
Also, I enjoy the weathering bit, it's the part of the modelling process where you most get to get creative and add your own personal 'style' (I think).
...So, quick change of plan. This Sherman replaces the Hurricane as my re-entry into the hobby.
Despite this model being, basically, a pretty simple Armourfast 'easy build' war-game kit I did do quite a bit of scratch upgrading to it (just to prove that you could make a bog-standard gaming model look a bit more realistic)...
To help get me re-started in making and painting scale models I have managed to find a very useful YouTube tutorial to guide me... (A bit of much needed 'hand-holding' as I'm a bit nervous!)
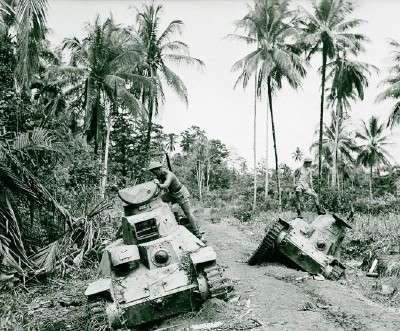
With progress being made on the tank models for my planned Pacific Island scenario for my 15mm TANKS! game, it's time to start putting together some of the terrain. (I'm working on some sketches of what the 3" x 3" game mat will look like, with the Japanese defending.)
I am thinking along the lines of including three jungle huts and two Japanese anti-tank bunkers and a collection of scatter foliage to break up the line of sight. I didn't know where to start with the island dwellings, so I relented and spent some money on a pre-build which I intend to use as a template for a couple of scratch built houses/huts.
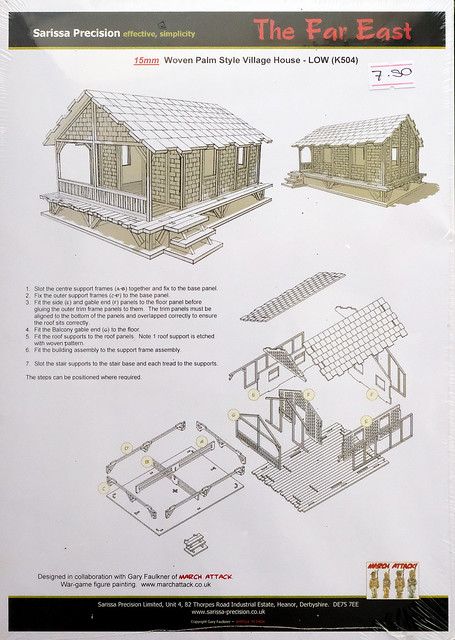
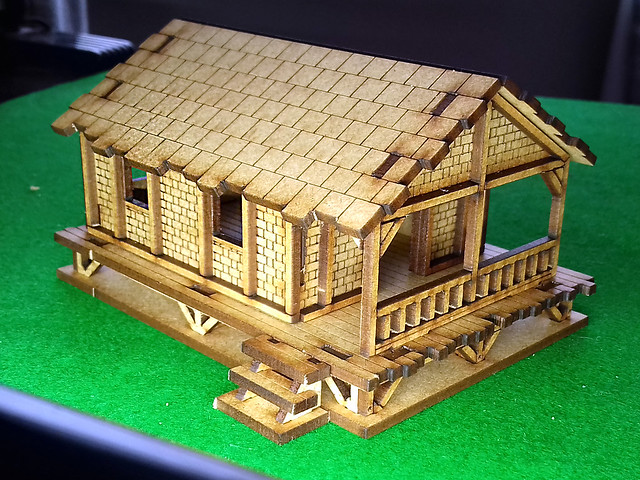
The pre-built model I bought is an Arcane Scenery and Models laser cut MDF Far East or Jungle Small House (£7.50)...
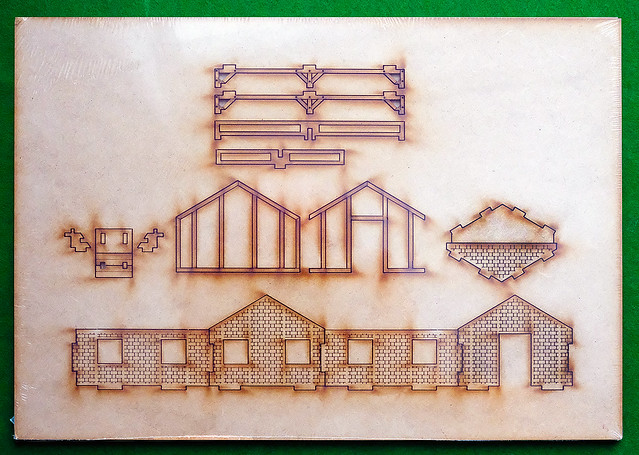
The model comes on two A4 sized 2mm MDF sheets and is quite easy to knockout.
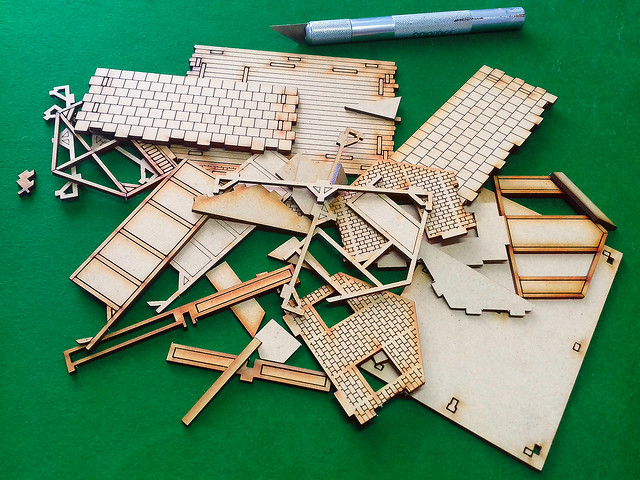
Once you knockout all the parts you end up with a big MDF jigsaw puzzle! But the instructions are good and it's pretty obvious where everything goes...
And you quickly pop the model together. The fit and design is very good and PVA glue is only really needed for the external framework (but you can glue the whole thing together if you prefer).
Lasercut MDF models have a tendency to be a little blocky, but this one isn't too bad (the roof is perhaps my only niggle) and - in this case - the bare MDF colour looks exactly right. You could get away without painting this jungle house.
It will be interesting to see if I can replicate this design.
Japanese Bunkers
Galeforce 9 games have some stats for the use of bunkers in one of their Normandy operation expansions (which are a free download from their website), but these stats are for a concrete bunker armed with the formidable German 75mm Pak40. The stats would have to be tweaked for a Japanese earth and log bunker and I will have to figure out what gun would likely be emplaced in them (perhaps the excellent Type 1 47 mm Anti-Tank Gun).
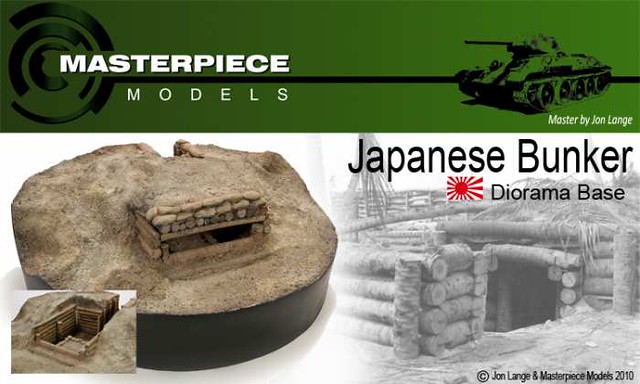
As to the design of the bunkers, I've been looking around for a design I can replicate and fount this one...
This is the Masterpiece 1/35 model, but it will make a good template for a scratch built 1/100 version.
Way Down Deep in the Middle of the Jungle...
Finally, there is the jungle foliage itself and luckily The TerrainTutor has some excellent 28mm ideas for making wargame jungle 'scatter' that I should be able to scale down for 15mm...
Before moving on, I decided that I needed to do something about the kits exceedingly flimsy 37mm gun barrel. There's no doubt in my mind that this would quickly break off while being handled during a game so I am replacing the plastic barrel with a piece of brass rod of roughly the same diameter...
The Painting Process
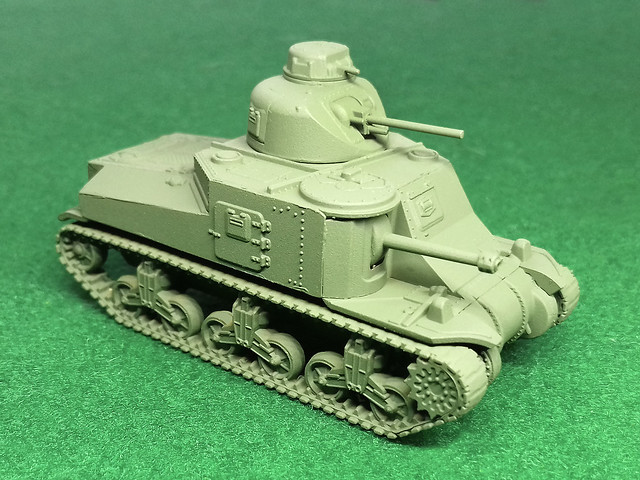
Onto my usual painting regime now; priming, base coating, (decaling), wash, staining/streaking, pin-wash outlining and then varnishing. Priming will be done using Humbrol's [86] Light Olive Matt - Acrylic Spray Paint, this should give a slightly faded US Olive Drab suitable for the Pacific theatre.
Amusing note: You'll probably be thinking 'that 37mm looks thicker than it did in the last picture'. And you'd be right, I broke off my first attempt at 'improving' the barrel! So, I had to have another go and this time I drilled right into the turret and superglued in a thicker brass rod. LOL
Decal Scheme
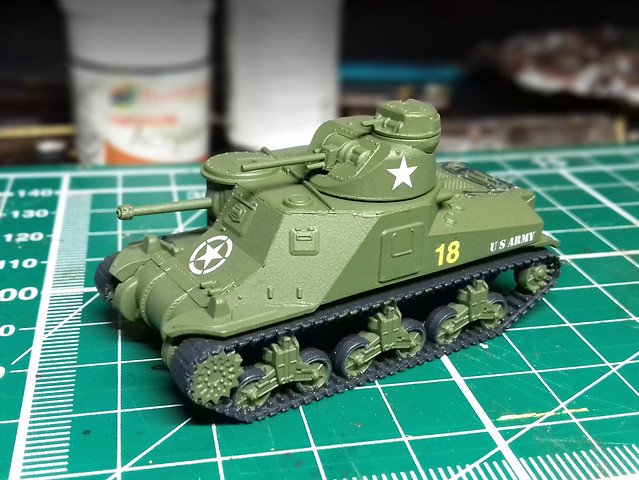
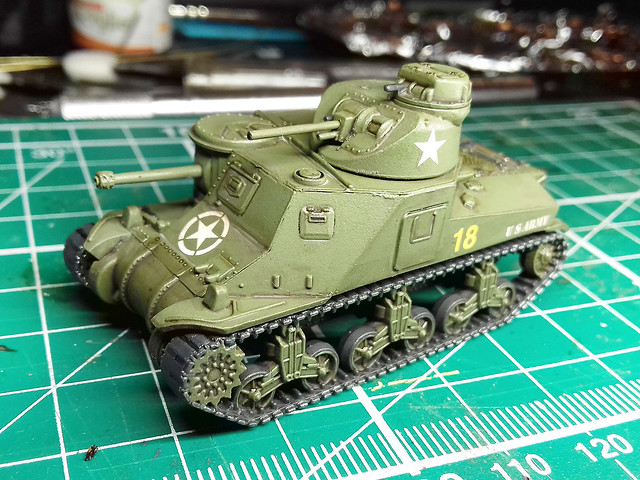
Because this model is for a game and will be used in a few different scenarios representing completely different WW2 combat theatres, I am using a little artistic licence with the decals in order to create a generic representation of 'a' M3 Lee tank in US Army service. The scheme is fictional...
Wash, Weathering & Mud
I'm going to try and go easy with the weathering and particularly with the amount of mud I will be applying this time. I was quite pleased with Tamiya's Weathering Sticks - which I used on my last 1/100 model - as I like this softer, more blendable medium. (Apparently, Tamiya's Sticks are just normal weathering powder pigments but mixed with a sort of cream or oil preparation. This makes them into something akin to cosmetic creams, like cheek blusher crème...Not that I'm an expert on lady's make-up you understand!)
But, before I start the weathering, I'll be applying what has become my 'usual' pre-weathering preparation of a wash of Citadel's Agrax Earthshade...
I'd like to try and go for dusty rather than overly muddy this time. I've never really mastered realistic dust and I'm thinking that I might play with eyeshadow powders and maybe some pigments (but added 'dry' onto the surface)...
The eyeshadow powder is a little bit granular compared to Tamiya's Master Weathering kit and their Weathering Sticks. I prefer the cream mediums a little better as the blend really well, creating a nice smooth - non-gritty - pigment film over the surface.
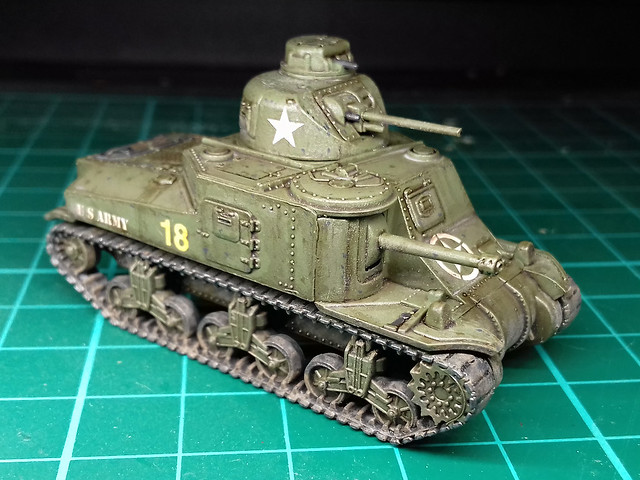
I added a little pin-washing effect with more Agrax Earthshade carefully painted into the panel lines and then finished off with some very fine line work using black ink for deep lines and the edges of doors and armoured windows and hatches.
And that's that for now, the tracks need some more attention before I finish this model off with a coat of matt varnish.
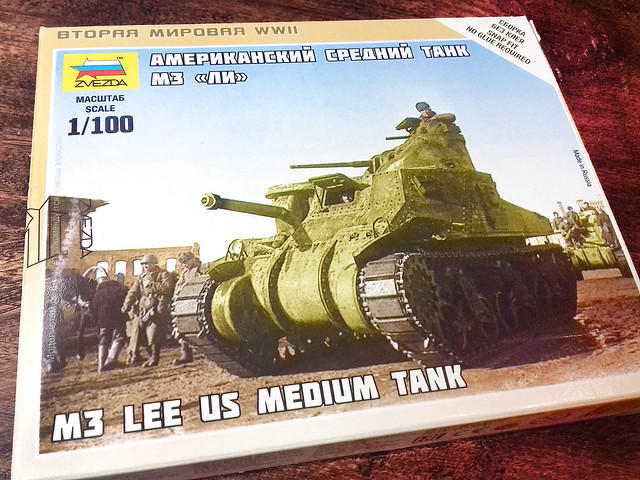
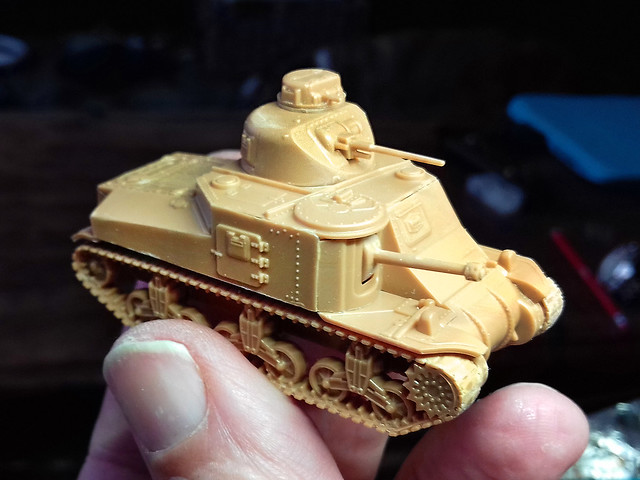
This is something new, I'm getting into doing very short and quick weekend projects courtesy of Zvezda's little 1/100 tank kits. This week I'm adding to the M3 Stuart that I already made for a WW2 Pacific scenario I have in mind with a US M3 Lee tank...
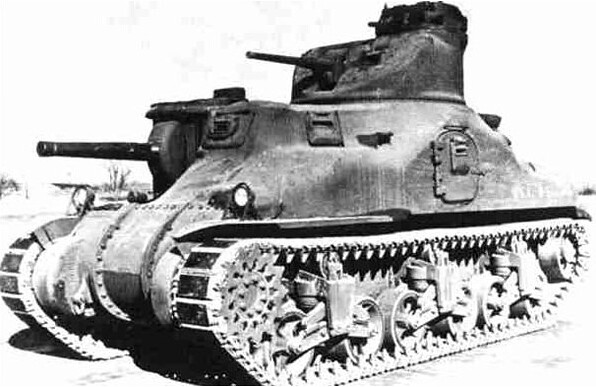
The M3 Lee is an interesting - if not terribly exciting - early way American tank. It was the predecessor to the legendary M4 Sherman and the US Army's first serious contender - if not quite a match - for contemporary German tanks. The M3 was the tank in which the US Army learned about 'modern' armoured warfare and - perhaps more importantly - first introduced a 75mm gun to the Allies armoury. As a lend-lease tank, the M3 added some much-needed firepower to the British in North Africa.
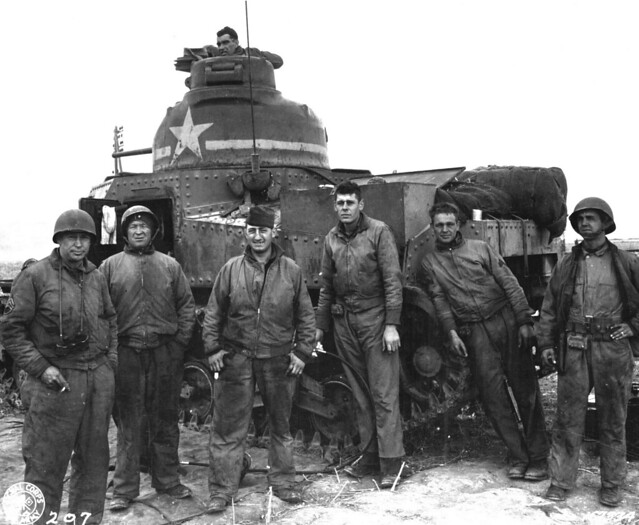
The Americans early war contribution - in North Africa and the Pacific - is often overlooked somewhat. This was a real trial by fire for them and they had a lot of catching up to do, with their already out-moded M3 they learned the hard way. Picture: Crew of M3 tank at Souk el Arba, Tunisia, November 23, 1942. Wikipedia.
The Zvezda Kit
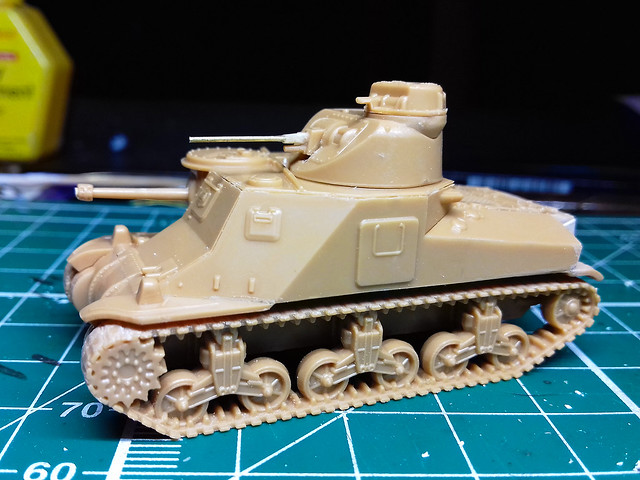
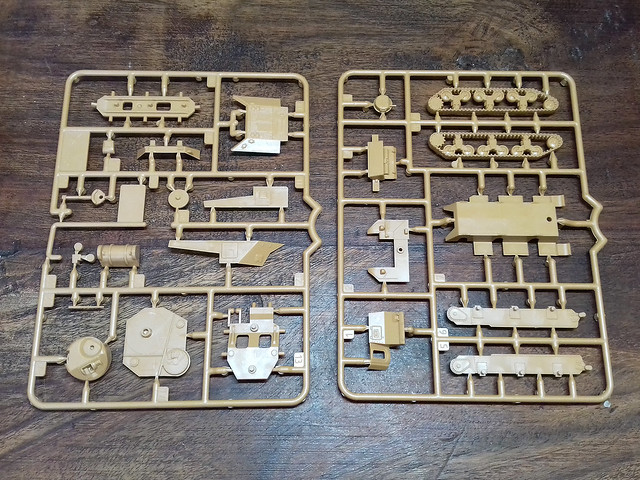
Despite being a diddy little kit Zvezda's Lee is a little complicated with quite a lot of parts compared to other tanks in its 1/100 range. This has as much to do with their insistence that their kits be 'snap together' as it is to do with the M3's unusual design.
Other companies - like PSC and Battlefront, for example - minimise the number of component parts their models require because they rely on the use of glue to stick the parts together. And even Zvezda, themselves, manage to come up with very part-efficient 1/100 models when the original tank design is conducive to low numbers of parts (their KV-1 kit has only 6 parts).
Anyway, the M3 is a complex design, what with its dual turrets featuring a Barbette-style hull-mounted 75mm gun....
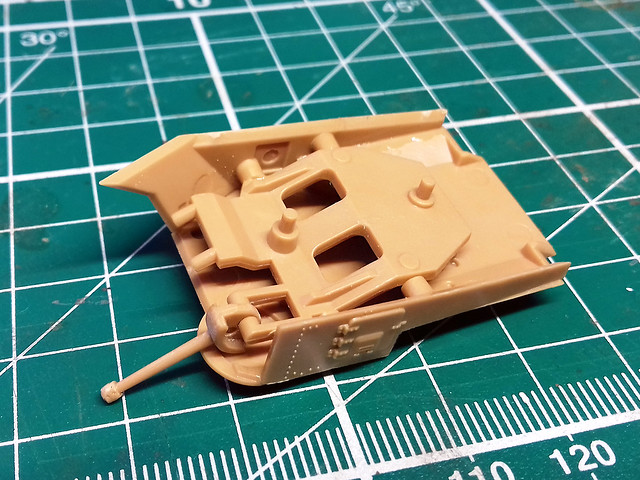
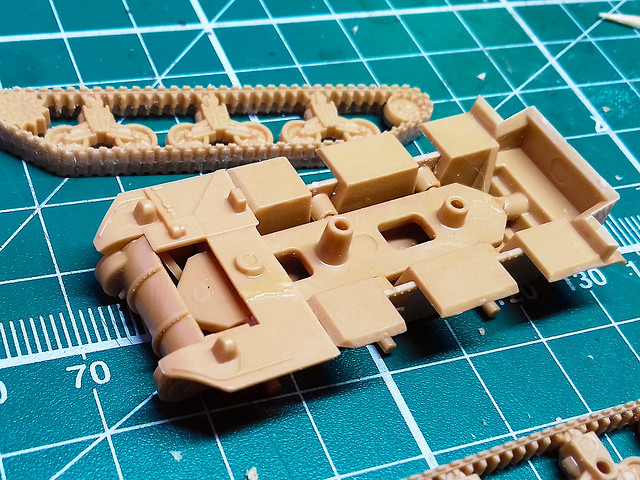
The above picture illustrates the point. This is just the upper hull assembly, holding the 75mm gun and when finished it will consist of no less than 8 parts! The lower hull was just as convoluted...
It was all a bit too complex for my liking, though I understand that to make it 'snap together' these extra parts were required.
Anyway, much fiddling about later...
Not a bad looking little model.
Thoughts about Construction & Quality The construction was a faff and needed a bit of pressure in places to ensure parts fitted together nicely. I had to hold some parts together until the glue set so that the seams didn't have any gaps.
But, overall I was happy with the quality. As usual with Zvezda, the moulding was crisp and there was a reasonable amount of surface detail, though - of course - the level of detail was simplified as this is a wargaming model.
The one noticeable issue is that I feel is worth mentioning is the fragility of the secondary gun barrels. The 37mm - top turret - is very thin and wouldn't take much of a knock to break it (in fact, you have to be careful cutting it off the sprue). Zvezda seem to scale their tank guns accurately, while other 1/100 wargame model manufacturers tend to 'over-scale' their guns to make them a bit more durable.
As usual, the tracks are simplified without much of a detailed tread pattern (the M3 tracks of the time were the pretty simple steel links with rectangular rubber track pads - the same ones used by the early Shermans).
Overall, I'm quite happy with the model - delicate parts aside - it captures nicely this early US tank and allows you to play early war Pacific, Far East and North African scenario and also Lees were supplied to the Soviets lend-lease, though they had a far from favourable view of this antiquated design.
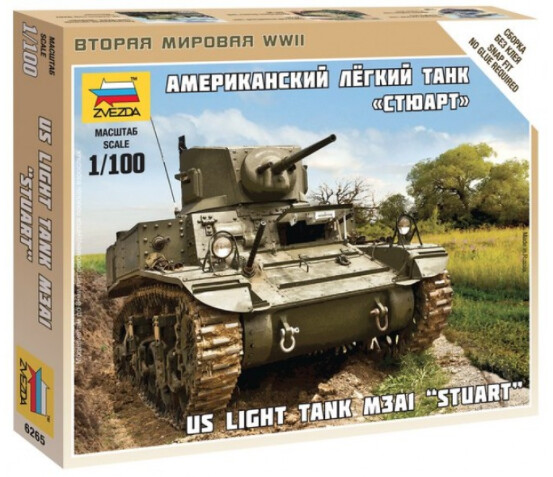
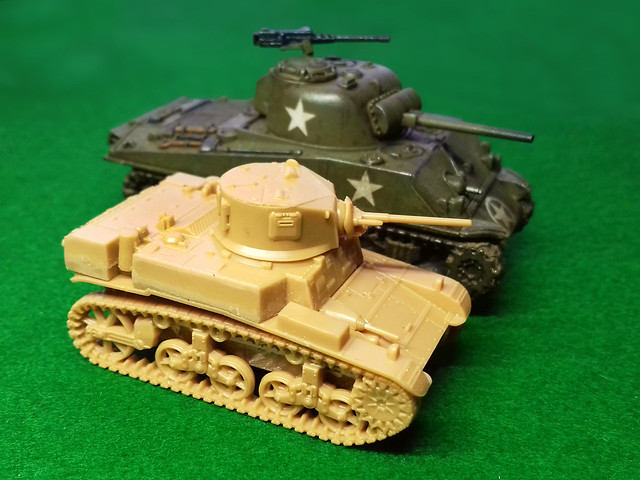
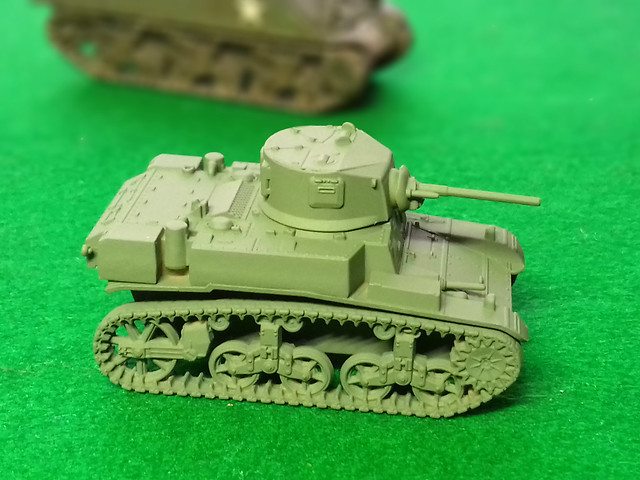
Damn these cheap 1/100 kits, they are so ripe for an impulse purchase. This diddy Stuart was one of two Zvezda 'Art of Tactic' (simplified wargame quality kits) that I just couldn't resist buying while browsing in my local model shop.
This model is so small and simple that it only consists of a single sprue of (10) parts. The instrustions for assembly are included on the rear of the box...
I would give you two tips if you are considering buying this kit; be very careful with the guns as they are quite thin and fragile and also install the rear hull plate before you install the upper hull!
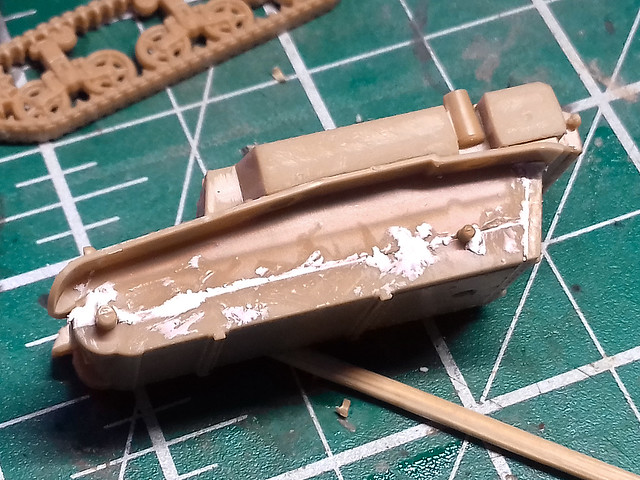
Everything goes together quite well, typically of Zvezda they slightly overcomplicate the assembly because they have opted to make their kit 'snap together'. But I chose to glue mine together and I did use some putty to fill some gaps in the lower hull's seam...
In any case, this was not a big issue and I till had the kit assembled lickity-split. I couldn't resist posing it next to one of my newly completed 1/100 Shermans just to give you some impression of the size of the Stuart...
As you can see, the Stuart comes in sand yellow plastic and the great temptation then is to paint the model up as a Britsh/Commonwealth 'Honey' in a North African scheme. With Gale Force 9 about to issue it's North African campaign tank models this would be the fashionable thing to do, I suppose.
But, I fancied something a little different and looked to the Pacific Theatre for inspiration. The early to mid campaigns of the US Army in the Pacific are often overlooked and some tend to forget that there was tank action between the Americans and the Japanese and I'll love to try out a game based these actions. (Battlefront does not do 15mm Japanese tanks yet, but models are available in this scale from other suppliers.)
Here's a rather useful video 'walk around' of an M3A1 Stuart with some very nice close-up detail...
While technically obsolete in the European theatre, the little Stuart could still give Japanese tanks a run for their money. and I suspect it's diminutive size was something of a plus point in jungle warfare. So, I'd like to paint up a - fictitious - US Army Stuart in an ad-hoc jungle scheme I found online, but let's get the priming done first...
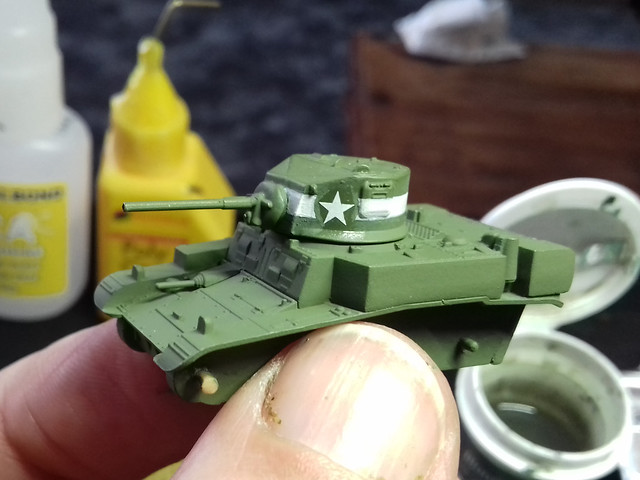
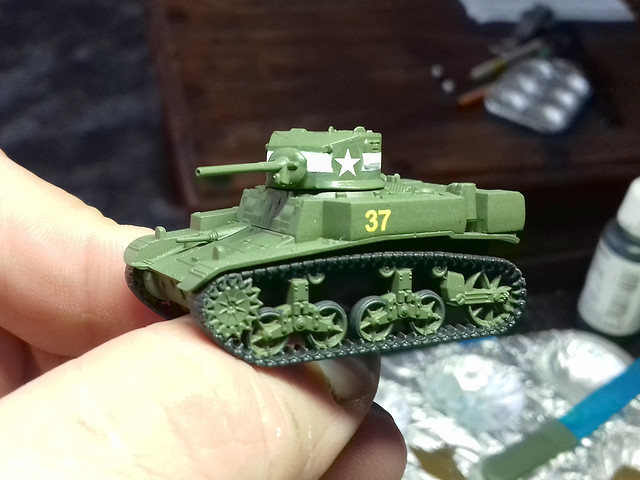
I went with Humbrol's Light Olive [86] to get that faded OD look and then added a US star decals and hand painted the white band around the turret. Not my best painting but this doesn't matter so much (for reasons that will become clear later)...
Incidentally, I tried out a different technique for the preparation before applying the decals. Normally, I just spray the whole model with Humbrol Gloss, but this time I just painted on some gloss only where the star decals would be positioned. Less spraying can only be a good thing.
After all the decals were down I did give the model a light spray of satin coat, though, to seal the decals and ready the model for the next stage of painting...
The next job is to paint some of the fine detail painted - like the tools and MGs, etc - and then to apply and overall wash of Citadels Agrax Earthshade. This serves to 'dirty up' the pristine paintwork and settle into the panel lines to give the surface detail some extra definition.
And finally, for this phase of the basic painting, I will be applying my 'staining & pin-washing' process, though I will be trying out eye-shodow powders again as the worked so well wih my previous 1/100 Sherman models...
xxxxxx
The Camo Pattern....
Now to the camouflage paint scheme and I maybe taking on something that's a bit too niche, so I may be biting off more than I can chew (particularly in this scale).
You may have noticed that I have applied the decals before I do the camo scheme in this instance, which seem wrong. But the particular scheme I am after is a little different...
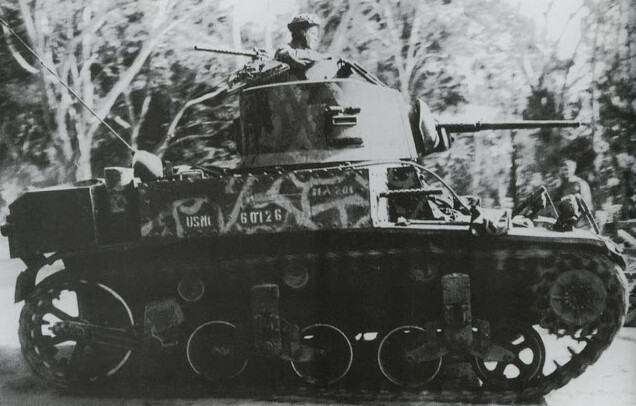
In the above - very rare - photo a USMC M3 Stuart has been given an improvisatory field 'paint job'. I've read several discussions about what colour these 'jungle stripes' might be, some people say white and some say a light tan (indeed there are some documented examples of US Pacific tank schemes in white stripes, I believe this unusual choice *may* be to do with bright sunlight shining through gaps in the jungle canopy).
However, if you look at the turret - where the ad hoc stripes have been painted over the US star - you can plainly determine that the colour cannot be white. This leaves two options, that it is light tan (or khaki) or it may actually be MUD used as an expedient!
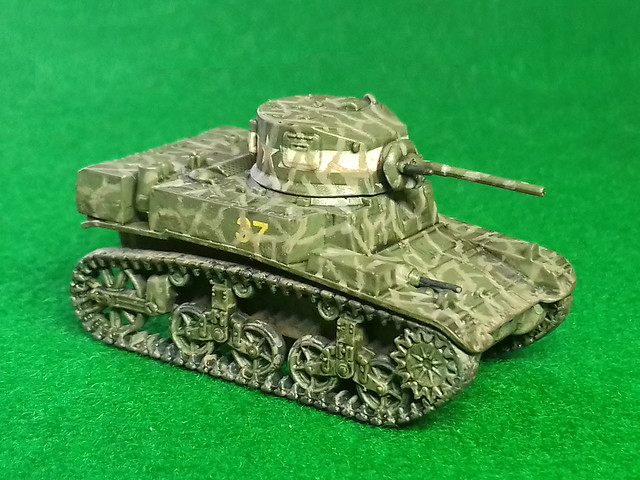
Were the above photo in colour, I *believe* this is how it would look...
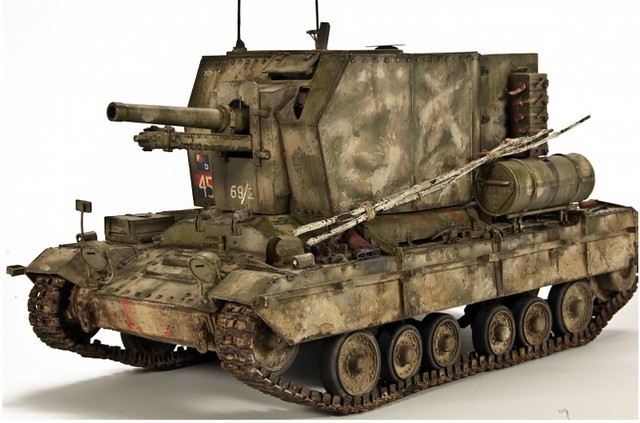
This model of a British Bishop SPG in Italy - by Rick Lawler - is an example of a field application of mud as a camouflage 'paint'.
I know, it's all guesswork but who's to say that this could not have been a field expedient used by the Americans as well? So I'm going to pretend it was!
NOW...This 'paint scheme' has the potential to turn out to be a horrible mess, but I would like to try it and - to be honest - it's best if I do on one of these little 1/100 models as it won't be a major disaster if things go wrong (it won't be the first time I have used these cheap little models as 'testers'). So, (deep breath) let's have a go...
Final Thoughts... For me, this was a very quick project, beginning to end in one post (that's unheard of)! But, actually, I could actually tinker a bit more with this if I wanted to.
The mud camo scheme turned out not too bad, but the two colours of 'mud' I used were a bit too much alike (I was trying to go for a lighter dried mud colour and a darked wet mud colour). But, having said that at tabletop distance it doesn't look too bad.
Once again, I have enjoyed making one of these little 1/100 models. Though, so far, I have made them OOB and not added any embellishments or improvements to the simplified detail. But, there again, this is probably somewhat counter to thier use as gaming pieces.
Weathering Effects...
Right, onto the creative part. Having laid down my base colours I turn to applying weathering effects, like staining, dirt and wear.
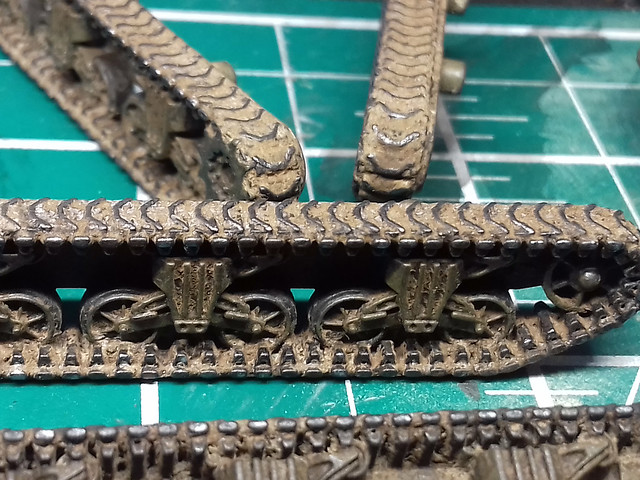
And here I came across another example of how effects that worked well for me in 1/72 scale didn't quite work out for me in 1/100 scale. I began with the tracks and set to work with my tried and tested powder pigment 'mud' mixture, but what would have been a light coat of mud on the larger scale turned out to be a thick clart (a Scottish word for a gooey mess) of mud on 1/100 tracks...
These are far muddier than I wanted but are - I suppose - realistic if the tanks had been driving through ploughed fields. It wasn't the effect I was actually after but will do, I'm happy to leave it and just modify my application for the smaller scale on future models. I suppose nobody will know that I didn't mean them to be this muddy if I don't tell them!
Staining the Sherman Hulls & Turrets
Finding that my usual 1/72 scale painting techniques were, perhaps, a little heavy handed for the smaller scale I decided to try something different for my usual 'staining' stage.
My staining and bleaching method is normally based on using oil paint which I dab on in spots then smear into streaks using thinners. I decided that this might be a little too invasive and harder to rectify if I didn't like the end result, so I looked for a 'softer' approach. I looked through my paint effects box and picked out the 'eyeshadow' set!
I've used these on a smaller scale on my previous models, as a secondary powder effect, but in this case, I will be trying them out as the primary weathering medium. These, in combination with Citadel's washes - which I am using more and more - gave me a rather more controllable (powders can be easy removed) staining technique for smaller models...
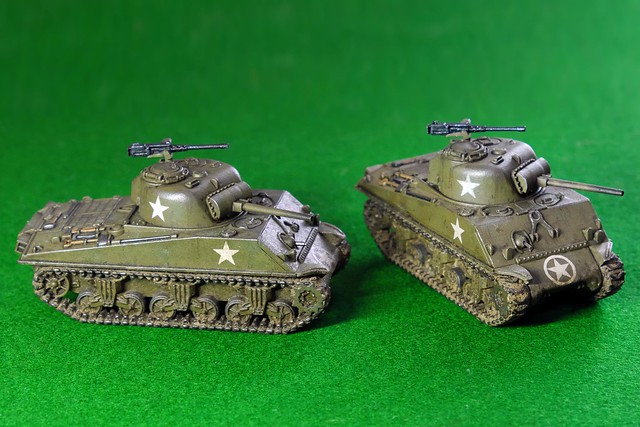
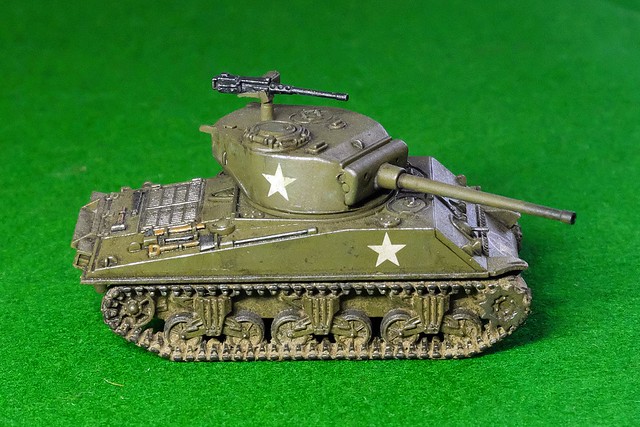
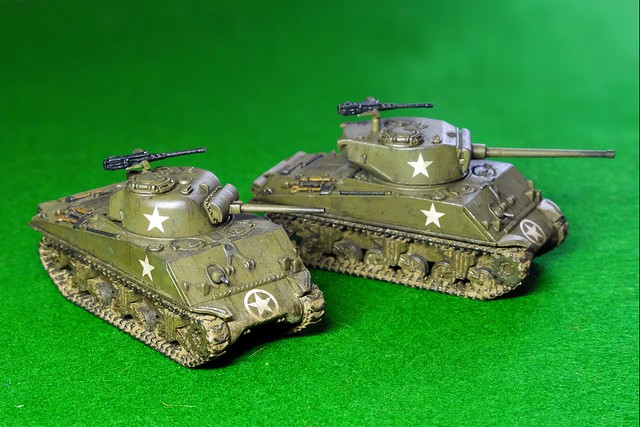
I was going for a dirty and oily, war-weary Sherman and I think I achieved this. I was quite please how well the eyeshadow effects went, so I will probably try this out on my 1/72 models now.
Conclusion
I'm really enjoying these little 1/100 tank models. The detail will probably not satisfy the most pedantic modeller, but I find the simplification takes a lot of the pressure off and I can simply relax and enjoy the painting.
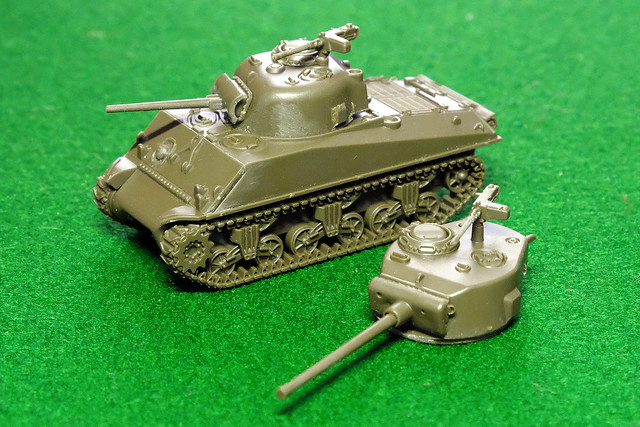
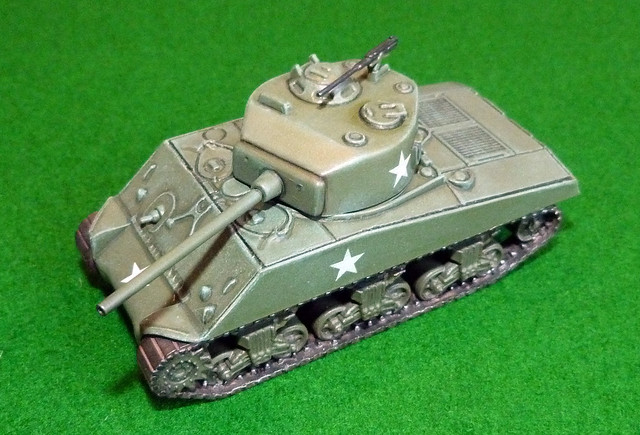
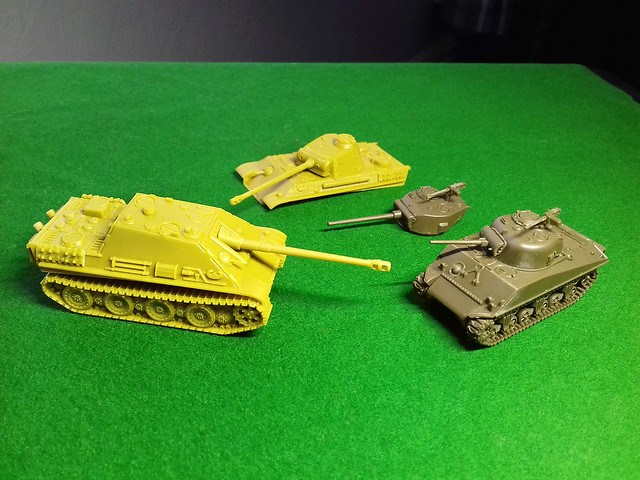
An additional benefit of these particular models is that they come with the option to swap out the turrets so I can have a 76mm gunned Sherman to 'play with' as well...
It'll be nice to get these on the gaming table as - as many wargamers point out - units always perform better when they are painted! :)
I'll be building up a few small 'armies' of tanks for the GF9 Tanks game, but my next priority to to get the 'bad guys' - the starter set Panther/Jagdpanther - painted!
Time to slap some paint on the little M4A3 Sherman models I got in the GF9 TANKS starter set. I'm not going to town with these, I pretty much want a generic vanilla US Army Sherman without all the bells and whistles (so no applique armour or hodge-podge of stowage).
This should be as simple and easy a modelling project as it gets and takes me right back to when I started modelling again as my first kit was a very unsophisticated 1/72 Armourfast M4A3...
It will be interesting to see how the little 15mm Shermans compare to the above attempt as - for simplicity of detail - both makes of model have a lot in common and are designed to do the same job, just in different scales.
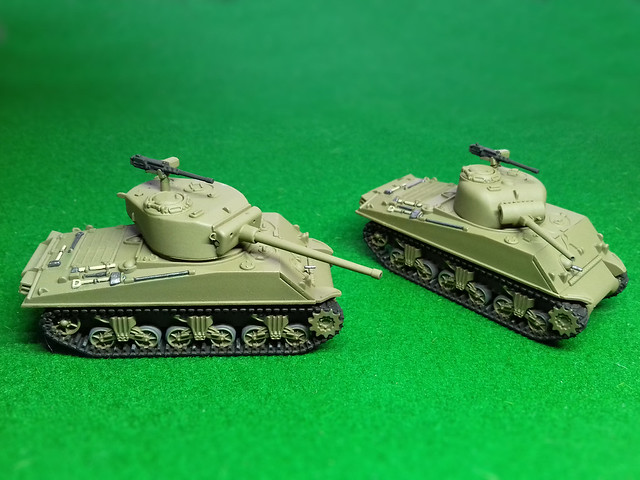
I primed my GF9 M4s (make by Battlefront, I believe) with Humbol Olive Drab acrylic spray - as I no longer have an airbrush, so it's back to basics. This is a lovely warm, slightly yellow tone, US OD, and as usual, the Humbrol paint goes on nice and smooth despite coming out a rattle can...
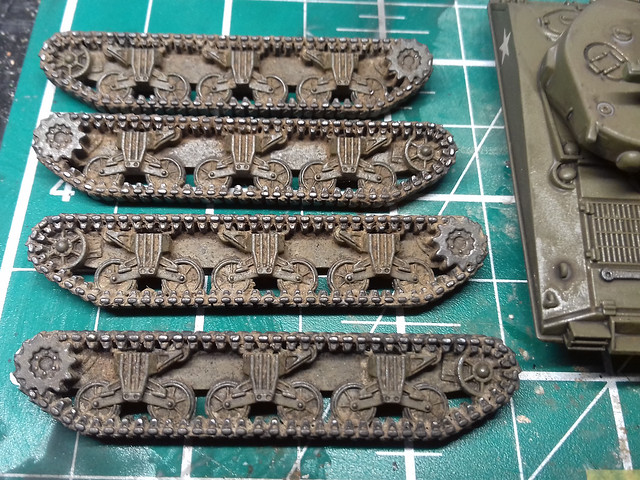
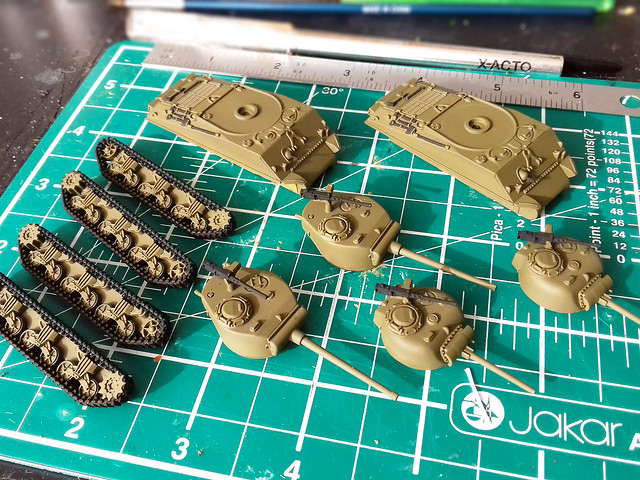
I chose to prime these models in their main sub-assembly groups, rather than a complete model. This is mainly so I can get at all the fiddly nooks and crannies in the track components. I masked off parts of the components that I knew I would later want to glue together with poly glue.
After priming I started to pick out all the black base coat areas and bits that I wanted an underlying coat of black (like the tools). I'm trying out a black base for the tracks, as Sherman's tracks are characterised by large black rubber pads over the steel links. We'll see how that goes (they will be finished off with a coat of mud anyway.)
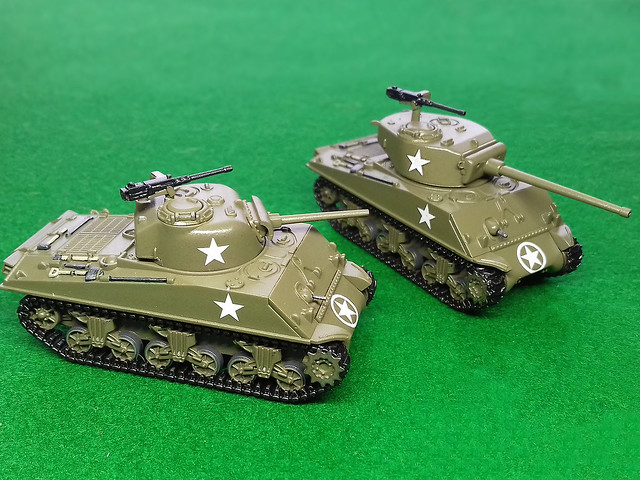
Once everything is base painted it's time for a quick coat of gloss and then the addition of the decals. The GF9 TANKS starter set does not include any decals, which is a wee bit annoying but I guess they are aiming the game at people who are maybe not so interested in modelling as gaming?
Luckily, I had plenty of spare US Army stars in my scraps box, the only downside is the set I have has no 'US ARMY' & vehicle registration number decals for the side (towards the rear). However, I had it in mind that I wanted these Shermans to be pretty generic/anonymous so I could use them as a basis for any Western Allied force I build (US Army, US Marines, French, Polish, British Commonwealth), so not having the 'US ARMY' lettering is a good thing...
A light squirt of gloss varnish over the decals to seal them and that's a job done. The gloss also is the preparatory coat for the next stage which is streaking and staining with oil paints. Next: The 'weathering' phase...We are getting there!
Magnetising tank models
I'm trying out something new, the addition of small magnets to my new 15mm tank models so I can swap out the various turrets (hopefully). On paper, it looks like a straightforward a job, but how many times have I said that on this blog!
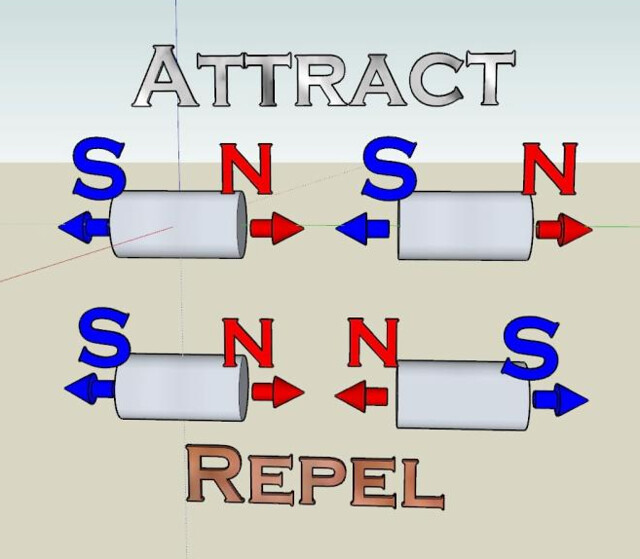
The key to proper magnet placement...Polarity.
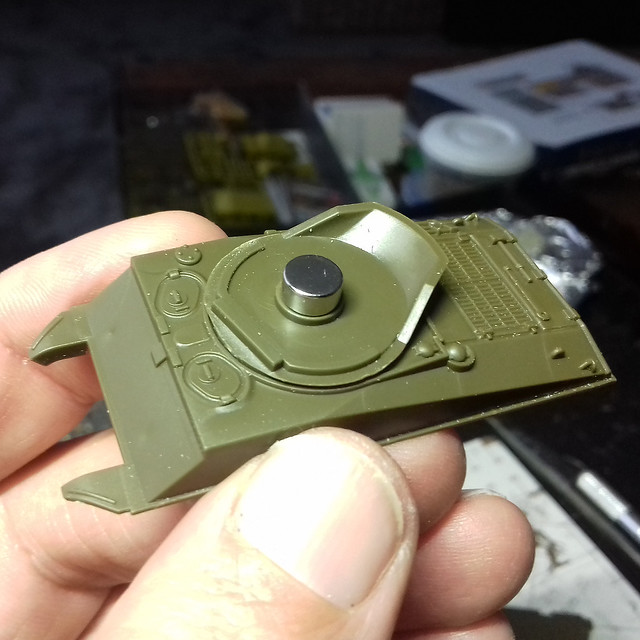
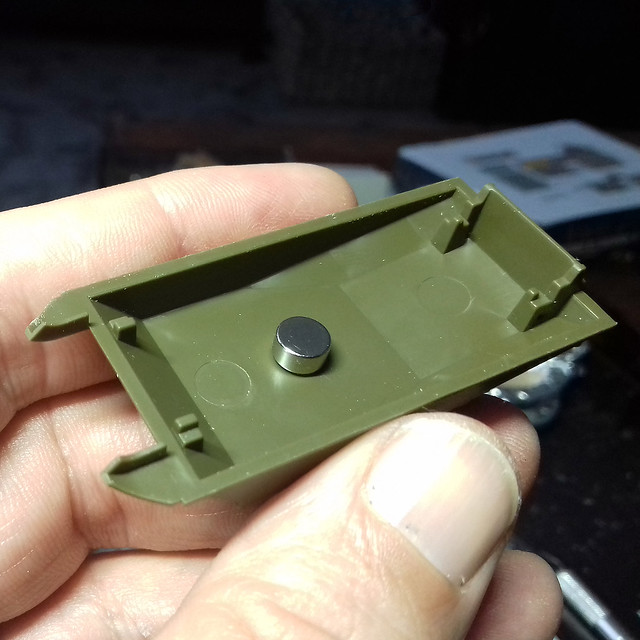
The first thing is to identify the polarity of the magnets so the two parts of the tank you are joining stick together as intended (easy enough). Then superglue the magnets - the correct way round, of course - to the inside of the turret and to the inside of the hull...
I'm using Vitalbond CA Medium super glue, this seems to work great with the metal magnets. I only mention this as I had been buying various makes of cheap DIY super glue from a household store and they've all been a bit rubbish. But this brand sticks rock solid.
GF9 Tanks - M4A3 Sherman, 75mm gun option.
GF9 Tanks - M4A3 Sherman, 76mm gun option.
And that's that really. It just works - I'm not sure why I thought it would be in any way difficult, except I wasn't sure how strong the mini-magnets might actually be and what effect on the magnetism the plastic between the magnets would have. You can tell I don't play with magnets much!
Notes on the construction of the GF9 Sherman kits
There were only about 11 components to make either version of the Sherman, so it wasn't worth me taking a load of pictures to illustrate the construction. Suffice to see it was very straight forward and very quick to do. There were no major problems, but it's worth mentioning that there does seem to be a lot of parts left over.
I'm not exactly clear on what the purpose of all the extra bits are BUT I *believe* there are parts on the sprue to make up the 105mm [M4A3(105)] gunned support Sherman. You would simply pop the appropriate gun mantlet and 105mm gun onto the 75mm Sherman turret.
There are also extra hatches, including open versions (but no commander figure), a .30 MG and some other random parts...I have a suspicion you might be able to construct an M4A3 'Jumbo' with some of these parts, but I am not sure.
As to quality, I'd say they are better than Armourfast but not quite as good as Plastic Soldier Company (to give you some reference point).
The Panther Hulls
OK, the Sherman's magnetisation was pretty simple, but what about attaching a complete upper tank hull using magnets? Well, let's see...
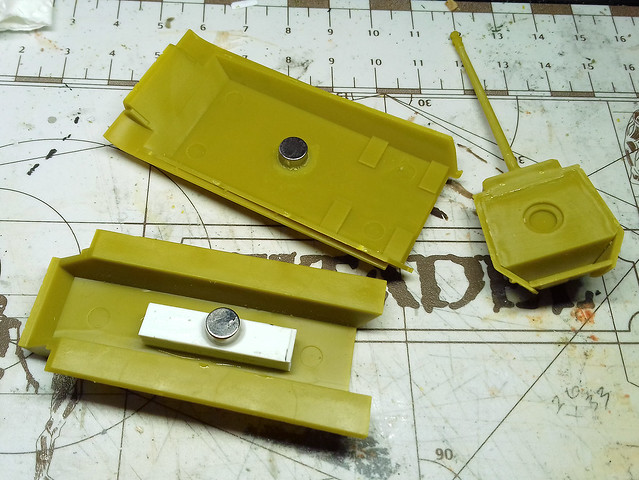
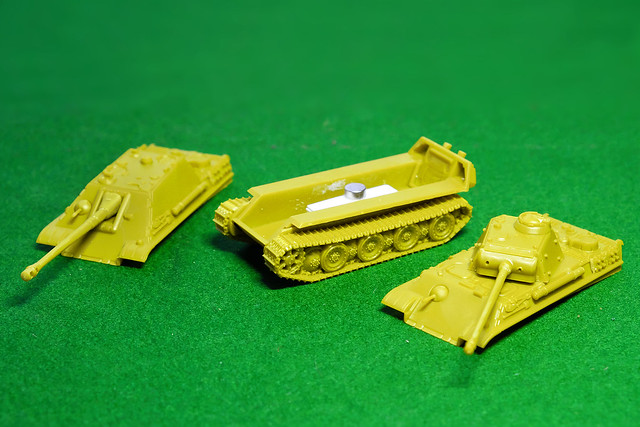
From left to right: The Jagdpanther hull, then the universal lower hull and finally the standard Panther hull.
The challenge here is the totally different shape of the normal Panther hull and the raised hull of the Jagdpanther. I'm thinking that the magnets may have to be mounted on raised blocks and with different length of dropped blocks for mounting the magnets on the upper hulls?
I'll start with the standard Panther...
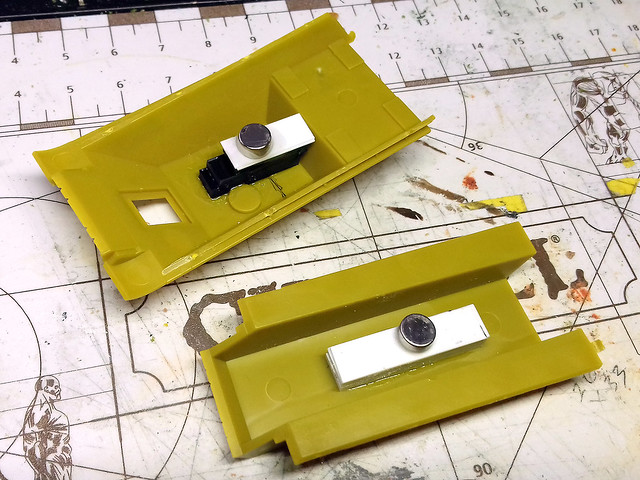
For the Panzer V I have used three magnets; one in the turret (as I did with the Shermans), one attached to the upper hull and another attached to the inside of the lower hull. This may seem overkill but because of the way I am thinking magnetising the optional Jagdpanther hull, I think this is the best arrangement.
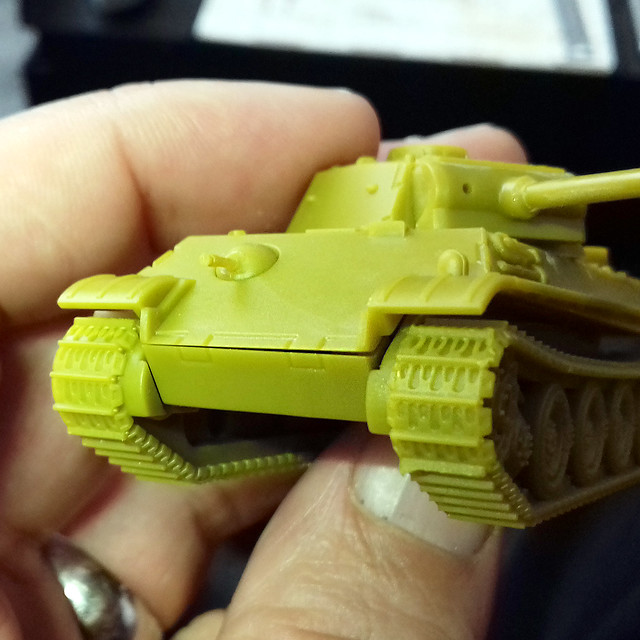
One thing which may be a 'con' to magnetising tank hulls like this is that you may end up with a tiny gap space between the upper and lower hull. Though, this may be down to the precision of the way you attach the magnets (my measuring may have been a little 'loose')!
Bearing in mind the advantages of being able to swap the upper hulls for the purposes of the game, this slight misfit may be annoying (from a models point of view) but may be worth putting up with from a gamers point of view! Swings and roundabouts, but, in any case, this may be too small a flaw to notice at tabletop distance.
Now, onto the lovely Jagdpanther. Because of the way I arranged the magnet in the Panther's lower hull I should only one magnet to hold the tank destroyer's top on...
It's a bit of a fudged job, but getting the exact measurements right so the magnets connect precisely was a bit tricky, especially as the Jagdpanther has a sloped roof. I'm sure there are probably neater ways to do this. But, anyway, it works AND - this time - there wasn't a noticable gap where the hulls met...
...That poor Sherman 75mm!
In Summary
Well, it wasn't as complex a job as imagined, obviously. I just don't like doing 'new' things, I guess!
But this technique was worthwhile as it does give me a variety of tank options to play with while I learn the game's rules and tactics. In time, I will probably settle on a specific faction and particular tank models I will want to play and so will enlarge my pool of tanks.
From a modelling point of view, I may want to get something a bit more detailed than these basic kits, but I will have to look around to see what's available in 1/100...I'm not sure what manufacturers there are, aside from the wargame model manufacturers I have already mentioned. But Plastic Soldier Company's models look attractive.
Next: I will eventually paint these models, but I am aware I have a cue of other stuff on my workbench first!