Showing posts with label war gaming. Show all posts

Sunday, 28 June 2020

Battlefield Scenery - Part 2 & 3/4!

While making my test piece for 'modular scenery' (see previous post - 'Road to Nowhere') it struck me that if I decide to go down this road (pun intended) it might take me quite some time to make enough scenery to dress my dinning-room table 'battlefield'! 😂

[I still have to work out how to do modular rivers and hills!]

And so... To hold me over until I have proper scenery made I decided to replace all my old crappy - and very tatty now - paper printed terrain (basically just printed-out stretches of textured patterns) with something newer and neater - felt scenery!

My selection of felt pieces and some printed out templates to
act as guides for cutting out my felt scenery.
There are plenty of examples online of wargamers who have been using felt terrain to great effect...
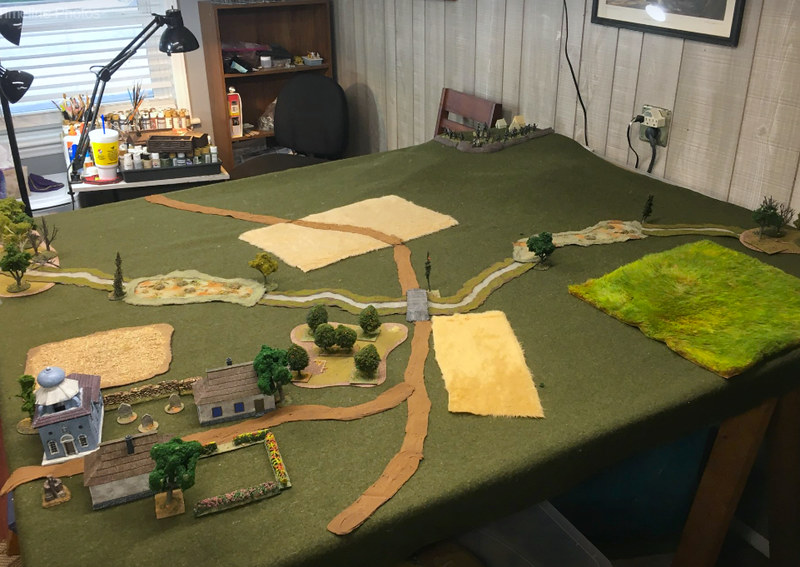
Felt battlefield example by Ronald Bingham.
For me, one of the greatest advantages of felt scenery items and felt battle mats is their portability. I don't have a shed, basement, spare room or garage where I can set up a permanent wargaming table, so my go-to alternative is the part-time use of our dining-room table!

This means that any game I plan has to be something that can be put together and taken apart quickly and easily. I also need all the relevant parts of my battle table to be easily stored, preferably in a number of small or medium-sized boxes. This is why I decided to make my own modular scenery in the first place.

BUT meanwhile...

As I said, until I can make all the bits and pieces I want for a better-looking battle table, felt seems to be the way to go. It's very cheap, very flexible (in that you can quickly and easily cut-out custom shapes to make new designs for any situation), fold-able and light.

Here you see the paper templates I cut out laid on top of my felt pieces ready
for me to trace the outlines of my scenery onto the felt...

But What About the Look?
Felt is a very simple solution - given - but it can look quite nice even mixed into pre-built scenery. But I actually like the simplistic and clean look of an all-felt battlefield, my favourite battle mat is - after all - a simple piece of green baize cloth (the type used to cover pool and snooker tables).

Cutting out my felt scenery was very easy using paper templates as guides...


The main trick to getting nice neat felt pieces is to use sharp fabric scissors (and have a steady hand). I did a bit of Googling and apparently there is a very handy rotary felt cutter that would be ideal for this, but as it was £20 I settled for scissors! 😁


The end product looks surprisingly OK once a few pieces are laid out. I managed to find some nice mottled textured felt that lends itself nicely to fields. These came in a variety of colours so I could make different 'crops' or perhaps use them to indicate marshy land...


I'm still cutting away with my scissors at the moment so I don't have a full table of scenery objects yet, but I thought it would be interesting to post up what I have so far so you can get an idea about what a minimalist looking table setup might look like...


I just have to work out how to do some little hills and bridges and woodland, then I think I'll do a little test game.

Monday, 22 June 2020

Road to Nowhere - Battlefield Scenery Pt. 2

Blimey - I completed something! Par-tae! 😂


OK, it's just a little test tile for a modular road set I'm thinking of making, but it's something. But before I get ahead of myself - here's how I completed the tile...

6... (See previous post for the first 5 steps)... I painted the black primed base with some muddy acrylics colours. I tried to make it quite thin in places so you can see faint patches of the black primer showing through...


I varied the mix of brown as I went along - a dark mahogany with a mid-chestnut - so that it also helped produce
 a patchy multi-tonal effect.

7... Next, I did some dry-brushing to pick out the raised textures to give the road some highlights. I went quite light to create some high-contrast so that - in theory - it would show through the flocking easier. It does look a little messy at this point...


Additionally, I drizzled in some dark wash into the deeper crevasses and around some of the 'rocks and stone', just so they 'popped' out a little more.

8... Onto the flocking. I haven't done a lot of this - just some vehicle bases - and so I was a little nervous about this stage as flocking is seen among modellers as being a bit of an art form! Also, I only have a very limited supply of mainly 'medium' summer green - The Terrain Tutor used a mix of three tones to create shade and highlights to his imitation grass...


After application (above photo) I tapped off the excess then waited for the PVA glue I used to stick the flock to the tile dry. Then I went over the grass with a dry paint brush and carefully brushed off any remaining flock AND to uncover any of the road detail that I wanted to show through - like the track texture pattern and clumps of 'rocks' and 'stones'.

9... Now, just to finish off my road I added some extra highlights (as the PVA I sprayed on the road to 'fix' the flocking in place has dulled down my previous highlighting). Also, because I only had one shade of grass flocking - medium summer green - I added some dry-brushed highlights to this as well using a ochre-beige (a light mustard shade) just to give the grass some tonal variation.

And bob's your aunty...


Conclusion...
Well, technically the test tile turned out 'OK'-ish. I'm both pleased that I have actually completed a bit of modelling AND that I think I did a decent job...BUT (there had to be one)...

As to it being the answer to my need for a modular road system for my 1/100 GF9T games, I am less happy. The main fly in the ointment is that the tile is warping - I managed to hide this fact in the photos I took BUT there is a noticeable bow in the middle... This annoys me as I notice it (it's an OCD thing)!

The whole point of reinforcing the foam board base of this tile with wooden lolly-sticks was to prevent warping...And this clearly hasn't worked. Also, this is project has been quite a lot of work so if I'm going to do it I want it to be damn near perfect with NO niggles.

So, what to do...?

Well, I think I have two options:

Option 1: Find a sturdier board on which to base my road WITHOUT it being too thick, heavy or expensive...

Option 2: Do some mental calculations about just how long a complete roadway set is going to take me to make and decide whether it would be more cost-effective just to buy a pre-made set from Fat Franks...

'Fat Frank's' 15mm Wargame Dirt Roads Set is £7.50 - taking into consideration
how much work it was to create my test tile, is paying £7.50 a better deal?

...To be Continued!

Saturday, 13 June 2020

1/100 KV-1S Conversion Pt.3

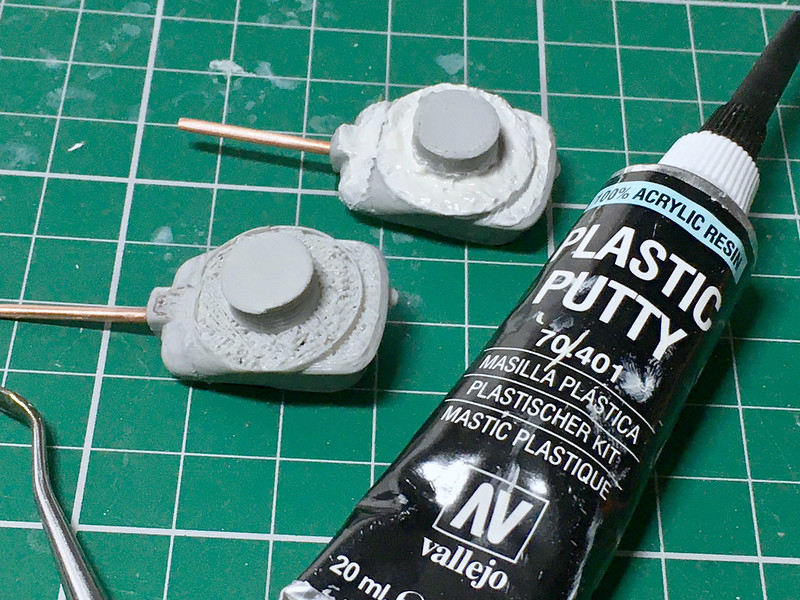
Well, I finished the modelling part of the work on my little KV-1S tank turrets. Working with a 3D printed model - by Butler Printed Models UK - wasn't the traumatic experience I thought it might be. Yes, the material is a bit weird - "It's plastic, but not as we know it, Jim" - and you do have to use a slight different approach to working with it, but it's not completely alien.

Cleaning up was done more by shaving and paring than by filing, I found this gave a sharper finish to the material BUT it can be filed and sanded, I just preferred to use this technique instead...

Using Tamiya's Modelling Chisel.
"A little off the back, Sir?"
Filling was optional and if you are just wanting to get a war-gaming model quickly onto the table you could skip this cosmetic phase. But, I've plenty of time so sorted out a couple of minor things (they were't even what I would call 'issues')...


I didn't try to smooth out the 3D 'stepping' pattern on the model by filling it - though I had thought about it - instead I gave it a quick sand with very fine grit paper and a thin coat of liquid cement followed by another light sanding. You can't get rid of all the 3D print steps as some are in awkward places but this model is what it is and it was never going to be display level quality.

Finally, I added some little details - again you don't have to for war-gaming...


After gluing on these little bits and pieces I filed or sanded them down to shape and that's that really.


I'm quite pleased, especially when you consider that these turret models only cost me £3.30 each. They really helped me out as it's still hard to find a model of the KV-1S in this scale. I was also, impressed that BPM has the good sense to allow you to buy just the turrets themselves rather than the full tank model. It means that, in cases like the KV tank - where the chassis didn't change all that much throughout the tank's development - you can 'upgrade' your model through the series just by replacing the turret you require. Neat.

Next: Onto making the chassis.
-------------------------------------------------------

Link to this project series - 1/100 KV-1S Conversion

Friday, 29 May 2020

The Mystery of the 'Bermuda Rectangle'!

As you know, I am just returning to the hobby of scale model making and tabletop war-gaming after a gap of two or three years. One of my main occupations at the moment, though, is cleaning up my junk-filled 'man cave' attic space so I can start making models again, but it's been a big job...

Errr, well my attic isn't quite this bad, it just seems like it sometimes! :)

I'll say this again - it's unbelievable the amount of junk that can build up in a household over just a couple of years. My attic became a store-room for box after box of crap, Christmas decorations (I think we could decorate three or four houses with the amount of crimble lights we have - not to mention the TREE Christmas trees of varying sizes) and the wife's shoe and out-of-season clothing collection.

Anyway (rant over)... Maybe. 😁

The point of this post is to highlight just one of the problems I am having with a hobby that was temporarily abandoned and that is - my forgetting just what stuff I had bought!

Example: In yesterday's post I mentioned how I would love to buy a couple of PSC 1/100 Panzer IV Ausf H tank models for my Kursk project. Well, while trawling back through my old Milgeek blog posts looking for a particular link I wanted I found the following post dated May 1st 2017...


Apparently, I had already bought a Battlefront Panzer IV H model!! BUT the irony is, it's disappeared under all the piles of rubbish I still have to clear away. Awwwww, bum-fluff!

Still, IF I can find the models it will have saved me buying new ones. Pretty handy as my finances are tighter than they were three years ago.

The sprues of my GF9 produced Panzer IV Ausf. H.... Wherever it is!

So, there you go - my attic is a either a portal to another dimension - in which case I hope the great ancient beings on the other side enjoy 1/100 model making - OR lurking underneath the remaining detritus I have the biggest 'carpet monster' ever!

...Oh, bit of a related postscript. Having discovered I had bought this model I checked through my Flickr photo gallery and actually found some pics I had taken of the kit (see sprues above) AND I had already started researching paint schemes for this model and save a nice graphic which will come on handy...

I like the two-tone 'splinter' camo - bottom row, third along!

Thursday, 25 January 2018

Stash Update - More Bad Guys!

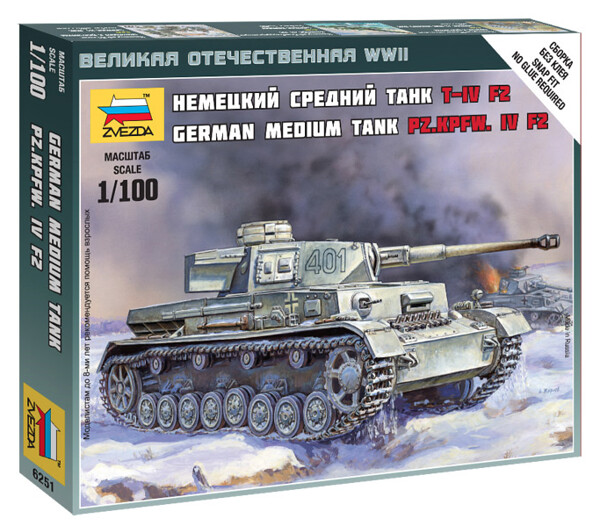
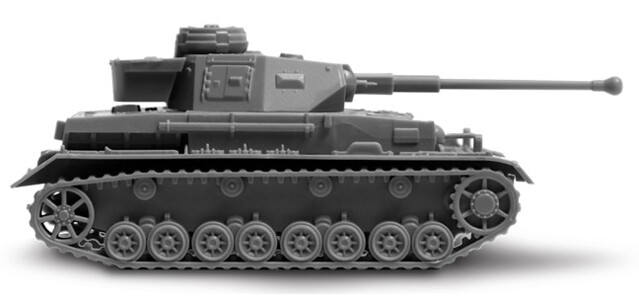
Continuing on with my 1/100 'Battle of Kursk' project for my forthcoming GF9 'TANKS!' game, I have added more 'bad guys' to the collection. These are the German's canon fodder for the battle, the venerable Panzer IV F2 - in this case, in model form by Zvezda...


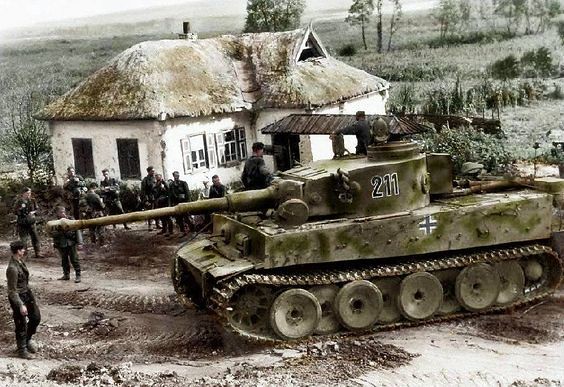
Now, that may sound disparaging, but that's only because the main focus of anyone's attention when talking about the Battle of Kursk is always inevitably the 'new' German big cats - the Tiger and the Panther. It seems that the poor old Panzer IV gets a wee bit overlooked, and yet it was still the backbone of panzer formations at the time and was still a pretty good tank.


In fact, due to the Soviet's muddling about with the - by then - obviously outmoded 'KV' heavy tank line the Pzr. IV could still hold it's own with practically anything the Red Army could throw at it. It had no problem dealing with either of the Soviet's two main battle tanks, the sluggish KV-1S or even it's nippier little cousin, the T-34/76. [In fact, I have heard many people say that had the Germans churned out more Pzr. IVs instead of relying on the new heavy tank 'super cats' - which turned out to have a lot of technical and reliability problems - the outcome of the battle *might* have been different. But that's an easy thing to say and I'm sure it's not that simple.]


But, hypothetical meanderings aside, a German panzer force of 1943 still requires a base of Panzer IVs in it's mix, so I bought two. Once again, I have gone with the budget option and plumped for Zvezda kits. At £3.50 each they fit the bill as 'canon fodder' for my game and I can easily get the GF9 TANKS!' data cards offline.

The Zvezda model is specifically the F2 variant of the tank, which was really seeing it's last hurrah at the the Battle of Kursk (the 'G' variant beginning to come into prominence). But despite this, with it's KwK 40 L/43 75mm gun, the F2 was still superior to the KV-1 and T-34 in terms of ballistics.

As with Zvezda's T-34s - which I am just working on - both PSC and Battlefront do offer more options and the ability to model more variants of the tank with their Pzr. IV kits. But I just don't need this flexibility, so the cost savings was of the greatest importance to me.

Here's a rather nice YouTube review of the Zvezda Pzr. IV F2 by Modeldads...

Saturday, 20 January 2018

Stash Update 'Project Kursk' - Part 2


As my tank collection for this project is now into the production phase it's time to think ahead and begin to gather the bits and pieces I need for the playing mat (for a GF9 'TANKS!' game).

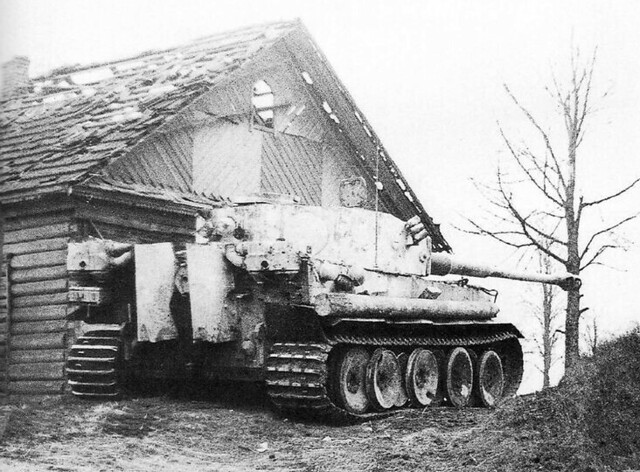
Obviously Project Kursk is a 'Russian Front' themed game set in 1943 and although buildings will be sparse for the type of open flat countryside that would be the setting for such a scenario I do want to include a few isolated farm buildings and huts to break up the line of fire. (I will also be including plenty of woodland, but more of that another time.)

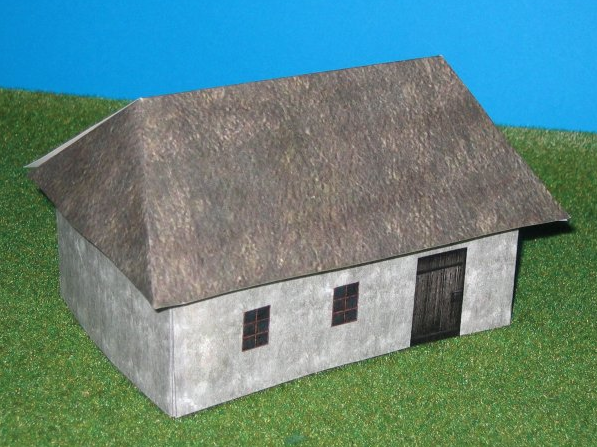
I already have a budget option for rural Russian building, as I came across some papercraft designs that are available for free download from the 'Perry's Heroes' site: Eastern Front - Paper Buildings.

As simple and cheap as you can get, but effective for a tabletop game. You will
have to do a bit of math to scale these paper designs for 15mm though.
My only niggle with paper and card models is durability. I'll probably want to play with these a few time for different Soviet games and - crucially - I will want to pack these items of terrain for transportation to my local club. I'm really not so sure how flimsy card models will stand up to being knocked about so I would prefer something along the lines of a MDF building in 15mm (I also ruled out cast resin buildings as, although they are cheap and fairly durable, they are pretty heavy).


Luckily there is no shortage of sources as 15mm wargaming is very popular and the manufacture of laser-cut MDF kits seems to have become a very popular cottage industry...

Star Fort Miniatures make this lovely Ukrainian/Russian rural church
for £14.99 (the roof comes off for infantry placement). They also do a
variety of Russian village dwellings.

Minibits have this 15mm Russian Village set  By Red Vectors for £18.
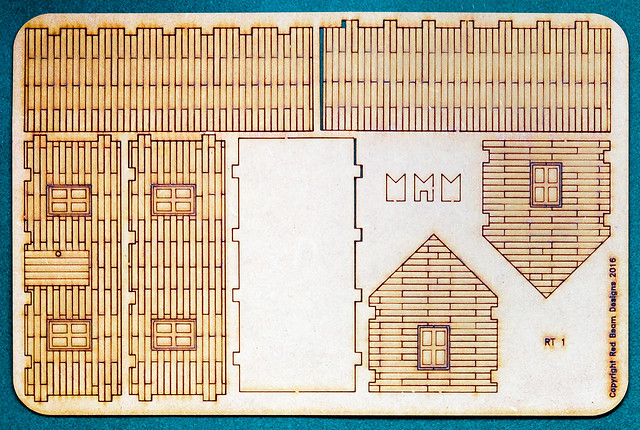
While all very nice, these would represent a bit of an investment and I have a hankering to make something myself from scratch (to keep costs down). So I plumped to by an single MDF building that I thought was good value from Red Beam Designs and will use that as a scale and style template for my own models.

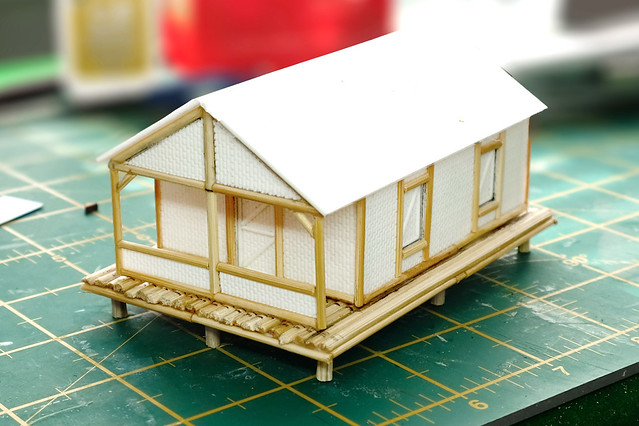
The Red Beam 'Russian Timber house' seems to be a design I could replicate
easily with plasticard strips.
At just £4.45 plus postage it's an affordable investment, and although a very simple design will give me the scale for my own scratch build timber hovels. Red Beam have a few more Russian houses in the series, by the way.

After just a few days the 'kit' arrived (I *think* they are laser-cut to order). It comes on just one small sheet (smelling nicely of burnt, laser cut MDF) of just ten parts, ready to knock-out and assemble...

Sunday, 30 July 2017

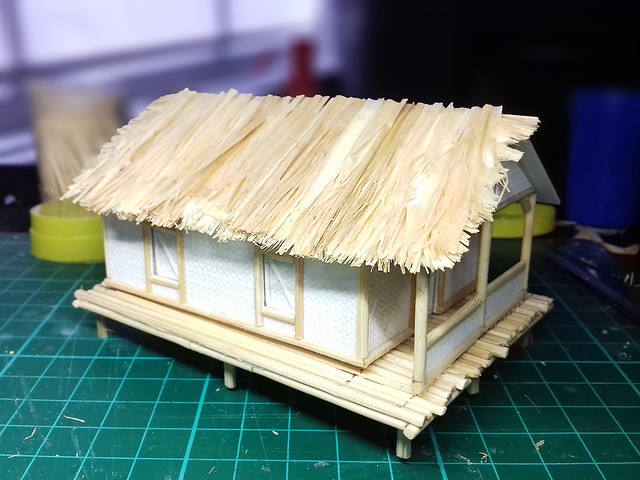
Scratch Built 'Jungle Hut' - Part 2

Time to think about the roof and this will be a little tricky as I will have to come up with a simple method for modeling a grass or thatched roof. Now, there is numerous way you can model 'thatch' (or other grass-made roofs), including actually using fibers to lay down a mock-thatch, but I really want something 'war game safe' (that can take a lot of handling) and that is quick to apply.

Quick addition of a couple of rectangles of styrene card to get an idea of some
of the dimensions of my hut's roof.
I considered several different ways of modeling 'thatch' and also had several suggestions when I asked for some advice on some of the hobby groups I subscribe to. Fake teddy bear fur was one idea and gardening raffia was another but neither really seemed right and also they sounded a little too fiddly. Still, I decided to try out the raffia as it was easily available in a local store...

A little too 'Tiki Bar' for my liking!
It turns out that gluing strips of raffia with PVA is a horrible messy process and I don't really think it was worth the bother. It doesn't look 'scale' for 15mm and takes a while to do. The above photo makes it look a little better than it actually does in reality.

And sooooo...After looking at several interesting YouTube tutorials on the various way that you can model thatch, I am plumping for the following technique...


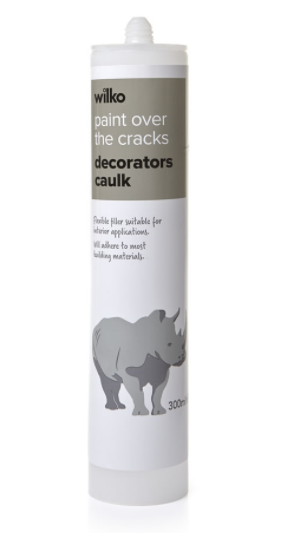
First question (if you are a Brit) may be 'what the heck is caulk'? Now, caulk does exist - much to my surprise - as a recognised British term, I just haven't heard it before (but plumbers and DIY enthusiasts will have). In fact - ramble alert - it is a historically old term which goes back to wooden ship building I believe...Anyway...

These days it is more normally known as an acrylic sealant and can be picked up really cheaply at Wilkos or other hardware stores (the one pictured on the left is just £1, but you will also need to buy one of those metal glue-pushing gun thingies if you don't have one).

Note: I've been told - on the Terrain Tutor's FB Group - NOT to confuse this product with silicone sealant. Acrylic sealant is easy to paint over, while silicone isn't.

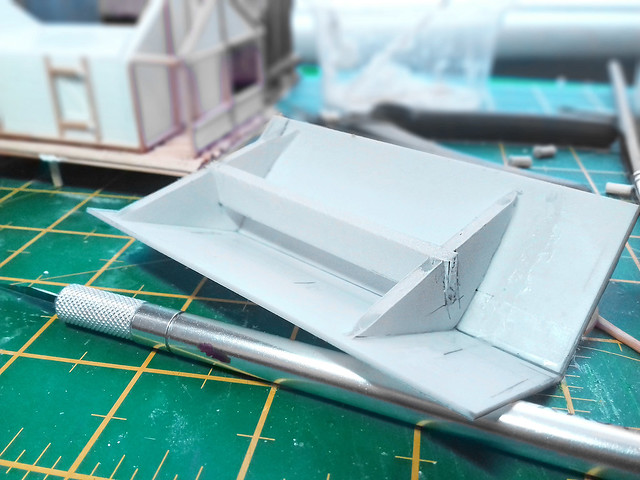
So, before I squirt any caulk in anger, I must make my roof's basic framework. A few bits of plasticard should suffice, as I want a reasonably thin base, but I think that thin card might warp or deform with 'wet' caulk smushed all over it.


The good thing about a very simple base like this is that if things go wrong with my caulk-ing then I haven't lost much...

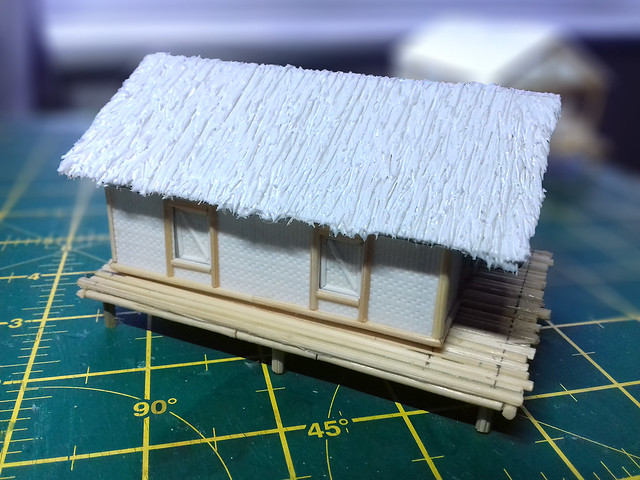
Now, the 'trick' - if you can call it that - to engraving a thatch pattern in caulk is to use a sharp cocktail stick and you will also have to keep cleaning the point as it soon builds up a blob of caulk on the end. So keep drawing you sharp lines and then keep wiping your point clean and you will end up with this (it isn't rocket science and there is no great knack to it)...


One of the good things about caulk - which, by the way, is the consistency of very thick yogurt - is that if you aren't happy with the way things are going you can just wipe it smooth and start again. It takes a while to dry so it remains wet enough to work with for a good amount of time.
Next: Well, hopefully, I can get the three houses for my Island village primed and ready to weather. Though I still have to think about the best way to base them.

Thursday, 25 May 2017

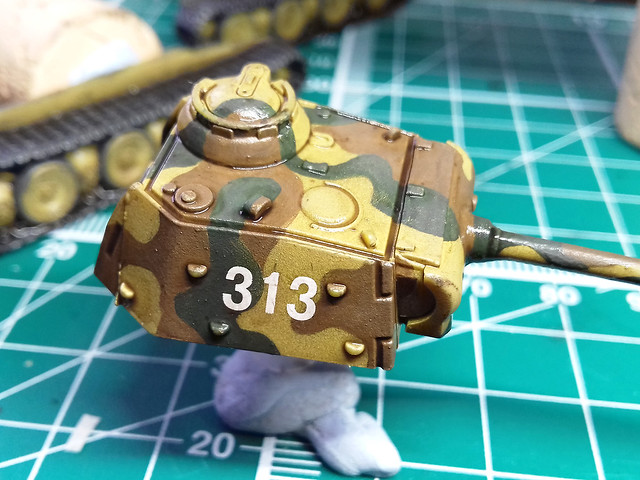
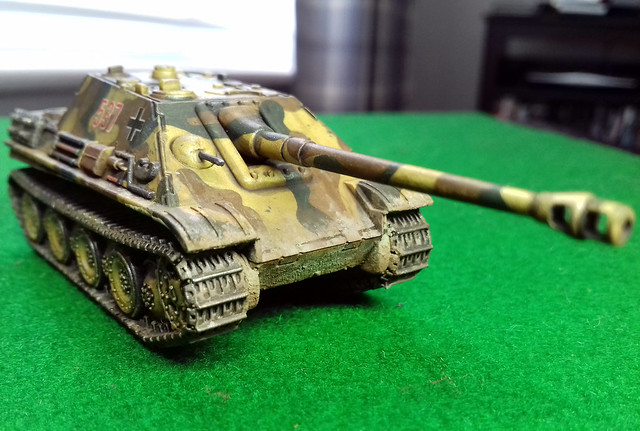
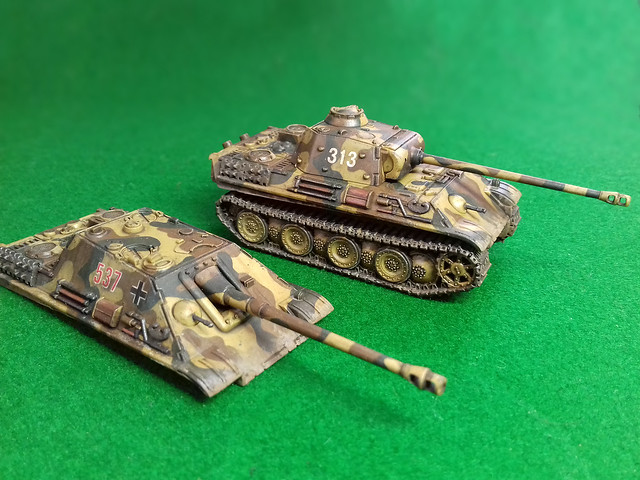
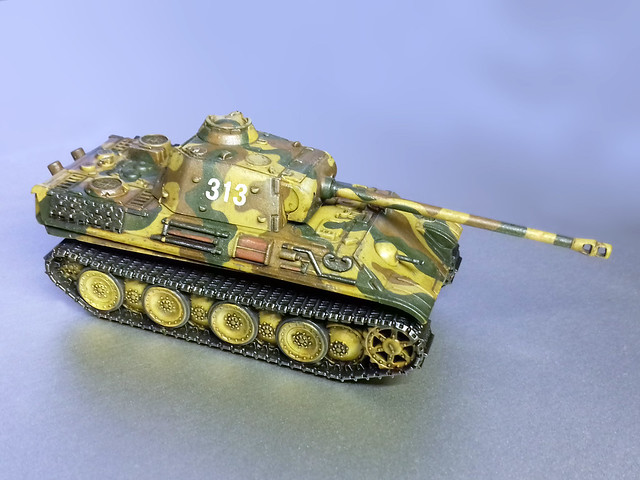
Battlefront 15mm Panther and Jagdpanther - Part 2

Applying the Wash
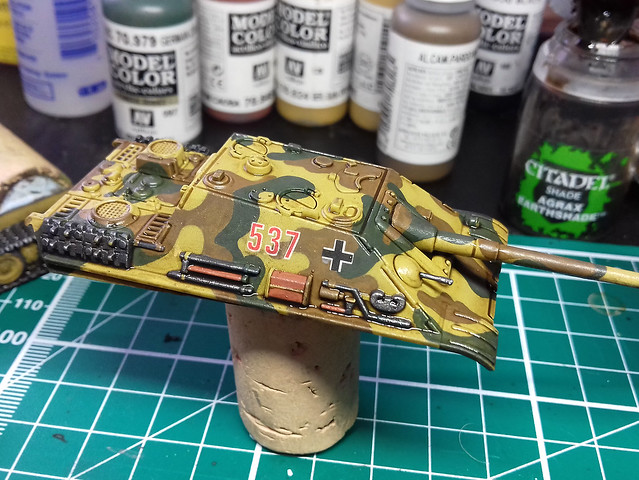
With all the base colours done it's time to apply the overall wash to the model. I'm using Citadel's Agrax Earthshade (again), diluted 50/50 with water...


Aside from adding a 'dirty' film all over the model, giving the basic paint coats a stained and 'aged' appearance (which I like) the wash also gives definition to panel lines and outlines other surface detail.

This replaces, to some degree, the pin-washing technique I normally use (usually after weathering) on larger scale model projects. Though, I will still be applying pin-washing to pick out the most prominent detail (using Vallejo's Dark Brown Wash) as this is a far darker outlining medium.

The Agrax Earthshade is a medium brown wash and for most
detail, this will suffice as a replacement for pin-washing. 
While I'm quite pleased with this 'new' (to me) effect, I am aware that it does darken the base colours. I can, and do, put this down to a later of 'dirt', but I will have to be aware that if I want a fresher looking model I may have to start with lighter base colours.

Staining & Streaking?
Actually, I'm cutting out this process (where I would apply oil paint dabs and streak them) and I am using eyeshadow powders to achieve a similar, though softer, effect. This is another change in technique due to the scale of the model.

While my usual weathering effects can still look quite nice when taking closeup photos of the models I think they may be a little bit of over-kill as these small models are meant to be seen at arm's distance on a tabletop. So, I am starting to use broader, less focused weathering effects for my 1/100 gaming models.


Far Too Shiny and Chrome!
With the upper hull of both versons of the Panther done, I turn my attention to the lower hull and tracks. At the moment the tracks are far too clean and shiny. As with the upper surfaces, I am looking to a more 'cosmetic' medium to apply the effects I want.

Tracks are definitely a part of my tank models that I still have the biggest problem with. I haven't devised a satisfactory 'recipe' for painting and weathering them to a point that I am happy with the result. My previous results have all been a bit hit and miss.

So, let's have another go...


The medium I have picked to weather my tracks are Tamiya's Weathering Sticks (Light Earth and Mud). Nothing new that I haven't used before BUT I recently discovered that these cosmetic type sticks can actually be mixed with water to produce a creamy paste.
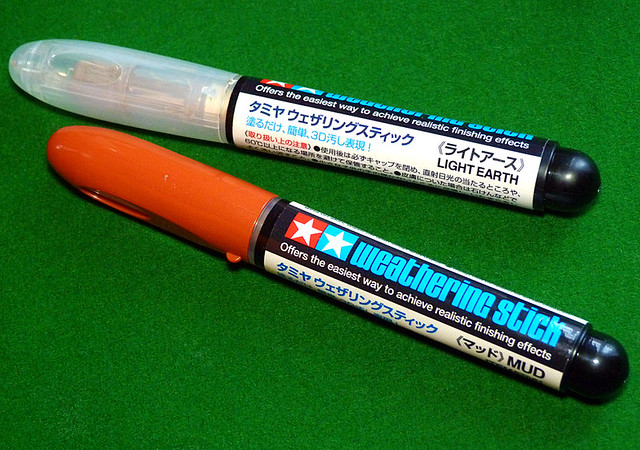
I used this technique On my 1/100 Stuart model and although I didn't quite get it right, I like how this cream approach was slightly more controllable than the powder method (with pigments) that I have been using. So, let's have a test on the bottom of the tank's chassis...
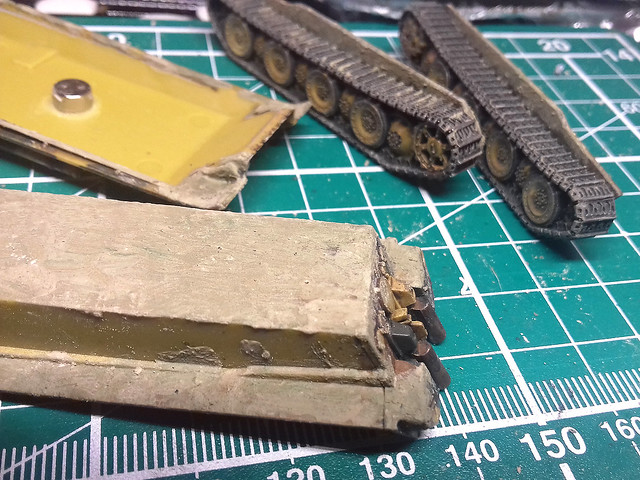

Because I wanted to add so much mud to the chassis I started by adding a thin coat of pigment mixture to give some texture, then applied the weathering stick medium over this. This saved on weathering stick and gave a mottled multinational mud effect.

So, in effect the pigments provide coverage and a base with the weathering stick medium softening the edges of where the mud ends. I haven't mastered this technique yet, and I've overdone the effect a little on this model (too much mud) but I'll go easier the next time. However, I am happier with this method than I am with the all-pigment method I used on my 1/100 Shermans where the mud was far too thick...

Pigments on the bottom, merging into Tamiya Weathering Stick medium on the
front-upper hull for a softer transition.
You'll notice what I mean by the fact that I have managed to retain the track pattern detail, instead of coering it up which I did with my heavy-handed approach on my Shermans. Here's the result...


Nearly, but not quite, happy with the result...Yet!

Next: Protective varnish and completion photos.

Thursday, 11 May 2017

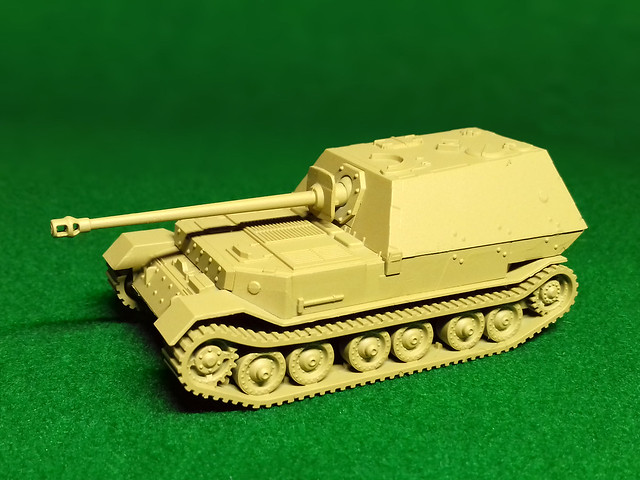
Zvezda 1/100 'Elefant' - Part 2

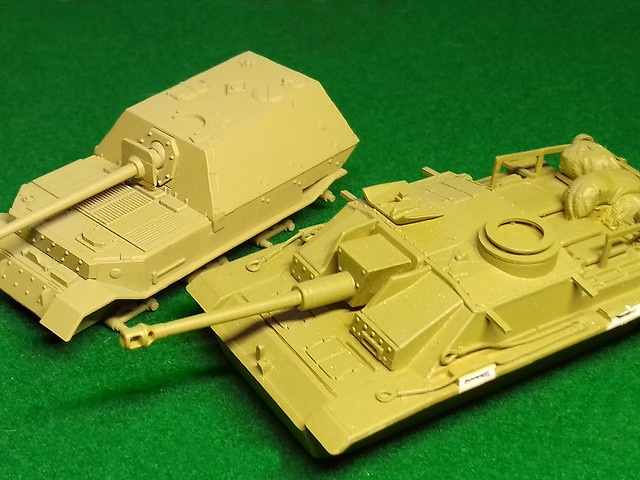
As my airbrush is out of action (I may have to buy a new one) I am back to using 'rattle cans'. I did look around for a good acrylic spray 'Dunkelgelb' - German Dark Yellow - but the only one I could find was by Flames of War in their War Paint range. Called 'Panther Yellow' it seemed to go on as well as Humbrol's excellent sprays...


Had my airbrush still been working I would have used Vallejo's excellent water-based polyurethane German Dark Yellow Primer. This has a tinge of pea-green to it, rather than the sand-yellow of the Flames of War paint...

Left: FoW's 'Panzer Yellow'. Right: Vallejo's 'German Dark Yellow'.
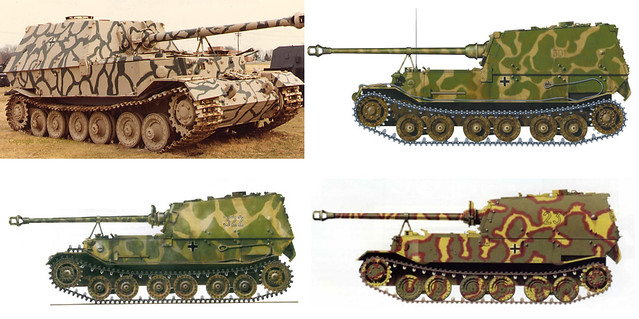
Choosing a Camouflage Pattern
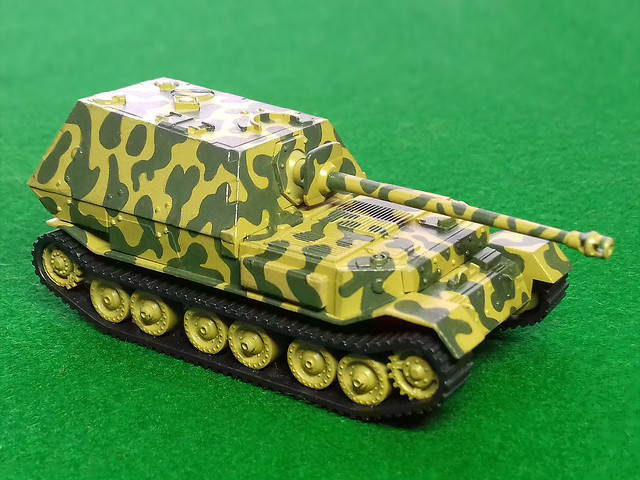
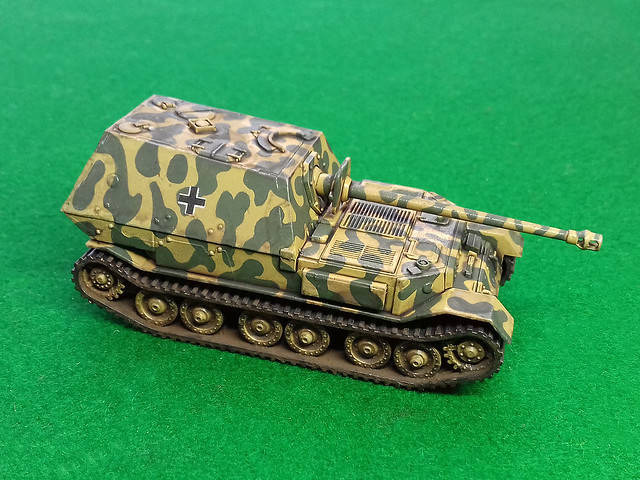
Now to the hard part, choosing a camo scheme. The Zvezda Elefant is the early model typical of the type that first saw action on the Russian Front in 1943, still, there are some very attractive patterns to chose from...


As I am keeping this model, exclusively, for games against mid-war Soviet opposition I don't mind that it won't get as much play as - say - a Panzer IV or a StuG III. It's just such an attractive model to have in my collection, and I am such a sucker for tank destroyers (I really want to build more)!

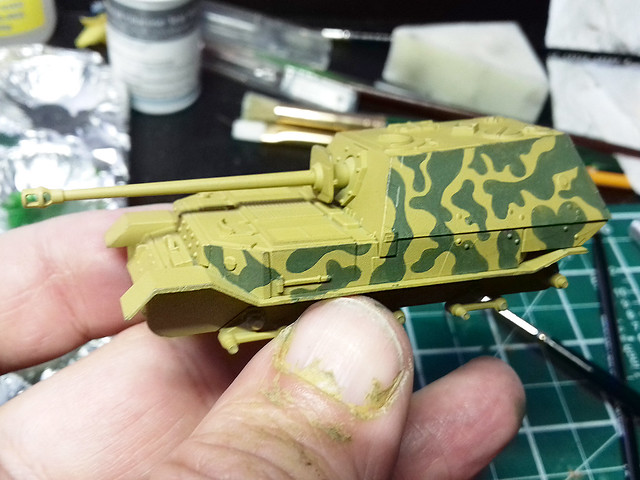
So, let's get cracking with my chosen camo type (with some poetic licence)...

As my airbrush is bust, it's back to good old brush painting. This may take
some time!
Phew...Boy, I am rusty, but it's getting there!
Track Record
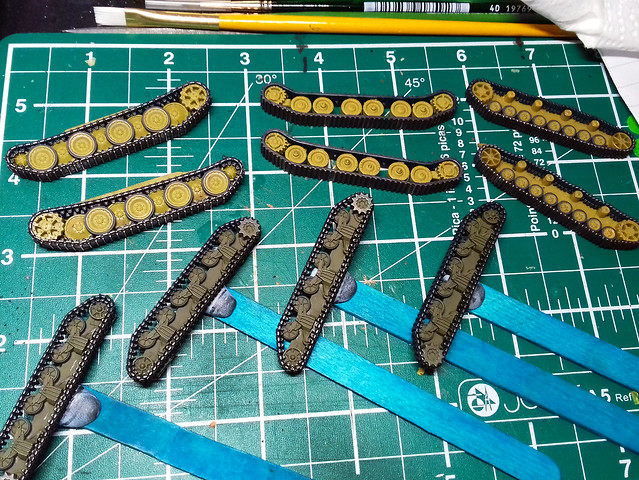
Just a little aside, because I have several of these little 15mm tank kits on the go at the same time I had the unusual sight of five sets of tracks on my small workbench at the same time!

As well as the 'Elefant' tracks - top middle - I am currently working on four
other sets; a Panther set, Panzer IV set and two sets of Sherman tracks!
After base painting these tracks a dark colour - black for the Shermans and German Grey for the panzers - I painted the outside of the roadwheels with Vallejo's Dark Rubber (except the Elefant's which seems to have all steel road wheels/rollers).

Then I gave all the tracks a rub with a graphite pencil to give the impression of bare steel. Then it's off for a light coat of gloss varnish in preparation for the application of some German insignia...

Oooops, I forgot (having learned this before) that doing the graphite pencil
work *before* glossing is a bad idea. The shiny 'steel' effect disappears
after a coat of gloss varnish! Du-oh! 

Decal Stage & 'Pre-Weathering'

Well, there are actually that many decals to apply, just three German crosses and two sets of vehicle numbers. I don't have 1/100 scale decals to hand so I'm hoping my smallest 1/76 German decals will work (I know the crosses will be a little too large). There was some poetic licence to my application of decals and they are not historically accurate but are intended to be suitable for tabletop gaming purposes.

With the decals quickly applied I moved on to a new process that I have just started applying to my models - 'pre-weathering' prep. The idea is to lay down a thin wash of peaty brown to indicate surface dirt and to take the 'newness' off the pristine painted model prior to more intensive weathering.

An added bonus of this 'pre-weathering' wash was to modulate the basic FoW
Panzer Yellow - which I thought was a little too bright - and make it more like
what I think Dunkelgelb is supposed to be like.
I have also started to apply some 'mud' (Humbrol Dark Earth Powder) to the tracks, so it's starting to look something like a finished model, but I have still some focused weathering to apply.

I am pleased with this newly added phase in my painting and will start to use it on more of my models. In fact, I had occasionally already been experimenting with a sort of weathering prep using powder pigments, but this was very hit and miss and I was never really satisfied with it. Using a light - diluted - wash is far more effective.

Next: Deep weathering - chipping, etc.