Sunday 31 March 2013

WTM 1/144 Fieseler Fi 156 Storch Pt. 6 - Finished

After putting this aside while I experimented with different types of stands I have decided to get the darn thing finished off. To be honest it just needed some touching up...


I know the camo pattern scheme is debatable, but I like it. As a war game marker it is a generic symbol of the type anyway. It was a fun wee project and I fancy repainting some more of these ready painted models (Tim Gow over at Megablitz has a wonderful example of a Brewster Buffalo in Finnish colours for example, I'd like to do one of those).

Hope you like my Storch and the accompanying 1/144 Finnish JU-88 is in the works.

Thursday 28 March 2013

Featured work - Early War Miniatures

Of course I usually feature the work of other modellers, but let's take a moment to appreciate the modelling done at the model makers end of things. I was particularly charmed by the 20mm figures and vehicles made by Early War Miniatures.

Belgian FN Tri-car, can be used as gun carrier
What I like is the range of models and figures for the smaller nations. 'Why?' I hear you say: 'They got trounced by the Germans!' Well, yes aside from 'what if?" scenarios the real history of the early war performance of nations like much-maligned France and particularly Holland was not in fact as bad as we commonly believe today. The Dutch especially gave the Germans a bit of a bloody nose for their size.

Dutch 75mm NM10 Krupp Siderius field gun and 6 crew men
I am a big fan of the underdog - hence my interest in the Finns - and it is often a cause of wonder 'what if?' other smaller armies (or larger armies like the French and Poles) had been organised, deployed or utilised in slightly more flexible and modern ways. It was - after all - the 'new' tactics used by the Germans as much as their equipment that won them their stunning victories. Or at least that's how I perceive things.

I especially feel sorry for the French who did make the Germans pay a price for taking their country...But anyway, back to the point...

Belgian SA FRC 47mm AT gun & crew


EWM make a lovely selection of models from:


French Army 1939 to 1943
British Empire 1930 till 1943
Dutch Army of 1940
Belgian Army of 1940
Norwegian Army of 1940
Polish Army of 1939
German Army Early War 1938 1942
Italian Army 1936 till 1943
Japanese Imperial Army
Other nations & export arms
Greek Army 1938 till 1941

(Thanks to Eastern Funker's 'Panzerfaust: Armoured Fist' blog for bringing this to my attention.)

If I *ever* finish my Finnish 1/72 army I would like to have a go at a 20mm Dutch or Belgian army from this period, and I would be happy to start with the work of Early War Miniatures.

Link: http://earlywarminiatures.com/ 

Wednesday 27 March 2013

ACE 1/72 BA-20 Armoured Car Pt. 3 - Construction III


While I did say that I had completed the basic construction of this model, I forgot the DIY aerial!

ACE leaves you to make the 'washing line aerial' for the BA-20, you use a length of thin wire - or brass rod in my case - and bend it to shape. It has to fit on top of the 6 support posts that ACE do supply. So, you have to get the measurements and shape of you wire aerial just right.


I started by drawing up a template to guide me in how and where I bent the wire - even so I had a couple of goes before I got it right. As shown in my diagram I divided this job up into two halves - front and rear, the rear half was the tricky curved part...


I tried making a small circular template out of plasticard so I could bend my wire into a semi-circle of the exact size I wanted, but this didn't work quite as I imagined. So it was down to good old fudging it and bending the curve by hand (fingers) and checking the shape against my diagram.

It seemed  to work well enough, I also kept checking my aerial's shape against the model and the support posts to make sure the wire would fit just right. Once I was happy with my aerial I glued it into place with super glue...


Hoo-rah! Job done, but now I will pause - I want the accompanying BA-10 armoured car model to be at the same stage so I can paint them together...So, it's on with my UM BA-10 kit.

Thursday 21 March 2013

Man Cave Refurbishment - progress

Modelling has been intermittent over the past couple of weeks as I try to get my 'man cave' in order. What was our dumping ground for all our detritus has been officially assigned to me as my new Man Cave.

First job was clearing out a lot of the rubbish so I could actually get into this attic space. This is an ongoing job but at least I managed to move my gaming computer and desk in (priority!) as 'World of Tanks' is my overriding source of calm and sanity!


Having created a bit of space at the far end of the attic I discovered that the back wall was in dire need of some emergency decorating as we seem to have developed some damp (possibly due to some deteriorating chimney flashing). The house is Victorian and such niggles are inevitable I suppose.

So I am half-way through my temporary DIY damp-proofing and patching. I know short term fixes like this are self-defeating in the end but our schedule was to have the roof and chimney looked at next year and this half-assed measure will have to suffice.

My intension is to make an 'L' shaped work bench at the far end to accomodate my modelling and airbrushing...IF I can eBay more of our 'junk' that is! :)


Above: World of Tanks - for when a chap can't actually make some tanks!

Featured work - Squad Painter's GAZ AAA paint job

Usually I feature finished work, but I couldn't resist this work in progress by Squad Painter and his airbrush technique for Braille Scale models. Additionally his subject is a really nice looking Soviet Gaz AAA truck by UM...


He starts with a black undercoat and then builds up increasingly lighter layers of greens. It has a nice depth to it which I would like to try when I get my new work area and mt airbrush up and running.

Link: The Squad Painter Blog - UM Models GAZ-AAA - Airbrushed!

Thursday 14 March 2013

1/72 Unimodel BA-10 Armoured Car Pt. 1 - Unboxing


While I complete the construction of my ACE BA-20 armoured car I thought I would start off the BA-10 I got to accompany it as part of my Finnish Army recce company. Another Ukrainian made kit I had trepidations after my ACE BA-20 experience.

However, a quick look over the various sprues in this kit (4, plus bag of tyres) was enough to satisfy me that the general quality of this UM model was superior to the ACE kit.


Moulded in a 'Russian green' plastic the parts are quite sharp and free of flash. Kudos UM!


No raggy edges or vague matching parts, everything looks likes they are meant to fit together tightly. But we shall see at the construction phase, still the look of the quality does instill some confidence.

Importantly - unlike the ACE BA-20 - each part is accompanied by very clear numerical IDs moulded onto the sprue...


This, of course, makes things a whole lot easier when it comes to identifying parts. Quite important when this model has more than 80 parts to it! Quite remarkable really.

And talking of identifying parts, this brings me to the instruction sheet...


The instructions are quite clear and everything seems to have an obvious place to go, again unlike the ACE armoured car where here were no pilot holes to help connect components together. Probably just as well with so many parts to deal with.

Of particular note, I thought, were the nicely moulded black rubber tyres. I haven't dealt with rubber tyres before in the kits I have made so far so this should be interesting.

As to the historical schemes that are included, well according to the instruction sheet there are three. All Soviet.

Now this is rather interesting as the decal sheet included in this kit also includes a Finnish option too. Good news for me you might think as I want to build this model as a 'liberated' Finnish  version of this vehicle. But no...

Unfortunately, and inexplicably, UniModels have included Finnish Hakenkruis (Finnish swastika) in completely the wrong colour. UM have supplied you with three medium blue swastikas on white outlines - while medium blue is correct for the Finnish air force of WW2 the Finnish army identified their armoured vehicles with a modified hakenkruis in black on an offset white outline.


There also appears to be a set of post-1945 Finnish roundels (as part of the peace agreement made between the Soviet Union and Finland in September 1944 the Finns got rid of their swastikas, for obvious reasons, and replaced them with blue and white roundels instead). Apparently the BA-10s (known to the Finns as the BAF C) served with the Finnish army until 1959, so these roundels would be appropriate if you wanted to build a post-war model.

Above: A captured Soviet BA-6 armoured car (predecessor to the BA-10) in use
with the Finnish army. You can see the off-set black swastika.


In conclusion, I am quite pleased so far with this UM kit, the first I have bought, and there are a lot of positive points especial compared to my recent ACE BA-20 build.

So, it's onto the construction...

Wednesday 13 March 2013

ACE 1/72 BA-20 Armoured Car Pt. 3 - Construction II

Got most of the fiddly little bits added to my BA-20, now ready to make the wire 'clothes line' arial around the roof...


You can see the filling I had to do with white Milliput putty. But I also had to use putty on the front bumper which I snapped while removing it from the sprue and to make a new hub cap to replace one that the small parts goblin stole!

I've put off doing the wire arial tonight as I'm pooped, but I also wanted to give the super glue I used on the arial supports overnight to dry properly. It's getting there though.

Tuesday 12 March 2013

Featured work - Florin David's mobile FLAK 43

Sometimes I think that I shouldn't look at other peoples' work. Today is one of those days. You know it's going to depress you when you start out by thinking 'that's a nice 1/35th model' and then - with horror - you realize it's a 1/72 model!


Simply beautiful.

If you have a masochistic streak you can go and see more of Florin's wonderful SPAA project here: Braille Scale Enthusiast - sWS with 3.7cm FlaK43

Saturday 9 March 2013

ACE 1/72 BA-20 Armoured Car Pt. 2 - Construction

I mentioned in my summary of the components contained within this kit that I was a little worried about fitting together of the parts when there were no obvious pilot holes. Well this issue did indeed come back to haunt me at the construction phase, most notably with the chassis...


The whole chassis is dependent on the placement of the leaf-spring suspension and these four parts simply lay on the main chassis body with no positive indentations - it's all down to your glue. These springs also suffer from flash and noticeable seams, which in itself I am not bothered about as these parts are - after all - underneath the car but what little detail there is on these parts soon evaporates after you sand away the offending rangam plastic.

I was also dubious about the centering of the axels. Again, with no pilot holes these have to be positioned largely by eye, though there are shallow notches in the springs which identify where they should go. But expect to have to dry fit the wheels a few time until you are satisfied that they  look OK under the mud guards.

And talking of the wheels, there was a lot of trimming and filing to be done to make the wheels fit correctly under the fenders as I found the axels a little too long.


Next, I had stupidly thought that after the fiddling about with the chassis that the main body of the car would be quite straight forward as they are all flattish plates. Oh dear, how wrong I was!

In the above photo I think you can make out the gaps between some of the hull parts - they just wouldn't fit together neatly. I wasn't too concerned because these can easily be filled with modeller's putty, but I was annoyed that I had to do so as these should have been fairly fool proof and uncomplicated parts.

Still, the best was saved for last, the turret...


Unfortunately my photo gives the impression that a - once again - fairly simple part fitted together and mated with other parts quite simply. Er, no. Amusingly the hole provided in the roof was way too small for the turret collar...Shazbat!

MORE sanding!

I think you can see that there are plenty of gaps between the ill-fitting parts. Really, £10.70?

Well, it all sort of went together in the end, but I haven't added smaller external components yet - like the arial or the machine guns - as I really felt like I needed a break before undertaking these. Next job, though, will be the filling of all the gaps and tidying up the edges.

...Grumble!

Friday 8 March 2013

ACE 1/72 BA-20 Armoured Car Pt. 1 - Unboxing


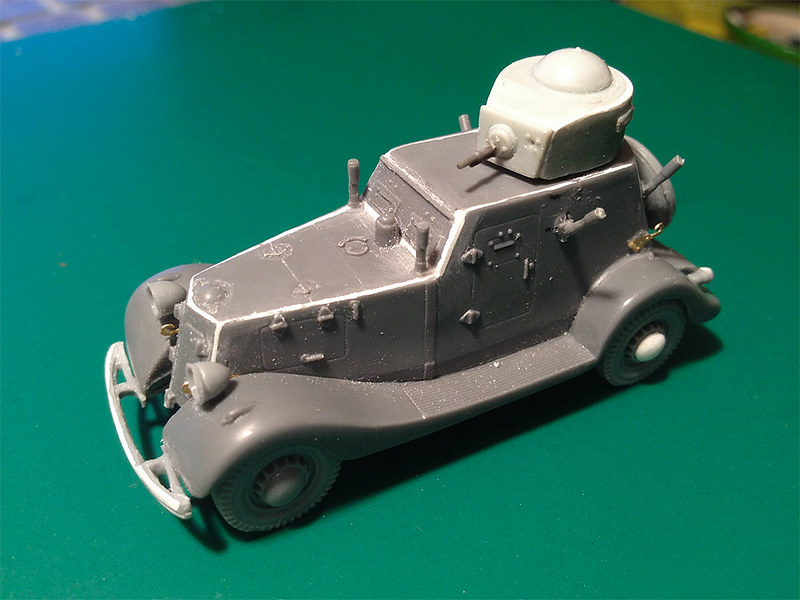
I was very excited as I cracked open the lid of this kit - I really like the look of this little armoured car. At first everything looked good, all sprues were encased in a sealed plastic bag (a good sign I thought) and inside this the tiny etched parts and decals were given their own separate plastic bag. On opening up the main bag this is what I got...


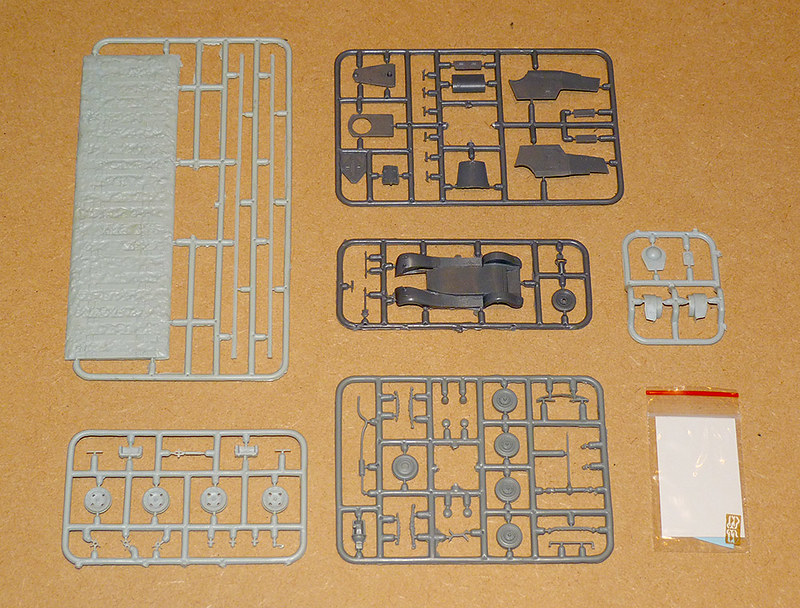
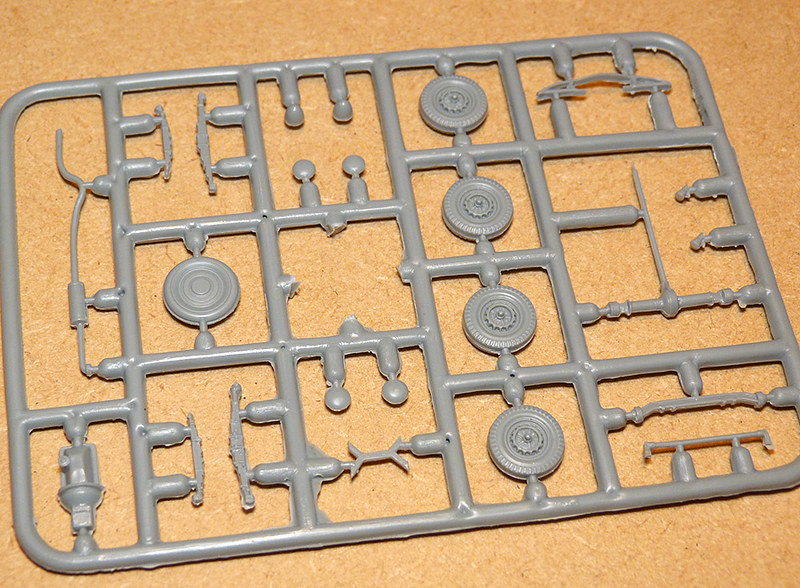
Notable among these are the two light grey sprues on the left - one is the small railway diorama (which I won't be needing, but thanks anyway) and the other is the railway wheels set. Obviously these will both be assigned to my spares box, but I am glad they are separates - it tells me that ACE added these to a basic BA-20 that they must've done. But more importantly...


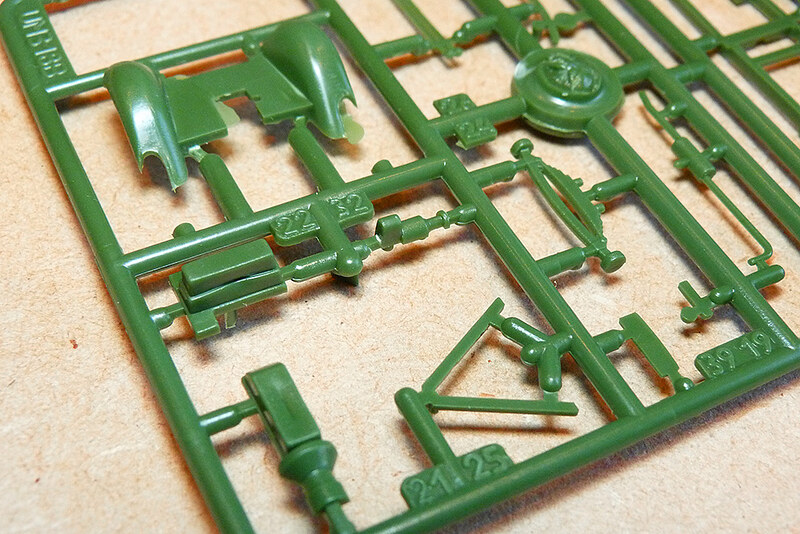
The normal road wheels come on their own sprue. These are solid plastic wheels and tyres, but I do like both the level of detail and the fact they come with optional domed hub caps.

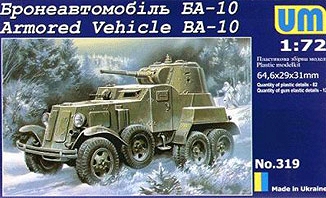
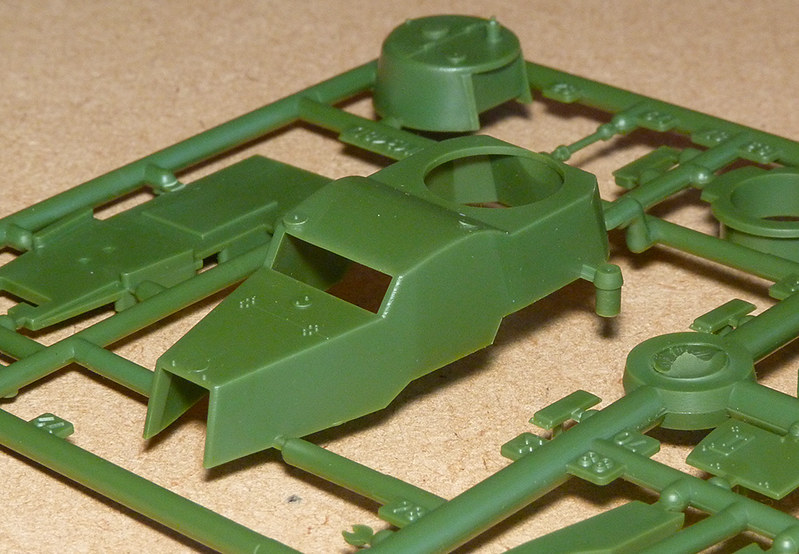
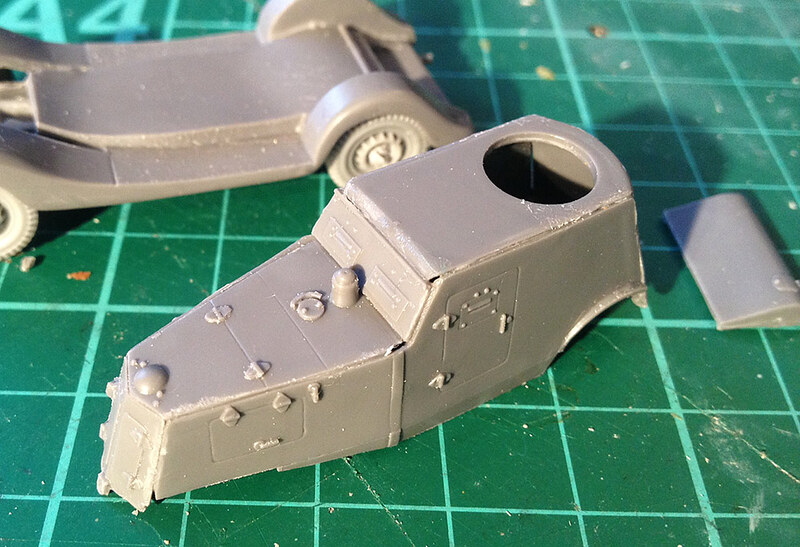
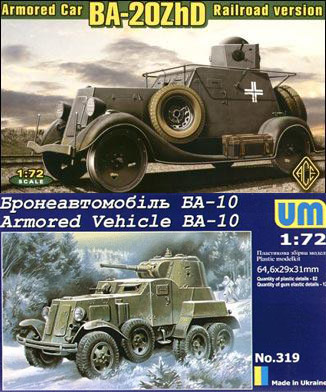
Now, I won't go through every sprue individually, but I do want to show you this one - the chassis sprue - in some detail. Now do bear in mind that out of the two armoured car kits I bought - this one and the UM BA-10 - this kit was the more expensive (£10.70) so the quality of this main component is interesting to say the least...


Just in case you can't make out what I am trying to get at, here is the same sprue photographed from a more side-on angle...


The phrase 'rough round the edges' comes to mind. Practically all parts in this kit, in fact, come with a fine film of flash around the seams and in this case the edges of the chassis are in need of a good sanding and the roughness has ruined the little lip which runs around this component. I shall have to do a bit of repairing here to smooth things out.


The above photo shows the quality of some of the panel line detail - they aren't the sharpest lines in the world, just OK. But maybe I am being too picky, I am sure they will be serviceable enough and will be picked up nicely at the painting stage.


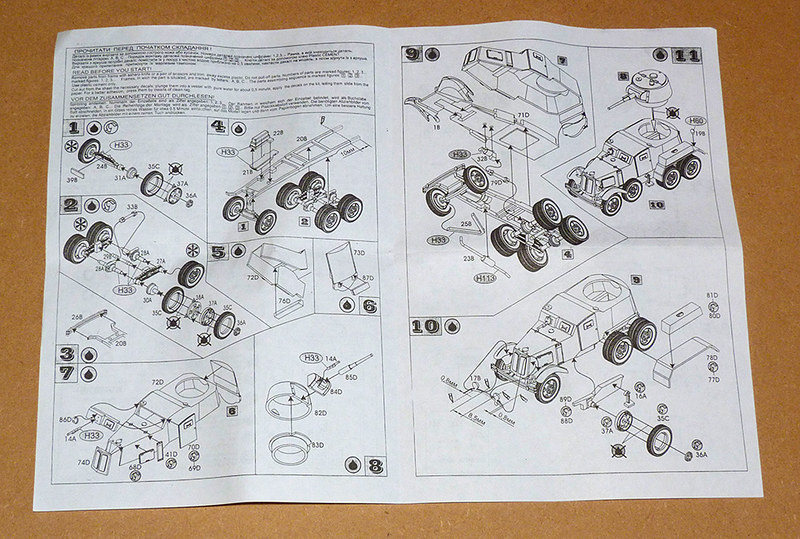
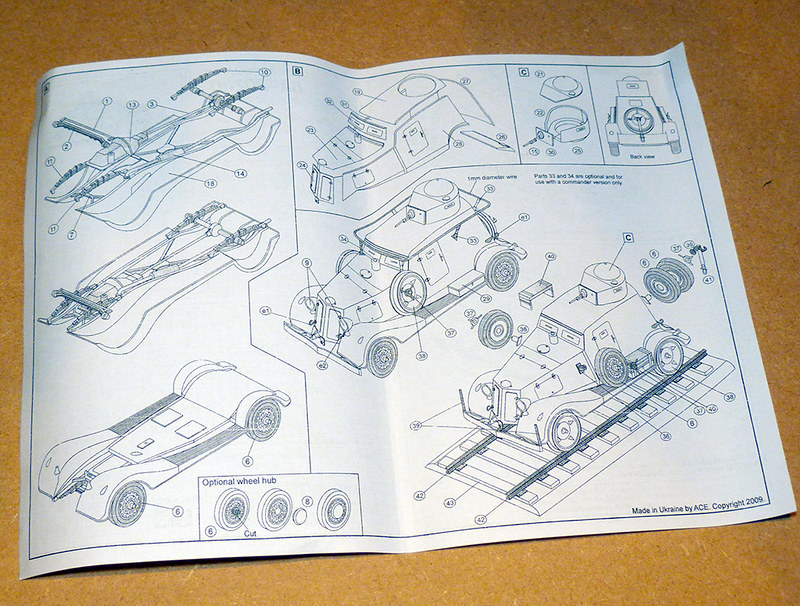
Instructions are clear enough, but while test fitting some of the parts I did find that ACE have left you to try and figure out the best place to glue some of the parts. The suspension in particular has a noticeable lack of pilot holes to guide your assembly.

Edit: Nearly forgot an important issue. While the instruction sheet clearly numbers each component ACE neglected to add these numbers to the sprues themselves! Common sense helps you identify parts, but in some cases - like the suspension springs - there can be some confusion.

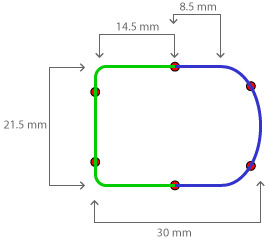
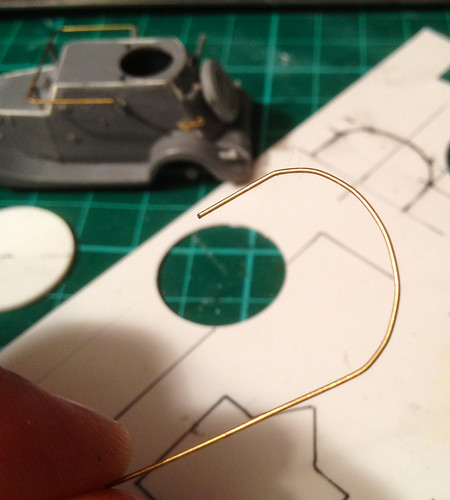
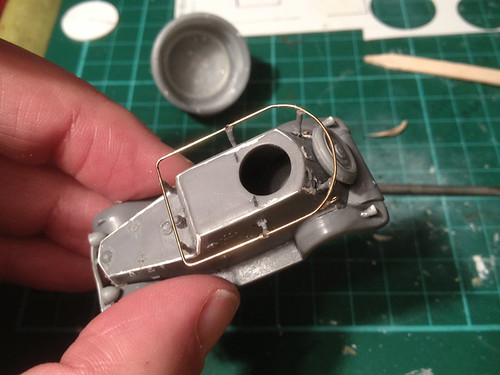
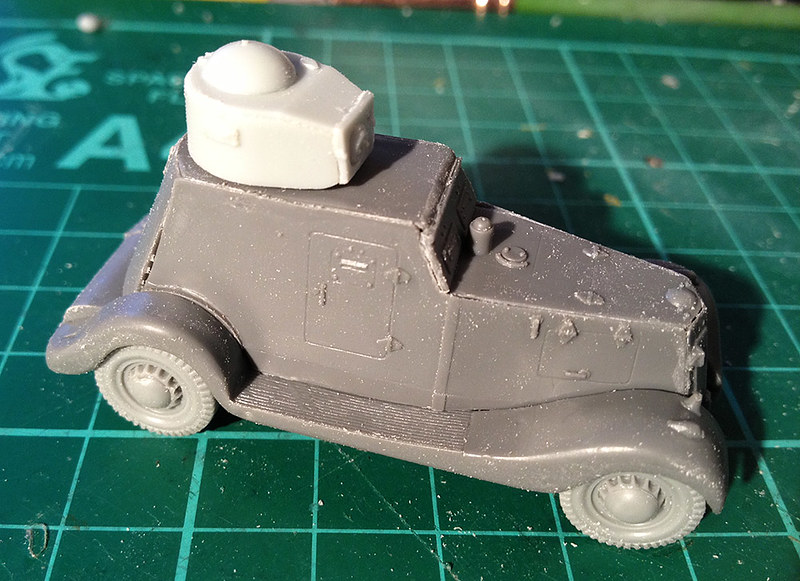
One thing to note is that you have to make the 'clothes line' antenna yourself out of some spare thin wire, not a big problem but the war gamer may chose to skip this fiddly step (some BA-20s were not equipped with this option anyway). And the last parts are the etched ones, four tiny brass tow hooks, a indication, to my mind, that ACE is not up to moulding more delicate parts in plastic.

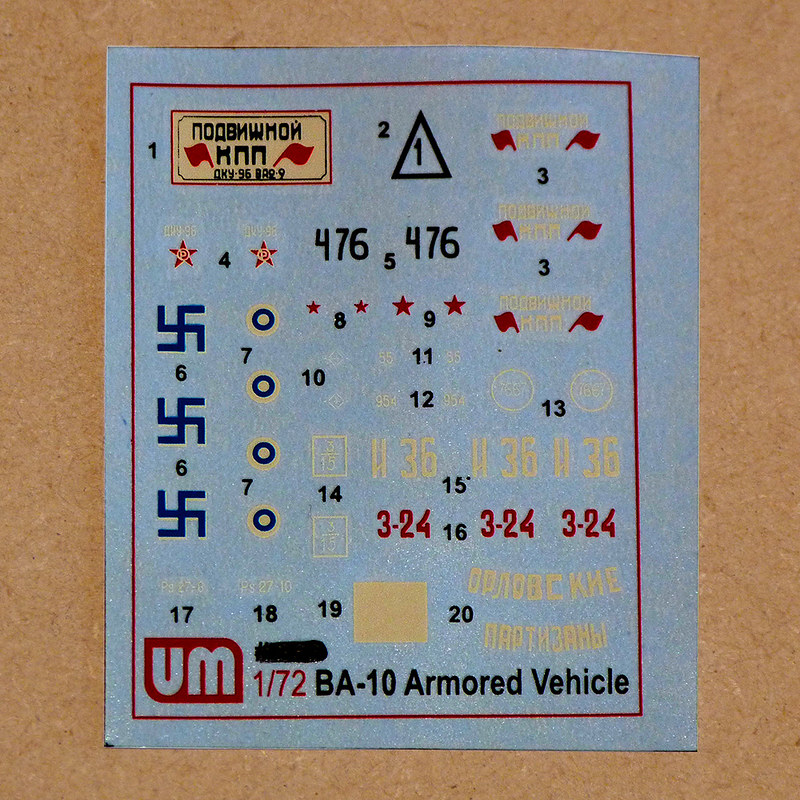
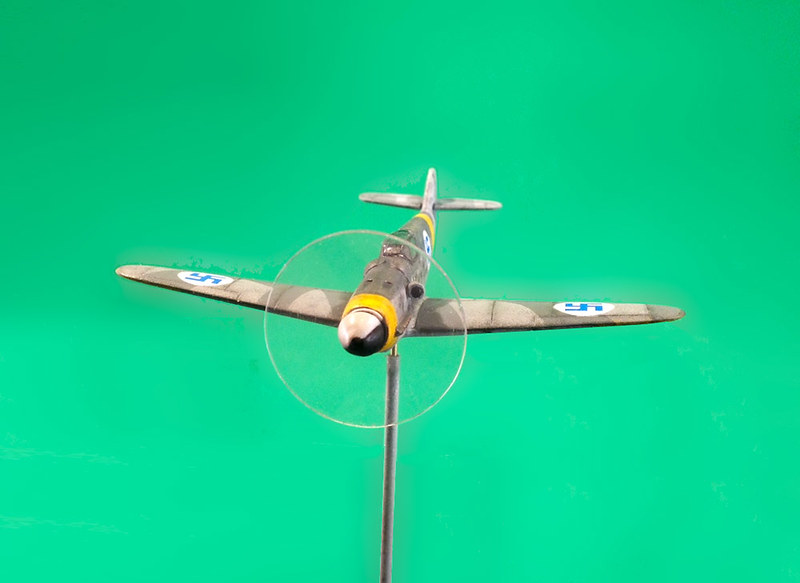
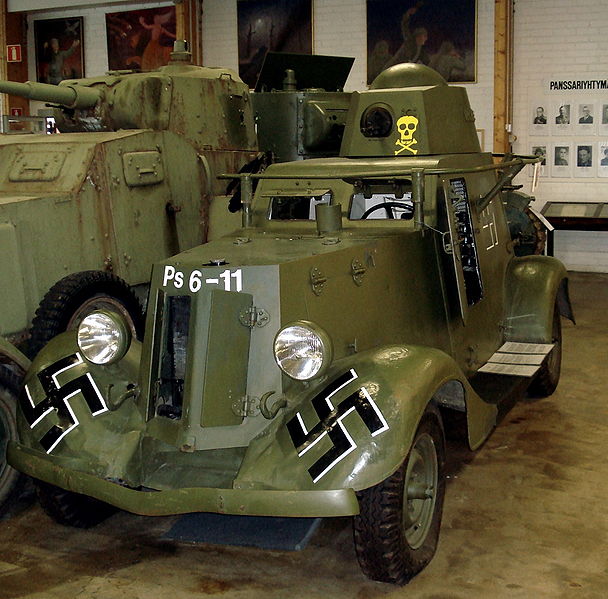
Finally, there are the decals - well, this particular version only comes with one set, some German crosses. I suppose my hope that they might have included some Soviet or Finnish decals to make the alternative road car was asking too much!

Above: A lovely built example of this kit by Neil Lyall. Photo
source: Henk of Holland's ACE WW2 models review section.

Overall I don't really think I am getting my ten quids worth here, but there again it is a relatively rare subject for 1/72 and I couldn't find any alternative, so beggars can't be choosers in my case. The quality of parts are mediocre, reminiscent of some of the older Airfix kits and I really did expect more.

It will be interesting to compare the quality of this to the UM BA-10 I have bought to accompany this BA-20. Both are Ukrainian made kits, I believe, but the UM armoured car was priced at a rather more palatable £7 (though do remember that you get TWO Pegasus BA-6 armoured cars for £9). It all depends wether, like me, you especially wanted this particular armoured car or not.

Thursday 7 March 2013

eBay Coup - Crescent 5.5 field gun

Dipping my toe in the whole eBay auction shenanigans - and I managed to get what I think is a good deal. I won the following item for just £2 plus postage...


It's a die cast Crescent 5.5 gun (No. 1251), which I believe may be roughly compatible with 1/32 figures (?). While being a modern artillery piece (based on the WW2 British 5.5 inch gun) I have bought it as a bit of a poor man's Britain's 4.7 inch gun. It is designed to fire projectiles and is - according to the eBay description - in working order.

Now Crescent was a British manufacturer that shut shop in 1980, although I can't seem to remember them from when I was a kid (Corgi, Dinky and Britains were the ones I can recall). But they seem to be  fairly well sought after on eBay so I was glad to grab this one at such a reasonable price.

As for use, I intend to 'Victorianize' it by adding a (removable) shield and some period looking wheel covers (like those on the Britain's 4.7). Nothing irreparable, all of which I could remove to get it back to it's original configuration should I want to. Painting is another thing - do I or don't I?

Hopefully it will look OK with my AIP Egyptians.

Link: Crescent die cast guns, tanks & trucks at Planet Die Cast

Eduard 1/144 Me 109 G-6 - Complete


Conclusion
Phew! I finished a model guys...Yay!

1/144 is a challenge, I found trying to directly scale down painting techniques I have been learning in 1/72 didn't always work. I also had to fudge the decals as I couldn't find suitable small numerals or the correct emblems in this size. Still, I kept reminding myself that I was building a war game model and not a historically exact display replica.

Tuesday 5 March 2013

Featured work - Panzerguy's Finnish BA-20

No prizes for the reason that I'm featuring this particular model! And although this is a 1/35 scale version of a vehicle I'm making next myself it's very interesting for me to look at how the painting has been handled. Panzerguy's has taken a series of very nice photos that give me some useful reference...


The BA-20 reminds me a little of the contemporary British Rolls Royce armoured car, although while the Roller was deemed obsolete early in World War 2 the Finns continued to use the BA-20 well into 1944.

You can see more of Panzerguy's lovely model here: Finnish Army Ba 20 Armored Car 1/35 Alan kit.

Monday 4 March 2013

Stash Update - Finnish Army Armoured Car Company

Seeing as I am a knat's whisker away from finishing my very first Rapid Fire! army unit - my Finnish Air Group (must call it something else, LOL) - I thought I best prepare my next project in this series. I am working on the HQ unit between the major fighting units so I can get onto more exciting AFVs, so next I decided to get on with my Armoured Car Company.

Under the Rapid Fire! ruleset the armoured car company for the Finns is made up of two units each comprising on one vehicle each. There's a HQ unit and the main company unit and these should be made up with one Soviet BA-20 (HQ) and one BA-10.

Left: Soviet BA-20 armored car, in Finnish markings, , displayed in Finnish Tank Museum (Panssarimuseo) in Parola. Source: Wikipedia

You can read all about the historical usage of captured Soviet armoured cars by the Finns here: Jaeger Platoon - Finnish Armoured Cars of WW2

The smaller BA-20 armoured car is a bit of a chew to get hold of in 1/72 plastic (though there are plenty of examples in 20mm resin), and the only one I could find which is readily available here in the UK is the BA-20 Railroad version from Ace. As the name suggests this is a version of the vehicle which comes with railway wheels so that it could ride on the tracks, but it does come with the ordinary road wheels too.


The bigger BA-10 is a lot easier to procure and there are nice versions by Pegasus (lovely 2 vehicle war game quality box set) and, for example, UniModels. It was the Unimodels version I decided to go for after reading a very positive review over at the SquadPainter blog.

Now I really like the look of this pair of armoured cars, they are sort of quaint in their way and yet I can see how in a war game senario they could be very useful despite their somewhat limited armament. Although the BA-10's 45mm gun would be very handy against infantry, light gun positions and soft vehicles it's as reconnaissance vehicles where I see this pair excelling.

Left: Soviet BA-10 armored car, displayed in Finnish Tank Museum (Panssarimuseo) in Parola. Source: Wikipedia

I haven't even opened the boxes yet so the next post will be the unboxing and will be followed by the building of the BA-20 first of all.

The BA20 was bought from Model Hobbies for £10.32 (yikes!) and I got the BA-10 from Hannants for £7.40.

Sunday 3 March 2013

Minicraft 1/144 JU-88 Pt. 5 – Base coats complete

Not as much model time this weekend as I would have liked (where does the time go?) but at least I got all the base coat and touching up done on my JU-88. I thought I'd picture the underside as it's quite colourful what with the theatre colours...


I haven't attached the bombs as I think they might hinder my plans for weathering the underside. Same with the machine guns and aerials, these will all be attached once all the major weathering has been completed.

Well, I've hit a bit of a speed bump now as the Finnish decals I have are not quite big enough for this bomber and I've had to order another set (this time a 1/72 scale sheet which has small Finnish decals which might do the job). So, time to finish up my two other aircraft in this project.  

Saturday 2 March 2013

Featured work - Darkbirk's KV-1

Wonderful Trumpeter KV-1 over at the 'Are We Not Men?' blog. By complete co-incidence I was at the point of buying this model yesterday for my Finnish army's heavy tank company, but at the last minute purchased something else...Now I'm kicking myself, the KV-1 is such a terrific looking beast.


As usual Darkbirk has done a lovely little photo vignette of this tank - the flamethrower version - tackling an enemy bunker (which is similarly excellent). There are more photos of this little diorama here: AWNM? - The guild - build up 2012 (9)