Tuesday 21 July 2020

...Just One More Thing! 1/100 KV-1.

Yes, I did say that I had completed the construction on my 1/100 KV-1S tanks... But... I hadn't! πŸ˜‚

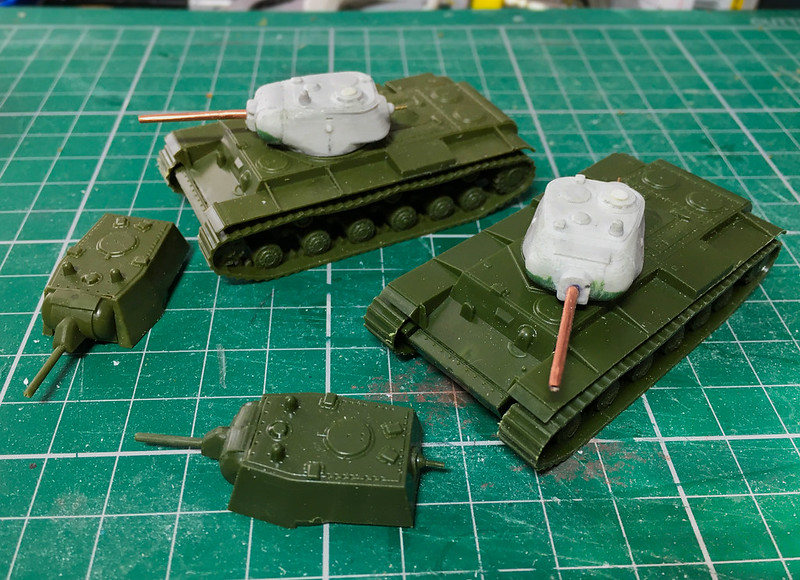
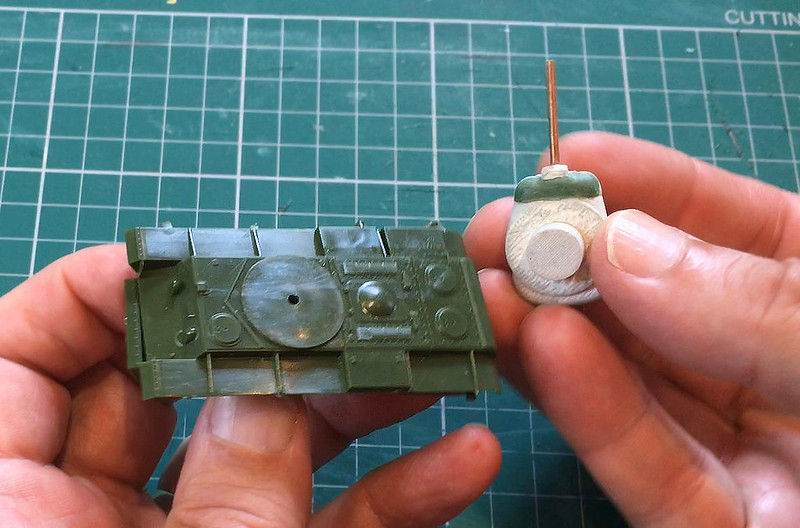
While the main feature of this projects is the conversion process of making a couple of KV-1S tanks my tinkering left me with a couple of KV-1 variant turrets. It seemed a pity to waste these parts and even though I don't foresee me wanting to play an Operation Barbarossa scenario (the German invasion of the Soviet Union in 1941) you never know! 😏

And so...

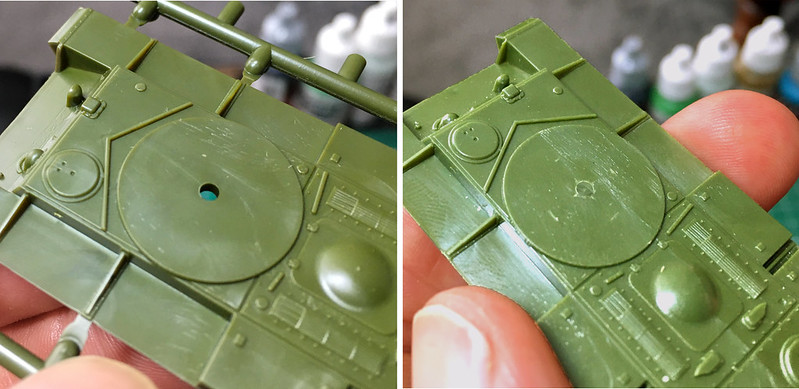
Having converted the KV-1 model's turret rings to accommodate the 3D printed turret's larger 10mm 'plug' attachment I would now have to modify the original Zvesda turrets - with their little pin attachment post - so that they would work with the new 'socket' mods.

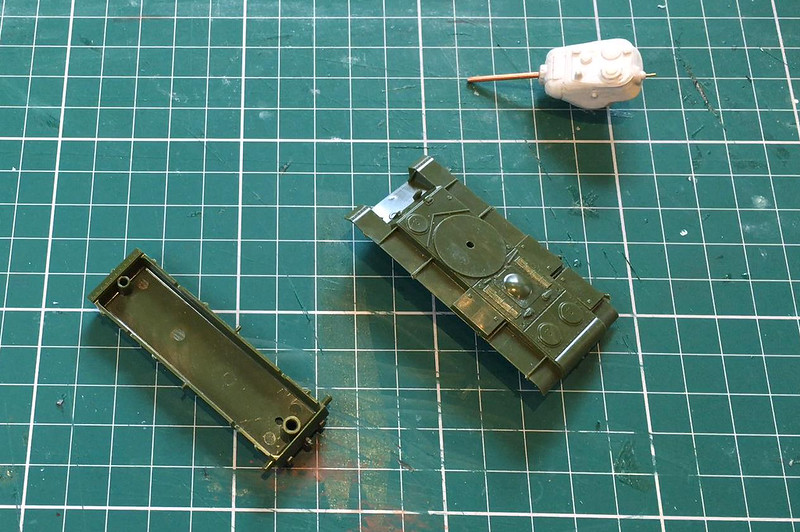
The principal of this upgrade is pretty straight forward. I now have to make two 10mm x 3.5mm cylindrical 'plugs' which I will glue onto the bottom of the KV-1 (Model 1940) turrets. However, I will also magnetising these turrets in a similar way to the way I did with my KV-1S turrets and hence the need for cylindrical 'plugs'. The magnet will be glued inside the tubular plugs.

I had to order in the 10mm diameter styrene tubes as my local craft store have a very limited range of styrene pieces. It took me a while to find exactly what I wanted online but I eventually tracked down the items to Dorsping Models of Cornwall, UK. Unfortunately, to keep costs down I opted for 2nd Class postage and so a annoyingly long wait ensued...


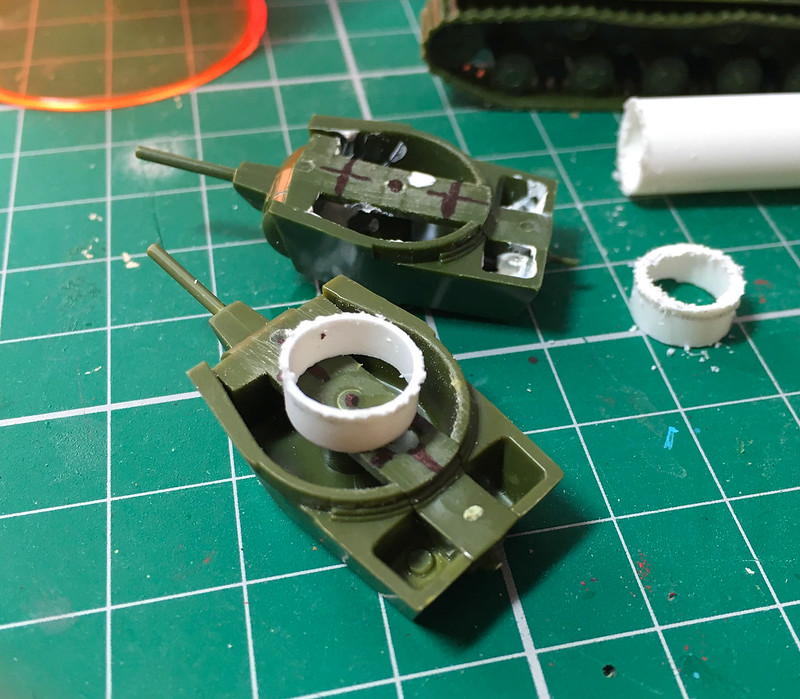
(I should add that I tested the uncut tube for size before I started sawing off 3.5mm rings. I was most satisfied when it slipped nicely into the hole in the hull I had cut for my turret plugs. I love it when a plan comes together!)

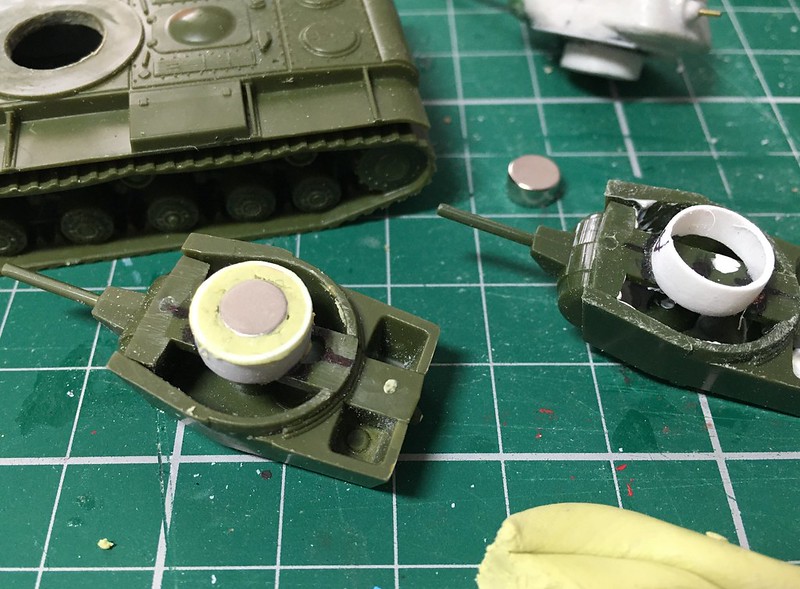
Anyway,  having created my new KV-1 attachment plugs I then had to stick a couple of the little button magnets I had into them. I did think about just super-gluing the magnets inside the cylinders but, in the end, I opted to secure the magnets to the turret floor and the plug ring by means of a nest of Milliput putty...


Now the annoying wait until the putty dries... 😫

And then...! Taa-daaaaah!


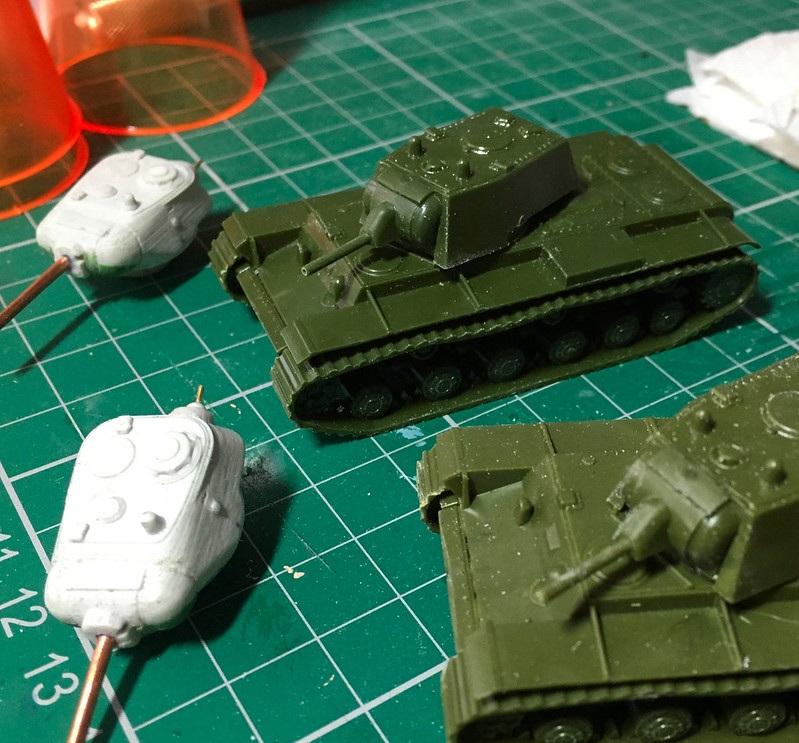
The new (old) KV-1 turrets snapped into place perfectly. I now have the ability to field a pair of KV heavy tank for scenarios fro 1940 to 1941 and another pair o KV variants to suit operations from late 1942 to mid-1943!

Job done... Now let's get 'em painted.

Sunday 12 July 2020

KV-1S Conversions - Construction Complete

Well, finally I've gotten round to finishing off the conversion and construction of my 1/100 Soviet KV-1S tanks. It's been dragging a bit as I was trying to video the process but that turned out to be a complete shambles and so I decided to wait until I have my man-cave workbench sorted before I try vlogging my kit making.

Still, quite pleased with the end result of my Frankenstein shenanigans...


As you can see, I built the original Zvesda kit's KV-1 turrets as well as I want to convert these so I can swap out the two different types of turrets. I'll magnetise the kit turrets but will need some 10mm plastic tube to make the larger size 'plug' attachments to make them work. In this way I can field either the KV in it's early (1940 'Operation Barbarossa' period) configuration OR the later KV-1S 1943 variant.

NEXT: Priming and painting.

Monday 6 July 2020

KV-1S - A Series of Unfortunate Events...

Part 4 of my KV-1S conversion started with a bit of a 'oh, crap' moment! 😑

Turret blown off a KV-1E, Soletsky District, Novgorod Oblast - July 1941!
What is Russian for 'oh, crap'? πŸ˜„

In my last post on this project I had just cut the hole in the chassis for the turret 'plug' (for want of a better word) so I could fit the two together. The hole was 'snug'...Very snug. So snug, in fact that one in the turret didn't want to come back out or even turn!

Never mind, I thought, a couple of good twists with free it , I thought...And then...

...SNAP! πŸ˜– 😭

I forgot that a 3D printed component like my turret is a flimsy hollow part with quite thin walls. Twisting the turret wrenched the turret plug off the bottom completely off...


Oooopsie! BUT, after the initial shock I realise that this was actually a bit of fortuitous accident. I was still trying to decide the best way in which to add a small magnet to the turret and the separation of the plug element gave me a good idea how I might, now, achieve this.

After I tapped the snapped-off plug out of the turret ring it became obvious that I now had a nice neat little 'pocket' I could glue my magnet into...


That done I then super-glued the plug attachment back onto the base of the turret (I wisely did some sanding of the turret ring hole to make sure that the fit wasn't so snug this time)! πŸ˜‚

...All I had to do then was mount another magnet into the hull of the tank and the two parts should then snap together perfectly! (As long as I have the magnets' POLARITY correct!)

Some very rough measuring and mental arithmetic ensued and I worked out that I needed to raise the hull magnet up about 4mm so that it met with the turret plug and it's magnet. These little magnets are quite strong so they don't need to be directly connecting with each other, they just need to be very close to each other.

I glued together a couple of 2mm thick styrene pieces to act as my platform and glued them onto the floor of the hull and a magnet (ensuring it's polarity was correct) onto the plastic strips...


And then came the moment of truth! I placed the turret in the hole and with a  satisfying 'snap' (a good one this time) it popped into place, attracted by the hull's magnet! HOORAH!!! πŸ˜πŸ‘Œ


Phew! Time for a cakie... (Interlude music!)


Well, that's the majority of the construction of my KV-1S conversion (there were only 6 parts to the Zvesda KV-1 kit in total), all that remained were the tracks but they are of the one-piece type...


NOW...I could attach these now - a lot of war-game modellers would - but I prefer to prime and paint these parts separately as it's a bit awkward to get the top of the tracks done as there ain't a lot of space once they are fitted onto the chassis. But that's a personal preference.

NEXT: Priming and painting.

--------------------------------------------------------

πŸ‘‰ Link to the KV-1S Conversion Project Series of Posts.

Friday 3 July 2020

1/100 KV-1S Conversion Pt.4

I've been a bit distracted with other things and have neglected my KV-1S conversion project, so it's time to get moving again!

Here's the various parts I shall be working with in this next stage of this build.
It's time to attach the 3D printed KV-1S turret to my Zvesda KV-1 hull, but there are a couple of things I need to do along the way. The first is to modify the hull's turret ring so I can attach the turrets plug into it...


The Zvesda hull has a pin-type turret attachment hole, this is going to have to be considerably enlarged, to 10mm. But even before that I will have to cut a nice clean circular hole precisely in the centre. I do have a circle cutter tool - like a drawing compass but with a small blade instead of a pencil - but I will need to fill the existing hole so I can draw the circle using it...


The hole filled, I can now set the hole cutter pin firmly in the middle of the turret ring and draw the blade around in a circle. This will provide me with an accurate guide by which I can cut out the new attachment socket...


Using a small drill bit I drilled a pilot hole on the inner edge of the guide and then used a Dremmel cutting bit to cut all the way round the guide. Although the quick way of getting the hole the bit left the soft plastic a little rough, so I then neatened up the edge of the circle - right up to the guide line - using a file...


I kept trying the turret in the socket hole until I eventually got a snug fit. After a wee while in she popped and I had a tank with a turret!


Well, that's the first part of my turret attachment plans - next I want to add a couple of small magnets to the model so that the turret stays in place but is easily removed and exchanged (I'll explain why later - as I have a 'cunning plan')! πŸ˜‰

Next: Adding the magnets!

-----------------------------------------------

Link to the KV-1S Conversion Project series.