Sunday 31 August 2014

Pegasus 1/72 German Army Truck - Part 4


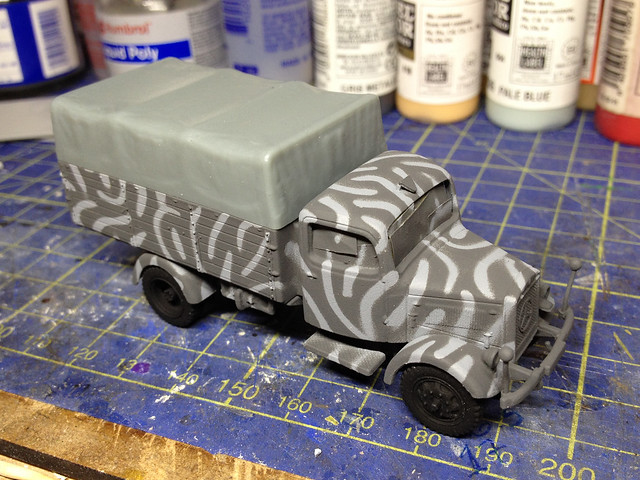
Before I begin the application of the decals there were a couple of little jobs I needed to do to prepare for this stage, the most important of which was sourcing some suitable decals to begin with! As the Pegasus kits do not come with decals - and only offer a vague paint scheme suggestion as part of the box artwork - it's pretty much up to you to research an appropriate finish for these trucks.


Luckily for me I also happened to be working on a conversion of an Italeri Opel Blitz and this offered some painting ideas and a set of suitable decals (while these were for variations of the Blitz truck in German service I figured they would be similar markings to those which would have appeared on Mercedes L3000 as it was in service at the same time).

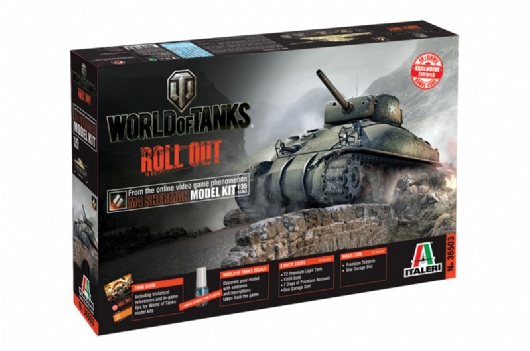
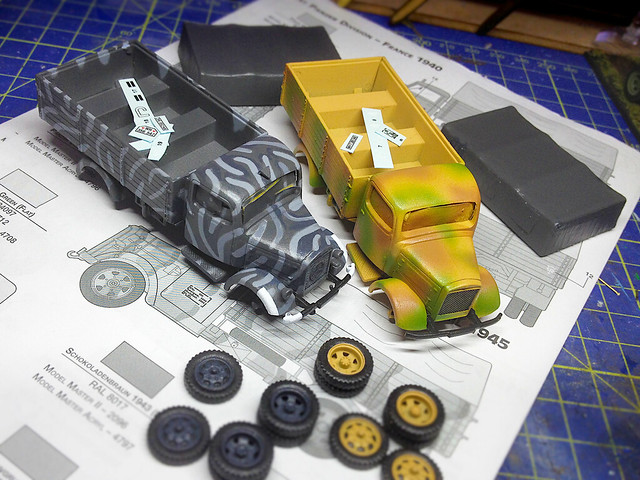
The Italeri Opel Blitz kit has some very interesting schemes for this type of
medium German Army truck. I guess that these colour patterns and unit
emblems were pretty widely used for a range of vehicles, only number
plates changing - but at 1/72 I'm not being too picky about that.
So, having got hold of some decals it was time to prep the model for their application. As usual I started by giving the models a light spray of Humbrol's Acrylic Gloss Varnish over the base coat, to protect that layer and to provide an extra smooth surface onto which the transfers could stick. This helps prevent 'silvering' of the transfers, where tiny air bubbles are trapped under the decal (normally encountered if you try to apply a decal directly to a matt paint surface). [Note: I mention this for the benefit of any beginners reading this - I know many of you will already appreciate this.]


I used Microscale's Micro Set and Micro Sol decals solutions to set and to soften the decals so they went onto the surface nicely. Micro Sol softens the decal so it conforms to any moulded detail on the surface of the model - for example, the unit decal on the side panel of one of the trucks sank into the gaps between the planking so that it looked like it had been painted on. Micro Sol is also good for getting rid of any noticeable edges on the decals, it smooths them out so that they look as if they are part of the surface rather than stuck on the top.


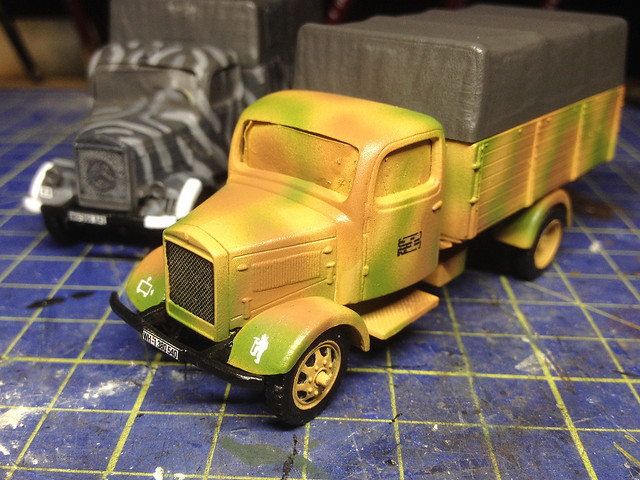
The end result is very pleasing. To finish this stage off, and seal the decals on, I give the models another light spray of Humbrol's Acrylic Gloss Varnish - this also sets me up for the next stage in the project, the weathering stage.

Tuesday 26 August 2014

Pegasus 1/72 German Army Truck - Part 3

Just to prove I am actually doing some model-making - here's a tiny update on the progress of my the second of my Pegasus German Army Trucks. As I wanted the second truck to be a bit more detailed I decided to add some extra texture to the disappointingly plain canvas tilt...


The standard German Army canvas 'tilt' cover was actually quite a complex affair with lots of flaps and ties and what-not. In particular troop transports like these Mercs and Opel Blitz had three large flaps on each side of the tilt (they look like 'windows' but I'm not sure of the correct term for them). But the Pegasus plastic cover does not show these feature clearly so I decided to give them a bit of extra emphasis by placing some wrinkled metal tape over the top (metal tape, I find, crinkles beautifully).

As I mentioned, this bit of work is hardly worth it's own post but it does illustrate how improving the level of detail of this 'easy build' kit can be quite a simple job. Indeed, all the extra detailing work I did on this model was as easy as this - which goes to show that not much needs to be done to turn this excellent 'quick build' kit into a fairly respectable display quality model.

Thursday 21 August 2014

Pegasus 1/72 German Army Truck - Part 2

Picking up from where I left off just before my summer holiday I'm cracking on with the second of my two pegasus German Army Trucks. A reminder...


I had chosen a dark grey camo with light-grey 'squiggles' from the colour scheme that came with an Italeri Opel Blitz kit I had. I don't know if any Wehrmacht Mercedes L3000s had this camo scheme but as the main purpose of this project was for me to try out new camo schemes I thought I would give it a go. I began by masking out the 'squiggles' using BluTac over a light-grey base coat...


This took a while and to be honest I think this was probably an overly convoluted technique, but my airbrush skill (or rather lack of it) just wouldn't allow me to paint the squiggles freehand (and I didn't want to brush paint these on). Once done I gave the whole thing a coat of Humbrol's acrylic spray in Tank Grey, then I peeled off the BluTac...


Not perfect but I suspect the real camo was just whacked on pretty haphazardly too. This will still need a bit of touching up though, just to clean up some of the more sloppy squiggles. But overall, it's an interesting effect.

So, once tidied up I'll give it a coat of gloss varnish before applying the decals (also from the Italeri Opel Blitz kit) and then another coat of varnish before starting the weathering.

Wednesday 20 August 2014

World of Tanks Roll Out in 1/35 scale


Here's a curious cross-over of hobbies. I am a fan of the World of Tanks computer game and I have to admit that occasionally I have considered making a plastic kit of a tank that's in my virtual garage. It would be an amusing and novel theme for a kit as the World of Tanks has some interesting - if not entirely authentic - colour schemes and also I must admit there are a couple of my virtual tin-cans that I am particularly fond of and have been with me for quite some time.

Anyway, here's the gist of this post - Italeri has released a series of models aimed specifically at World of Tank fans like myself. Now you can build a little representation of your virtual war-chariot and stick it on your mantle-piece!

I must admit I wasn't a big fan of the M4 Sherman in the game, for me it was just
a means to an end - I wanted to get to this beasty, the M4A3E8 (or 'Easy Eight').
It's just merchandising of course, sticking the WoT branding on a specially designed box - there isn't actually anything special about the kits themselves and they are just re-packaged versions of tanks Italeri already have in their range (probably). Though you do get a nice sheet of decals that replicate some of the emblems that you can put on your tank in the game itself.

So far they have released kits for the:

  • Sturmgeschutz (StuG) 8.8cm Pak43/2 (Ferdinand/Elefant)
  • Panzerkampfwagen VI Tiger Ausf.E
  • M4 Sherman
  • M24 Chaffee

As a World of Tanks fan I have to say it's a bit of an uninspired line-up. Part of the joy of playing the game is that the developers have brought to life a wide variety of 'paper tanks' (design concepts and prototypes which never actually saw action in WW2) and I would have liked to have seen some of these in kit form. As I said, Italeri have taken the easy option of releasing tanks that they already had as part of their line-up.

Aside from the kit itself Italeri have produced some special World of Tanks
literature to accompany the model. They have also included some special
game codes that provide you and your friends with some benefits in the
game. The literature is noting you can't find online really.
One other thing is that these kits are all in 1/35 scale. Not a problem as I guess fans of the game will want reasonably big ornaments to stick in their trophy cabinet.

As yet I haven't managed to find a price for these 'special' editions* but if it's any more than the bog-standard 1/35 versions of the models then I would have to say that it's a bit of a gimmick and not worth it. Just buy the cheapest 1/35 version of your beloved WoT tank and paint it in whatever scheme you like!

* They are 29 Euros (£23.86) - compared to the standard Italeri version of this model which can be had on Amazon Uk for just £14.99!!!

Link to the Italeri World of Tanks 'Roll Out' Range.

Now, if Italeri had included some of the more novel tanks in the game, like this
Object 268 I might have been tempted. This was a favorite of mine in the game.

Tuesday 12 August 2014

I'm back...Now keep on trucking!

Italy was fantastic! And while it's always a bit depressing at the end of a wonderful holiday at least I had a couple of parcels waiting for me when I returned to ease the pain!

Zebrano is a Belarus company which seems to specialise in short-run resin
kits of less well known Soviet military vehicles. Unfortunately I couldn't
get hold of their YaG-6, but their YaG-10 can easily be converted.
The YaG-10 is a bit of a monster, and 8 ton load truck which I had never heard of until I came across a rare photo of it's 5-ton 4x2 sibling - the YaG-6 - over at the SA KUVA WW2 Finnish Army archive. The YaG-10 is the larger triple axled (6x4) 8 ton load version, but is otherwise identical to the YaG-6 except for the extra rear axle.

Finnish soldiers look over their latest acquisition - courtesy of the Soviet
Army - and they seem to be very pleased. As well they might, as it's 5 ton
load capacity would have been greatly appreciated. Source: SA KUVA
Two of these heavy trucks were captured by the Finns and were put to immediate use. I'll be taking a bit of a liberty with the historical facts and using this model - once it's converted to the 4x2 format - as part of my Heavy Artillery section. I realize that under the Rapid Fire wargame rules that I am using as a guide to my Finnish Continuation War collection of models that 'heavy' artillery - if at all available - is an 'off table' resource, but as I am not collecting in order to play the game I'm not worried about such technicalities.

The YaG-6, 4x2 version of these heavy Soviet transports. Nearly identical
to the YaG-10, except for the rear axle format. It seemed to me that this
big truck would be ideal for towing heavy artillery pieces.
The Zebrano kit is of the short run resin type, of which I have had no experience making. I do have a Wespe Citroen C-45 in my stash which can also be described as being for 'the advanced modeller' due to it's large number of small resin parts, but the Zebrano kit isn't quite that complicated.

It was a bit expensive at €27.45 - hence it being my only kit acquisition for August - and also a bit hard to find (mine came from Germany) but I really wanted to add a few 'niche' and less well known vehicles to my Finnish collection to illustrate the eclectic nature of their procurement in WW2. It seems to me that the Soviet YaG trucks fit the bill of being pretty niche!

Anyway, aside from the lovely Zebrano YaG-10 I also received a smaller parcel from Australia containing a set of Value Gear resin 'Truck Blobs' (yes, that IS what they called them) - these are two prefabricated and one-piece truck cargo loads. I know I could make my own, but these just looked so nice that I couldn't resist buying a set just to try them out and/or to act as inspiration for my own scratch built cargo 'blobs'.

I opted for their '72GT1 German Truck Blobs #1' set as the tarp covered cargo looks like it will be a suitable load for an artillery truck.