Showing posts with label X-Ref: HUN/Ford39V8/0117. Show all posts

Thursday, 21 May 2020

Ford Trucks... 2nd (Re-)Starter Project

Yesterday I discussed what would be my first re-starter assignment - my Armourfast M4, which is mainly a painting job - and today I'm going to reacquaint myself with the other models I have chosen to get me going in the hobby again. These will be a pair of Hunor 1/72 resin 1939 V8 Ford trucks...


Now these models must have been the very last thing that I was working on before I stopped model making in 2018. I didn't even stop construction at a obvious place (unusual for me) and I seem to have has some sort of 'cunning plan' in mind...But goodness knows what that was!

I checked back on my blog - thank goodness for my blog - and it seems like these models turned out to be a bit of a challenge (I don't think I have had a resin model yet that hasn't been). You can check out 'the story so far' by following this link: Kitnoob's Finnish m39 Ford V8 Truck Saga.

But here's just one little pic which will give you an idea of how painful this build was...


😣

...But, of course, it's me we are talking about so I was obviously loving this! 😂

This appears to be the last photo I took, but it gives a bit of a false impression about how far along I was as this was just a dry fitting test. There were still several issues I still had to resolve before putting the major parts together...


The good thing about this particular job is that it will definitely dust the cobwebs off my construction skills. That's if I can find all my modelling tools, which are mostly still under some of the junk in my attic dumping ground!

Saturday, 21 January 2017

Hunor Model 1939 Ford V8 Truck - Part 5

We'll start this post by having a quick look at how I intend to produce a couple of driver figures for my Hunor trucks. Annoyingly, these kits do not come with generic 1/72 drivers (I wish manufacturers would, by default, supply a driver, it's sad that so many do not).

Because these trucks will be part of my Finnish Continuation War collection the drivers will have to look the part, so I will have to cobble together something suitably 'Finnish' looking!


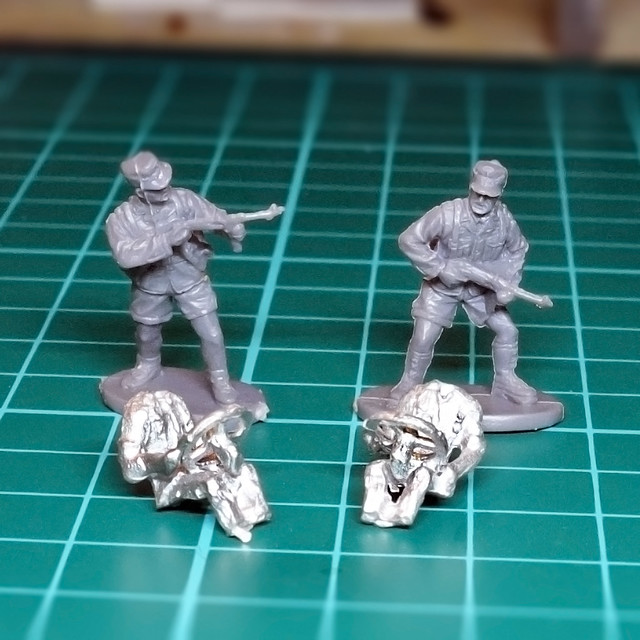
What I decided to use were two of my S&S Models 1/76 white metal Generic Driver bodies, and then I will transplant the heads from two of Ceaser's Africa Korps infantry onto them. The German field caps on these particular 1/72 figures look very close to the Finnish issue field cap of WW2.

As you can see, I have gone for a body that also includes a steering wheel, this is just convenient for me because - although Hunor does include a resin steering wheel - I don't want to muck about with tiny and delicate resin components like steering wheels (which are super delicate and, once again, are attached to a slab of resin). I figure that once the completed driver is mounted inside the model's cab you won't be able to notice this fudge.
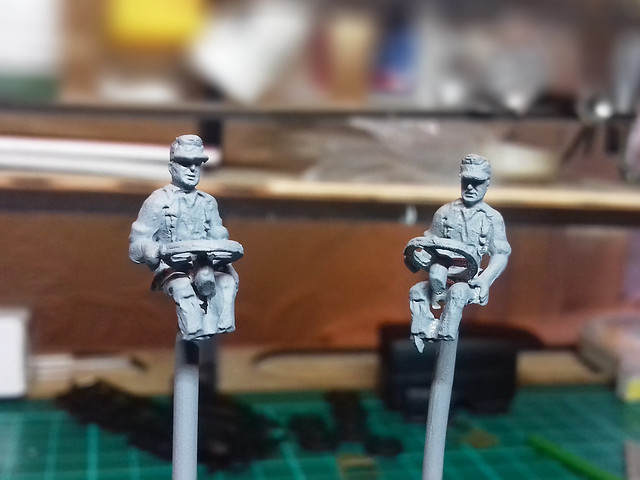
Head transplant completed and primed, I am quite pleased with these figures.
Anyhoo, I have decided to have a go at making my own cargo flatbed to replace the resin parts that were supplied. Now, I have to say you do not have to do this, the supplied parts aren't great but they are useable. But, I want to build a canvas tilt cover onto the top of my flatbed, so I wanted something a little more sturdy (the walls of the Hunor flatbed were very flimsy and a little warped).

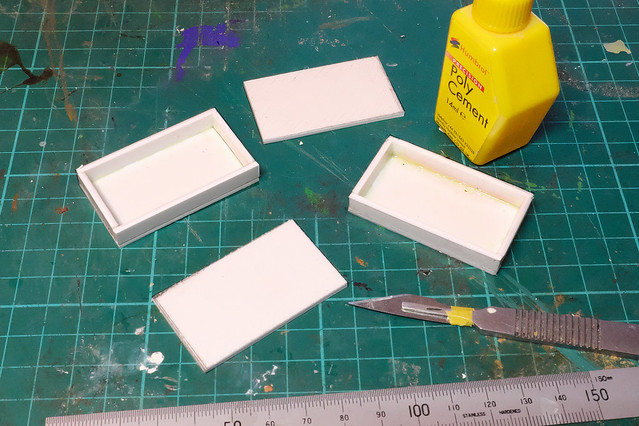
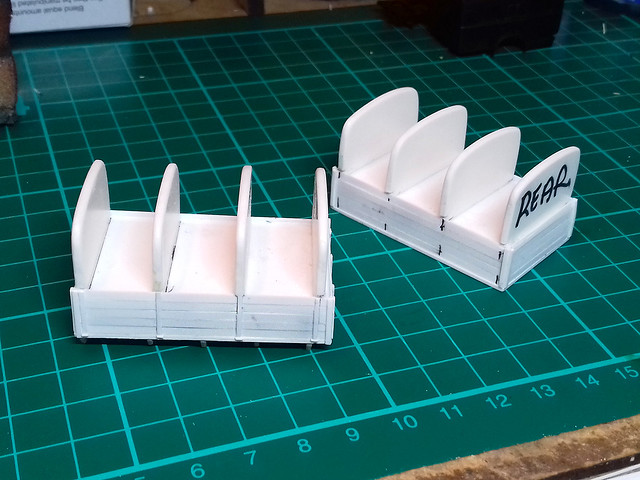
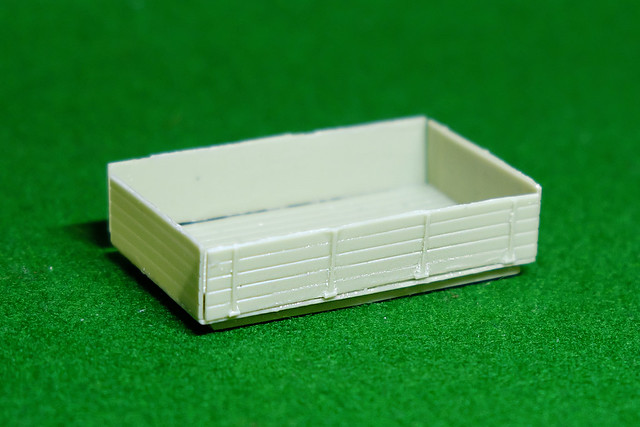
I started my flatbed by making two simple styrene boxes...


These would be a nice, square (as in, evenly proportioned) and very solid platform onto which I could add the detail and the additional 'canvas' cover construction.

Historical note: In actual fact, while having a canvas cover suits my wargaming aesthetic preferences, the real 1939 American commercial Ford trucks don't seem to have had them. In fact, most of the commercial trucks imported to Finland from the US seem to be what are called 'stake trucks', which don't have a cover, just wooden slated side-walls. The German-made Ford V8s - designated Ford G91[9]7T, 3-ton, 4x2, 'Ford Einheitslastwagen' [Universal truck]- did have canvas covers, but that's probably because these were manufactured with the military in mind. So my interpretation is a bit of a hybrid model of convenience!
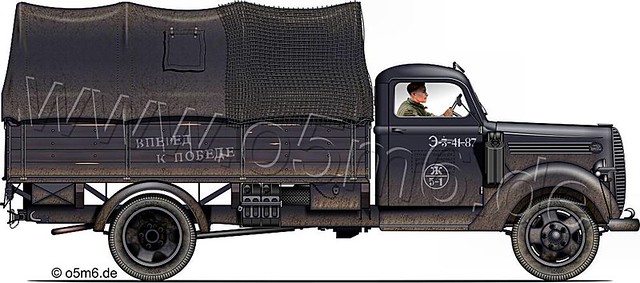
The German-built Ford (yes, the Americans made a profit from this as they were
yet to enter the war), these were modified to suit military use. Additions included;
rear mudguards, 'jerry cans', tool boxes, roof-mounted convoy signal and the
standard Wehrmacht type of canvas tilt cover. The German M39 Ford also had
a single piece windscreen, all things that the American version didn't have.
Picture source: Engines of the Red Army in WW2
So, I reiterate, I am actually cheating by adding a canvas tilt to a commercial American Ford M39. That's not to say that they never had a canvas cargo cover, I've found pictures of US Ford '39s with locally made canvas covers, but they seem to be the exception rather than the rule. But, these covers suit wargaming as it means you don't have to make removable passengers to represent the troops that accompany this vehicle. :)

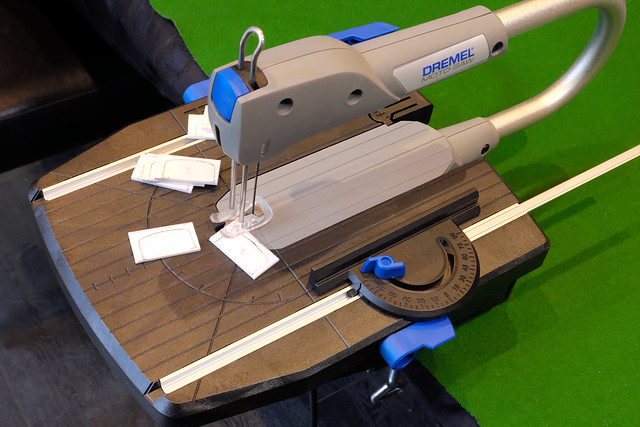
Now, here's an opportunity for me to use my fancy-nancy Dremmel Fretsaw!
With the basic boxes (cargo flatbeds) constructed, I start making the canvas covers. I'll be making a couple of simple ribbed-framed boxes, much in the same way as I did when I converted my Steyr Raupenschlepper (RSO) Prime Mover...
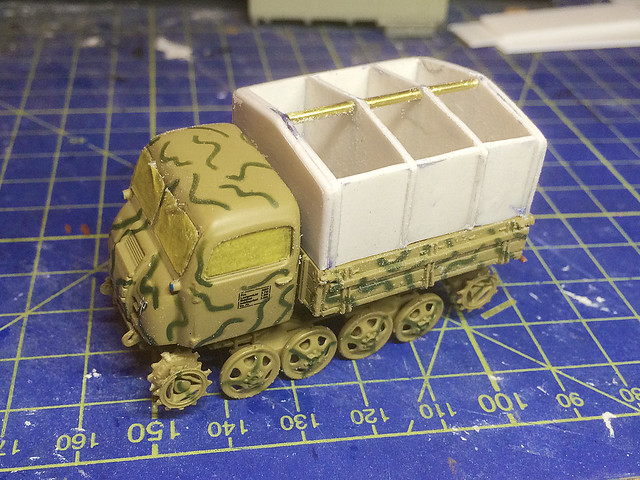
A 'canvas tilt cover' frame construction, which I added to my RSO.
The RSO had a nice easy squarish canvas cover, but my Fords will have a more arched cover, with rounded edges, so here's where my Dremmel Fretsaw comes in. It's ideal for cutting out freehand shapes neatly...


I used styrene card, as that's what I just happened to have to hand at the moment, but this could have been just as easily done using ply or even balsa wood. However, using plastic card means that the frames should be nice and sturdy and will glue nicely onto the flatbeds I made.

One word of caution - if you are going to give this a try - the fretsaw is primarily designed for cutting wood and thin metals, while it does cut plastic you will have to make shorter cuts on slower speed settings. Long cutting session on high speeds creates HEAT, and - as I found - you could actually melt the plastic you are cutting so you SEAL up the cut as you are going along! (I kid you not!)


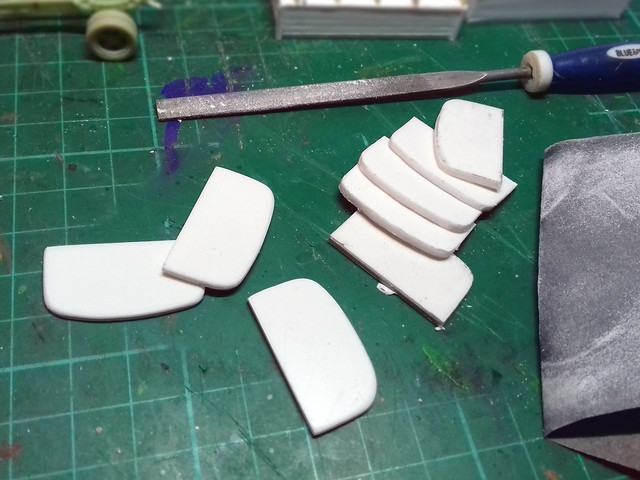
With some sanding to finish off any rough edges, my plastic arched ribs are ready to attach to the flatbed. I've also started adding the detail to the flatbed boxes, like side planks and 'metal' side strips...


I'm still undecided as to what material I will make the actual canvas cover - maybe masking take or tissue - as the tin foil (kitchen foil) I used for my RSO cover was a bit of a pig to work with and paint. I think I'll have to do some experiments.

BUGGER...Another fly in the ointment!
...On testing the fit of the flatbed to the chassis frame I discovered that there seems to be a possible issue with the dimensions of Hunor's chassis. It may be too short. If you attach the support spars where Hunor suggests you do on the bottom of the flatbed (and they are very specific in their instructions) the rearmost spar overshoots the chassis...


After going back to the reference material I have and some Googling, I think I have solved the puzzle of this issue. Hunor - as with their Ford V3000 truck - do two versions of this vehicle, one based on the American design and another based on the German licenced-build version. However, to save time and money, it looks like they have cheated and used the same chassis for both models and this may be inaccurate as I believe the German chassis and chassis support arrangement differs slightly from the original American version. Still, there are some dimensional issues as well.

What makes me think they have included the German chassis is that they have also included the rear mudguards - which the American version didn't have - and some additional accessories that relate to the German militarised Ford G91[9]7T version of the truck.

It's not a major disaster, just another annoyance and means you will have to show some initiative when constructing this model (which seems to be a pre-requisite for building resin models)!

Saturday, 14 January 2017

Hunor Model 1939 Ford V8 Truck - Part 4

While I continue to wrestle with the Ford's cab (a lot of work there), I have managed to prepare one of the other main sub-assemblies, the chassis...


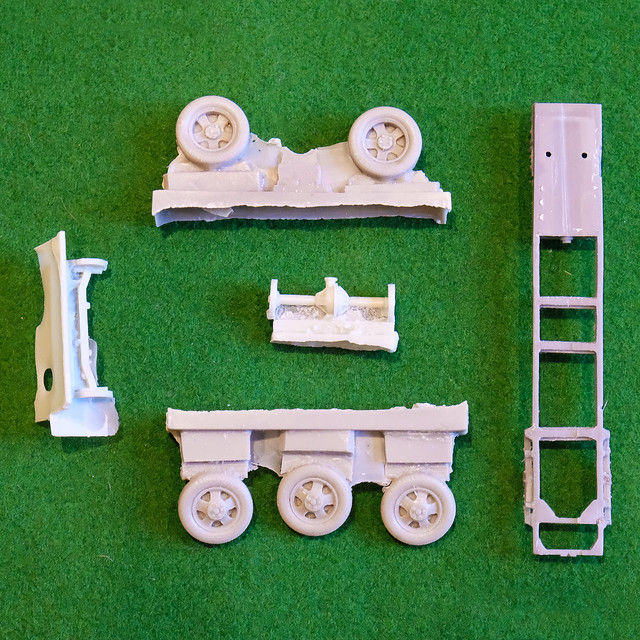
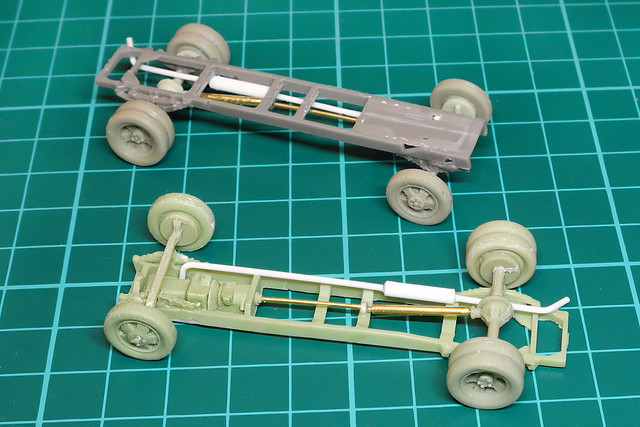
In the above photo are the unprepared resin parts - aside from the chassis frame itself, which I freed from its slab of resin earlier - and below is the chassis components of my second Ford prepped and ready to assemble.


There are other components, or rather, there should be a selection of other components to complete the chassis, but some are missing! One of the kits has a missing exhaust and driveshaft, and even the kit that does have these parts bits the exhaust component is broken. Furthermore, and I have to be honest, I really can't be bothered cutting the rudimentary driveshaft that I do have from its resin block, it would be easier just to make a new one from a bit of styrene or brass rod.

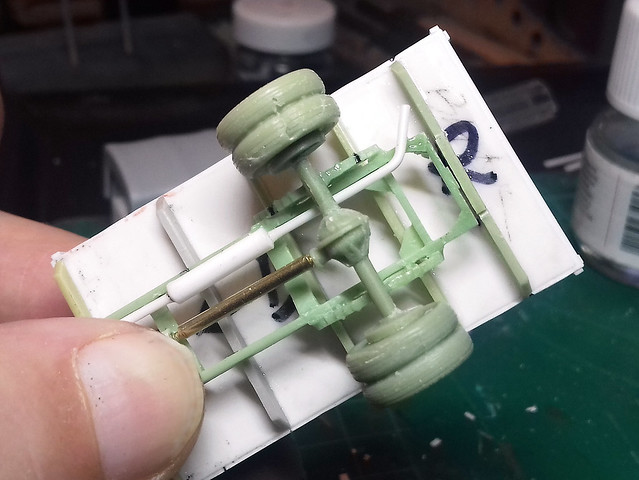
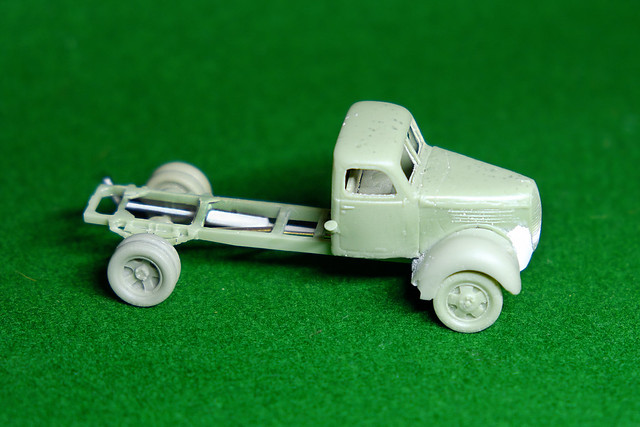
So, after a bit of tinkering and glueing...


Yes, it's a bit of a dog's dinner, but due to lack of clarity in the instructions (and the lack of a complete exhaust component to work from) I had to use a bit of poetic license in my interpretation of what a 1939 Ford truck chassis looks like (I did Google for images, but just couldn't find the reference material I needed). Obviously, if this had been a model for display or a competition, I would have gone the extra mile and joined a few Ford vintage truck forums and requested some pictures or advice, but as this is for a wargame model and the underside will be hidden, I forewent that!

The third main sub-assembly in this kit is the cargo flatbed (the others being the cab and the chassis) and this is perhaps the simplest part of the model and won't give me too much trouble...


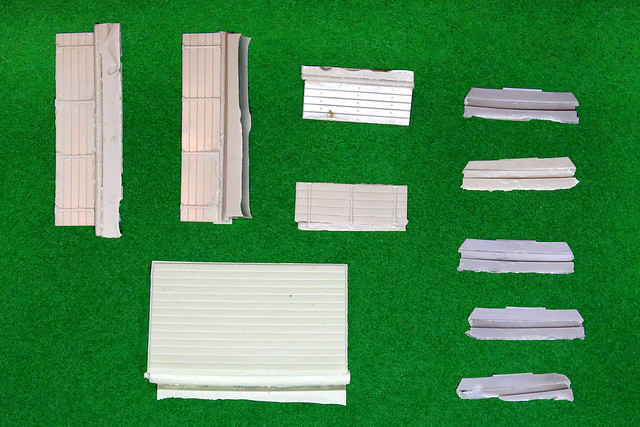
There's the four 'walls' of the cargo flatbed, the floor and then five support spars for the underneath of the floor (which attach the bed to the chassis frame). As usual, there is some trimming to do to get rid of excess resin.

And this is where the construction ground to a halt (again) as I realised what a shoddy fit the flatbed assembly is - not really surprised, though...


I'll stop here, as I now have to decide whether to persevere with the supplied flatbed parts OR do I have a go at making my own. They aren't that complex, but, also, I want to add 'canvas' tilt covers to the cargo area of these trucks, so it's perhaps just as easy to go the whole hog and build the whole section myself...

I shall think on this.

....But, I couldn't resist doing a little test fit...

Tuesday, 10 January 2017

Hunor Model 1939 Ford V8 Truck - Part 3

Oh, dear! This is gonna be a long haul...

Just a tiny update on this project, so you can see what I'm up against and why this is going to crawl along with some very insignificant progress updates.

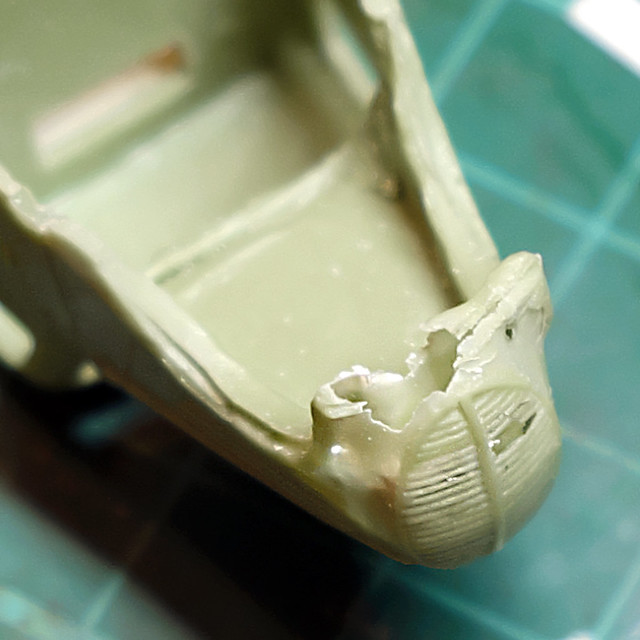
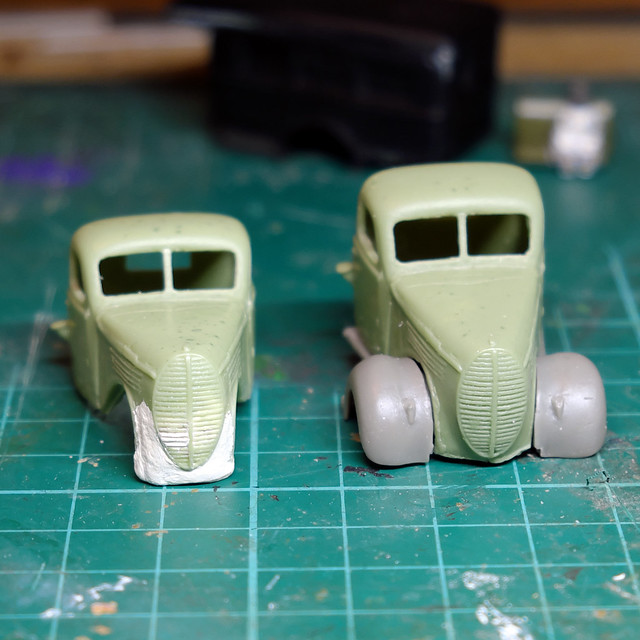
One of my two Hunor Ford M39's arrived with a damaged 'nose'...


It seems there might have been an air bubble in the mould, the truck's grill and lower edge were paper thin and disintegrated when touched. So I am having to rebuild the damaged area with some Milliput putty.


While this may be an extreme example of some of the problems that exist with this model, there will undoubtedly be a lot more work for the Milliput on these models.

Once the Milliput has dried I will sand it into shape properly. I'm quite pleased with the job I made of repairing the grill, I think it will suffice. From here I will move onto fitting the cab and bonnet to the cab floor and fenders (which you can see temporarily fitted to the cab on the right).

You perhaps won't be surprised to hear that the cab and its floor and fenders aren't a great fit. You'll notice the gaps between the fenders and the bonnet in the picture, but this is the least of the problems

But, that - as they say - is a story for another time!

Friday, 6 January 2017

Hunor Model 1939 Ford V8 Truck - Part 2

I keep telling myself 'no more resin kits' and yet, here I am learning just why I swear I'll never do another!

There must be modellers who like resin kits, really there must...The sort of masochists who like wobbling loose teeth until they fall out, or like licking batteries. I guess, to be fair, resin short-run kits fill the dark void where plastic injection manufacturers do not want to tread. Where else would I get an obscure pre-WW2 commercial truck kit if not from resin magicians like Hunor?

Grudging acknowledgement of the important role resin manufacturers have to play in the hobby aside, this kit is already driving me mad...


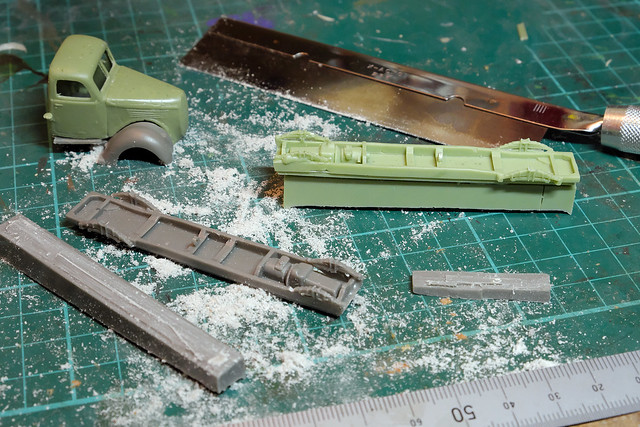
In the above picture, you can see the enormous lump of resin which is attached to the chassis frame as well as a second chassis I have already freed with a modelling saw (I am making two of these Ford kits). Resin isn't the easiest material to cut when it's so thick, but this hefty chunk is taking the mickey.

The reason I'm moaning is that, when you have to cut free delicate components like this it can be so easy to slip and cut or snap the item...So, I saw or cut slowly...


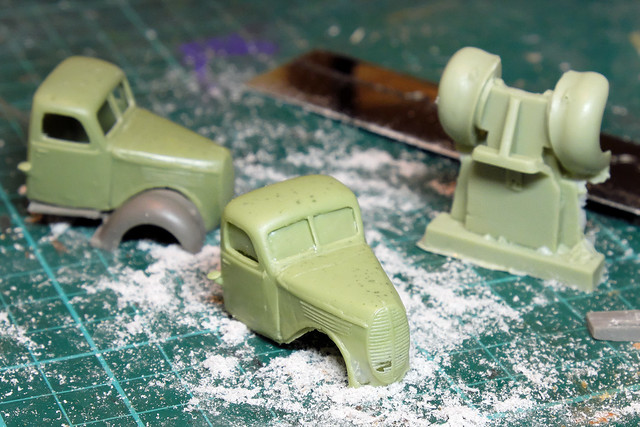
I'd already cut the truck cab floor from a small slab of resin (just about to start the second) and did some general flash removal. Unfortunately, Hunor's quality control isn't on the ball as you may notice that the radiator grill of the cab in the foreground is damaged...


The other niggle I have about having to cut off slabs of resin like this is that I'm not always sure where, exactly, I'm supposed to detach the component. With the cab's floor it was pretty obvious where to cut, but the chassis was less than clear and I may have to trim some more resin off after I have test fitted all the parts.

It's going to take me some time to safely detach all the parts from their resin imprisonment, so don't expect another update on this project any time soon!

(Just one last thing, I have been reminded that I should include a warning about resin dust. As you can see from my photos, cutting or sawing - or sanding - resin does produce a fair amount of dust. Please remember to wear a protective mask while doing this and clean up your work bench as you go, this stuff is not good for your lungs!)

Saturday, 31 December 2016

Hunor Model 1939 Ford V8 Truck - Part 1


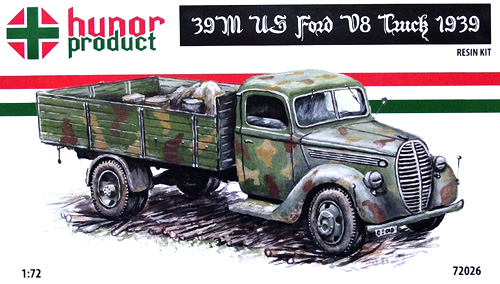
First build for 2017 will be a resin kit by the Hungarian company Hunor. It's another truck for my Finnish Continuation War project and is, once again, a little obscure pre-WW2 design that was typical of the Finn's reliance on civilian and commercial vehicles that were imported from America.

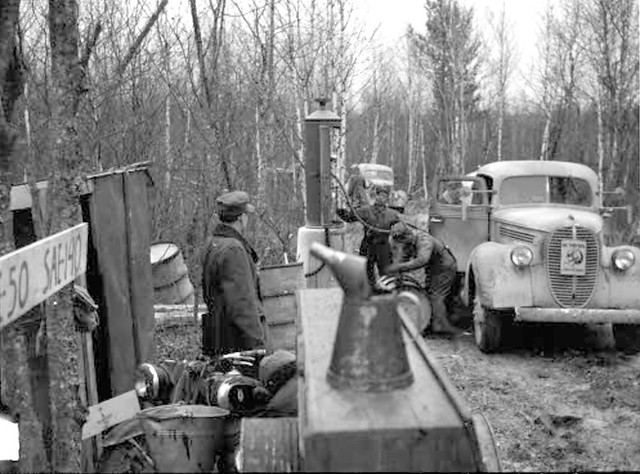
Nice photo of a Finnish Ford at what looks like a military fuel supply stop.
Dated 1941. Photo credit: SA KUVA
This will be my first Hunor model and despite unhappy memories of the last resin kit I made (by Zebrano) I am looking forward to this build as I have heard good things about Hunor.

The 1939 Ford V8 truck is fairly typical of the lighter type of commercial flat-bed cargo vehicles of this time. In truth, it was only slightly bigger than a pick-up truck and shared the same cab design across the range, from van to truck...


While this format was prevalent and popular at the time it's suitability as a military prime mover may be questionable because of its light weight. But still, it's availability and the reliability of its V8 engine was what the Finn's sorely needed at the time. These trucks just kept on going, as can be seen in this 2015 video of an American family's Ford, which has been their farm truck since 1953...


One final historical note worth mentioning is that, the 1939 Ford V8 design is yet another one of those late 1930s American vehicle designs that was manufactured both in the USA and in Germany! I *think* the Finn's M39 Fords were US imports rather than products of Germany's Fordwerkes. (Apparently, they were produced in Germany from 1939 to 1941. Like the Ford V3000 V8s, the way to tell the American from the German version is that the US-made models had a split windscreen, while the German Fords had a one-piece windscreen.)

The Hunor kit
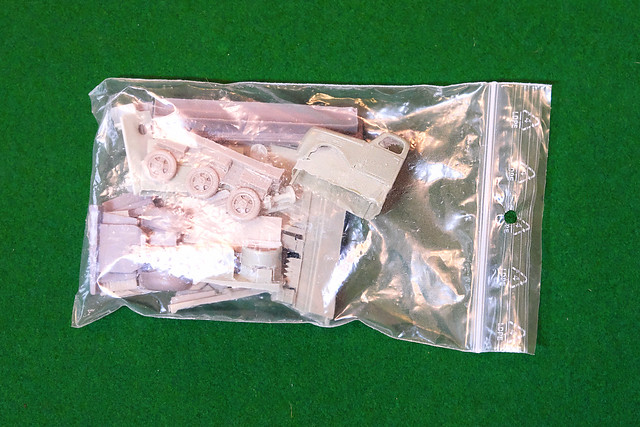
The kit comes in a nice cardboard box, but inside you will be met with some polystyrene packing and a plastic bag of parts...


While I guess it's hard to produce resin models on a sprue - like plastic kits - I always wince when I see all the delicate resin components squeezed into a loose bag like this. Fingers crossed for no broken parts!

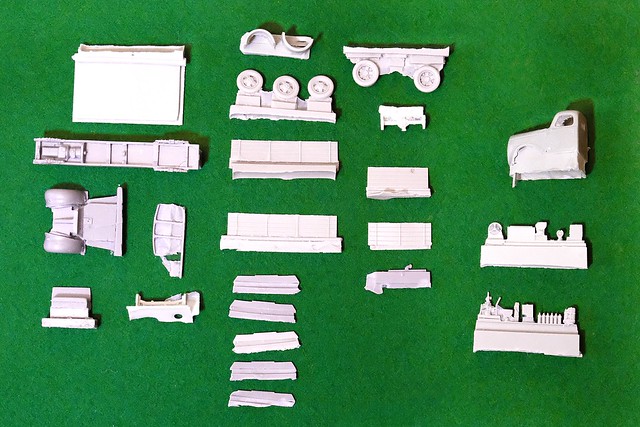
Luckily, everything seemed to be in order when I checked all the parts but there is quite a bit of flash and smaller detailed parts are attached to large blocks of resin. A lot of cutting and cleaning will be required...


One of the constant niggles (I have) with resin model manufacturers is the low quality of their printed instructions, Hunor seems to be no different...


Oh dear! Not only draw by an 8 year old child but also - when one checks the parts - a few operations are only very vaguely alluded too. For example, the flatbed supporting spars will need a lot of TLC lavished on them before they can be affixed to the underside of the flatbed.

I may be being picky, but when you consider the premium price one is being asked to pay for these kits (€35 plus shipping) you would think the least they could do is spend some time on better instructions!

Well, I guess the moral when dealing with resin kits is that it's all in the prep! So, I'll be spending quite some time preparing all the parts so that they are in a finished state ready for the assembly.