Showing posts with label WW2. Show all posts

Saturday, 6 February 2021

1940 US K7 Truck Conversion - Part 4

Back to the Drawing Board!
When I was working as a Web Designer one of my personal rules became 'never use a new technique or tool first on a live job'. This was rule was born of long experience where I always found that 'new things' (however cool they sounded in theory) always tended to screw things up by adding unforeseen complications. Such - it turned out - was my attempt to jump straight into a ongoing project by adding 3D printing into the mix! ๐Ÿ˜ฃ

My idea was to simply print out several individual parts that I wanted to use to 'retrograde' my ICM Zil-157 truck and just 'stick them on' to the existing parts. Uh-uh! That was a very short-sighted move as I has put little thought into how I would attach them and what knock-on effect they might have to the rest of the  existing kit assembly.

This picture above shows my move from printing small individual objects - and then sticking them together - to thinking about building a one-piece large component that makes it easier to joint other components to it.

This also means that I will have to do some simple modifications to the original kit as well...

In a nutshell - this is a 'look before you jump' situation. You can't just bang bits together and hope for the best, there has to be some sort of grand plan from the outset. Lesson learned.

The good news is that the initial 3D design work I did isn't wasted. I can simply put the individual object files together into one larger component...


So what started as a 'quick fix' of a job turned into something a little more complicated, but I guess that's pretty typical when you are trying to learn something new. Overall, I'm really enjoying the 3D printing thing, but I have so much to learn!

Still, the results - so far - are quite satisfactory and definitely a step up from my old scratch built efforts...

NEXT: Completing the cab and priming.

Friday, 15 January 2021

1940 US K7 Truck Conversion - Part 3

The K7 Mudguards...
The original American K7 truck had pretty beefy mudguards, but the Soviets soon got rid of those for something simpler (and cheaper to make). So, to turn my current kit back into it's precursor I'll have to make a set of these rounded mudguards to turn the Zil-157 back into the good old American K7!

But, how to do it? ๐Ÿ˜

The American IH K7 - I like big mudguards and I cannot lie...

Creating an accurate and complex 3D model is a bit beyond my software skills (for now) so I had to take a sneakier tack. I spent some time trawling through the 3D model repository THINGYVERSE to see if I could find at least something similar looking (these big rounded mudguards were pretty common in the 1940s & 50s). Maybe there was another WW2 truck model I could filtch the mudguards from?

Well, and this is a funny story, it turns out there wasn't a suitable WW2 truck model BUT - for some strange reason - they did have a model of a 1950s Romanian Steagul Roศ™u SR-101...And you are not going to believe this (I didn't) but the SR-101 was a Romanian copy of the Soviet Zis-150 which was a copy of the US K7! ๐Ÿ˜‚

The Romanian Steagul Roศ™u SR-101 - a copy of a copy of the K7!

Nothing I do is ever straight forward, but until I learn how to use a proper 3D modelling program - so I can create my own models - I'm going to have to settle for these half-assed shenanigans (making very simple models and 'borrowing' shapes/parts from Thingyverse). 

Anyway, I downloaded the 3D model files and opened the one relating to the cab component and happily there were those lovely big mudguards...

The messing around didn't end there though, after I did a quick test print I found that the model was not scaled accurately (typical). So, I had to do some measuring and some quick math and rescaled it so that the mudguards matched the size of my plastic kit's cab.

I printed the model out using the new black PLA I bought and set the quality to 'high' to make sure the rounded mudguards came out as smoothly as possible...

Not bad at all! ๐Ÿ˜Š Some of the cab was a bit messy (not my printer's fault, it was a crumby model) but fortunately the important bits were fit for purpose. It was now just a case of cutting the mudguards off the 3D model and doing a bit of a Dr. Frankenstein by transplanting them onto my Zil-157's cab.

Out comes my little multitool and a thin circular cutter...

First of all, I roughly cut out a chunk of the trucks bonnet including the mudguard. Then I carefully trim away the unwanted bits of the 3D print until I'm left with just the mudguard component itself.

Once I have a roughed piece I try a bit of preliminary fitting to get an idea how I will go about cleaning up a finished mudguard and how I will attach it to the bonnet...


Not too bad, and the size is spot on. But now I have to neaten this all up and permanently attach the grill and mudguards...Which is where I will leave things for now.

NEXT: (HOPEFULLY) A COMPLETED K7 CAB.

Wednesday, 19 August 2020

1/100 KV-1 Tanks Primed

 Yes, it really has taken me this long to get this job done - a whole month. There again a lot has been going on in my life this month, including a week in hospital! (All sorted now though.)

Anyway, my KV-1 tanks have progressed and I've finally got them primed. As usual I did this with a coat of Humbrol's Light Olive acrylic spray - my go to quick-prep for my 1/100 green tanks.

I've mentioned it before but it's worth repeating, I love this product. Not only does it go on very smoothly - giving a fine base coat - but it's an excellent jumping off green which you can then modulate into any of the greens used by the major armies in WW2; British Bronze Green, American Olive Drab or Soviet Russian Green.

As you can see I am now have KV tanks suitable for early WW2 or mid-war, just by switching out the turrets. It is - in reality - a bit of a fudge as the chassis of these models of KV did actually differ slightly. But for 1/100 war gaming I think I can get away with it!

Now to plan the next stage - adding the decals.

Tuesday, 21 July 2020

...Just One More Thing! 1/100 KV-1.

Yes, I did say that I had completed the construction on my 1/100 KV-1S tanks... But... I hadn't! ๐Ÿ˜‚

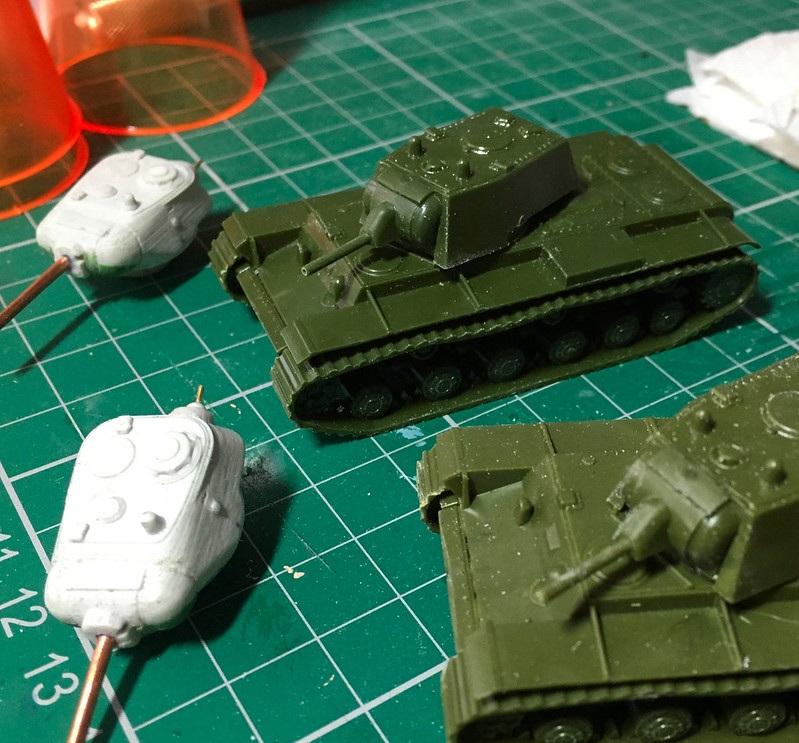
While the main feature of this projects is the conversion process of making a couple of KV-1S tanks my tinkering left me with a couple of KV-1 variant turrets. It seemed a pity to waste these parts and even though I don't foresee me wanting to play an Operation Barbarossa scenario (the German invasion of the Soviet Union in 1941) you never know! ๐Ÿ˜

And so...

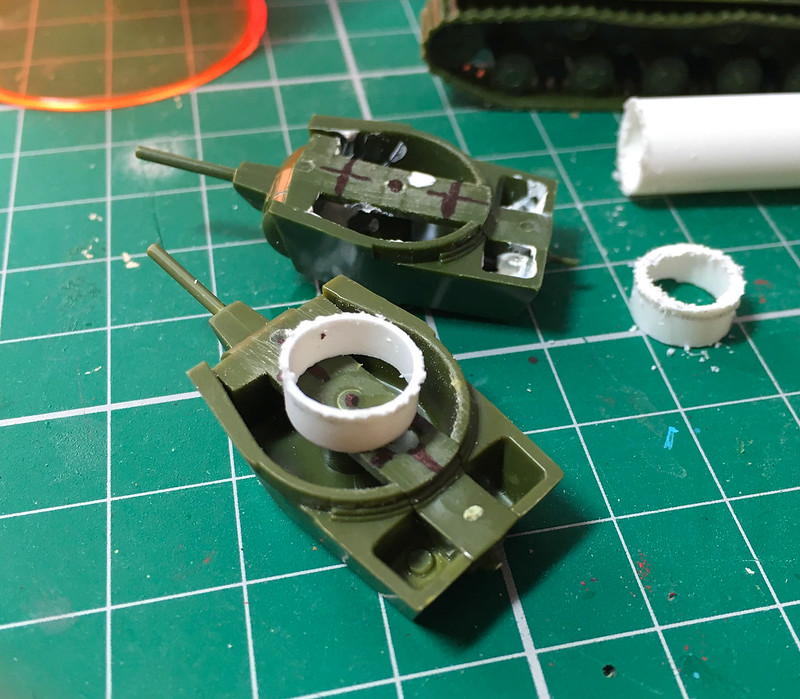
Having converted the KV-1 model's turret rings to accommodate the 3D printed turret's larger 10mm 'plug' attachment I would now have to modify the original Zvesda turrets - with their little pin attachment post - so that they would work with the new 'socket' mods.

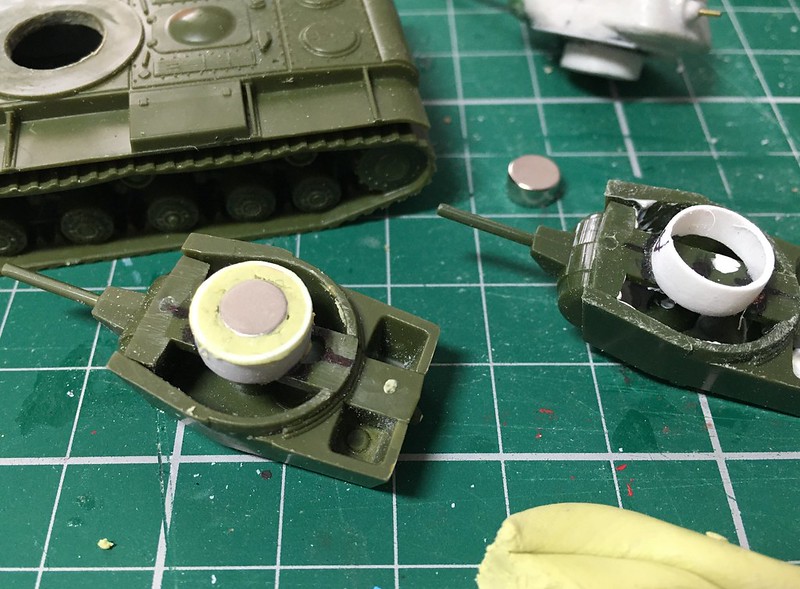
The principal of this upgrade is pretty straight forward. I now have to make two 10mm x 3.5mm cylindrical 'plugs' which I will glue onto the bottom of the KV-1 (Model 1940) turrets. However, I will also magnetising these turrets in a similar way to the way I did with my KV-1S turrets and hence the need for cylindrical 'plugs'. The magnet will be glued inside the tubular plugs.

I had to order in the 10mm diameter styrene tubes as my local craft store have a very limited range of styrene pieces. It took me a while to find exactly what I wanted online but I eventually tracked down the items to Dorsping Models of Cornwall, UK. Unfortunately, to keep costs down I opted for 2nd Class postage and so a annoyingly long wait ensued...


(I should add that I tested the uncut tube for size before I started sawing off 3.5mm rings. I was most satisfied when it slipped nicely into the hole in the hull I had cut for my turret plugs. I love it when a plan comes together!)

Anyway,  having created my new KV-1 attachment plugs I then had to stick a couple of the little button magnets I had into them. I did think about just super-gluing the magnets inside the cylinders but, in the end, I opted to secure the magnets to the turret floor and the plug ring by means of a nest of Milliput putty...


Now the annoying wait until the putty dries... ๐Ÿ˜ซ

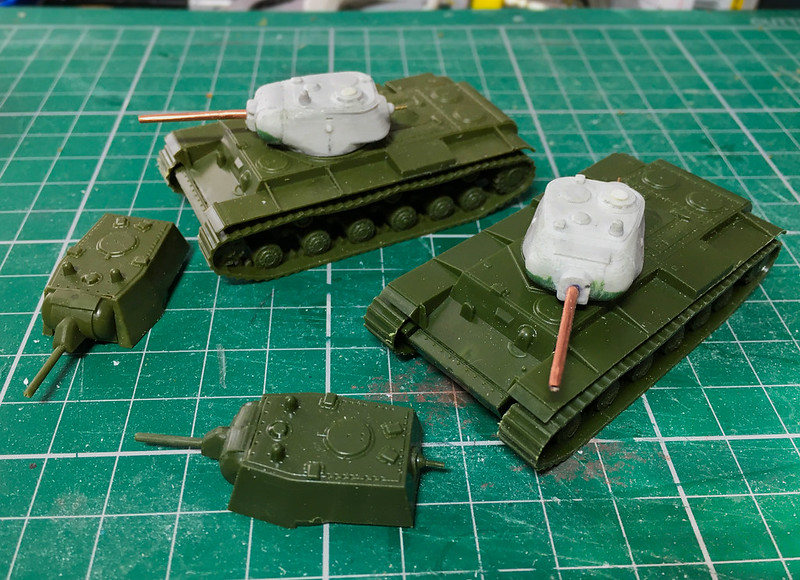
And then...! Taa-daaaaah!


The new (old) KV-1 turrets snapped into place perfectly. I now have the ability to field a pair of KV heavy tank for scenarios fro 1940 to 1941 and another pair o KV variants to suit operations from late 1942 to mid-1943!

Job done... Now let's get 'em painted.

Sunday, 12 July 2020

KV-1S Conversions - Construction Complete

Well, finally I've gotten round to finishing off the conversion and construction of my 1/100 Soviet KV-1S tanks. It's been dragging a bit as I was trying to video the process but that turned out to be a complete shambles and so I decided to wait until I have my man-cave workbench sorted before I try vlogging my kit making.

Still, quite pleased with the end result of my Frankenstein shenanigans...


As you can see, I built the original Zvesda kit's KV-1 turrets as well as I want to convert these so I can swap out the two different types of turrets. I'll magnetise the kit turrets but will need some 10mm plastic tube to make the larger size 'plug' attachments to make them work. In this way I can field either the KV in it's early (1940 'Operation Barbarossa' period) configuration OR the later KV-1S 1943 variant.

NEXT: Priming and painting.

Monday, 6 July 2020

KV-1S - A Series of Unfortunate Events...

Part 4 of my KV-1S conversion started with a bit of a 'oh, crap' moment! ๐Ÿ˜ก

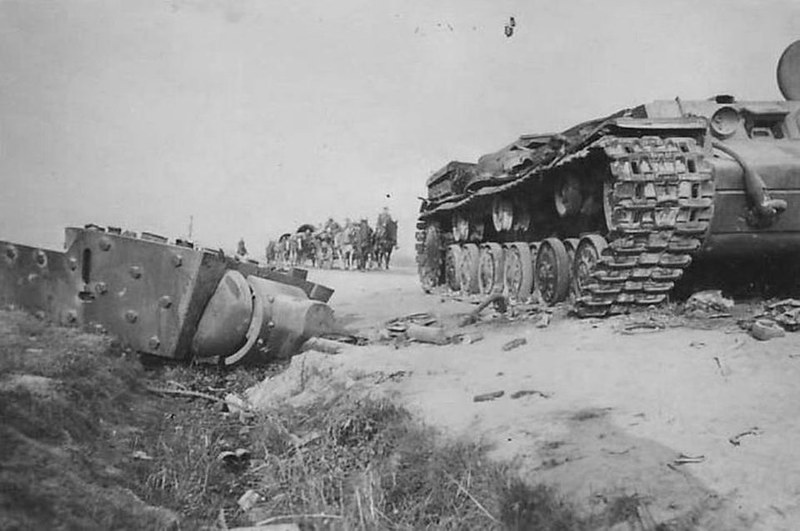
Turret blown off a KV-1E, Soletsky District, Novgorod Oblast - July 1941!
What is Russian for 'oh, crap'? ๐Ÿ˜„

In my last post on this project I had just cut the hole in the chassis for the turret 'plug' (for want of a better word) so I could fit the two together. The hole was 'snug'...Very snug. So snug, in fact that one in the turret didn't want to come back out or even turn!

Never mind, I thought, a couple of good twists with free it , I thought...And then...

...SNAP! ๐Ÿ˜– ๐Ÿ˜ญ

I forgot that a 3D printed component like my turret is a flimsy hollow part with quite thin walls. Twisting the turret wrenched the turret plug off the bottom completely off...


Oooopsie! BUT, after the initial shock I realise that this was actually a bit of fortuitous accident. I was still trying to decide the best way in which to add a small magnet to the turret and the separation of the plug element gave me a good idea how I might, now, achieve this.

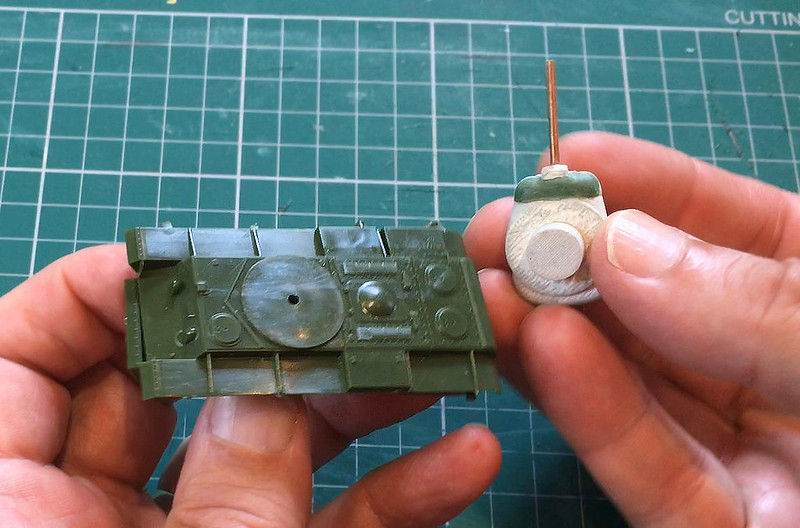
After I tapped the snapped-off plug out of the turret ring it became obvious that I now had a nice neat little 'pocket' I could glue my magnet into...


That done I then super-glued the plug attachment back onto the base of the turret (I wisely did some sanding of the turret ring hole to make sure that the fit wasn't so snug this time)! ๐Ÿ˜‚

...All I had to do then was mount another magnet into the hull of the tank and the two parts should then snap together perfectly! (As long as I have the magnets' POLARITY correct!)

Some very rough measuring and mental arithmetic ensued and I worked out that I needed to raise the hull magnet up about 4mm so that it met with the turret plug and it's magnet. These little magnets are quite strong so they don't need to be directly connecting with each other, they just need to be very close to each other.

I glued together a couple of 2mm thick styrene pieces to act as my platform and glued them onto the floor of the hull and a magnet (ensuring it's polarity was correct) onto the plastic strips...


And then came the moment of truth! I placed the turret in the hole and with a  satisfying 'snap' (a good one this time) it popped into place, attracted by the hull's magnet! HOORAH!!! ๐Ÿ˜๐Ÿ‘Œ


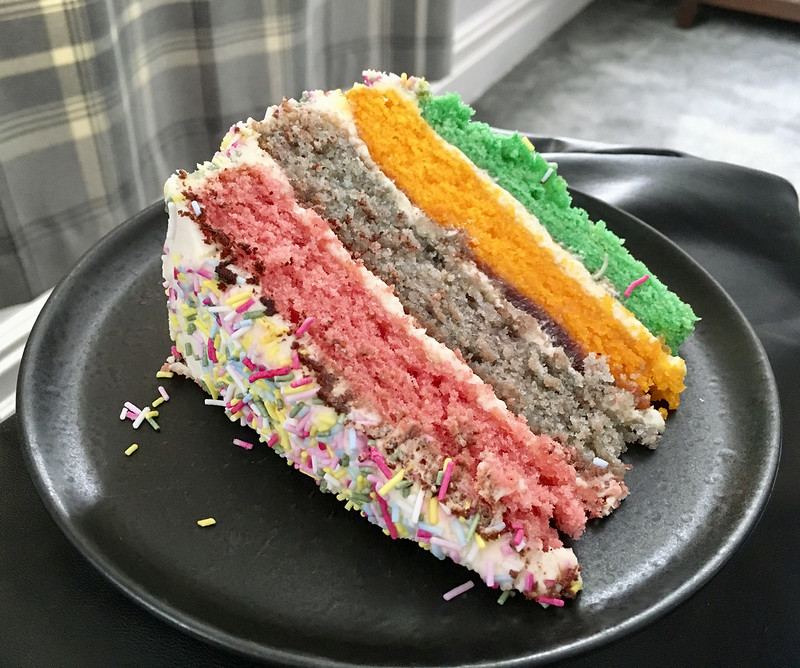
Phew! Time for a cakie... (Interlude music!)


Well, that's the majority of the construction of my KV-1S conversion (there were only 6 parts to the Zvesda KV-1 kit in total), all that remained were the tracks but they are of the one-piece type...


NOW...I could attach these now - a lot of war-game modellers would - but I prefer to prime and paint these parts separately as it's a bit awkward to get the top of the tracks done as there ain't a lot of space once they are fitted onto the chassis. But that's a personal preference.

NEXT: Priming and painting.

--------------------------------------------------------

๐Ÿ‘‰ Link to the KV-1S Conversion Project Series of Posts.

Friday, 3 July 2020

1/100 KV-1S Conversion Pt.4

I've been a bit distracted with other things and have neglected my KV-1S conversion project, so it's time to get moving again!

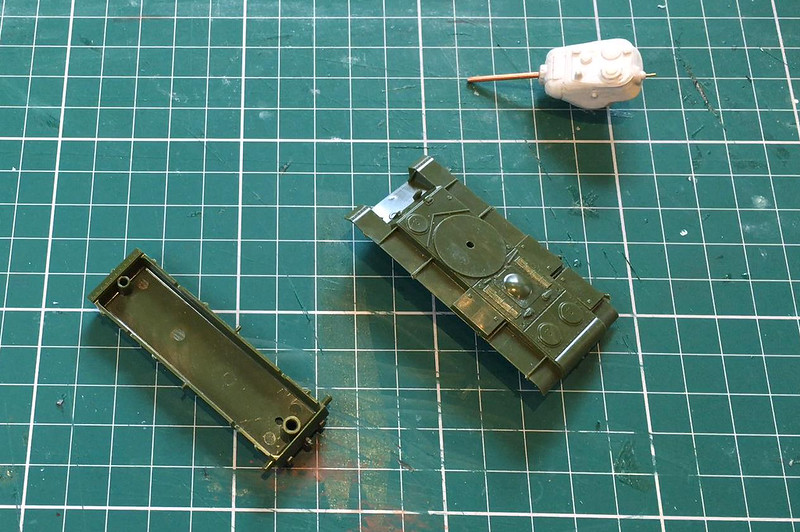
Here's the various parts I shall be working with in this next stage of this build.
It's time to attach the 3D printed KV-1S turret to my Zvesda KV-1 hull, but there are a couple of things I need to do along the way. The first is to modify the hull's turret ring so I can attach the turrets plug into it...


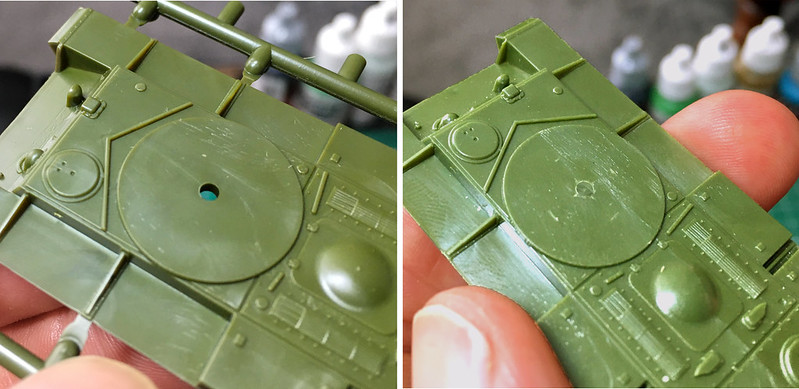
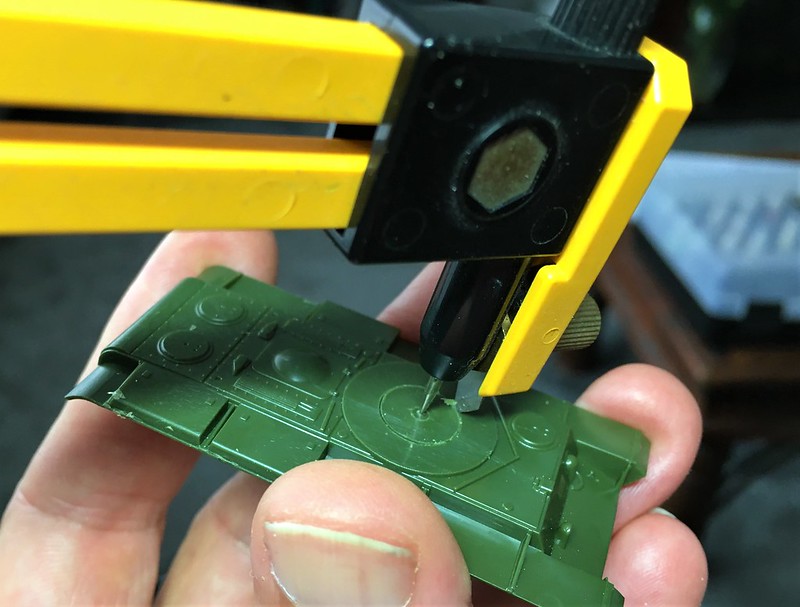
The Zvesda hull has a pin-type turret attachment hole, this is going to have to be considerably enlarged, to 10mm. But even before that I will have to cut a nice clean circular hole precisely in the centre. I do have a circle cutter tool - like a drawing compass but with a small blade instead of a pencil - but I will need to fill the existing hole so I can draw the circle using it...


The hole filled, I can now set the hole cutter pin firmly in the middle of the turret ring and draw the blade around in a circle. This will provide me with an accurate guide by which I can cut out the new attachment socket...


Using a small drill bit I drilled a pilot hole on the inner edge of the guide and then used a Dremmel cutting bit to cut all the way round the guide. Although the quick way of getting the hole the bit left the soft plastic a little rough, so I then neatened up the edge of the circle - right up to the guide line - using a file...


I kept trying the turret in the socket hole until I eventually got a snug fit. After a wee while in she popped and I had a tank with a turret!


Well, that's the first part of my turret attachment plans - next I want to add a couple of small magnets to the model so that the turret stays in place but is easily removed and exchanged (I'll explain why later - as I have a 'cunning plan')! ๐Ÿ˜‰

Next: Adding the magnets!

-----------------------------------------------

Link to the KV-1S Conversion Project series.

Tuesday, 9 June 2020

1/100 Kursk Project - Scenery Pt. 3

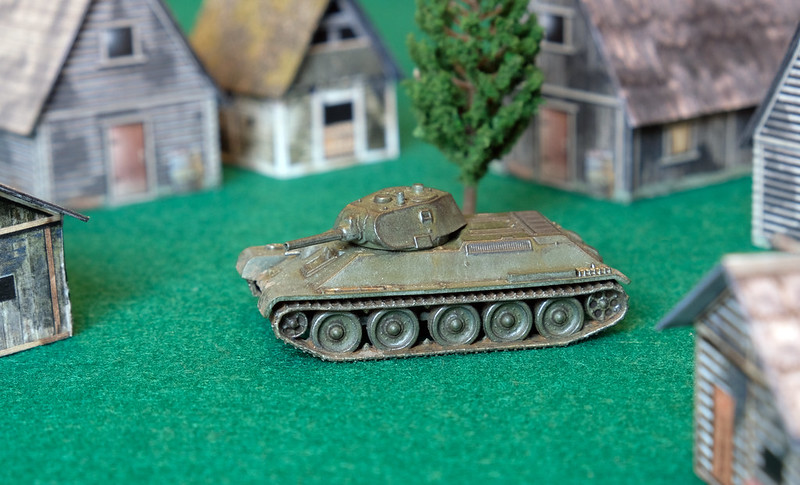
I finished off the 'Rusgorov' paper-craft hamlet models yesterday, and I have to admit that I am quite pleased with them. I was a bit unsure about them at first because they seem to lean towards the fantasy rather than historical end of the hobby, being a little on the stylised and colourful side.

But, in the end, I don't think they look too outlandish or unrealistic...


Building these paper and card models was very enjoyable and I look forward to making some more when the opportunity presents itself. (Predictably, I already have an idea for another project in the back of my mind.) ๐Ÿ˜Š

The purpose of these little buildings are to provide some scenery and tactical cover for my planned Battle of Kursk war-game. GF9 TANKS! is intrinsically a 'line of sight' game and therefore having scenery and objects that can obstruct a direct view between a tank and it's target can help to make the game more interesting and challenging. Well, at least this is what I have come to believe from the games I have played so far and this is why I wanted to include a little Russian hamlet as a key objective in my Kursk themed game.


Well, what else will I include on my game table? I can't just have a village in the middle of nowhere.

I've had a good look at a lot of photographs of the landscape on which the Battle of Kursk took place in 1943 and what strikes you most of all is how well suited the countryside was to 'The Biggest Tank Battle in History'! I suppose that's probably putting the cart before the horse as it was as likely as it was the flat and open nature of the region that made it a obvious choice for a set-piece tank battle.


Obviously, I don't think I'll add rolling hills, dense forests or lakes to my battlefield, rather I'll be constructing a pretty flat board with large grass plains interspersed with the occasional hovel and field. Therefore, any obstructions to line of sight will have to be artificial.

Natural landscape 'To do' list:
- How to make 1/100 scale fields.
- How to make some small dirt roads.

What these obstructions ill be will be the next challenge.


Thursday, 4 June 2020

1/100 KV-1S Conversion Pt.2

I'm very slowly getting back into modelling, but I'm finding it tricky. I am suffering from a bit of anxiety about getting down to it because - I think - after such a long break any modelling I do now may not be up to the standard that I managed to get to three years ago. It's frustrating and is causing me to procrastinate about putting craft knife or file to plastic.

However, today (finally) I took some baby steps towards actually doing something!

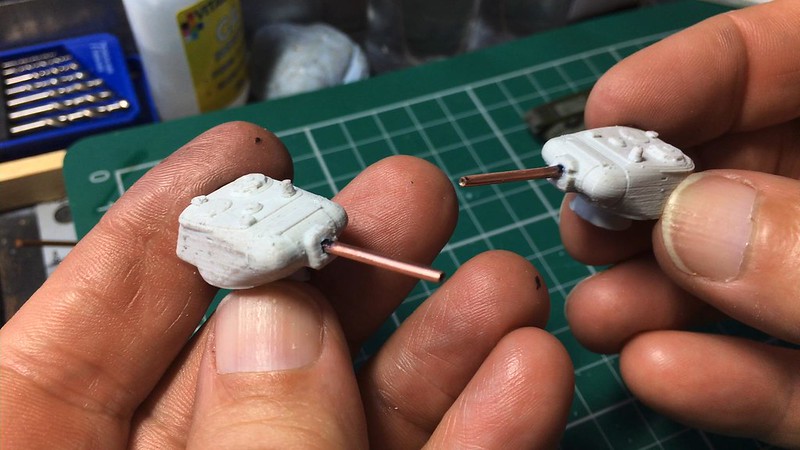
Having spent some time trimming the excess flash and support filaments from the turrets I got them in a state where I could look at them properly and decide what they needed doing to them ...


As you can see from the accompanying picture the 3D printed turrets are a little rough with the stepping effect of the 3D printing pretty obvious. I will have to do something about that, but - first of all - I really wanted to tackle the overly thin and fragile main guns.


I managed to find a piece of copper tubing that was approximately the right size for use as a replacement barrel. I checked these dimensions against one of the T-34/76 models I had already done as both the T-34 and the KV-1S were equipped with the same 76.2mm ZIS-5 gun.

I had to do a little bit of sanding and filing of the soft copper to get it close to the right diameter and then I trimmed the 3D printed gun off the turret. The new barrel needed socket to fit into so I drilled a hole in the mantlet to accommodate it...

Excuse the filthy hands but sanding and filing copper is a messy business!
I got a bit of a surprise when I drilled into the turret as I discovered that the 3D printing process produced a hollow part. I didn't know that - This is my first 3D model!

Anyway, I super glued the tube into place and checked it off against my T-34 model. It is still a tiny bit thicker but I reckon at 1/100 and it being a tabletop gaming piece nobody will complain too much!


I'm much happier with a metal barrel as - being game pieces - these models will be handled quite a lot and they will have to be sturdy enough to put up with use.

Next: Now onto smoothing out the turret and cleaning up the fine detail...
-----------------------------------------------------------

Link to this project series - 1/100 KV-1S Conversion

Friday, 29 May 2020

The Mystery of the 'Bermuda Rectangle'!

As you know, I am just returning to the hobby of scale model making and tabletop war-gaming after a gap of two or three years. One of my main occupations at the moment, though, is cleaning up my junk-filled 'man cave' attic space so I can start making models again, but it's been a big job...

Errr, well my attic isn't quite this bad, it just seems like it sometimes! :)

I'll say this again - it's unbelievable the amount of junk that can build up in a household over just a couple of years. My attic became a store-room for box after box of crap, Christmas decorations (I think we could decorate three or four houses with the amount of crimble lights we have - not to mention the TREE Christmas trees of varying sizes) and the wife's shoe and out-of-season clothing collection.

Anyway (rant over)... Maybe. ๐Ÿ˜

The point of this post is to highlight just one of the problems I am having with a hobby that was temporarily abandoned and that is - my forgetting just what stuff I had bought!

Example: In yesterday's post I mentioned how I would love to buy a couple of PSC 1/100 Panzer IV Ausf H tank models for my Kursk project. Well, while trawling back through my old Milgeek blog posts looking for a particular link I wanted I found the following post dated May 1st 2017...


Apparently, I had already bought a Battlefront Panzer IV H model!! BUT the irony is, it's disappeared under all the piles of rubbish I still have to clear away. Awwwww, bum-fluff!

Still, IF I can find the models it will have saved me buying new ones. Pretty handy as my finances are tighter than they were three years ago.

The sprues of my GF9 produced Panzer IV Ausf. H.... Wherever it is!

So, there you go - my attic is a either a portal to another dimension - in which case I hope the great ancient beings on the other side enjoy 1/100 model making - OR lurking underneath the remaining detritus I have the biggest 'carpet monster' ever!

...Oh, bit of a related postscript. Having discovered I had bought this model I checked through my Flickr photo gallery and actually found some pics I had taken of the kit (see sprues above) AND I had already started researching paint schemes for this model and save a nice graphic which will come on handy...

I like the two-tone 'splinter' camo - bottom row, third along!

Thursday, 21 May 2020

Ford Trucks... 2nd (Re-)Starter Project

Yesterday I discussed what would be my first re-starter assignment - my Armourfast M4, which is mainly a painting job - and today I'm going to reacquaint myself with the other models I have chosen to get me going in the hobby again. These will be a pair of Hunor 1/72 resin 1939 V8 Ford trucks...


Now these models must have been the very last thing that I was working on before I stopped model making in 2018. I didn't even stop construction at a obvious place (unusual for me) and I seem to have has some sort of 'cunning plan' in mind...But goodness knows what that was!

I checked back on my blog - thank goodness for my blog - and it seems like these models turned out to be a bit of a challenge (I don't think I have had a resin model yet that hasn't been). You can check out 'the story so far' by following this link: Kitnoob's Finnish m39 Ford V8 Truck Saga.

But here's just one little pic which will give you an idea of how painful this build was...


๐Ÿ˜ฃ

...But, of course, it's me we are talking about so I was obviously loving this! ๐Ÿ˜‚

This appears to be the last photo I took, but it gives a bit of a false impression about how far along I was as this was just a dry fitting test. There were still several issues I still had to resolve before putting the major parts together...


The good thing about this particular job is that it will definitely dust the cobwebs off my construction skills. That's if I can find all my modelling tools, which are mostly still under some of the junk in my attic dumping ground!

Wednesday, 20 May 2020

And...I Change My Mind! 1/72 US Sherman.

As I mentioned, I am currently rummaging through the junk pile which is my old attic work area. It seems that every time I remove a layer of crap I find something new or something I had forgotten about underneath... I daren't even show you a photo, it's too embarrassing!

Now, I thought I had found all of my old projects and I carefully placed them in a separate box and had picked out a couple that seemed like good ones that would restart my model making with. But, no...

One more layer of random 'stuff' and I came across yet another oh-so-nearly completed model that had completely forgotten I had. And this one is another - like my Hurricane model - that is ready to have the final weathering phase to be applied...


Like my Hurricane model., this 1/72 M4 Sherman model (by Armourfast) was a 'fun' project totally unrelated to any of my main projects. So it's ideal to use as a (re-) starter activity, because I would hate to make a mess of one of the models I was making for, for example, my Finnish Army project where each model is a bit of a custom job with a lot of work put into them.

Also, I enjoy the weathering bit, it's the part of the modelling process where you most get to get creative and add your own personal 'style' (I think).

...So, quick change of plan. This Sherman replaces the Hurricane as my re-entry into the hobby.

Despite this model being, basically, a pretty simple Armourfast 'easy build' war-game kit I did do quite a bit of scratch upgrading to it (just to prove that you could make a bog-standard gaming model look a bit more realistic)...


To help get me re-started in making and painting scale models I have managed to find a very useful YouTube tutorial to guide me... (A bit of much needed 'hand-holding' as I'm a bit nervous!)