Before moving on, I decided that I needed to do something about the kits exceedingly flimsy 37mm gun barrel. There's no doubt in my mind that this would quickly break off while being handled during a game so I am replacing the plastic barrel with a piece of brass rod of roughly the same diameter...
The Painting Process
Onto my usual painting regime now; priming, base coating, (decaling), wash, staining/streaking, pin-wash outlining and then varnishing. Priming will be done using Humbrol's [86] Light Olive Matt - Acrylic Spray Paint, this should give a slightly faded US Olive Drab suitable for the Pacific theatre.
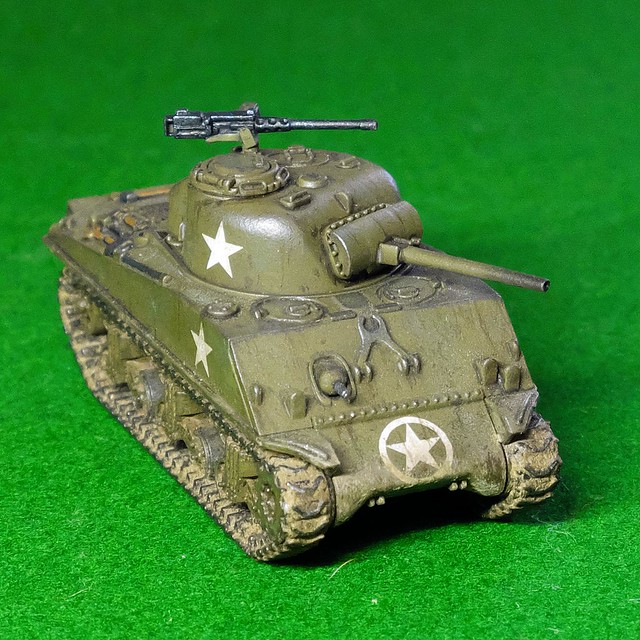
Amusing note: You'll probably be thinking 'that 37mm looks thicker than it did in the last picture'. And you'd be right, I broke off my first attempt at 'improving' the barrel! So, I had to have another go and this time I drilled right into the turret and superglued in a thicker brass rod. LOL
Decal Scheme
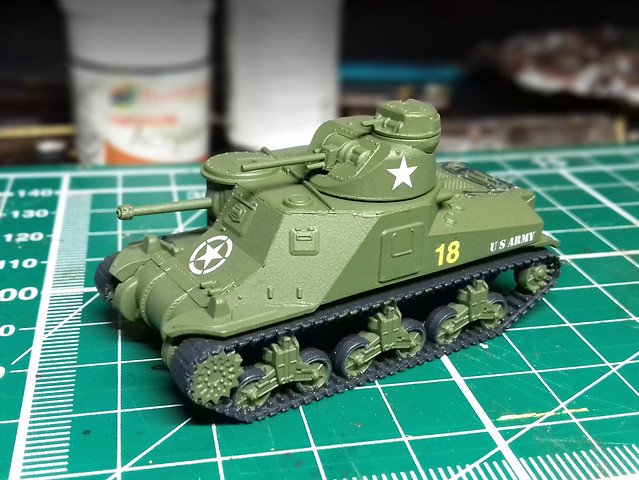
Because this model is for a game and will be used in a few different scenarios representing completely different WW2 combat theatres, I am using a little artistic licence with the decals in order to create a generic representation of 'a' M3 Lee tank in US Army service. The scheme is fictional...
Wash, Weathering & Mud
I'm going to try and go easy with the weathering and particularly with the amount of mud I will be applying this time. I was quite pleased with Tamiya's Weathering Sticks - which I used on my last 1/100 model - as I like this softer, more blendable medium. (Apparently, Tamiya's Sticks are just normal weathering powder pigments but mixed with a sort of cream or oil preparation. This makes them into something akin to cosmetic creams, like cheek blusher crème...Not that I'm an expert on lady's make-up you understand!)
But, before I start the weathering, I'll be applying what has become my 'usual' pre-weathering preparation of a wash of Citadel's Agrax Earthshade...
I'd like to try and go for dusty rather than overly muddy this time. I've never really mastered realistic dust and I'm thinking that I might play with eyeshadow powders and maybe some pigments (but added 'dry' onto the surface)...
The eyeshadow powder is a little bit granular compared to Tamiya's Master Weathering kit and their Weathering Sticks. I prefer the cream mediums a little better as the blend really well, creating a nice smooth - non-gritty - pigment film over the surface.
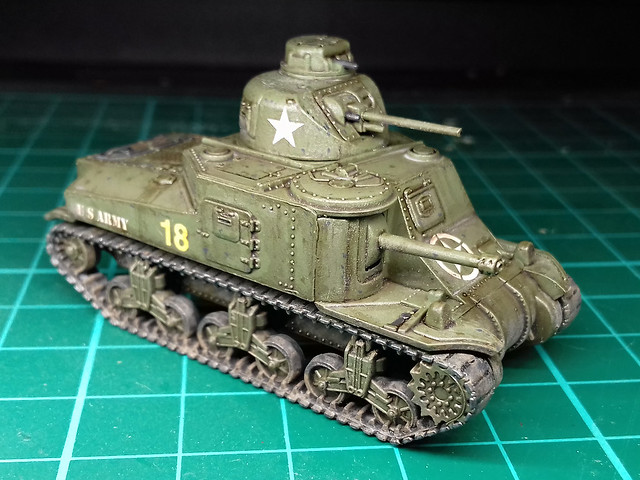
I added a little pin-washing effect with more Agrax Earthshade carefully painted into the panel lines and then finished off with some very fine line work using black ink for deep lines and the edges of doors and armoured windows and hatches.
And that's that for now, the tracks need some more attention before I finish this model off with a coat of matt varnish.
Having completed the GF9 TANKS starter set models, I'm getting back on with my 1/72 projects. But, I'm already planning my next expansion of my GF9T inventory and the postman brought these additions to my kit stash yesterday...
These mid-WW2 (1943) Soviet tanks will make up a small Red Army force for a 'Battle of Kursk' themed game I am currently planning. I have already built a German 'Elefant' Tank Destroyer, have a Panzer IV H in construction and have a Tiger I in my stash, so my inventory is in place for the game.
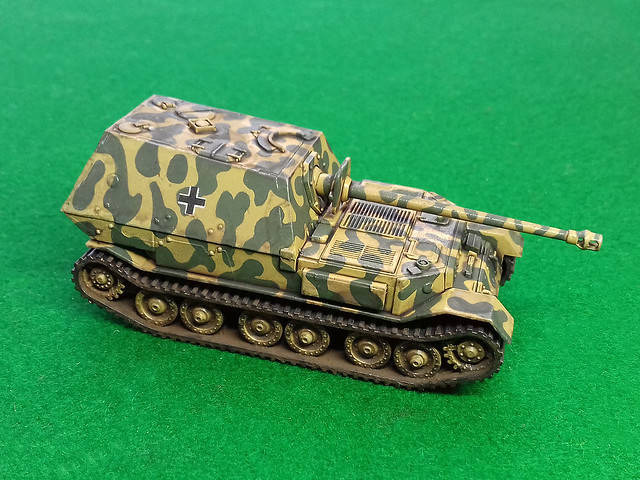
One of the German opposition that my new Soviet tanks will be up against! My recently completed 'Elefant' (or 'Ferdinand' if you prefer).
I went for the Zvezda KV-1 m41 as it was the cheaper option than buying the rarer - and much more expensive - 1/100 Battlefront KV-1S (£9), even though by this stage in the war the KV-1 had been mostly replaced by the KV-1S. I can get away with this as I know there were at least 22 of the older KV-1 tanks at the battle (and probably more).
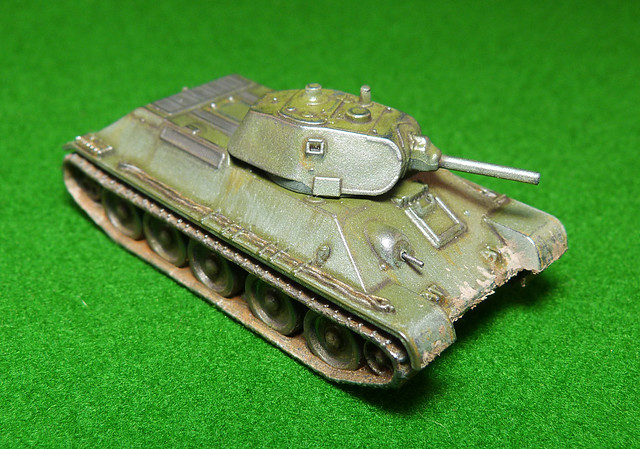
It will be interesting to compare the size of the Battlefront T-34 with the Zvezda T-34 I already have, as Battlefront tends to be a little larger than Zvezda's '1/100'.
My Zvezda 1/100 T-34/76 m40. How will this compare in size to my new Battlefront T-34? Will there be much difference?
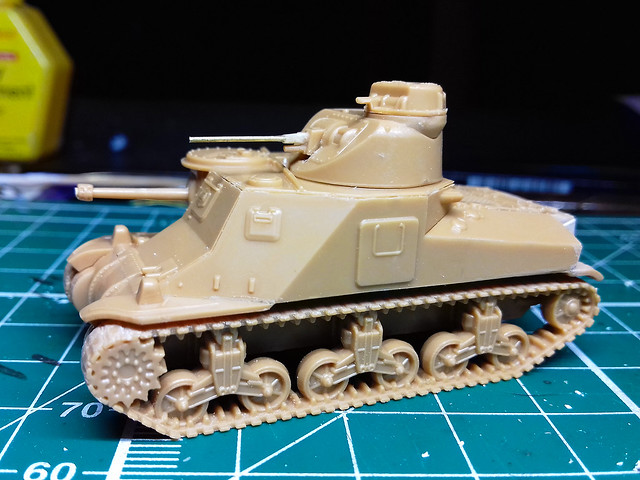
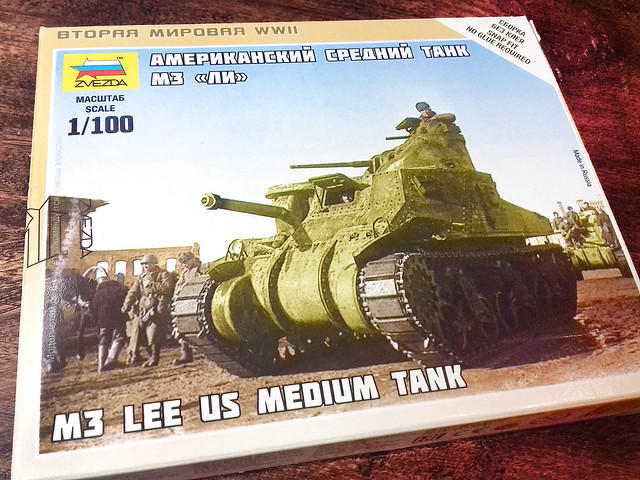
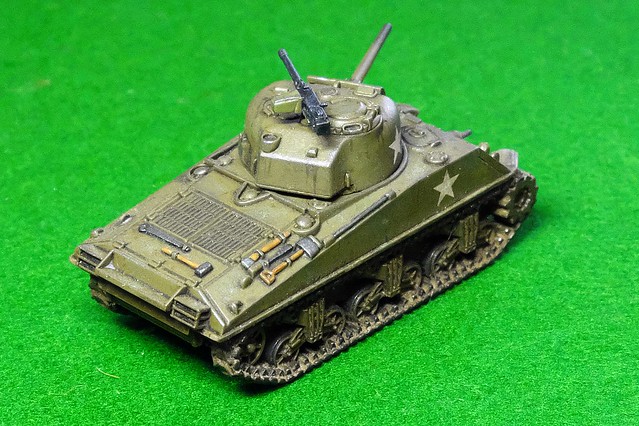
This is something new, I'm getting into doing very short and quick weekend projects courtesy of Zvezda's little 1/100 tank kits. This week I'm adding to the M3 Stuart that I already made for a WW2 Pacific scenario I have in mind with a US M3 Lee tank...
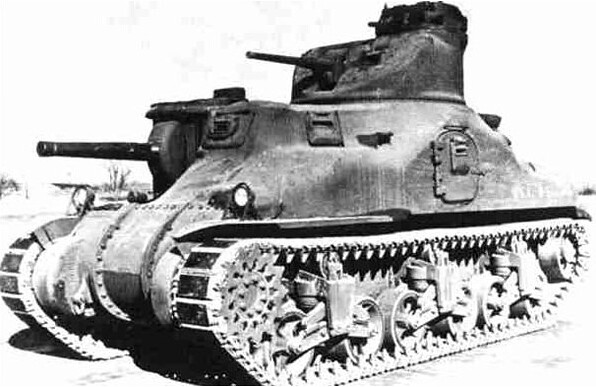
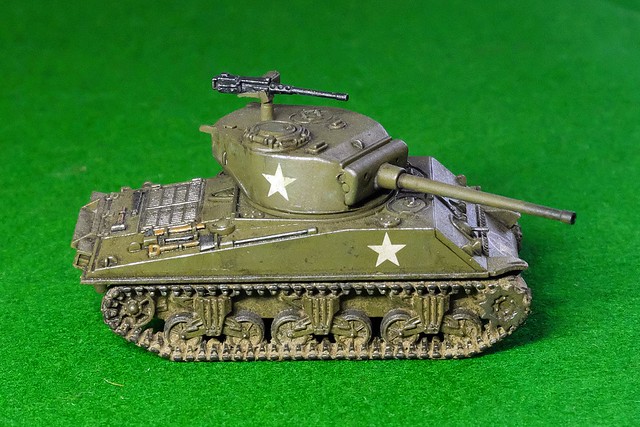
The M3 Lee is an interesting - if not terribly exciting - early way American tank. It was the predecessor to the legendary M4 Sherman and the US Army's first serious contender - if not quite a match - for contemporary German tanks. The M3 was the tank in which the US Army learned about 'modern' armoured warfare and - perhaps more importantly - first introduced a 75mm gun to the Allies armoury. As a lend-lease tank, the M3 added some much-needed firepower to the British in North Africa.
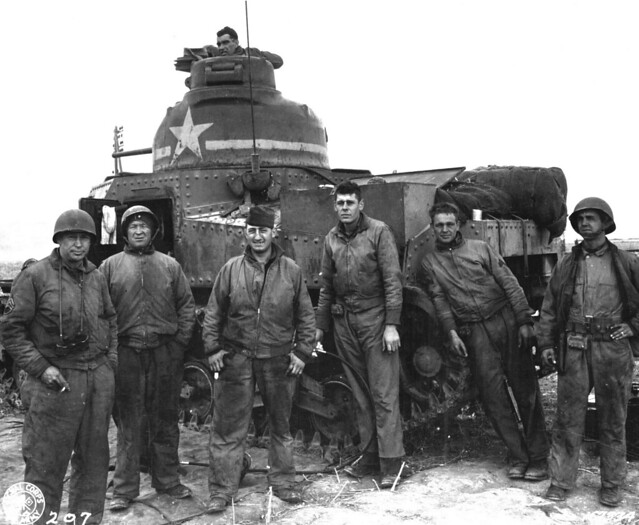
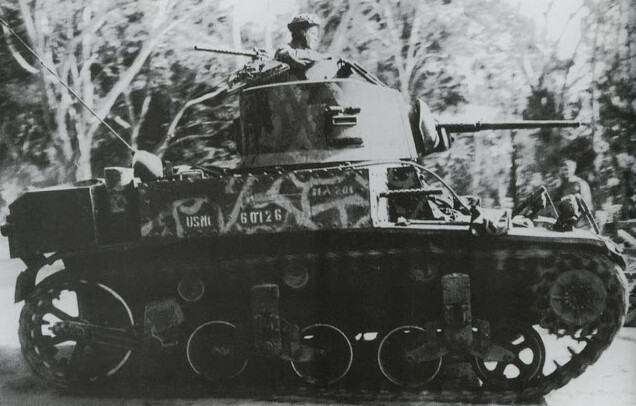
The Americans early war contribution - in North Africa and the Pacific - is often overlooked somewhat. This was a real trial by fire for them and they had a lot of catching up to do, with their already out-moded M3 they learned the hard way. Picture: Crew of M3 tank at Souk el Arba, Tunisia, November 23, 1942. Wikipedia.
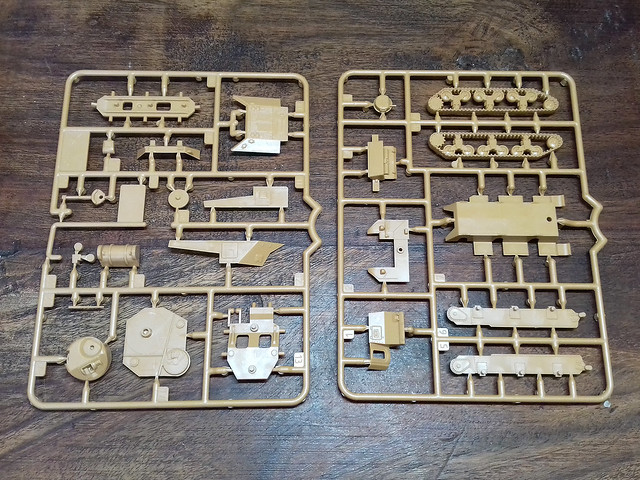
The Zvezda Kit
Despite being a diddy little kit Zvezda's Lee is a little complicated with quite a lot of parts compared to other tanks in its 1/100 range. This has as much to do with their insistence that their kits be 'snap together' as it is to do with the M3's unusual design.
Other companies - like PSC and Battlefront, for example - minimise the number of component parts their models require because they rely on the use of glue to stick the parts together. And even Zvezda, themselves, manage to come up with very part-efficient 1/100 models when the original tank design is conducive to low numbers of parts (their KV-1 kit has only 6 parts).
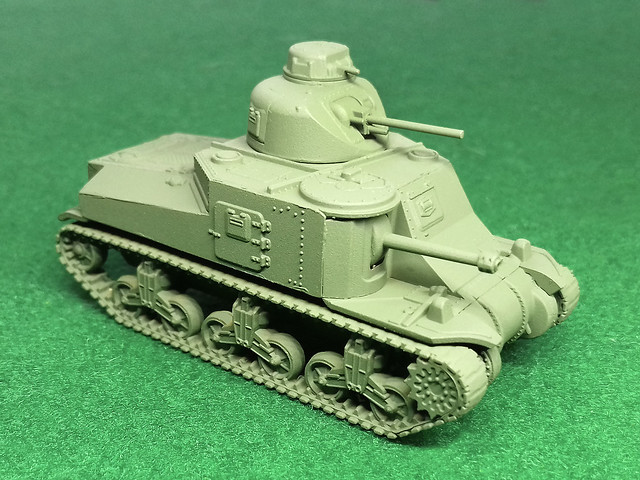
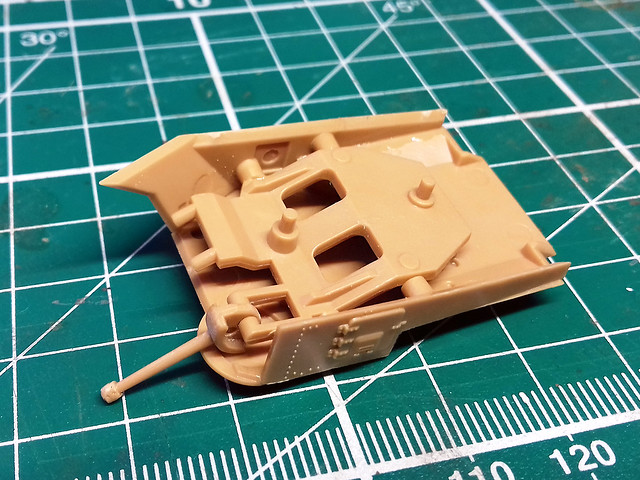
Anyway, the M3 is a complex design, what with its dual turrets featuring a Barbette-style hull-mounted 75mm gun....
The above picture illustrates the point. This is just the upper hull assembly, holding the 75mm gun and when finished it will consist of no less than 8 parts! The lower hull was just as convoluted...
It was all a bit too complex for my liking, though I understand that to make it 'snap together' these extra parts were required.
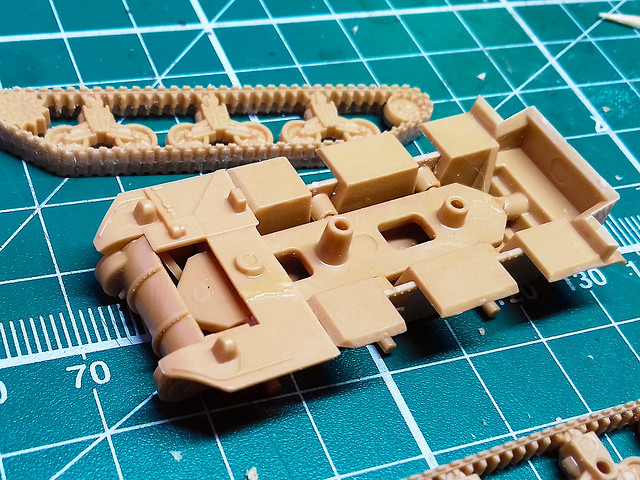
Anyway, much fiddling about later...
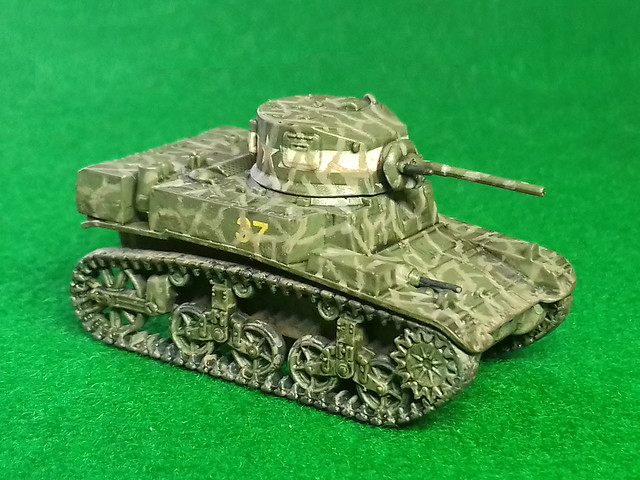
Not a bad looking little model.
Thoughts about Construction & Quality The construction was a faff and needed a bit of pressure in places to ensure parts fitted together nicely. I had to hold some parts together until the glue set so that the seams didn't have any gaps.
But, overall I was happy with the quality. As usual with Zvezda, the moulding was crisp and there was a reasonable amount of surface detail, though - of course - the level of detail was simplified as this is a wargaming model.
The one noticeable issue is that I feel is worth mentioning is the fragility of the secondary gun barrels. The 37mm - top turret - is very thin and wouldn't take much of a knock to break it (in fact, you have to be careful cutting it off the sprue). Zvezda seem to scale their tank guns accurately, while other 1/100 wargame model manufacturers tend to 'over-scale' their guns to make them a bit more durable.
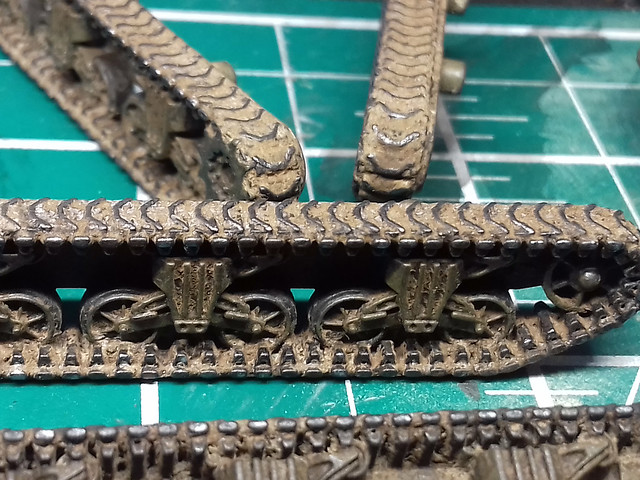
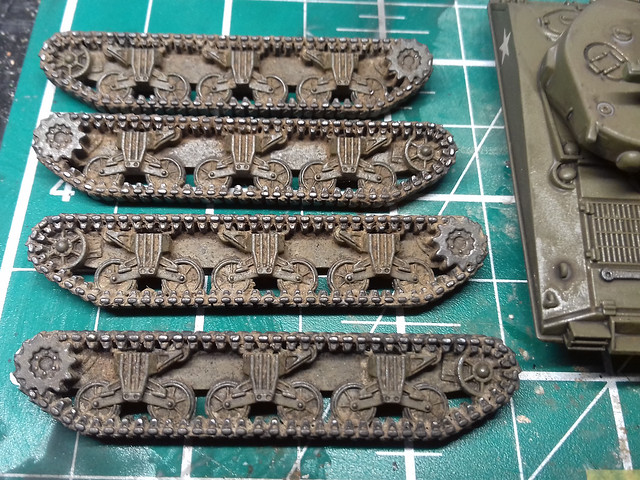
As usual, the tracks are simplified without much of a detailed tread pattern (the M3 tracks of the time were the pretty simple steel links with rectangular rubber track pads - the same ones used by the early Shermans).
Overall, I'm quite happy with the model - delicate parts aside - it captures nicely this early US tank and allows you to play early war Pacific, Far East and North African scenario and also Lees were supplied to the Soviets lend-lease, though they had a far from favourable view of this antiquated design.
Applying the Wash
With all the base colours done it's time to apply the overall wash to the model. I'm using Citadel's Agrax Earthshade (again), diluted 50/50 with water...
Aside from adding a 'dirty' film all over the model, giving the basic paint coats a stained and 'aged' appearance (which I like) the wash also gives definition to panel lines and outlines other surface detail.
This replaces, to some degree, the pin-washing technique I normally use (usually after weathering) on larger scale model projects. Though, I will still be applying pin-washing to pick out the most prominent detail (using Vallejo's Dark Brown Wash) as this is a far darker outlining medium.
The Agrax Earthshade is a medium brown wash and for most detail, this will suffice as a replacement for pin-washing.
While I'm quite pleased with this 'new' (to me) effect, I am aware that it does darken the base colours. I can, and do, put this down to a later of 'dirt', but I will have to be aware that if I want a fresher looking model I may have to start with lighter base colours.
Staining & Streaking?
Actually, I'm cutting out this process (where I would apply oil paint dabs and streak them) and I am using eyeshadow powders to achieve a similar, though softer, effect. This is another change in technique due to the scale of the model.
While my usual weathering effects can still look quite nice when taking closeup photos of the models I think they may be a little bit of over-kill as these small models are meant to be seen at arm's distance on a tabletop. So, I am starting to use broader, less focused weathering effects for my 1/100 gaming models.
Far Too Shiny and Chrome!
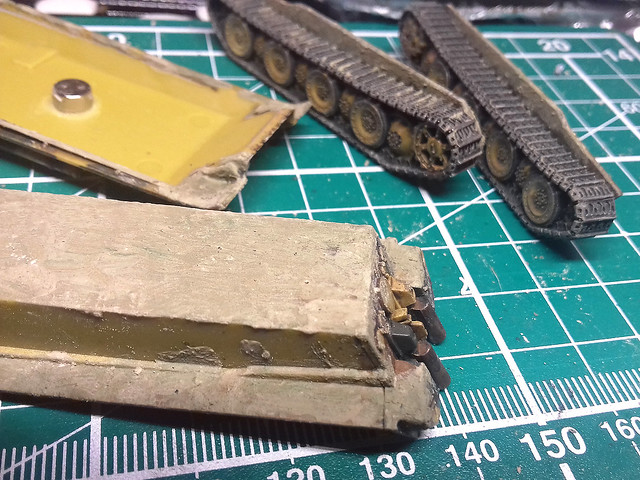
With the upper hull of both versons of the Panther done, I turn my attention to the lower hull and tracks. At the moment the tracks are far too clean and shiny. As with the upper surfaces, I am looking to a more 'cosmetic' medium to apply the effects I want.
Tracks are definitely a part of my tank models that I still have the biggest problem with. I haven't devised a satisfactory 'recipe' for painting and weathering them to a point that I am happy with the result. My previous results have all been a bit hit and miss.
So, let's have another go...
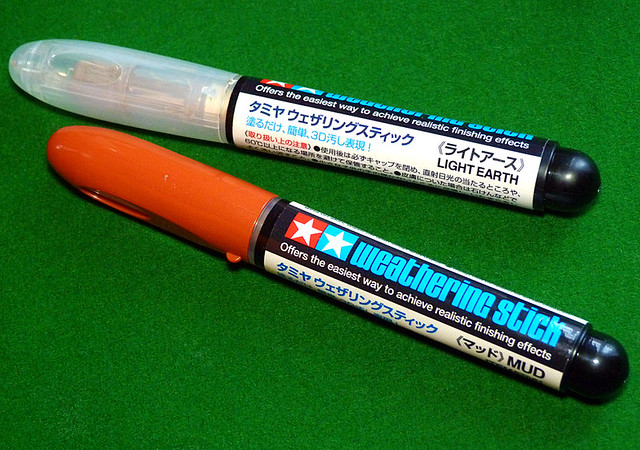
The medium I have picked to weather my tracks are Tamiya's Weathering Sticks (Light Earth and Mud). Nothing new that I haven't used before BUT I recently discovered that these cosmetic type sticks can actually be mixed with water to produce a creamy paste.
I used this technique On my 1/100 Stuart model and although I didn't quite get it right, I like how this cream approach was slightly more controllable than the powder method (with pigments) that I have been using. So, let's have a test on the bottom of the tank's chassis...
Because I wanted to add so much mud to the chassis I started by adding a thin coat of pigment mixture to give some texture, then applied the weathering stick medium over this. This saved on weathering stick and gave a mottled multinational mud effect.
So, in effect the pigments provide coverage and a base with the weathering stick medium softening the edges of where the mud ends. I haven't mastered this technique yet, and I've overdone the effect a little on this model (too much mud) but I'll go easier the next time. However, I am happier with this method than I am with the all-pigment method I used on my 1/100 Shermans where the mud was far too thick...
Pigments on the bottom, merging into Tamiya Weathering Stick medium on the front-upper hull for a softer transition.
You'll notice what I mean by the fact that I have managed to retain the track pattern detail, instead of coering it up which I did with my heavy-handed approach on my Shermans. Here's the result...
Nearly, but not quite, happy with the result...Yet! Next: Protective varnish and completion photos.
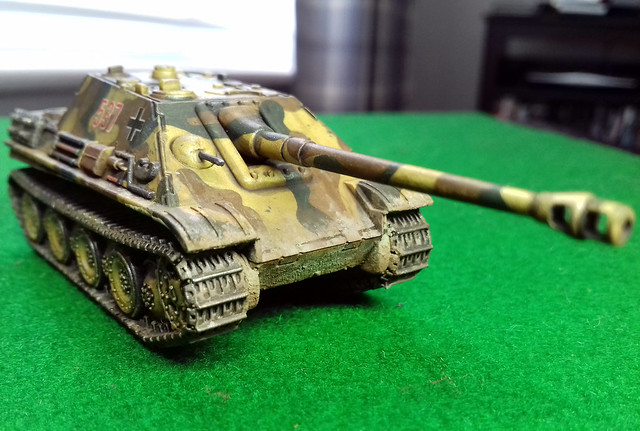
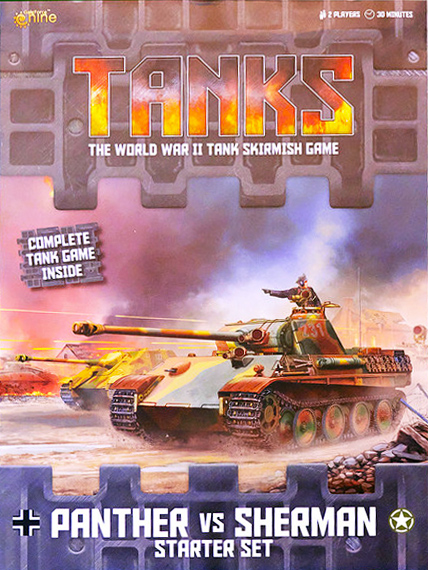
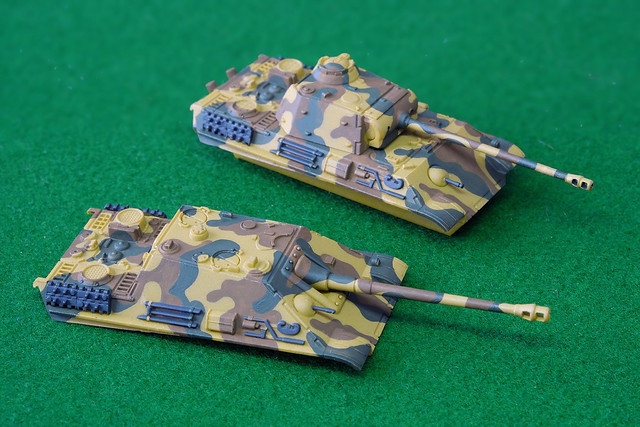
This is the final part of my 'GF9 Tanks Starter Set (Panther Vs Sherman)' series and comprises of the production of the German opposition in the game, the Panzer V Panther. However, as I mentioned in an earlier post about this game set (link to post here), there is an option to mount the Jagdpanther upper hull on the Panther chassis to get two tanks for one (with some sneaky use of mini-magnets)!
The 1/100 Battlefront Panther and Jagdpanther kits are rather nice - if somewhat 'chunky'* and simplified - models. But, they are - in my opinion - on the higher quality end of the wargaming quality kit spectrum. They have packed a good deal of nice surface detail into these little kits and have some very nice track detail. * I have noted on several occasions, when talking about these sort of 'wargaming quality' kits that they can be a little 'chunky' and sometimes over-scaled (Plastic Soldier Company models are a prime example). Well, I've come to understand that is sort of deliberate to make the models a little more durable as playing pieces. Zvezda scales their 1/100 models more accurately, but - as I found out with their M3A1 Stuart kit - this means details like guns become very fine and therefore possibly prone to breakage. This over-scaling is sometimes referred to as 'Heroic' scaling.
Anyway, back to the job in hand. Having mad up my Panther/JP model for playing purposes (unpainted) it's now time for my GF9 panzers to follow the example of their Sherman opponents and get a lick of paint!
Choosing a Panther Camo Scheme
As I found with my 1/100 'Elefant', the choice of German WW2 is wide and wonderful, and this is particularly true of the later war panzer schemes. Starting from D-Day the variety of camouflage patterns seemed to snowball from the fairly standard - but still variable - 'three colour pattern' to - by 1945 - and almost anything goes 'let's just get the tank on the battlefield' (sometimes not painted at all) attitude!
So, I decided that the best place to start was to pick a specific period and/or theatre. This would help me pin down a sort of historic parameter for camo choices.
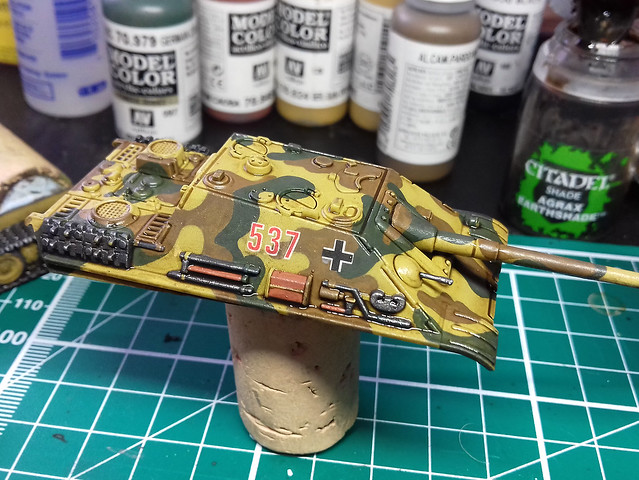
I wanted my Panther/JP to be D-Day specific - so as to be suitable opponents for my D-Day Shermans - so this ruled out a lot of the more weird and wonderful 'late war' Panther schemes. I eventually came across a 1944 3-colour paint pattern that I liked (I sort of prefer large, harder-edged patterns)...
I will be using this same pattern for both the standard Panther upper hull and that of the optional Jagdpanther hull.
Hairy Stick Time
As I am still without an airbrush at the moment, it's another chance to practice my brush skills (another reason to go for a 'hard-edged' camp pattern). I began by priming the Panther hulls with Flames of War's 'Panther Yellow' and then I worked on the brown patches of camo using Vallejo Model Color 'German Cam. Med. Brown' [826]...
My LED desk lamp made these a little over saturated, the colours are actually a little more muted than this.
I tried to follow - roughly - the same shapes on both hulls so that they would neatly join up with the pattern painted on the lower hull. One thing I like about painting patterns using a brush is that if I vary the dilution of the acrylic with water you get a semi-opaque - almost 'watercolour' - effect where the paint is not uniform and 'flat'. This can add to the impression that the camo was added over the Dunklegelb base colour in the field and also that it was 'faded' in places (that's my excuse).
Next I start to add the green 'blotches' using Vallejo's Model Color 'German Cam. Dark Green' [979]. Now, I know there is some amount of debate as to whether these two colours are true to the original German paint colours (the brown doesn't seem to be red enough and the green not green enough, allegedly) but I want a more muted effect...
Lighting was a bit dark here, but hopefully, you get the idea.
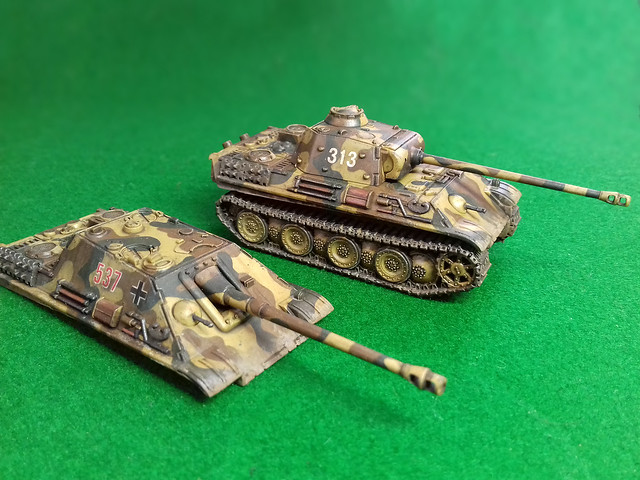
Emblems/Decals Doing an 'authentic' scheme for Battlefront's 1/100 game tanks models is a bit of a 'DIY' process. Unlike 'display' kits these little models don't come with decals or a 'suggested scheme', so you are left to your own devices as to how you paint and decorate them.
Also, authenticity isn't, perhaps, the absolute priority here as these models are playing pieces, so there's an accepted leeway for 'artistic licence'. Basically, nobody will pull you up if your chosen camo scheme wasn't entirely correct for this or that theatre or period or unit, so long as the spirit of the national faction is adhered to for the game. Players of this game don't tend to be rivet counters or pedants (IMHO).
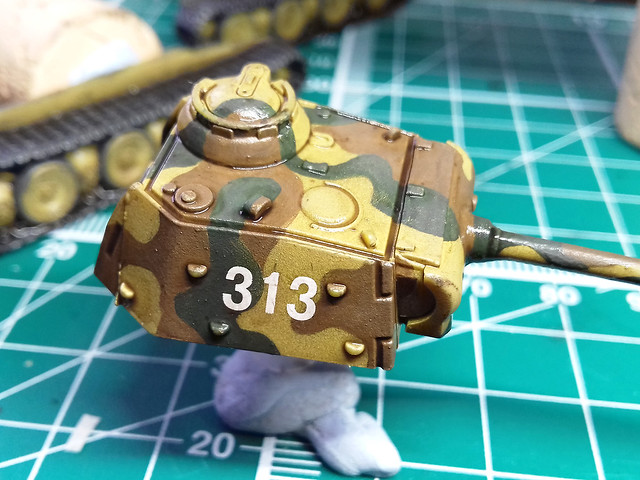
Here's an example of Panther numbering and emblem format that I quite like. The plain white numbering suits my intention to use dry transfer lettering as I have similar font/styles.
So, with this in mind, my camo scheme for the Panther/JP was a 'generalisation' and that's how my decoration will be as well. I'll be keeping it simple, with just a couple of German crosses and a made-up vehicle number...This model is NOT based on any actual identifiable historic tank or unit!
I'm using Woodland Scenics dry transfer numbers for the Panther and the decals for my Jagdpanther are from the Skyrex AD43 German Tank Numbers and AD28 German Crosses. I have to say, I'm not so impressed with the quality of the Skyrex decals, I think they are short run printed decals and their transfer film is quite thick so I'm having to use Microscale's Micro Sol to help settle them in nicely.
Applying one number at a time is a bit tricky as you are never completely satisfied that everything is straight and level...
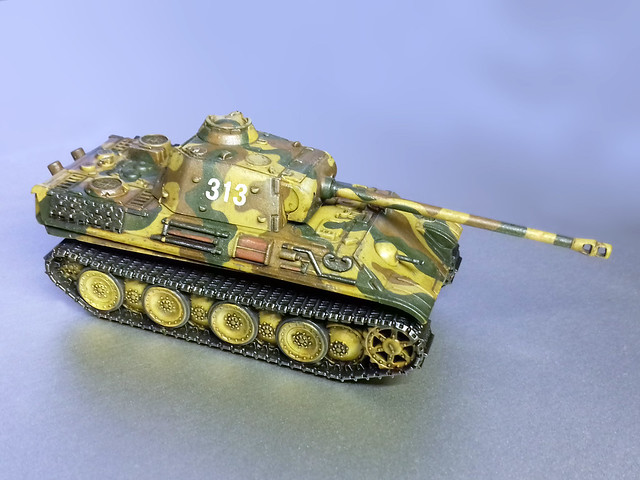
And that's nearly it for the basic paint scheme and decalling. I have to go around them again to do a bit of touching up and add some metalic dry-brush effects to the bare steel part and then the everything will be real for a coat of satin varnish. This helps seal the decals and prepares and protects the paintwork for teh next stage, which is an overall wash.
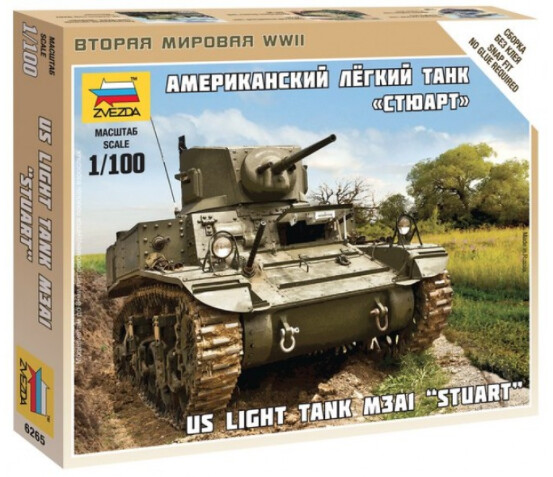
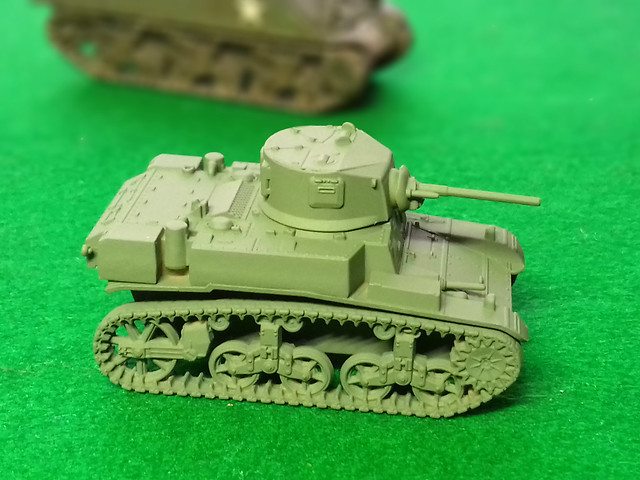
Damn these cheap 1/100 kits, they are so ripe for an impulse purchase. This diddy Stuart was one of two Zvezda 'Art of Tactic' (simplified wargame quality kits) that I just couldn't resist buying while browsing in my local model shop.
This model is so small and simple that it only consists of a single sprue of (10) parts. The instrustions for assembly are included on the rear of the box...
I would give you two tips if you are considering buying this kit; be very careful with the guns as they are quite thin and fragile and also install the rear hull plate before you install the upper hull!
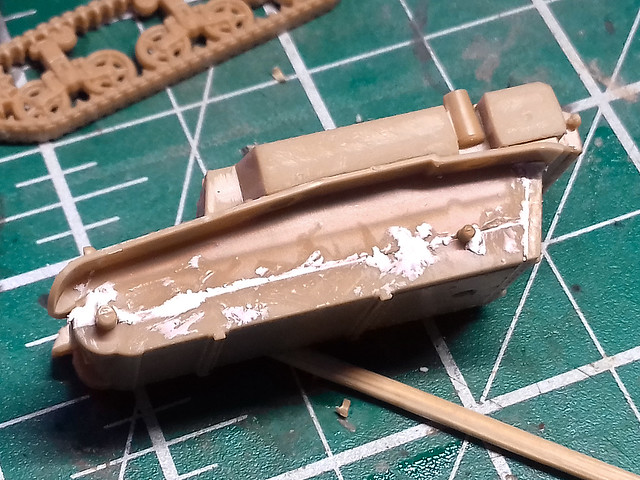
Everything goes together quite well, typically of Zvezda they slightly overcomplicate the assembly because they have opted to make their kit 'snap together'. But I chose to glue mine together and I did use some putty to fill some gaps in the lower hull's seam...
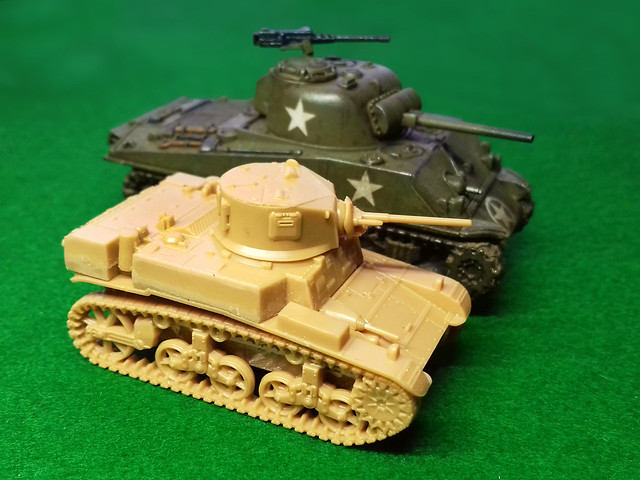
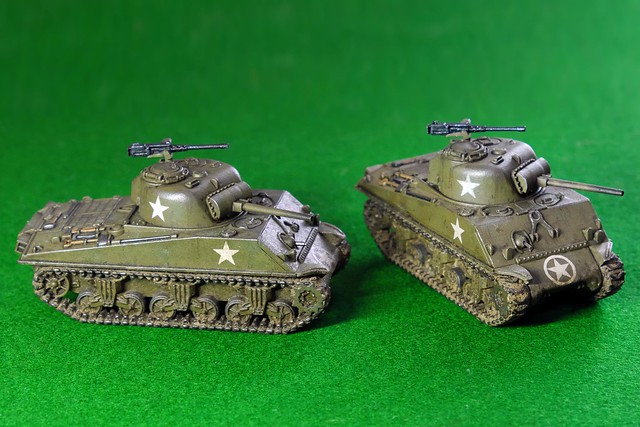
In any case, this was not a big issue and I till had the kit assembled lickity-split. I couldn't resist posing it next to one of my newly completed 1/100 Shermans just to give you some impression of the size of the Stuart...
As you can see, the Stuart comes in sand yellow plastic and the great temptation then is to paint the model up as a Britsh/Commonwealth 'Honey' in a North African scheme. With Gale Force 9 about to issue it's North African campaign tank models this would be the fashionable thing to do, I suppose.
But, I fancied something a little different and looked to the Pacific Theatre for inspiration. The early to mid campaigns of the US Army in the Pacific are often overlooked and some tend to forget that there was tank action between the Americans and the Japanese and I'll love to try out a game based these actions. (Battlefront does not do 15mm Japanese tanks yet, but models are available in this scale from other suppliers.)
Here's a rather useful video 'walk around' of an M3A1 Stuart with some very nice close-up detail...
While technically obsolete in the European theatre, the little Stuart could still give Japanese tanks a run for their money. and I suspect it's diminutive size was something of a plus point in jungle warfare. So, I'd like to paint up a - fictitious - US Army Stuart in an ad-hoc jungle scheme I found online, but let's get the priming done first...
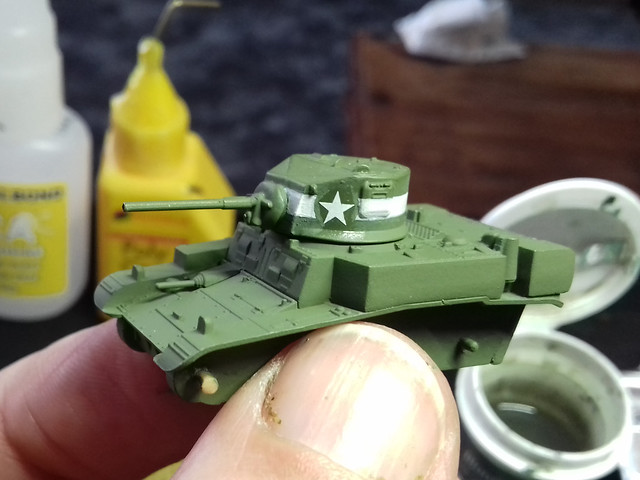
I went with Humbrol's Light Olive [86] to get that faded OD look and then added a US star decals and hand painted the white band around the turret. Not my best painting but this doesn't matter so much (for reasons that will become clear later)...
Incidentally, I tried out a different technique for the preparation before applying the decals. Normally, I just spray the whole model with Humbrol Gloss, but this time I just painted on some gloss only where the star decals would be positioned. Less spraying can only be a good thing.
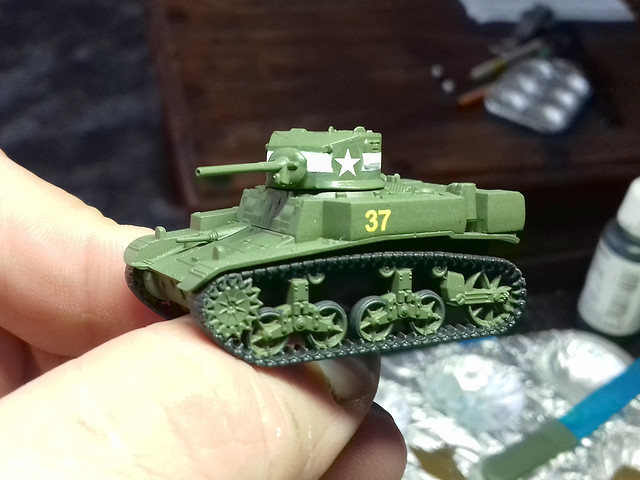
After all the decals were down I did give the model a light spray of satin coat, though, to seal the decals and ready the model for the next stage of painting...
The next job is to paint some of the fine detail painted - like the tools and MGs, etc - and then to apply and overall wash of Citadels Agrax Earthshade. This serves to 'dirty up' the pristine paintwork and settle into the panel lines to give the surface detail some extra definition.
And finally, for this phase of the basic painting, I will be applying my 'staining & pin-washing' process, though I will be trying out eye-shodow powders again as the worked so well wih my previous 1/100 Sherman models...
xxxxxx
The Camo Pattern....
Now to the camouflage paint scheme and I maybe taking on something that's a bit too niche, so I may be biting off more than I can chew (particularly in this scale).
You may have noticed that I have applied the decals before I do the camo scheme in this instance, which seem wrong. But the particular scheme I am after is a little different...
In the above - very rare - photo a USMC M3 Stuart has been given an improvisatory field 'paint job'. I've read several discussions about what colour these 'jungle stripes' might be, some people say white and some say a light tan (indeed there are some documented examples of US Pacific tank schemes in white stripes, I believe this unusual choice *may* be to do with bright sunlight shining through gaps in the jungle canopy).
However, if you look at the turret - where the ad hoc stripes have been painted over the US star - you can plainly determine that the colour cannot be white. This leaves two options, that it is light tan (or khaki) or it may actually be MUD used as an expedient!
Were the above photo in colour, I *believe* this is how it would look...
This model of a British Bishop SPG in Italy - by Rick Lawler - is an example of a field application of mud as a camouflage 'paint'.
I know, it's all guesswork but who's to say that this could not have been a field expedient used by the Americans as well? So I'm going to pretend it was!
NOW...This 'paint scheme' has the potential to turn out to be a horrible mess, but I would like to try it and - to be honest - it's best if I do on one of these little 1/100 models as it won't be a major disaster if things go wrong (it won't be the first time I have used these cheap little models as 'testers'). So, (deep breath) let's have a go...
Final Thoughts... For me, this was a very quick project, beginning to end in one post (that's unheard of)! But, actually, I could actually tinker a bit more with this if I wanted to.
The mud camo scheme turned out not too bad, but the two colours of 'mud' I used were a bit too much alike (I was trying to go for a lighter dried mud colour and a darked wet mud colour). But, having said that at tabletop distance it doesn't look too bad.
Once again, I have enjoyed making one of these little 1/100 models. Though, so far, I have made them OOB and not added any embellishments or improvements to the simplified detail. But, there again, this is probably somewhat counter to thier use as gaming pieces.
Weathering Effects...
Right, onto the creative part. Having laid down my base colours I turn to applying weathering effects, like staining, dirt and wear.
And here I came across another example of how effects that worked well for me in 1/72 scale didn't quite work out for me in 1/100 scale. I began with the tracks and set to work with my tried and tested powder pigment 'mud' mixture, but what would have been a light coat of mud on the larger scale turned out to be a thick clart (a Scottish word for a gooey mess) of mud on 1/100 tracks...
These are far muddier than I wanted but are - I suppose - realistic if the tanks had been driving through ploughed fields. It wasn't the effect I was actually after but will do, I'm happy to leave it and just modify my application for the smaller scale on future models. I suppose nobody will know that I didn't mean them to be this muddy if I don't tell them!
Staining the Sherman Hulls & Turrets
Finding that my usual 1/72 scale painting techniques were, perhaps, a little heavy handed for the smaller scale I decided to try something different for my usual 'staining' stage.
My staining and bleaching method is normally based on using oil paint which I dab on in spots then smear into streaks using thinners. I decided that this might be a little too invasive and harder to rectify if I didn't like the end result, so I looked for a 'softer' approach. I looked through my paint effects box and picked out the 'eyeshadow' set!
I've used these on a smaller scale on my previous models, as a secondary powder effect, but in this case, I will be trying them out as the primary weathering medium. These, in combination with Citadel's washes - which I am using more and more - gave me a rather more controllable (powders can be easy removed) staining technique for smaller models...
I was going for a dirty and oily, war-weary Sherman and I think I achieved this. I was quite please how well the eyeshadow effects went, so I will probably try this out on my 1/72 models now.
Conclusion
I'm really enjoying these little 1/100 tank models. The detail will probably not satisfy the most pedantic modeller, but I find the simplification takes a lot of the pressure off and I can simply relax and enjoy the painting.
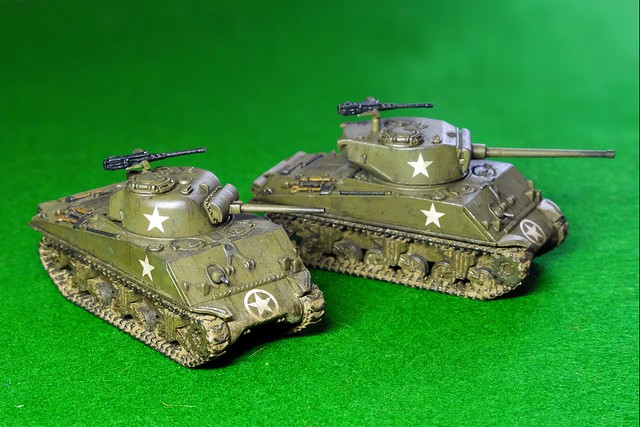
An additional benefit of these particular models is that they come with the option to swap out the turrets so I can have a 76mm gunned Sherman to 'play with' as well...
It'll be nice to get these on the gaming table as - as many wargamers point out - units always perform better when they are painted! :)
I'll be building up a few small 'armies' of tanks for the GF9 Tanks game, but my next priority to to get the 'bad guys' - the starter set Panther/Jagdpanther - painted!