Showing posts with label Armourfast. Show all posts

Wednesday, 20 May 2020

And...I Change My Mind! 1/72 US Sherman.

As I mentioned, I am currently rummaging through the junk pile which is my old attic work area. It seems that every time I remove a layer of crap I find something new or something I had forgotten about underneath... I daren't even show you a photo, it's too embarrassing!

Now, I thought I had found all of my old projects and I carefully placed them in a separate box and had picked out a couple that seemed like good ones that would restart my model making with. But, no...

One more layer of random 'stuff' and I came across yet another oh-so-nearly completed model that had completely forgotten I had. And this one is another - like my Hurricane model - that is ready to have the final weathering phase to be applied...


Like my Hurricane model., this 1/72 M4 Sherman model (by Armourfast) was a 'fun' project totally unrelated to any of my main projects. So it's ideal to use as a (re-) starter activity, because I would hate to make a mess of one of the models I was making for, for example, my Finnish Army project where each model is a bit of a custom job with a lot of work put into them.

Also, I enjoy the weathering bit, it's the part of the modelling process where you most get to get creative and add your own personal 'style' (I think).

...So, quick change of plan. This Sherman replaces the Hurricane as my re-entry into the hobby.

Despite this model being, basically, a pretty simple Armourfast 'easy build' war-game kit I did do quite a bit of scratch upgrading to it (just to prove that you could make a bog-standard gaming model look a bit more realistic)...


To help get me re-started in making and painting scale models I have managed to find a very useful YouTube tutorial to guide me... (A bit of much needed 'hand-holding' as I'm a bit nervous!)

Monday, 13 February 2017

Armourfast Stug II - Part 3

I am my own worst enemy - this was supposed to be a 'quick' project, just to get some much-needed painting practice in. But, I just had to tinker, didn't I?

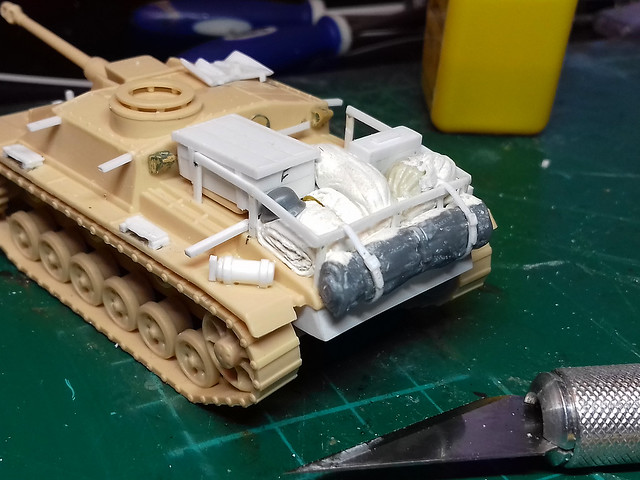
As this Stug is meant to be a later war (Normanady, 1944) model, I decided that I wanted to give it the war weary look of a veteran unit by adding some of the accoutrements of an experienced armoured vehicle crew. In other words, stowage...And lots of it...

As usual, photographing pure white Milliput is a little challenging!
I did buy the Plastic Soldier Company's 'German stowage and tank commanders' accessory set, but some of it's stowage items look a bit unconvincing so I ended up only using a couple (the dark grey items in the photo). The rest of my random collection of bits and bobs were scratch made from styrene or from white Milliput.


I didn't go as far as throwing in a kitchen sink, but there I've pretty much filled the cargo area. In reality, I believe so much stowage - especially the large oil drum I will be adding - was perhaps more relevant to vehicles serving on the Eastern Front (where they had to travel long distances from a depot). But, I think it gives my Stug a bit of the 'lived in' look!

Note: The dust particles aren't part of the weathering! :)
Priming - With Vallejo Surface Primer 'Dunkelgelb'
With regards to my Stugs priming colour, I've dodged the whole question of what exactly 'Dunkelgelb' is (the mustardy dark yellow that the Germans used as a base colour) by actually going out and buying Vallejo's Acrylic Polyurethane Primer German Dark Yellow (RAL 7028).

This is the first time I have bought a proper modelling primer rather than using a Halford's or Autocar rattle can primer. So, it will be interesting to see if there is any real difference in quality.

The Vallejo primer is designed to be applied by an airbrush in a few very light coats, so no more impatient lashing on of a thick coat of Halford's then!


Spot on for the 'Dunklegelb', but...

To be honest, as I begin to lean more and more towards wargame modeling (as opposed to display modeling) the care with which this methodical priming process takes is probably overkill. The Vallejo Surface Primer should be applied in several light coats, slowly building up the opacity. This takes time, as does the drying as the model remained tacky for several hours (apparently the process can be sped up by using a hairdryer)!

For war game models, I have to concede that a quick squirt of Humbrol acrylic spray (Desert Yellow in this case) would have been perfectly adequate. And the drying time is much faster. (I would just have to modulate the Desert Yellow to give it a more mustard tone.)

Still, that's the model primed, with the tracks and some of the stowage primed in black. Next, I have to plan which camouflage pattern I want to give this Normandy Stug. (I read that German Army vehicles came with their base colour - Dunkengelb or German Gray - from the factory. It was up to the troops in the field to apply whatever camo pattern their unit deemed suitable over the top of these base colours.)

Monday, 6 February 2017

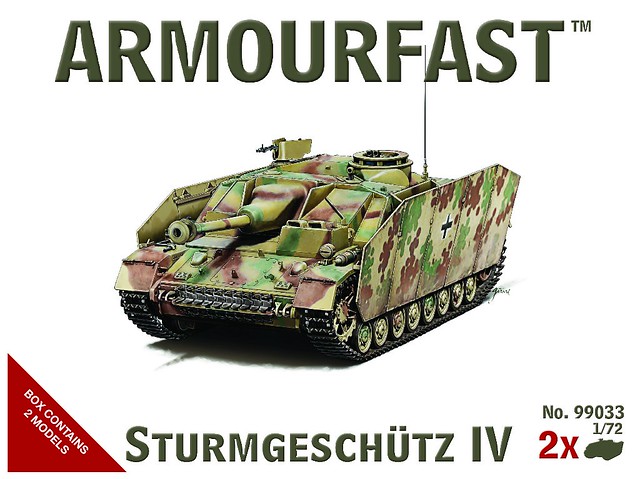
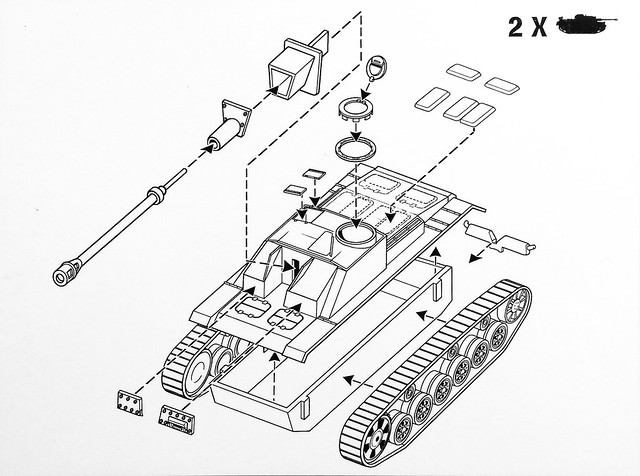
New Armourfast Stug IV

I like Armourfast (and the other war game 'easy build' manufacturers), their kits give you (or rather 'me') a challenge - 'how good can you make these simplified models look?'

Well, it's been a while since Armourfast brought out anything new, so it was a nice surprise to get an email from them this morning announcing a brand new model. Never ones to ignore what the people (seem to) want, they decided to add some more German armour to their range...


Now, I'm developing into a bit of a Stug fan, so this Mk. IV is very tempting, even if I have absolutely no need for it in any of my current projects.

it also raises some wishful thinking on the part of Armourfast fans - will they have modified their simplified track process to include some better track detail? (I suspect not.) Also, in the past, there has been some deviation from what you get in the box and what the box artwork depicts, so will the detailed illustration match the number of parts? (Again, I doubt it, forget the headlamps and aerial for a start! But, I do hope they include the distinctive remote controlled MG.)

Update: Just had a quick gander at the pictures on the Armourfast website and, sadly, no, the remote MG is NOT part of the kit!

Very 'clean' interpretation of the Stug IV (especially given the nice detailed box artwork)!
Price is a reasonable £7.50 for two models, but, as usual, you will have to weight up whether this simplified kit is right for your needs. But, there again, none of the other 'easy build' manufacturers have a Stug IV, so Armourfast may have spotted a gap in the market.

Link to the Armourfast Stug IV page.

Thursday, 2 February 2017

Armourfast Stug II - Part 2

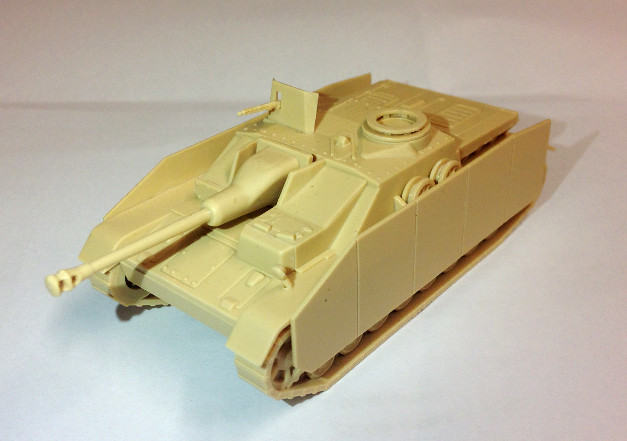
Errata: I said in my previous post on this project that Armourfast kit that I had was an earlier version of the Stug, without side-armour 'skirts' ('Schürzen'). Well, I lied!

The box instructions make no mention of the inclusion of side-armour plates, but, in actual fact, they are included on the sprue (I just over-looked them). So you can make a later war (mid-1943 onwards) Stugs with the extra armour, though be aware Armourfast supply you with early 'Schürzen', the design evolved and I suggest you pop over to this website for a detailed explanation: (Stugiii.com) Sturmgeschütze vor!

Right that out the way...
Er, I have another confession. I also suggested that I will be keeping this build simple so I could concentrate on the painting (which was the purpose of this project). I fibbed again.

Having discovered that I now had the chance to add the side-armour, it seemed fitting just to add a few other later model Stug furnishings. I mean, it would be rude not to...
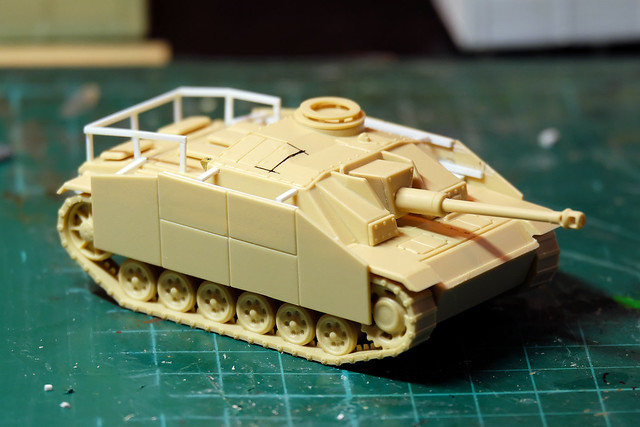
My Stug with it's skirts on! I'm also in the process of adding a few bits of bling.
However, I'm not doing masses of research (which will lead me onto tinkering even further with my Armourfast 'Easy Build' kit) and everything I'm doing is suitably simplified in keeping with the kit's theme.

The Great 'MG Shield - Up or Down' Controversy
And here's where I accidently stumbled into a piece of essoteric war game modeller's controversy. :)
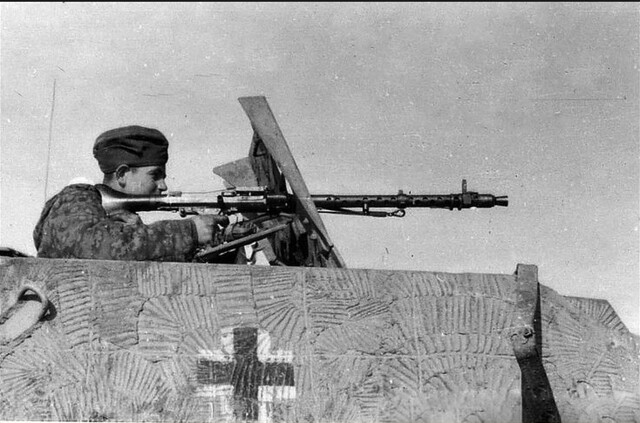
The Stug's roof mounted MG, operated by the Loader from atop his hatch.
The 'G' variant Stug III (onwards) was given a roof mounted machine-gun. Initially, this was simply a metal sheild with a MG34 (but sometimes a MG42)mounted in it, but later in the war it was fitted with a 'remote' fired MG34 so that the crew could safely fire the machine-gun from inside the Stug.

But, here's the problem...The early shield mounted MG was not a 'fixed' solution (like the shield protected .50 cal on Allied tanks), instead the MG34/42 was carried inside the Stug and only fitted in place on the shield when needed. This, admittedly inconvienient, arrangement was due to a badly thought through design by someone who obviously never actually had to use a roof mounted machine-gun under fire!
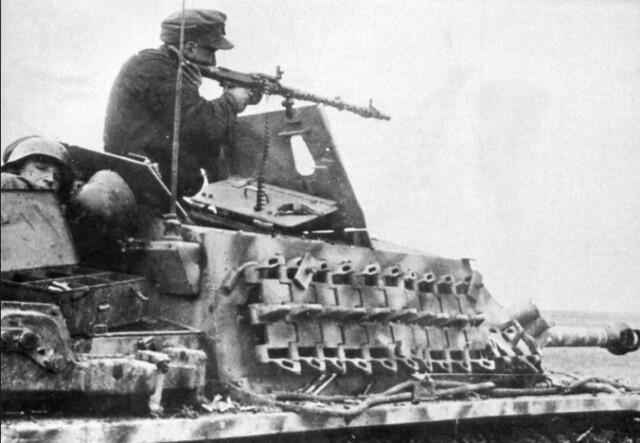
A terric view of the Stug's MG in action! You can clearly see how the Loader's
roof hatch is proping up the MG-shield. Without this support the shield would
just flop about and is normally stored foded forward, flat.
Now, this arangement - of shield 'up' when in use, shield 'down' when not - causes modellers who don't do thier research properly a lot of problems. Quite a few model thier Stug's with both the shield up and teh Loader's hatch closed (what would hold the shielf up, then).

But, in wargaming, it causes additional bamboozelment. Gamers may wish to have the Stug's MG on display - to indicate it has a secondary armament - but might not want to model a Loader figure poking out the roof of their Stug...So, basically, they 'cheat' and model the shield up as if it were a fixed accessory, as in this lovely example of a 28mm 'Bolt Action' Stug by Aodhan Bunny Burrows and featured on the Bolt Action Facebook Group...

Loader's hatch closed, but MG & shield up! Cool looking, but not accurate.
OK, this may be one of those modeller's 'mountain out of a molehill' issues, but things like that matter and I really can see some people being as pedantic enough to take issue with this inaccuracy during a game (tongue in cheek maybe). This is because, with the shield proped open only by the MG - as in the above example - the Loader could not open his hatch (easily) so how could he man the gun? Hmmm...

My solution to this rivet-counter's conundrum was to mount a shield on my Stug BUT to have it attached in the 'down' (folded) position. In a game, it would be my contention that the MG is available for use as - were it needed - the hypothetical Loader would hypothetically deploy the MG34 in it it's shield which could be - hypothetically - rased into place!
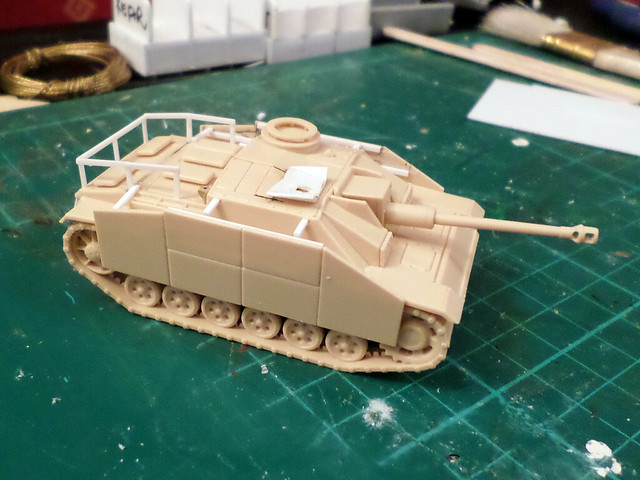
My Stug with it's MG shield folded forward, but ready for deployment if needed!
Welcome to the world of war gaming! :D

Sunday, 29 January 2017

Bolt Action 1/72 Normandy StuG III

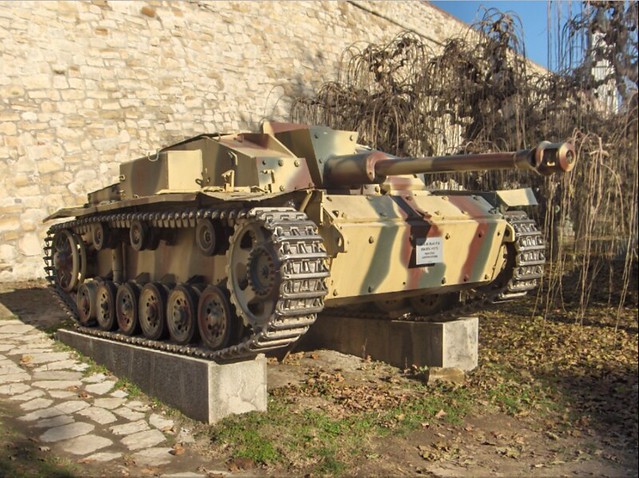
StuG III Ausf. F/8 (Sd.Kfz.142/1) at Belgrade Military Museum.
Author - Slaven Radovic. Source: WIkipedia
After my hiatus, I desperately need to get some painting practice. I don't want to jump straight back into my main project until I blow away some of the cobwebs on my brushes!

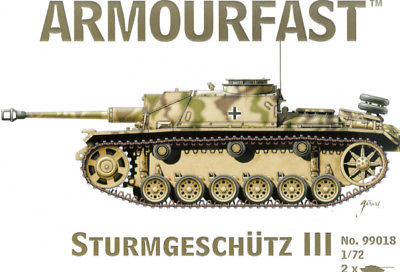
I had a good look through my stash and old project shelf for something that would ease me back into splashing on acrylics. Something that didn't need to be 'display quality' painting. Then I remembered my 1/72 Bolt Action project and that I had bought an Armourfast 'Easy Build' Stug III, ideal for a simple paint job.

The version of Armourfast's Stug III kit that I had was the older, original, model.
This was the 'earlier' version of the assault gun, without the upgraded side shields.
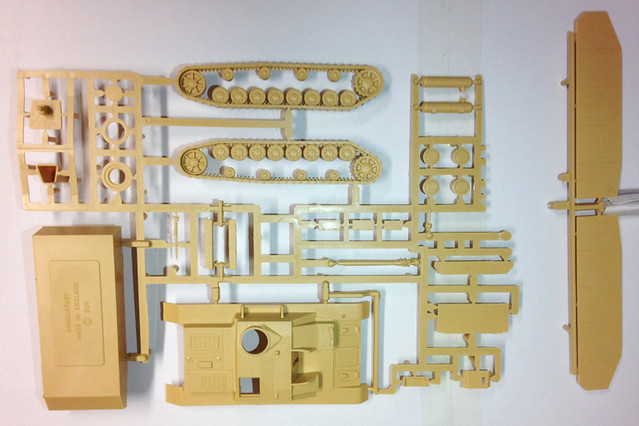
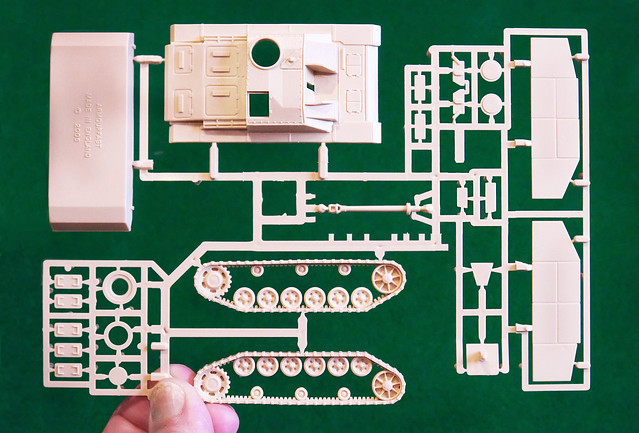
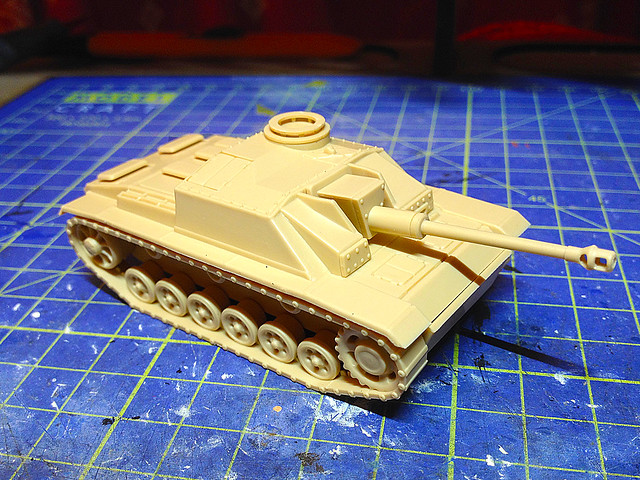
The kit itself - created especially for war gamers - is a pretty simple one with an uncomplicated level of detail, meaning there isn't a lot of fiddly parts to paint. In all, there are only 25 parts to the kit and the majority of the assault gun's design elements are moulded directly onto the main hull parts...


This uncomplicated model should allow me to concentrate on getting my painting mojo back, and without me getting too engrossed in minutia. Yet, it should turn out (unless I completely mess it up) good enough for use in my 1/72 Bolt Action gaming set.

Although the Stug III represented by this kit is an earlier version of the Stug (StuG III Ausf. F/8, I believe), without the spaced side-shield armour, this version of the Stug lingered on in use well into late war...

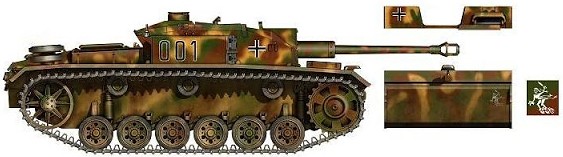
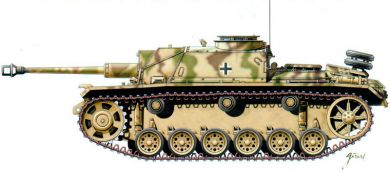
Sturmgeschütz III Ausf. F/8 coded “001” from Pz.Jg.Abt.61, 11th Panzer
Division, France, September 1944. Source: Unknown

The above colour scheme seems ideal for my purposes, as even though I may be a touch rusty I still think I may be able to pull this off. Certainly, the build poses no problems whatsoever, as it only takes five minutes to put the basic kit together...


Next: Too simple? Do I add at least a few pieces of stowage? We shall see...

Tuesday, 1 October 2013

ISU-122 progress...Finally!

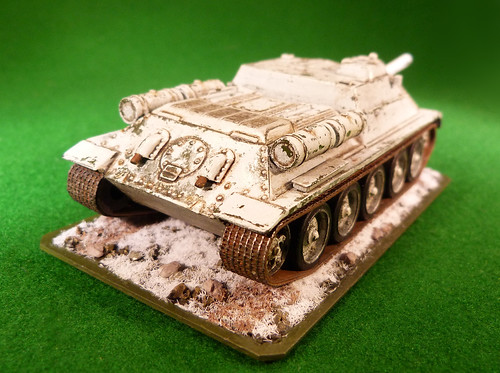
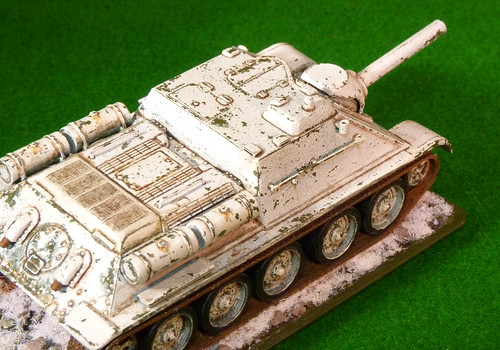
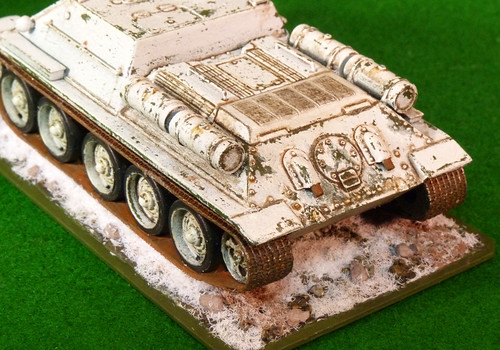
Phew, it's been a while hasn't it? This hiatus has been due to some intense modelling I've been doing over on my 1/32 toy soldier blog...Other pastimes have suffered as a result. Anyway, I have finally managed to get back into my ISU-122 experiment.

To recap - my Soviet tank destroyer was undertaken to practise some finishing and weathering techniques. At this point I needed to add some identification stripes to my tank, but these needed to look hastily applied and hand painted.

As far as I have been able to find out the late war Soviet ID stripes were quickly daubed on in the field, probably with white wash...
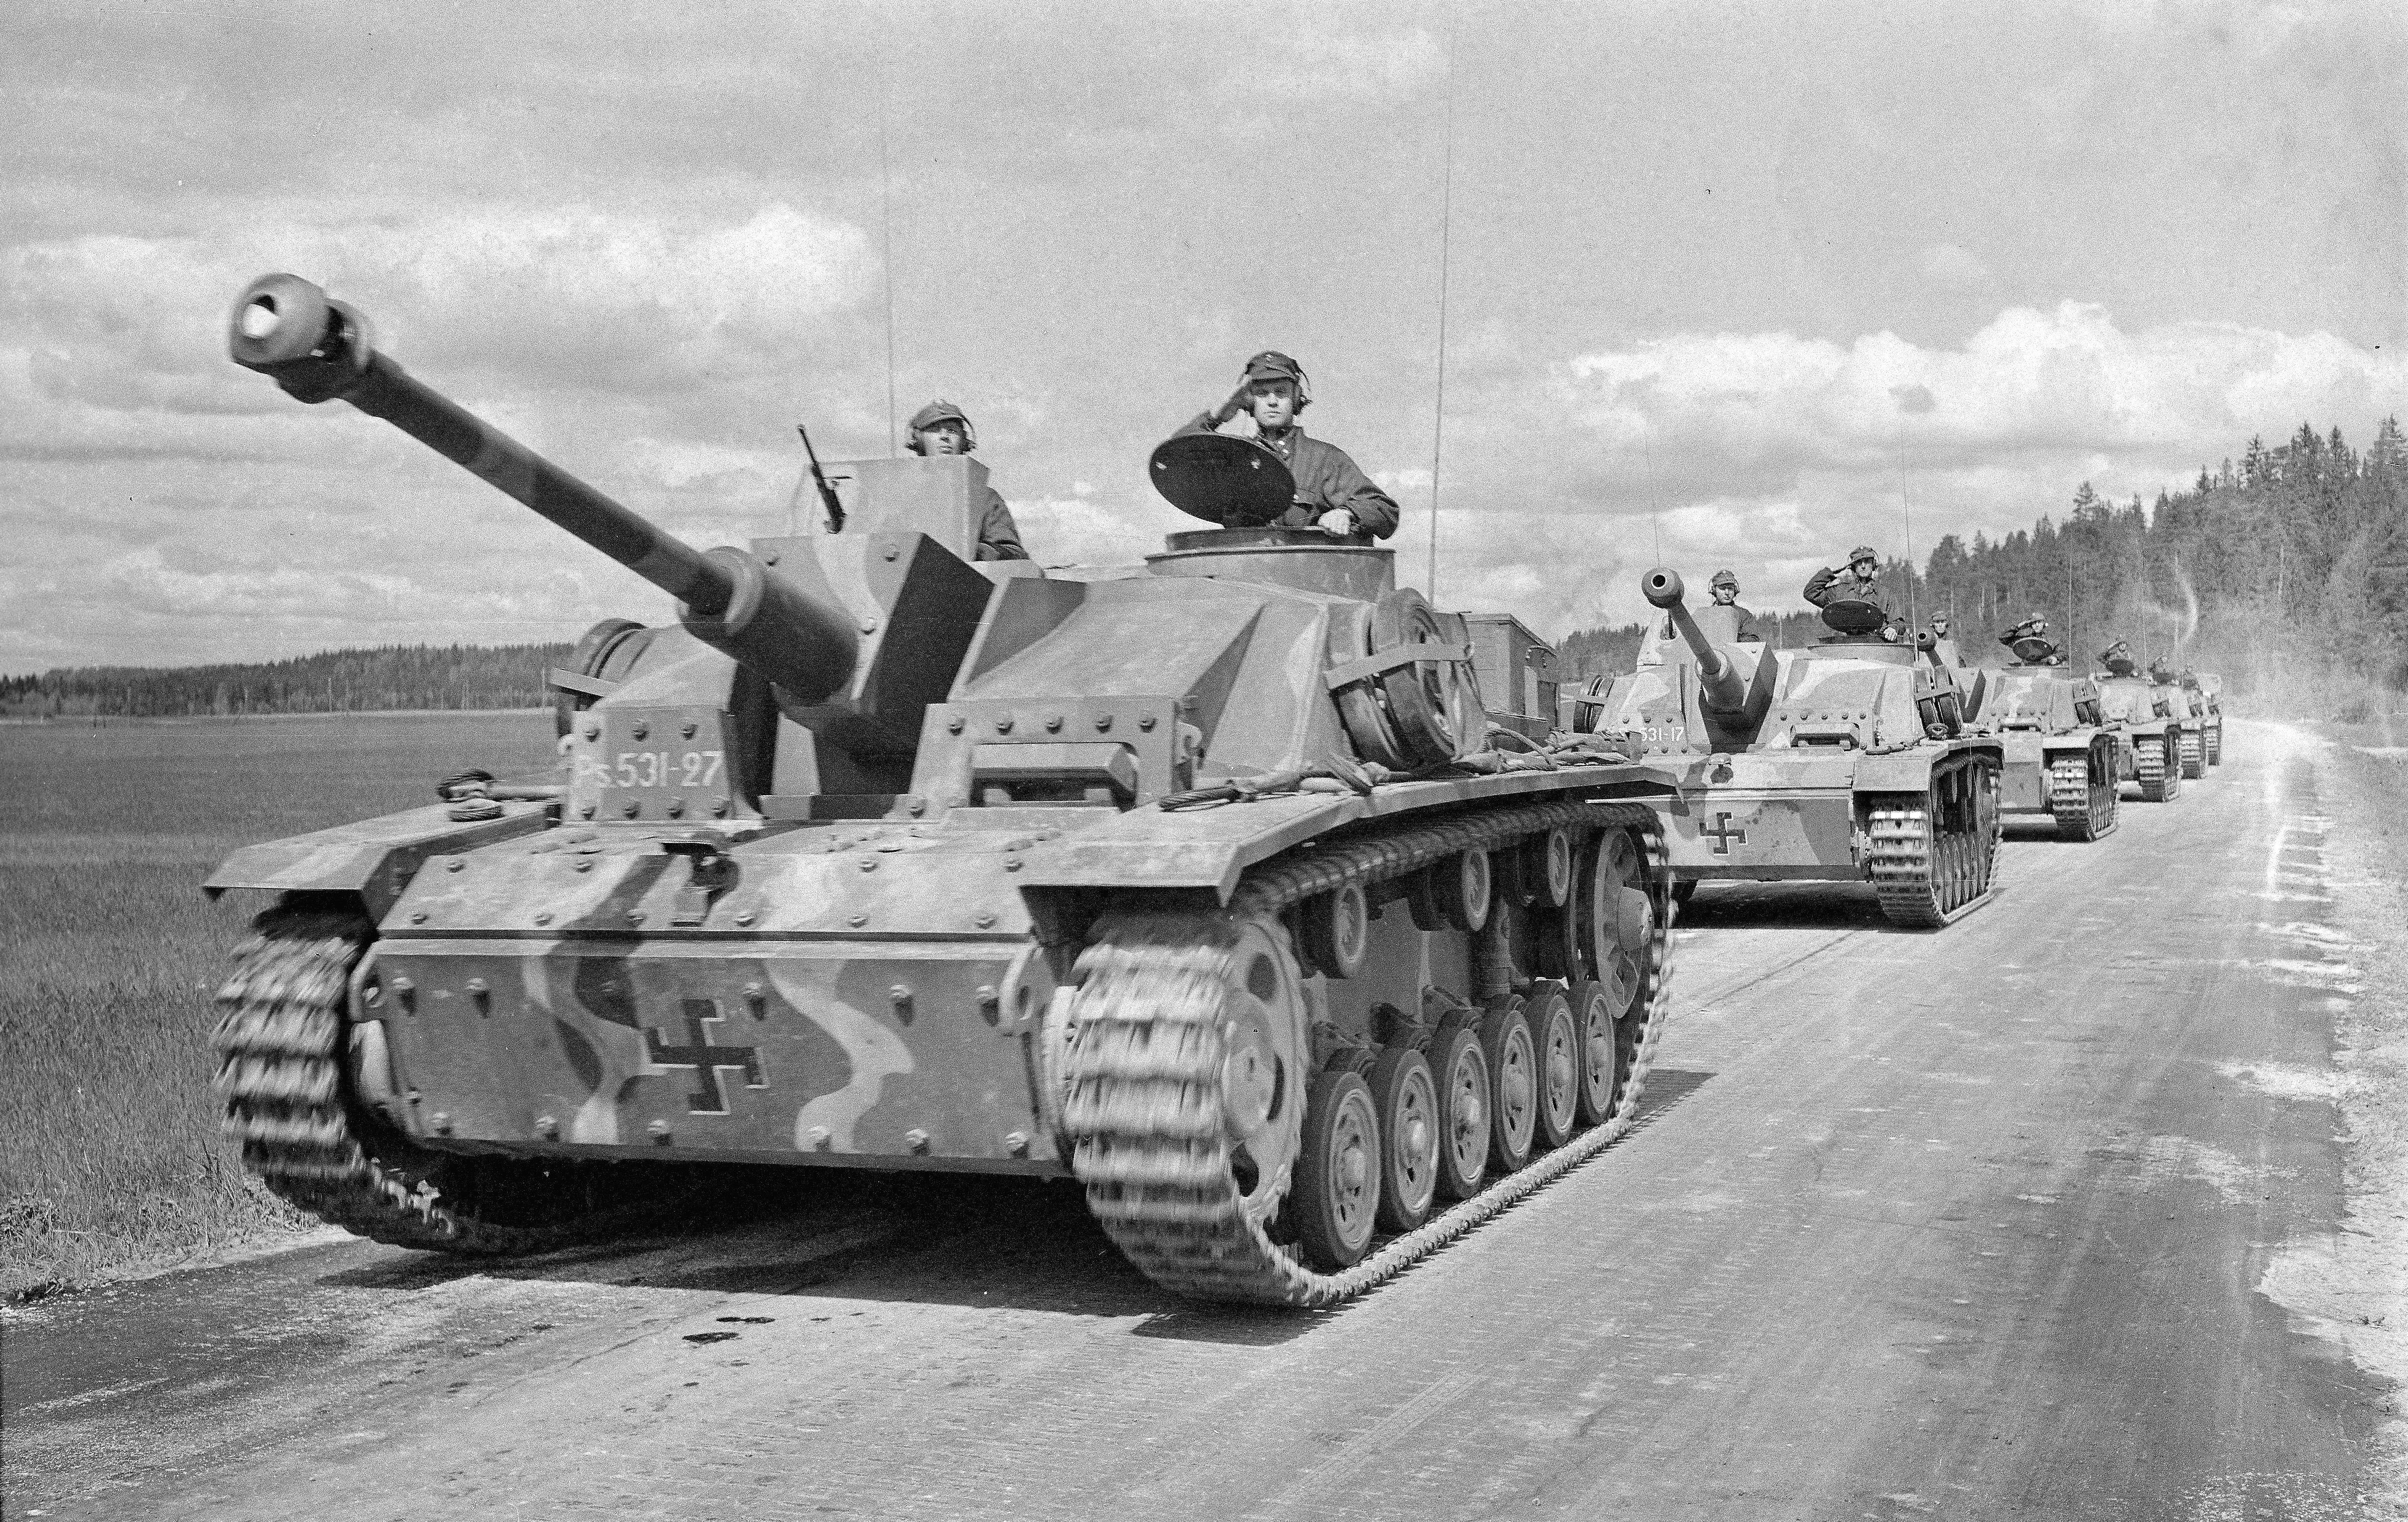
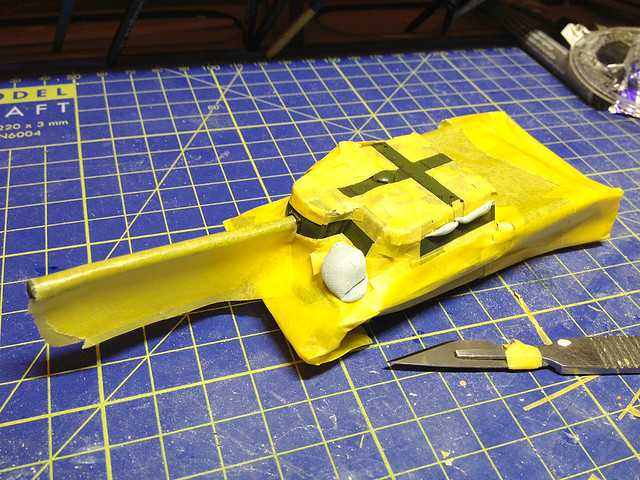
The first step in applying Soviet ariel reconition stripes is to mark out the outline
of these stripes using thin strips of making tape. These are just guides for adding
the actual painting mask itself.
Stephen Hamiliton’s (2008.25) ‘Bloody Streets: The Soviet Assault on Berlin’ where, citing a ShAEF report dated 21/04/45, he states: 
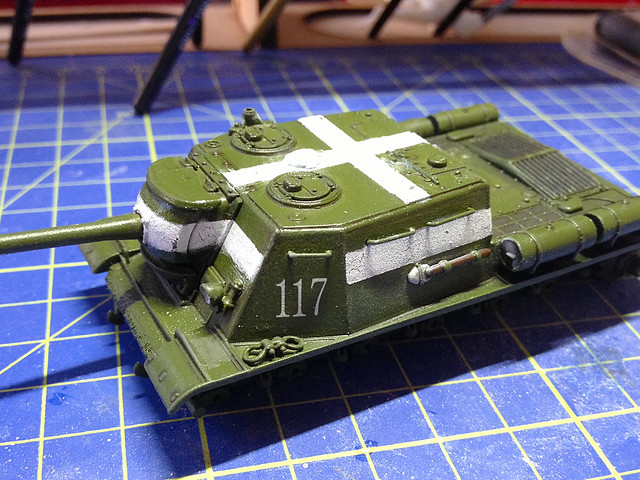
‘Still believing they [the Soviets] would run into U.S. or British units along the way [to Berlin], Stavka agreed with Eisenhower that Soviet tanks should be painted with a white stripe around the turret and a white cross on the top. It has been suggested that this stripe was designed for recognition of Soviet tanks and SP guns during the street fighting in Berlin, but in reality [Hamilton proposes] it was to differentiate their vehicles from the Western Allies. Studies of late war photos of Russian armour depict no vehicles outside of the fighting for Berlin carrying the white stripe. By the end of April the Soviet tank recognition marking changed from the white stripe to a small triangle on the turret. This change was caused by Gertman Panzers in the 9. Armee painting their tanks with the Soviet recognition stripes in an attempt to fool the Soviets during their breakout West. Again, a study of late war Soviet photos show the small triangle marking on vehicles involved in the Berlin fighting but nowhere else.’

So, how to paint the recognition stripes? To start with I laid down some guides using thin strips of making take (see above) and then masked off the rest of the tank, then removed the guide tape...


Now, this is where things got tricky. I decided to try out the hairspray technique again - I used this with some success on my SU-122M conversion. So the next stage was to spray on a layer of hairspray, let that dry and then spray over a layer of white paint.

The idea is that you can then easily distress the white layer using water, scraping off small spots of paint to reveal the green paint underneath...


Unfortunately, I overdid the hairspray - applying too thick a layer - and the white paint started to come off in large flakes. Oooops! (I reckon one light layer of hairspray is all you need.)

I had to do some remedial painting with white acrylic, which was a bit of a shame - however, and luckily, because the final effect was supposed to look slap-dash I *think* my dodgy painting will just past muster.

Next: Another layer of gloss and then some final weathering, distressing and chipping.

Sunday, 10 February 2013

More unfinished business - another Sherman

Having found my Airfix 1/76 M4 Sherman I thought I would have a rummage around to see what else I squirreled away until I got better at painting models. Well, surprise surprise, I found another Sherman!

This one was done after my initial Airfix M4 and I put a lot of what I learned about detailing into practise with this conversion. The base model is a Armourfast M4 which I pimped out with a lot of extra scratch built parts and some lovely third party decals (Bison's 37th US Tank Battalion, 1944).


Again, I stopped work on this because I knew I was not up to the pin-washing and weathering techniques at that point. Since then I have done several practice models specifically to learn about finishing off my models.

Funnily enough the part of this model I am most proud of is the work I did on the rear of the tank. Armourfast didn't include any hull details on the back - aside from a hatch - and the suspension, exhaust system and hatch hinges were absent. And so...


As with the Airfix Sherman the main construction left to do is to find a suitable way of improving the track treads (having a further rummage through my draws today for some donor tracks). After that it's just a matter of doing the pin-washing and weathering.

You can see the 'story so far' on this build here: Flickr - Armourfast (HAT) 1:72 Sherman M4

Saturday, 23 June 2012

Featured work - Steve's Panzer WIPs

It's great to look at smart finished models, all decorated and weathered and photographed expertly, but I especially enjoy seeing works in progress. As a novice it's really useful to see how other modellers go about putting together or paint a kit, if only to confirm that I am 'doing it right' myself!

Over at the Regeln des Krieges blog Steve (the author) has posted up this terrific photo or a brace of Armourfast Panzer III/IVs going through his camo painting process. It looks like he hand paints the camo - rather than spraying which I have started to do - and I have to say he looks to have a very steady and expert brush hand!


As a graphic designer I actually like this clean flat painted stage, though as a modeller it's what he does next - during the pin washing and weathering - that's probably more exciting.

Check out his blog as there's loads of really interesting things to see - including some wonderful buildings: Regeln des Krieges - Keeping wargames simple!

Friday, 1 June 2012

Making a gun emplacement - Part 5


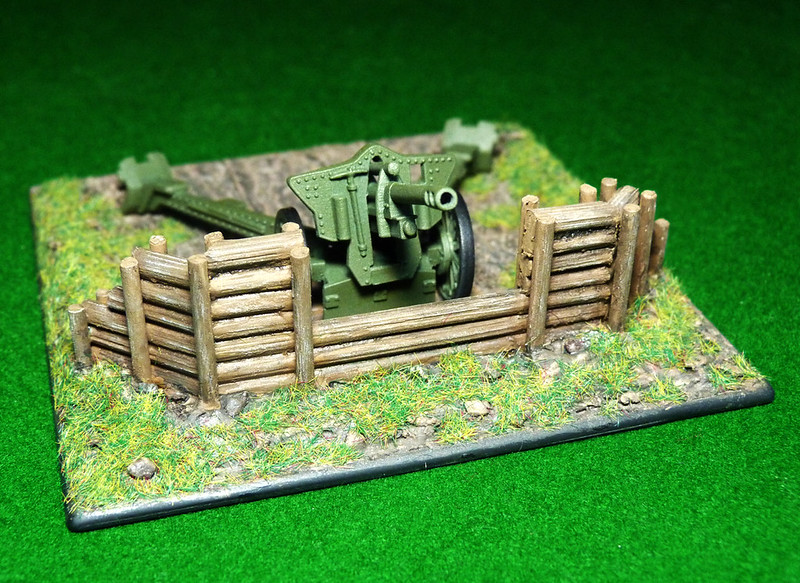
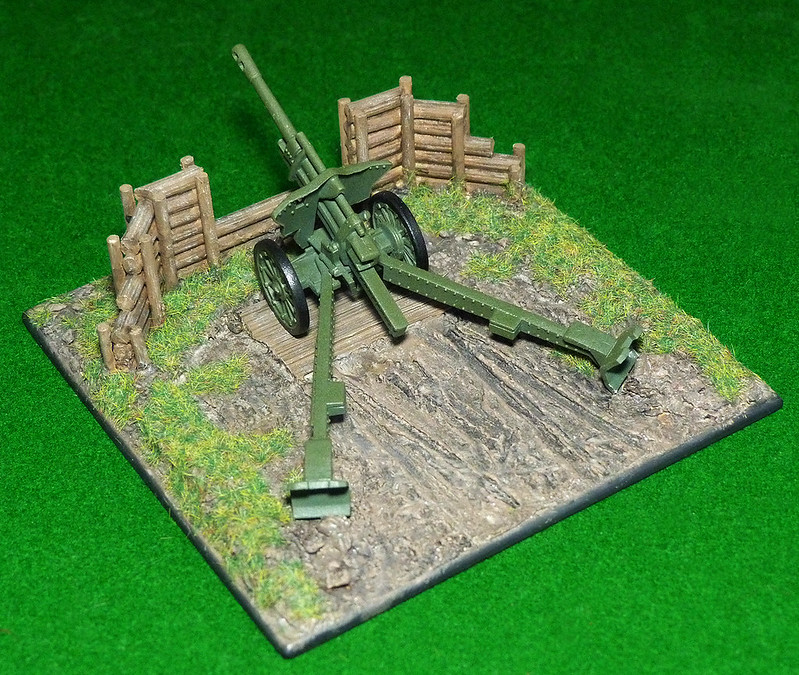
While I didn't achieve a finished build in time for the Armourfast Group Build deadline I am still pleased with the way things are going with my LeFH18 gun position. Sorry if I sound a little self-congratulatory but it's nice - and a pleasant surprise - when something you haven't done before doesn't end in complete disaster. This project is actually going as well as I could have hoped - which as a modelling newbie is a happy place to be!


Once again I have used the Citadel scorched summer grass, a nice mixed colour flocking which has some subtle tones of reds and browns in it as well as the light summer green. I've tried to ensure that the tiny stones I carefully placed around the gun pit show though.

Painting the base Pollyfilla 'earth' was pretty straight forward - a mid-coloured base coat of Humbrols' spray buff followed by a wash of a darkened version of Tamiya's Flat Earth followed again by some dry brushing of two tones of lighter mixes of the Flat Earth colour. Really the rough Pollyfilla 'earth' does most of the work by means of it's nice texture.


The logs were a little harder as I have never painted wood before. Again, the base coat was buff to which I applied a dark wash (dark brown) to emphasis the shadow areas. Highlighting was done in two stages with increasingly lighter shades of Tamiya's indispensable Flat Earth and then I touched in some white highlights to try and bring out the grain in my wood skewer 'logs'.


Next: Well I still want to add some more new diorama accessories - like small bushes and brush scrub - and I would like to have a try at adding some moss to the logs!

After that it's back on to finishing of the gun itself with some gentle weathering and then I have the scary bit (for me) which is painting the crew!


Monday, 28 May 2012

Making a gun emplacement - Part 2

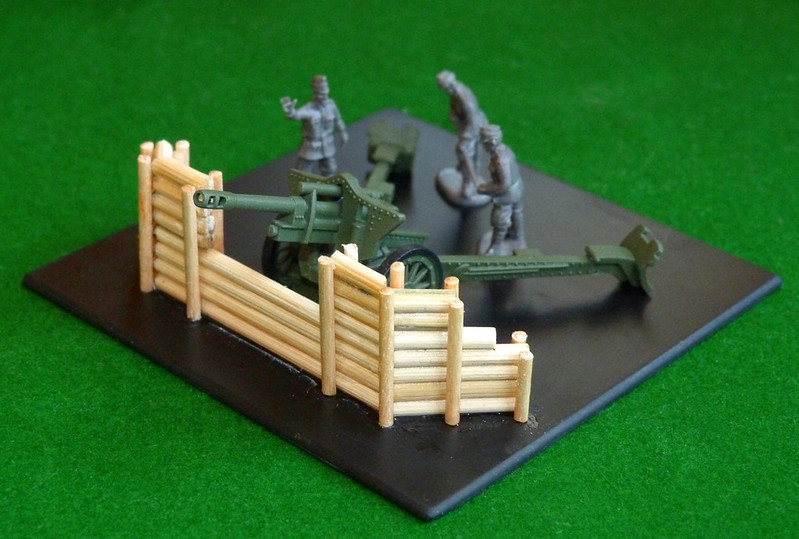
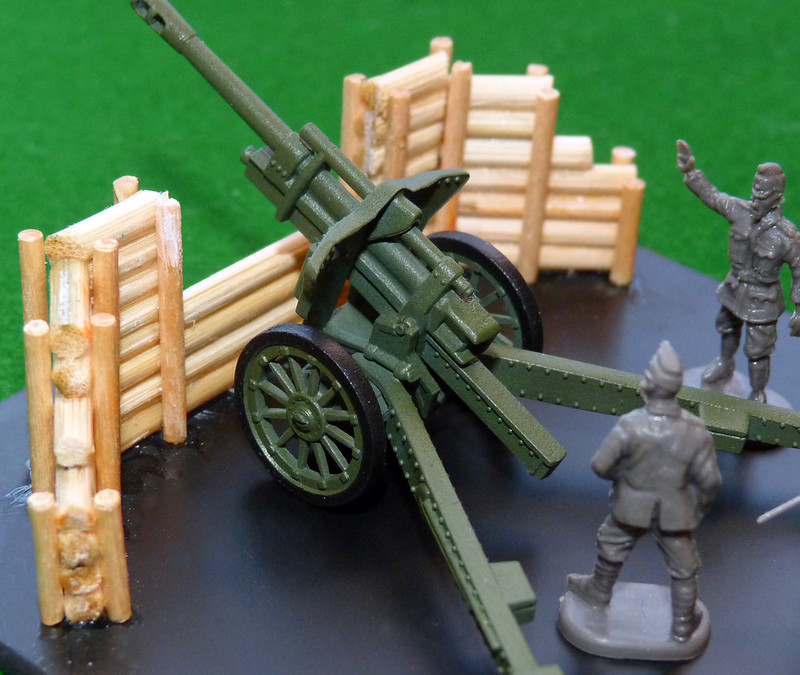
Time to play with sticks! I'm using a mixture of wooden BBQ skewers and cocktail sticks for the different thickness of logs, the skewers have a nice wood grain in them that should paint up well.


Following the pattern set by Gunbird in his tutorial I made a wall using the skewers and then secured them upright by using the cocktail sticks as stakes. I have probably gone a bit over the top but it's a fun experiment and it'll be nice to see what I can do with this when I make the earth works to make this more 'bunkerish'.

My crew still have to be modified and painted and I am just using three, which isn't a lot but I believe this is the norm for war games. Besides space is a bit cramped for a full historical simulation of a real gun crew and all their associated nick-nacks.


Next: The earth work and gun weathering.

Sunday, 27 May 2012

Making a gun emplacement - Part 1


Integral to my 105mm LeFH18 howitzer build - part of a group project on the Armourfast forum - was the intention of making a base for the model, a sort of mini-diorama. Although there is a train of thought that says artillery pieces for war games shouldn't have a base I was persuaded to the contrary by the argument that although not basing a gun means you can fit it 'anywhere' a gun shouldn't be able to go 'anywhere'.

Anyway, suffice to say that my interests in modelling still lay half-way between display modelling and war game modelling, so this is a hybrid project.

I have decided to model a make-shift gun emplacement made from logs, typical of the sort of quickly constructed emplacements that might have been found in the forest battlegrounds during the Finnish campaigns during the mid-late WW2 period. It will give me some much needed diorama practice and make a nice simple little display.

Luckily for me a modelling blogger called Gunbird has created a really informative tutorial on making log bunkers which is an ideal starting point for my project, you can find it here: 20mm and then some blog… Tutorial - Log MG Bunker

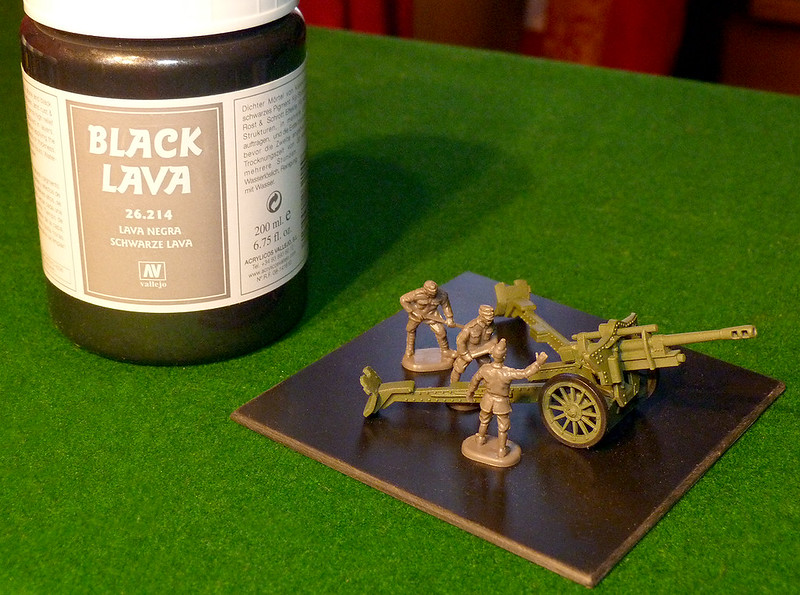
I've cut a 9cm x 9cm square piece of black plasticard to act as my base and, as it happens, I came across a pot of Vallejo's 'Black Lava' in a local store so we will see how that product works compared to Pollyfilla.

By the way, the crew you see are figures from HaT's WW1 Austrian artillery figures set, the closest figures I have found that will make do for a summer uniformed Finnish gun crew.

Next: Building the bunker

Wednesday, 9 May 2012

Finnish field guns - basic paint coat


It's nice to see a 'herd' of models together at one time and is what has swayed me more to the war gaming side of the hobby than the individual display side of things. There is a weird attraction to seeing a group of vehicles or weapons like this together.

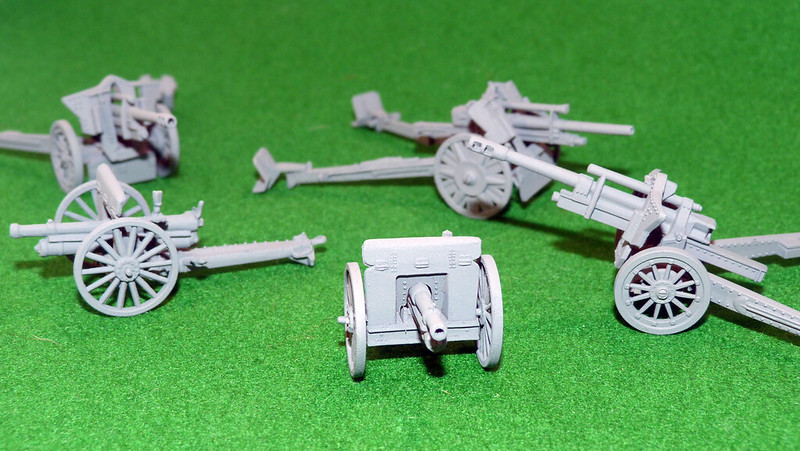
Anyway, here's a group of my WW2 Finnish Army field guns. These include two of my light Putilov 76mm guns and three LeFH18 105mm medium howitzers (by Revell and Armourfast). This is just the field green base coat - Humbrol's Dark Green spray - but it does bring out the detail nicely.


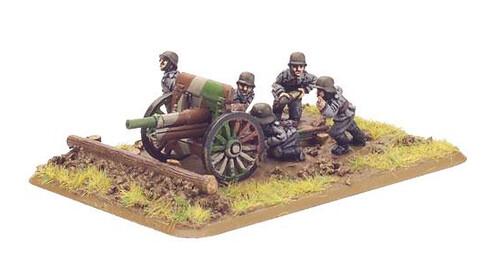
I will be keeping these guns a plain field green with appropriate weathering and will resist the temptation to apply the pretty Finnish 3 colour camo pattern to them. I guess for war gaming there may be an argument to apply a standard camo across your army to aid easy identification of units, certainly the guys at the Flames of War site could not help themselves and use the 3 colour scheme on their Putilov guns...

Above: The Flames of War team could not help themselves but applied the
distinctive Finnish 3-colour camo scheme to this field gun. This despite the fact
that the Finnish Army actually used a rather more mundane field green.

A simple field green may not be the most attractive scheme but using this camo on ALL my Finnish models just wouldn't be authentic. One thing though, my flash has turned Humbrol's Dark Grey into something a lot more like mid-grey, I will have to adjust my lighting in my next snaps to get a truer reflection of the green coat I have applied.

Wednesday, 25 April 2012

Armourfast versus Revell LeFH18 105mm gun - Part 2


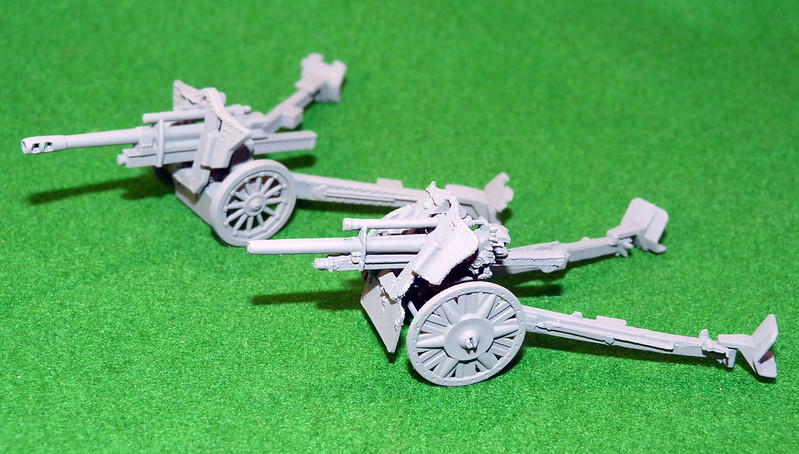
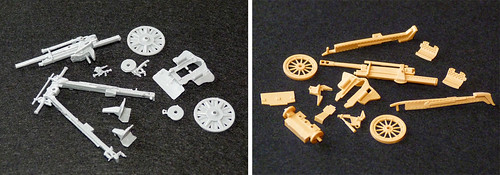
Having discussed the initial impression of the two LeFH18 models it’s time to put them together and compare the ease of construction, quality of detail and sturdiness of material.

Thursday, 19 April 2012

Armourfast versus Revell LeFH18 105mm gun - Part 1

Description: The is a comparative review of two similar products, the Revell German Artillery set (£4.99 from ModelZone.co.uk) and the Armourfast LeFH 18 105mm Howitzer set (£7.50 from Armourfast).
The 10.5 cm leFH 18 was the standard divisional field howitzer used by the Wehrmacht during the Second World War. It was designed and developed by Rheinmetall in 1929-30 and entered service with the Wehrmacht in 1935. Generally it did not equip independent artillery battalions until after the Battle of Stalingrad in 1943. Before 1938 the leFH 18 was exported to Hungary and Spain. 53 were also exported to Finland, where they were known as 105 H 33. [Source: Wikipedia]
 Of course it's the 'exported to Finland' that caught my eye and why I was eager to get my hands on Armourfast's newly released LeFH18 gun set. However, I also knew that I wanted a gun tractor of some sort and additional crew, so while looking for these I came across Revell's German Artillery set on sale at a local store. this turned out to be a very interesting find and unexpectedly inspired this comparative review.

Monday, 2 April 2012

Stash addition - Armourfast 1/72 Sturmgeschütz (StuG) III

Model addition: Armourfast StuG III quick-build model in 1/72. Cost: £7.95 (for 2 in box)

Right, this is a bit of an unusual subject for me and bears some explanation. First off, as a general rule, I DON'T do WW2 German subjects - it's a little personal quirk based on my staunch anti-nazi beliefs (I won't bore you any further on this subject). However, of late - through my interest in WW2 Soviet armour - my imagination was caught by the role played by Finland during it's WInter War and it's later Continuation War against the Soviets.

Suspect friendships aside, Finland gained a lot of respect for it's steadfast defence of it's independence against an invading Soviet army, which incurred humiliating losses before a peace treaty was agreed. Later Finland entered into a marriage of convenience with the Nazis in order to conduct it's aptly named Continuation War against the Soviets. The Finnish armed forces punched well above their weight against the might of the Red Army, fighting the best that the Soviet Union had with a rag-tag inventory of beg, stollen or borrowed equipment.

Photo source: Wikipedia - 'Finnish Armoured Division'

The Sturmgeschütz (StuG) III was perhaps one of the more potent weapons in the Finn's armoury as they bought 50 plus from the Germans. This ambush tank destroyer seems to have suited both the Finnish tactics and geography as even in the late war when the Soviets brought to bear increasing numbers of more modern designs the Finns still managed to inflict a frustrating number of losses on them.

This model will join the small fleet of Finnish vehicles and artillery I have planned and - importantly - it will also give me another chance to get to grips with a multi-coloured camouflage paint pattern.

Sunday, 1 April 2012

SU-122M conversion - Part 5, The End!

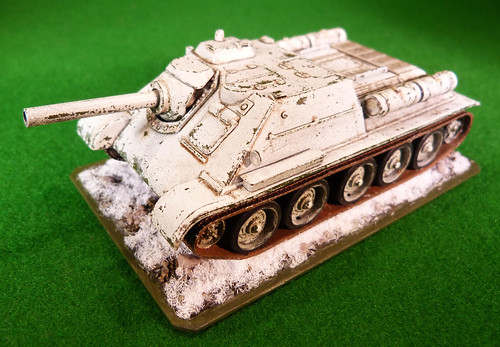
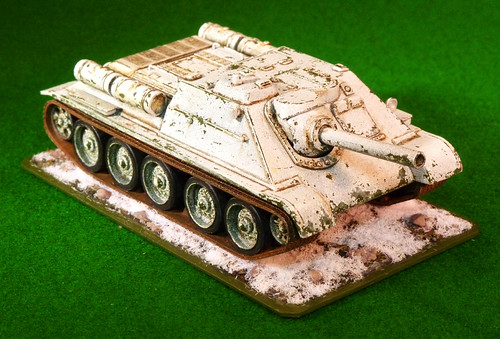
Today I finished my experiment in winter camouflage, my Armourfast SU-85 conversion - the SU122M(3). I'm quite pleased with the weathered chipped effect, it's really fun but you can get a little carried away (as I did). But what the heck, it's a 'what if?' model anyway so who's to say it's not right.


Saturday, 31 March 2012

New out - Armourfast LEFH 18 Howitzer 105mm

Once again Armourfast has taken us by surprise! After the release of thier wonderful StulG 33B SPG they have sneakily come up with another new model out of the blue - the impressive WW2 German LEFH 18 Howitzer.

"The 10.5 cm leFH 18 was the standard divisional field howitzer used by the Wehrmacht during the Second World War. It was designed and developed by Rheinmetall in 1929-30 and entered service with the Wehrmacht in 1935. Generally it did not equip independent artillery battalions until after the Battle of Stalingrad in 1943. Before 1938 the leFH 18 was exported to Hungary and Spain. 53 were also exported to Finland, where they were known as 105 H 33. 166 leFH were exported to Bulgaria in 1943 and 1944 (until February 1st, 1944)[1] Sweden purchased 142 leFH 18 howitzers from Germany between 1939 and 1942, designating it Haubits m/39. It was decommissioned from Swedish service in 1982." [Wikipedia: 10.5 cm leFH 18]

Photo source: Wikipedia

Now, what interests me about this big beast is that it was exported to Finland. I've been getting quite interested in the role of Finland during WW2 and have already made a Finnish KV-1 and what to build more models in Finnish colours, so this gun might make a good artillery piece for this little army.

In any case it shows excellent marketing judgment by Armourfast in a very competitive arena. I am liking thier lateral thinking and hope they apply this same inginuity in choice of models to Soviet or British arms and armour (a big Soviet 152mm or British 5.5 inch gun would be very nice thank you).