Showing posts with label plastic. Show all posts

Sunday, 4 February 2018

1/100 Plastic T-34/76 Kits - Part 4

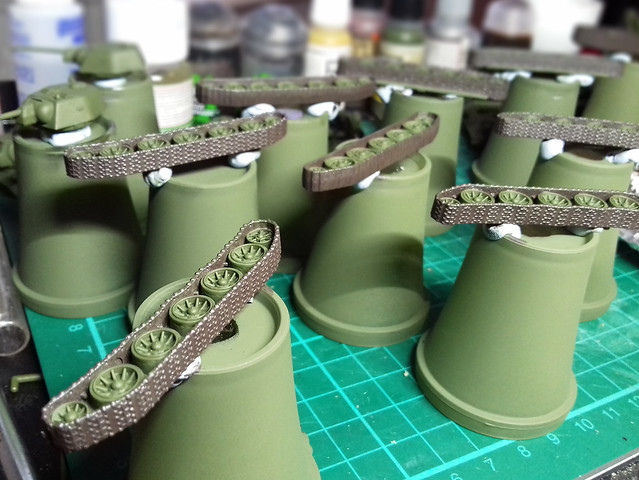
One Track Mind...
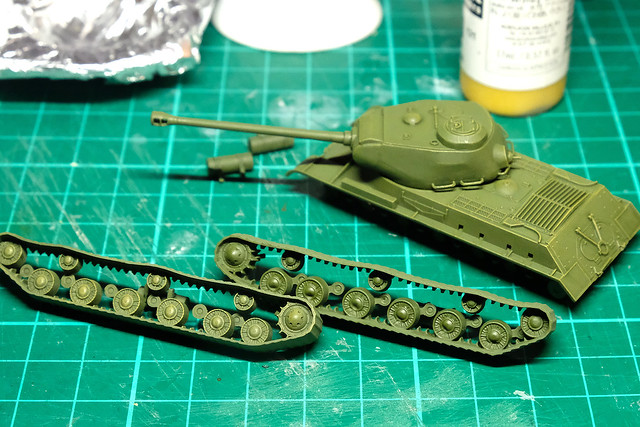
Er, make that 10 track mind! The downside of production line model making for war-game is; yes, you get a nice little army of models at the end, BUT this means that every stage in building and painting becomes a intimidating and repetitive chore...

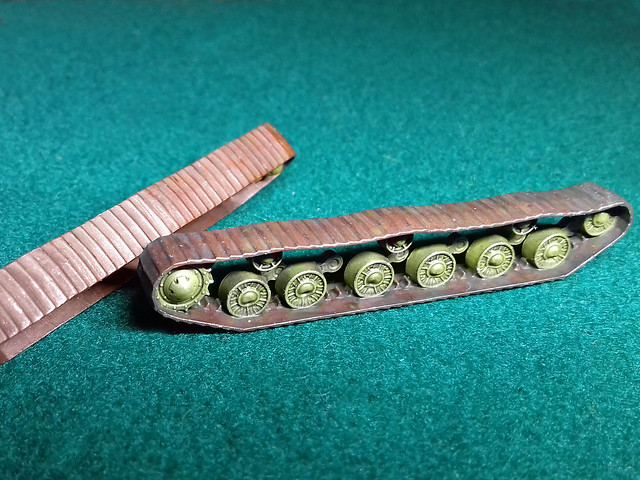
Tracks all-over primed and track links painted base colour.
I'll be discussing my exact paint process for these 1/100 scale tanks and their tracks in my next post (about my SU-152), but here's a quick overview in bullet-point form:

• Prime tracks (mine are all over light olive)...
• Paint tracks base colour - I've chosen a metallic dark-brown...
• Apply dark wash (Citadel Agrax Earthshade) all over...
• Dry-brush highlight green on road wheels...
• Highlight track tread with metallic colour or graphite pencil...
• Pin-wash road wheels and track treads with black (Citadel Nuln Oil)...
• Apply dust of mud effects (to your tastes)...
• Seal with varnish.

Next: Painting the hull and turret.

Friday, 2 February 2018

Zvezda 1/100 SU-152 'Animal Killer' - Part 1

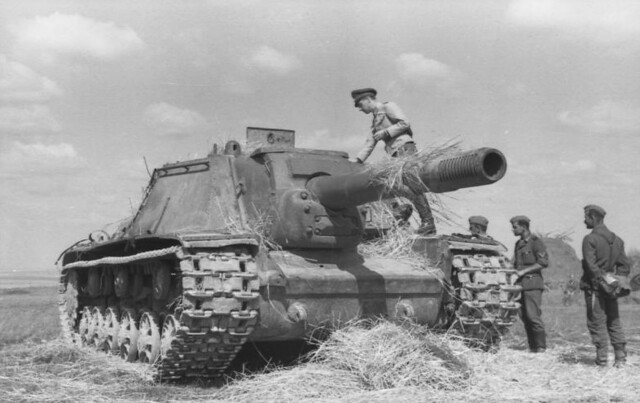
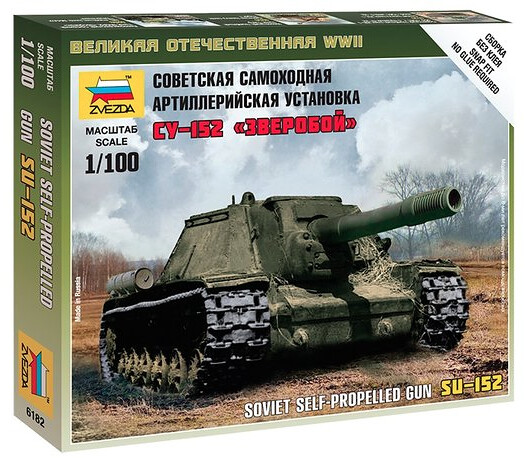
My 'Battle of Kursk' project trundles forward apace with this monstrous addition to my Soviet force. The 152mm gunned SU-152, known as the 'Animal Killer' (or 'Beast Killer') as it was designed specifically to hunt the German's Tigers, Panthers and Elephants.

An abandoned SU-152 assault gun inspected by German troops, Russia, 1943.
(These Germans must be counting their blessings!) Source: Wikipedia
Quick Overview
I've made no secret that I love Zvezda's little 1/100 range of armour. Their level of accuracy for a simple 'easy build' war-game model is excellent (bar one detail) and the cost is very attractive compared to the competition.


However, every silver lining has a grey cloud attached and Zvezda kits have two slight drawbacks; they don't tend to come with optional builds/accessories and their tracks are...Well...'Bare bones'.

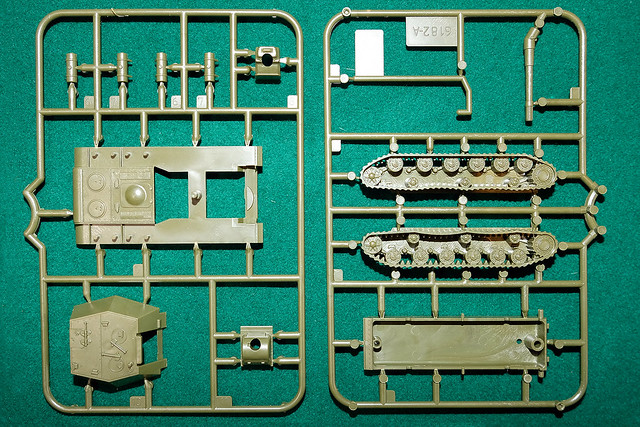
The Zvezda SU-152 follows this format, the kit has only 12 parts with no 'optionals' and the tracks are a little disappointing. BUT, these kits are what they are and as war-game markers they are more than adequate.


Unfortunately, to keep the part count down something had to give and that was the complexity (or lack thereof) of the tracks. Making the track sub-assembly one-piece - including wheels, suspension and the tracks themselves - seems to have impacted just how much detail can be included on the moulding. I guess they figured that - at 1/100 scale and being partially hidden by the fenders - the track pattern would not be a overtly noticeable feature. This is a matter of opinion.

(As mentioned in my 1/100 T-34/76 post, the best tracks are those done by Plastic Soldier Company. But they achieved their nice track components by using three-piece assemblies.)

However, the rest of the detail is well represented for the scale and is crisp and delicately moulded. (Other 1/100 armour manufacturers tend to go for a slightly exaggerated 'chunky' look so that details show up better - and are more easily painted.)

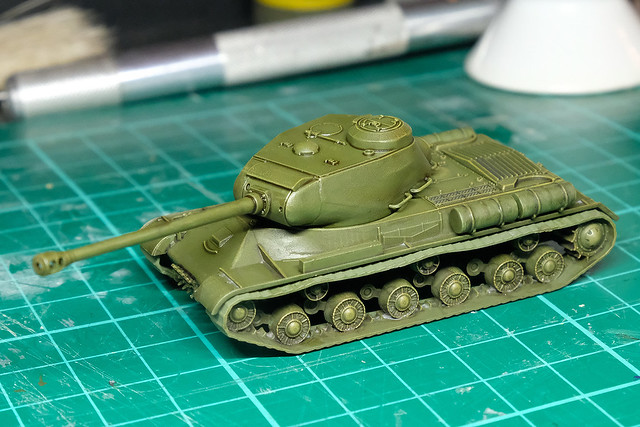
Completed in just a few minutes, at tabletop distance it's a lovely looking model.
The massive 152mm gun barrel is not 'drilled out', but that's easily remedied. I drilled a tiny pilot hole first - to ensure the hole was centred properly - before drilling out the final barrel width with a larger drill.

Options?
Although the kit does not come with options, it might be nice to add some stowage. Things like tool boxes or a piece of timber for 'unditching', which was a common practise on Soviet tanks. I could scratch build these easily.

Next: Painting.

Thursday, 1 February 2018

1/100 Plastic T-34/76 Kits - Part 3

Cleaning, Priming & Base Colour Planning
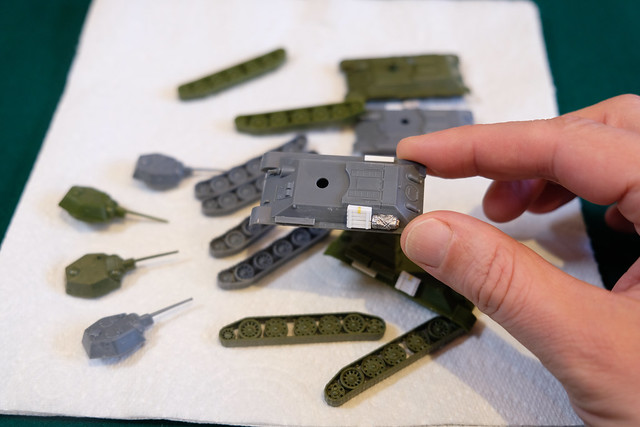
A process I - and other modellers - do, and yet I have never mentioned it on this blog, is to wash the 'raw' plastic sub-assemblies before priming! I don't know why I have never mentioned this before as it is quite an important stage in the painting process.

It's also a very simple process (maybe that's why I have overlooked it before), but novice modellers tend to either not know about this process or chose to ignore it.


To be fair, I didn't clean my raw models before priming when I started, but when I did eventually try it I immediately understood why people do this. For example, I tend to file and sand my models a lot - either to remove sprue nubs or moulding seams or to correct details - and this causes microscopic particles of plastic dust to cling to the surface of your kit.

For some reason, you only seem to notice these small grains of plastic once you have primed, and then it's too late. Sometimes the tiny blemishes can be scraped off and the primer can be retouched, but there is nothing more annoying than discovering particles of dust spoiling you nice neat primer coat!

So, I bath my sub-assemblies in warm, soapy water. This gets rid of most particles and any surface grease left behind by your fingers (this can be just your natural skin oils, but can form a barrier to the primer paint).

Priming
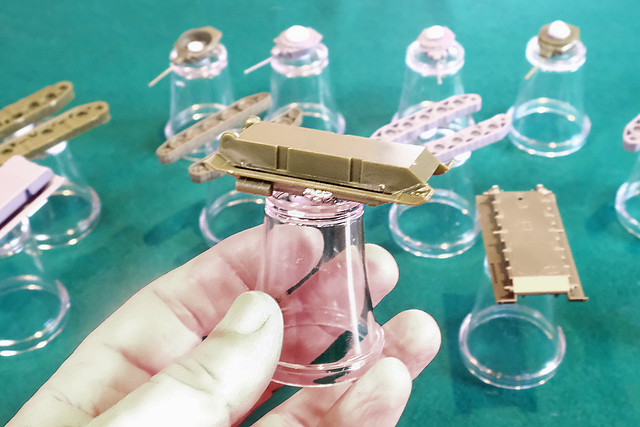
Before spraying I mounted all of the sub-assemblies onto little plastic shot glasses that I got from a local thrift store. I like to mount parts for spraying and painting as I like a 'handle' to hold onto the part. It makes it easier to manipulate for painting details.

I have used cheap corks before, but I prefer these shot glasses as they can put down and stand on their own, which is great for when paint is drying. I stick the parts to the glasses using BluTac...


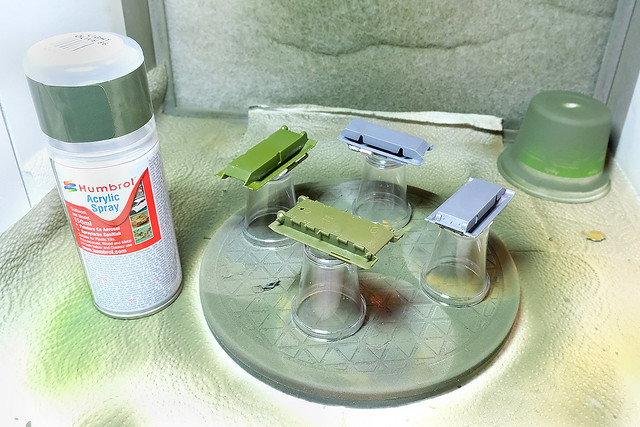
And from there it was onto the spray booth turntable. As usual, I'll be breaking out the Humbrol [86] Light Green Olive Acrylic Spray as a light base for my 'Russian Green' wash...


As much as I am enamoured by this particular make of rattle can, I'm starting to question the economics of aerosols as primers, more especially when you have several identical models to spray. I'm considering moving across to airbrush primers once I have gotten back to using an airbrush again.

But, in the meantime, I am still impressed with the nice smooth coat that the Humbrol spray gives me...


Planning the Colour Scheme
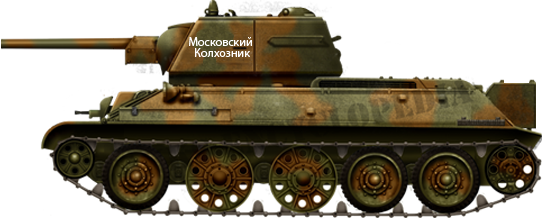
Being mid-war Soviet tanks you could get away with a very simple colour scheme, Russian Green. But I'd like to do something a little different, just to give some visual variety (I know some people like uniformity when it comes to war-game tank squadrons), so I looked around to find examples of those rare occasions that the Red Army used camouflage schemes.

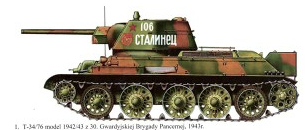
While the Soviets made great use of winter schemes, summer multi-coloured camo patterns are relatively rare as far as I can see. But I found one example that looks interesting...


I've seen this two-tone green and tan/brown scheme a couple of times and quite like it. I'll probably just do one of my T-34s in this, just to imply that different regiments are involved in my game. Just for fun! :)

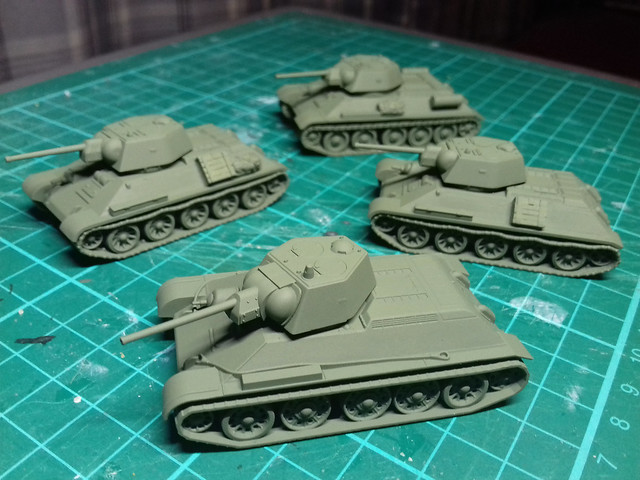
As for the other three, variously weathered plain green, I think.

Next: Painting.

Wednesday, 31 January 2018

The 'Cat Killers' Are Here!

New to my stash for my 'Battle of Kursk' themed wargame are three lovely 1/100 Soviet tank destroyers. The plastic Zvezda SU-152 and two Skyrex white metal SU-122s...


Although I call them 'Cat Killers' I believe the nickname really translates from Russian as 'Animal Killers' - referring to their intended victims, the German Tigers, Panthers and Elephants - and it really was only applied to the SU-152 and it's massive gun. Still, the SU-122's big gun was nothing to be sniffed at either and had the same function - to get rid of those pesky Kraut Heavies!

These will make up the core of my Soviet force for my planned game of GF9 'TANKS!', as the Soviets fought more defensively in this battle.

Sunday, 28 January 2018

1/100 Plastic T-34/76 Kits - Part 2

A *very* slow Sunday on the workbench, due to having to babysit the daughter's very needy dog! ("No, don't make models, tickle me...Me, me, me!")

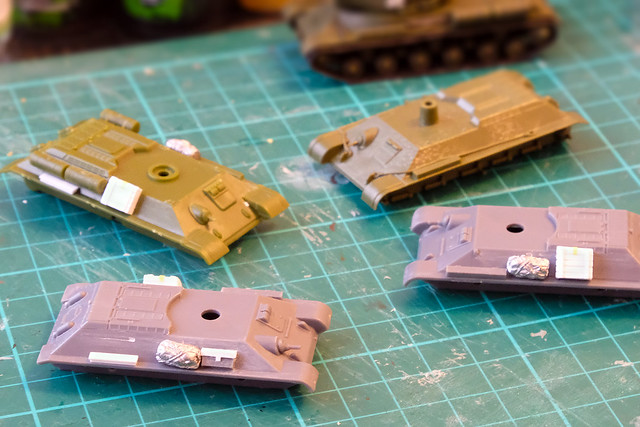
Anyway, got the stowage done for my T-34s - just a few extra tool boxes and what-not. I also trimmed off the horrible plastic 'bumps' that are supposed to represent the 'hand rails', so I'm a lot more satisfied now.


It seems to me that making accessories for 1/100 scale armour is a little anal, but I can't seem to kick the habit. But you can tell I'm more used to making such things in 1/72 scale as my attempts are a little on the big side. Still, they add variety onto otherwise very spartan Soviet tanks.

And that's it for today, I'm afraid. Not a big modelling weekend really and the time has flown.

Next: I'll clean the models with soapy water before applying the primer coat.

Thursday, 25 January 2018

Stash Update - More Bad Guys!

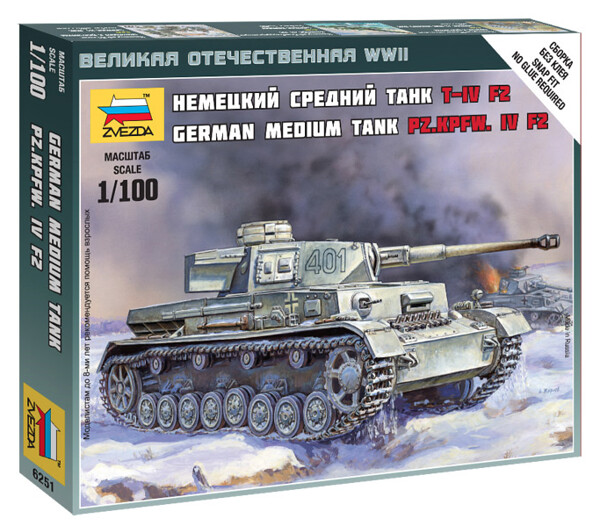
Continuing on with my 1/100 'Battle of Kursk' project for my forthcoming GF9 'TANKS!' game, I have added more 'bad guys' to the collection. These are the German's canon fodder for the battle, the venerable Panzer IV F2 - in this case, in model form by Zvezda...


Now, that may sound disparaging, but that's only because the main focus of anyone's attention when talking about the Battle of Kursk is always inevitably the 'new' German big cats - the Tiger and the Panther. It seems that the poor old Panzer IV gets a wee bit overlooked, and yet it was still the backbone of panzer formations at the time and was still a pretty good tank.


In fact, due to the Soviet's muddling about with the - by then - obviously outmoded 'KV' heavy tank line the Pzr. IV could still hold it's own with practically anything the Red Army could throw at it. It had no problem dealing with either of the Soviet's two main battle tanks, the sluggish KV-1S or even it's nippier little cousin, the T-34/76. [In fact, I have heard many people say that had the Germans churned out more Pzr. IVs instead of relying on the new heavy tank 'super cats' - which turned out to have a lot of technical and reliability problems - the outcome of the battle *might* have been different. But that's an easy thing to say and I'm sure it's not that simple.]


But, hypothetical meanderings aside, a German panzer force of 1943 still requires a base of Panzer IVs in it's mix, so I bought two. Once again, I have gone with the budget option and plumped for Zvezda kits. At £3.50 each they fit the bill as 'canon fodder' for my game and I can easily get the GF9 TANKS!' data cards offline.

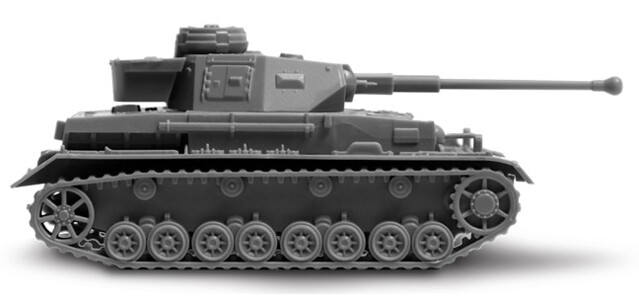
The Zvezda model is specifically the F2 variant of the tank, which was really seeing it's last hurrah at the the Battle of Kursk (the 'G' variant beginning to come into prominence). But despite this, with it's KwK 40 L/43 75mm gun, the F2 was still superior to the KV-1 and T-34 in terms of ballistics.

As with Zvezda's T-34s - which I am just working on - both PSC and Battlefront do offer more options and the ability to model more variants of the tank with their Pzr. IV kits. But I just don't need this flexibility, so the cost savings was of the greatest importance to me.

Here's a rather nice YouTube review of the Zvezda Pzr. IV F2 by Modeldads...

Wednesday, 24 January 2018

Camo Scheme for my Zvezda 1/100 IS-2

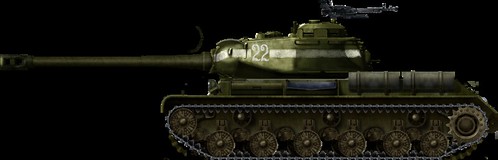
Before I actually get down to the nitty-gritty of painting a camouflage pattern on my IS-2, there is the little matter of applying the decals. There isn't always insignia on WW2 Soviet tanks, in fact sometimes they left the factory and went straight into action 'as was', but more usually at least a vehicle number was applied.


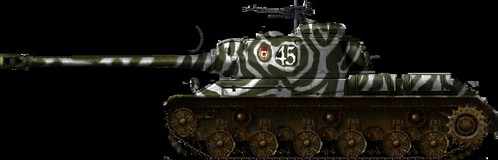
IS-2 model 1943, 88th Independent Guards Heavy Tank Regiment, Berlin, April 1945.
Source: Tanks-Encyclopaedia.com
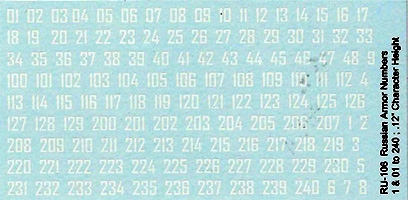
As a graphic designer I really like the Soviet fonts, but finding good decals in 15mm scale can be a little challenging (Zvezda does not supply any with the model). My usual source of smaller scale armour decals is Minibits.net as they have a rather good selection of historic and generic numbers, letters, military emblems and national symbols in 15mm scale.

I had already purchased their 'Russian WWII 'Cryllic style' numbers [1:100-1:76]' decal sheet for my 'Battle of Kursk' project's T-34s and was tempted to use it for my IS-2 as well...


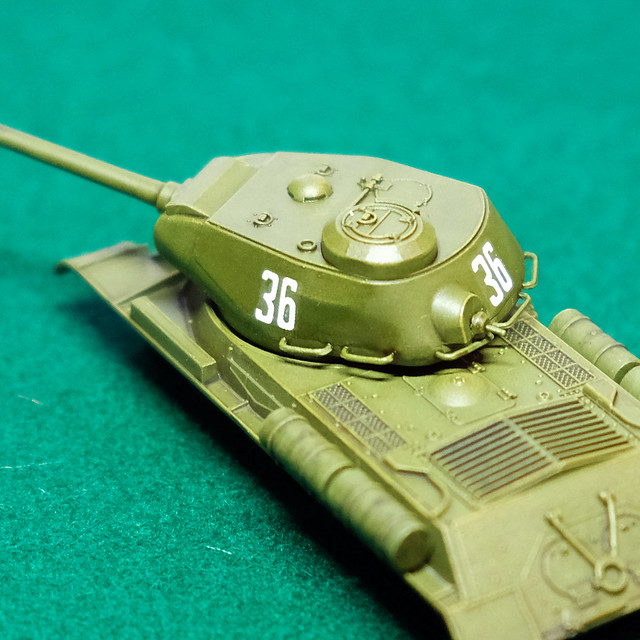
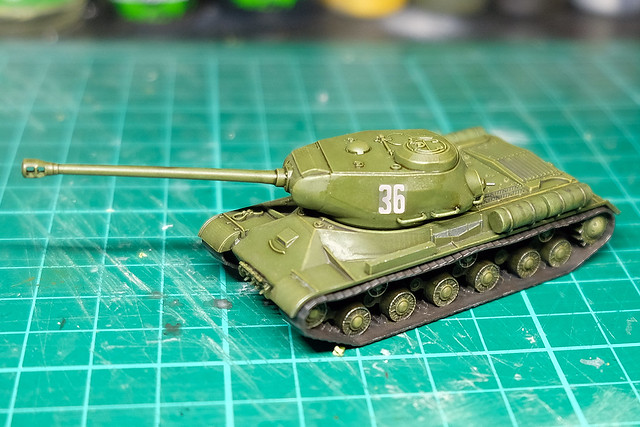
But at the last minute I changed my mind and went hunting through my decal stash for something more suitable for the IS-2's larger turret. I managed to find a nice set of Cyrillic numbers which had been for a 1/72 BA-10 armoured car, but seemed to just the size I was after.


As usual I prepared my model surface for decals by painting on a small area of gloss varnish, just where the  numbers would go. Once the varnish was dry, I used some Microscale MicroSet setting solution to seat the decal. I find that MicroSet and MicroSol liquids help prevent silvering and hide the decals carrier film (although it can be clearly seen in the above photo, for now).


Once satisfied the decal is smooth, straight and adhering perfectly I let it dry and the dab on some MicroSol around the edges of the decals carrier film. This should further help the film blend in to the model's base coat and make the decal look like it has been painted on.


I conclude the process with a thin coat of satin varnish, to permanently fix the decal and protect it during the weathering stages.

The Camouflage Pattern
I'd decided that I wanted a winter camo pattern for my IS-2. Should I decide to add more late WW2 Soviet tanks to it (for a game of GF9 'TANKS!') I wanted to distinguish these Soviet vehicles from my mid-war 'Kursk' collection (which will be in plain Russian Green for the summer months of the war).

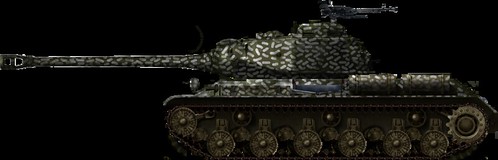
I didn't really want to do an all-over 'white-washed' winter scheme, so looked around for something a little different. Tanks-Encyclopaedia came to my aid with a couple of very nice examples of winter camp schemes...

29th Guards Heavy Tank Battalion, Poland, early 1945. Source: Tanks-Encyclopedia.com
Partial winter camouflage, Eastern Prussia, February 1945. Source: Tanks-Encyclopaedia.com
Initially, I favoured the 'dotty' pattern, but the thought of painting all those on at 15mm scale eventually put me off! The 'snow tiger' pattern won me over as it's just the sort of thing that can be done well with just a brush.

I'll began by sketching out the outlines of the 'snow stripes' using a white chinagraph pencil...

Next: Camo Scheme Painting.

Sunday, 21 January 2018

Painting the Zvezda 15mm IS-2

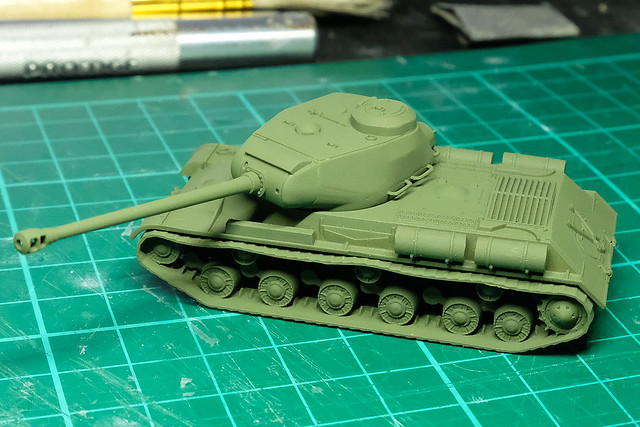
Having broken the ice with this easy little build it's time to see how rusty my brush skills have gotten. I began by having a look back over some of my old 15mm tank posts and realised that I don't really have a set 'process'...I surprised myself to realise that my whole modelling technique is based on 'winging it'! 😀

Well, too late to change my ways now, so lets just see what happens. However, if you'd like to see and example of a more structured process for painting a 15mm IS-2, then have a look at the excellent Herbert Erpaderp's tutorial for some alternative ideas...


And now, on with my very unstructured method...

Base Coat/Priming
I begin with the one procedure that hasn't changed that much over all the vehicles I have made, and that is to prime the tank with a coat of Humbrol's 'Light Olive' Acrylic Aerosol. I've mentioned before that I like this colour as it can be easily modulated to become any of the WW2 Allied 'greens', from British Bronze, to US Olive Drab to Soviet 'Russian Green' (and even Finnish 'Moss Green').


To modify the base olive coat to something a little more deep and rich for Soviet armour I will be trying out a wash of Vallejo's Model Air 'Russian Green [71017]. This paint is really intended for airbrush use and is already pre-diluted so *should* work quite well as a wash (fingers crossed).

The IS-2 hull (at back) has been modulated using Vallejo's Russian Green,
while the turret is still in it's primer coat of light olive.

It worked! ...Er, I'm not surprised at all. Cough. The difference is subtle, but a richer and deeper green. It is a little patchy and streaky (being a wash) but I like that as it adds some wear/fading effect to the overall appearance of the tank.

Note: I could also have achieved a similar effect more quickly by simply spraying Vallejo's Acrylic Russian Green Primer on to begin with. But, I can't actually find my bottle of this at the moment, plus I need to reacquaint myself with the workings of my airbrush before I take on a live project with it!

Highlighting and Shading
And so, moving on, I will try out Herbert Erpaderp's suggestion and give my base green a bit of a highlighting with some dry brushing. I'll simply mix some of the Russian Green with some lighter buff paint to produce my highlighting colour. Though, again, I will be going for a subtle effect...

It's very subtle, but the front set of tracks has been highlighted, while the rear
set is just flat Russian Green. The hull and turret are highlighted.
Well, I like the effect. Is it too subtle, and will the following shadow wash negate the effect? I guess that's what experimentation is all about though - if it doesn't work I will modify the technique.

The paint I used was Vallejo's Model Color Yellow Ochre [913] as this gives a warmer and more 'sunny' highlight than using straight white. I built up the strength of the ochre, mixing it with the Russian Green paint, until it hit the strength that I was after.

Right...So, the moment of truth, will the shadow wash destroy the 3D highlighting effect I've just created? ------>

The shading wash phase, at this scale this can also pass for pin-washing adding
depth to panel lines and joints. Washing is a quicker way of creating depth than
outlining each area edge with individually.
Actually, and I am surprised, this worked. Yes, the dark wash (created using Citadel's Agrax Earthshade wash) did darken some of the highlights I had previously applied BUT not so much as to have made the prior highlighting a waste of time. The contrast between the highlighted bits and the base colour areas is still noticeable through the translucent wash.

It is - once again - very subtle so I guess if you wanted something more obvious the trick might be to exaggerate the highlight before applying the dulling wash. I'd do this by dry brushing with an even lighter shade of ochre (bordering on yellow).

The Tracks
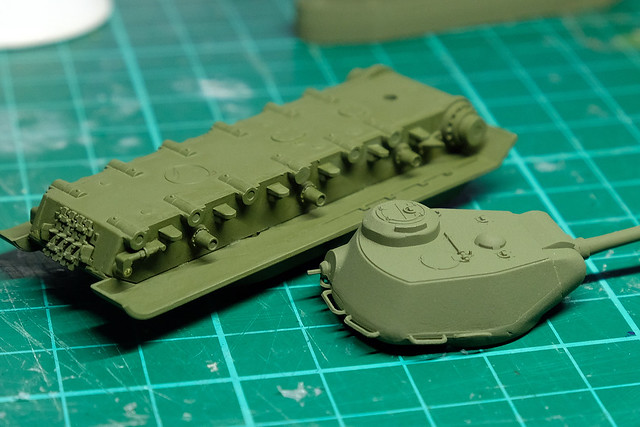
Now to to what is perhaps the least satisfying part of the Zvezda model, the tracks. The model has very simplified tracks with practically no tread pattern to speak of, just regularly spaced slats. The challenge here is to make something interesting out of these rather dull and uninspiring components.

The easiest 'cheat' is to disguise the lack of detail by slapping on a thick layer of 'mud' effect (which, I admit, I have resorted to doing before). But, we shall see...

First off, I mixed some Vallejo German Cam. Black Brown [822] with a spot of Vallejo Game Color Silver [052] to make a rusty steel colour. This will be my base coat for my tracks. That done, I'll give them a wash of good old reliable Agrax Earthshade mixed with a little Citadel Nuln Oil to give the tracks a greasy oily look.

Still a bit wet, but hopefully rusty steel looking.
And finally, I'll apply some powdered graphite to give the raised tracks a metallic sheen and also some dots and spots of silver here and there to simulate the raw steel of the tracks showing through where damaged...


Hmmm, tempted to add a mud layer.

Well, that's the base coat painting done. I have some minor detail painting to do on some of the none green parts but otherwise it's onto the decals. Not that there are many (remember, no decals come with the Zvezda kit), the wartime IS-2s seem to have had little more than numbers unless they were a Guards unit.

Next: Decals and the Winter Camouflage.

Thursday, 18 January 2018

1/100 Plastic T-34/76 Kits - Part 1

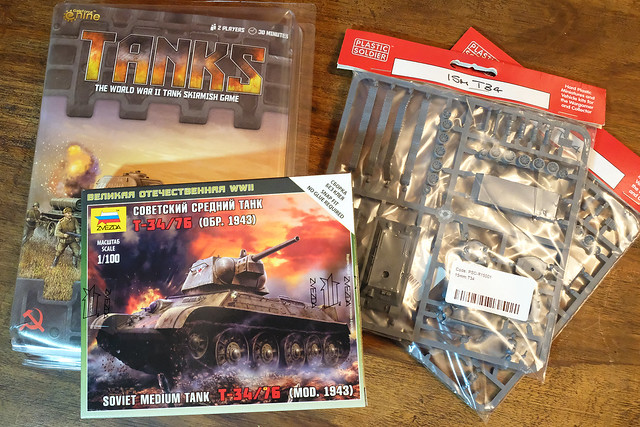
Curiosity got the better of me and instead of just buying four 1/100 T-34s of the same make for my 'Project Kursk' I decided to buy different makes of model so I could compare them (I did something similar when I made some 1/72 wargame T-34 models). The models I bought were by Zvezda, Plastic Soldier Company (PSC) and Battlefront.

Note: As my project is a Battle of Kursk (July/August 1943) themed game, the Mod. 43 (Model 1943) T-34/76 (76mm gunned version) tank would make the most appropriate choice, so my purchases were based on this fact...


When reading about these various kits I noticed each seemed to have their own pros and cons and from my point of view, not one of them seemed to be the 'killer' T-34 kit that would make me plump for just that one manufacturer. So here's my overview of the three makes I decided to try out...

Sprue Review
I noticed immediately that each manufacturer had it's own ideas about what was necessary to make an acceptable wargame tank model. Zvezda takes a minimalist approach based on a strict budget, while PSC and Battlefront take the view that 'extras' and optional parts are what the gamer is after.

Both Zvezda (£3.15) and Battlefront (£5.95) supply a single tank in their packs, while PSC is more specifically geared towards the troop level game and their models usually come in a multipack (5 tanks for £18.64). However, a single PSC T-34 model is available if you go onto their website and look for their 'reinforcement' pack, which is an individual sprue of their T-34 tank set for just £5.99.

And here is what you get...

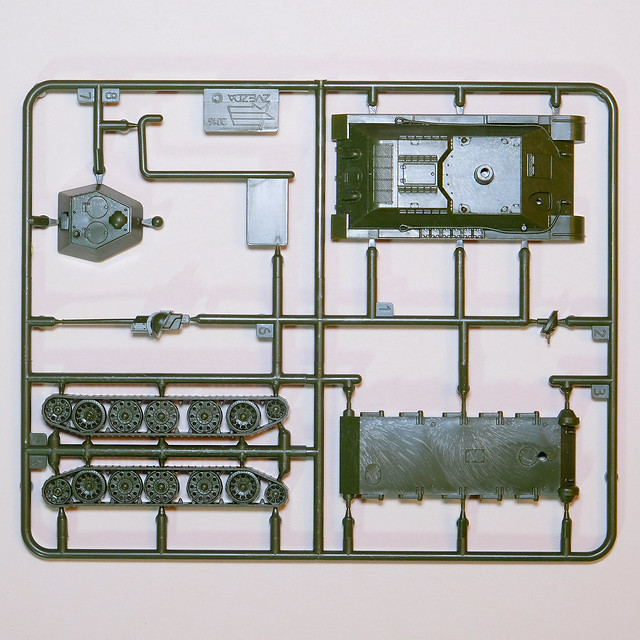
ZVEZDA

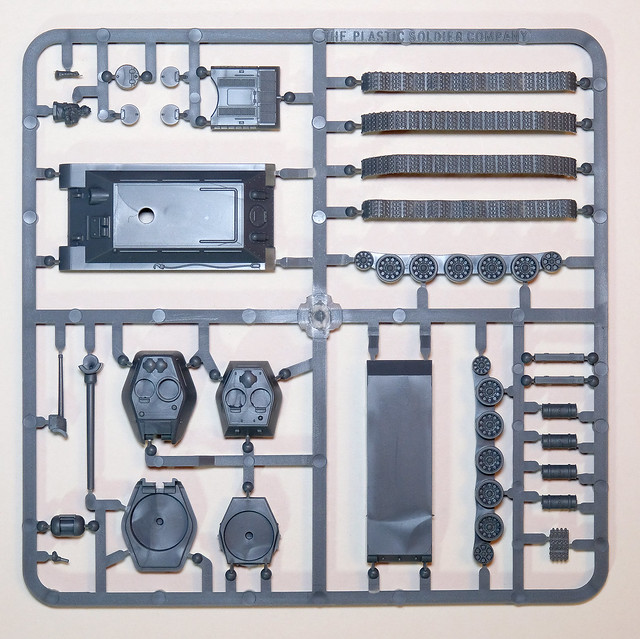
PLASTIC SOLDIER COMPANY

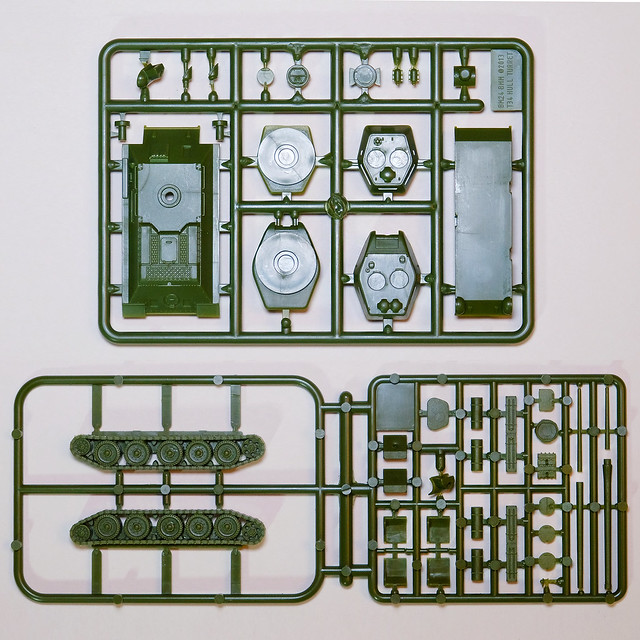
BATTLEFRONT

As you can see the amount of parts tends to escalate relative to the cost, even so Battlefront's two sprue set seems to offer very good value for money. While Zvezda does win the cost battle hands down you do have to bear in mind that with both PSC and Battlefront you are really getting two tanks for the price of one as they included the extra parts to make a T-34/85 variant turret which you can swap out. A nice option.

If, like me, all you want is the T-34 76mm gunned version the Zvezda budget kit makes sense. But having the ability to 'upgrade' your model by swapping turrets means that with PSC and Battlefront you can play games which are set from 1943 to the end of WW2 in Europe. The Zvezda tank is generally more suited to games set in 1943 to early 1944, the Soviets having accelerated the upgrade process from T-34s to T-34/85s in earnest in 1944 (the final version of the 76mm gunned T-34 was designated the 'Mod 44' - or Model 1944' - and was called the T-34/76E by the Germans).

A Model 1943 76mm gunned T-34 on display in Gdansk, Poland
Source: Wikipedia 
And so, on to the quality and technical authenticity of the kits. Let's start with those turrets...

T-34 Turret Components
All three turrets for the T-34/76 models are the late production Hexagonal Turret of the 'hard edge' (flat panel) versions equipped with the 76.2mm F-34 gun. This was indicative of the penultimate 76mm gunned T-34 version which was built from May 1942 to 1944, but is generally known as the Model 1943 (or the 'T-34/76D' by the Germans).

For complete list of the evolution of the 76mm gunned T-34 see: T-34 variants on Wikipedia.

Aside from the 'hexagonal' shape, this turret was an improvement over the original (model 1940-1942) T-34 turret principally because of it's two crew hatches in the roof. Amusingly, when these hatches were open, their side-by-side arrangement prompted the Germans to give the Model 1943 the nickname 'Micky Mouse'!

Top to bottom: Zvezda, PSC and Battlefront.
The Zvezda hatches are moulded into the turret component, but both the PSC and the Battlefront turrets have separate hatch components. Because you have to glue these hatches in they are slightly more raised than the Zvezda's, which I think looks a little better (generally the Zvezda's surface detail, while crisp and accurate, can be a little too subtle at times, at 1/100 scale).
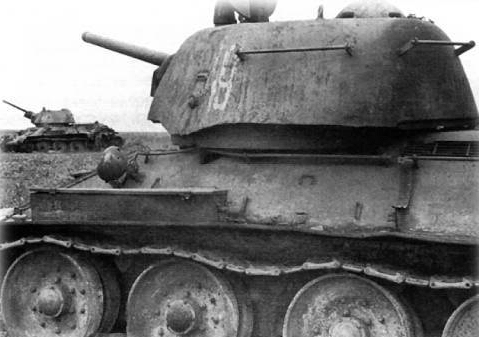
Picture of a T-34/76 'Mod. 42' (known to the Germans as the T-34/76C) which
clearly shows the distinctive 'hand rails' which attached to the hull and the turret
so that infantry had something to hold onto when riding atop the tank. This '1942'
version of the T-34 featured a new shaped turret which were either of a welded
or - as in this case - slightly rounder 'stamp cast' made by the Ural or 'UTZM'
factory. Also note the 'Early Dish Wheels'.
One prominent point of detail that's a bit 'iffy' is the implementation of the turret's hand-rails, which were arranged around the turret's sides. Zvezda decided not to include these at all at this scale, while PSC and Battlefront simplified the rails to mere plastic 'bumps'. I can understand why they chose this very superficial means of embellishment at 1/100 scale, but I personally prefer Zvezda's approach of omitting these details altogether...
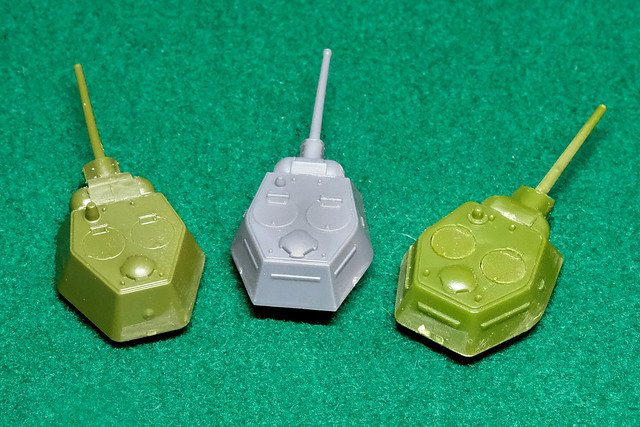
Left to right: Zvezda, PSC and Battlefront.
Finally, there is a bit of a problem with dimensions. The PSC and Battlefront turrets are a little too wide at the back, while the Zvezda's rear panel is the correct width.

T-34 Hull Components
Further dimensional problems are obvious in the difference in sizes between the three makes of hull. While the Zvezda and the Battlefront are similar in overall length, the PSC hull is shorter by a couple of millimetres...

Left to right: Battlefront, Zvezda and PSC. Note how shorter in length the
PSC T-34 model is.
Other differences - placement and size of detail - are relatively minor, though they do vary significantly stylistically. This is most easily illustrated by the differences in how the various tank's engine decks have been modelled.

As is becoming clear, the Zvezda model is the most historically accurate, while PSC and Battlefront have employed some 'artistic licence' in the way they have simplified certain detail...
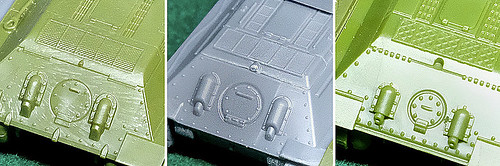
Left to right: Zvezda, PSC and Battlefront.
The Zvezda detail is historically accurate, dimensionally correct and is also stylistically faithful to the original T-34 design. This is most evident in the engine's mesh grills on the rear hull, Zvezda's is a delicate criss-cross design, with PSC has gone for a very simple slatted design and Battlefront has a rather horrible over-scaled 'diamond' hatch. (I should also note that Zvezda was the only manufacturer to get the slightly rounded rear slope of the engine deck looking right, the other two went for a more angular look.)

Short to long, PSC, Zvezda and the Battlefront (though the difference
between the Zvezda and the BF isn't quite as noticeable).
However, I should mention that - in my initial builds of the three models - I have omitted a lot of the extra optional extras from the PSC and Battlefront kits that come already moulded onto the Zvezda model. Things like storage boxes and external fuel tanks (which, incidentally, the Zvezda kit does not come with at all) are separate components in the PSC and BF kits. I left them off so all three tanks looked externally similar, for comparison purposes.

The Battlefront kit, in particular, comes with a very good amount of 'extras', which allow you to vary the look of tank models - if you make a troop - or make slightly different versions of the basic tank. (Interestingly, it also looks like they include some extra parts not intended for the T-34 at all, but rather T-34 variants, such as the SU-100 tank destroyer. Presumably they utilise a common sprue?)

T-34 Tracks and Wheel Components
The Zvezda kit come swith a beautiful set of mixed ‘Half Spider Wheels’ and full steel perforated wheels. On the real tank, the Half Spider wheels were added at the front and rear to negate the vibration and wear and tear caused by the full steel wheels. These wheels are characteristic of late 1943 T-34s *only* (T-34/85s were not equipped with solid steel wheels).


Though I should mention - on a historical note - that 'Early Dished Wheels' (solid steel with rubber 'tyres') were also used on T-34 throughout their deployment, it just seems to have depended what was available in whichever factory that the T-34 was manufactured.

T-34/76 model 1942 at Kharkov. Note the mixture of all steel perforated wheels
and solid 'dish' style wheels with rubber tyres. The all steel wheels were originally
brought in when material shortages (particularly rubber) were at their height. As
the war progressed rubber became more widely available so all steel wheels were
withdrawn. By the advent of the T-34/85 all steel wheels were no longer used.
Picture source: Tank-Encyclopaedia.com
The PSC T-34 kit is equipped with the spoked type ‘Full Spider Wheels’. These came into use in late 1943 and so are suitable for late variant WW2 T-34s and very late war and post-war T-34/85s. The moulding is characteristically ‘chunky’ (for PSC) and the perforations in the wheels are not ‘drilled out’.


And Finally, the Battlefront kit comes with a full set of ‘Early Dished Wheels’, which were solid steel wheels but with perforated rubber ‘tyres’. Once again, these are common for both T-34s and T-34/85s from late 1943.


Summary: The PSC wheels, while adequate, are the least satisfying of the three makes (being a bit 'chunky'). The Battlefront wheels are nice and even show the correct perforations in the ‘tyres’. But the Zvezda wheels are magnificent (for the scale) and their only drawback is that they are specific to the T-34 *only*, while PSC and Battlefront have chosen wheel designs that are suitable for both the T-34 and the T-34/85. (Though Zvezda makes a separate T-34/85 kit with the appropriate wheels.)

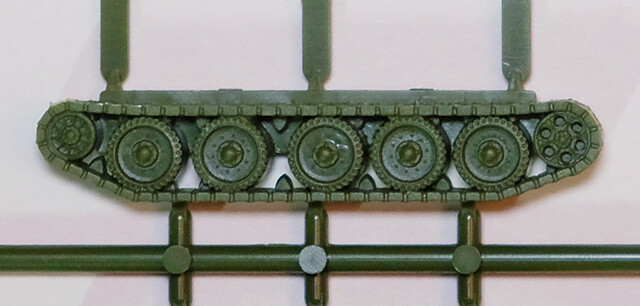
1/100 T-34 models - Tracks
Without getting too technical, one of the most characteristic aspects of the T-34 series was it’s wide ‘waffle pattern’ tracks. Unfortunately, as is fairly common in 1/100 plastic wargaming kits this feature  simplified to various degrees...
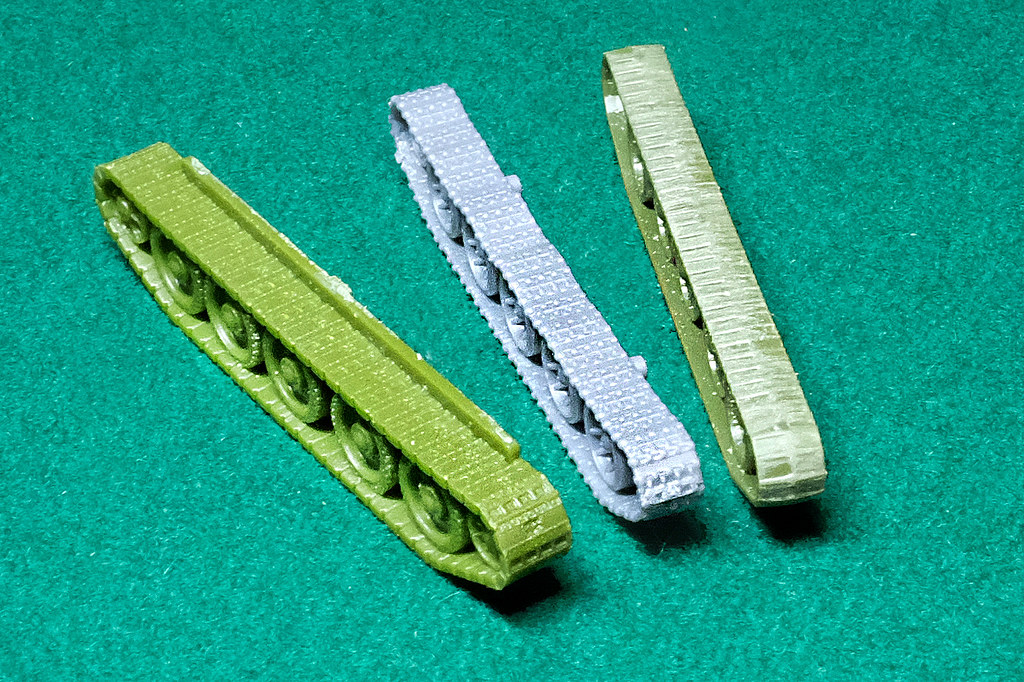
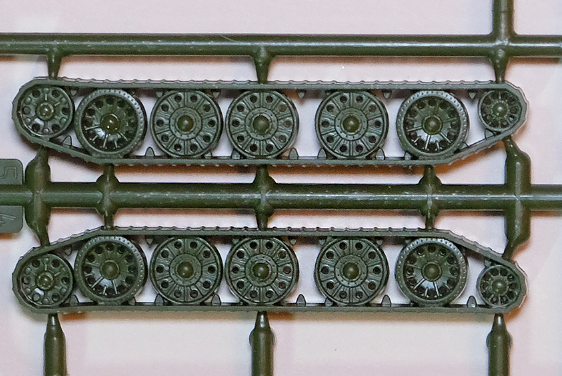
The Zvezda tracks (right) look even worse than they actually are because I
had to sand down an obvious moulding seam that runs down the middle!
Of all the makes, PSC does the most commendable job of trying to recreate the texture of the T-34's track links. They do this by providing you with three separate parts to make one track set - a 'wheels' component, an upper track part and a lower track part. Once glued together, this multi-part unit makes a very nice representation of the T-34's excellent tracks...
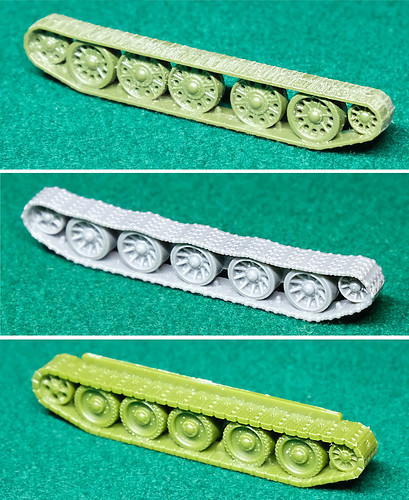
Top to bottom: Zvezda, PSC and Battlefront.
Both Battlefront and Zvezda got for a 'one piece' track component, with integrated tracks and wheels. The way they have gone about this has its pros and cons, for while both have nicely done wheels (the Zvezda has, again, terrific wheels) both tracks have differing problems.

The Battlefront has had a stab at creating a track link pattern (inside and outside of the track), but it's a lot less detailed as PSC's. However, perhaps in order to tick all these boxes, the tracks are excessively and unattractively thick (which the T-34's tracks were not).
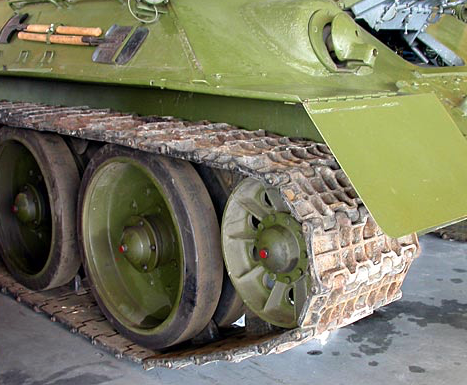
A nice shot of the real T-34's 'waffle' tracks. Source: Bill Maloney
Zvezda, on the other hand, has the thickness of the track correct but then have abandoned any attempt at trying to model the track pattern at all! Instead they have settled for a very unsatisfactory slatted pattern on just the outside of their track, perhaps in the hope that at 1/100 and on a table nobody would notice. Well, I noticed!

Summary: I'd love to have seen Zvezda compliment it's lovely wheels with lovely tracks, but it wasn't to be. Zvezda's 1/100 tanks have a poor track record (!) in providing an acceptable link pattern on their models. Battlefront has made a spirited attempt at good tracks in a one-piece format, but don't really pull it off. PSC, I have to admit, have taken the best approach to a satisfactory final product by making a three-part track system. OK, their wheels aren't the best, but out of the two - good wheels or good tracks - I prefer to have the acceptable tracks.

Overall Summary and Conclusions
Well, every manufacturers' set of components seems to have pros and cons, and my overall conclusion is that - perhaps - the 'perfect' 1/100 T-34/76 model doesn't quite exist. However, having said that - bearing in mind that these models are for gaming and are not display quality scale models - being too critical over details that will not effect the effectiveness of these models purpose as game markers would be a little unfair.


Still, even though much of the detail may not be fully appreciable at 1/100 scale at tabletop distance it's satisfying to have a model that's an accurate representation of a historically important tank. And so, which of the three models did justice to the legendary T-34?

It's actually easier to say which of the three that is least satisfying, and that is the Battlefront T-34. After building a couple of their rather nice M4 Sherman models I was a bit disappointed that their T-34s weren't of a similar standard. The main problem, from my point of view, is the level of simplification and how ham-fisted they have stylised some of the signature features of the T-34, like the engine deck and the tracks.
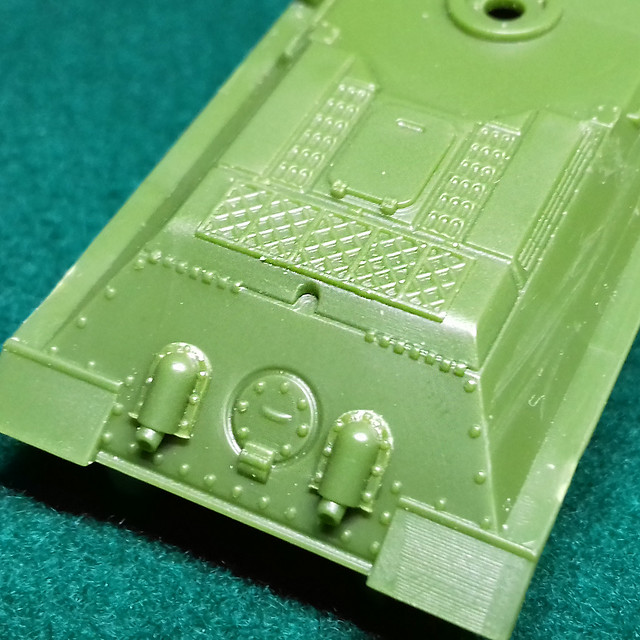
Battlefront's detailing can be a little clumsy looking on occasion.
While, PSC's T-34 - like the Battlefront one - seems a little 'chunky' (and occasionally over-scaled) in it's depiction of certain features, the moulding does seem a little cleaner and crisper. In fact, this reminds me of one of my main niggles with the Battlefront model - the sprue attachment points are far too thick and can cause problems when trying to separate the part from the sprue cleanly!
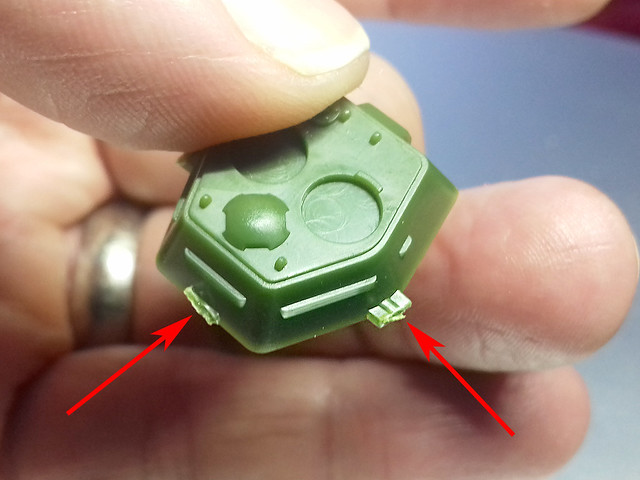
Battlefront sprue attachment points - lots to trim off!
It's not a huge deal, but is a bit annoying as not matter how careful you try to be when trimming the tabs off they sometime leave a bit of a mark on the model surfaces. I only mention it as both Zvezda and PSC managed to use thinner and more discrete sprue attachment points that did not impact the model themselves.
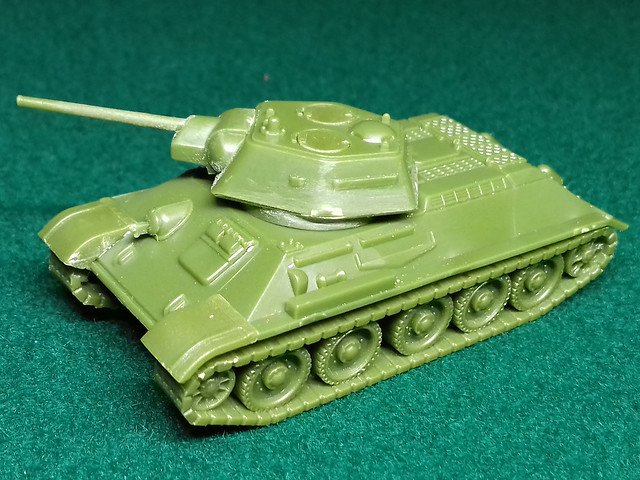
In the end, just a little too untidy for me. Even all Battlefront's extras couldn't
win me over!
So, third place to Battlefront, but out of Zvezda and PSC is the best 1/100 plastic T-34 kit?

Well, I'd love to say Zvezda. It has so much going for it, undoubtedly it is the most technically authentic looking. I love it...But those tracks! If I could have the Zvezda turret and hull, but the PSC's tracks incorporating Zvezda's Half Spider Wheels I really think you would have a fantastic 1/100 Mod. 43 T-34/76. But, that's not the case. 😭

What I think people really want to know is if I could only buy just one make, which one would it be?

I would have to plump for the PSC T-34 set as the best all-rounder, with the caveat that if cost is your primary concern then the Zvezda is the best alternative choice.
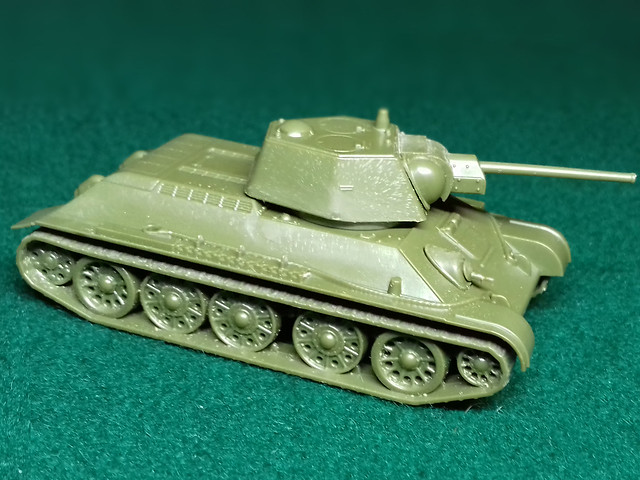
Isn't she lovely! (Just don't look at the tracks, this is her best angle.)
The PSC is a chunky monkey - though ironically the smallest of the models of the group - but the detail is crisp and over-scaled with a purpose. Given the small scale the slightly exaggerated detail is great for war-game painters, allowing salient features to be picked out even at tabletop distance.

One cannot ignore the extras one gets with the PSC sprue, it may not be as much as Battlefront gives you but it is a nice little selection of parts and even comes with a commander figure. (One thing I do like about Battlefront's options is that it does come with the Mod. 44 raised commander's cupola allowing you to make the final version of the T-34/76.)

Battlefront and PSC both give you optional parts to make open turret hatches and both BF & PSC give you the option to build a T-34/85 turret with which you can alternatively equip your tank. Very handy. (Though, here is one area PSC falls down - with it's famously horrendous 85mm T-34/85 gun which is grossly over-sized, looking much more like a 120mm gun.)

The bottom line is that as a war gamer you will probably want to buy several models of the T-34 to play with - to make up a tank troop - and with PSC offering a five tank box set (with the cost working out at just £3.75 a tank) the extra variety made available with the optional parts is an attractive feature. Whereas the simple - although beautiful - Zvezda's lack of options means that you would have to make your own extras to provide a bit of variety.
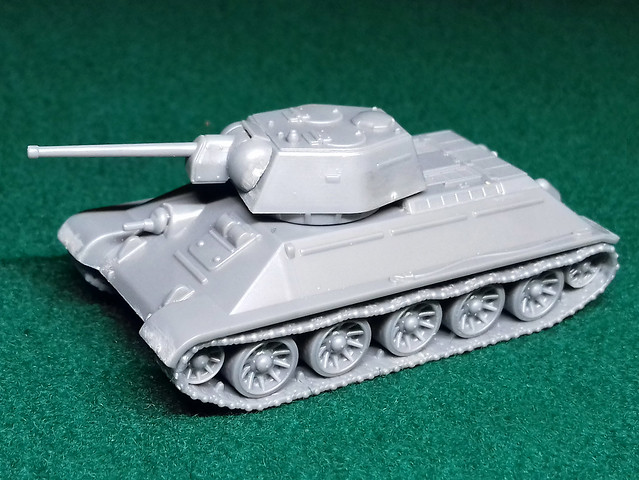
Not outstanding, but a competent all-rounder. Just like the real T-34 really!
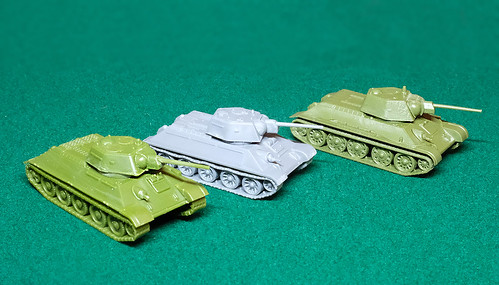
...It's tempting to just ignore Zvezda's pathetic tracks for the price. But, PSC's overall package of tidy detailing and ability to add some extras should you want them ultimately wins the day (in 1/100 scale at least).

In Part 2: I see what these little beasts look like painted.