Friday 28 November 2014

Finnish Three-Colour tank Camouflage experiment

It's approaching that time when I have to leave the comparatively comfortable world of plain old green trucks and try my hand at some 3-colour camo! Eeek!

A very nice example of the Finnish 3-colour camo done right(ish). While being
nicely applied there is some question over the use of the 'buff' colour, which
is supposed to be a 'grey' colour but opinions differ (even among experts).
Picture source: 
Stephen Brezinski, www.onthewaymodels.com
My Finnish 'Heavy' Tank Company rumbles inextricably closer to my workbench as it works it's way down the cue of projects and it's a job I have not been looking forward to. As a Kitnoob I still haven't had a lot of experience with the masking technique involved with a multi-colour camo scheme and what's worse is that the two early attempts at this ended in failure...

My very first attempt at 3-colour Finnish camo was with this poor old Pegasus
KV-1. What a mess! A mix of bad masking and too thick an application of spray paint.
So, before I undertake this process again I thought I would seek out a 'practise victim', a model that I didn't mind sacrificing to the god of bodged paint jobs!

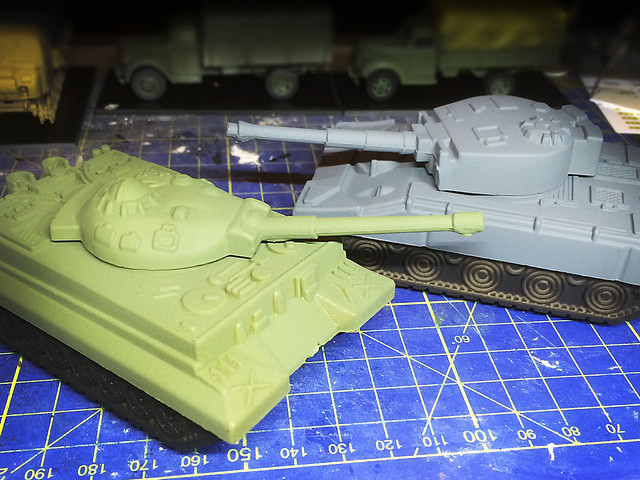
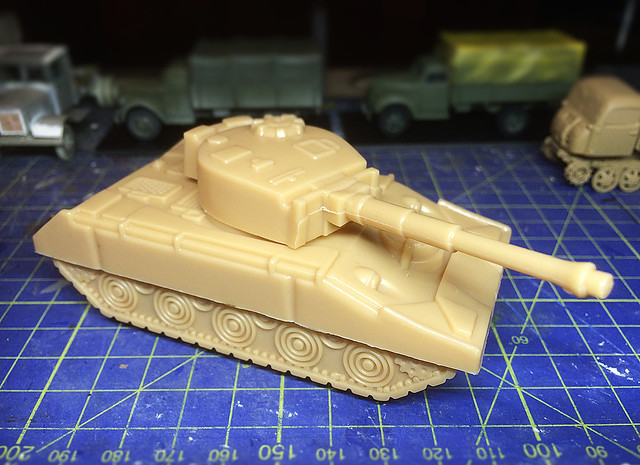
I picked up a pack of plastic soldiers and tanks at my local Pound Store as the tanks included in the cheap and nasty play set looked like they might has some merit for just this sort of painting experiment. The tanks were hardly accurate or complex models, but in this case that suited me fine...


Now, to nitty gritty. World War 2 Finnish Three-Colour camoflague is described repeatedly as having been 'grey, brown and Moss Green' in various reference publications, typical of these is this description in Osprey's 'Tanks of Hitler's Eastern Allies 1941-45' [Page 38]...

"In the spring of 1943, the summer scheme of dark green overall was superseded by a three-color camouflage scheme of moss green (~FS 34083), grey (~FS36306), and sand brown (~FS 30040). In spite of its official name, the sand brown was in fact a dark brown." [www.ospreypublishing.com]
The mis-application of buff instead of the grey by so many modellers is a little baffling. I *think* the confusion may have come about for two reasons; first the designation of 'sand brown' which people mis-interpreted as being the lightest of the three colours used and secondly because in certain light the richness of the dark brown may have made the grey look a 'warmer' shade (in art and design this effect is called simultaneous contrast).

The situation has not been helped by the illustrators of reference books (and even some armour museums) perpetuating the mistake by painting the grey as a 'sand brown'.

This is a typical example of the confusing colour advice that is out there for
Finnish 3-colour camo. This 'authentic' paint set by Lifecolor clearly denotes
the use of 'UA 244 Harmma No1 Grey' and yet look at the colour swatch for
in the refernce chart (and the light shade in the camo on the StuG).
Of course, some might argue - conversely - that the mis-designation lays in the lightest colour being called 'grey' - as in the Lifecolor case above - but the real colour used being a buff colour!

Last word: Confused? Well, please refer to this reference page on Andreaslarka.net for both a level of clarification AND also a nice example of the simultaneous contrast effect (and poor lighting) at work. Is it a light creamy-buff or is it grey - you decide! (Hint: Compare the 'grey' that's next to the brown and then compare it again when it's next to the green.) Link: Finnish T-34 m1941 # Ps. 231-1 reference photos.

Anyway - that conundrum out the way, lets talk painting....

I decided to use both toy tanks from the set so I could try out variations in techniques. So teh first job was to base coat the little blighters.


The plan is to use the BluTack masking technique on the grey panzer (for a soft edged effect) and a straight forward masking tape method for the green tank (for a hard edged look).

I have a few pictures of Finnish three-colour camo patterns to use as guides for how I arrange my masking materials on the tanks....
A Finnish T-28 in 3-colour camo.
Picture source: Armchairgeneral.com
In both cases I will begin by masking out the two base colours - green and grey. Then I will spray the next colour, then mask that out and then spray on the final colour. The other way of doing this is to mask one colour, then remove all the masking material then mask for the next colour, then remove that and then mask for the third. Here's a video which shows this second method in action (you can skip through the video to the main..


BluTack and masking tape at the ready!

Technique 1 - Masking tape/hard edge
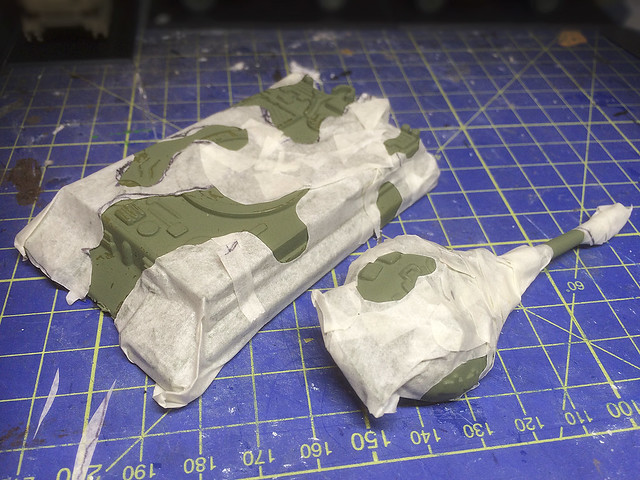
OK, green tank gets the masking tape method. I mask off to spray one colour at a time (in this case I ready to spray the grey layer)...


I will spray, then remove the masking tape before masking for the final colour - brown. This should produce a clean hard edge between the colours - looking at the reference I have it seems the Finns painted hard edges to their camo patterns so this method should be more authentic.

Technique 2 - BluTack/soft edge
Grey panzer (it's supposed to be a Tiger turret I think) get's the soft edge approach. In this method I mask out to spray the brown layer, but instead of removing this mask when done to apply the next mask I simply ADD another mask on top of parts of the brown layer I want to keep and then spray the green over the areas I leave unmasked.


The rounded edges to the BluTack masks should help produce the soft edge when spraying. Although this isn't perhaps appropriate for Finnish armour I want to practice spraying a soft edge 3-colour camo (as I have a German StuG in the pipeline).

Next: The second and third of the camo colours and the un-masking!
Thursday 27 November 2014

1/72 Steyr RSO - Part 3

Basic painting
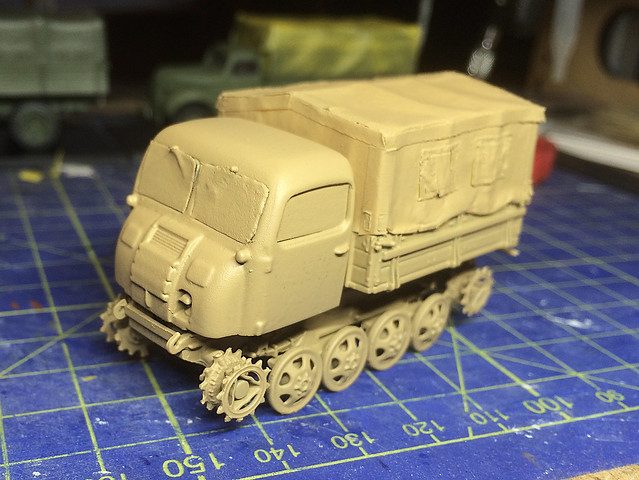
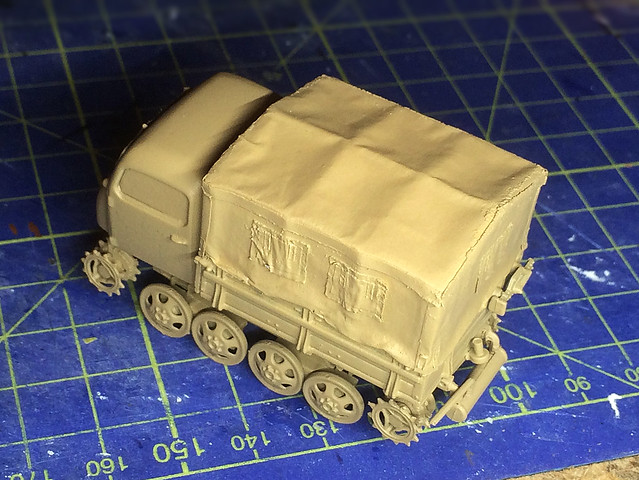
I have now sprayed the RSO with a coat of Humbrol's 'Matt Desert Yellow' (#93) acrylic spray. I could have gone with a black base coat - I know many modellers like that method - but I like to start with a mid-shade base coats so I can go darker or lighter with my subsequent shading.


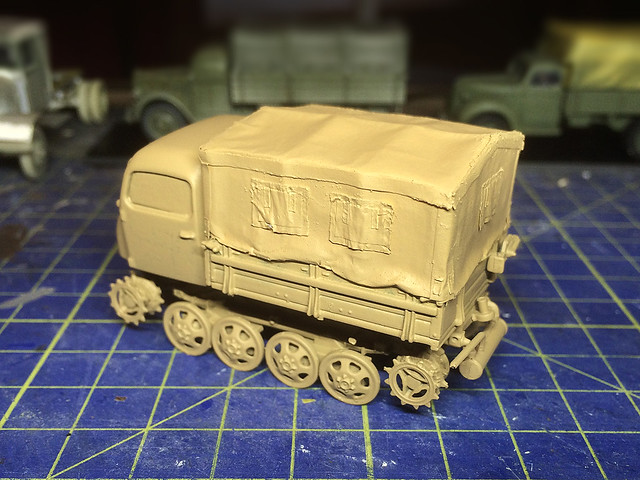
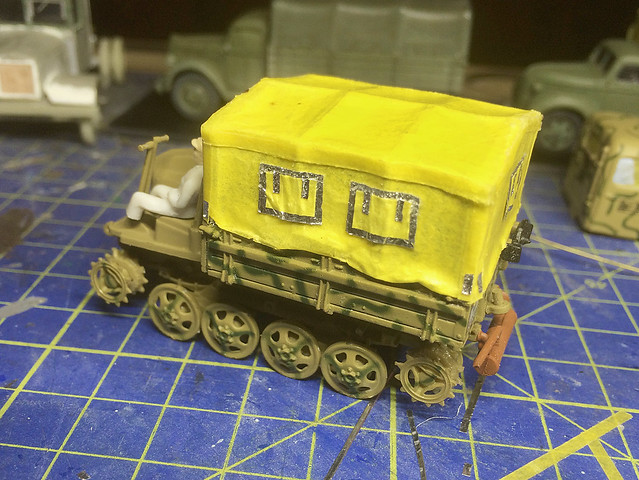
I was pleased that this light coat covered up the model's original camo colours nicely and I did manage to get some of the wrinkle effect in my canvas tilt...


Obviously if I had gone for a thinner masking tape when making the tilt cover more of the wrinkles from the foil base layer would have been evident. But, still, the effect isn't bad. The roof of the tilt came out especially well, with just the right amount of 'droop' between the supports...


The base painting has highlighted some ragged seams and areas that need some extra work. A quick bit of sanding here or there, nothing major.

Next I add the modulation colour with a airbrush misting of Vallejo's 'Middle Stone' (#031). This will create a slightly darker tone to the 'Dunkelgelb' areas and make the overall effect a little less yellow. Hopefully I can create some nice tonal effects by letting more or less of the base coat show through.

Yes...Vallejo's 'Middle Stone' (ochre) paint is a bit on the vivid side! But this will
be toned downed at the weathering stage when I do some fading, staining and
shading. 'Dunkelgerb' is a tricky little sucker!
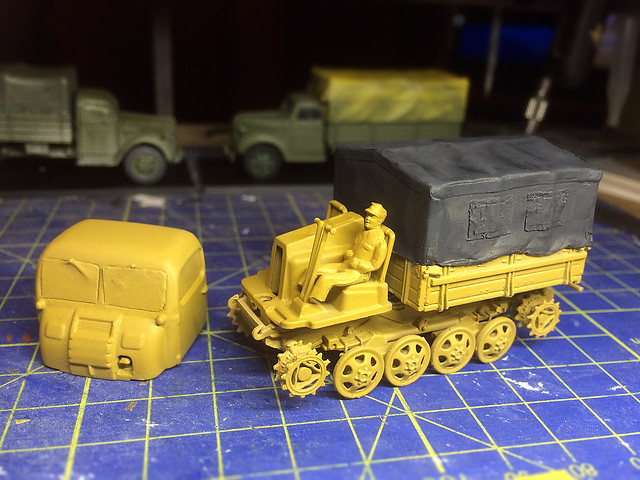
I then masked out the tilt and give it a spray of a dark grey. I could have used the current base coat as a good starter for a khaki canvas cover, but I want some contrast and I note that a lot of the RSOs seem to have a dirty field grey tarp in contemporary photos.

Note: Just looked at this again and I'm not sure I am at all happy with the 'yellow' colour of the Vellejo Middle Stone paint. I think I was happier with the Humbrol Desert Yellow that I primed the model with! Oh dear, this vehicle might look different the next time you see it!

NEXT: Painting the cab interior.

Tuesday 25 November 2014

1/72 Steyr RSO - Part 2


As I mentioned in the first part of this project thread I have two main modelling jobs to do on this diecast RSO. The first is to make a driver figure and the second is to make a canvas tilt cover.

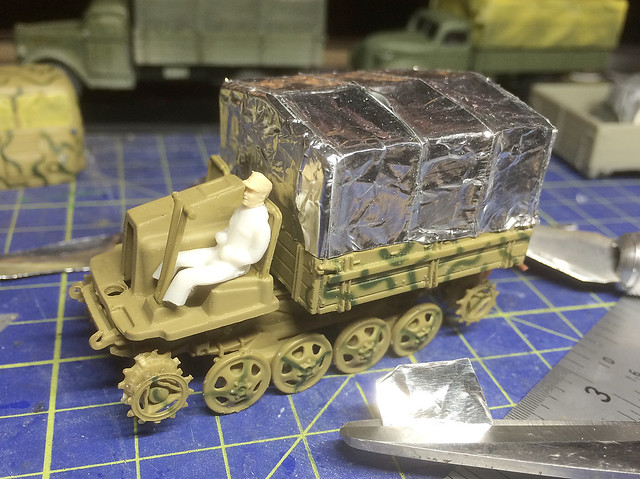
The figure is very straight forward, I've done this three or four times now. I use a 1/76 seated model railway model figure's body - as full-sized 1/72 figures look too big inside 1/72 model vehicle cabs for some reason - and cut off it's head, replacing it with a 1/72 military figure's head.


Even with the 'smaller' body I still had to cut off the feet to squeeze him into the very cramped cab! Still, you won't see this when the cab body is re-attached.

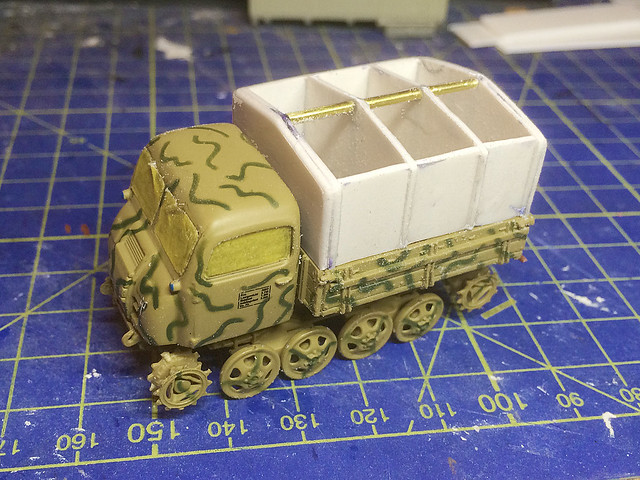
I then made a start on the canvas tilt cover. I began by making a set of 'ribs' to denote where the canvas support rods would be - the idea being that I drape my tarp material over this to give the impression of the supports with some 'droop' in between them.

Next I created some walls for support, recessing them just a tiny bit so I can create the slackness in the canvas that I am after.


I left the top of this support open but added a longitudinal support rod down the middle so the canvas material could drape over it, giving a natural droop in-between the 'spines' of the tilt. If that makes sense? (I'm making this up as I go along!)

For the material itself I am experimenting with a sandwich of two materials. I'm starting with the foil tape that I have used before on other canvas tilts - because it's foil it wrinkles and keeps it shape, making nice little folds. But foil is a bitch to paint (paint is apt to chip and  flake off it I have found) so...


On top of my foil tape base I will stick some masking tape. This not only takes paint better - being a little absorbent - but creates a nice textured surface giving the impression of a fabric based material. (In theory!)

Note: You could just use the foil on it's own, depending if you want a lot of wrinkles. I wanted a subtler effect. Whether it has worked will depend on how it looks after the paint has been applied.

Using more pieces of masking tape I add some of the tarp details, like extra seams and the window flaps, etc. Working with tape for modelling fabric is nice as you can create natural looking folds and wrinkles - but for extra hold you can coat the masking tape with a thin coating of super-glue.


Note: The masking tape I used was a bit too thick, to really get the benefit of the foil wrinkles below you ned to use very thin modellers masking tape instead of the decorators tape I used. The next time I try something like this I might try gluing PVA soaked tissue paper over the foil instead.

And finally...
There is one more modelling job that I *could* do but haven't decided whether I should or shouldn't as it is an optional item.

The Steyr RSO came with a set of winter/soft ground track shoes (or grousers). They are clearly seen in many reference photos and were included because the RSO was originally designed with the 'Russian Front' in mind (RSO stood for Raupenschlepper Ost, which is literally "Caterpillar Tractor East"). So all RSOs came from the factory with a set of wooden 'slats' which could be fitted to the narrow tracks should the ground be boggy or snow very deep.

This later model RSO/03 clearly shows the grousers attached to the side of the
cargo flatbed. These 'clipped' into the tracks widening them and giving the
vehicle a larger footprint and greater grip in soft ground.
These rectangular wooden track shoes were store in a rack fitted to the sides of the RSO's cargo flatbed. In contemporary photos sometimes these are missing and sometimes they are present, hence this being an optional item for modelling. It's up to you whether you want to add them or not.

My Finnish photo of an RSO has them fitted, and I suppose when you bear in mind teh geography and climate of the Finnish theatre - with boggy forests and harsh winters - it kinda makes sense for them to be a 'non-optional' item really.


...I'll think about it!

Sunday 23 November 2014

Next up - Finnish Raupenschlepper Ost RSO

OK, you've probably had enough of trucks by now, eh? So I'm moving on - a little.

Altaya's Steyr RSO Diecast Model (Panzer Collection PZ08)
Thinking ahead to the heavy armour company I will be making I wanted a project that would bridge the gap between wheeled vehicles and tanks and the German RSO/01 - 'Caterpillar Tractor East' - seems the idea transition vehicle. The Finns purchased 30-50 of these 1.5 ton prime movers from 1943, presumably to replace the mish-mash of under-powered captured Soviet tractors and commercial vehicles that they had been using since the Winter War (1939-40).

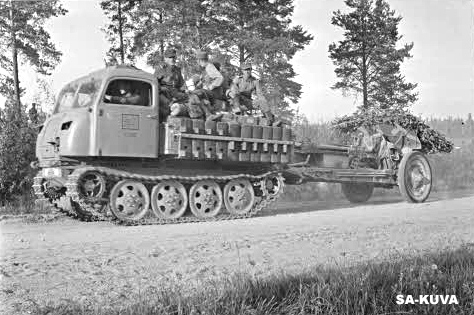
I found Altaya's 1/72 diecast model on eBay at a reasonable price so I snapped it up as I am going for the option that the Rapid Fire rules give you for the late war Finns to upgrade their anti-tank guns to 75mm Pak40s. Alternatively - and more accurately - I could use these tractors to tow Finnish 105mm (German FH18 10.5cm Howitzer) as I have found a nice contemporary photo of this configuration being used by the Finns...

Here we see one of the Finnish RSO/01s towing a 105mm howitzer in 1944.
Source: SA-KUVA Finnish WW2 photo archive
This project will also be quite interesting as I now have quite a few of these type of diecast models and I want to see how well they turn out when converted and re-painted. With regards to the RSO I will have to do some dismantling in order to add a driver figure to match the rest of my truck models.

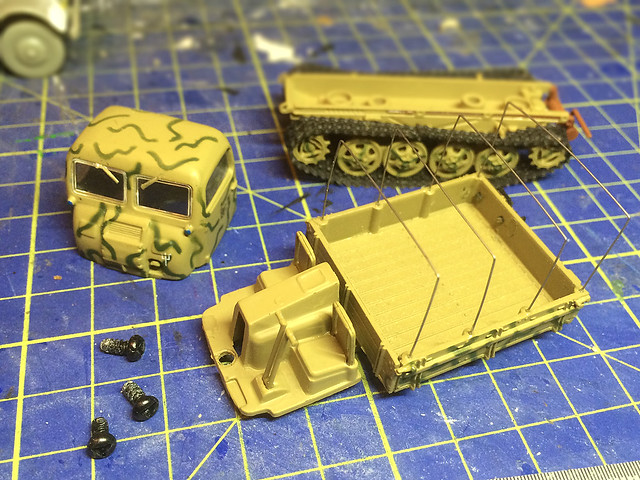
The Altaya model is held together with three tiny triangular head screws, luckily I have a precision screw driver set with these shaped screw-heads in it. But bear this in mind before undertaking a  similar conversion...

Once the screws are removed the model breaks down into three pieces. But the
windows are - unfortunately - glued in place. Pity, but I can mask them prior
to re-spraying the base 'Dunkelgelb' yellow.
Aside from the driver another addition to the basic diecast model will be a tilt canvas cover. The model does come with a set of very flimsy wire supports for a canvas cover, but no cover itself. I want a tilt cover so as to circumvent that annoying 'crew aboard or not' that war-gaming rules produce - while stationary your crew will be stand-alone figures on the table, when moving the crew are technically supposed to be aboard the vehicle.

You could make some 'removable crew' to fulfil the needs of the game, but the easiest way to get around this is to make a tilt cover so you can't tell whether the crew is aboard or not.

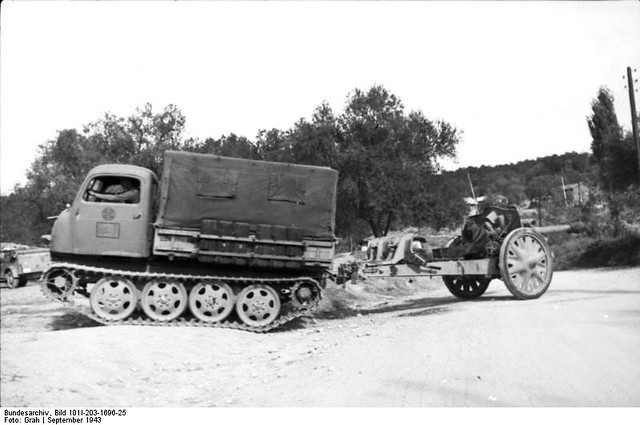
An German RSO/01 with canvas tilt towing a 10.5 cm leFH 18 light howitzer.
Picture Source: Wikipedia
I'll have to put some thought into how I will make the tilt, but it shouldn't be too hard. A simple plasticard 'box' with some textured paper over it should suffice.

Painting: The Finnish RSOs seem to have come from the factory in Germany and straight into service. Unfortunately as only monochrome photographs exist we can only make a guess as to the basic colour, but generally the factory colour for German military transport was either 'Dunkelgelb' (a dirty yellow) or 'Dunkelgrau' (a mid-grey).

After comparing several black & white photos I have chosen to plump for the 'Dunkelgelb'. The Altaya model is basically this colour but has green camo added, hence the respray. Vallejo do a passable 'Dunkelgelb' in their Model Air range, my local store didn't have this but did have Vallejo's Model Air 031 'Middle Stone' which is within the spectrum that can be considered 'Dunkelgelb' (which can vary shades from a ocre-yellow to a khaki/mustard).

Next: A driver and a tilt cover.

Thursday 20 November 2014

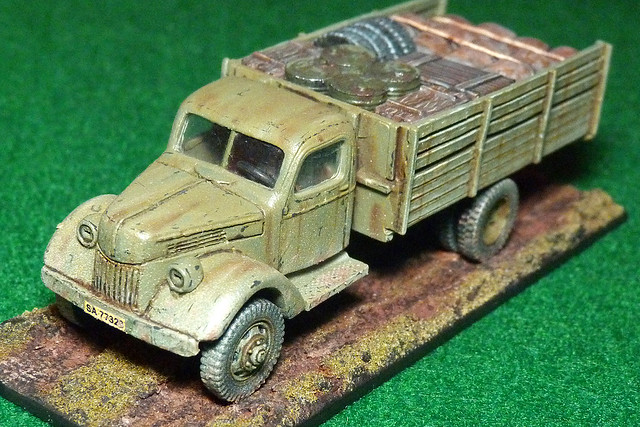
Cheap Ford V3000 (Pt.14) - Finished!


Here's a blast from the past. This Ford V3000 was actually a very early attempt of mine at a conversion, but although I managed the construction part of the project I was - at that point - completely clueless about the painting side of things. So I shelved it (until I thought I could handle the weathering and finishing).

Well, I feel I am moderately adequate at painting now so I finished the project off!


To recap; this conversion was my very first 'cut & shut' attempt, with the bonnet being from that old favourite the Valiant resin V3000 and everything back of that being from the Pegasus 'American Army Truck' kit.

It's supposed to be the Ford American model V3000 in a long-base 'stake truck' format (the difference between this and the German V3000 being the split windscreen). The fenders aren't quite right, but for my first conversion attempt I was quite pleased.


From the point of view of this being part of my 'Rapid Fire' Finnish Continuation War collection this truck represents the HQ Company supply truck.

...Phew! Slowly working through my back-log of stalled projects! :)

Afterthought! Oh I forgot to add...The reason this project came about and is called 'Cheap Ford V3000' is because there is no reasonably priced plastic injection kit of this vehicle on the market in 1/72. The only kit available is an expensive short-run resin kit by Hunor (though there are a couple of resin conversion options, like the MT conversion that I have also built.)

Wednesday 19 November 2014

Pegasus 1/72 German Army Truck - Part 10


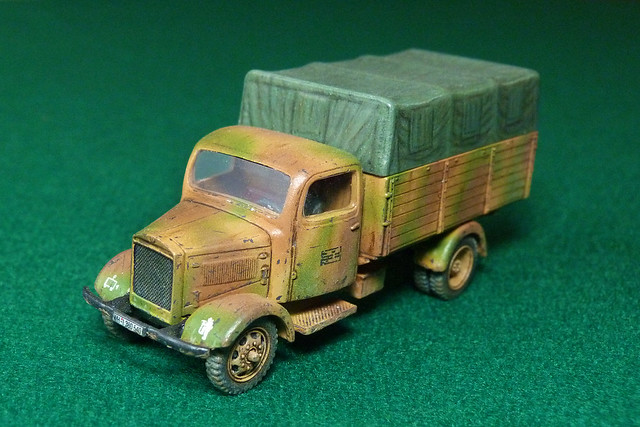
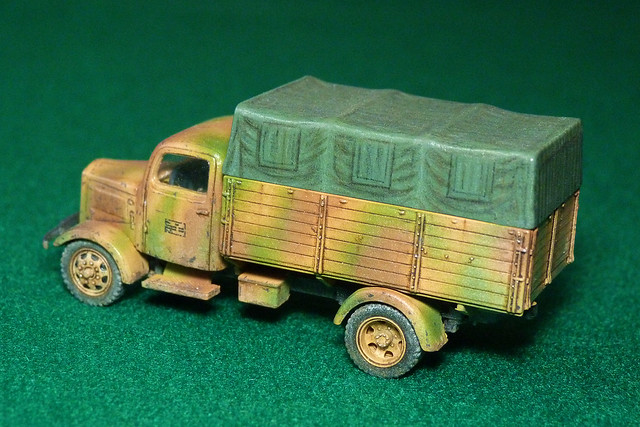
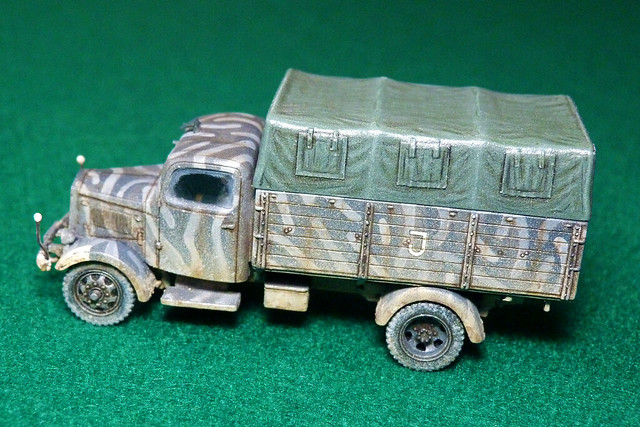
As promised, my Pegasus 'German Army Trucks' are now finished! Hooray!

I should remind you that there was - as usual - a bit of experimentation going on here. The 'yellow' truck was build fairly much 'out the box' (except I added the windscreens), while the 'grey' truck was an attempt to bring the kit up to something approaching 'display standard' with a lot of extra detailing.

Was it worth it? Depends what you want really, I just wanted to show that the Pegasus kit is a very nice one and would suit either a war-gamer or a display builder. (See if you can spot the differences!)


Overall I am quite happy, although some of my weathering experiments didn't quite come off the way I wanted them to. Still, I did learn a lot even if the lesson was 'how not to do something'!

I guess the thing I am most pleased about are the tilt canvas covers which were an experiment using Conte colour drawing pencils (rather than paints)! I admit they obviously do look 'drawn on' but I think it's an interesting style.

Out of the two my favourite is the 'yellow' truck. This was my first attempt at a German tree-colour camo pattern using an airbrush freehand, and I was quite happy with the result. (Part of the reason for doing these trucks was to practise this camo pattern before I attempt the StuG III and Hanomag I will be doing next for my Bolt Action Germans.)

Tuesday 18 November 2014

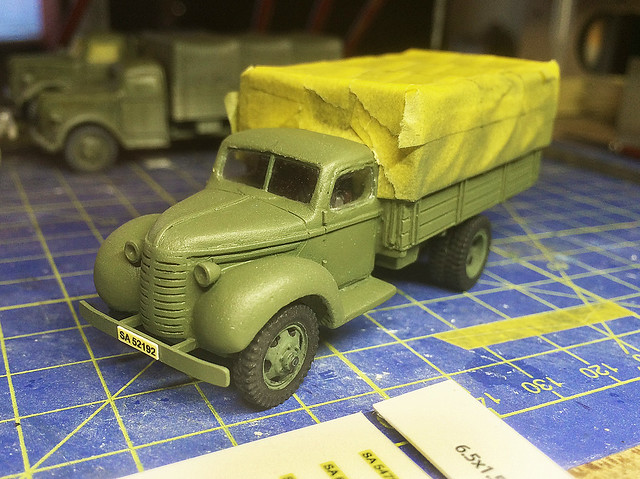
Quick '39 Chevy Truck Part 7

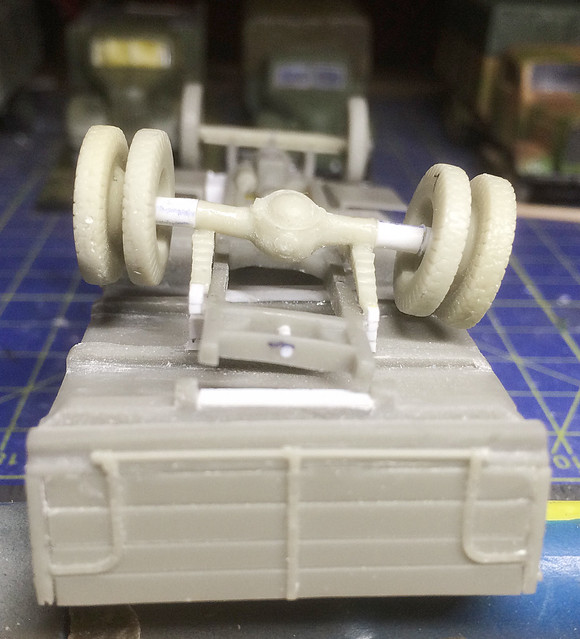
Progressing between other jobs, I have now 'closed up' the hole I made in order to excavate the cab interior of my solid resin Valiant truck model. I have also made some very rudimentary underside detail including a simple driveshaft.

Obviously as this part of the model will be conveniently hidden I don't have to do too much to this area, but I did want to neaten it up. I've also tried to make slots to securely hold the axels in place, just to make sure the wheels are all nice and level...


But...I haven't finished with the underside of this truck yet. I haven't fixed the axels into place as I want to add 'mud' and other weathering effects to the underside before fixing the wheels permanently into place. Getting into the underside of the mudguards - for example - is a bit tricky with the wheels attached.

First job is to spray the underside with a coat of the base - Light Olive - colour and then give the whole truck a light coat of satin varnish before moving on to the basic pin-washing phase.

Ready to begin pin-washing. My Chevy now has a windscreen and I've just
applied the Finnish 'SA' number plates.
I then go through my tried and tested process of pin-washing, dusting, weathering, chipping and then highlighting. I seem to have this procedure off-pat now, well at least for olive drab vehicles.

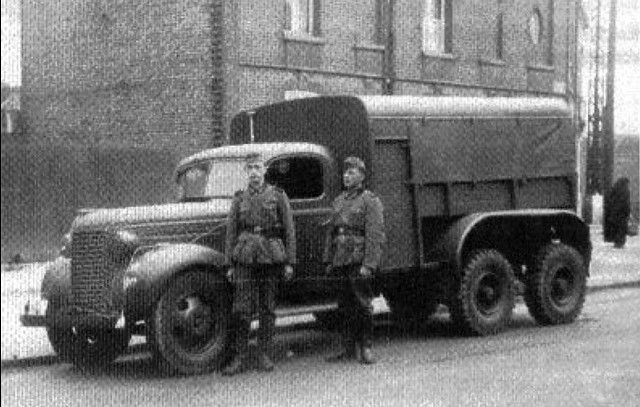
Above: Here's an interesting shot of a 1939 model Chevrolet truck in German Army service. The caption read: "Truck, type VD, converted with the Trado kit. The captured vehicles were still years in the German army." I think what the bad Google translation means is that the Germans kept captured Allied - in this case Dutch - vehicles in service for many years. I'm not sure what a 'Trado kit' is, but at a guess maybe it's the addition of the rear duel axel modification (which wasn't standard with '39 Chevrolet models but I believe was made by the Dutch DAF company for the German army).

Next: Pin-washing and weathering.

Thursday 13 November 2014

YaG-6 cargo

The YaG-6 kit does not come with a tilt cover. This is sort of inconvenient if you are using a vehicle for war games as a canvas cover over the flatbed can disguise the fact that the cargo area is either empty or full. But anyway, while there are ways around this (or you can ignore this) I decided that I wanted to include some cargo, mainly so the vehicle didn't look so 'bare'.

Source: 'Engines of the Red Army' web site. Source: © www.o5m6.de
Historical note: I've been through quite a few period photos of the YaG-6 (and YaG family) and to be honest I have not seen one example of this large truck that included a tilt cover. So while it might be tempting - and easy - to add one on so you avoid any war-game issues regarding 'empty or full' it really doesn't seem appropriate to add a canvas cover to this particular truck.

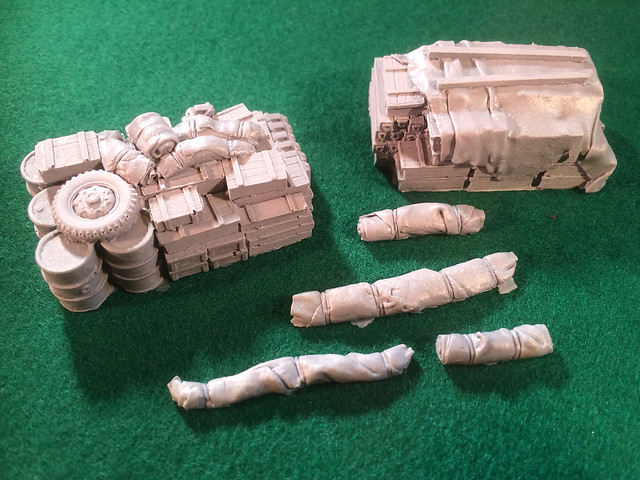
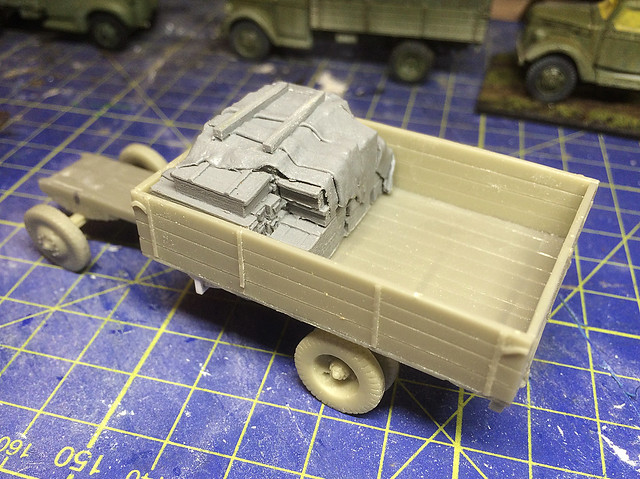
Deciding on cargo. I opted for the load stack on the right for my YaG. It's an
ammo box heavy load with a very nice tarp...The problem is it's too big!
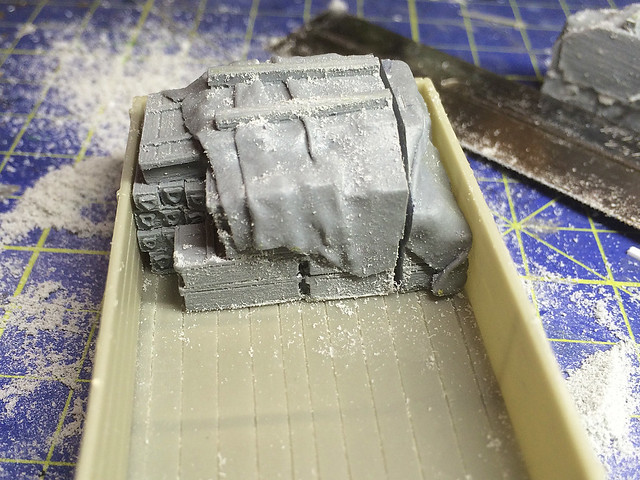
My YaG will be a heavy artillery tow, so - naturally - I will want to include a cargo that matches this purpose. Luckily for me the Value Gear truck cargo 'blobs' set I just relieved does have a very nice load that includes artillery ammunition crates. The only down side is that these loads were really intended for a medium weight truck and so aren't big enough to fill the YaG's cavernous flatbed.

...No problem though. I also wanted to have a partially loaded truck as I wanted to leave space for a 'theoretical' gun crew. So I realised I would have to do some creative re-sizing of the Value Gear 'blob'. After some measuring up I reached for my mini-saw...


I decided that the cargo would look nice in a cross-wise orientation hard up against the front of the flatbed, just behind the truck's cab. I found a nice logical place to dissect the load - right where a stack of crates met another - and removed a section keeping the larger load and a nice 'end cap'.


Checking the fit I was very pleased with how the load looked. I'll rejoin the two parts of the load and fill the gap with - you guessed it - Milliput.


While giving the truck a suitable 'artillery' look there is enough space to - theoretically - accommodate the gun crew, though I could add some additional personal equipment or tools if needs be.

While I could have created this cargo myself the Value Gear 'blobs' are very nicely crafted and do save me a lot of time (there isn't much joy to be had out of modelling small crates)! Though, I might be tempted to add some rope ties around the load.
This moves my YaG one step on and all the major components are complete (now all my tweeking has been done). So the next stage is the actual base coating.

Sunday 9 November 2014

I hate you Zebrano!

(Bear with me...) I was just watching Will Wheaton play a game of Dungeons & Dragons with Acquisitions Inc. on YouTube, and the party's magician repeatedly threw terrible saving throws on every one of his turns...This, to me, seemed to be exactly what it was like building this Zebrano YaG-6 resin kit!

Du-oh! God damn you Zebrano!
I hoped with each new stage of the build that the process would go well, but the Gods of Resin peed mightily on me every time!

This stage - the test fitting of all three main truck components (cab, chassis and flatbed) - should have been a walk over. Were this an Italeri or Airfix plastic kit the likelihood that it would have been and all there parts would simply slot together in a very satisfying way. But not with a Zebrano resin kit, on no - dear me no!

Everything is warped.

The chassis is bent through either plain. The guiding track down the bottom of the flatbed that the chassis is supposed to slot into is mis-aligned. The cab has no positive seating points and sits askew on the chassis AND will not sit flat on the chassis anyway. So all I've done this weekend - in the bit of modelling time available to me - is sort out these problems.

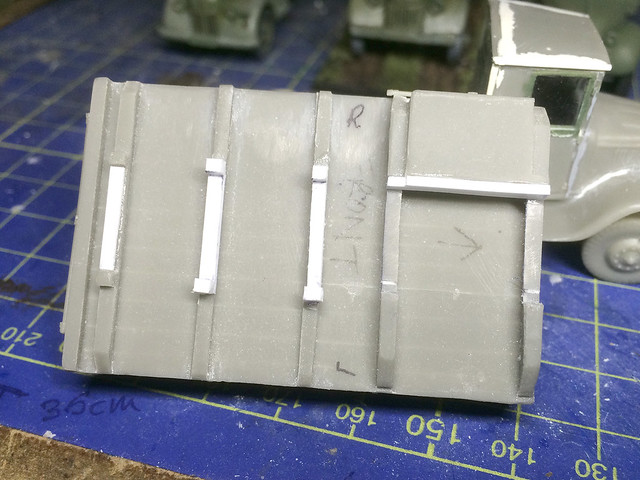
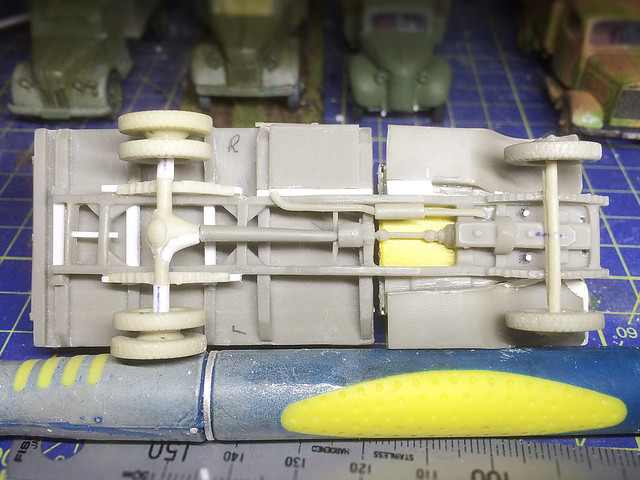
What I have had to do is make the means of attaching the parts together more positive by building on better 'slots' using bis of plasticard strips...

This new 'track' helps straighten out the warped chassis and helps it seat the flatbed
better onto the chassis.
You do have to do a lot of dry-fitting and measuring of the relative positions of the three major components to ensure they fit together - roughly - how they should. The lack of 'pin and hole' guides leaves a lot of this work to your judgement so you have to constantly be comparing the kit's composition to reference photos.

In this case the main reference point was that the centre of the rear wheels was suppose to be in line with the mid-point between the second and third flatbed support spars. Everything else worked around this.


However, there was a lot of 'shoving and pushing' as each part jostled for 'best position', so the end result is a compromise. Everything is nearly in the correct position - but nothing actually is!

By using small bits of plastic as wedges I straightened up the alignment of the flatbed and cab along the chassis - which wanted to bend in both the vertical and horizontal - and all the parts sort of look straight now.

I had to drill holes through the chassis into the cab and glue plastic 'pins' into the cab. This helped the cab 'clip' into position on the chassis and keeps it sitting straight. (And by the way - I still have to make a new spare wheel to fit on the bottom of the flatbed!)

Ah well. I can't believe that one simple job turned into a post on it's own. But there you go...I give you Zebrano models. Sheesh!

Wednesday 5 November 2014

A cargo of cargo


This months hobby spends are having to be curtailed somewhat - what with the festive season at the back of my mind - so I've tried to concentrate on things I actually need to finish ongoing projects than adding to my 'stash'. What I needed for this month was cargo.

Some of my small fleet of trucks will require stowage for their cargo decks, things like crates and rolled tarps, etc. While I could make these bits and bobs myself - and things like this were fun to do when I first began - the time it takes to make these small ornaments could be better used elsewhere.

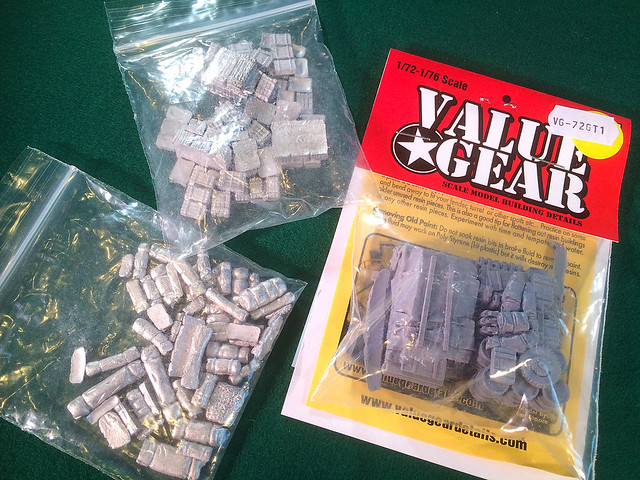
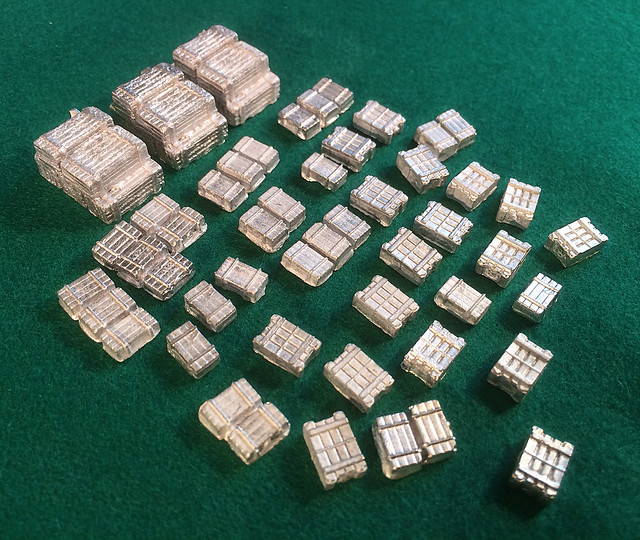
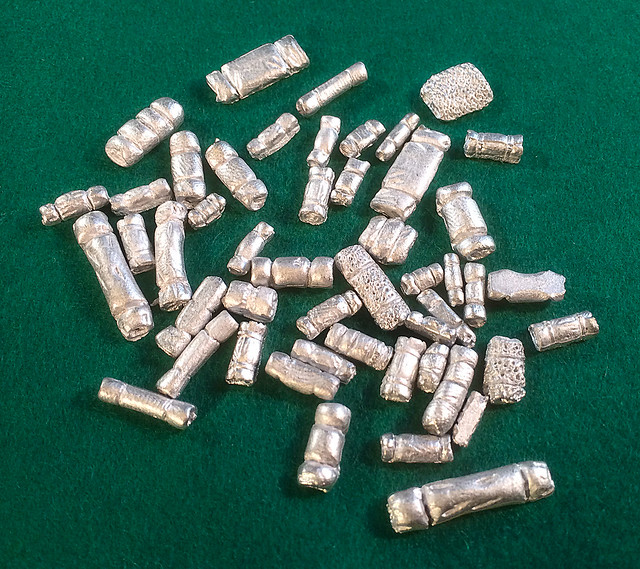
I discovered Lancer Miniatures recently and while looking through their online catalogue notice they had some stowage items that were quite cheap. I bought a packet of their 'stowage items' (40 items for £4.50) and a couple of their 'boxes/crates' (10 items for £2). This seemed quite good value for money for what I wanted.


Next, and not so cheap I suppose, was a cargo set by Value Gear. Their amusingly named 'truck blobs' are sets of two sculpted cargo truck loads. At €9 each plus international shipping these are accessories primarily aimed at the display modelling market, but they are very nicely sculpted.


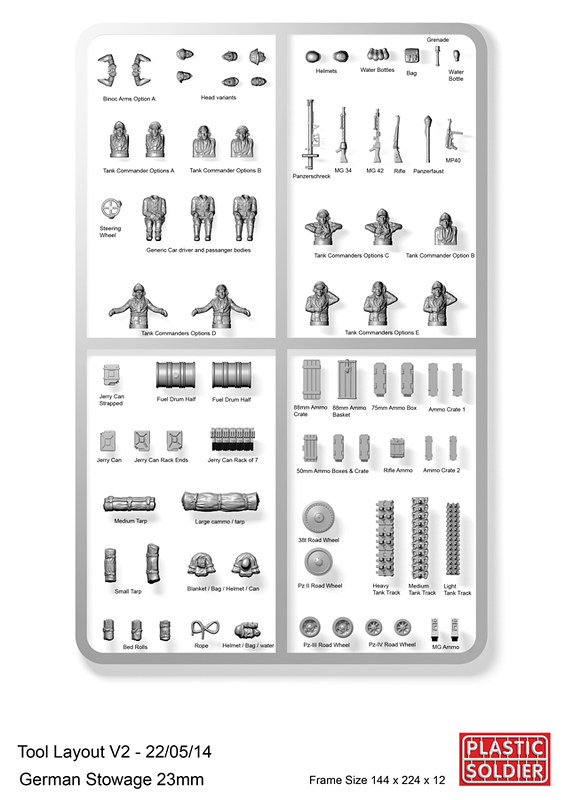
And finally, I bought one of Plastic Soldier Company's new 1/72nd German stowage and tank commanders sets. For £12.95 you get three large sprues, each with a variety of commander and driver figures plus a good miscellany of German Army themed vehicle stowage, accessories and weapons.

This particular set was needed for the next model in my Bolt Action project - an Armourfast StuG III which I want to dress up a bit. But there is more than enough useful items in this set to keep me going for quite some time.

One word of warning though. As I suspected the PSC items are  like their figures - at the larger end of the 1/72 scale and may not be exactly compatible with other 1/72 German figures from manufacturers like Revell, Italeri, Caesar, etc.