Showing posts with label X-Ref: GF9/starterset/0417. Show all posts

Thursday, 25 May 2017

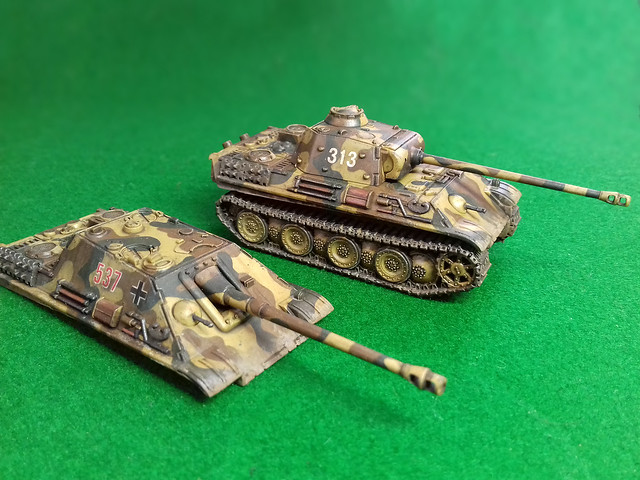
Battlefront 15mm Panther and Jagdpanther - Part 2

Applying the Wash
With all the base colours done it's time to apply the overall wash to the model. I'm using Citadel's Agrax Earthshade (again), diluted 50/50 with water...
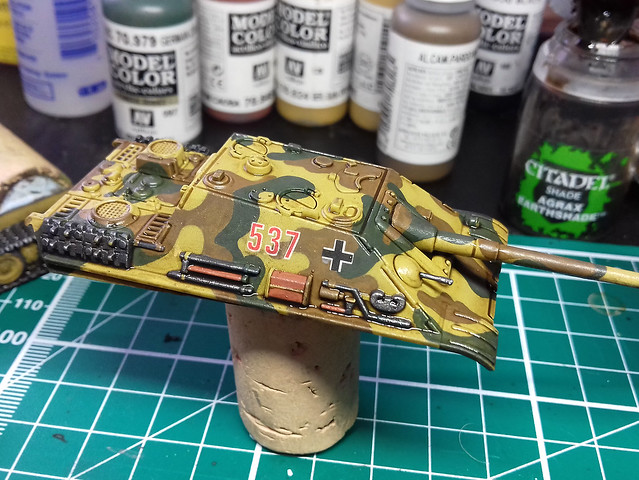

Aside from adding a 'dirty' film all over the model, giving the basic paint coats a stained and 'aged' appearance (which I like) the wash also gives definition to panel lines and outlines other surface detail.

This replaces, to some degree, the pin-washing technique I normally use (usually after weathering) on larger scale model projects. Though, I will still be applying pin-washing to pick out the most prominent detail (using Vallejo's Dark Brown Wash) as this is a far darker outlining medium.
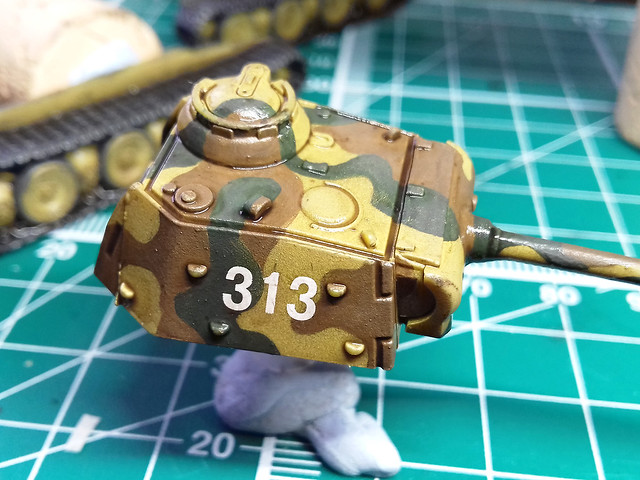
The Agrax Earthshade is a medium brown wash and for most
detail, this will suffice as a replacement for pin-washing. 
While I'm quite pleased with this 'new' (to me) effect, I am aware that it does darken the base colours. I can, and do, put this down to a later of 'dirt', but I will have to be aware that if I want a fresher looking model I may have to start with lighter base colours.

Staining & Streaking?
Actually, I'm cutting out this process (where I would apply oil paint dabs and streak them) and I am using eyeshadow powders to achieve a similar, though softer, effect. This is another change in technique due to the scale of the model.

While my usual weathering effects can still look quite nice when taking closeup photos of the models I think they may be a little bit of over-kill as these small models are meant to be seen at arm's distance on a tabletop. So, I am starting to use broader, less focused weathering effects for my 1/100 gaming models.

Far Too Shiny and Chrome!
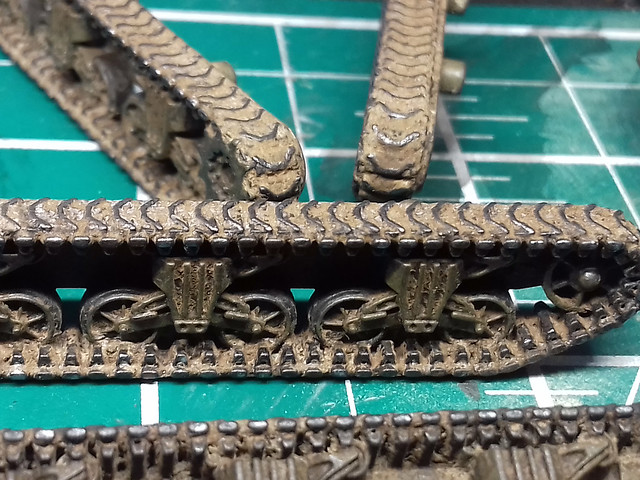
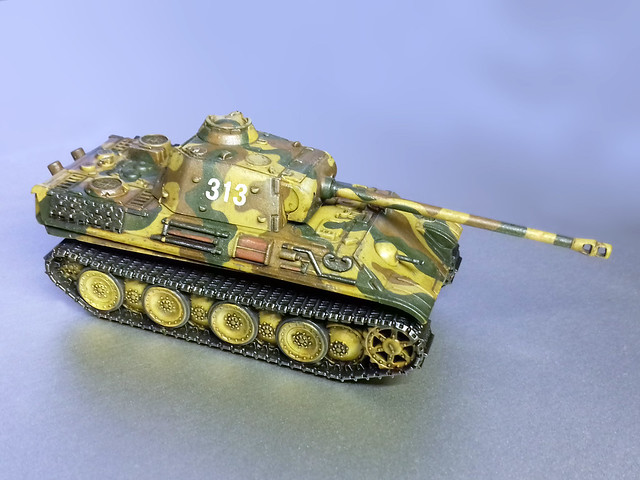
With the upper hull of both versons of the Panther done, I turn my attention to the lower hull and tracks. At the moment the tracks are far too clean and shiny. As with the upper surfaces, I am looking to a more 'cosmetic' medium to apply the effects I want.

Tracks are definitely a part of my tank models that I still have the biggest problem with. I haven't devised a satisfactory 'recipe' for painting and weathering them to a point that I am happy with the result. My previous results have all been a bit hit and miss.

So, let's have another go...
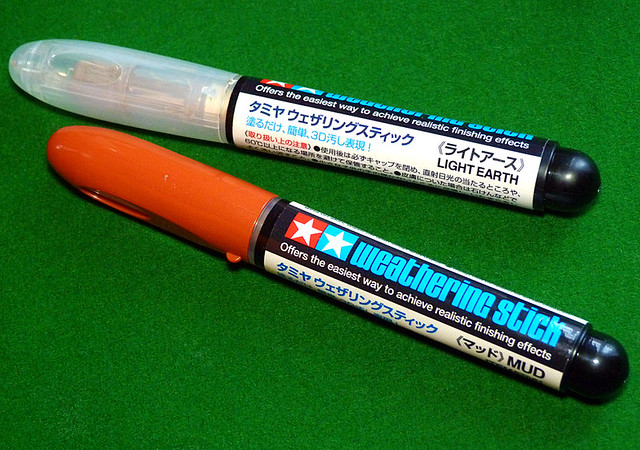

The medium I have picked to weather my tracks are Tamiya's Weathering Sticks (Light Earth and Mud). Nothing new that I haven't used before BUT I recently discovered that these cosmetic type sticks can actually be mixed with water to produce a creamy paste.

I used this technique On my 1/100 Stuart model and although I didn't quite get it right, I like how this cream approach was slightly more controllable than the powder method (with pigments) that I have been using. So, let's have a test on the bottom of the tank's chassis...
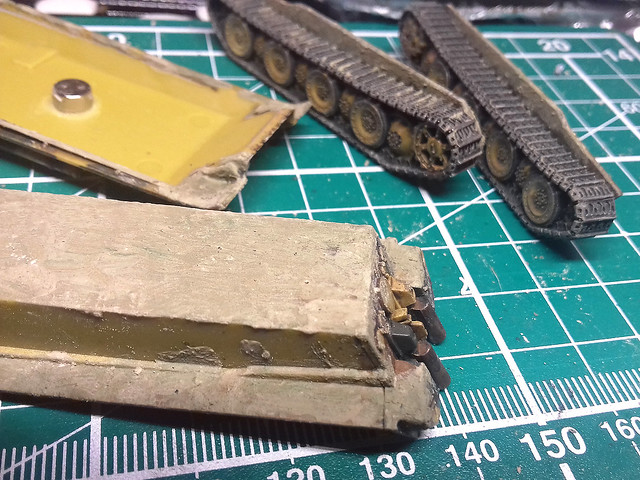

Because I wanted to add so much mud to the chassis I started by adding a thin coat of pigment mixture to give some texture, then applied the weathering stick medium over this. This saved on weathering stick and gave a mottled multinational mud effect.

So, in effect the pigments provide coverage and a base with the weathering stick medium softening the edges of where the mud ends. I haven't mastered this technique yet, and I've overdone the effect a little on this model (too much mud) but I'll go easier the next time. However, I am happier with this method than I am with the all-pigment method I used on my 1/100 Shermans where the mud was far too thick...
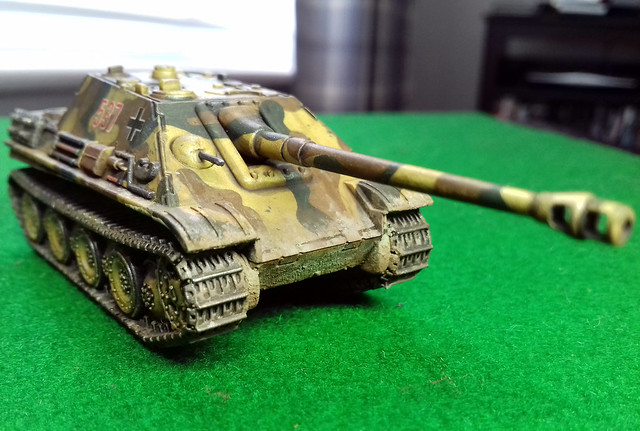
Pigments on the bottom, merging into Tamiya Weathering Stick medium on the
front-upper hull for a softer transition.
You'll notice what I mean by the fact that I have managed to retain the track pattern detail, instead of coering it up which I did with my heavy-handed approach on my Shermans. Here's the result...


Nearly, but not quite, happy with the result...Yet!

Next: Protective varnish and completion photos.

Sunday, 21 May 2017

Battlefront 15mm Panther and Jagdpanther


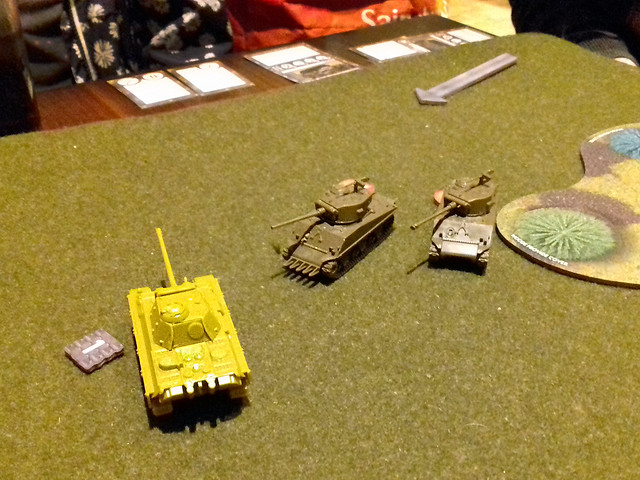
This is the final part of my 'GF9 Tanks Starter Set (Panther Vs Sherman)' series and comprises of the production of the German opposition in the game, the Panzer V Panther. However, as I mentioned in an earlier post about this game set (link to post here), there is an option to mount the Jagdpanther upper hull on the Panther chassis to get two tanks for one (with some sneaky use of mini-magnets)!

The 1/100 Battlefront Panther and Jagdpanther kits are rather nice - if somewhat 'chunky'* and simplified - models. But, they are - in my opinion - on the higher quality end of the wargaming quality kit spectrum. They have packed a good deal of nice surface detail into these little kits and have some very nice track detail.
* I have noted on several occasions, when talking about these sort of 'wargaming quality' kits that they can be a little 'chunky' and sometimes over-scaled (Plastic Soldier Company models are a prime example). Well, I've come to understand that is sort of deliberate to make the models a little more durable as playing pieces. Zvezda scales their 1/100 models more accurately, but - as I found out with their M3A1 Stuart kit - this means details like guns become very fine and therefore possibly prone to breakage. This over-scaling is sometimes referred to as 'Heroic' scaling.

Anyway, back to the job in hand. Having mad up my Panther/JP model for playing purposes (unpainted) it's now time for my GF9 panzers to follow the example of their Sherman opponents and get a lick of paint!

Choosing a Panther Camo Scheme
As I found with my 1/100 'Elefant', the choice of German WW2 is wide and wonderful, and this is particularly true of the later war panzer schemes. Starting from D-Day the variety of camouflage patterns seemed to snowball from the fairly standard - but still variable - 'three colour pattern' to - by 1945 - and almost anything goes 'let's just get the tank on the battlefield' (sometimes not painted at all) attitude!

So, I decided that the best place to start was to pick a specific period and/or theatre. This would help me pin down a sort of historic parameter for camo choices.

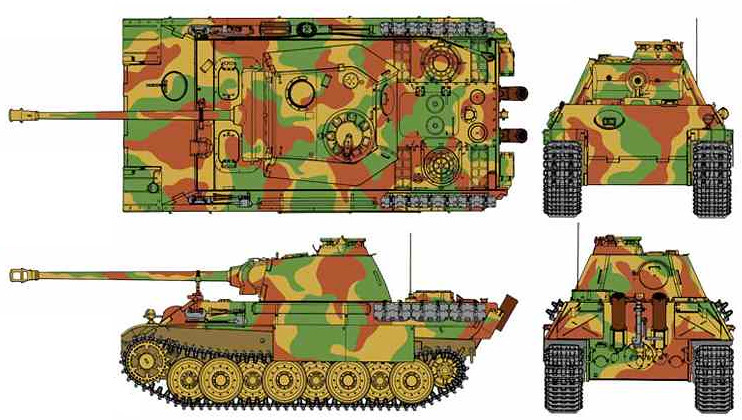
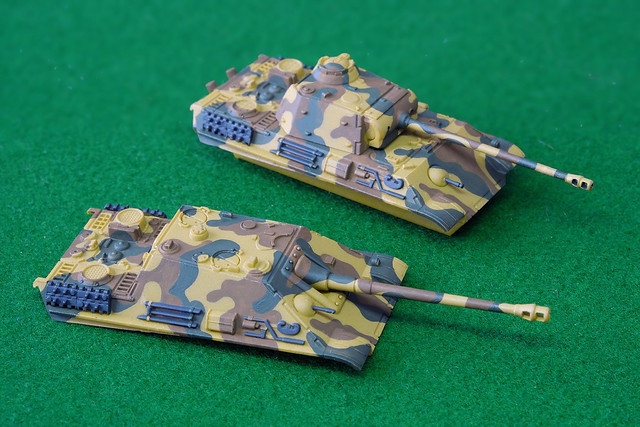
I wanted my Panther/JP to be D-Day specific - so as to be suitable opponents for my D-Day Shermans - so this ruled out a lot of the more weird and wonderful 'late war' Panther schemes. I eventually came across a 1944 3-colour paint pattern that I liked (I sort of prefer large, harder-edged patterns)...


I will be using this same pattern for both the standard Panther upper hull and that of the optional Jagdpanther hull.

Hairy Stick Time
As I am still without an airbrush at the moment, it's another chance to practice my brush skills (another reason to go for a 'hard-edged' camp pattern). I began by priming the Panther hulls with Flames of War's 'Panther Yellow' and then I worked on the brown patches of camo using Vallejo Model Color 'German Cam. Med. Brown' [826]...

My LED desk lamp made these a little over saturated, the colours are actually
a little more muted than this.
I tried to follow - roughly - the same shapes on both hulls so that they would neatly join up with the pattern painted on the lower hull. One thing I like about painting patterns using a brush is that if I vary the dilution of the acrylic with water you get a semi-opaque - almost 'watercolour' - effect where the paint is not uniform and 'flat'. This can add to the impression that the camo was added over the Dunklegelb base colour in the field and also that it was 'faded' in places (that's my excuse).

Next I start to add the green 'blotches' using Vallejo's Model Color 'German Cam. Dark Green' [979]. Now, I know there is some amount of debate as to whether these two colours are true to the original German paint colours (the brown doesn't seem to be red enough and the green not green enough, allegedly) but I want a more muted effect...

Lighting was a bit dark here, but hopefully, you get the idea.
Emblems/Decals
Doing an 'authentic' scheme for Battlefront's 1/100 game tanks models is a bit of a 'DIY' process. Unlike 'display' kits these little models don't come with decals or a 'suggested scheme', so you are left to your own devices as to how you paint and decorate them.

Also, authenticity isn't, perhaps, the absolute priority here as these models are playing pieces, so there's an accepted leeway for 'artistic licence'. Basically, nobody will pull you up if your chosen camo scheme wasn't entirely correct for this or that theatre or period or unit, so long as the spirit of the national faction is adhered to for the game. Players of this game don't tend to be rivet counters or pedants (IMHO).

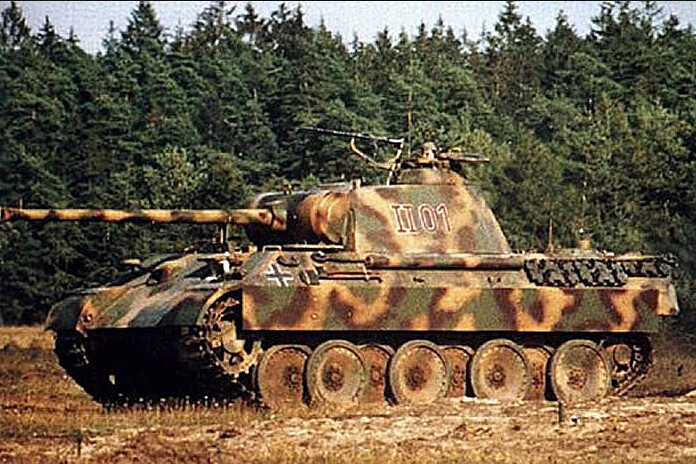
Here's an example of Panther numbering and emblem format that
I quite like. The plain white numbering suits my intention to use
dry transfer lettering as I have similar font/styles.
So, with this in mind, my camo scheme for the Panther/JP was a 'generalisation' and that's how my decoration will be as well. I'll be keeping it simple, with just a couple of German crosses and a made-up vehicle number...This model is NOT based on any actual identifiable historic tank or unit!

I'm using Woodland Scenics dry transfer numbers for the Panther and the decals for my Jagdpanther are from the Skyrex AD43 German Tank Numbers and AD28 German Crosses. I have to say, I'm not so impressed with the quality of the Skyrex decals, I think they are short run printed decals and their transfer film is quite thick so I'm having to use Microscale's Micro Sol to help settle them in nicely.

Applying one number at a time is a bit tricky as you are never completely satisfied that everything is straight and level...


And that's nearly it for the basic paint scheme and decalling. I have to go around them again to do a bit of touching up and add some metalic dry-brush effects to the bare steel part and then the everything will be real for a coat of satin varnish. This helps seal the decals and prepares and protects the paintwork for teh next stage, which is an overall wash.

Sunday, 14 May 2017

15mm Scale Shermans - Part 3

Weathering Effects...
Right, onto the creative part. Having laid down my base colours I turn to applying weathering effects, like staining, dirt and wear.

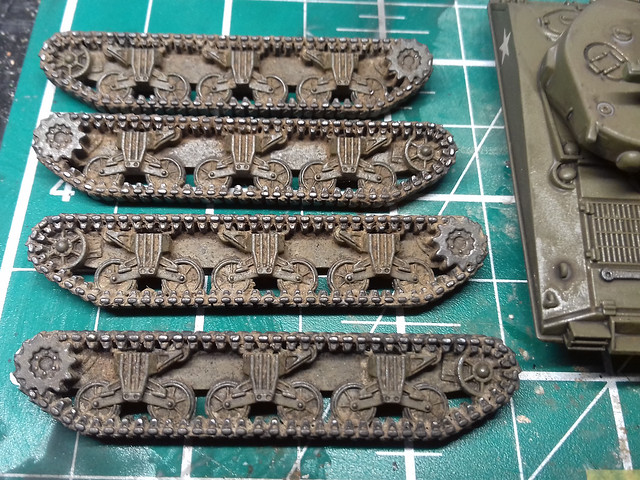
And here I came across another example of how effects that worked well for me in 1/72 scale didn't quite work out for me in 1/100 scale. I began with the tracks and set to work with my tried and tested powder pigment 'mud' mixture, but what would have been a light coat of mud on the larger scale turned out to be a thick clart (a Scottish word for a gooey mess) of mud on 1/100 tracks...


These are far muddier than I wanted but are - I suppose - realistic if the tanks had been driving through ploughed fields. It wasn't the effect I was actually after but will do, I'm happy to leave it and just modify my application for the smaller scale on future models. I suppose nobody will know that I didn't mean them to be this muddy if I don't tell them!


Staining the Sherman Hulls & Turrets
Finding that my usual 1/72 scale painting techniques were, perhaps, a little heavy handed for the smaller scale I decided to try something different for my usual 'staining' stage.

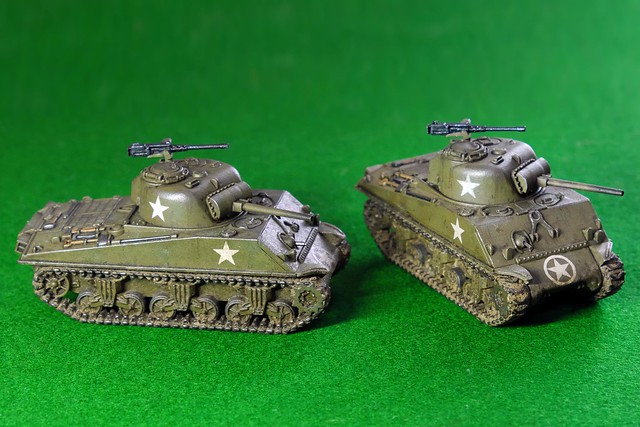
My staining and bleaching method is normally based on using oil paint which I dab on in spots then smear into streaks using thinners. I decided that this might be a little too invasive and harder to rectify if I didn't like the end result, so I looked for a 'softer' approach. I looked through my paint effects box and picked out the 'eyeshadow' set!


I've used these on a smaller scale on my previous models, as a secondary powder effect, but in this case, I will be trying them out as the primary weathering medium. These, in combination with Citadel's washes - which I am using more and more - gave me a rather more controllable (powders can be easy removed) staining technique for smaller models...


I was going for a dirty and oily, war-weary Sherman and I think I achieved this. I was quite please how well the eyeshadow effects went, so I will probably try this out on my 1/72 models now.

Conclusion
I'm really enjoying these little 1/100 tank models. The detail will probably not satisfy the most pedantic modeller, but I find the simplification takes a lot of the pressure off and I can simply relax and enjoy the painting.

An additional benefit of these particular models is that they come with the option to swap out the turrets so I can have a 76mm gunned Sherman to 'play with' as well...


It'll be nice to get these on the gaming table as - as many wargamers point out - units always perform better when they are painted! :)


I'll be building up a few small 'armies' of tanks for the GF9 Tanks game, but my next priority to to get the 'bad guys' - the starter set Panther/Jagdpanther - painted!

Wednesday, 10 May 2017

15mm Scale Shermans - Part 2

I'm experimenting with and modifying slightly my 1/72 scale painting techniques for the smaller 15mm scale models. Because of the smaller scale, and commensurately smaller detail, painting is a little more 'impressionistic' and I am doing things with broader brush strokes than normal.

Here's where I left off. A bit too clean and sparkling for my tastes.
I have seen plenty of very experienced 15mm scale model veterans paint in this scale to a very high degree, to the point where you think they are working on a larger scale. But, as I am fairly new to this diminutive scale I am going for a wider picture and fudging the minutiae a bit.

So, here's the process I've planned...

1. Taking the Shine Off
My newly base painted Shermans look a little too factory fresh for my liking. Sure, they might have looked something like this fresh straight off the landing craft (if not so glossy) but I prefer the dustier 'seen some action' look to my tanks.

So, the first job is to take the shine off by applying a very light overall wash of Citadel's lovely Agrax Earthshade. I dilute the wash slightly with some water as I want a soft surface dirt effect and not the deeply ingrained mucky look that neat Agrax normally gives...


The wash effect is subtle, but it just scuffs off the shine so they don't look like
brand new tanks. The wash also defines some of the detail (like a sort of pre-
pin wash) and you could leave your tanks like this, as if they were just off
the landing craft. But I want to go a step further - say D-Day + 30 days.
This stage is - in effect - a 'pre-weathering' preparation, so I conclude this phase with a light coat of gloss varnish to protect and preserve it.

Next: Stage 2 - Staining & Streaking with Oils.

Monday, 8 May 2017

15mm Scale Shermans


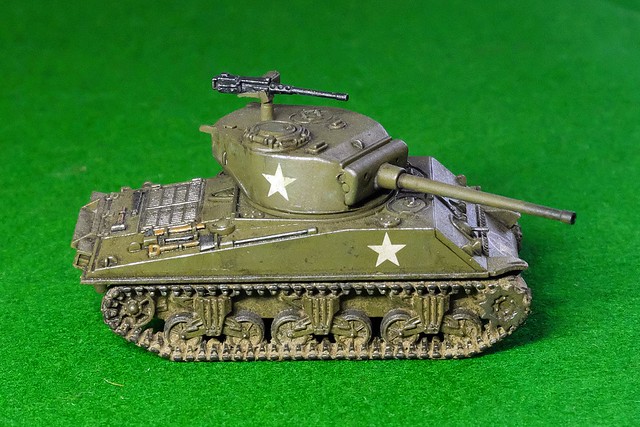
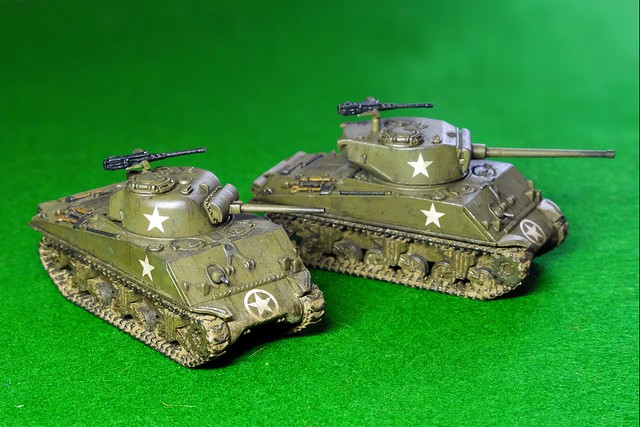
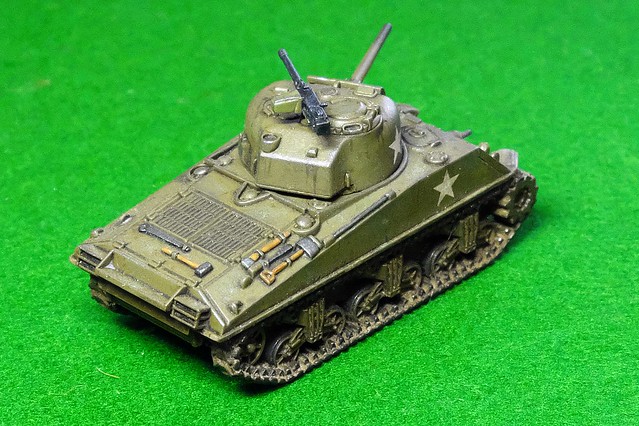
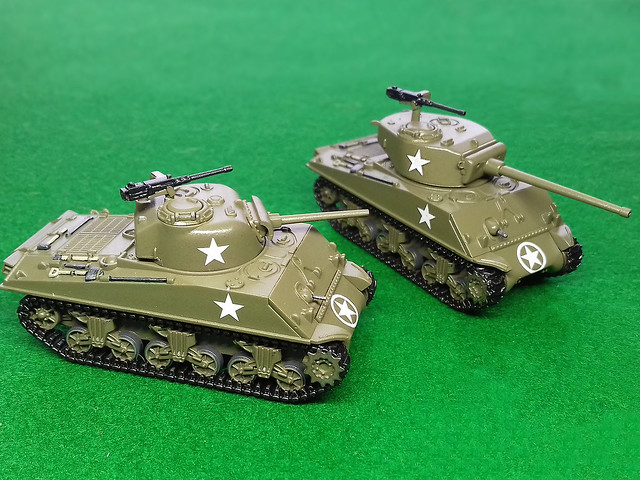
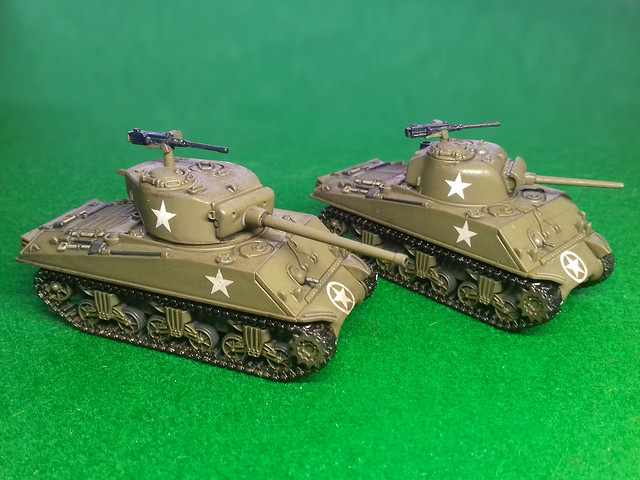
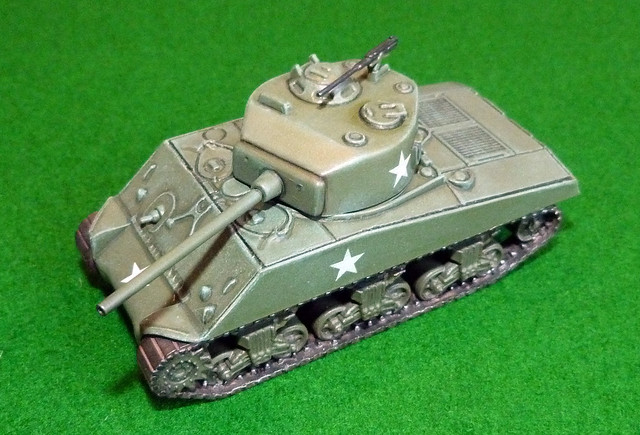
Time to slap some paint on the little M4A3 Sherman models I got in the  GF9 TANKS starter set. I'm not going to town with these, I pretty much want a generic vanilla US Army Sherman without all the bells and whistles (so no applique armour or hodge-podge of stowage).

This should be as simple and easy a modelling project as it gets and takes me right back to when I started modelling again as my first kit was a very unsophisticated 1/72 Armourfast M4A3...


It will be interesting to see how the little 15mm Shermans compare to the above attempt as - for simplicity of detail - both makes of model have a lot in common and are designed to do the same job, just in different scales.

I primed my GF9 M4s (make by Battlefront, I believe) with Humbol Olive Drab acrylic spray - as I no longer have an airbrush, so it's back to basics. This is a lovely warm, slightly yellow tone, US OD, and as usual, the Humbrol paint goes on nice and smooth despite coming out a rattle can...


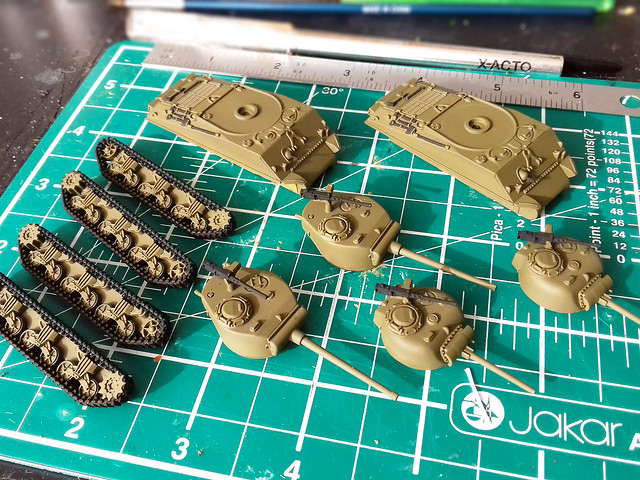
I chose to prime these models in their main sub-assembly groups, rather than a complete model. This is mainly so I can get at all the fiddly nooks and crannies in the track components. I masked off parts of the components that I knew I would later want to glue together with poly glue.

After priming I started to pick out all the black base coat areas and bits that I wanted an underlying coat of black (like the tools). I'm trying out a black base for the tracks, as Sherman's tracks are characterised by large black rubber pads over the steel links. We'll see how that goes (they will be finished off with a coat of mud anyway.)


Once everything is base painted it's time for a quick coat of gloss and then the addition of the decals. The GF9 TANKS starter set does not include any decals, which is a wee bit annoying but I guess they are aiming the game at people who are maybe not so interested in modelling as gaming?

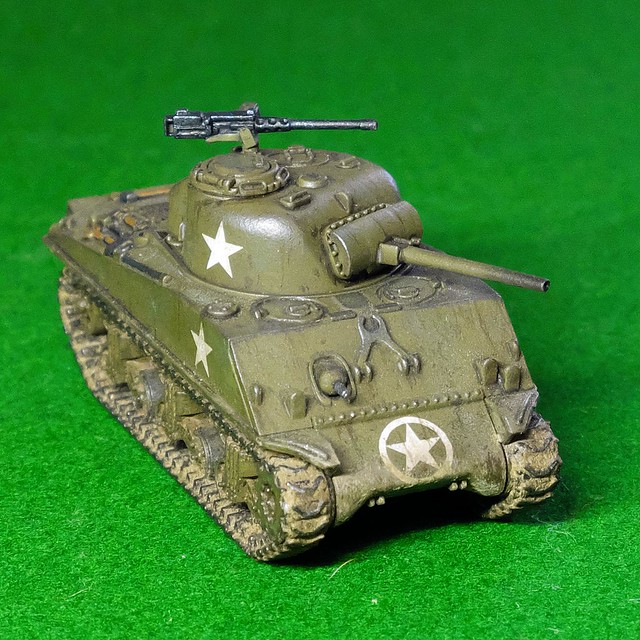
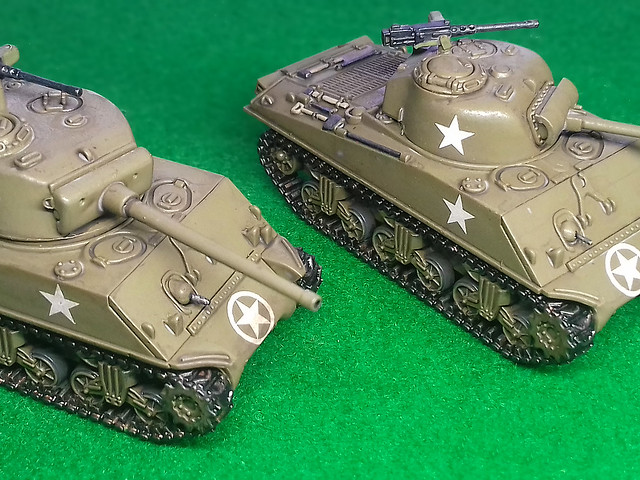
Luckily, I had plenty of spare US Army stars in my scraps box, the only downside is the set I have has no 'US ARMY' & vehicle registration number decals for the side (towards the rear). However, I had it in mind that I wanted these Shermans to be pretty generic/anonymous so I could use them as a basis for any Western Allied force I build (US Army, US Marines, French, Polish, British Commonwealth), so not having the 'US ARMY' lettering is a good thing...


A light squirt of gloss varnish over the decals to seal them and that's a job done. The gloss also is the preparatory coat for the next stage which is streaking and staining with oil paints.

Next: The 'weathering' phase...We are getting there!

Sunday, 16 April 2017

GF9 Tanks Starter Set - Part 2

Magnetising tank models
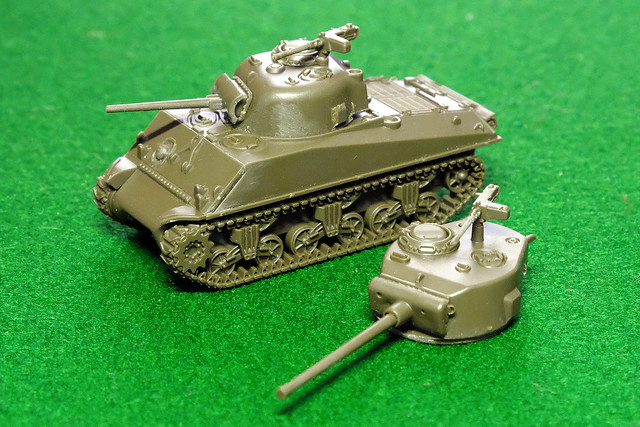
I'm trying out something new, the addition of small magnets to my new 15mm tank models so I can swap out the various turrets (hopefully). On paper, it looks like a straightforward a job, but how many times have I said that on this blog!

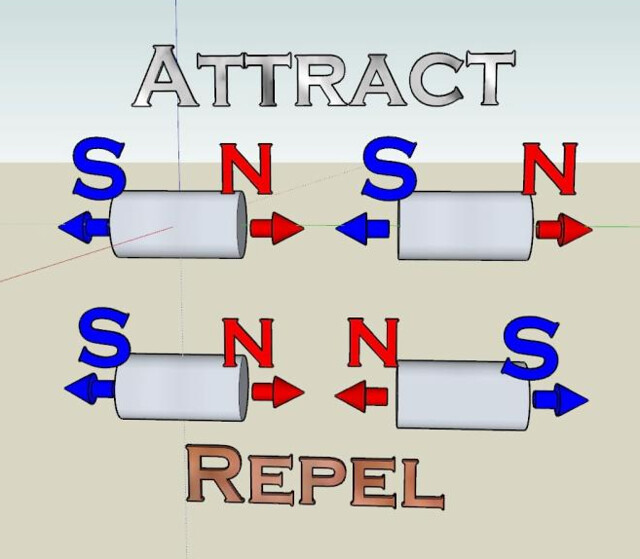
The key to proper magnet placement...Polarity.
The first thing is to identify the polarity of the magnets so the two parts of the tank you are joining stick together as intended (easy enough). Then superglue the magnets - the correct way round, of course - to the inside of the turret and to the inside of the hull...


I'm using Vitalbond CA Medium super glue, this seems to work great with the metal magnets. I only mention this as I had been buying various makes of cheap DIY super glue from a household store and they've all been a bit rubbish. But this brand sticks rock solid.

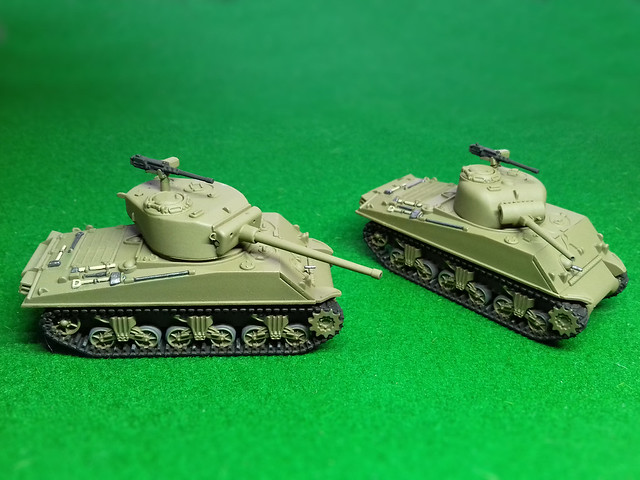
GF9 Tanks - M4A3 Sherman, 75mm gun option.
GF9 Tanks - M4A3 Sherman, 76mm gun option.
And that's that really. It just works - I'm not sure why I thought it would be in any way difficult, except I wasn't sure how strong the mini-magnets might actually be and what effect on the magnetism the plastic between the magnets would have. You can tell I don't play with magnets much!

Notes on the construction of the GF9 Sherman kits 
There were only about 11 components to make either version of the Sherman, so it wasn't worth me taking a load of pictures to illustrate the construction. Suffice to see it was very straight forward and very quick to do. There were no major problems, but it's worth mentioning that there does seem to be a lot of parts left over.

I'm not exactly clear on what the purpose of all the extra bits are BUT I *believe* there are parts on the sprue to make up the 105mm [M4A3(105)] gunned support Sherman. You would simply pop the appropriate gun mantlet and 105mm gun onto the 75mm Sherman turret.

There are also extra hatches, including open versions (but no commander figure), a .30 MG and some other random parts...I have a suspicion you might be able to construct an M4A3 'Jumbo' with some of these parts, but I am not sure.

As to quality, I'd say they are better than Armourfast but not quite as good as Plastic Soldier Company (to give you some reference point).

The Panther Hulls
OK, the Sherman's magnetisation was pretty simple, but what about attaching a complete upper tank hull using magnets? Well, let's see...

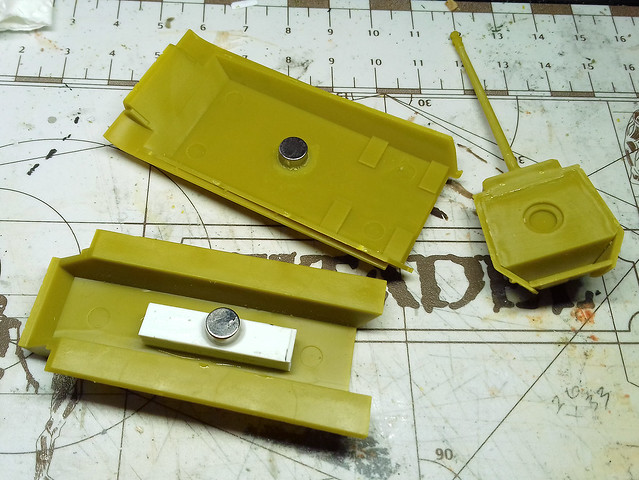
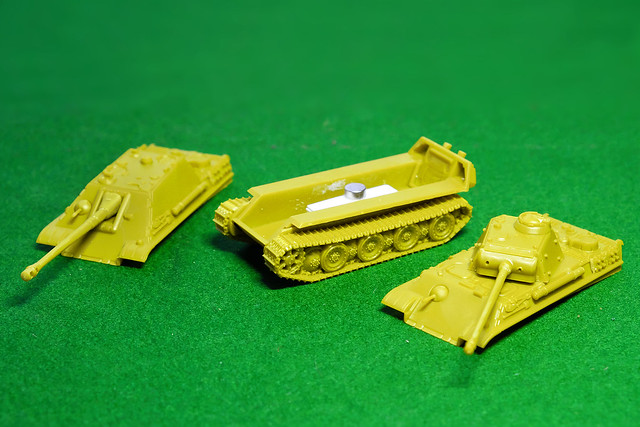
From left to right: The Jagdpanther hull, then the universal lower hull and finally
the standard Panther hull.
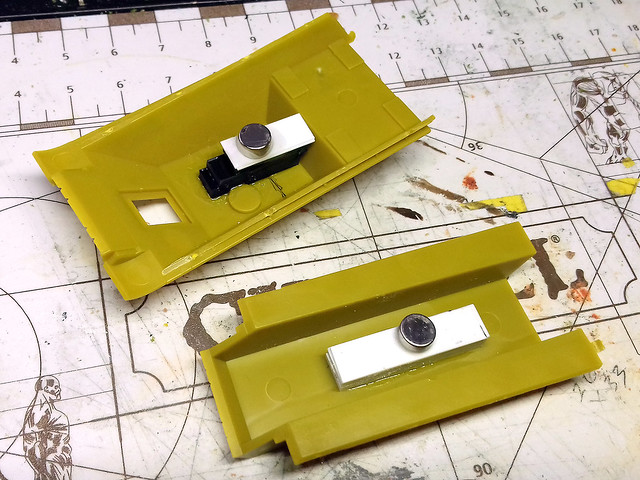
The challenge here is the totally different shape of the normal Panther hull and the raised hull of the Jagdpanther. I'm thinking that the magnets may have to be mounted on raised blocks and with different length of dropped blocks for mounting the magnets on the upper hulls?

I'll start with the standard Panther...


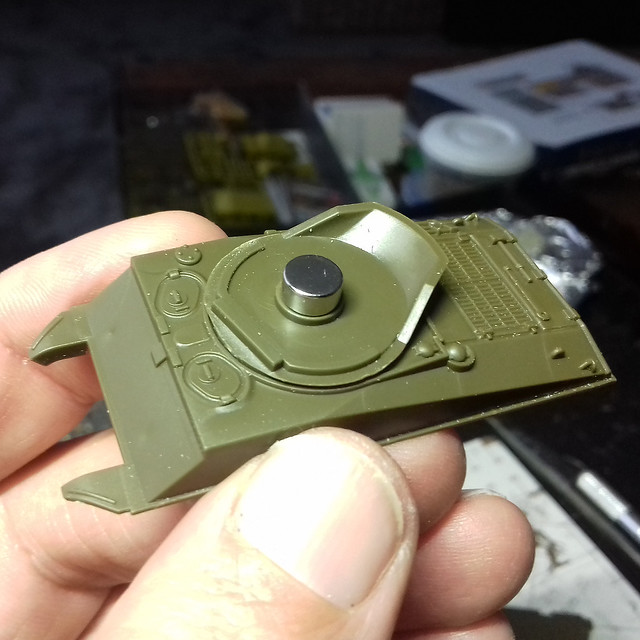
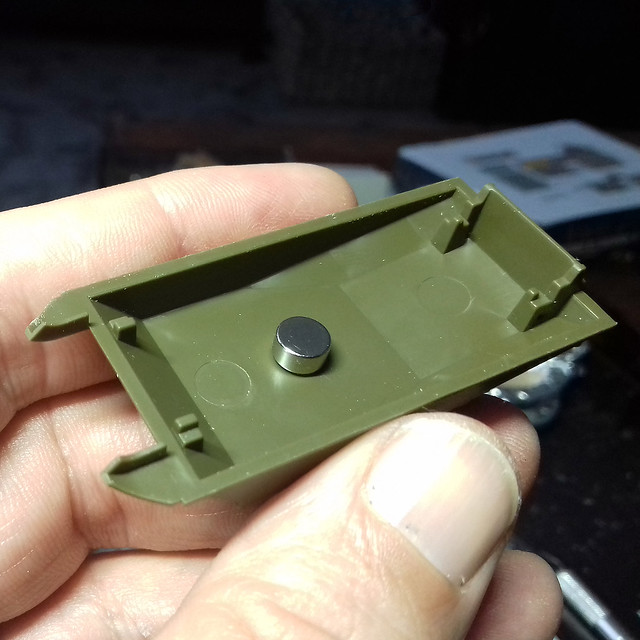
For the Panzer V I have used three magnets; one in the turret (as I did with the Shermans), one attached to the upper hull and another attached to the inside of the lower hull. This may seem overkill but because of the way I am thinking magnetising the optional Jagdpanther hull, I think this is the best arrangement.

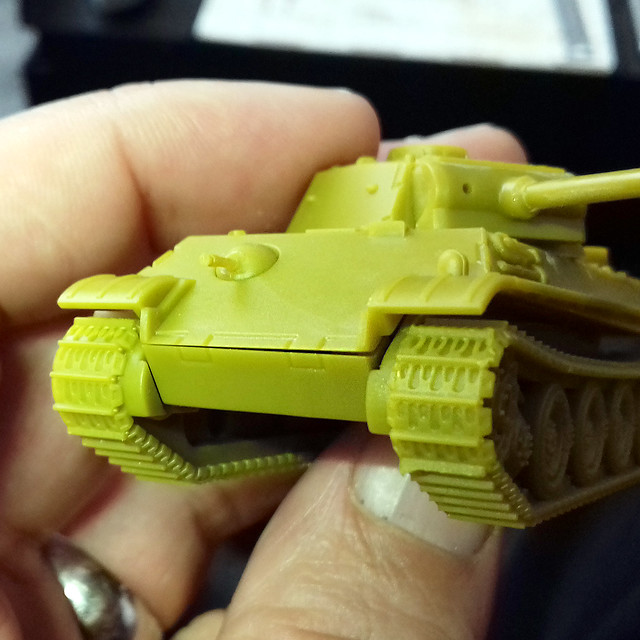
One thing which may be a 'con' to magnetising tank hulls like this is that you may end up with a tiny gap space between the upper and lower hull. Though, this may be down to the precision of the way you attach the magnets (my measuring may have been a little 'loose')!


Bearing in mind the advantages of being able to swap the upper hulls for the purposes of the game, this slight misfit may be annoying (from a models point of view) but may be worth putting up with from a gamers point of view! Swings and roundabouts, but, in any case, this may be too small a flaw to notice at tabletop distance.

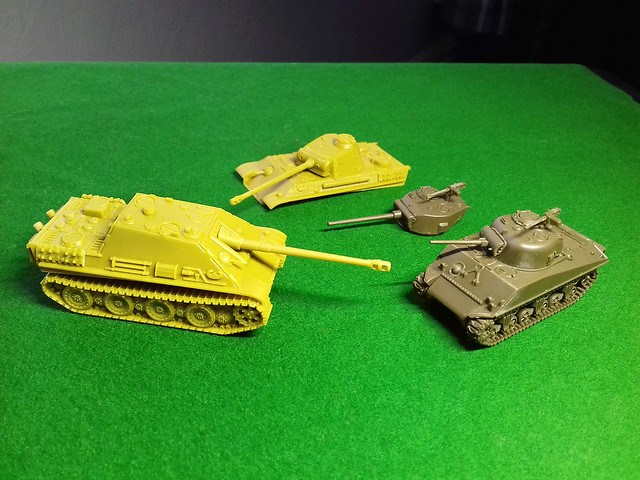
Now, onto the lovely Jagdpanther. Because of the way I arranged the magnet in the Panther's lower hull I should only one magnet to hold the tank destroyer's top on...


It's a bit of a fudged job, but getting the exact measurements right so the magnets connect precisely was a bit tricky, especially as the Jagdpanther has a sloped roof. I'm sure there are probably neater ways to do this. But, anyway, it works AND - this time - there wasn't a noticable gap where the hulls met...


...That poor Sherman 75mm!

In Summary
Well, it wasn't as complex a job as imagined, obviously. I just don't like doing 'new' things, I guess!

But this technique was worthwhile as it does give me a variety of tank options to play with while I learn the game's rules and tactics. In time, I will probably settle on a specific faction and particular tank models I will want to play and so will enlarge my pool of tanks.

From a modelling point of view, I may want to get something a bit more detailed than these basic kits, but I will have to look around to see what's available in 1/100...I'm not sure what manufacturers there are, aside from the wargame model manufacturers I have already mentioned. But Plastic Soldier Company's models look attractive.

Next: I will eventually paint these models, but I am aware I have a cue of other stuff on my workbench first!

Friday, 14 April 2017

15mm scale tanks

I'm scooting around all over the place with my project scales at the moment (mostly thanks to my involvement with the Scarborough Games Society, who have been introducing me to all sorts of different and interesting war games).

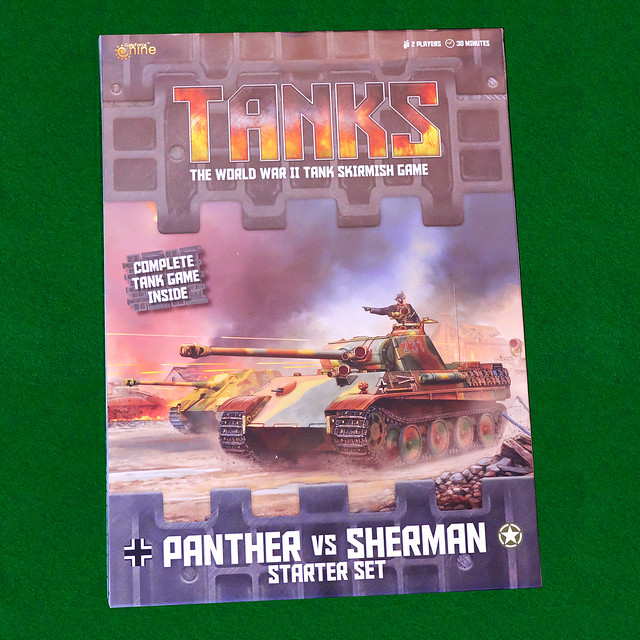
I've just bought GF9's 'Tanks' tabletop skirmish game, and that comes with some 15mm (1/100) plastic tanks which you have to build, so there's a bit of modelling/gaming crossover there.

Now, this isn't my first encounter with 1/100 tanks as I have used examples of Zvezda's range of WW2 armour in this scale as 'test' platforms for painting experiments before. I have to admit that enjoyed these simple little models and remember thinking that I would like to do more (particularly as they do a nice range of early-war British BEF tanks, like the Matilda).

A Zvezda 1/100 T-34/76 that I did as a painting test. It turned out quite nice.
Anyway, I now have an immediate reason to tackle 1/100 scale armour as I need to get the game's little tanks together so I can get some practice in and learn how to play.

Cat and Mouse..Or Meeses!
The game comes with four sprue sets which allow you to build three tanks - two Shermans and one Panther. I should explain that, although this might seem a little unfair (depending on how much or little you know about these tanks) the game allows you to add upgrades to you tanks in the form of crew cards so the Panther - in theory - should be a match for two Shermans. (But I won't go into the game mechanics here, instead, you can pop over to my gaming blog to find out more: Milgeek - GF9 Tanks.)

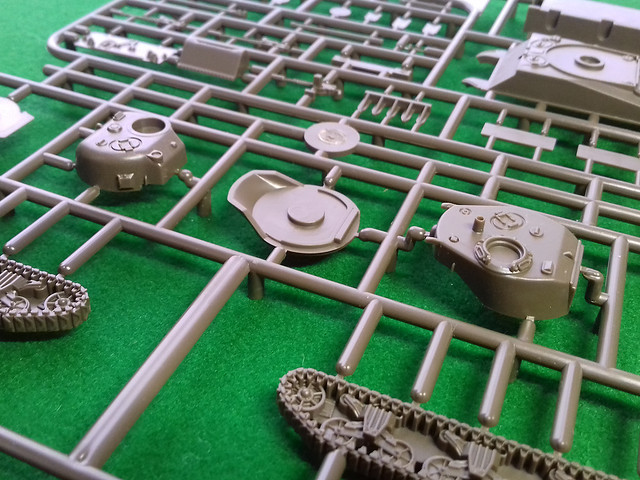
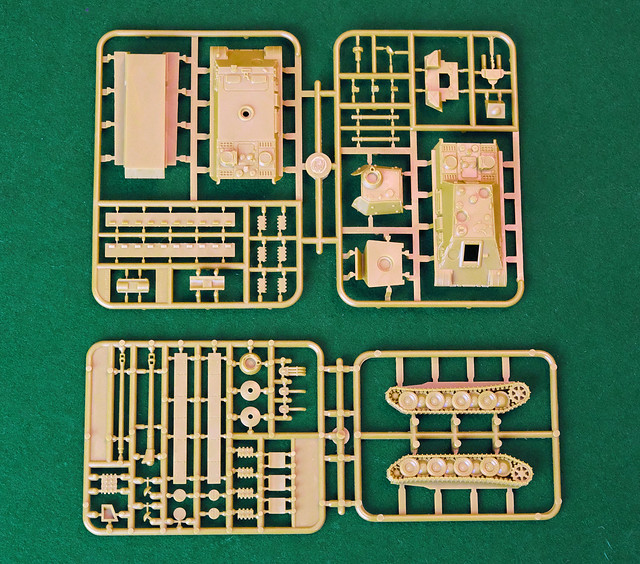
Here's are the sprue sets...

- SHERMANS -

- PANTHER/S -

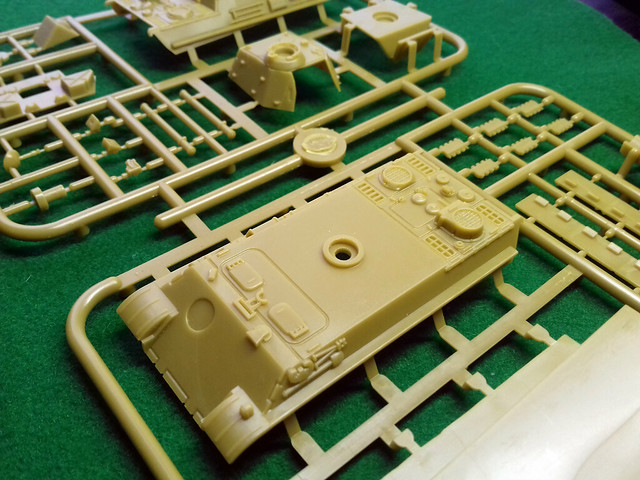
Now, although, for the game, the basic suggested set of tanks that you could make up are an M4A3 Sherman 75mm gun tanks, an M4A3 Sherman 76mm gun tank and a Panzer V Panther, the sprues do include a selection of optional parts for variations.

There are four Sherman turrets included so you can make two 75mm M4s or two 76mm gun versions, or - as suggested - a mix of one of each. And, on the Panther sprue, you have an extra upper hull with which you could build the Jagdpanther tank destroyer variant of the tank! Not bad value.

Although you can only make up one Panther tank model - the sprues only
come with one set of tracks - you have the choice of 'turrets' to apply to the
model - the standard Panther or the Jagdpanther tank destroyer version.

Kit quality and detail
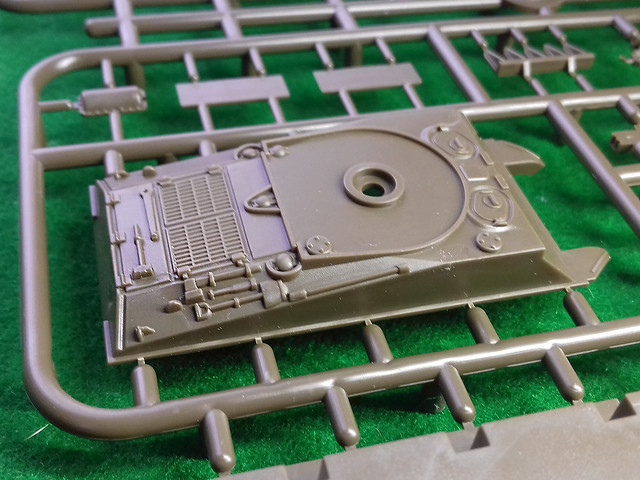
Now, I do not know who make these plastic kits for GF6, but they are quite nice little models. Obviously, they are the usual 'wargame' quality models - as they are intended for play - and so are somewhat simplified and have all the detail like tank furniture moulded directly onto the main hull...


This is on par with the simplified models done by Plastic Soldier Company or Armourfast, but is reasonably sharp and, of course, more than satisfactory for a game piece.

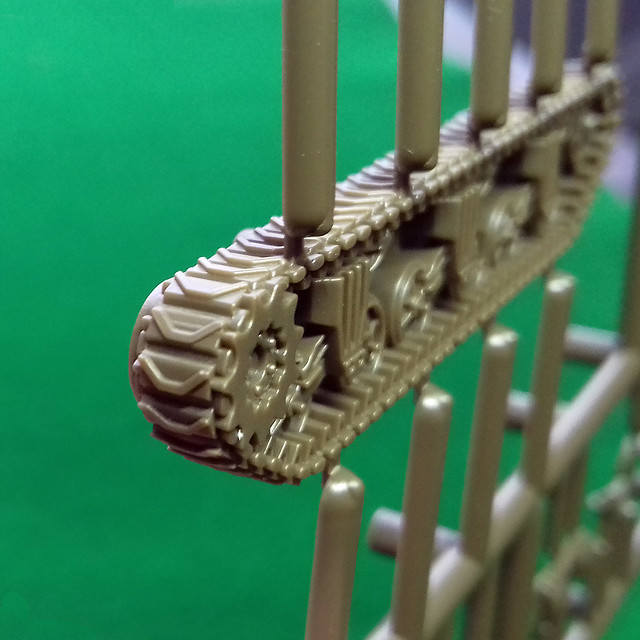
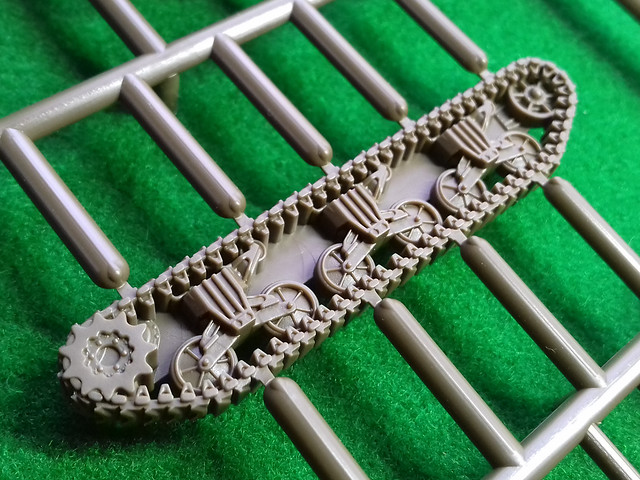
One thing that particularly impressed me - bearing in mind my experience with Armourfast models in the past - was the quality of the models' one-piece tracks...They have track tread detail...

Take note Armourfast...If these guys can do it so can you!
Not the worst detail I've seen.
Perhaps injection moulding techniques have come on, but I think Armourfast can no longer excuse their very poor track tread detail, they really should be looking at these examples as reference points of what should be the acceptable standard for wargame quality tank tracks!

Anyway, moving on, the panther deck isn't quite as well done, in my opinion, but is certainly up to the standards of Plastic Soldier Company in its chunky style of detail...


As I mentioned, you do get more options with the Sherman sprues which allow you to build two models of two different versions, because they have included the additional tracks and turrets.


The 'normal' rounded 75mm Sherman gun turret is accompanied by the more straight sided 76mm gun turret. Both types were used by several Allied armies, including - naturally- the Americans, but also the British (who used the 76mm version in Italy), the Polish, the French and via 'lend lease' the Soviets, so you have plenty of decal and painting options with these. (Incidentally, 1/100 decals are NOT included, so you will have to source these yourself, but here's one source: Minibits.net.)

This brings me to a bit of a quandary, with all these available build options which tanks do I make?

The 'stock' M4 75mm, M4 76mm and Panther Panzer V variants are the suggested combination to get started and learn the game, but what about after that...That Jagdpanther looks very tempting and having a duo of 76mm armed Shermans does give you a more formidable Allied combo.

I began to wonder if I could make the parts interchangeable, or swappable. I have read about the use of small magnets to attach turrets for wargames purposes but I have no experience with adding these to plastic models. But, I figured it was work a try, so I ordered some...


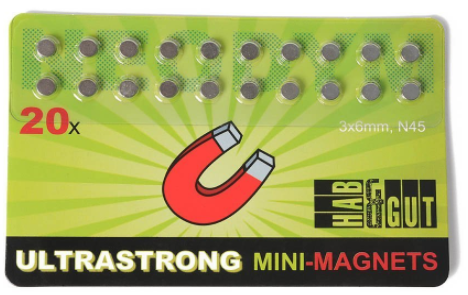
These tiny - but very strong magnets - measure 6mm diameter by 3mm thickness and are available from Amazon at a cost of £4.99 for 20 (I'm sure you can get a better deal if you shop around on eBay though).

What I will experiment with - which assembling my model tanks - is how to incorporate these magnets into the models so I can attach and detach the turrets and, in the case of the Panther, the complete upper hulls. Fingers crossed!

While the models are designed so you can use them unpainted, naturally, a
wargame miniature always performs better if it's been given a lick of paint!

Next: 1/100 tank assembly!