Showing posts with label terrain. Show all posts

Sunday, 28 June 2020

Battlefield Scenery - Part 2 & 3/4!

While making my test piece for 'modular scenery' (see previous post - 'Road to Nowhere') it struck me that if I decide to go down this road (pun intended) it might take me quite some time to make enough scenery to dress my dinning-room table 'battlefield'! πŸ˜‚

[I still have to work out how to do modular rivers and hills!]

And so... To hold me over until I have proper scenery made I decided to replace all my old crappy - and very tatty now - paper printed terrain (basically just printed-out stretches of textured patterns) with something newer and neater - felt scenery!

My selection of felt pieces and some printed out templates to
act as guides for cutting out my felt scenery.
There are plenty of examples online of wargamers who have been using felt terrain to great effect...

Felt battlefield example by Ronald Bingham.
For me, one of the greatest advantages of felt scenery items and felt battle mats is their portability. I don't have a shed, basement, spare room or garage where I can set up a permanent wargaming table, so my go-to alternative is the part-time use of our dining-room table!

This means that any game I plan has to be something that can be put together and taken apart quickly and easily. I also need all the relevant parts of my battle table to be easily stored, preferably in a number of small or medium-sized boxes. This is why I decided to make my own modular scenery in the first place.

BUT meanwhile...

As I said, until I can make all the bits and pieces I want for a better-looking battle table, felt seems to be the way to go. It's very cheap, very flexible (in that you can quickly and easily cut-out custom shapes to make new designs for any situation), fold-able and light.

Here you see the paper templates I cut out laid on top of my felt pieces ready
for me to trace the outlines of my scenery onto the felt...

But What About the Look?
Felt is a very simple solution - given - but it can look quite nice even mixed into pre-built scenery. But I actually like the simplistic and clean look of an all-felt battlefield, my favourite battle mat is - after all - a simple piece of green baize cloth (the type used to cover pool and snooker tables).

Cutting out my felt scenery was very easy using paper templates as guides...


The main trick to getting nice neat felt pieces is to use sharp fabric scissors (and have a steady hand). I did a bit of Googling and apparently there is a very handy rotary felt cutter that would be ideal for this, but as it was £20 I settled for scissors! 😁


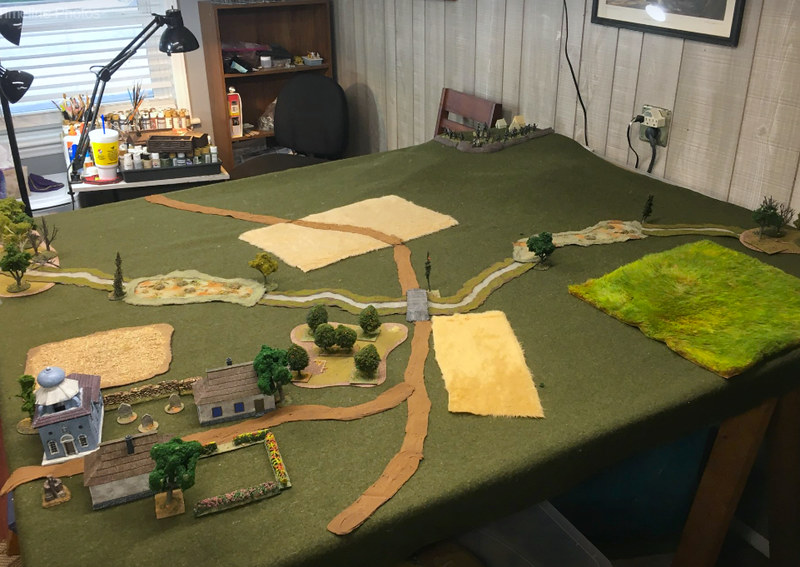
The end product looks surprisingly OK once a few pieces are laid out. I managed to find some nice mottled textured felt that lends itself nicely to fields. These came in a variety of colours so I could make different 'crops' or perhaps use them to indicate marshy land...


I'm still cutting away with my scissors at the moment so I don't have a full table of scenery objects yet, but I thought it would be interesting to post up what I have so far so you can get an idea about what a minimalist looking table setup might look like...


I just have to work out how to do some little hills and bridges and woodland, then I think I'll do a little test game.

Monday, 22 June 2020

Road to Nowhere - Battlefield Scenery Pt. 2

Blimey - I completed something! Par-tae! πŸ˜‚


OK, it's just a little test tile for a modular road set I'm thinking of making, but it's something. But before I get ahead of myself - here's how I completed the tile...

6... (See previous post for the first 5 steps)... I painted the black primed base with some muddy acrylics colours. I tried to make it quite thin in places so you can see faint patches of the black primer showing through...


I varied the mix of brown as I went along - a dark mahogany with a mid-chestnut - so that it also helped produce
 a patchy multi-tonal effect.

7... Next, I did some dry-brushing to pick out the raised textures to give the road some highlights. I went quite light to create some high-contrast so that - in theory - it would show through the flocking easier. It does look a little messy at this point...


Additionally, I drizzled in some dark wash into the deeper crevasses and around some of the 'rocks and stone', just so they 'popped' out a little more.

8... Onto the flocking. I haven't done a lot of this - just some vehicle bases - and so I was a little nervous about this stage as flocking is seen among modellers as being a bit of an art form! Also, I only have a very limited supply of mainly 'medium' summer green - The Terrain Tutor used a mix of three tones to create shade and highlights to his imitation grass...


After application (above photo) I tapped off the excess then waited for the PVA glue I used to stick the flock to the tile dry. Then I went over the grass with a dry paint brush and carefully brushed off any remaining flock AND to uncover any of the road detail that I wanted to show through - like the track texture pattern and clumps of 'rocks' and 'stones'.

9... Now, just to finish off my road I added some extra highlights (as the PVA I sprayed on the road to 'fix' the flocking in place has dulled down my previous highlighting). Also, because I only had one shade of grass flocking - medium summer green - I added some dry-brushed highlights to this as well using a ochre-beige (a light mustard shade) just to give the grass some tonal variation.

And bob's your aunty...


Conclusion...
Well, technically the test tile turned out 'OK'-ish. I'm both pleased that I have actually completed a bit of modelling AND that I think I did a decent job...BUT (there had to be one)...

As to it being the answer to my need for a modular road system for my 1/100 GF9T games, I am less happy. The main fly in the ointment is that the tile is warping - I managed to hide this fact in the photos I took BUT there is a noticeable bow in the middle... This annoys me as I notice it (it's an OCD thing)!

The whole point of reinforcing the foam board base of this tile with wooden lolly-sticks was to prevent warping...And this clearly hasn't worked. Also, this is project has been quite a lot of work so if I'm going to do it I want it to be damn near perfect with NO niggles.

So, what to do...?

Well, I think I have two options:

Option 1: Find a sturdier board on which to base my road WITHOUT it being too thick, heavy or expensive...

Option 2: Do some mental calculations about just how long a complete roadway set is going to take me to make and decide whether it would be more cost-effective just to buy a pre-made set from Fat Franks...

'Fat Frank's' 15mm Wargame Dirt Roads Set is £7.50 - taking into consideration
how much work it was to create my test tile, is paying £7.50 a better deal?

...To be Continued!

Wednesday, 10 June 2020

Get Real? Tabletop Battlefield Design.

I'm at the stage with my GF9 TANKS! Kursk project where I'm thinking about the design of my battlefield. Now war-gaming is such a developed hobby/industry now that - to be honest - you can get most anything you want to make a really fantastic and realistic looking miniature battlefield without having to do any real work (aside from clicking on an online store's  'purchase' button).

However, for many war-gamers, part of the enjoyment of the hobby is the crafting of scenery and accessories and making a little historically accurate piece of Waterloo or Normandy or whatever your choice of battle is that you wish to recreate. So, much crafting ensues!

Just how far down the rabbit hole of 'authenticity' you want to go is up to the individual and, certainly, I have seen some amazing examples of realistic looking and beautifully landscaped battle tables...

An wonderful example of some beautifully constructed and realistic landscape!
A magnificently atmospheric recreation of Normandy for
some war gaming, the town painstakingly crafted.
Looking at some of the breathtakingly intricate terrain models that some war-game clubs have taken months to build I find myself brimmed full of admiration BUT at the same time asking myself  this question - how 'realistic' does a game table need to be?

The Galeforce 9 TANKS! Battlefield Philosophy...
One of the things I liked about GF9T was that you could jump straight in with everything you needed by buying one of their starter sets. In the box you got all the bits and pieces you needed to start playing the game immediately, including some tanks and some flat 'scenery' with which you could make your battlefield...

My very first game of GF9T - straight out the box, with the 'scenery' provided
and the tanks aren't even painted yet! LOL
My first few games of GF9T were played on the dinning-room table with just a length of green felt thrown over it and using the flat printed 'scenery' that came in the box. This was perfectly adequate for learning how to play the game AND easily portable if you wanted to set-up at a friend's house.

However, I eventually found that ALL flat scenery had some disadvantages. As you can see from the above picture of my very first game the set-up leaves something to be desired by way of atmosphere - you'd have to really stretch your imagination to feel immersed in the idea that this was supposed to be France in 1944! πŸ˜‚

Additionally, as I have mentioned in previous posts, GF9T's base mechanic is tank combat using 'line of sight' - in other words, if you can see it you can shoot it. Therefore, the intensive to add some proper 3D scenery becomes desirable, if only to help resolve instances of 'you can't see me from there' disagreements (which are a little more problematic when using flat scenery).
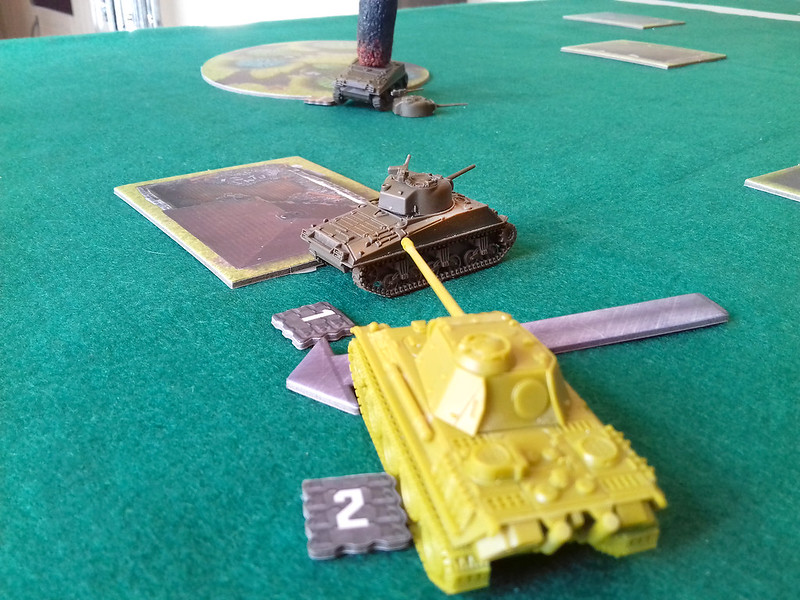
The most important view in GF9T...Line of sight to your enemy. But is that
flat 'cottage' tile blocking your view? Hhhhhmmmm...
So, 3D scenery was the way to go - for me at least - but then did I want to start building little miniature landscapes? The quick answer is 'no' and here's why...

Terrain building is an art in itself and once you start down that slippery slope you have to be very careful to balance your original intent - just to play a quick hour long game - against a project that could then blossom into an obsessive modelling project that could take up weeks of your time!!!

While full-blown wargamers who play games with rules that mean that their games could stretch into days long play (if not longer if they are playing a campaign) might want to have a immerse battlefield because they are spending so much time playing on it, I - on the other hand - just want a quick fix of blast 'em up fun and action.

I very soon began to add simple 3D objects to my games to make the task of
determining line of sight easier and to add some decoration. Adding objects also
adds an extra tactical element to the game as the intelligent use of 'cover'
becomes an essential aspect of the battle.
 I don't care so much if a certain house does't look like the one in the photo reference take in 1943 or whatever, I'm not - generally speaking - out to recreate an historic engagement in order to resolve some armchair general's academic 'what if'.Whether a building is of the exactly correct architecture or whether a particular model tree is exactly native to that particular environment is not so important... Me just want go 'boom boom'!!! 😈

Horse's for Courses...
So the driving force behind my need for scenery is simple, practical and is based on fun rather than on what is strictly factual. I'm make some effort to make my board look pretty - but I'm not going to spend enormous amounts of time planning and making a replica battlefield when I already have three or four (or more) ideas about the next battles I'd like to play banging about in my head.

I'm looking at scenery that can be quickly laid down to create a general sense of landscape but which can just as quickly be dissembled and packed away.

This attitude formed the fundamental requirements for how complex my scenery needed to be. It needed to be quick and easy to construct - I might only use it a couple of times so no weird and niche items that will just end up as draw fodder - and they should be rather generic and so re-usable.

Your requirements may differ - it's a sort of sliding scale.

The basis of any tabletop battlefield is the battlefield itself - by this I mean the base on which you place any other scenic items. And for me, my ubiquitous green felt cloth (other colours are available) is the ideal multi-national, all-encompassing 'moderate climate' theatre of war. That said, I have of late been tempted by off-the-peg battle mats that have texture patterns printed on them...

Might one of these printed battle mats finally replace my trusty felt cloth as
my go to battlefield? This is a Deepcut Studio 'Grass Plains' mat.
These seem to have all the advantages of my old felt cloth (you can roll them up and stick them in a draw) while at the same time adding the illusion of real ground texture. The downside is perhaps the expense, although I have noticed that they are getting cheaper all the time. A 3x3' mat - the basic standard size for a GF9T skirmish - is 26 Euros plus shipping, a bit more than the £7 I paid for my felt cloth cut-off! 😊

KISS - Keep it Simple Stupid!
...And having established my preference for a simpler and more 'stylised' approach to making my battlefield everything else sort of just falls into place...

I have already desired that I really like the quick build paper-craft buildings I have been making, they fit right into my 'cheep and cheerful' ideal. Because of this pared-down 'psudo-realism' all my other scenic items sort of need to follow suit. They have to be...

- Cheap
- Easy and quick to make

- Preferably modular and usable in different ways
- Unfussy and simple (preferably not multipart things I have to assemble)
- Portable and kinda disposable
- East to store

Because of my new love affair with papercraft models I am keen to carry this on for different parts of my terrain, such as rivers, roads, etc. In this way I can have a sort of unified aesthetic, so I'm now on the hunt for different pieces I can collect to make a 'battlefield kit'...


I've already found a modular 'flat' printable river kit by Fat Dragon Games. Although this is a stylised 'fantasy RPG' scenery I'm fine with the aesthetic as GF9T is a sort of cartoon caricature of armoured warfare itself. Also, it fits in well with the tiled scenery items that came with the basic starter kit, all I have to do is print out the river tiles I need and mount them on card and place them on my battle mat. Simples! (Do people still say that?) πŸ˜†

And so the search for papercraft terrain begins!

Sunday, 30 July 2017

Scratch Built 'Jungle Hut' - Part 2

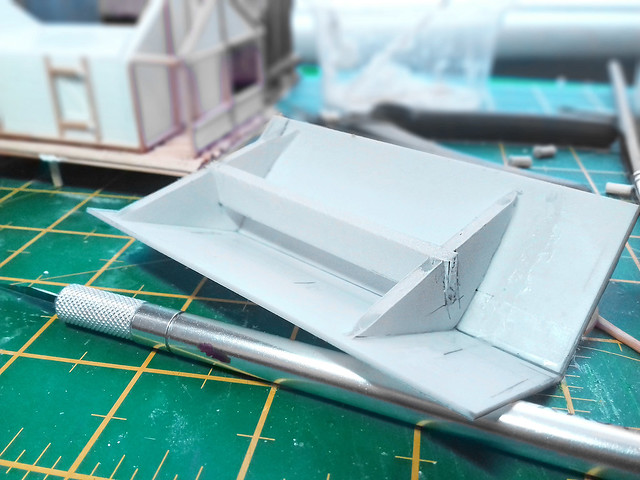
Time to think about the roof and this will be a little tricky as I will have to come up with a simple method for modeling a grass or thatched roof. Now, there is numerous way you can model 'thatch' (or other grass-made roofs), including actually using fibers to lay down a mock-thatch, but I really want something 'war game safe' (that can take a lot of handling) and that is quick to apply.

Quick addition of a couple of rectangles of styrene card to get an idea of some
of the dimensions of my hut's roof.
I considered several different ways of modeling 'thatch' and also had several suggestions when I asked for some advice on some of the hobby groups I subscribe to. Fake teddy bear fur was one idea and gardening raffia was another but neither really seemed right and also they sounded a little too fiddly. Still, I decided to try out the raffia as it was easily available in a local store...

A little too 'Tiki Bar' for my liking!
It turns out that gluing strips of raffia with PVA is a horrible messy process and I don't really think it was worth the bother. It doesn't look 'scale' for 15mm and takes a while to do. The above photo makes it look a little better than it actually does in reality.

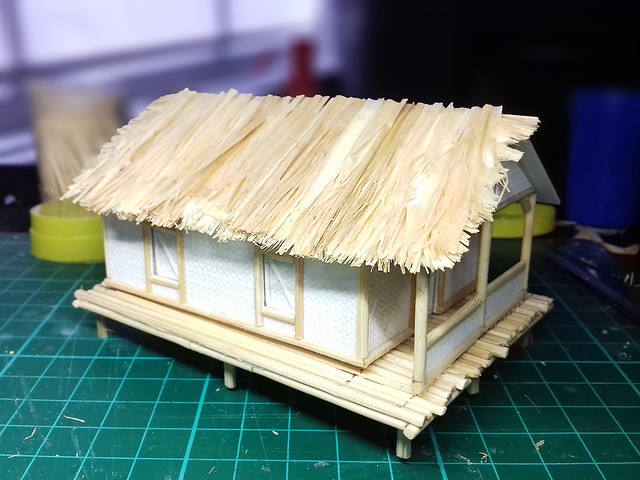
And sooooo...After looking at several interesting YouTube tutorials on the various way that you can model thatch, I am plumping for the following technique...


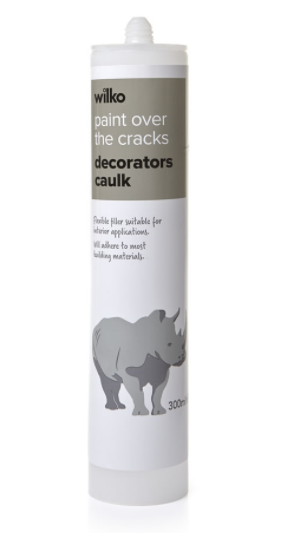
First question (if you are a Brit) may be 'what the heck is caulk'? Now, caulk does exist - much to my surprise - as a recognised British term, I just haven't heard it before (but plumbers and DIY enthusiasts will have). In fact - ramble alert - it is a historically old term which goes back to wooden ship building I believe...Anyway...

These days it is more normally known as an acrylic sealant and can be picked up really cheaply at Wilkos or other hardware stores (the one pictured on the left is just £1, but you will also need to buy one of those metal glue-pushing gun thingies if you don't have one).

Note: I've been told - on the Terrain Tutor's FB Group - NOT to confuse this product with silicone sealant. Acrylic sealant is easy to paint over, while silicone isn't.

So, before I squirt any caulk in anger, I must make my roof's basic framework. A few bits of plasticard should suffice, as I want a reasonably thin base, but I think that thin card might warp or deform with 'wet' caulk smushed all over it.


The good thing about a very simple base like this is that if things go wrong with my caulk-ing then I haven't lost much...

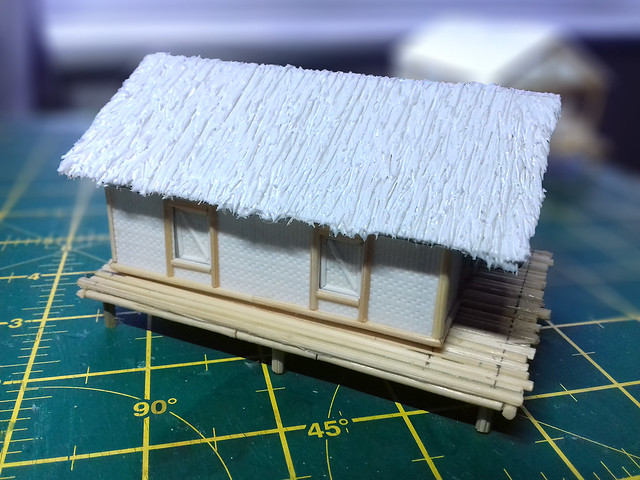
Now, the 'trick' - if you can call it that - to engraving a thatch pattern in caulk is to use a sharp cocktail stick and you will also have to keep cleaning the point as it soon builds up a blob of caulk on the end. So keep drawing you sharp lines and then keep wiping your point clean and you will end up with this (it isn't rocket science and there is no great knack to it)...


One of the good things about caulk - which, by the way, is the consistency of very thick yogurt - is that if you aren't happy with the way things are going you can just wipe it smooth and start again. It takes a while to dry so it remains wet enough to work with for a good amount of time.

Next: Well, hopefully, I can get the three houses for my Island village primed and ready to weather. Though I still have to think about the best way to base them.

Sunday, 16 July 2017

Scratch-Built Jungle 'Hut'

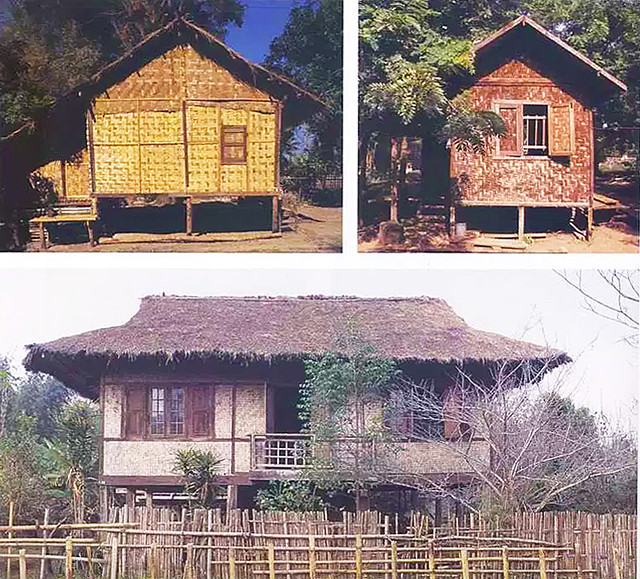
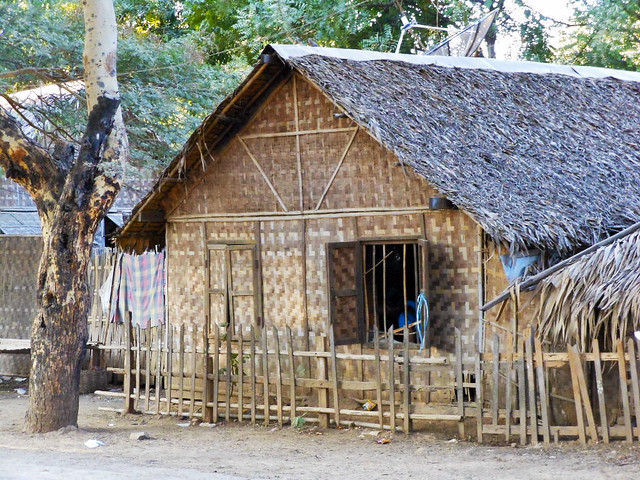
Palm-woven dwelling designs vary across the Far-East and Pacific so I'm
going with a sort of generic impression. I don't want to model a building of
a specific location as I want to re-use these model for any Asia or Oceania
scenario or game.
It was always my attention to scratch-build a couple of island dwellings to compliment my Arcane 15mm laser-cut Jungle house, but the need to make my own buildings may be more necessary than I thought.  As it turns out, I am not quite happy with Arcane's scaling of their house model, I personally feel it is a smidgen bigger than the stated 15mm.

Another of Arcane's 15mm Far-East/Pacific building models. It's a nice model,
for laser-cut MDF, but one compromise is the roof which perhaps should be
palm thatch (which would be very hard to replicate in MDF). I'll probably
rectify this with my models though.
My criteria for judging a 15mm building's scale is quite rudimentary and is based on a 'standard' door dimensions - which I judge to be about 10mm wide and 20mm height at 15mm or 1/100 - and Arcane's doors and windows seem a little too large for my taste (especially next to Zvezda's M3 Stuart tank).

So, I'm making my scratch-built houses a little smaller (I'll still use the Arcane hut, but keep it separate from the rest of the island buildings - I'm thinking of using it as the Japanese HQ objective).

Kappa the Hut (Sorry)!
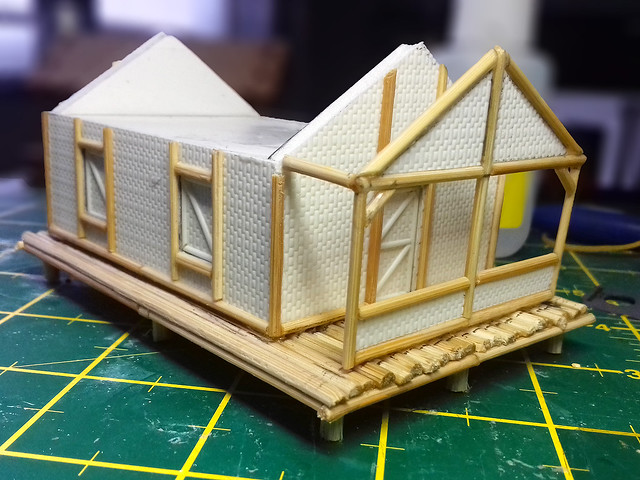
I'll be using 3mm foam board as the main building material for my huts (which we used to call 'Kappa Board' when I was at art school). It's quick and easy to cut out and put together a basic framework for a building with this stuff...

Er, yes...I am using spaghetti as 'bamboo' flooring!

Cladding the framework - Palm Woven Texture

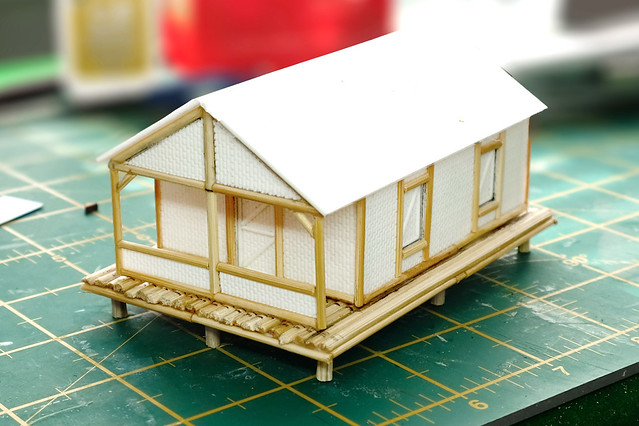
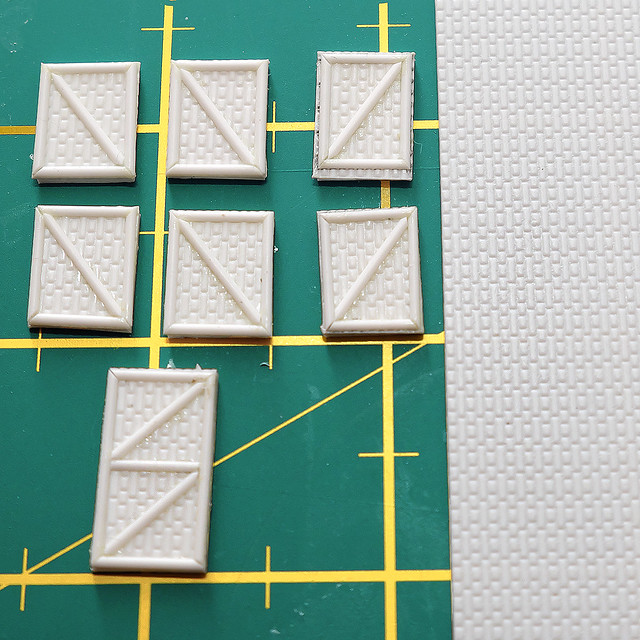
The construction may be simple enough, but to get that native-made look I'm had to do a bit of head scratching. Many of these island (and Far-Eastern) dwellings seem to have woven walls made from dried palm leaf strips (which I believe is very fibrous and strong). Now, how do I get a pattern that looks like it's palm-woven?

Left: Palm-weaving. The newly harvested palm leaves are still green at this point, but eventually, dry out into a khaki beige colour.

Arcane went for a simple engraved checkered design which - in actuality - looked exactly like a 'brick wall' pattern. But it sort of worked (if you half-close your eyes). So, I decided to pinch the idea, tweak it slightly and here's my take on a faux- palm-weave pattern...


After a good search through all my various textured cards and whatnot, I realised that if I turned a regular 'brick wall' pattern texture vertically it kinda looked like a weave pattern (-ish).

A Note on Construction - 'Solid' versus 'Box'
While the GF9T game is seen as an entry level Segway or introduction to 'Flames of War', there is no infantry - or, indeed, any other vehicles aside from tanks - in GF9 TANKS!

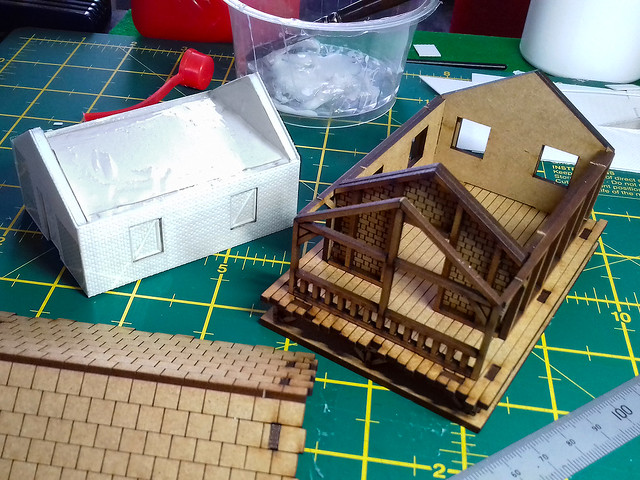
Store bought 15mm buildings intended for FofW are of the opening box type so that you can place infantry inside them, but buildings made for GF9T do not need this facility. Obviously, if you think you might progress onto Flames of War you may want to make your scratch-built houses with removable roofs, but you do not have to. GF9T buildings can be solid (i.e. not openable).

Above: My 'box hut' on the left, compared to the lovely Arcane Far-East house
on the right. The Arcane's removable roof can be seen at the bottom and the
floor planking of the laser-cut model's interior is very nice.
This can make you building designs a lot simpler, particularly when making multi-storey houses.

Round or Flat Planks?
One small quandary is whether to make the outer frame and flooring round or flat/square planks. Arcane, naturally, went with flat as this suits laser-cut MDF models, but really native-built palm huts would have been constructed from the natural trunks of trees or palms, so would be round.

However, finding my cunning spaghetti plan for the wooden planks was a stupid idea I have now returned to bamboo skewers and cocktail sticks...


As usual, I'm making things up as I go along, but - in theory - this should be a simple enough model for me to get away with it. Once I have completed this first test design the further two huts I require for my game should be easier and faster to put together.

I'm using super glue to stick the wooden frame together and as usual, I'm sticking things to me more than anything else! I must really look into what kind of glue is the best for sticking wooden things together quickly and securely.

Anyway, super glue is doing the job and I was rather pleased with the job I made of the hut's porch...


Though, I am a little unsure just how high I should make the stilts that these houses stand on. I based my initial attempts on the stilts that the Arcane model has, but I'm now thinking these look a little low. I may double the height.

Well, that's it for now. I'll have to put a bit of a spurt on this week as I'm on a tight schedule with this project and I wan to start the jungle scatter foliage this week.

Saturday, 8 July 2017

Arcane 15mm Jungle 'Hut'


With progress being made on the tank models for my planned Pacific Island scenario for my 15mm TANKS! game, it's time to start putting together some of the terrain. (I'm working on some sketches of what the 3" x 3" game mat will look like, with the Japanese defending.)

I am thinking along the lines of including three jungle huts and two Japanese anti-tank bunkers and a collection of scatter foliage to break up the line of sight. I didn't know where to start with the island dwellings, so I relented and spent some money on a pre-build which I intend to use as a template for a couple of scratch built houses/huts.

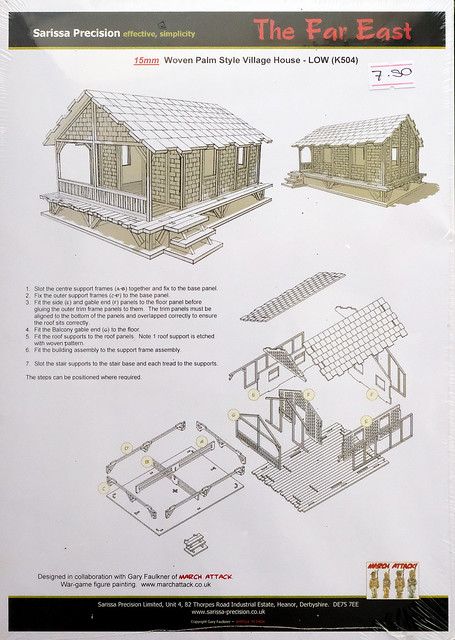
The pre-built model I bought is an Arcane Scenery and Models laser cut MDF Far East or Jungle Small House (£7.50)...


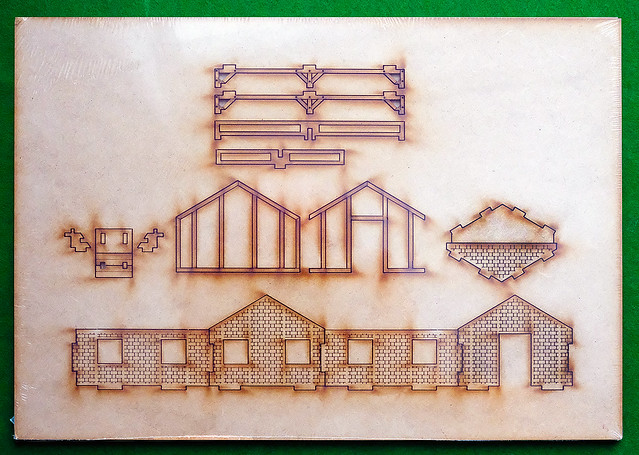
The model comes on two A4 sized 2mm MDF sheets and is quite easy to
knockout.
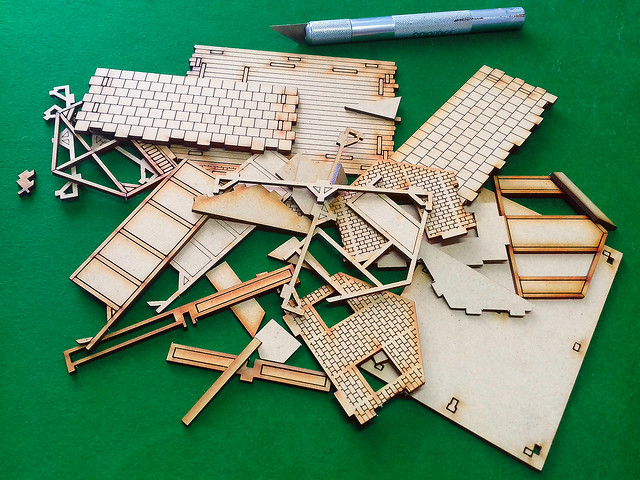
Once you knockout all the parts you end up with a big MDF jigsaw puzzle! But the instructions are good and it's pretty obvious where everything goes...


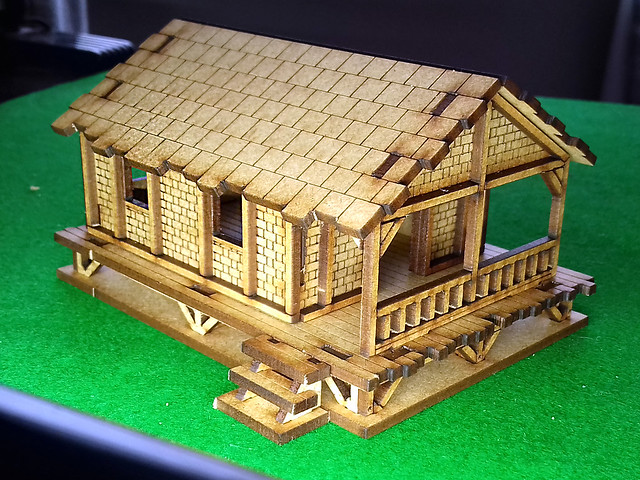
And you quickly pop the model together. The fit and design is very good and PVA glue is only really needed for the external framework (but you can glue the whole thing together if you prefer).


Lasercut MDF models have a tendency to be a little blocky, but this one isn't too bad (the roof is perhaps my only niggle) and - in this case - the bare MDF colour looks exactly right. You could get away without painting this jungle house.

It will be interesting to see if I can replicate this design. 

Japanese Bunkers
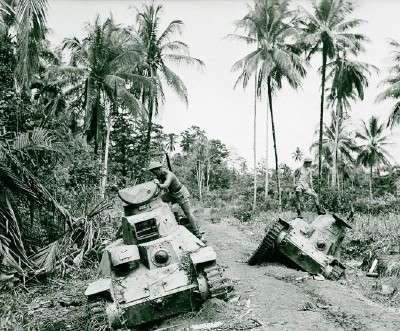
Galeforce 9 games have some stats for the use of bunkers in one of their Normandy operation expansions (which are a free download from their website), but these stats are for a concrete bunker armed with the formidable German 75mm Pak40. The stats would have to be tweaked for a Japanese earth and log bunker and I will have to figure out what gun would likely be emplaced in them (perhaps the excellent Type 1 47 mm Anti-Tank Gun).

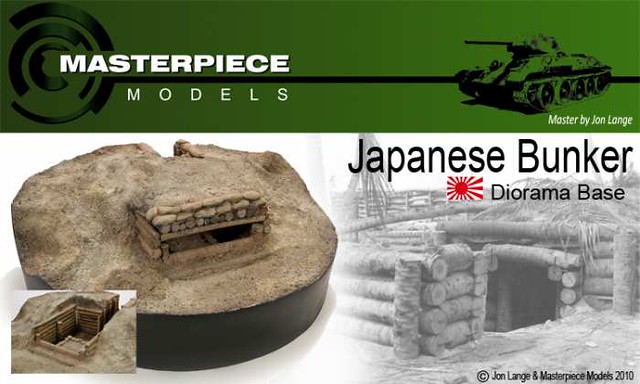
As to the design of the bunkers, I've been looking around for a design I can replicate and fount this one...

This is the Masterpiece 1/35 model, but it will make a good template for a
scratch built 1/100 version.

Way Down Deep in the Middle of the Jungle...
Finally, there is the jungle foliage itself and luckily The TerrainTutor has some excellent 28mm ideas for making wargame jungle 'scatter' that I should be able to scale down for 15mm...


Phew! A lot of work, but let's crack on...

Next: Scratch built Island Dwellings.

Thursday, 4 May 2017

15mm Scale 'Countryside' Battle Mat - Part 1

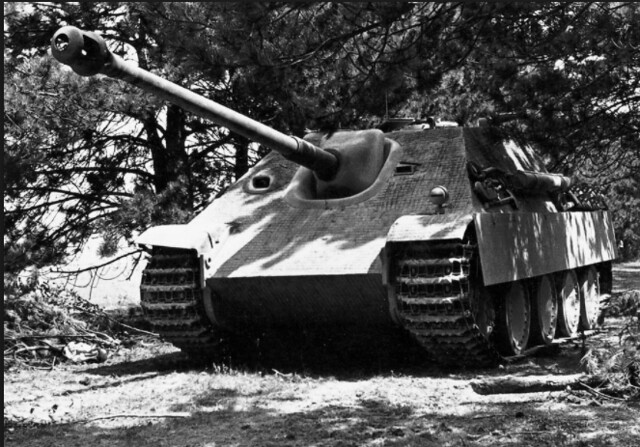
For my next game of GF9's 'TANKS' I would like to have a rural setting for my little tanks to battle over. In particular, I want to try out my Jagdpanther in a defensive ambush scenario.


For this, I will have to put together some bits and pieces of homemade scenery quickly (and cheaply), so I've been looking about my workbench for 'things' to make countryside features with. It's all going to be very 'Blue Peter' cardboard and glue soft of stuff and my first priority was trees.

Scale model trees are readily available - my local model railways store has an excellent assortment - but the trouble is that ready-made model railway scenery can be a little bit expensive and my budget for this project is exactly *zero*.

Crappy Trees
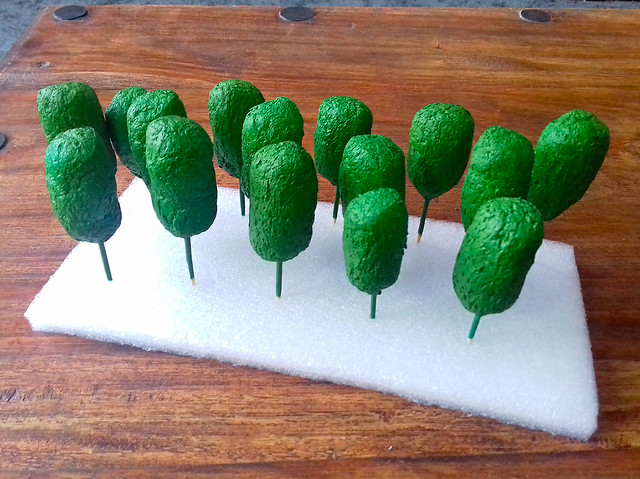
The first thing that came to hand for making model trees was some packaging I got in a parcel (called 'void chips' which I believe are biodegradable expanded corn starch chips). I had already played around with some of these to make some very quick (and incredibly bad) 'smoke markers' for my Tanks game, but looking at them I thought the shape might make good little trees.

So, I skewered the little packing chips with wooden cocktail sticks and then gave them a quick spray of Grass Green...


A bit Cambellwick Green (showing my age there) but they are passable...Well, to get me started anyway. I'm not sure how many I will need, but I can easily make more.

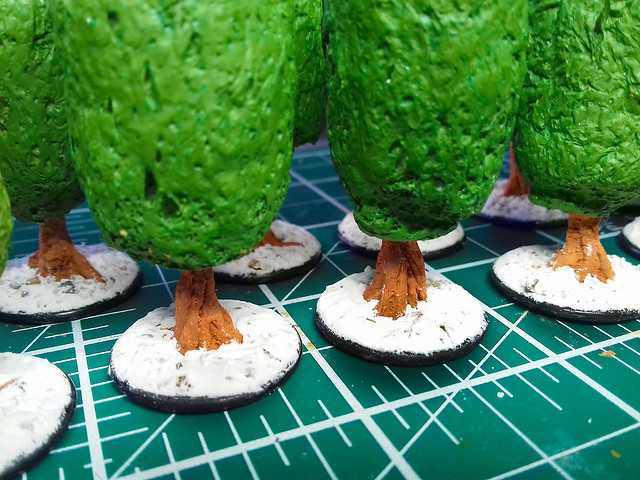
I was a bit stuck as to what to do about the bases, at first, but then I remembered I had a pack of plastic counters that I had tried to base some figures on (before I decided that steel washers were the way to go). I drilled a hole in the counters and glued the cocktail sticks into the holes...


They needed a bit of work, though. I decided some Milliput putty might make the trucks look a bit more convincing and a little more sturdy too...


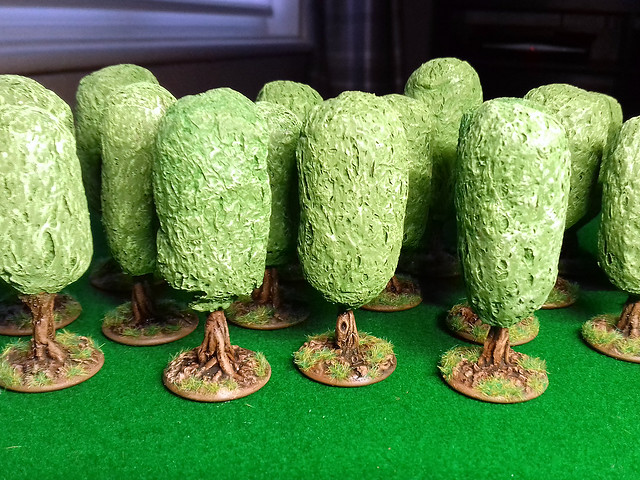
After a couple of coats of paint and a fair amount of dry brushing, the end result looks 'OK' for a quick bodged but of scenery...


I am particularly pleased with the trunks, the Milliput putty made some very natural looking twisted trunks. I will definitely use this technique again on my next attempt at scale trees.

Next: Now I have to work out how to make some little hills for my French countryside...And, once again, it'll have to be a solution that cost nearly nothing!

Amusing postscript: People are funny...I know these 'trees' are 'crap', I've gone to great pains to emphasise this point right from the start and to underscore that these are an 'emergency' bodge. Despite this, I have had several comments about how crap they are!

Now, I'm used to negative feedback - I don't call this blog 'Kitnoob' for nothing - but it makes me smile when people take what is obviously a tongue-in-cheek solution to quick scenery seriously. And what is even more amusing is that - when I checked, and as far as I could tell - the people who criticised haven't even tried to *make* their own model trees. :)