Showing posts with label Zvezda. Show all posts

Wednesday, 7 February 2018

Zvezda 1/100 SU-152 'Animal Killer' - Part 2

Well, this project isn't going to take long!

...So, moving along briskly, it's on with the painting. And, because I've a pretty well defined painting plan for these Soviet tanks 'briskly' is the operatively word...

[Note: I took the pictures as I went along with my mobile phone - for convenience sake - so, unfortunately, the colour reproduction varied wildly, depending on the lighting. My apologies.]

1. Priming - Humbrol Light Olive Green
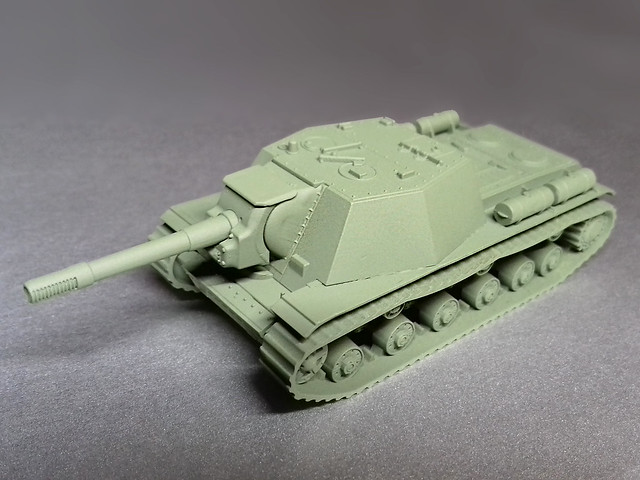

2. Modulation - Vallejo 'Russian Green' Wash

3. Painting Tracks - Basics
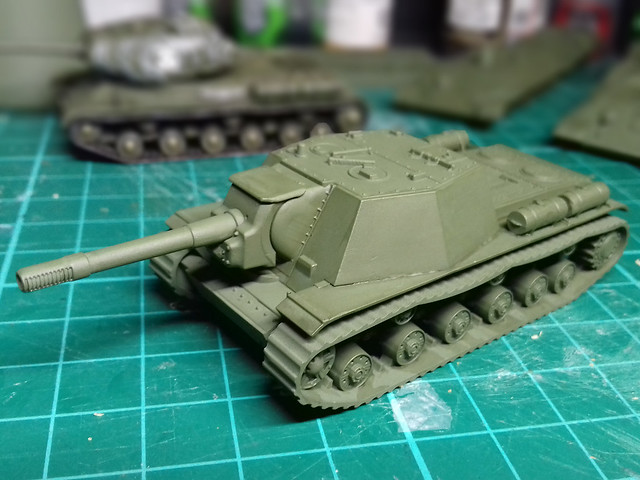
First stage in my track painting (for these 1/100s) is to base coat the tracks with a mix of 70/30 Vallejo Model Color 'German C. Black Brown' [822] and Game Color 'Plata Silver' [052]. This just gives the tracks a vaguely rusty-metallic lustre...
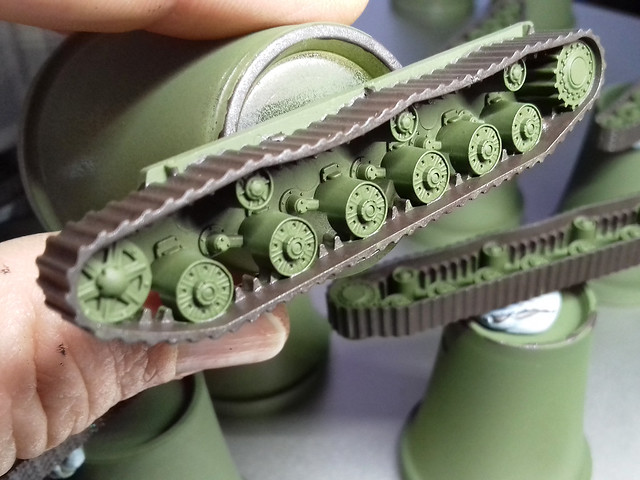
This shot shows the very basic nature of the track detail (or rather, the lack
of track detail)!
Next I brush on a dark brown wash of Citadel Agrax Earthshade (slightly diluted). But, be careful, as this wash doesn't seem to like too much water added and will sometimes dry with a white residue. I've been told that to avoid this you should dampen the surface you are applying the wash to first.

Anyway, the wash gives nice definition to detail and gives the base colour a slightly dirty look...
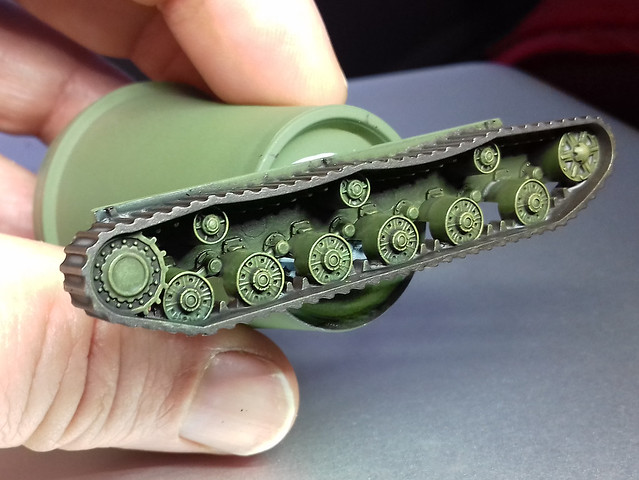
Compare this to the picture above. Notice how the wash has picked out the
details of the road wheels in particular.
On top of this I dry-brush a highlighting colour of Vallejo's Model Color Yellow Ochre [913] (mixed with a little Vallejo Model Air Russian Green for effect). This is just to make the most prominent detail 'pop' out a bit.

And finally (prior to weathering anyway), I do some pin-washing using Citadel's Nuln Oil shade [wash]. This is to deepen some of the most shaded detail in the road wheels...
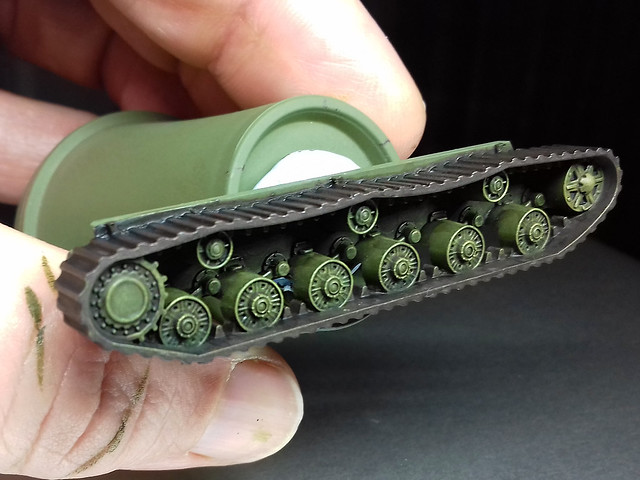
Yes, subtle I know, but believe me, some of the deeper detail is now better
defined and shaded. I may re-highlight a it, but otherwise onwards we go!
4. Highlighting (Dry Brushing) the Hull
These stages repeat the wash, highlighting and pin-wash processes described above. This stage is very subtle so I've skipped photographic it. BUT, it is worth doing as once the next stage of shading wash has been applied it gives some very subdued highlighting to raised edges and panel lines.

(As these are war-game models I've started experimenting with some high-contrast highlighting by using a little white. It's not very realistic per say  but it is a nice effect. I highlight with my yellow/green mix, then dry-brush a little whiter mix on top - just on the very most prominent features.)

5. Shadow Shading - Citadel Agrax Earthshade

6. Pin Wash - Citadel Nuln Oil
With the pin-washing done, this brings the hull and the tracks to the same stage of basic painting.


7. Decals
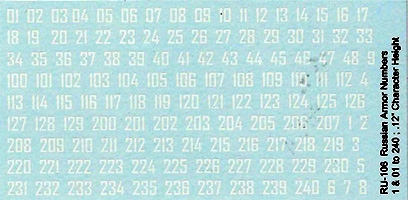
I'm not basing this tank on any specific historical vehicle, so the decals are just to add character to the model. I begin by a flicking through my collection of spare decals and found a set of - appropriately - large Cyrillic numbers ('14') that I thought would compliment such a big tank.

The model was prepped with a  light patch of Humbrol's 'Gloss Cote' on the hull where the decal would be placed. As usual, Microscope's Micro Set was used to help seat and set the decal in place...


Sometimes less is more with Red Army armour!

(Another light coat of Humbrol varnish would be applied on top of the decal to seal the transfer permanently.)

8. Chipping, Grime & Weathering
As this is a war-game model there will be plenty of character about it, and this includes a slightly exaggerated amount of weathering. This is definitely 'just for fun' and not strictly historical.

I'll start with chipping as, it seems to me that, grime and dust would naturally occur on top of chips and scratches (maybe). I use Vallejo's Panzer Aces Dark Rubber [306] and dot and dab it in minute patches and scratches on areas I think would see wear and tear...
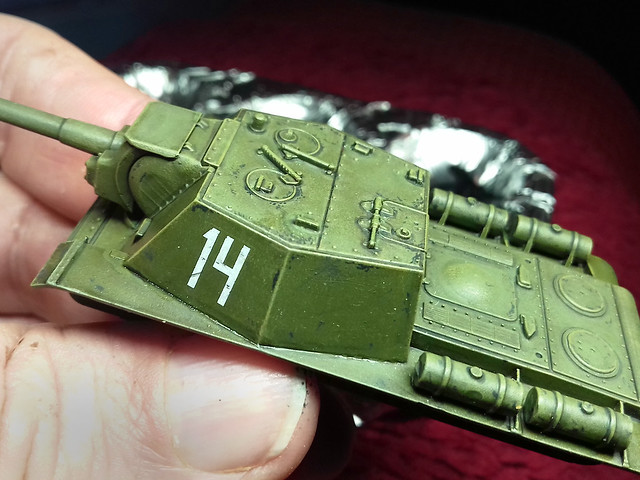
It's debatable whether - at this scale - small detail effects like chipping are
needed. I shall decide when I see the finished model.
Aside from the grey ('flakey paint') chips I'll additionally add the occasional speck of silver to simulate chips that have gone down to bare steel (like chips on hinges and wheel rims, etc). I could add some touches of graphite pencil to get that metallic look to the surface (I shall try this out on the bottom of the hull first to see if I like it.)

And finally, I'll add a few grime, stain and oil streaks to the hull and slightly discolour the decals to get rid of that 'new' looking brightness.

9. Finishing Tracks - Weathering
As above, there will be a touch of chipping and silver flecks to imply scratches (I also did a little silver dry-brushing to give a metallic sheen to the steel tracks). But the main job will be to add dust and dirt (or mud if I want a very weathered look). This is the bit I always dread as it's so easy to get carried away. So, before the mud...


(Edit: I thought the tracks looked a bit flat - in tone - so I added a wash of Vallejo's Game Color Wash in Sepia Shade [200]. This added a nice tinge of rust to the bare steel of the track links.

And, after the mud...
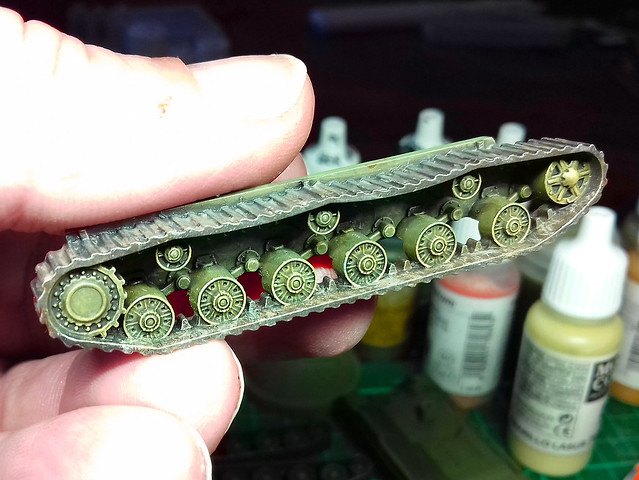
I'm not happy with my 'mud' technique yet. I keep trying out new medium, in
this case it's Tamiya's Weathering Sticks. I think I prefer powders.
10. Finishing Up...
Well, I just can't resist tinkering and I did some more chipping and streaking. But that's normal with me - I just can't leave well enough alone!
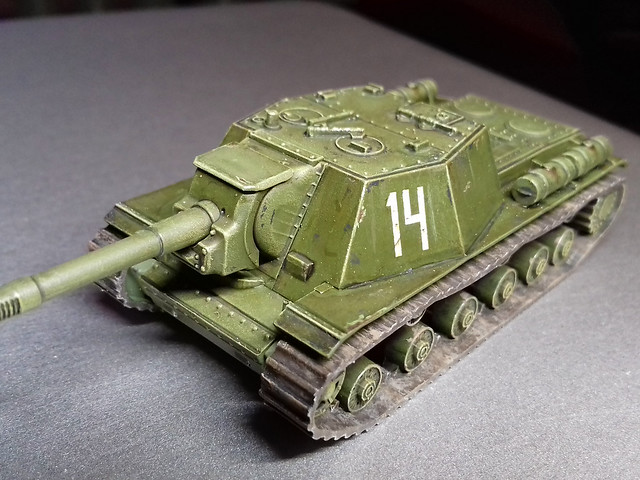
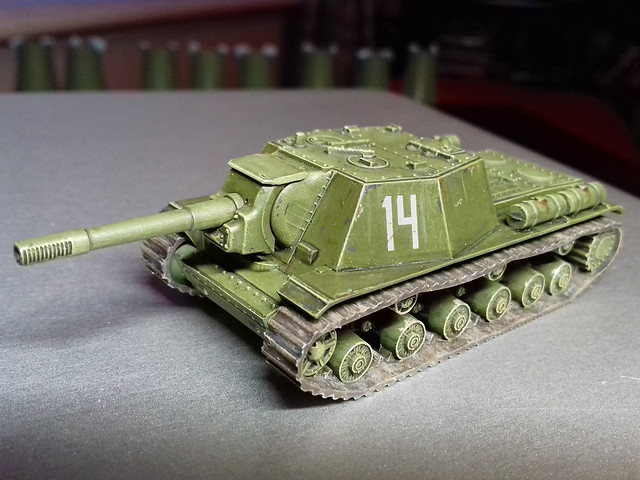
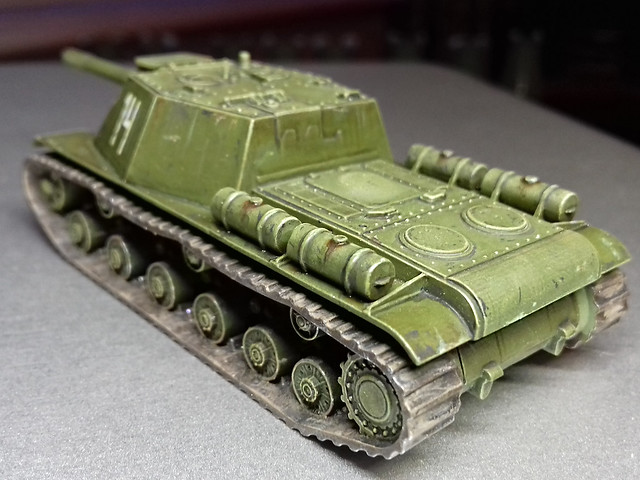

I'm fairly pleased with this model, though a little disappointed with how the tracks turned out. It's perhaps half to do with how simplified the tracks were - offering scant detail - and half my poor 'mud' painting technique (I shall have to practise with some other medium).

But, let's not get too negative...This is a perfectly fine war-game piece for GF9 Tanks, and that's the main thing.

All that's left if to varnish the model. I'll probably go with several light coats as it's intended to be handled. Other than that, it's on with the next models in this project - my T-34s.

Sunday, 4 February 2018

1/100 Plastic T-34/76 Kits - Part 4

One Track Mind...
Er, make that 10 track mind! The downside of production line model making for war-game is; yes, you get a nice little army of models at the end, BUT this means that every stage in building and painting becomes a intimidating and repetitive chore...

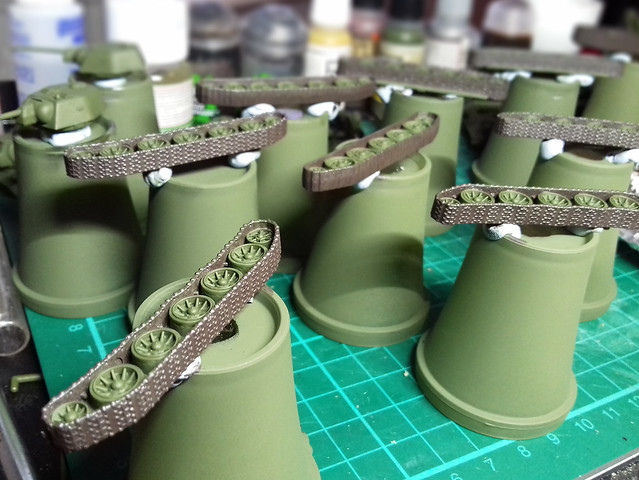
Tracks all-over primed and track links painted base colour.
I'll be discussing my exact paint process for these 1/100 scale tanks and their tracks in my next post (about my SU-152), but here's a quick overview in bullet-point form:

• Prime tracks (mine are all over light olive)...
• Paint tracks base colour - I've chosen a metallic dark-brown...
• Apply dark wash (Citadel Agrax Earthshade) all over...
• Dry-brush highlight green on road wheels...
• Highlight track tread with metallic colour or graphite pencil...
• Pin-wash road wheels and track treads with black (Citadel Nuln Oil)...
• Apply dust of mud effects (to your tastes)...
• Seal with varnish.

Next: Painting the hull and turret.

Friday, 2 February 2018

Zvezda 1/100 SU-152 'Animal Killer' - Part 1

My 'Battle of Kursk' project trundles forward apace with this monstrous addition to my Soviet force. The 152mm gunned SU-152, known as the 'Animal Killer' (or 'Beast Killer') as it was designed specifically to hunt the German's Tigers, Panthers and Elephants.

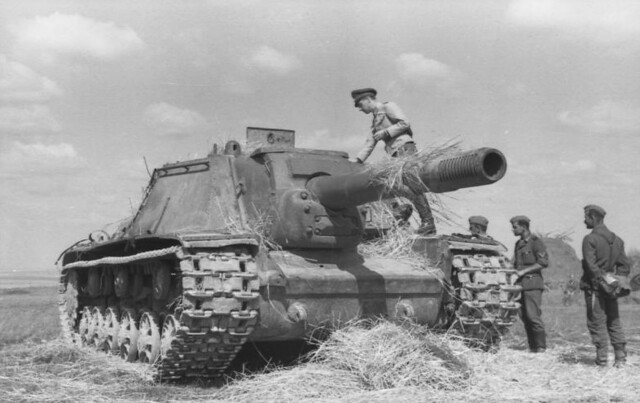
An abandoned SU-152 assault gun inspected by German troops, Russia, 1943.
(These Germans must be counting their blessings!) Source: Wikipedia
Quick Overview
I've made no secret that I love Zvezda's little 1/100 range of armour. Their level of accuracy for a simple 'easy build' war-game model is excellent (bar one detail) and the cost is very attractive compared to the competition.


However, every silver lining has a grey cloud attached and Zvezda kits have two slight drawbacks; they don't tend to come with optional builds/accessories and their tracks are...Well...'Bare bones'.

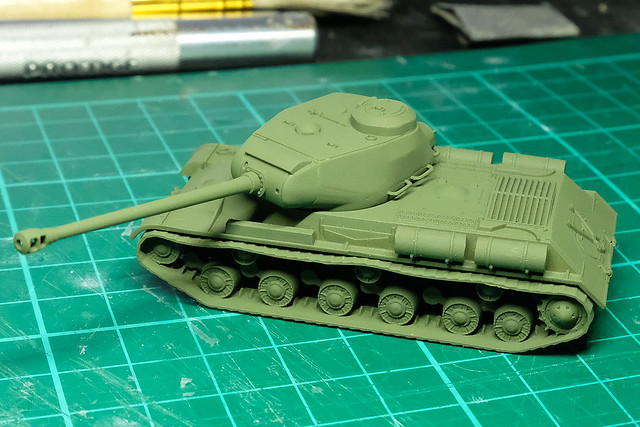
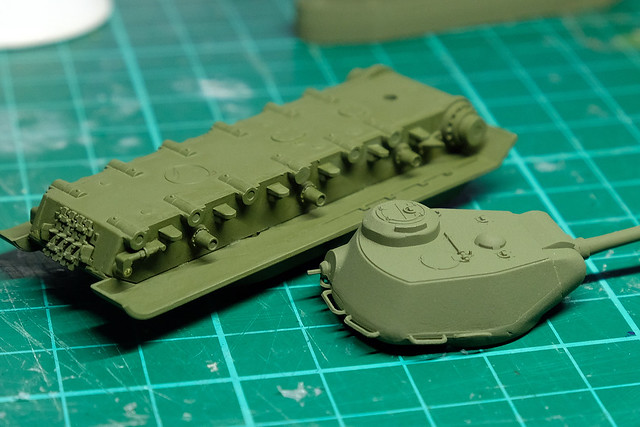
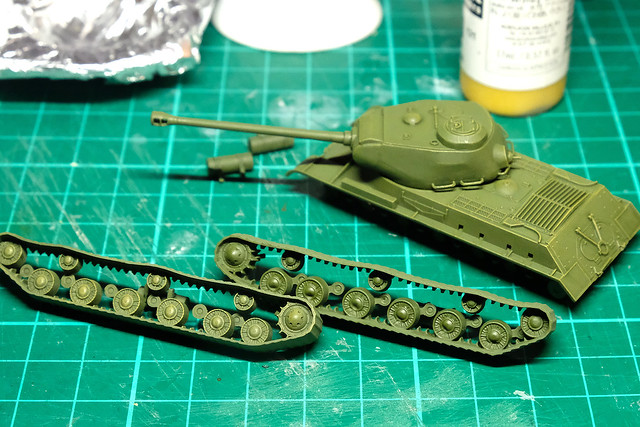
The Zvezda SU-152 follows this format, the kit has only 12 parts with no 'optionals' and the tracks are a little disappointing. BUT, these kits are what they are and as war-game markers they are more than adequate.


Unfortunately, to keep the part count down something had to give and that was the complexity (or lack thereof) of the tracks. Making the track sub-assembly one-piece - including wheels, suspension and the tracks themselves - seems to have impacted just how much detail can be included on the moulding. I guess they figured that - at 1/100 scale and being partially hidden by the fenders - the track pattern would not be a overtly noticeable feature. This is a matter of opinion.

(As mentioned in my 1/100 T-34/76 post, the best tracks are those done by Plastic Soldier Company. But they achieved their nice track components by using three-piece assemblies.)

However, the rest of the detail is well represented for the scale and is crisp and delicately moulded. (Other 1/100 armour manufacturers tend to go for a slightly exaggerated 'chunky' look so that details show up better - and are more easily painted.)

Completed in just a few minutes, at tabletop distance it's a lovely looking model.
The massive 152mm gun barrel is not 'drilled out', but that's easily remedied. I drilled a tiny pilot hole first - to ensure the hole was centred properly - before drilling out the final barrel width with a larger drill.

Options?
Although the kit does not come with options, it might be nice to add some stowage. Things like tool boxes or a piece of timber for 'unditching', which was a common practise on Soviet tanks. I could scratch build these easily.

Next: Painting.

Wednesday, 24 January 2018

Camo Scheme for my Zvezda 1/100 IS-2

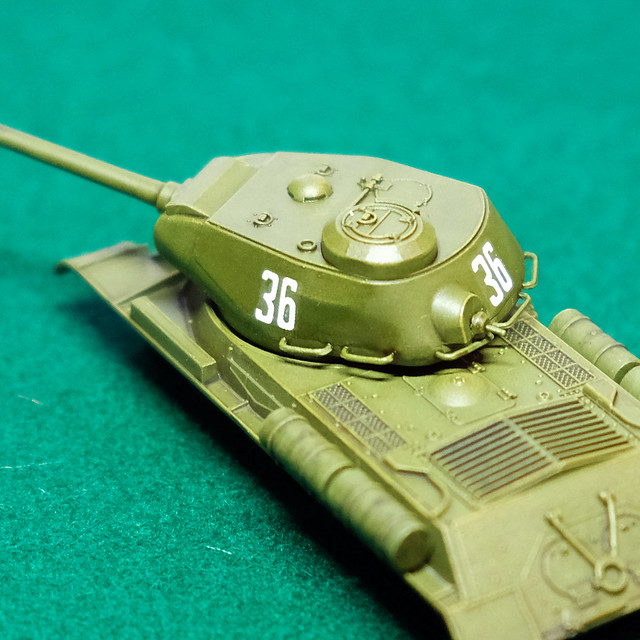
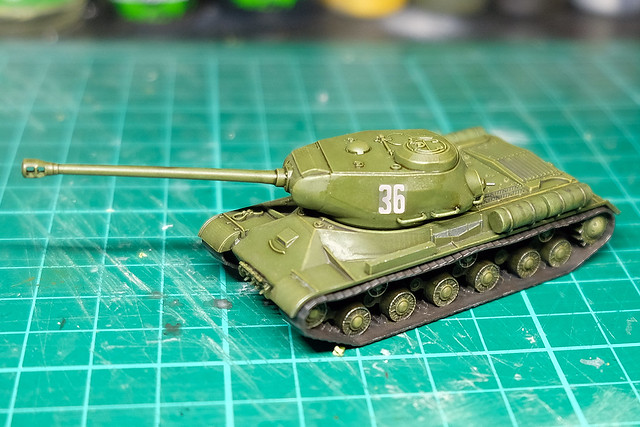
Before I actually get down to the nitty-gritty of painting a camouflage pattern on my IS-2, there is the little matter of applying the decals. There isn't always insignia on WW2 Soviet tanks, in fact sometimes they left the factory and went straight into action 'as was', but more usually at least a vehicle number was applied.


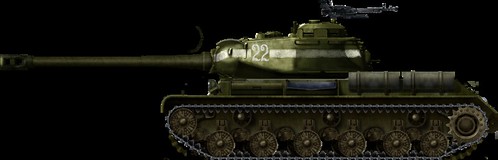
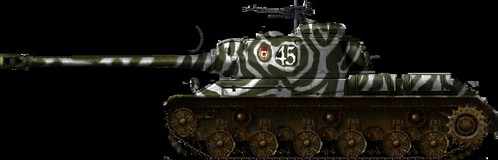
IS-2 model 1943, 88th Independent Guards Heavy Tank Regiment, Berlin, April 1945.
Source: Tanks-Encyclopaedia.com
As a graphic designer I really like the Soviet fonts, but finding good decals in 15mm scale can be a little challenging (Zvezda does not supply any with the model). My usual source of smaller scale armour decals is Minibits.net as they have a rather good selection of historic and generic numbers, letters, military emblems and national symbols in 15mm scale.

I had already purchased their 'Russian WWII 'Cryllic style' numbers [1:100-1:76]' decal sheet for my 'Battle of Kursk' project's T-34s and was tempted to use it for my IS-2 as well...


But at the last minute I changed my mind and went hunting through my decal stash for something more suitable for the IS-2's larger turret. I managed to find a nice set of Cyrillic numbers which had been for a 1/72 BA-10 armoured car, but seemed to just the size I was after.


As usual I prepared my model surface for decals by painting on a small area of gloss varnish, just where the  numbers would go. Once the varnish was dry, I used some Microscale MicroSet setting solution to seat the decal. I find that MicroSet and MicroSol liquids help prevent silvering and hide the decals carrier film (although it can be clearly seen in the above photo, for now).


Once satisfied the decal is smooth, straight and adhering perfectly I let it dry and the dab on some MicroSol around the edges of the decals carrier film. This should further help the film blend in to the model's base coat and make the decal look like it has been painted on.


I conclude the process with a thin coat of satin varnish, to permanently fix the decal and protect it during the weathering stages.

The Camouflage Pattern
I'd decided that I wanted a winter camo pattern for my IS-2. Should I decide to add more late WW2 Soviet tanks to it (for a game of GF9 'TANKS!') I wanted to distinguish these Soviet vehicles from my mid-war 'Kursk' collection (which will be in plain Russian Green for the summer months of the war).

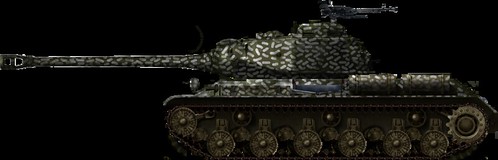
I didn't really want to do an all-over 'white-washed' winter scheme, so looked around for something a little different. Tanks-Encyclopaedia came to my aid with a couple of very nice examples of winter camp schemes...

29th Guards Heavy Tank Battalion, Poland, early 1945. Source: Tanks-Encyclopedia.com
Partial winter camouflage, Eastern Prussia, February 1945. Source: Tanks-Encyclopaedia.com
Initially, I favoured the 'dotty' pattern, but the thought of painting all those on at 15mm scale eventually put me off! The 'snow tiger' pattern won me over as it's just the sort of thing that can be done well with just a brush.

I'll began by sketching out the outlines of the 'snow stripes' using a white chinagraph pencil...

Next: Camo Scheme Painting.

Sunday, 21 January 2018

Painting the Zvezda 15mm IS-2

Having broken the ice with this easy little build it's time to see how rusty my brush skills have gotten. I began by having a look back over some of my old 15mm tank posts and realised that I don't really have a set 'process'...I surprised myself to realise that my whole modelling technique is based on 'winging it'! 😀

Well, too late to change my ways now, so lets just see what happens. However, if you'd like to see and example of a more structured process for painting a 15mm IS-2, then have a look at the excellent Herbert Erpaderp's tutorial for some alternative ideas...


And now, on with my very unstructured method...

Base Coat/Priming
I begin with the one procedure that hasn't changed that much over all the vehicles I have made, and that is to prime the tank with a coat of Humbrol's 'Light Olive' Acrylic Aerosol. I've mentioned before that I like this colour as it can be easily modulated to become any of the WW2 Allied 'greens', from British Bronze, to US Olive Drab to Soviet 'Russian Green' (and even Finnish 'Moss Green').


To modify the base olive coat to something a little more deep and rich for Soviet armour I will be trying out a wash of Vallejo's Model Air 'Russian Green [71017]. This paint is really intended for airbrush use and is already pre-diluted so *should* work quite well as a wash (fingers crossed).

The IS-2 hull (at back) has been modulated using Vallejo's Russian Green,
while the turret is still in it's primer coat of light olive.

It worked! ...Er, I'm not surprised at all. Cough. The difference is subtle, but a richer and deeper green. It is a little patchy and streaky (being a wash) but I like that as it adds some wear/fading effect to the overall appearance of the tank.

Note: I could also have achieved a similar effect more quickly by simply spraying Vallejo's Acrylic Russian Green Primer on to begin with. But, I can't actually find my bottle of this at the moment, plus I need to reacquaint myself with the workings of my airbrush before I take on a live project with it!

Highlighting and Shading
And so, moving on, I will try out Herbert Erpaderp's suggestion and give my base green a bit of a highlighting with some dry brushing. I'll simply mix some of the Russian Green with some lighter buff paint to produce my highlighting colour. Though, again, I will be going for a subtle effect...

It's very subtle, but the front set of tracks has been highlighted, while the rear
set is just flat Russian Green. The hull and turret are highlighted.
Well, I like the effect. Is it too subtle, and will the following shadow wash negate the effect? I guess that's what experimentation is all about though - if it doesn't work I will modify the technique.

The paint I used was Vallejo's Model Color Yellow Ochre [913] as this gives a warmer and more 'sunny' highlight than using straight white. I built up the strength of the ochre, mixing it with the Russian Green paint, until it hit the strength that I was after.

Right...So, the moment of truth, will the shadow wash destroy the 3D highlighting effect I've just created? ------>

The shading wash phase, at this scale this can also pass for pin-washing adding
depth to panel lines and joints. Washing is a quicker way of creating depth than
outlining each area edge with individually.
Actually, and I am surprised, this worked. Yes, the dark wash (created using Citadel's Agrax Earthshade wash) did darken some of the highlights I had previously applied BUT not so much as to have made the prior highlighting a waste of time. The contrast between the highlighted bits and the base colour areas is still noticeable through the translucent wash.

It is - once again - very subtle so I guess if you wanted something more obvious the trick might be to exaggerate the highlight before applying the dulling wash. I'd do this by dry brushing with an even lighter shade of ochre (bordering on yellow).

The Tracks
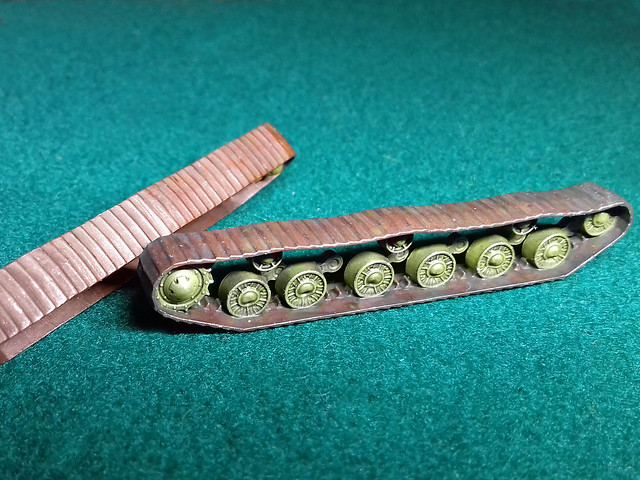
Now to to what is perhaps the least satisfying part of the Zvezda model, the tracks. The model has very simplified tracks with practically no tread pattern to speak of, just regularly spaced slats. The challenge here is to make something interesting out of these rather dull and uninspiring components.

The easiest 'cheat' is to disguise the lack of detail by slapping on a thick layer of 'mud' effect (which, I admit, I have resorted to doing before). But, we shall see...

First off, I mixed some Vallejo German Cam. Black Brown [822] with a spot of Vallejo Game Color Silver [052] to make a rusty steel colour. This will be my base coat for my tracks. That done, I'll give them a wash of good old reliable Agrax Earthshade mixed with a little Citadel Nuln Oil to give the tracks a greasy oily look.

Still a bit wet, but hopefully rusty steel looking.
And finally, I'll apply some powdered graphite to give the raised tracks a metallic sheen and also some dots and spots of silver here and there to simulate the raw steel of the tracks showing through where damaged...


Hmmm, tempted to add a mud layer.

Well, that's the base coat painting done. I have some minor detail painting to do on some of the none green parts but otherwise it's onto the decals. Not that there are many (remember, no decals come with the Zvezda kit), the wartime IS-2s seem to have had little more than numbers unless they were a Guards unit.

Next: Decals and the Winter Camouflage.

Thursday, 11 January 2018

Back for 2018!

Hooray, my modelling mojo seems to be returning! 😎


After 2017's recurring illness and major creative doldrums, I feel reenergized for the New Year and forced myself to return to the Scarborough Games Society for its first session. They kicked off the 2018 season with a painting evening, an ideal opportunity for me to dust off my little workbox and get going again.

The SGS is my local port of call for a game of Gale Force 9 'TANKS' - the tabletop tank warfare game - and the addition of a special 'paint night' to their club meetings is a great way to kick start your 'army' construction for a game. Aside from my putting together my practise tank (yes, although it was a 'paint night' model construction is allowed) there were a number of other armies being painted by other members which ranged from historical (e.g. Bolt Action) to fantasy (Warhammer and some very novel 'Toy Soldier' figures).

I decided to start with a very simple 15mm (1/100) Zvezda IS-2 Soviet Heavy tank. Although I have a very large backlog of other projects, I did not want to jump straight back in with an ongoing model until I had gotten some much needed modelling & painting practise again.

Nice comparison shot of the IS-2 (front) compared to the later IS-3 showing
how Soviet tanks were to evolve. The IS-3 arrived just too late for WW2, but
gave the West a very nasty shock and initiated a rush for heavier tank designs.
(Source: Wikipedia.)
Also, I didn't want to make a mess of one of my 'good' models, so decided to start by making a completely unrelated test model first, before re-embarcking on either my Finnish, Kursk or Pacific projects. I happened to have the IS-2 knocking about my stash so it seemed a good candidate for a guinea pig!

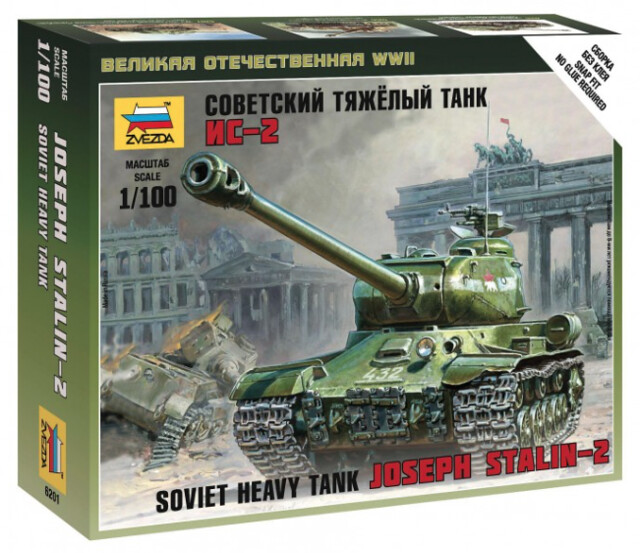
The Zvezda 1/100 IS-2 'Joseph Stalin' Heavy Tank
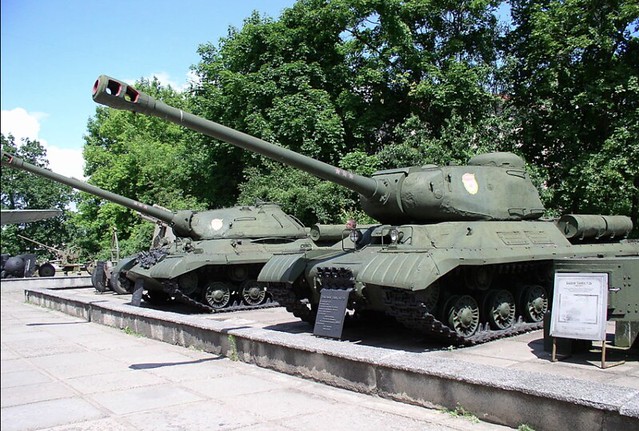
Many modellers wax lyrical about the German 'heavies' - I call it 'Tiger love' - but I have always had a bit of a crush on the Soviet IS series of tanks. It was a long lived series which spanned the whole of WW2 and beyond, and was very influential (in the end, more influential than the German heavies) the development of Cold War tanks in both the East and the West.

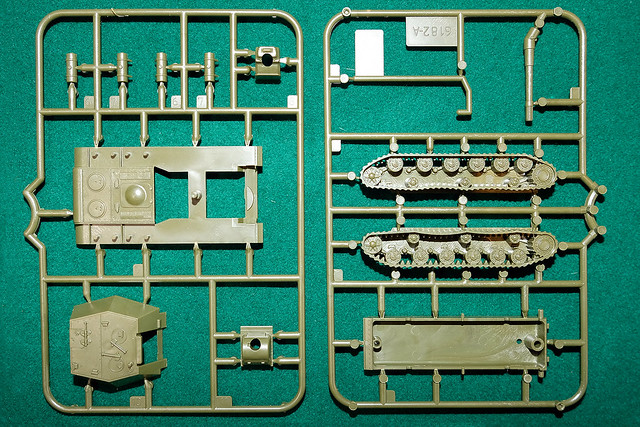
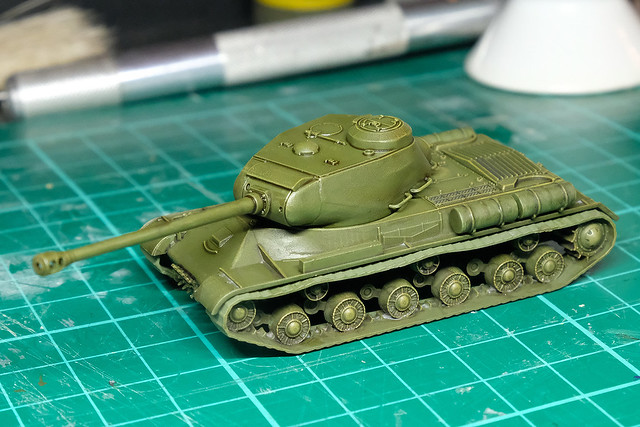
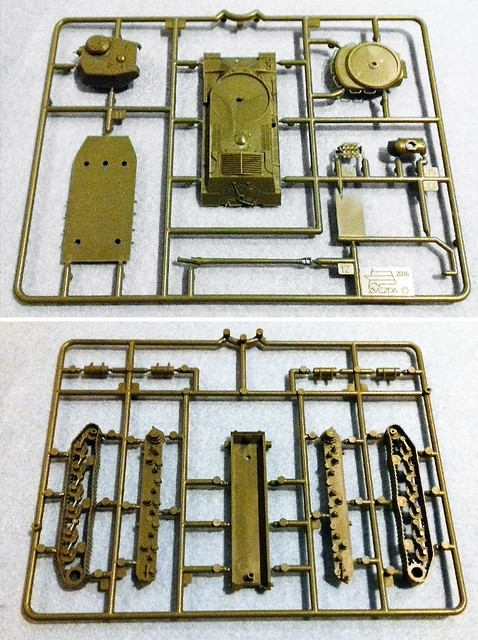
Just 2 spures with 16 parts in total, not a complex job!
(Sorry about the naff photo, the lighting plus my awful
phone camera was against me.)
As usual, Zvezda have produced a very simple 'game marker' quality tank kit, with very few parts that simply snap-together quickly. Though, as usual, I took my time about construction as I looked for ways I could improve of modify the basic model.

To be honest, aside from the addition of some small items of storage, there isn't much more I would do to this model (aside from paint it). I've looked at quite a few reference photos now and - for a Soviet tank - the IS-2s seemed to run pretty lean (no great piles of gear strapped to the hull). I'm sure there was cases where the crew added plenty of stowage to the outside, but I'm gonna go with a clean look with this one. This, incidentally, suits this test project as I don't want to over-complicate the process.

The kit is the usual Zvezda 'Art of Tactic' fair with a minimum of parts (just 16) with much of the detail being moulded onto the components.


The detail itself is crisp enough (as usual with Zvezda) but the lack of options or alternative versions is the compromises which keeps the price of this kit low. By contrast the PSC IS-2 pack gives options to build either a IS1, IS85 or a IS2 and comes with a commander figure. BUT, it also comes with 5 tank kits and costs £19.95. So, you pay you're money and takes your choice.

Personally, I find the level of detail on the Zvezda perfectly acceptable for a game of GF9 'TANKS', in fact - for a war-game player rather than a committed modeller - the simplicity of the Zvezda model is actually a positive. If you twisted my arm for a criticism, I suppose - as usual - it might be that the track treads lack detail - but that's the compromise with one-piece tracks.

The end result is a nicely intimidating heavy tank which should put the shivers up even an opposing 'German' player fielding his selection of heavies. Combined with supporting T-34/85s and perhaps a heavy tank destroyer - like the ISU-152 - or more IS-2s, this model will make an excellent spearhead for a late WW2 Soviet assault force.

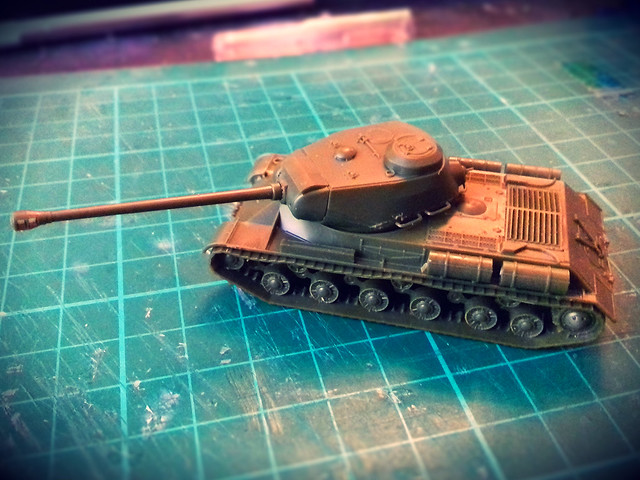
Ta-Da! Done, I will probably drill out the gun muzzle, but aside from that
she's ready for priming. Nice ease start to the year!

Next: Now to dust off my brushes!

Thursday, 6 July 2017

Zvezda 1/100 Tiger I - Finished

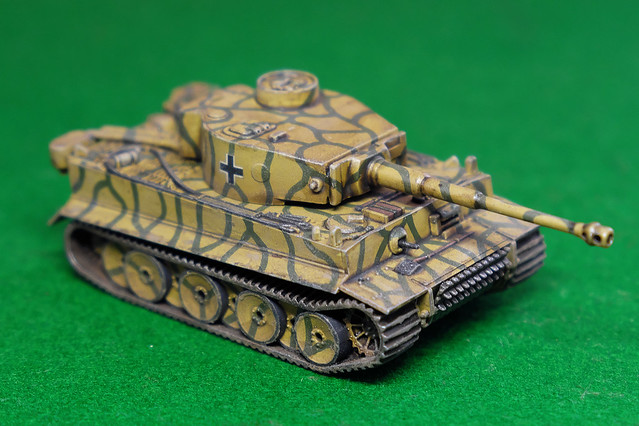
Finally managed to get my Kursk Tiger I finished off. Phew, I made a meal out of this one (I blame the wife giving me loads of jobs around the house)!


I'm reasonably pleased with it, but Zvezda's simplified tracks niggle me. Still, that's half my German force done for my TANKS! Kursk scenario, I just need to make a couple of Panzer IVs for cannon fodder! :)

Thursday, 8 June 2017

Zvezda 1/100 Tiger I - Part 2


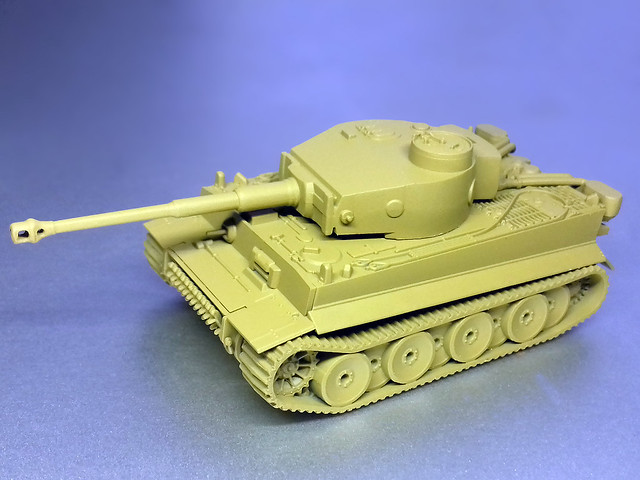
Before I got down to priming the model I decided to have a go at drilling out the model's muzzle break as that feature (or rather lack of feature) is the one major gripe I have with this kit. The tracks are a bit oversimplified as well, but I can live with them as this is pretty standard for Zvezda.

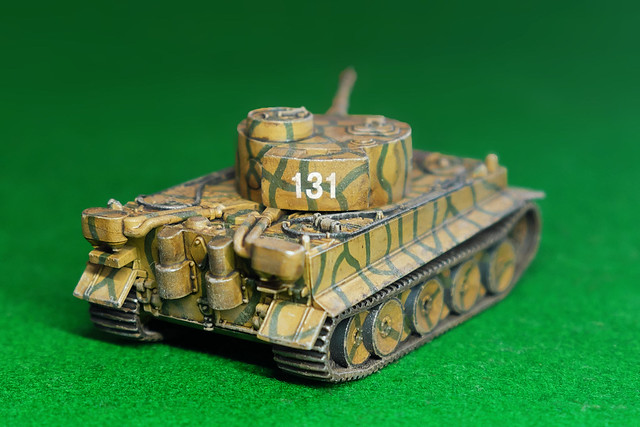
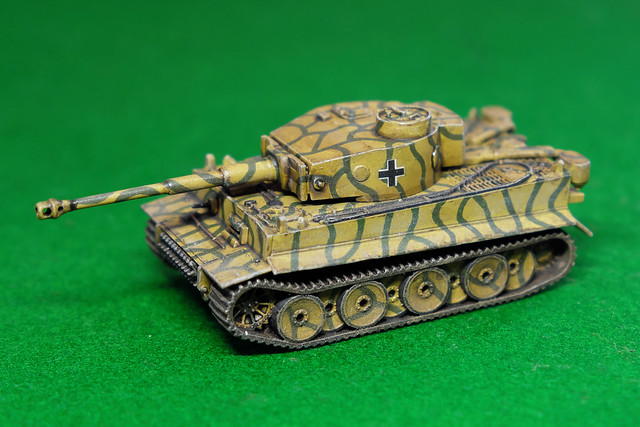
Anyway, muzzle improvement done, I primed the Tiger with Flames of War's 'Panther Yellow'...


I was really pleased with how this primer goes on, for a rattle can it lays down quite a thin and smooth coat. That said, i'll be glad when I have an airbrush again as it's a lot more cost effective than the Flames of War spray can at £7.50 a pop.

Tiger Stripes?
OK, now what camo scheme? Since this Tiger is intended for my planned 'Battle of Kursk' GF9 TANKS game, it won't be one of the more familiar post-D-Day 3-colour patterns (or popular 'Ambush' pattern). I want a pattern that's specifically not D-Day-ish.

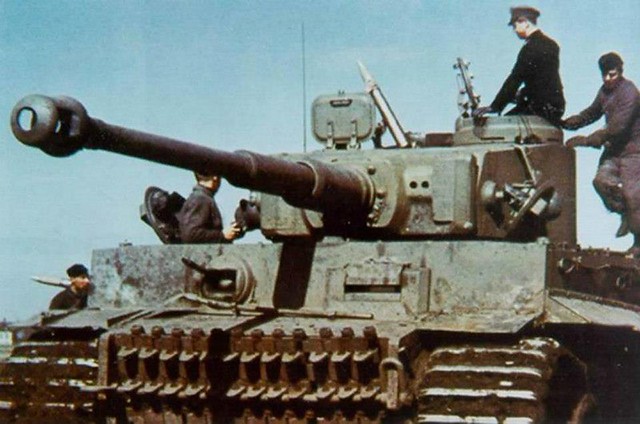
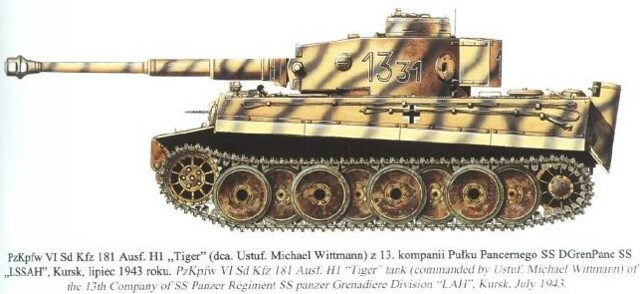
Something like this...


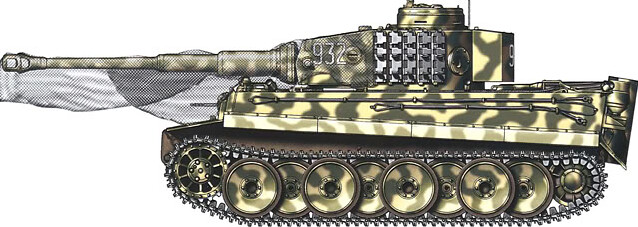
And NOT because it's Michael Wittmann's tank, by the way! I just fancy a simpler 'tiger stripe' pattern...Because, it's a tiger! (I won't go as far as making it black and orange though.) Here's another example of green 'stripes'...


The only issue, if you can call it that, is that I will be using a brush to apply these stripes, whereas it would normally be tempting to reach for an airbrush for these stripes. However, the second example I have (above) looks like it is hard-edged, so a brush should be perfectly fine.

Finally, my choice of green will be Vallejo's German Cam. Dark Green [979].

Keeping Track
I'd like to get the tracks out the way before I launch into the hull painting. With this Tiger - as it is for a 'Russian Front' game - I want to produce a similar reddish coloured mud effect that I did for my recent 'Ferdinand' (which is for the same game). I may be wrong but I equate the eastern front with a redder mud, I admit this may just be my false impression (as I guess mud is mud really).

I used Vallejo pigments for my Ferdinand's tracks but I am trying something different this time and I'm following a tutorial from the Flames of War website called: 'Changing A Tiger's Stripes'.

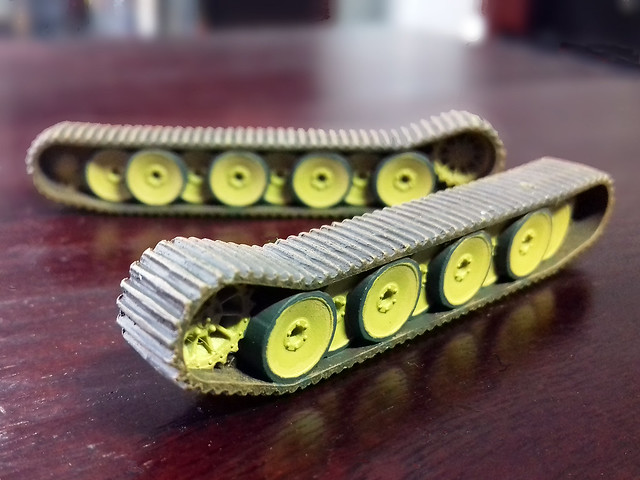
Not the tidiest job - those road wheel edges were a nightmare - but it should
all smooth out once I apply a wash. I'm still not sure about starting with a
brown base for tracks, but let's see how it turns out.
The Zvezda tracks are very simple 'slats' and this is where - as mentioned previously - where Battlefront's (and possibly the 15mm models of the Plastic Soldier Company) have the advantage in the level of detail. How much this will mean if you are primarily a gamer and not a modeller is something each buyer will have to decide for themselves...I had my gamer hat on when I bought this.

The Tiger Onesie!
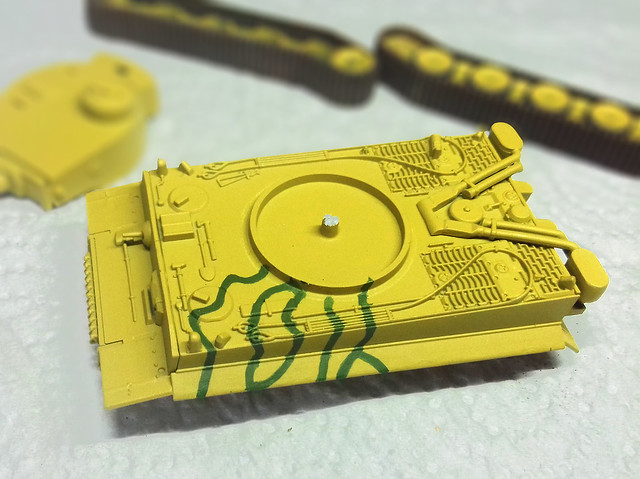
Back to camouflage now and the striped scheme should be, technically, a pretty simple pattern to reproduce. I'm not a confident freehand painter but in this case sketching out the pattern lightly using a pencil seems a little unnecessary, so I'm jumping straight in with a slightly random pattern...


Next: Hopefully this Tiger will have all its stripes and I can move on to the decals!

Saturday, 3 June 2017

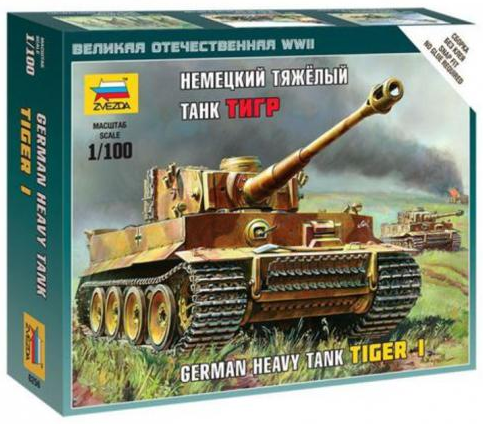
Zvezda 1/100 Tiger I

Another quick weekend project, this time the mighty Panzerkampfwagen VI Tiger for my Kursk scenario (and another M3 Stuart for my Pacific Tanks game scenario project). This is Zvezda's 1/100 scale Tiger I and like all Zvezda's models in it's 'Art of Tactic' series it's detail is simplified as it is intended as a gaming piece.


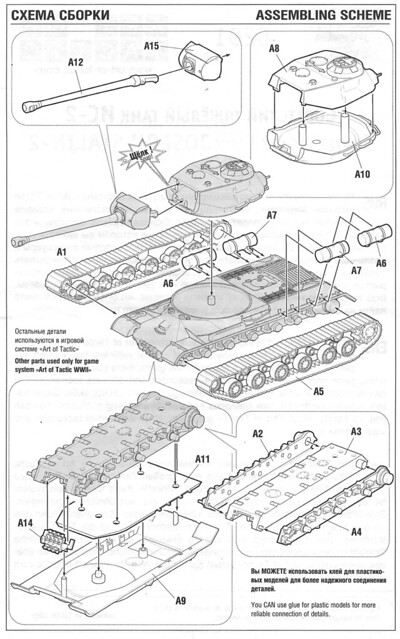
I won't go through the construction as it will probably take longer for me to type out the process than it actually took me to put the kit together (there were only 12 component parts). Instead, here's a picture of the instructions which tells you all you need to know...

Once again, Zvezda's 1/100 kits are a bit more
complicated than they perhaps should be because
they are 'snap together'.
I've done a few of these Zvezda 1/100 kits now - and, indeed, made a second example of their M3 Stuart while I was making this Tiger - and I have to say that I'm a little disappointed in this take on the legendary 'big cat'.

It's not a horrendous and neither is it hard to put together - in fact, the fit quality is very good - but the combination of Zvezda's usual oversimplified tracks together with a turret with a prominent moulding seam (and an awful mussel break).

In short, it's my least favourite Zvezda so far...

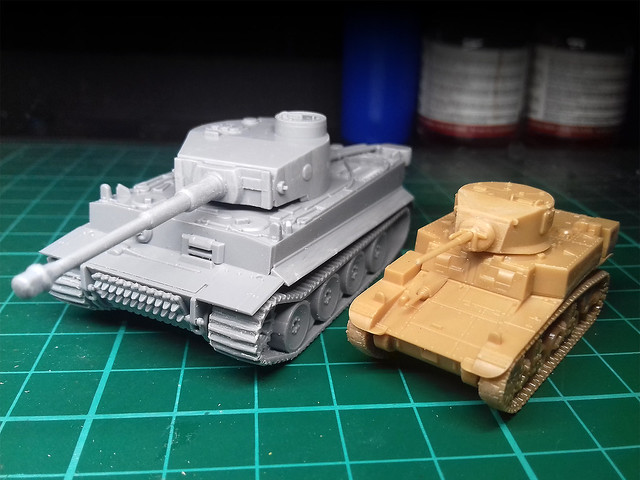
Muzzle break, what muzzle break? (And, oh, isn't the Stuart small!)

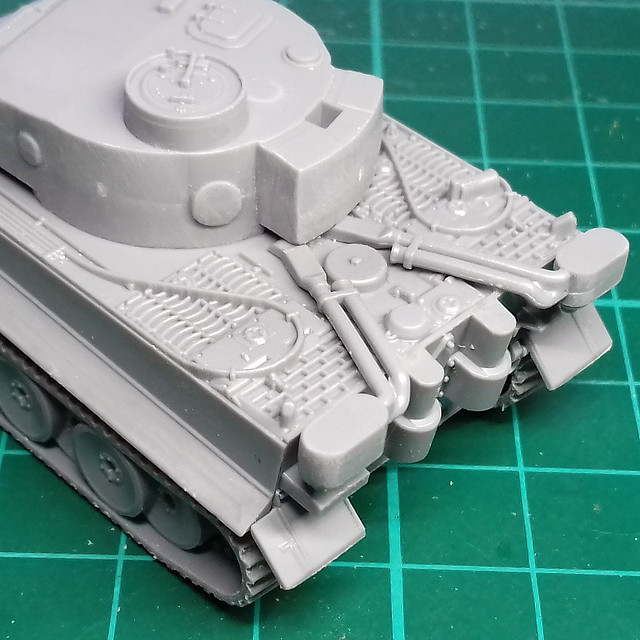
Zvezda's Tiger is a bit soft looking and although it's a small thing that excuse for a muzzle break really spoils the infamous '88'. That said, there is some nice detail on the engine deck, it's just a shame that they didn't carry that on to the turret and the tracks.

A nice level of detail on the Tiger's engine deck. Tow cables
are moulded on, but at this scale that is more usual.
Still, it is a wargame model and meant to be seen at tabletop distance, so let's see how she paints up.

Note price: Zvezda 1/100 models are usually very competitively priced - I just bought one of their mighty KV-1s for just £3.50 - but the Tiger I is one of their more expensive kits, at £6.50. Now, this negates the advantage of buying Zvezda's kits instead of the official Galeforce 9 (Battlefront) ones. The Galeforce Tiger I is exactly the same price. I only bought the Zvezda version because my local model shop had it (so I benefitted from not having to pay shipping). But at this price level Zvezda has less of an advantage over the Galeforce 9 kits (which are generally better quality anyway).