Sunday 28 August 2016

Gaz 55 Ambulance - Part 3

Today I moved from the construction the driver's cab to assembling the ambulance enclosure. This looks a pretty simple construction of four walls, a roof and a floor but I want to modify it slightly in light of some reference material I've found...


Note that two of the three rear windows have either been boarded up or they have integral shutters which can be closed. I have checked various other sources and this configuration is quite widespread (one of the two windows on the rear doors is also similarly covered).

Find out more here: Engines of The Red Army in WW2 - Gaz 55 Ambulance

(I also noticed that the roof on these vehicles seems to be painted or covered with a gray material. But, I will look into this a little later.)

So, first job was to cover the closed panels...


Now, I had to think about how would make the 'white' semi-opaque windows. I decided to fill these empty panels with some very thin white plasticard and cover these with an even thinner rectangle of transparent plastic over the top of it to give it a glass-like look.

But, before I installed these panel windows I thought it easier to spray the base green colour first as trying to paint the window sills after the windows are fitted would be a pain. I would then mask out the windows before continuing the painting of the ambulance.


Preparatory base coat done on the rear bodywork, it's time to try and fit all the rest of the body components together. Now, this is where things started to go a little awry!

First of all, the ambulance body parts don't actually fit all that snugly, not horrendously bad - but not terribly well either. But, when you try and put the assembled ambulance body onto the chassis and join it to the driver's cab, you have to wonder if they are part of the same kit.

In actual fact, of course, they are not (exactly) part of the same kit, as the grey ambulance body sprue is a separate addition to the green Gaz truck sprues - designed and manufactured as an after-thought. So - long story short - you will end up having to do a lot of work to get all the vehicle's major parts - chassis, front upper body and rear upper body - to fit together like they should.

As you can see, the Gaz 55's cab merges seamlessly into the ambulance body.
Unlike my PST Gaz 55 model which is - funnily enough - a bit of a car crash.
And this is where I will leave things...

As you can see from the above picture, I will have to play with all the parts and move things around - and possibly file and trim bits here and there - to get the ambulance body to mate seamlessly with the cab section. Oh, joy!

Friday 19 August 2016

Canopy complete - Phew!

My least favourite modelling job - painting canopy frames on aircraft. I don't really do enough aircraft to practise this skill to get to the skill level I would prefer. So, in this case, I was just happy to get the darn thing done. I went down the masking route...


I know some experienced aircraft modellers will probably say that I could have done this job more quickly and easily by painting the canopy frame freehand, but I'm afraid my hands are too shaky and so I copped out!

Once masked I gave the canopy a couple of light sprays of Humbrol's Dark Green. Then I removed the masking tape and touched up by hand (I felt up to that)...


Not perfect, but acceptable for what is - after all - just a paint test model. As usual, photography flatters the results!

That out the way, I can re-mask the canopy so I can gloss the rest of the model ready for the application of Hobby Boss's dreaded decals! Will the third time be the charm? We shall see.

Wednesday 17 August 2016

Zebrano's YAG 6 Completion photos

I mentioned my YAG 6 model in yesterday's post and while looking back on my posts on this horrible model I realised that I never did a 'completion post' for it! Now, I suspect this was because it was such a traumatic build and because I was just so pleased to finish it that I subconsciously blocked out any idea of showcasing the final model!

So, to rectify this, here is the finished Zebrano YAG 6 Soviet Heavy Truck (Finnish Army, 1943)...


So, there you go. The completion shots for what was undoubtedly the most horrendous kit build I have made so far! (I still shudder just thinking about it.)

If you really want to know just what was so bad about this Zebrano model - and why I will never buy another - you can look back over the build journal by following this link (posts in reverse order, last first): Zebrano 1/72 resin YAG-6 Soviet Heavy Truck.

And now, let's never talk of this model ever again!

Tuesday 16 August 2016

Gaz 55 Ambulance - Part 2

Got some work done on the construction of the Gaz, and have some opinions about PST's components. The sprues are a little too over-populated for my liking and, to make matters worse, PST do try to do some components which are maybe too small and too fragile for plastic in 1/72 scale.

Sometimes, PST seem to over-engineer things, like the drive shaft. Why make one
component when three will do? To be fair to them, this may be so you get the
utmost level of detail on this part, but it does make things a bit fiddly.
Were this kit Dragon or Trumpeter a lot of these fiddly components would probably be on a separate photo-etched brass sheet. I guess that PST's priority is keeping the cost of the kit down, so they include some tiny parts on the plastic sprue. This pleases the carpet monster!

That aside, I do love the early WW2 Soviet trucks, they always put me in mind of the old TV series 'The Waltons'! Of course, the reason this would be is because these Gaz vehicles were all licence-built copies of the 1920/30 American Ford light trucks...


The other minor niggle with PST's mouldings is there is a bit of warping of components. The chassis is quite twisted and the fender footplates are a bit warped too.

The small imperfections can be easily rectified, though I did giggle when I heard that ZEBRANO may have had something to do with the design of this kit (they seem to do a lot of collaboration with PST). This brought back bad memories of their horrendous 1/72 Yag-6 Soviet Heavy Truck that I made...Oh, dear me! :(

Still, as long as you take this kit very carefully (the main instruction panel is just a jumble) you should be OK. It's been enjoyable so far.

Sunday 14 August 2016

A break from planes - GAZ Ambulance

My short attention span strikes again! I need a break from aircraft so I rummaged in my stash (oh er, matron) and found a nice little PST GAZ Ambulance...


Technically, this kit will be part of my Finnish Continuation War project, although under the Rapid Fire wargame rules for this conflict there is no requirement to add an ambulance. But, I know for a fact that the Finns did have at least one of these Soviet-made vehicles in their inventory ('liberated' from the Red Army), and there is a nice photo of it available on the SA KUVA archive. So, I just fancied adding one to my collection.

Source: SA KUVA

What's in the box?
As usual with PST kits, the sprue complement is something of an eclectic mix made up from a basic sprue set from PST's GAZ light truck kit with the special additional sprue which has the ambulance components on it. I always appreciate PST's 'modular' approach to kit variations as it always means some left over parts that I can add to my spares box!

The main green sprue is PST's basic GAZ truck parts and the gray sprue is the
additional parts to convert the basic truck chassis into the ambulance version.
(Incidentally, in case you were wondering, there are enough parts on the green sprue to make up an ordinary GAZ light truck, with a cargo flatbed.)

One thing I appreciated was the inclusion of a sheet of transparent plastic with the 'glass' parts marked out on it. This will save me a lot of time making my own windshields.

The 'ambulance sprue' has all the parts that will replace the normal cargo flatbed on the GAZ chassis. Each side has a three-panel window, but I'm still a bit unsure whether these 'windows' should be opaque white or transparent. I will have to do some research.


Finally, the instructions are the normal PST 'photocopied' pieces of A4 paper. Perfectly useable but the quality can vary...


Directions for decals and colour scheme are left to the box artwork I'm afraid. This is a shame as there are a reasonable amount of decals and some more precise instructions for their application would have been helpful. I suppose I will have to rely on online reference.

So, fairly much the usual pros and cons for a PST kit. But, to end on a positive note, the quality of plastic is good and there is an absence of flash or any noticeable deformations. Looking forward to making this.

Friday 5 August 2016

Hobby Boss 1/72 Hawker Hurricane Mk. IIC - Part 5

Basic painting done! I like getting to the end of a phase of work. I haven't been happy with the painting with this, but let's put that behind us now...


I've test fitted the canopy, but before I glue it on permanently I'll weather the cabin interior and dip the canopy in a bath of Pledge Klear. The painting of the canopy frame will be a separate job and I will have to do a bit of masking to do this.

The next major stage is the glossing prior to applying the decals. Adding the Hobby Boss decals makes me a little nervous as I've had some bad experiences with them in the past. So fingers crossed!

Wednesday 3 August 2016

Hobby Boss 1/72 Spitfire Vb (Trop) complete.

Finally got round to taking the completion photos of my Hobby Boss desert Spit. Despite this just being a 'painting test' it turned out OK and so is worth a look...

Probably the most flattering shot as it makes the horrible canopy look 'OK'!
Classic Spitfire 'take off' shot.

The least flattering angle, as you can see the flaw with the canopy. I took
the opportunity to drill out the wing MGs, which look quite nice.
Conclusion
As I said, this was just a painting test - a practise paint job on a cheap kit before I took on a 'serious' project - but, for all that, it's turned out OK I think. I was particularly pleased with my 'eyeshadow' weathering.

As to the kit itself, it's actually an alright beginner's 'easy build', the most obvious flaw being the over-seized canopy (which is why I painted it 'wargame model style'). Minor niggles were the over-simplified undercarriage - which were designed only to be made in the 'down' position - and the very spindly propellors.

Still, as I bout this kit for just £2.95 I can't really complain all that much can I?

Tuesday 2 August 2016

Hataka trauma over!

Hobby Boss 1/72 Hawker Hurricane Mk. IIC - Part 4
Phew! This is as much as I'm doing with Hakata paints (bored now), but I have learned a few things...


Once again, I have to thank the very helpful and friendly guys over on Facebook's 'The Plastic Scale Model Making Group' (Closed Group, you need to ask to join) with whom I've had a very lively and informative discussion about Hataka paints. The upshot of this conversation was 'it's not just me' (which is nice to know) as quite a few people have found this make of acrylic paints 'tricky' to use (and to be fair, a couple have actually mastered them).

The general consensus is that - to brush-apply Hataka acrylics - you do need to use multiple thin coats of paint. This is in line with what I have found - I made an utter mess of the 'Ocean Grey' areas of the camo scheme by trying to apply it like I would have with enamels.

What will be interesting now is how the proceeding decaling and weathering stages will affect how my shoddy brush painting looks!

Monday 1 August 2016

I still hate Hataka paints!

Hobby Boss 1/72 Hawker Hurricane Mk. IIC - Part 3


The final parts of the easy build kit went together very quickly and with no real bother. I did have to fill the unsightly gap where the fuselage joins the one-piece wing component.

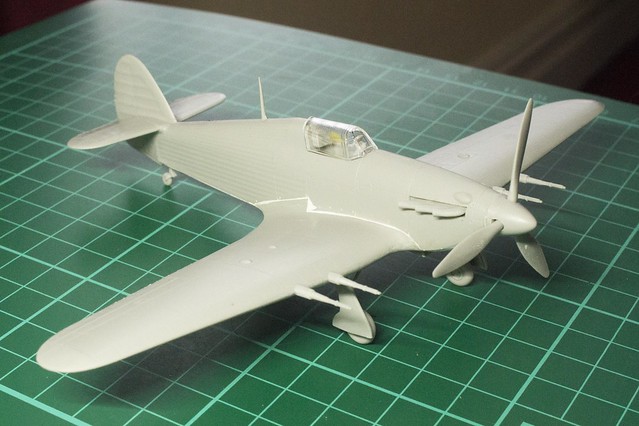
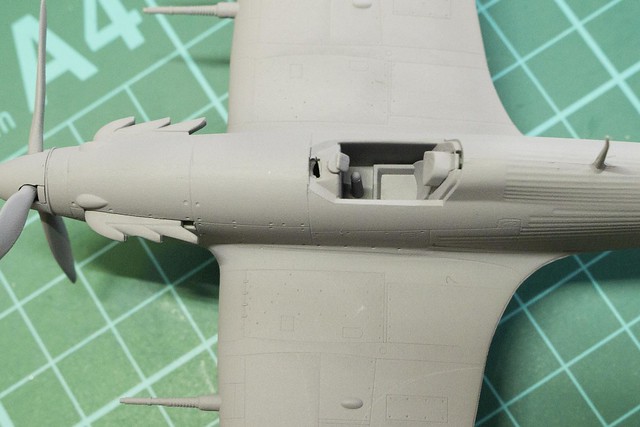
One other detail that's worth mentioning is the cockpit, or rather the lack of detail therein. It is better than Hobby Boss's Easy Build Spitfire that I recently made (which was nothing more than an empty slot), but that's not saying much. Still, here's what you get...


Not much to see, really. A seat, a headrest, a very rudimentary (and incorrect) joystick and a simple gunsight. I'm hoping that once the canopy is on that this poor detail will not be so noticeable.

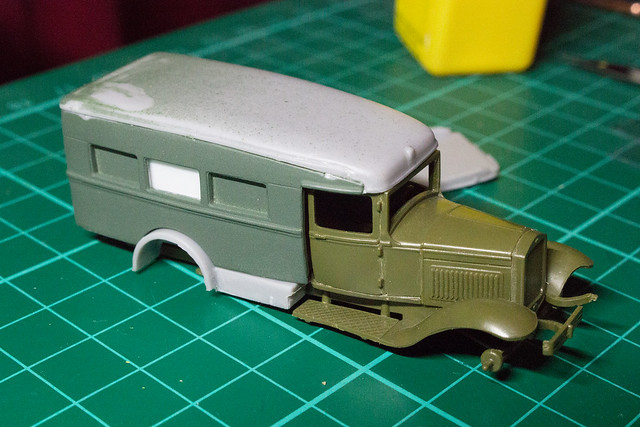
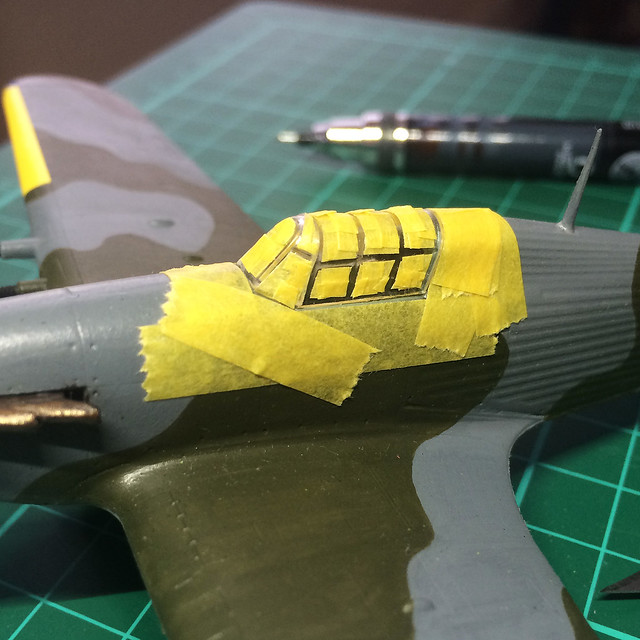
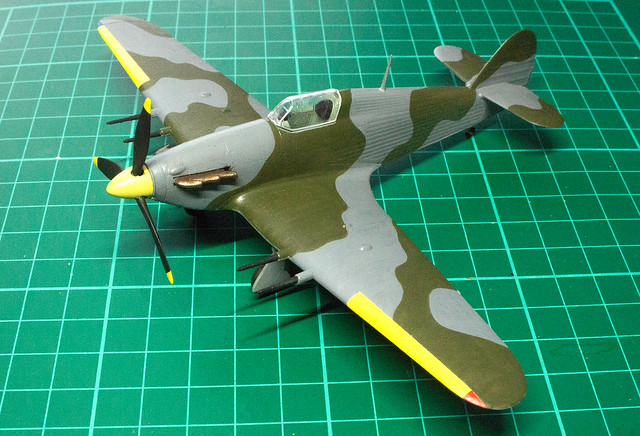
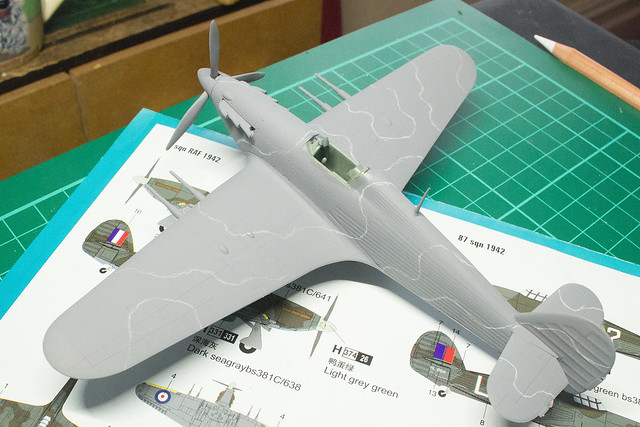
Now, having primed the model with Humbrol Spray Acrylic Primer I started marking out the camouflage pattern using a white pencil crayon...


As this model is a painting test to see how easily Hataka paints are applied by brush I'm applying the camo scheme freehand, but some faint guidelines will help me paint a fairly realistic pattern. Hopefully.

I wasn't all that impressed with how the Hataka acrylic paints went on using an airbrush, so let's see if they brush on any better...


Nope! Not liking this!
Maybe it's just me, maybe I just don't like brush painting (large areas), but Hataka paints continue to be a challenge. However, I have learned a couple of things...

First of all, mix Hataka paints well - 
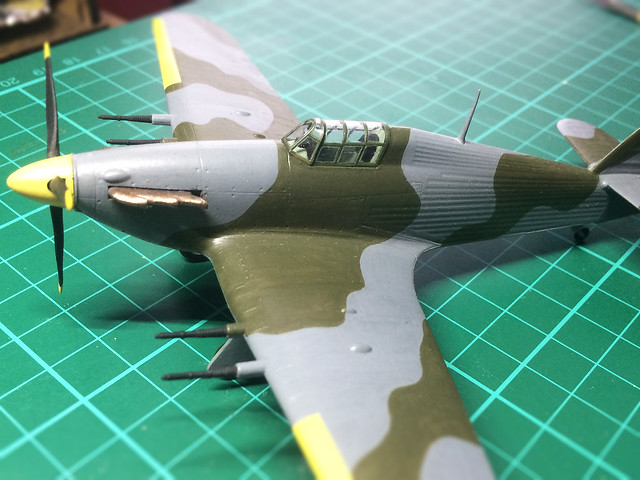
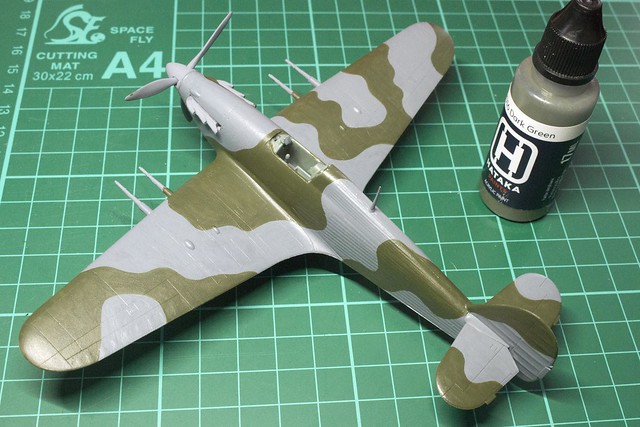
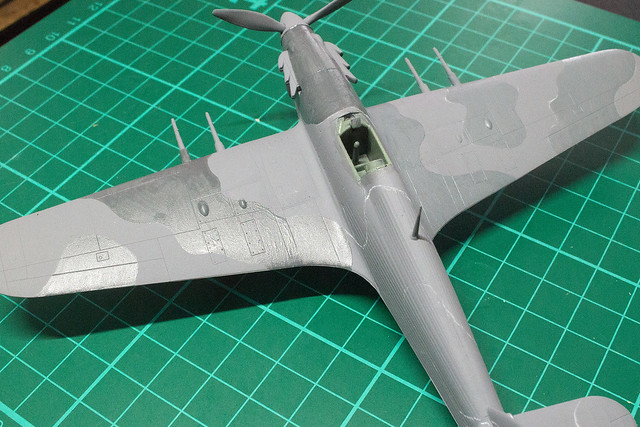
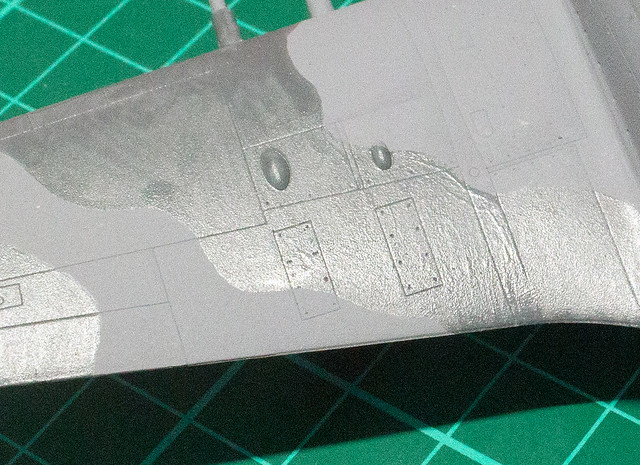
I mean really well. On my first attempt, I shook the Hataka paint bottle the same amount of time I do with my Vallejo paints, about 30-40 seconds (really hard). But this still resulted in a milky solution where the paint binder was not completely mixed with the paint. This resulted in a streaky and glossy 'paint' (see left wing)...


Learning from this I shook and shook and shook the Hataka paint, ensuring that the ball-bearing that they put in their bottles was floating free in the bottle (it sometimes sticks to the side if you leave the bottles unused for a while). This time, I shook the bottle for well over a minute, and the difference was marked.

The binder was properly mixed, this time, the paint was easier to apply and not quite so streaky. BUT, there was also a marked colour change in the paint compared to the colour I expected (see the right wing of the above photo). I was expecting Hataka's 'Ocean Grey' to be a darker grey (based on the Hobby Boss paint instructions), but it turned out not that much darker than the primer I sprayed on.

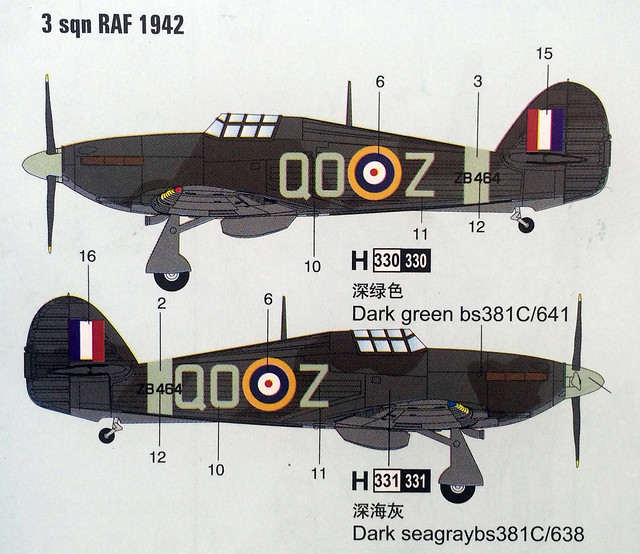
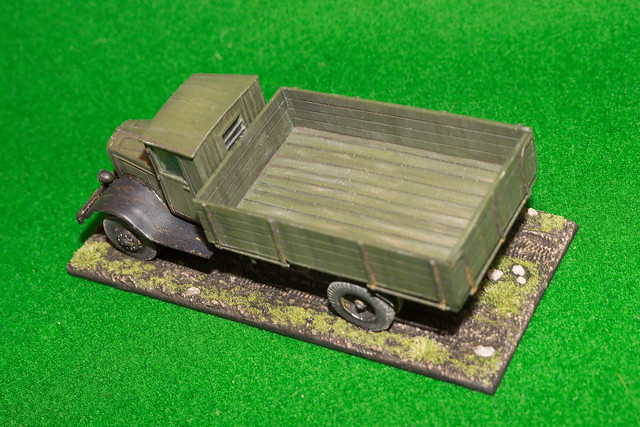
Hobby Boss paint instructions...
The correct RAF 'Ocean Grey'. Source: Wings Palette
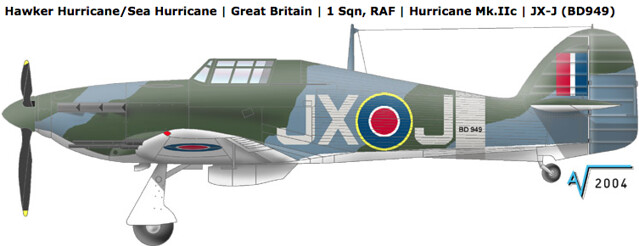
The Hobby Boss paint instructions indicate a mid-charcoal grey for the fuselage, but checking online references (see above photo) it looks like Hataka is closer to the correct shade of grey. So, once again, while using Hataka paints are a challenge (at least for me, it seems) they are very good renditions of the correct original paint schemes.

And, onto the 'Dark Green'
Despite my problems, I decided that as I've gone this far I might as well complete the model and the test (I was tempted to just respray the model, but resisted)!

So...It's shake, shake, shake, shake that Hataka paint!


While still not happy, I seem to be getting the measure of brush applying Hataka paints. Unlike when airbrushing, do not attempt to use Humbrol Acrylic Thinners but instead just use ordinary tap water to get the paint to a useable consistency. I have also settled on applying two thinner coats of paint rather than trying to get a good coat with one coat.

The Hataka paint has a tendency to dry fast (as I discovered to my horror when using with an airbrush) so you have to watch our for drying stains where you are brushing over already drying paint. Two light coats helps with that issue as well.

Even so, I found I had to be reasonably speedy in applying my coats and I took the precaution of applying the paint in zones - filling in panels so that the edge of my completed areas did not show up under the next brushed section. Stop and start mid panel and you are liable to see where you stopped underneath the next coat.

The effect is still a little streaky for my tastes - I cannot say that brush painting or Hataka paints have grown on me any!