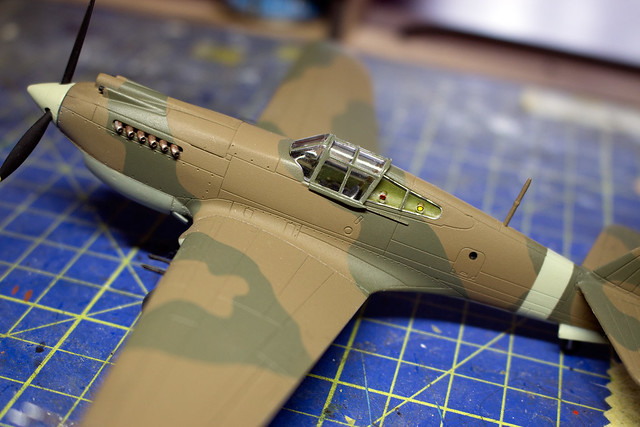
By now I had hoped to have the all the decals applied, the Tomahawk weathered and - perhaps optimistically - the model finished and ready to mount on the diorama base I have designed. But, guess what, I hit some snags.
 |
| What problems? Annoyingly - in this instance - some of the issues I have experienced have been 'glossed over' (excuse the pun) by the photography! |
Basically, I made a complete mess of the glossing stage as my choice of Humbrol enamel varnish (over acrylic) appears to have been a faux pass of major proportions. At the very least I should have research this product more and done some experimentation before using it on a 'live project'.
The unfamiliar varnish has never dried properly for me (my subsequent research suggests this is a reasonably common problem and might be caused by the varnish not having been stirred sufficiently before use). It remained stubbornly tacky and this caused a lot of other problems down the line.
Handling the model became very difficult indeed. The sticky gloss coat became a trap for dust and finger prints and each touch resulted in the gradual destruction of a little bit of the basic paint coat that the varnish was actually intended to protect.
And then...
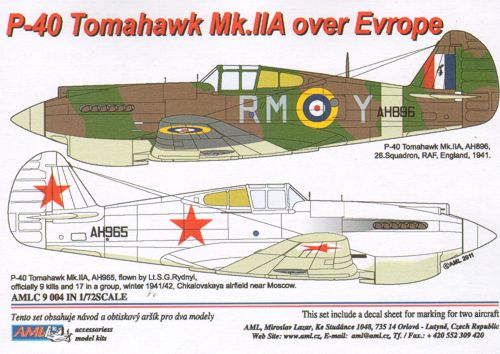
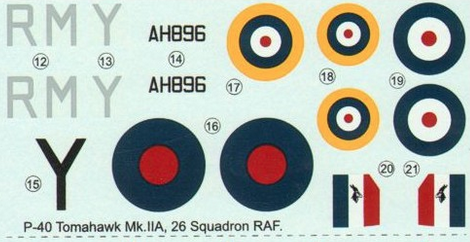
The AML Decal Set
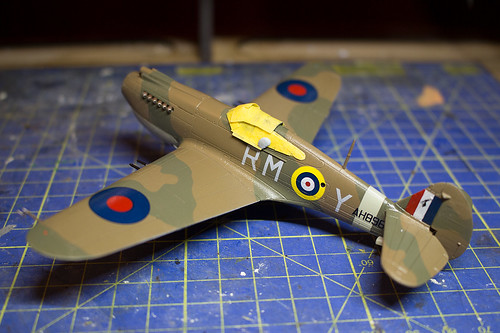
So, the gloss problems set the scene (and may be connected) with the issues I am having with the AML decal set I bought. Ironically, while my gloss coat was too sticky one of the main problems I encountered with AML's water-slide transfers was that they weren't sticky enough!
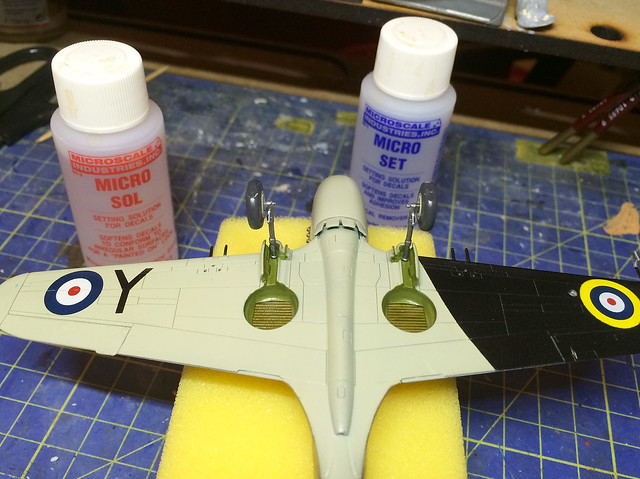
To begin with though, while my initial impression of the decals (while still on the carrier sheet) were positive - the print and colour quality being good - once it came to applying the decals a couple of things were not so positive. The AML decals appears to be quite thick - in my opinion (similar to some of the cheaper Italieri decals I have used but perhaps not quite as glossy) and they were also did not seem to respond quite so well to either Micro Sol or Micro Set solutions.
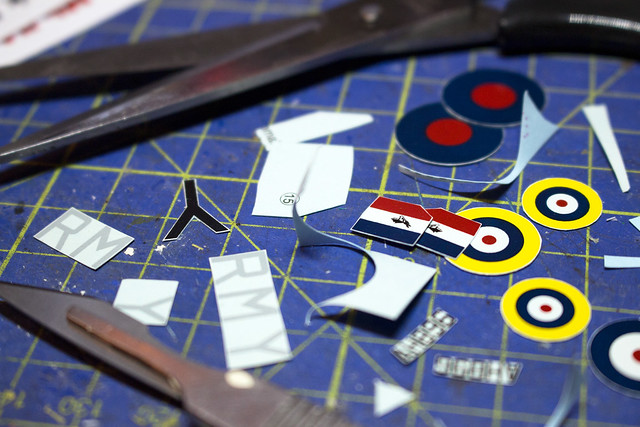
I did take the precaution of trimming the decals as close to the graphic as I could, minimising the amount of transparent carrier film visible around the edge of each symbol. One of the effects of Micro Set/Sol is that it aids the creation of a 'painted on' effect where the carrier film appears to blend in seamlessly with the underlying paint scheme. The level to which this is successful depends on the coat onto which they are applied (gloss or Klear being best), the quality and thickness of the decals themselves (the thinner the more chance they have of blending in) and the pliability of the decal (where Micro Sol, in particularly, can help the decal conform to irregular shaped surface detail).
AML decals - sadly - seemed immune to my decal fix solutions, even the stronger Micro Sol (which I have know to completely dissolve some Hobby Boss decals in the past).
Was it the failed gloss preparatory coat onto which the decals were applied? Was it the thickness or lack of adhesion of the AML decals themselves? I know it wasn't a 'bad batch' as - I must admit - I had to order a second set of the decals as I accidentally damaged one of the vital letter transfers and the replacement set was just as stubbornly 'un-sticky' as the first was.
In consequence, although it is (ironically) not apparent from the first photo at the top of this entry, some of the decals have areas where the carrier film is obviously visible - despite repeated applications of Micro Sol - and in a couple of places the edges of some decals have persistently peeled up slightly.
My only hope is that the protective varnish 'sealing layer' I am about to apply with help to remedy this somewhat. And here I must assure you that I am NOT using Humbrol's Enamel Cote but am instead returning to my tried and tested (if somewhat thicker) Humbrol Acrylic Satin Varnish aerosol spray.