Before moving on, I decided that I needed to do something about the kits exceedingly flimsy 37mm gun barrel. There's no doubt in my mind that this would quickly break off while being handled during a game so I am replacing the plastic barrel with a piece of brass rod of roughly the same diameter...
The Painting Process
Onto my usual painting regime now; priming, base coating, (decaling), wash, staining/streaking, pin-wash outlining and then varnishing. Priming will be done using Humbrol's [86] Light Olive Matt - Acrylic Spray Paint, this should give a slightly faded US Olive Drab suitable for the Pacific theatre.
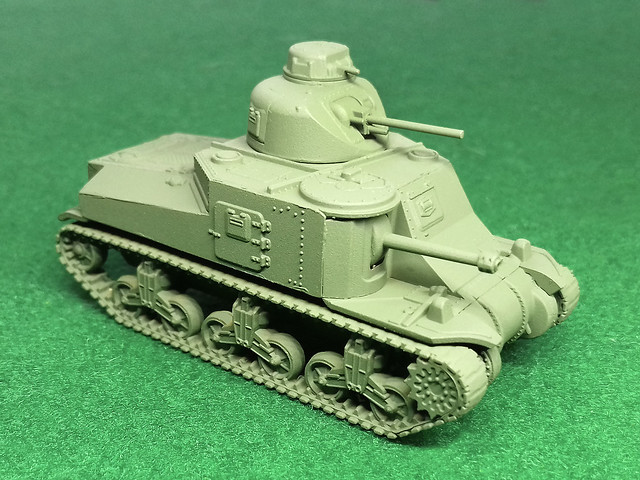
Amusing note: You'll probably be thinking 'that 37mm looks thicker than it did in the last picture'. And you'd be right, I broke off my first attempt at 'improving' the barrel! So, I had to have another go and this time I drilled right into the turret and superglued in a thicker brass rod. LOL
Decal Scheme
Because this model is for a game and will be used in a few different scenarios representing completely different WW2 combat theatres, I am using a little artistic licence with the decals in order to create a generic representation of 'a' M3 Lee tank in US Army service. The scheme is fictional...
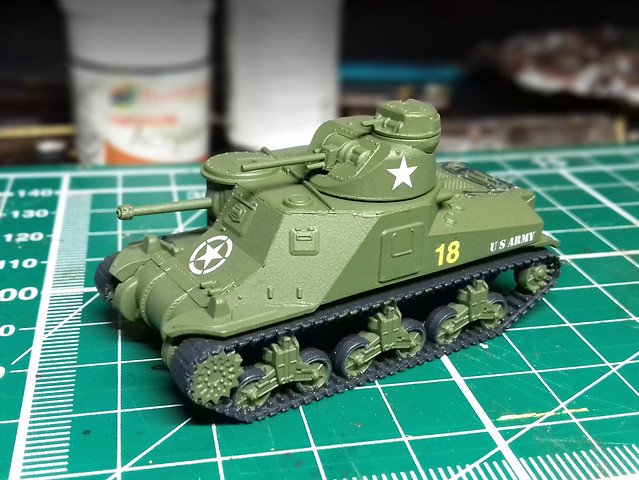
Wash, Weathering & Mud
I'm going to try and go easy with the weathering and particularly with the amount of mud I will be applying this time. I was quite pleased with Tamiya's Weathering Sticks - which I used on my last 1/100 model - as I like this softer, more blendable medium. (Apparently, Tamiya's Sticks are just normal weathering powder pigments but mixed with a sort of cream or oil preparation. This makes them into something akin to cosmetic creams, like cheek blusher crème...Not that I'm an expert on lady's make-up you understand!)
But, before I start the weathering, I'll be applying what has become my 'usual' pre-weathering preparation of a wash of Citadel's Agrax Earthshade...
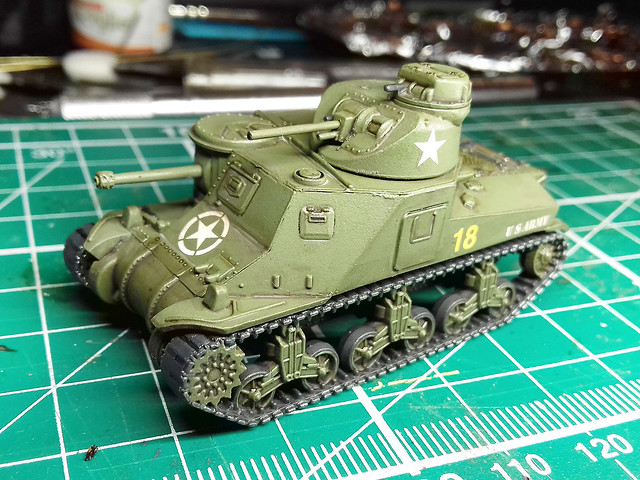
I'd like to try and go for dusty rather than overly muddy this time. I've never really mastered realistic dust and I'm thinking that I might play with eyeshadow powders and maybe some pigments (but added 'dry' onto the surface)...
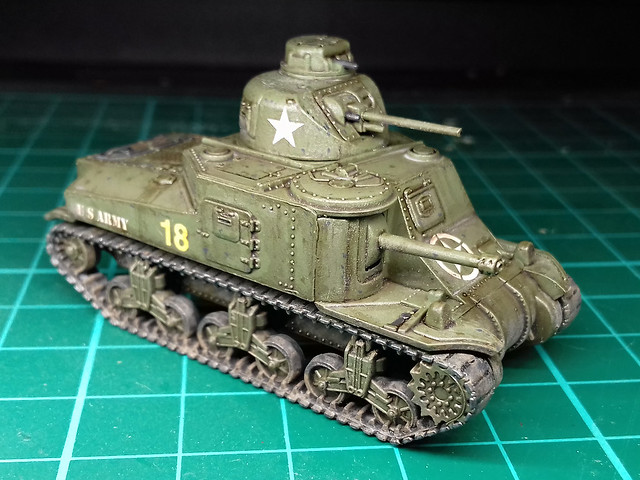
The eyeshadow powder is a little bit granular compared to Tamiya's Master Weathering kit and their Weathering Sticks. I prefer the cream mediums a little better as the blend really well, creating a nice smooth - non-gritty - pigment film over the surface.
I added a little pin-washing effect with more Agrax Earthshade carefully painted into the panel lines and then finished off with some very fine line work using black ink for deep lines and the edges of doors and armoured windows and hatches.
And that's that for now, the tracks need some more attention before I finish this model off with a coat of matt varnish.
Diary of a novice scale model maker and his adventures in the wacky world of Braille Scale.
Showing posts with label X-Ref: ZVS/100M3Lee/0517. Show all posts
Tuesday, 30 May 2017
Friday, 26 May 2017
Something for the Weekend...1/100 M3 Lee
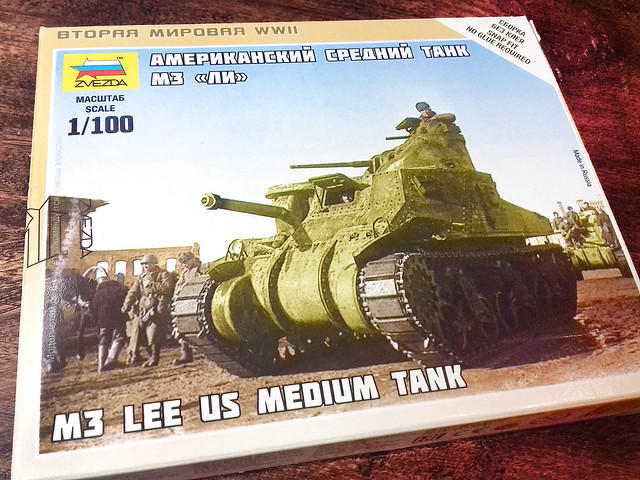
This is something new, I'm getting into doing very short and quick weekend projects courtesy of Zvezda's little 1/100 tank kits. This week I'm adding to the M3 Stuart that I already made for a WW2 Pacific scenario I have in mind with a US M3 Lee tank...
The M3 Lee is an interesting - if not terribly exciting - early way American tank. It was the predecessor to the legendary M4 Sherman and the US Army's first serious contender - if not quite a match - for contemporary German tanks. The M3 was the tank in which the US Army learned about 'modern' armoured warfare and - perhaps more importantly - first introduced a 75mm gun to the Allies armoury. As a lend-lease tank, the M3 added some much-needed firepower to the British in North Africa.
The Zvezda Kit
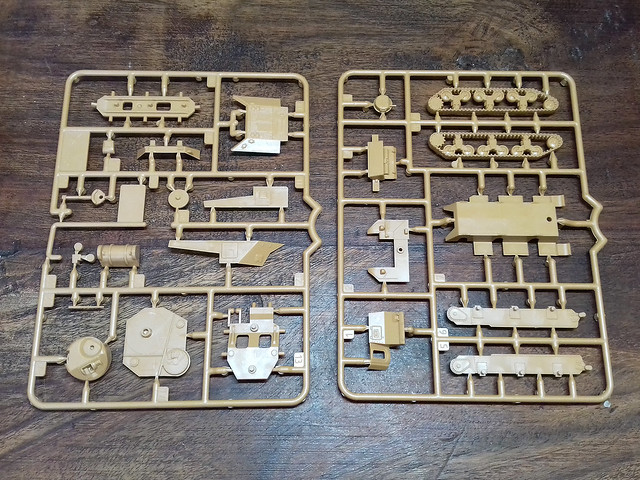
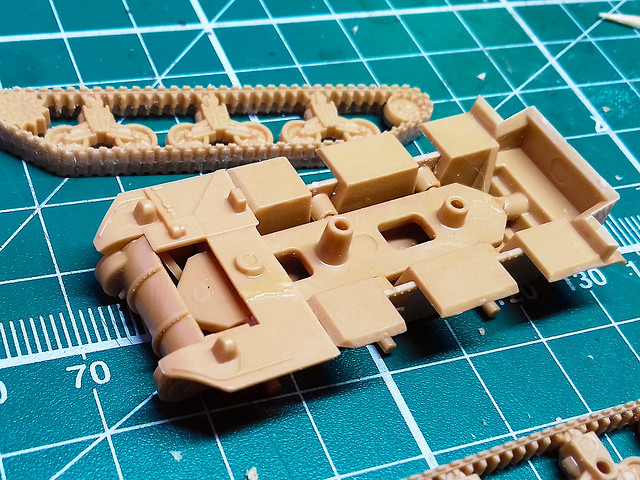
Despite being a diddy little kit Zvezda's Lee is a little complicated with quite a lot of parts compared to other tanks in its 1/100 range. This has as much to do with their insistence that their kits be 'snap together' as it is to do with the M3's unusual design.
Other companies - like PSC and Battlefront, for example - minimise the number of component parts their models require because they rely on the use of glue to stick the parts together. And even Zvezda, themselves, manage to come up with very part-efficient 1/100 models when the original tank design is conducive to low numbers of parts (their KV-1 kit has only 6 parts).
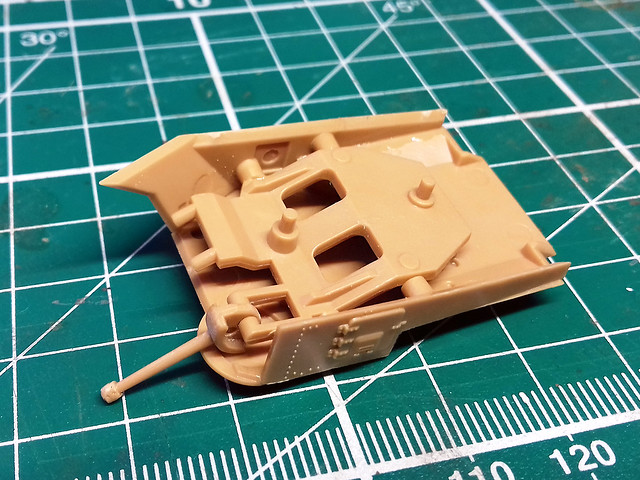
Anyway, the M3 is a complex design, what with its dual turrets featuring a Barbette-style hull-mounted 75mm gun....
The above picture illustrates the point. This is just the upper hull assembly, holding the 75mm gun and when finished it will consist of no less than 8 parts! The lower hull was just as convoluted...
It was all a bit too complex for my liking, though I understand that to make it 'snap together' these extra parts were required.
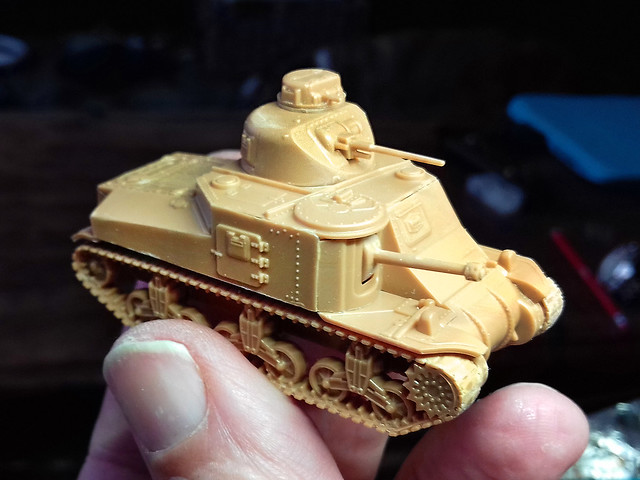
Anyway, much fiddling about later...
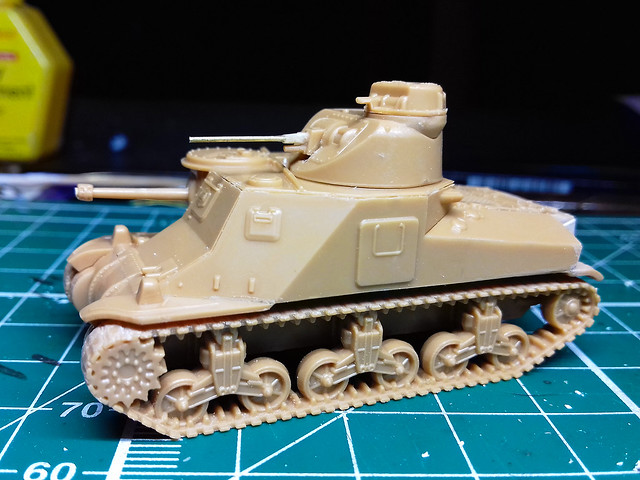
Not a bad looking little model.
Thoughts about Construction & Quality
The construction was a faff and needed a bit of pressure in places to ensure parts fitted together nicely. I had to hold some parts together until the glue set so that the seams didn't have any gaps.
But, overall I was happy with the quality. As usual with Zvezda, the moulding was crisp and there was a reasonable amount of surface detail, though - of course - the level of detail was simplified as this is a wargaming model.
The one noticeable issue is that I feel is worth mentioning is the fragility of the secondary gun barrels. The 37mm - top turret - is very thin and wouldn't take much of a knock to break it (in fact, you have to be careful cutting it off the sprue). Zvezda seem to scale their tank guns accurately, while other 1/100 wargame model manufacturers tend to 'over-scale' their guns to make them a bit more durable.
As usual, the tracks are simplified without much of a detailed tread pattern (the M3 tracks of the time were the pretty simple steel links with rectangular rubber track pads - the same ones used by the early Shermans).
Overall, I'm quite happy with the model - delicate parts aside - it captures nicely this early US tank and allows you to play early war Pacific, Far East and North African scenario and also Lees were supplied to the Soviets lend-lease, though they had a far from favourable view of this antiquated design.
Next: Priming and Painting
The M3 Lee is an interesting - if not terribly exciting - early way American tank. It was the predecessor to the legendary M4 Sherman and the US Army's first serious contender - if not quite a match - for contemporary German tanks. The M3 was the tank in which the US Army learned about 'modern' armoured warfare and - perhaps more importantly - first introduced a 75mm gun to the Allies armoury. As a lend-lease tank, the M3 added some much-needed firepower to the British in North Africa.
![]() |
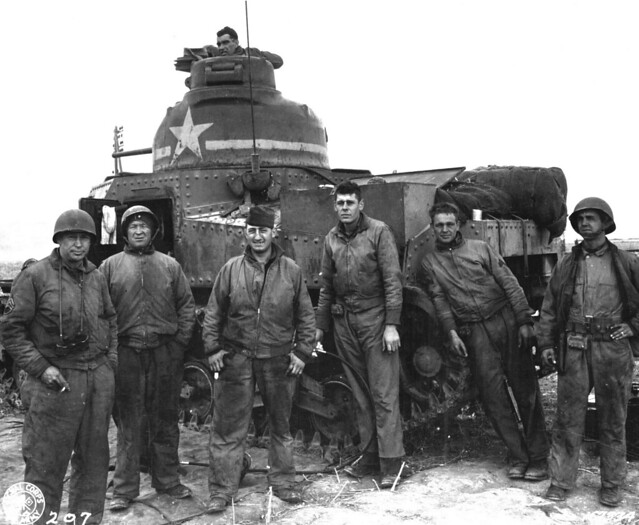
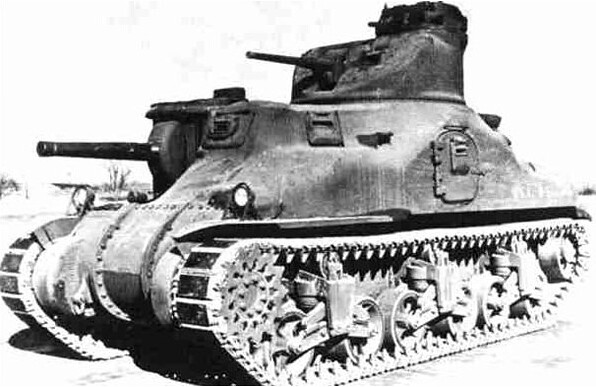
| The Americans early war contribution - in North Africa and the Pacific - is often overlooked somewhat. This was a real trial by fire for them and they had a lot of catching up to do, with their already out-moded M3 they learned the hard way. Picture: Crew of M3 tank at Souk el Arba, Tunisia, November 23, 1942. Wikipedia. |
The Zvezda Kit
Despite being a diddy little kit Zvezda's Lee is a little complicated with quite a lot of parts compared to other tanks in its 1/100 range. This has as much to do with their insistence that their kits be 'snap together' as it is to do with the M3's unusual design.
Other companies - like PSC and Battlefront, for example - minimise the number of component parts their models require because they rely on the use of glue to stick the parts together. And even Zvezda, themselves, manage to come up with very part-efficient 1/100 models when the original tank design is conducive to low numbers of parts (their KV-1 kit has only 6 parts).
Anyway, the M3 is a complex design, what with its dual turrets featuring a Barbette-style hull-mounted 75mm gun....
The above picture illustrates the point. This is just the upper hull assembly, holding the 75mm gun and when finished it will consist of no less than 8 parts! The lower hull was just as convoluted...
It was all a bit too complex for my liking, though I understand that to make it 'snap together' these extra parts were required.
Anyway, much fiddling about later...
Not a bad looking little model.
Thoughts about Construction & Quality
The construction was a faff and needed a bit of pressure in places to ensure parts fitted together nicely. I had to hold some parts together until the glue set so that the seams didn't have any gaps.
But, overall I was happy with the quality. As usual with Zvezda, the moulding was crisp and there was a reasonable amount of surface detail, though - of course - the level of detail was simplified as this is a wargaming model.
The one noticeable issue is that I feel is worth mentioning is the fragility of the secondary gun barrels. The 37mm - top turret - is very thin and wouldn't take much of a knock to break it (in fact, you have to be careful cutting it off the sprue). Zvezda seem to scale their tank guns accurately, while other 1/100 wargame model manufacturers tend to 'over-scale' their guns to make them a bit more durable.
As usual, the tracks are simplified without much of a detailed tread pattern (the M3 tracks of the time were the pretty simple steel links with rectangular rubber track pads - the same ones used by the early Shermans).
Overall, I'm quite happy with the model - delicate parts aside - it captures nicely this early US tank and allows you to play early war Pacific, Far East and North African scenario and also Lees were supplied to the Soviets lend-lease, though they had a far from favourable view of this antiquated design.
Next: Priming and Painting
Subscribe to:
Posts (Atom)