Showing posts with label GF9 Tanks. Show all posts

Wednesday, 19 August 2020

1/100 KV-1 Tanks Primed

 Yes, it really has taken me this long to get this job done - a whole month. There again a lot has been going on in my life this month, including a week in hospital! (All sorted now though.)

Anyway, my KV-1 tanks have progressed and I've finally got them primed. As usual I did this with a coat of Humbrol's Light Olive acrylic spray - my go to quick-prep for my 1/100 green tanks.

I've mentioned it before but it's worth repeating, I love this product. Not only does it go on very smoothly - giving a fine base coat - but it's an excellent jumping off green which you can then modulate into any of the greens used by the major armies in WW2; British Bronze Green, American Olive Drab or Soviet Russian Green.

As you can see I am now have KV tanks suitable for early WW2 or mid-war, just by switching out the turrets. It is - in reality - a bit of a fudge as the chassis of these models of KV did actually differ slightly. But for 1/100 war gaming I think I can get away with it!

Now to plan the next stage - adding the decals.

Saturday, 13 June 2020

1/100 KV-1S Conversion Pt.3

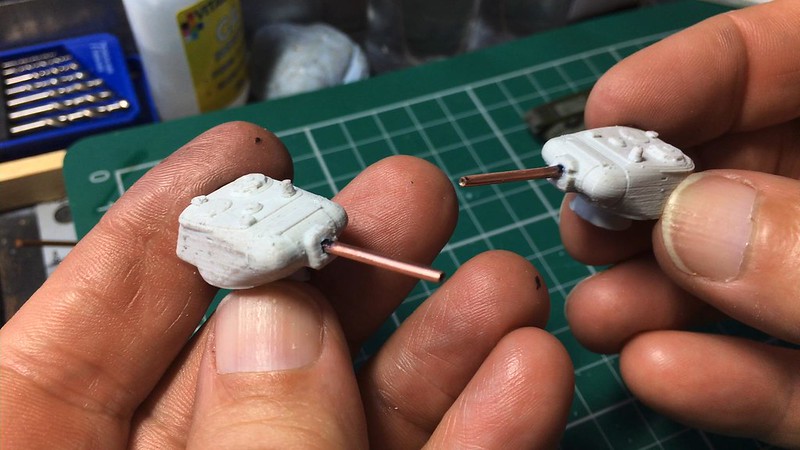
Well, I finished the modelling part of the work on my little KV-1S tank turrets. Working with a 3D printed model - by Butler Printed Models UK - wasn't the traumatic experience I thought it might be. Yes, the material is a bit weird - "It's plastic, but not as we know it, Jim" - and you do have to use a slight different approach to working with it, but it's not completely alien.

Cleaning up was done more by shaving and paring than by filing, I found this gave a sharper finish to the material BUT it can be filed and sanded, I just preferred to use this technique instead...

Using Tamiya's Modelling Chisel.
"A little off the back, Sir?"
Filling was optional and if you are just wanting to get a war-gaming model quickly onto the table you could skip this cosmetic phase. But, I've plenty of time so sorted out a couple of minor things (they were't even what I would call 'issues')...


I didn't try to smooth out the 3D 'stepping' pattern on the model by filling it - though I had thought about it - instead I gave it a quick sand with very fine grit paper and a thin coat of liquid cement followed by another light sanding. You can't get rid of all the 3D print steps as some are in awkward places but this model is what it is and it was never going to be display level quality.

Finally, I added some little details - again you don't have to for war-gaming...


After gluing on these little bits and pieces I filed or sanded them down to shape and that's that really.


I'm quite pleased, especially when you consider that these turret models only cost me £3.30 each. They really helped me out as it's still hard to find a model of the KV-1S in this scale. I was also, impressed that BPM has the good sense to allow you to buy just the turrets themselves rather than the full tank model. It means that, in cases like the KV tank - where the chassis didn't change all that much throughout the tank's development - you can 'upgrade' your model through the series just by replacing the turret you require. Neat.

Next: Onto making the chassis.
-------------------------------------------------------

Link to this project series - 1/100 KV-1S Conversion

Wednesday, 10 June 2020

Get Real? Tabletop Battlefield Design.

I'm at the stage with my GF9 TANKS! Kursk project where I'm thinking about the design of my battlefield. Now war-gaming is such a developed hobby/industry now that - to be honest - you can get most anything you want to make a really fantastic and realistic looking miniature battlefield without having to do any real work (aside from clicking on an online store's  'purchase' button).

However, for many war-gamers, part of the enjoyment of the hobby is the crafting of scenery and accessories and making a little historically accurate piece of Waterloo or Normandy or whatever your choice of battle is that you wish to recreate. So, much crafting ensues!

Just how far down the rabbit hole of 'authenticity' you want to go is up to the individual and, certainly, I have seen some amazing examples of realistic looking and beautifully landscaped battle tables...

An wonderful example of some beautifully constructed and realistic landscape!
A magnificently atmospheric recreation of Normandy for
some war gaming, the town painstakingly crafted.
Looking at some of the breathtakingly intricate terrain models that some war-game clubs have taken months to build I find myself brimmed full of admiration BUT at the same time asking myself  this question - how 'realistic' does a game table need to be?

The Galeforce 9 TANKS! Battlefield Philosophy...
One of the things I liked about GF9T was that you could jump straight in with everything you needed by buying one of their starter sets. In the box you got all the bits and pieces you needed to start playing the game immediately, including some tanks and some flat 'scenery' with which you could make your battlefield...

My very first game of GF9T - straight out the box, with the 'scenery' provided
and the tanks aren't even painted yet! LOL
My first few games of GF9T were played on the dinning-room table with just a length of green felt thrown over it and using the flat printed 'scenery' that came in the box. This was perfectly adequate for learning how to play the game AND easily portable if you wanted to set-up at a friend's house.

However, I eventually found that ALL flat scenery had some disadvantages. As you can see from the above picture of my very first game the set-up leaves something to be desired by way of atmosphere - you'd have to really stretch your imagination to feel immersed in the idea that this was supposed to be France in 1944! 😂

Additionally, as I have mentioned in previous posts, GF9T's base mechanic is tank combat using 'line of sight' - in other words, if you can see it you can shoot it. Therefore, the intensive to add some proper 3D scenery becomes desirable, if only to help resolve instances of 'you can't see me from there' disagreements (which are a little more problematic when using flat scenery).
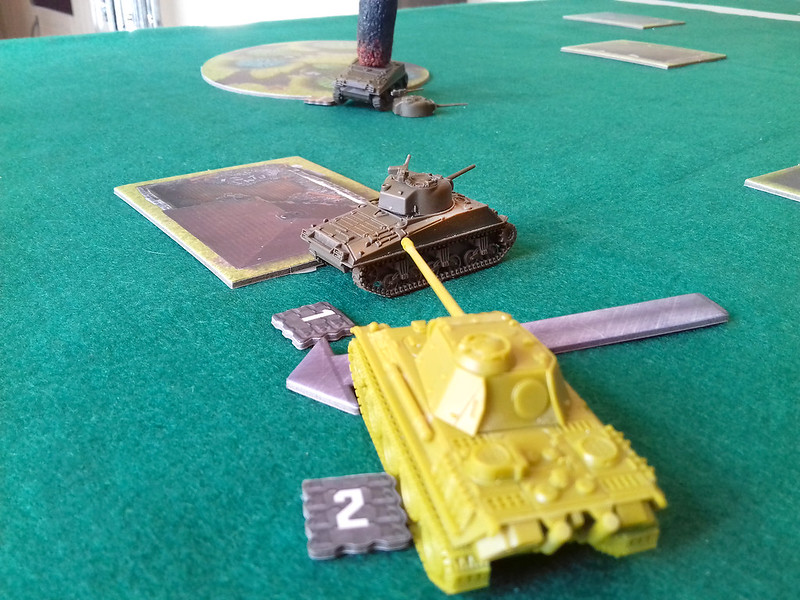
The most important view in GF9T...Line of sight to your enemy. But is that
flat 'cottage' tile blocking your view? Hhhhhmmmm...
So, 3D scenery was the way to go - for me at least - but then did I want to start building little miniature landscapes? The quick answer is 'no' and here's why...

Terrain building is an art in itself and once you start down that slippery slope you have to be very careful to balance your original intent - just to play a quick hour long game - against a project that could then blossom into an obsessive modelling project that could take up weeks of your time!!!

While full-blown wargamers who play games with rules that mean that their games could stretch into days long play (if not longer if they are playing a campaign) might want to have a immerse battlefield because they are spending so much time playing on it, I - on the other hand - just want a quick fix of blast 'em up fun and action.

I very soon began to add simple 3D objects to my games to make the task of
determining line of sight easier and to add some decoration. Adding objects also
adds an extra tactical element to the game as the intelligent use of 'cover'
becomes an essential aspect of the battle.
 I don't care so much if a certain house does't look like the one in the photo reference take in 1943 or whatever, I'm not - generally speaking - out to recreate an historic engagement in order to resolve some armchair general's academic 'what if'.Whether a building is of the exactly correct architecture or whether a particular model tree is exactly native to that particular environment is not so important... Me just want go 'boom boom'!!! 😈

Horse's for Courses...
So the driving force behind my need for scenery is simple, practical and is based on fun rather than on what is strictly factual. I'm make some effort to make my board look pretty - but I'm not going to spend enormous amounts of time planning and making a replica battlefield when I already have three or four (or more) ideas about the next battles I'd like to play banging about in my head.

I'm looking at scenery that can be quickly laid down to create a general sense of landscape but which can just as quickly be dissembled and packed away.

This attitude formed the fundamental requirements for how complex my scenery needed to be. It needed to be quick and easy to construct - I might only use it a couple of times so no weird and niche items that will just end up as draw fodder - and they should be rather generic and so re-usable.

Your requirements may differ - it's a sort of sliding scale.

The basis of any tabletop battlefield is the battlefield itself - by this I mean the base on which you place any other scenic items. And for me, my ubiquitous green felt cloth (other colours are available) is the ideal multi-national, all-encompassing 'moderate climate' theatre of war. That said, I have of late been tempted by off-the-peg battle mats that have texture patterns printed on them...

Might one of these printed battle mats finally replace my trusty felt cloth as
my go to battlefield? This is a Deepcut Studio 'Grass Plains' mat.
These seem to have all the advantages of my old felt cloth (you can roll them up and stick them in a draw) while at the same time adding the illusion of real ground texture. The downside is perhaps the expense, although I have noticed that they are getting cheaper all the time. A 3x3' mat - the basic standard size for a GF9T skirmish - is 26 Euros plus shipping, a bit more than the £7 I paid for my felt cloth cut-off! 😊

KISS - Keep it Simple Stupid!
...And having established my preference for a simpler and more 'stylised' approach to making my battlefield everything else sort of just falls into place...

I have already desired that I really like the quick build paper-craft buildings I have been making, they fit right into my 'cheep and cheerful' ideal. Because of this pared-down 'psudo-realism' all my other scenic items sort of need to follow suit. They have to be...

- Cheap
- Easy and quick to make

- Preferably modular and usable in different ways
- Unfussy and simple (preferably not multipart things I have to assemble)
- Portable and kinda disposable
- East to store

Because of my new love affair with papercraft models I am keen to carry this on for different parts of my terrain, such as rivers, roads, etc. In this way I can have a sort of unified aesthetic, so I'm now on the hunt for different pieces I can collect to make a 'battlefield kit'...


I've already found a modular 'flat' printable river kit by Fat Dragon Games. Although this is a stylised 'fantasy RPG' scenery I'm fine with the aesthetic as GF9T is a sort of cartoon caricature of armoured warfare itself. Also, it fits in well with the tiled scenery items that came with the basic starter kit, all I have to do is print out the river tiles I need and mount them on card and place them on my battle mat. Simples! (Do people still say that?) 😆

And so the search for papercraft terrain begins!

Thursday, 4 June 2020

1/100 KV-1S Conversion Pt.2

I'm very slowly getting back into modelling, but I'm finding it tricky. I am suffering from a bit of anxiety about getting down to it because - I think - after such a long break any modelling I do now may not be up to the standard that I managed to get to three years ago. It's frustrating and is causing me to procrastinate about putting craft knife or file to plastic.

However, today (finally) I took some baby steps towards actually doing something!

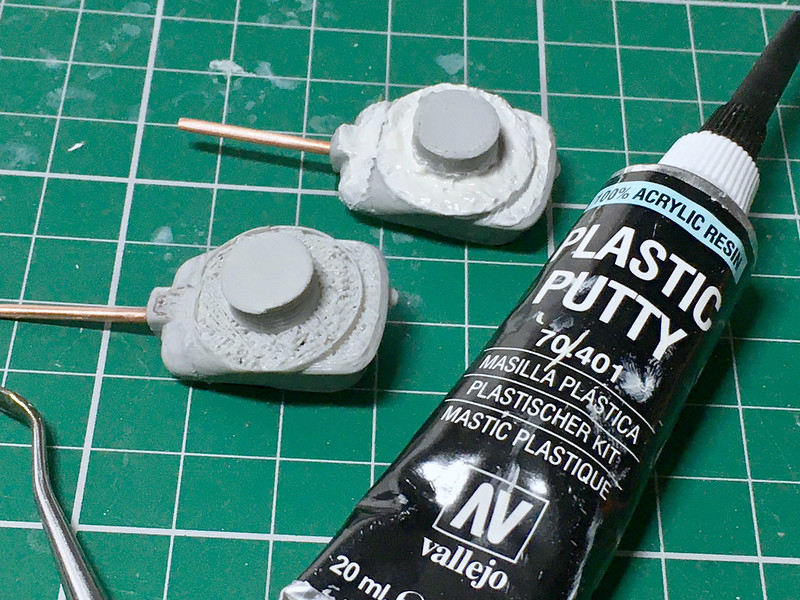
Having spent some time trimming the excess flash and support filaments from the turrets I got them in a state where I could look at them properly and decide what they needed doing to them ...


As you can see from the accompanying picture the 3D printed turrets are a little rough with the stepping effect of the 3D printing pretty obvious. I will have to do something about that, but - first of all - I really wanted to tackle the overly thin and fragile main guns.


I managed to find a piece of copper tubing that was approximately the right size for use as a replacement barrel. I checked these dimensions against one of the T-34/76 models I had already done as both the T-34 and the KV-1S were equipped with the same 76.2mm ZIS-5 gun.

I had to do a little bit of sanding and filing of the soft copper to get it close to the right diameter and then I trimmed the 3D printed gun off the turret. The new barrel needed socket to fit into so I drilled a hole in the mantlet to accommodate it...

Excuse the filthy hands but sanding and filing copper is a messy business!
I got a bit of a surprise when I drilled into the turret as I discovered that the 3D printing process produced a hollow part. I didn't know that - This is my first 3D model!

Anyway, I super glued the tube into place and checked it off against my T-34 model. It is still a tiny bit thicker but I reckon at 1/100 and it being a tabletop gaming piece nobody will complain too much!


I'm much happier with a metal barrel as - being game pieces - these models will be handled quite a lot and they will have to be sturdy enough to put up with use.

Next: Now onto smoothing out the turret and cleaning up the fine detail...
-----------------------------------------------------------

Link to this project series - 1/100 KV-1S Conversion

Monday, 1 June 2020

1/100 Kursk Project - Scenery Pt. 2

While still searching for all my tools and materials among the plethora of random junk in my attic I have managed to locate enough of my basic modelling tool set to have a stab at building something. Honestly, nothing is quite where I expected it should be which is very, very frustrating.

Anyway, I found enough bits and pieces to try putting together one of the little houses from the 'Rusgorod: Russian Hovels' paper-craft set I downloaded. I just wanted to see what the little models looked like built and to check that my size reduction from the set's original 28mm scale had worked.


Now, I don't have a great printer, it's just a cheap home-office HP and the resolution isn't fantastic (even when set to 'Best Quality'), but even so I was quite pleased with print-out I got and got down to cutting it out...


This is one 'Russian Hovel No. 1' - out of a set of 6 buildings - and as you can see is a log cabin with a (very) high 'A' frame roof (I know nothing about architecture). I'm not sure how authentic this is, but it looks quite cute and kinda similar to some of the log buildings I've seen in photos of the Russian countryside taken during WW2... So let's go with it!

Well, as you can see, it ain't the most complicated model to put together, the ones I did for my 1/100 Normandy game were a lot more fiddly. But, LOL, I still managed to get myself covered in Pritt Stick! 😂

I put together the inner shell or framework using 3mm Kappa board (as we used to call it in art school) - that's foam board if you prefer - and pasted the print-out onto it. The roof, however, was heavy card stock instead as I didn't want it too think...


For once, all my measurements seemed to be spot on and everything came together without any gaps at the seams.  This may have been to do with my cutting the board fractionally bigger, sticking the print onto it and then trimming off any excess? (For my Normandy card buildings I stuck all the printout onto the heavy card stock AND THEN cut everything out. I think my new way is better.)


Finally, with the walls glued together to form an open box, I cut out a rectangle of foam board for the floor and ground floor roof and then stuck them inside the box. This gave the building extra rigidity.

With the roof glued in place to complete the model I could't resist taking a photo of the cabin next to one of my 1/110 T-34s (Early Model)...


I think the scale looks just right - although I don't have any 15mm figures to check for sure - and next to the T-34 the model really does give off that rural Russian vibe.

This - as you can see - was a very quick build and there are a few things I would like to do to improve these models when I start banging out the rest of the set. For example, the exposed white card under the roof doesn't look good, I'll need to colour that (maybe a dark brown. And, also, I'll put on a darker roof cap along the length of the point, just to hide the little cut I made so I could fold the roof.

But, aside from these little niggles I am quite pleased with the model. It's what I was after - something cheap and easy and quick to put together. And I do prefer using foam board in order to create an inner supporting box as I noticed that after a while my 'card only' Normandy houses did warp a bit after being in storage in a cold, damp attic. These new models should last a bit longer.

Now, onto the other five buildings!

-------------------------------------------------------------

'Rusgorod: Russian Hovels' are by Finger and Toe Models and are available from Wargamevault.com ($5 download).


PS... I'm almost tempted to but their onion domed church (above) as well and they also have other houses in the series that are worth a look.

Sunday, 31 May 2020

The Curse of 'OCD' Strikes Again!

I've been really excited about restarting my modelling hobby after a two year hiatus, but I needed the break as I had burnt myself out a bit (plus there were health issues at the time). However, in all the giddiness and enthusiasm of 'something new' (which is how it seems now) I had forgotten some of the pitfalls of the hobby which contributed to my burn-out in the first place.

Like many modellers I suffer from a certain degree of OCD - well, let's just say that I'm 'on the spectrum' - and that's a bad combo! 😂

Joking aside, the worst thing about 'modelling OCD' is that it can be very distracting. Here's yesterday's example which illustrates just how easy it is for me to get diverted by 'shiny things'...

My main restart project - apart for some practice activity -  is my 1/100 'Battle o Kursk' modelling and I have been busy planning how I will put together a 'battlefield' table on which I can deploy my model tanks to play some games (GF9 'TANKS!').

'Ohhh, this is a nice little idea' - I said in the beginning. What could go wrong?

So, I was Googling around looking at cool bits of game table scenery and I came across a model of a derailed train - see above pic - 'great', I thought...But then modelling OCD set in...

Fast forward 24 hours and what started as thinking of buying a nice little gaming ornament (just to give the game some atmosphere) turned into a long research into the use of locomotives on the Russian Front, thence onto where I could find a suitable 1/100 model, then onto how I could get track and rolling stock to match, THEN I found some more interesting historical reference photos... THEN... THEN... THEN... THEN... And so on. 😖

The upshot was, what started out as a small static ornament eventually turned into a huge modelling project in of itself... The idea to construct a complete Soviet Armoured train in 1/100!!!

How did my simple idea turn into THIS!!!

...AND research into how I could add extra gaming rules to accommodate it into my game!

So there you go....DISTRACTION.

I'll have to be wary of this as I progress this time around and try and stick rigidly to my original - (usually) simpler - ideas and plans. This does explain why it seems I was unable to get so many of my original model projects completed - they all morphed into something else! 😣

Saturday, 30 May 2020

1/100 Kursk Project - Scenery

I'm pretty much clear on what tank models I need for my GF9 'TANKS!' Battle of Kursk scenario. And what's more I half almost all of them and about 60% of them built...So...

Just what kind of terrain, scenery and scatter should I put together for the battle table?


A lot of the photos I've seen of the battle makes the landscape of the battle look fairly desolate, with large empty plains. But, the battle was actually a series of battles over an enormous front so whatever I produce will simply be a generic representation.

That said, I would like to add some cover - my past games of GF9T! has proven that adding obstacles in a line of sight tabletop war game greatly increases the tactical aspect and excitement (in my opinion). Hills, patches of trees, buildings and even destroyed tanks all provide sneaky patches of cover for tank duels.

Photo source: German Federal Archive. Photographer: Britting

My first thought is adding a Russian hamlet as both a sub-objective and area of cover. And so, the hunt for 1/100 Russian buildings began.

Note: GF9T! comes with some generic flat printed scenery in the starter box set and technically flat scenery has it's advantages, for starters you can drive your tank right over it easily! BUT, while perfectly serviceable, I found in the games that I played having proper 3D obstacles took a lot of the guess work out of determining just what or was not in 'line of sight'. So I prefer 3D models.

So, then the choice is: 3D printed, MDF laser cut, scratch built, resign moulded or paper-craft buildings???

Some rather nice Red Vectors laser-cut village buildings, but £18? Hmmm.

Out of these scratch built and paper-craft are the cheapest (maybe I should add 'can be the'), while unless you have your own 3D printer (I don't) the other formats mean forking out some dosh (boooo)! That's not to say it would cost a fortune to buy a set of 3D builings in 1/100, the resin ones, in particular, are pretty good value...

Peter Pig's Russian Timber Church (supplied unpainted), just £3.50! Not bad!

But, I'm of the mind that why should I fork out a sum of money for a set of buildings I will only use a couple of times and then have to store away. I'd much rather go for a cheaper and slightly more temporary solution. But that's a matter of your own opinion and choice.

As if to prove me a lair Paperterrain's Russian Hamlet is $20! For a papercraft
set...Mind you, it is a good one, but still. Phew!
After much Googling I eventually came across a rather nice little papercraft set that was definitely in my price range. On Wargamevault.com I found Finger and Toes Model's 'Rusgorod: Medieval Russian Hovels' PDF in 28mm scale.

Now, despite being in 28mm and being described as 'medieval' buildings this attractive little set was a very satisfying $5 - I could go for that, I thought! 28mm 2D models scale very nicely at 50% when printing and even though it says 'medieval' I didn't see much that differentiated them from a 20th century Russian hamlet...

I like the style of these particular models. Yes, they a bit more 'creative' in their decoration, more akin to a fantasy style than a historic one, but I appreciate that extra splash of colour. Some of the 'more historically accurate' models I have seen are a wee bit dull. I concede that's just a realistic fact of life as it was in Russia at this time, extreme poverty saw to that, but GF9 'TANKS!' isn't a serious game - it's war-gaming lite - and a bit of poetic licence in style is in keeping with the spirit of the game.

Anyway, I bought and downloaded the 'Rusgorod Hamlet' set and have done some test printouts to ensure that the scaling from 28mm - 50% - works, and it does.

The original 28mm scale design filled the A4 page. This is what the 50%
reduction looks like, it is now 15mm (1/100) scale and ready to cut out.

Battlefield Deleterious - Scatter Scenery

Quite apart from terrain and buildings, 'scatter' items give the tabletop battlefield a little flavour and provide some extra obstacles or cover.

From the beginning I knew I wanted to maybe add features like a railway line, a fordable stream or a road. While not obstacles in the true sense - being transversable - each of these features does have an effect on vehicle movement. Crossing a wide stream or railway line would slow down tank movement and a good road would speed up movement. However, these are not the the only reasons I wanted to add these - they also allow for the opportunity to add additional 'scatter' objects to the table...

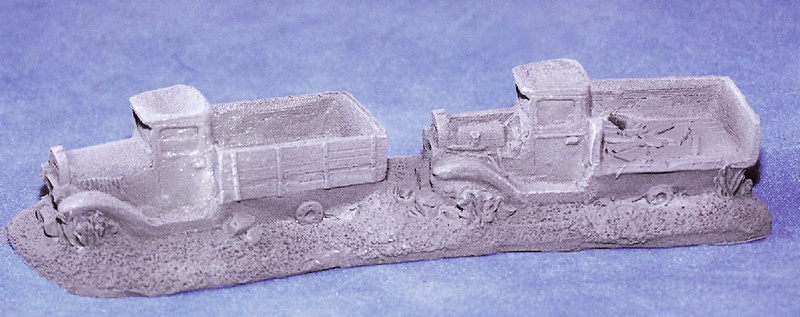
Burnt out GAZ truck convoy by Peter Pig.
Again by Peter Pig, a knocked out Russian T-34 tank!

Something I really fancied putting together was a burnt out truck convoy on the road, this would be very atmospheric, provide cover BUT also stop either participant from doing a rush all the way up the road. Similarly, a destroyed train could provide a good means of tanks crossing otherwise open countryside.

How cool is this? A 15mm derailed train transport. 26 Euros, but so tempting!
This is all going to sound like it's a LOT - houses, destroyed trucks, etc - and there is a danger that I make the table too 'busy', especially if I start adding trees and small hills. So, there will have to be some thought put into what I add with a view to game balance - remembering that the Soviets fought defensively so they will probably need some in-placements for their AT guns and maybe some mine fields.

A lot to think about... (But THAT train, eh?) 😁

Next: Sketching a battlefield plan.

Friday, 29 May 2020

The Mystery of the 'Bermuda Rectangle'!

As you know, I am just returning to the hobby of scale model making and tabletop war-gaming after a gap of two or three years. One of my main occupations at the moment, though, is cleaning up my junk-filled 'man cave' attic space so I can start making models again, but it's been a big job...

Errr, well my attic isn't quite this bad, it just seems like it sometimes! :)

I'll say this again - it's unbelievable the amount of junk that can build up in a household over just a couple of years. My attic became a store-room for box after box of crap, Christmas decorations (I think we could decorate three or four houses with the amount of crimble lights we have - not to mention the TREE Christmas trees of varying sizes) and the wife's shoe and out-of-season clothing collection.

Anyway (rant over)... Maybe. 😁

The point of this post is to highlight just one of the problems I am having with a hobby that was temporarily abandoned and that is - my forgetting just what stuff I had bought!

Example: In yesterday's post I mentioned how I would love to buy a couple of PSC 1/100 Panzer IV Ausf H tank models for my Kursk project. Well, while trawling back through my old Milgeek blog posts looking for a particular link I wanted I found the following post dated May 1st 2017...


Apparently, I had already bought a Battlefront Panzer IV H model!! BUT the irony is, it's disappeared under all the piles of rubbish I still have to clear away. Awwwww, bum-fluff!

Still, IF I can find the models it will have saved me buying new ones. Pretty handy as my finances are tighter than they were three years ago.

The sprues of my GF9 produced Panzer IV Ausf. H.... Wherever it is!

So, there you go - my attic is a either a portal to another dimension - in which case I hope the great ancient beings on the other side enjoy 1/100 model making - OR lurking underneath the remaining detritus I have the biggest 'carpet monster' ever!

...Oh, bit of a related postscript. Having discovered I had bought this model I checked through my Flickr photo gallery and actually found some pics I had taken of the kit (see sprues above) AND I had already started researching paint schemes for this model and save a nice graphic which will come on handy...

I like the two-tone 'splinter' camo - bottom row, third along!

Saturday, 23 May 2020

1/100 KV-1S Turret Conversion

Following up my mention of a purchase (link here) of  couple of 3D printed model conversion parts (something new to me), I got a nice surprise in the post this morning...


After cleaning these parts up I will be mating these turrets to a couple of Zvezda KV-1 chassis. And voile! Two KV-1S tanks...


These 'heavy' Soviet tank models - as I pointed out in my original post - will not give me parity with the German Tiger 1 for my Kursk war-game. In fact, despite the fact that these were considered 'modernised' (at the time) versions of the original KV-1 tanks, the Russians had lightened the tank's armour to improve mobility, thus negating one of the few major advantages of the KV series.

Still, these monsters will look quite impressive on the game table and will provide a little variety in what might otherwise be a T-34 heavy force.

Next: I prep the 3D printed turrets and build the Zvezda plastic chassis.

Saturday, 16 May 2020

1/100 Plastic T-34/76 Kits - Part 6

Preface: I'm back! Yes, after a two year hiatus I seem to have rekindles my modelling mojo! And luckily enough - when I checked - I conveniently had the following post still awaiting publication (written in 2018). This sets out exactly where I was with my models when I 'downed tools'. Enjoy...More to come. Milgeek.


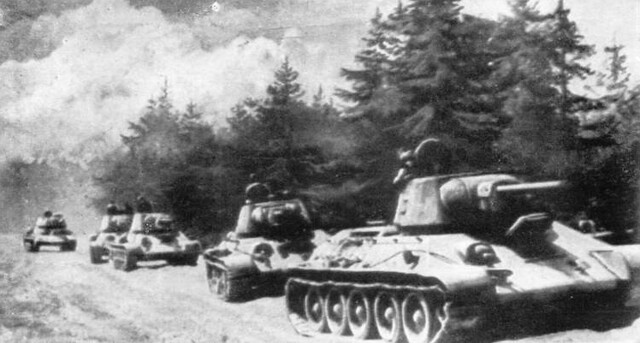
A column of T-34 Model 1943 Medium Tanks, with the hexagonal turret,
advancing through Poland. Source: Historyofwar.org

Phew! I'm probably making a real meal of doing what is - after all - a very simple kit. But, in my defence I am a slow modeller and I'm doing four vehicles at one time for the first time.

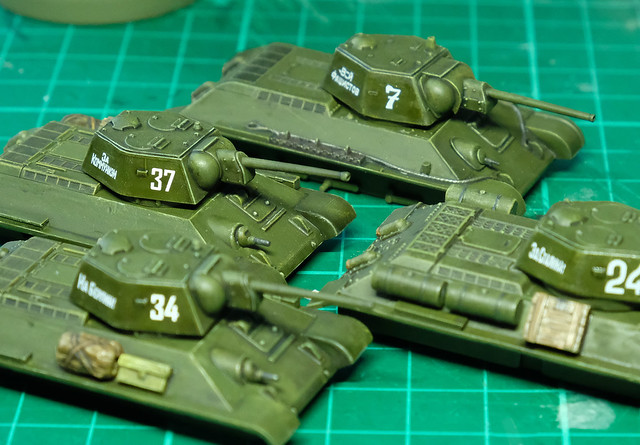
In any case, my little troop of T-34s trundles on (however ponderously) and I finally get around to adding the decals...


Now, to be fair, I had to order some of these especially for this project (which meant waiting for pay day, as I am now on a much reduced salary). It's one of the annoying aspects of modelling 1/100 war-game armour that - generally - the models do not come with decals, so you have to source your own if you want them.

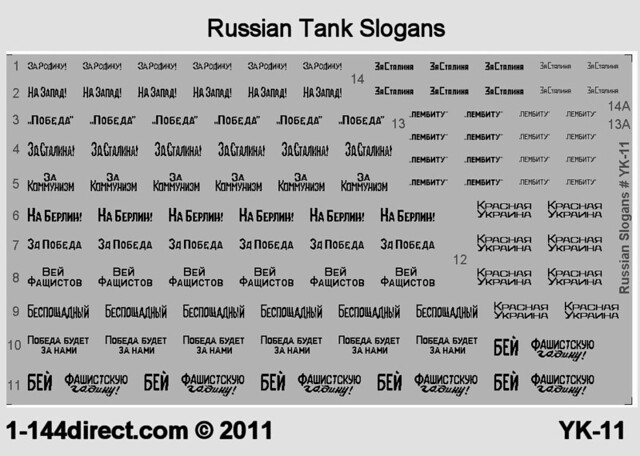
Luckily there are a few companies out there that take advantage of this gap in the market. I make a lot of use of I-94 Enterprise's 1/100 decals (available from Minibits in the UK), but I also found a rather nice set of Soviet tank slogans on eBay by 1-144direct.com...

These decals are really 1/144 scale but can be used on 1/100 at a pinch. They
are available in red, black or white at £3.25.
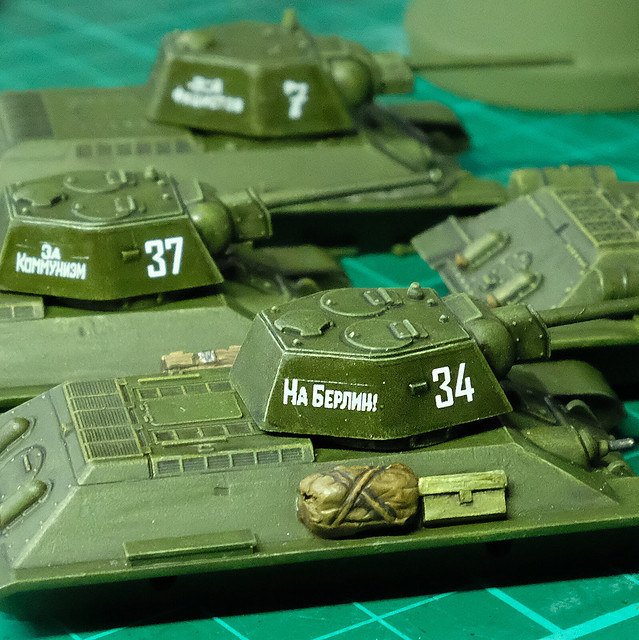
The eBay seller's page for these - click here - comes with a key translation for the slogans so you are sure that they are not requests for soup! Although a little small (at 1/144) they do actually fit nicely onto my T-34 turret facets quite nicely...


Warning: These are APL printed decals and not the kit manufactures film transfers you may be used to. They need special care in using and the sellers webpage (provided above) gives full instructions in their use - THEY ARE QUITE DELICATE! (I ruined one set during application.)

I sealed these decals - and my tank numbers - using acrylic gloss varnish (you could also use Johnson's Klear, I guess, but test first). Don't use enamels, as spirit based stuff melts the APL decals, as I found out to my annoyance (read the instructions - du-oh)!

Anyway, I was very happy with these as they give my otherwise generic looking green machines a bit of individual character.

Tuesday, 27 February 2018

Skyrex 1/100 SU-122 - Part 3


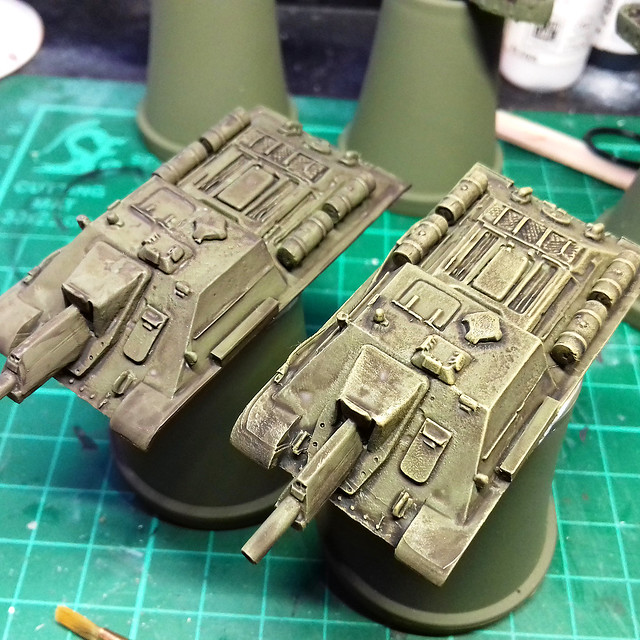
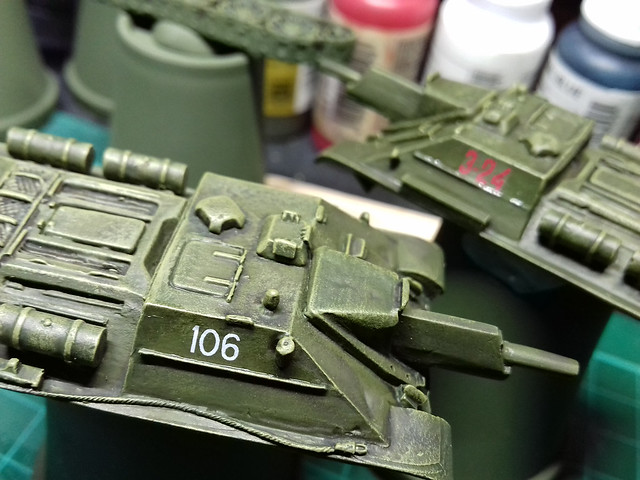
Moving on from the priming, I've applied my now standard wash procedure for WW2 Soviet armour. A dark staining wash of Citadel Agrax Earthshade, followed by a light dry brushed highlighting of Vallejo Model Color Yellow Ochre.

It's a subtle process, but you might just be able to tell the difference if you study this photo. The unhighlighted SU-122 is on the left and the one with the yellow ochre dry brushing applied in on the right...


It just picks out the raised edges and corners and gives some small amount of 3-D tonal contrast on raised detail. At this stage it does look a little in your face (though I have seen some war-game modellers who like 'high contrast' stop at this point), so I prefer to take a step backwards - of sorts - and smooth out this contrasty highlighting with a overall modulating wash of diluted Vallejo Model Air Russian Green.

This - to me - ties together the underlying high contrast coats and flattens them out again with a rich semi-glaze (no it isn't actually a glaze, but the Russian Green is a rich colour that gives seem transparent jewel-like coating that tones down the contrasty undercoat). It's kinda hard to explain and - again - is subtle...But I am kinda liking the effect...

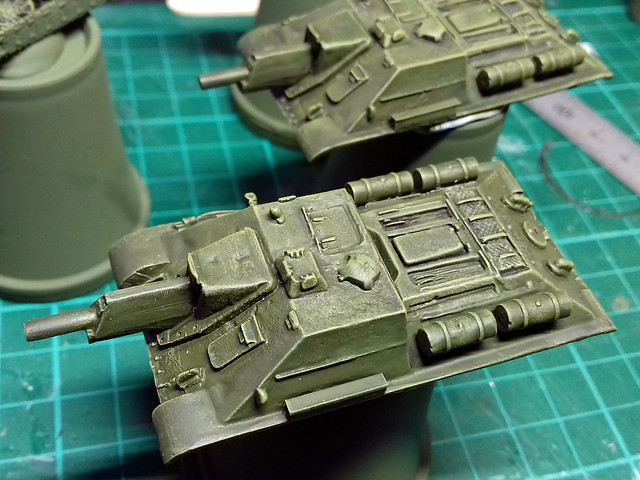
The underlying contrast of the shadow wash and highlighting dry brushing
is modulated by the overall wash of Russian Green. But, you still get the
faint mottling of the darker shades showing through.

In a way I am sort of a fan of the opposite of the airbrushed 'panel shading' effect that you see on a lot of models these days, where the modeller highlights areas of panels with lighter tones to give a '3-D effect'. I prefer to work the other way, with a darkening underlying effect as I never feel comfortable with military vehicles being too bright.

Decals - We Don't Need No Sticking Badges!
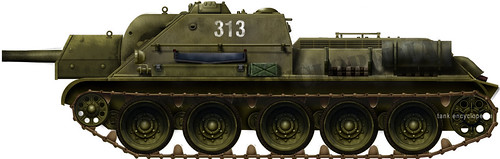
Being a Soviet tanks less is more regarding markings. As far as I can see, the SU-122s in particular - being something of a stop-gap - was one of those Red Army vehicles that only got the most    expedient of identifications...Principally a vehicle number.

Not exactly exciting markings but this seems to have been as complicated as it got for the
SU-122s around the time of the Battle of Kursk. Source: Tanks-Encyclopedia.com

I searched through my decal stash and found a couple of numbers that looked the right size (though they are not historically correct and are really meant for other Soviet vehicle types)...

My chosen decals - '106' went on nicely, but 'Red 3-24' had a very heavy film
and silvered despite my use of MicroSet. This particular decal was made by
ACE (for one of their kits) and they are generally of poor quality, sadly.

Because these are just for wargaming and indicate examples of types I don't think we have to be too fastidious when it come to markings (they are not intended to be models of specific vehicles from specific units at a specific time). So long as they look the part I'm happy.

Next: Tracks and Mud