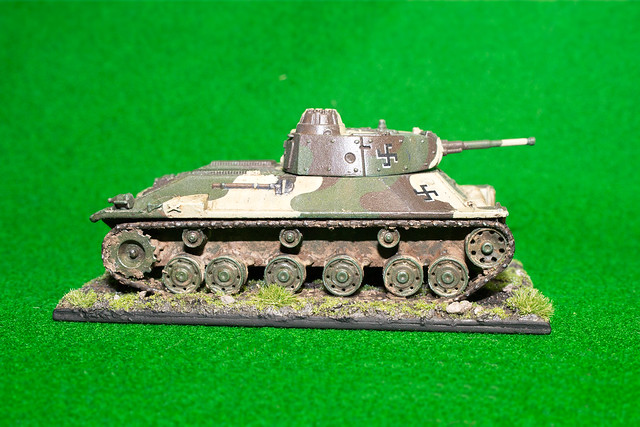
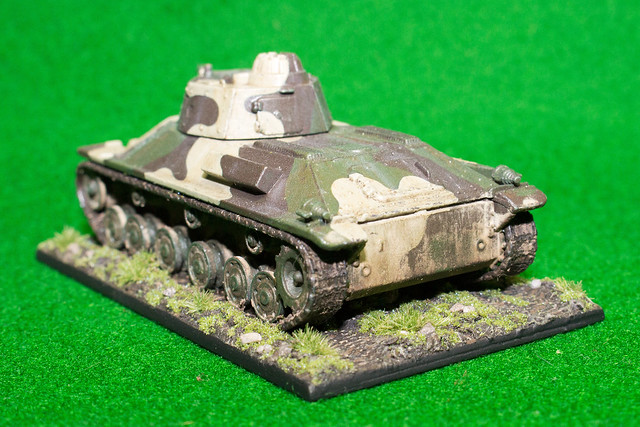
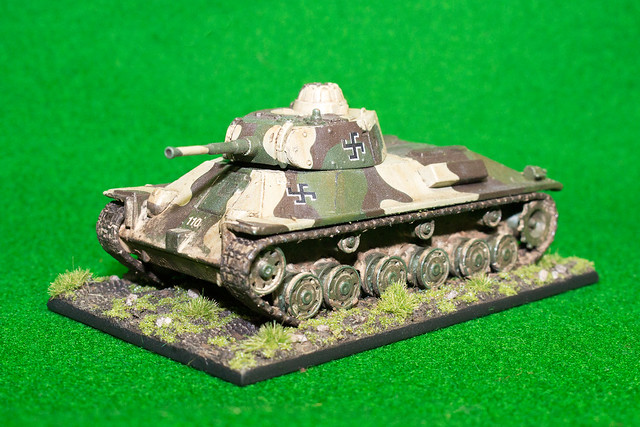
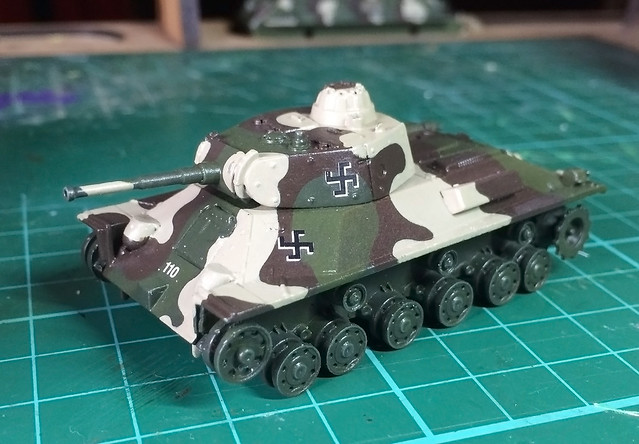
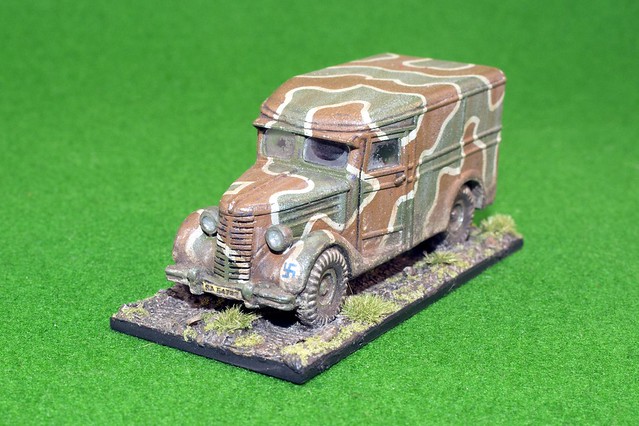
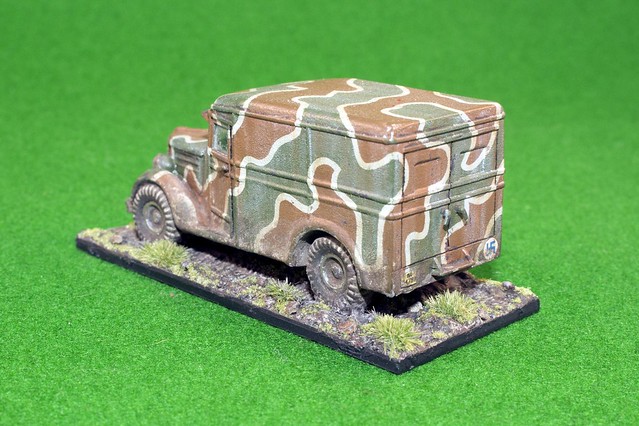
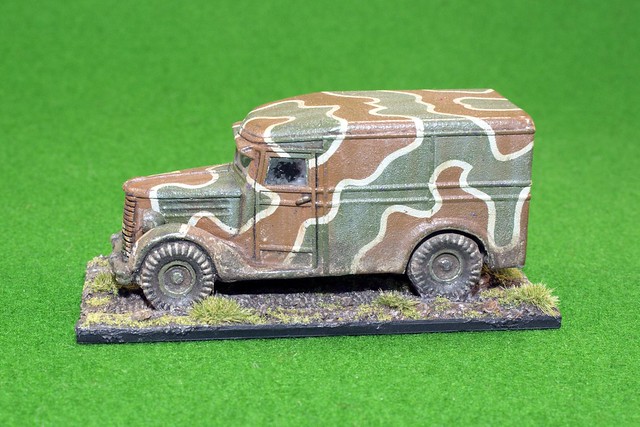
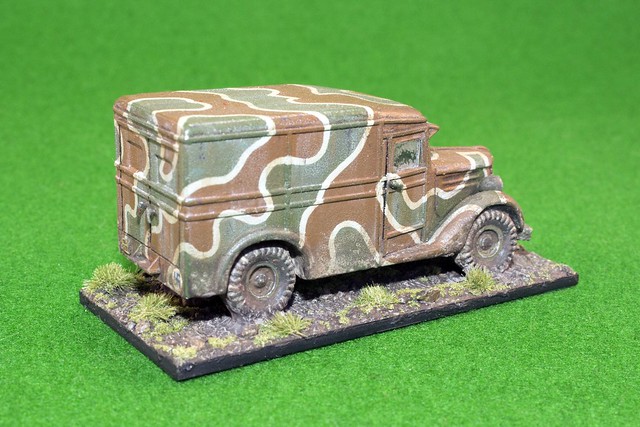
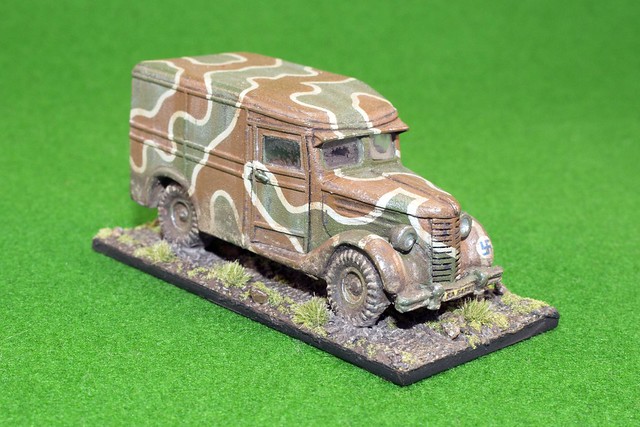
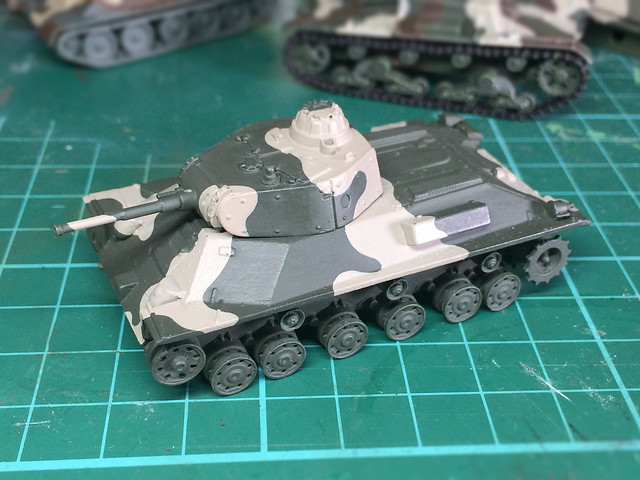
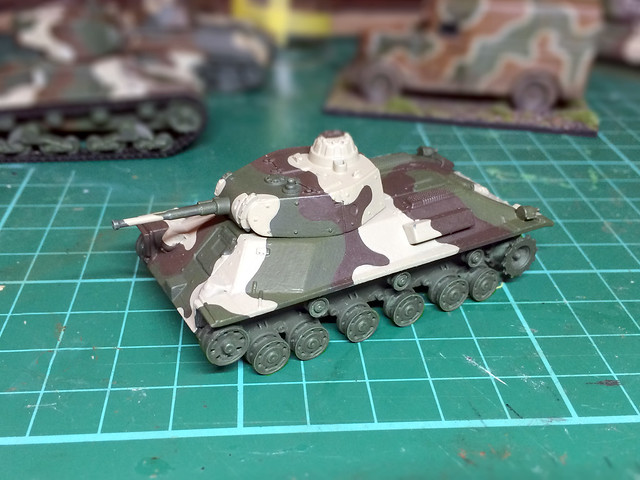
Phew, just finished this before going back to work tomorrow!
Diary of a novice scale model maker and his adventures in the wacky world of Braille Scale.
Sunday 21 February 2016
Saturday 20 February 2016
T-50 - so close, but no cigar!
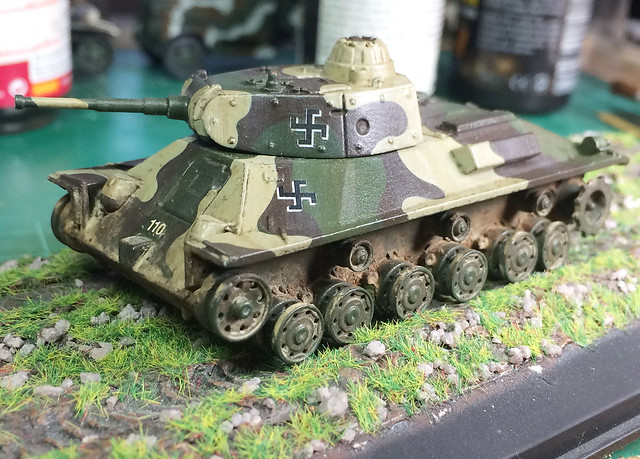
Had to share out my holiday time this week, so my plan to get my T-50 complete by today didn't come to pass. But I gave it a good go, and in the end I missed my own target by just a smidgen...
Another reason this model is 'so close' but doesn't quite hit the mark is probably the authenticity. But I get the feeling that will always be the case with all my Finnish projects. So few of the models I intend to include in my collection have reliable, certified original reference examples to go by.
Still, what is perhaps just as important for a wargame collection, like this one, is that I am quite happy with the colour scheme I have produced in the end. If nothing else, I think it's quite attractive! (Forgive my self-congratulation.)
This 3-colour scheme will be the standard which I will be applying to all my other Finnish tanks (though the exact pattern of the camo will vary). It's sort of a case that I have nailed my colours to the post and that's that!
A final note on diecast conversions
In the end I think I got away with this conversion, that was mainly due to the good job that Altaya made of their interpretation of the Soviet T-50 light tank in the first place. Though I'm still not happy with the bend tracks!
It makes me tempted to have a go and try and convert the remaining Altaya models I have for this project (such as my KV-1, T-34/75 and T-28). But I will have to take into consideration the complexity of the work and the thickness of teh diecast metal which will need to be modified. The T-34, in particular, seems like it would be a little bit of a nightmare and I may still replace this with a plastic kit (as there are panty of plastic versions available - I have two in my stash).
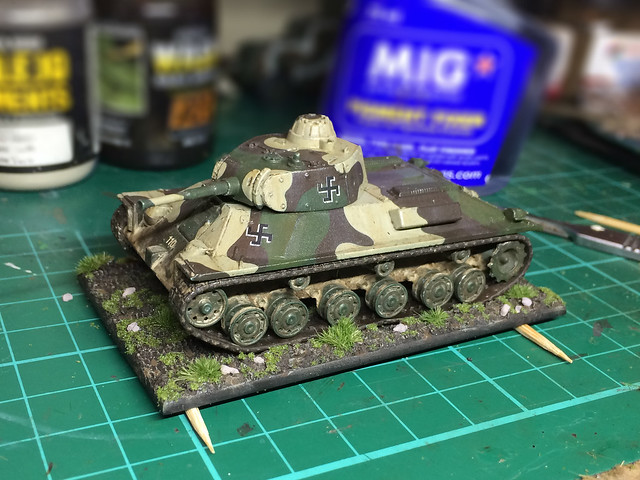 |
| So, close...But still some final touches to do. |
Still, what is perhaps just as important for a wargame collection, like this one, is that I am quite happy with the colour scheme I have produced in the end. If nothing else, I think it's quite attractive! (Forgive my self-congratulation.)
This 3-colour scheme will be the standard which I will be applying to all my other Finnish tanks (though the exact pattern of the camo will vary). It's sort of a case that I have nailed my colours to the post and that's that!
A final note on diecast conversions
In the end I think I got away with this conversion, that was mainly due to the good job that Altaya made of their interpretation of the Soviet T-50 light tank in the first place. Though I'm still not happy with the bend tracks!
It makes me tempted to have a go and try and convert the remaining Altaya models I have for this project (such as my KV-1, T-34/75 and T-28). But I will have to take into consideration the complexity of the work and the thickness of teh diecast metal which will need to be modified. The T-34, in particular, seems like it would be a little bit of a nightmare and I may still replace this with a plastic kit (as there are panty of plastic versions available - I have two in my stash).
Wednesday 17 February 2016
Altaya 1/72 T-50 - Part 8
Painting the 'elastic band' tracks
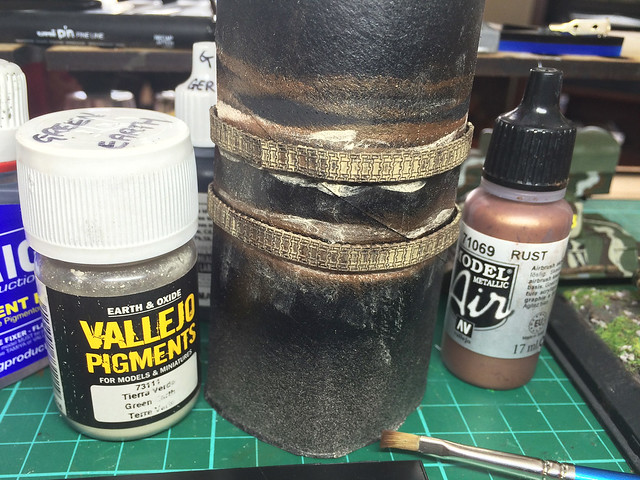
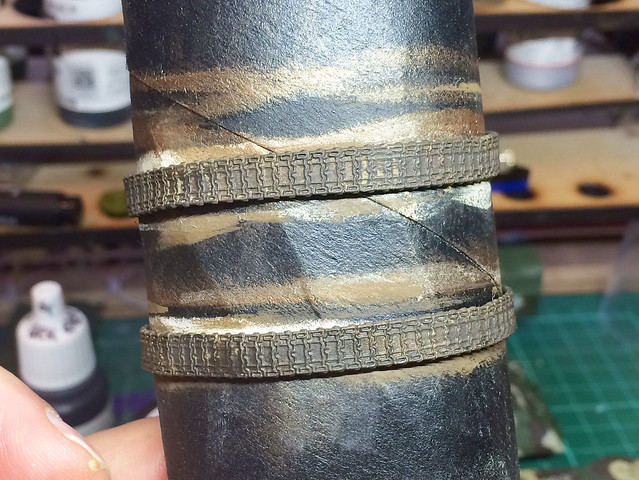
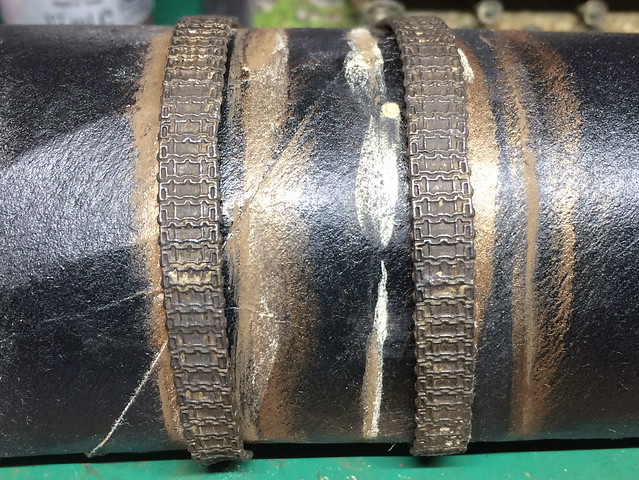
Now onto the fiddly 'elastic band' tracks of the Altaya model. To be fair, these vinyl tracks are probably better than some of the older Airfix tracks that I remember from modelling as a kid. Altaya have managed to get quite a delicate pattern on reasonably thin band of soft plastic.
I wasn't happy with the vinyl tracks I painted for my RSO tractor, so I thought I'd do a bit more work with weathering powders to make the effect a little less bland. I began with a black primer, then a wash of Vallejo's Rust followed by a dusting of Vallejo's Green Earth pigment.
This turned out a little too light and patchy for my taste (which only became apparent once the first layer of pigment - mixed with MIG's Pigment Fixer - dried) so then I applied a light overall dusting of Humbrol's Dark Earth weathering powder. Just to tone things down a little and unify the effect...
So, now I have a more even rusty, muddy colour across the tracks. But, it's a bit 'flat' looking so it needs some shadow and highlighting now, to finish it off.
I'll conclude this post by saying I loath 'elastic band' tracks. In the end, no matter what kind of job you do painting them you know they will deform when you stretch them to put them back on the tanks' running gear. I much prefer solid plastic tracks.
I will be hiding the joining seam at the bottom, of course. And, unfortunately, there is no track pattern detail on the inside of the elastic band, so both of these failings will have to be camoflagued with 'mud'.
Next: Well, folks. That's about it for this one (I won't bother showing my base making process as I've done this a good few time now). So, next time you see this model will be the completion photos. Another one bites the dust!
Sunday 14 February 2016
Altaya 1/72 T-50 - Part 7
Pin-washing, chipping and dust
Right, moving on. We are now at the pin-washing stage of weathering. I admit I go a bit heavy with the pin-wash as my models are a bit more 'theatrical' in their painting because that is my preference...
I'm still a fan of AK Interactive's Dark Brown Wash for Green Vehicles for doing pin-washing. As mentioned several times before, it has a 'greasy' grimmy consistency to it that suits vehicles. However, I am slowly starting to move away from outlining *every* crease, seam and panel-line with it, as I did when I first began using this technique.
I'm also starting to take into consideration the paint scheme I'm applying it too. Obviously, it works very well on plain green vehicles (as that is what it was designed for) but, perhaps, less so well on other colours. I'm toying with the idea of experimenting with pin-washing with inks of complimentary colours, for a more subtle effect (I will be trying that with my next models).
Likewise, I am reconsidering my use of chipping. I have done a few models where I have obviously gone over the top with the technique in order to create a more dramatic effect (which seems to be a convention in wargame modelling).
Having said that, here's a lovely photo of an extreme in vehicle chipping and deterioration...
Note: The above photo is of the single T-50 that the Finns captured, on display at the Parola Tank Museum. It's an odd scheme, as it seems to appear to represent, perhaps, an earlier state in it's Finnish career (perhaps soon after it's capture in 1941). This would seem to be a repaint, undertaken after to the war, as it had the 3-colour camo scheme between 1943 and the end of the war.
I won't be going that far! In fact, I think I will keep the chipping minimal. Maybe some paint wear and tear around the obvious points of traffic - the hatches and clamber points.
Dust and dirt - base layers
Although I used to apply mud and dirt as one of the final layers of weathering I am now doing the dirt effect as a two-stage process. There are areas of the vehicle that are difficult to access later in the build and so they have to have their dust and muck applied earlier on - the inside of tracks is an example of this.
Having tackled the muck behind the road-wheels I can now think about preparing and painting the tracks. In the end, I decided as I was adding mud I might as well add some to the front and back of the hull as well, instead of waiting until later (when I might not be able to match the colours).
She's getting there!
Right, moving on. We are now at the pin-washing stage of weathering. I admit I go a bit heavy with the pin-wash as my models are a bit more 'theatrical' in their painting because that is my preference...
I'm still a fan of AK Interactive's Dark Brown Wash for Green Vehicles for doing pin-washing. As mentioned several times before, it has a 'greasy' grimmy consistency to it that suits vehicles. However, I am slowly starting to move away from outlining *every* crease, seam and panel-line with it, as I did when I first began using this technique.
I'm also starting to take into consideration the paint scheme I'm applying it too. Obviously, it works very well on plain green vehicles (as that is what it was designed for) but, perhaps, less so well on other colours. I'm toying with the idea of experimenting with pin-washing with inks of complimentary colours, for a more subtle effect (I will be trying that with my next models).
Likewise, I am reconsidering my use of chipping. I have done a few models where I have obviously gone over the top with the technique in order to create a more dramatic effect (which seems to be a convention in wargame modelling).
Having said that, here's a lovely photo of an extreme in vehicle chipping and deterioration...
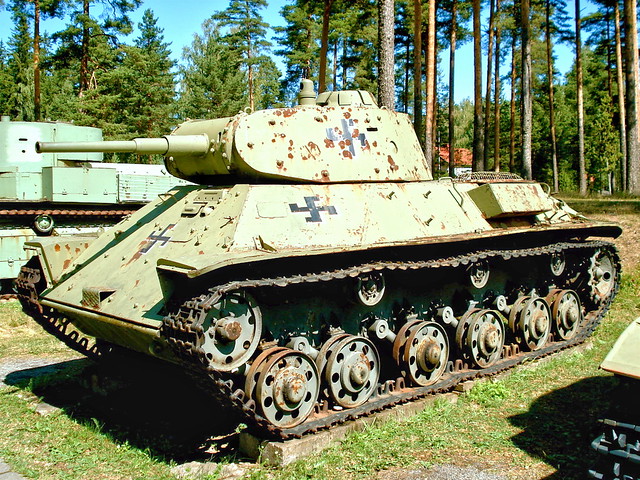 |
| Source: Wikipedia |
I won't be going that far! In fact, I think I will keep the chipping minimal. Maybe some paint wear and tear around the obvious points of traffic - the hatches and clamber points.
Dust and dirt - base layers
Although I used to apply mud and dirt as one of the final layers of weathering I am now doing the dirt effect as a two-stage process. There are areas of the vehicle that are difficult to access later in the build and so they have to have their dust and muck applied earlier on - the inside of tracks is an example of this.
Having tackled the muck behind the road-wheels I can now think about preparing and painting the tracks. In the end, I decided as I was adding mud I might as well add some to the front and back of the hull as well, instead of waiting until later (when I might not be able to match the colours).
She's getting there!
What next? Let's look in the stash...
It actually seems like it's been a long time since I made a proper kit. It's all been resin conversions, diecast conversions and 'easy build' kits of late, so time to look at what I have in the stash that would be a bit more challenging from a build point of view. Here are some of the contenders...
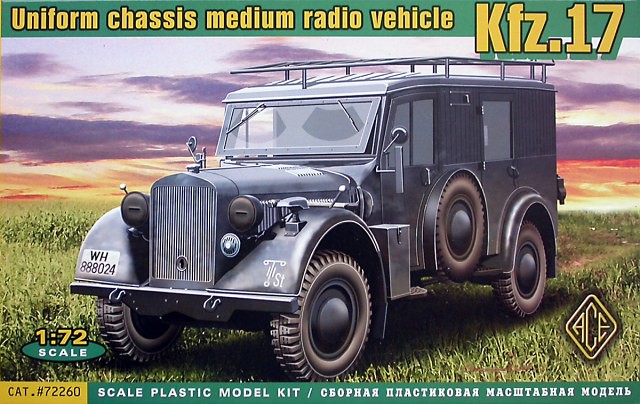
The very complex looking ACE Kfz.17 - the second of the three radio wagons I need for my Finnish project...
The even more complex Trumpeter Sd.kfz.9/1 recovery vehicle...
This is an absolute monster of a kit, the Trumper gives you the option to make the version without the crane (which the Finns used). I'd be using the crane for another conversion project, so it won't be going to waste.
Turning the complexity down a bit, I also have a very nice Academy Blitz (which, I guess for licensing reasons, the simply call a 'German Cargo Truck)!
I picked this up really cheaply in a sale, but I believe it is a very well regarded kit of the legendary German truck. Again, the Finn's had a good few of the early (commercial) models of this cargo vehicle.
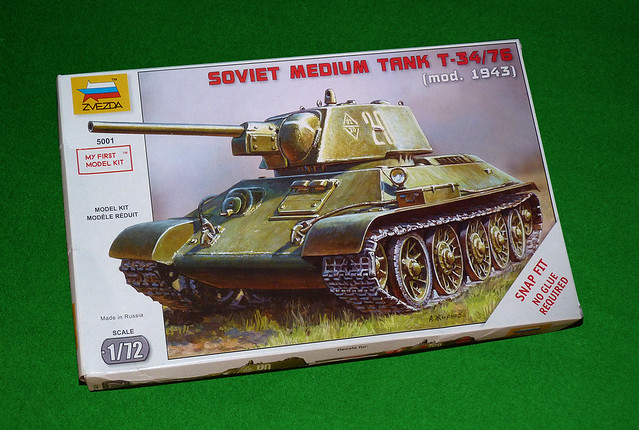
Now, here's something a bit different. Basically, what we have here is a very nice Zvezda T-34/75 m43 'snap fit' kit. It's actually a sort of advanced 'easy build', but with lots of very nice detail...
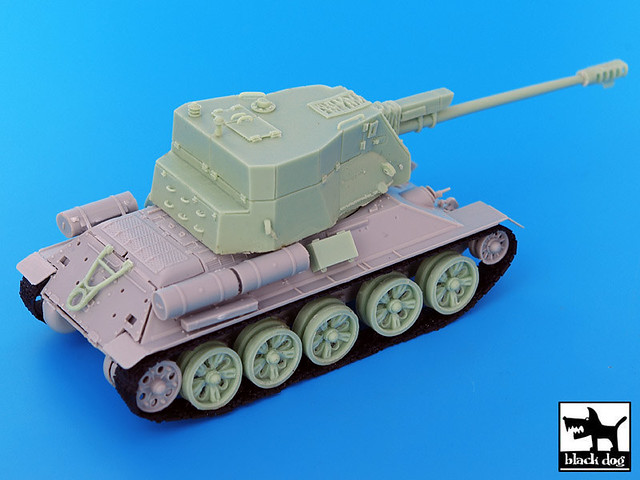
However, I had something very special in mind for this kit and had been saving it for the right moment. What I had in mind was adding a very nice specialist conversion kit by Black Dog, which turns the bog-standard T-34 into an Egyptian 122mm Self Propelled Gun!
Now, that's different, eh? :)
Thursday 11 February 2016
Finnish T-50, an interesting observation
If I ever needed a reminder that I am still just a 'kitnoob', this is it! Apparently you not only have to be a keen fan of the past to model WW2 models but you also have to have the ability to see into the future as well.
As you may know, I have laboured hard to try to get what I thought was 'a' (it's all subjective) accurate 3-colour Finnish camo scheme. And just when I was fairly satisfied whit my recipe the God of Modelmaking has come along and kicked me in the ass.
Here's a reminder of what I was happy(ish) with before weathering...
And now, after starting the weathering process with my - now usual - 'bleaching and staining' stage using oils I have this...
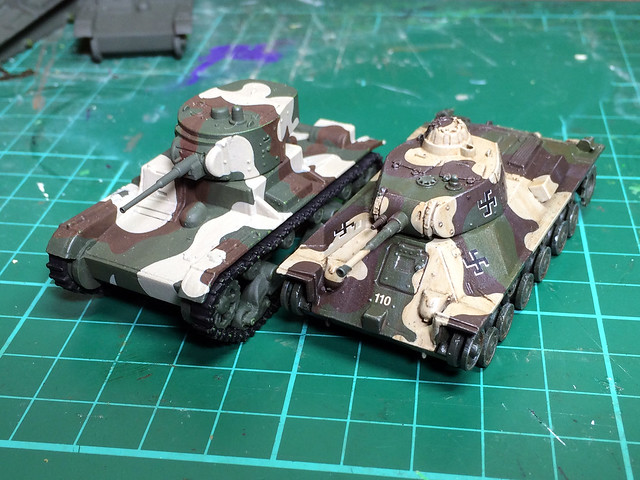
Now, the difference may be somewhat subtle but in effect, my T-50s scheme has been knocked back a shade and the hue slightly modified. This is particularly noticeable in the 'beige grey' colour, which in now a light tan colour. Here's another picture which may illustrate the change better...
The T-26 (left) has my original Finnish scheme in pristine colours, while the T-50 has the same colours 'modulated' through the weathering I applied.
Now experienced modellers will say, 'yeah, and...' because they will know that I should have taken this modification in colour into consideration at the base camo painting stage (perhaps by painting the scheme deliberately lighter).
Bum!
Another thing to take into consideration.
As it turns out I kinda like the new tones (well, I have to say that now don't I)! The option would be to start again if I didn't. Thinking logically, this is perhaps what would have actually happened to the real scheme in the field, when dirt and dust covered the paint and subtly changing their appearance.
Phew...There's always something new to learn.
Tuesday 9 February 2016
1939 Chevrolet Radio Wagon completed
At last! I have completed something. To my great relief, I finally decided that this model was finished. It seems as if, sometimes, it's quite hard to know when a model is actually finished and I could have tinkered with this one for a while longer...But, I decided enough was enough.
Despite this being something of a ham-fisted conversion, I am rather fond of it. The weathering is rather heavy-handed too, but I figured that by 1944 a pre-war vehicle would have been showing definite signs of wear and tear.
Despite this being something of a ham-fisted conversion, I am rather fond of it. The weathering is rather heavy-handed too, but I figured that by 1944 a pre-war vehicle would have been showing definite signs of wear and tear.
Monday 8 February 2016
Altaya 1/72 T-50 - Part 5
Slow, slow, slow progress. I'd love to be faster at making models, and it depresses me a bit as I see other modelers - whose blogs I read - churn out their wonderful models while my projects crawl to their conclusion. But there you go, I spare what time I have so please bare with my minor updates...
After the base of dark green I applied the 'Finish Grey', or rather, I added my interpretation of it - a light beige-grey (50/50 mix of Valejo's Stone Grey and German Camo Biege).
I'm afraid I had to be a little creative with the camo pattern as there are only two period photographs of this particular tank, and they are - sadly - in black and white. So, I've used my artistic licence.
I read that the Finn's applied the Grey to a 50% proportion of tehoverall camo, with the Green and Brown making up 25% each. But, from what I have seen - in reference photos - the application of paint and it's pattern was a bit more ad-hoc than that.
The Finn's variety of tanks all seem to have displayed a variety of patterns - some with thin stripes of the 3-colour scheme, some with large patches. There doesn't seem to have been a a printed guide to scheme application - as there was in the British and US armies - so I am guessing there was some latitude from unit to unit.
I am quite pleased with my brown mix, but I still think my 'Moss Green' was lacking a little oomph. So I modulated my dark green with a quick, thin wash of Vallajo Air's Russian Green. This was just enough to give the green a bit of luster in the right light.
Tuesday 2 February 2016
Altaya 1/72 T-50 - Part 4
Having gotten the modifications to my little T-50 done it's time to get on with the painting. I began with a primer coat - of sorts - of Humbrol's 'Dark Green'...
This led me into a bit of a think about why I (and other people) use primer paints for modelling. I guess I did so - in the beginning - ‘because that’s what people did’ (as a complete beginner I believed without question whatever ‘experts’ told me was the ‘done thing’).
There’s a really nice article on the purpose of using a primer over on Scalemodelguide.com - 'All About Primers' - which is worth a read, just to remind one’s self what priming is all about. Reading it over, some of the reasons for using a primer ticks a few of my personal boxes - specifically (in order of precedence):
• Improve the adhesion of top-coats
• Showing up surface defects
• As a Pre-shading layer
My initial reason for using a primer was that I considered that acrylic paints need a preparatory surface for adhesion (unlike the enamels I used when I was a kid). Also, I initially (and still do occasionally) use a flat black primer as an aid to shading, but in the case of my T-50 I wanted an underlying vivid green to give some luminance to my top-coat green (if that makes sense).
The highlighting of defects was something that developed into a useful and unexpected role for applying a primer. As I have gotten more into the converting of models I often find that that 'good job' of sanding a repair or modification isn't such a good job, after all, once I get the first coat of paint on it! Priming highlights these glitches and gives me a chance to correct them before re-applying a spot of primer over the top of them.
It's worth reevaluating your model painting process regularly, I think, as you can get into a habit of doing things without reviewing their relevancy. As each model is different and so might need a slightly different approach, it's good to ask oneself 'why am I doing this again?' every so often!
The base ‘Finnish Green’
I have settled on a darker - slightly olive - green for use as the Finnish ‘Moss Green’. This will not be to everyone’s taste (many modeller's prefer a brighter green for Finnish armour), but I have gone for this shade/hue due to consideration of those examples still in museums which experts in this area deem ‘good’ examples of period Finnish camoflague. I have also gone for a darker green due to the ‘scale effect’ - or, to put it another way, what I think looks right at a distance.
The caveat here is this; like all my attempts at 'Finnish colours', my interpretations are based on *my eye-sight*. And my eye-sight is, in all likelihood, very different from yours!
My green is a 50/50 mix of Vallejo’s German Camo Dark Green and their Yellow Olive. The olive sheen is very (very) subtle, depending on the light...
Next: The camoflague.
This led me into a bit of a think about why I (and other people) use primer paints for modelling. I guess I did so - in the beginning - ‘because that’s what people did’ (as a complete beginner I believed without question whatever ‘experts’ told me was the ‘done thing’).
There’s a really nice article on the purpose of using a primer over on Scalemodelguide.com - 'All About Primers' - which is worth a read, just to remind one’s self what priming is all about. Reading it over, some of the reasons for using a primer ticks a few of my personal boxes - specifically (in order of precedence):
• Improve the adhesion of top-coats
• Showing up surface defects
• As a Pre-shading layer
My initial reason for using a primer was that I considered that acrylic paints need a preparatory surface for adhesion (unlike the enamels I used when I was a kid). Also, I initially (and still do occasionally) use a flat black primer as an aid to shading, but in the case of my T-50 I wanted an underlying vivid green to give some luminance to my top-coat green (if that makes sense).
The highlighting of defects was something that developed into a useful and unexpected role for applying a primer. As I have gotten more into the converting of models I often find that that 'good job' of sanding a repair or modification isn't such a good job, after all, once I get the first coat of paint on it! Priming highlights these glitches and gives me a chance to correct them before re-applying a spot of primer over the top of them.
It's worth reevaluating your model painting process regularly, I think, as you can get into a habit of doing things without reviewing their relevancy. As each model is different and so might need a slightly different approach, it's good to ask oneself 'why am I doing this again?' every so often!
The base ‘Finnish Green’
I have settled on a darker - slightly olive - green for use as the Finnish ‘Moss Green’. This will not be to everyone’s taste (many modeller's prefer a brighter green for Finnish armour), but I have gone for this shade/hue due to consideration of those examples still in museums which experts in this area deem ‘good’ examples of period Finnish camoflague. I have also gone for a darker green due to the ‘scale effect’ - or, to put it another way, what I think looks right at a distance.
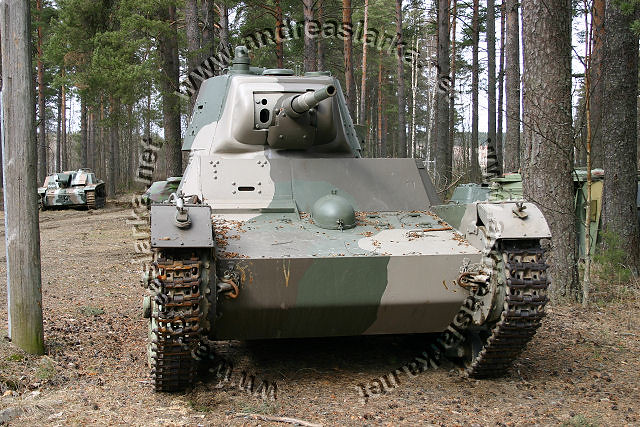 |
| This photo, of a nicely restored Finnish WW2 tank, comes as something of a surprise to many modellers. It's not exactly the typical 'Finnish 3-colour camo' that modellers are used to seeing on much of the relevant kit box art! Source: Andreaslarka.net |
My green is a 50/50 mix of Vallejo’s German Camo Dark Green and their Yellow Olive. The olive sheen is very (very) subtle, depending on the light...
Next: The camoflague.
Subscribe to:
Posts (Atom)

