As my practice IS-2 comes to completion I want to move quickly onto shifting some of the backlog of projects that I had collected last year. Not quite ready to just straight back into my 'Finnish Continuation War' project, I'm moving onto one of my secondary project activities - GF9 TANKS! 'Project Kursk'.
This idea was meant to be a be a slightly more ambitious GF9T game incorporating a greater number of vehicles (5v5 or 6v6) than my first few basic games of 3v3 tanks.
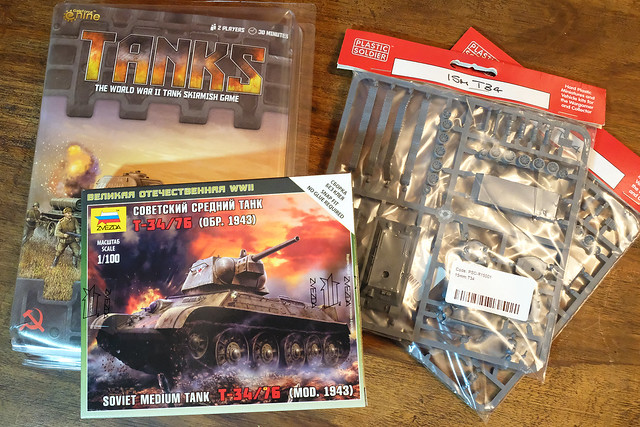
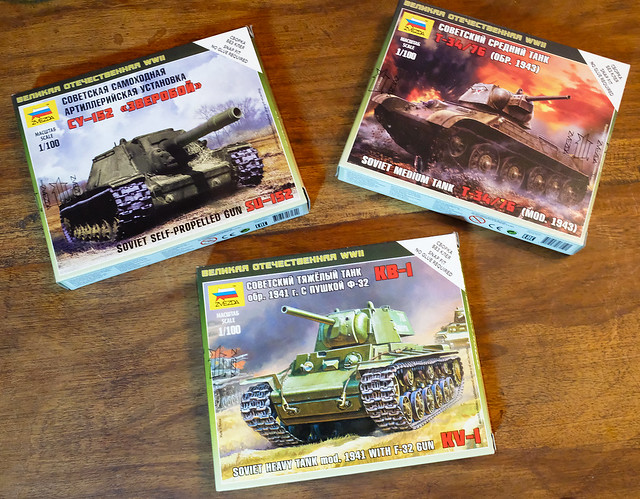
The last two models arrived over Christmas - having anticipated my return to modelling - and my Soviet force is now complete. Here's the 1/100 kit lineup:
• Zvezda KV-1 Heavy Tank
• Zvezda SU-152 Heavy Assault Gun
• 4 x T-34 model 1943 by Zvezda, Battlefront and PSC
The T-34s should be interesting. I have opted to buy examples of each of the three plastic kits available of this tank, from Zvezda, Battlefront and PSC. Strangly enough, I've made the PSC T-34 before, but in 1/72 scale (it's the same kit, simply scaled down). I like doing this sort of direct comparison and look forward to the builds.
Next: 'Project Kursk' Part 2 - German Force.
Diary of a novice scale model maker and his adventures in the wacky world of Braille Scale.
Sunday, 14 January 2018
Thursday, 11 January 2018
Back for 2018!
Hooray, my modelling mojo seems to be returning! 😎
After 2017's recurring illness and major creative doldrums, I feel reenergized for the New Year and forced myself to return to the Scarborough Games Society for its first session. They kicked off the 2018 season with a painting evening, an ideal opportunity for me to dust off my little workbox and get going again.
The SGS is my local port of call for a game of Gale Force 9 'TANKS' - the tabletop tank warfare game - and the addition of a special 'paint night' to their club meetings is a great way to kick start your 'army' construction for a game. Aside from my putting together my practise tank (yes, although it was a 'paint night' model construction is allowed) there were a number of other armies being painted by other members which ranged from historical (e.g. Bolt Action) to fantasy (Warhammer and some very novel 'Toy Soldier' figures).
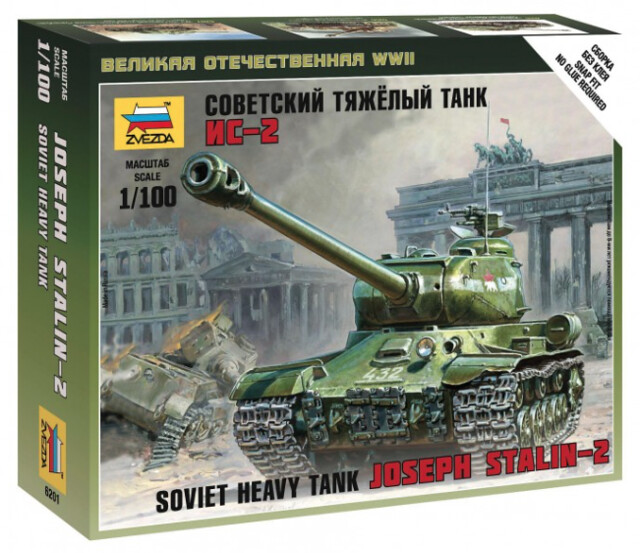
I decided to start with a very simple 15mm (1/100) Zvezda IS-2 Soviet Heavy tank. Although I have a very large backlog of other projects, I did not want to jump straight back in with an ongoing model until I had gotten some much needed modelling & painting practise again.
Also, I didn't want to make a mess of one of my 'good' models, so decided to start by making a completely unrelated test model first, before re-embarcking on either my Finnish, Kursk or Pacific projects. I happened to have the IS-2 knocking about my stash so it seemed a good candidate for a guinea pig!
The Zvezda 1/100 IS-2 'Joseph Stalin' Heavy Tank
Many modellers wax lyrical about the German 'heavies' - I call it 'Tiger love' - but I have always had a bit of a crush on the Soviet IS series of tanks. It was a long lived series which spanned the whole of WW2 and beyond, and was very influential (in the end, more influential than the German heavies) the development of Cold War tanks in both the East and the West.
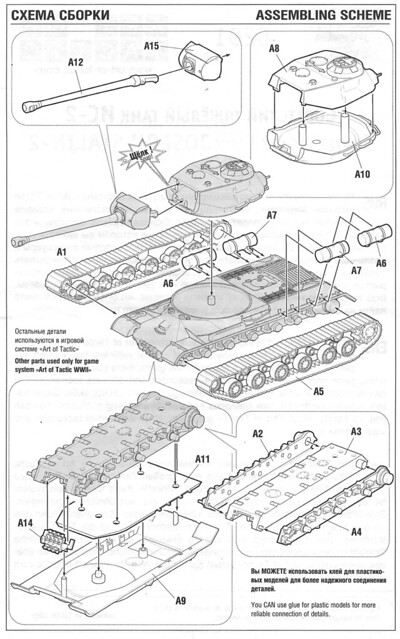
As usual, Zvezda have produced a very simple 'game marker' quality tank kit, with very few parts that simply snap-together quickly. Though, as usual, I took my time about construction as I looked for ways I could improve of modify the basic model.
To be honest, aside from the addition of some small items of storage, there isn't much more I would do to this model (aside from paint it). I've looked at quite a few reference photos now and - for a Soviet tank - the IS-2s seemed to run pretty lean (no great piles of gear strapped to the hull). I'm sure there was cases where the crew added plenty of stowage to the outside, but I'm gonna go with a clean look with this one. This, incidentally, suits this test project as I don't want to over-complicate the process.
The kit is the usual Zvezda 'Art of Tactic' fair with a minimum of parts (just 16) with much of the detail being moulded onto the components.
The detail itself is crisp enough (as usual with Zvezda) but the lack of options or alternative versions is the compromises which keeps the price of this kit low. By contrast the PSC IS-2 pack gives options to build either a IS1, IS85 or a IS2 and comes with a commander figure. BUT, it also comes with 5 tank kits and costs £19.95. So, you pay you're money and takes your choice.
Personally, I find the level of detail on the Zvezda perfectly acceptable for a game of GF9 'TANKS', in fact - for a war-game player rather than a committed modeller - the simplicity of the Zvezda model is actually a positive. If you twisted my arm for a criticism, I suppose - as usual - it might be that the track treads lack detail - but that's the compromise with one-piece tracks.
The end result is a nicely intimidating heavy tank which should put the shivers up even an opposing 'German' player fielding his selection of heavies. Combined with supporting T-34/85s and perhaps a heavy tank destroyer - like the ISU-152 - or more IS-2s, this model will make an excellent spearhead for a late WW2 Soviet assault force.
Next: Now to dust off my brushes!
After 2017's recurring illness and major creative doldrums, I feel reenergized for the New Year and forced myself to return to the Scarborough Games Society for its first session. They kicked off the 2018 season with a painting evening, an ideal opportunity for me to dust off my little workbox and get going again.
The SGS is my local port of call for a game of Gale Force 9 'TANKS' - the tabletop tank warfare game - and the addition of a special 'paint night' to their club meetings is a great way to kick start your 'army' construction for a game. Aside from my putting together my practise tank (yes, although it was a 'paint night' model construction is allowed) there were a number of other armies being painted by other members which ranged from historical (e.g. Bolt Action) to fantasy (Warhammer and some very novel 'Toy Soldier' figures).
I decided to start with a very simple 15mm (1/100) Zvezda IS-2 Soviet Heavy tank. Although I have a very large backlog of other projects, I did not want to jump straight back in with an ongoing model until I had gotten some much needed modelling & painting practise again.
![]() |
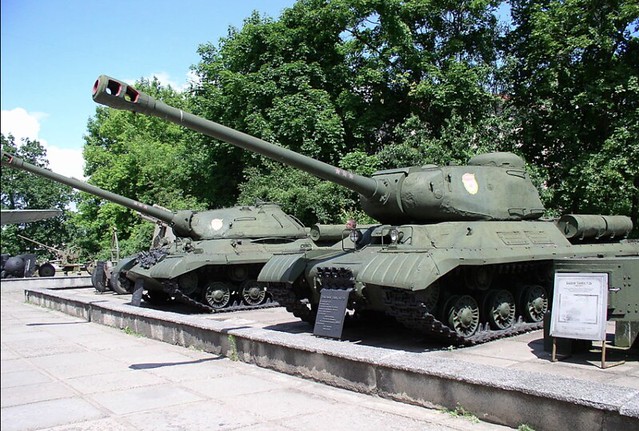
| Nice comparison shot of the IS-2 (front) compared to the later IS-3 showing how Soviet tanks were to evolve. The IS-3 arrived just too late for WW2, but gave the West a very nasty shock and initiated a rush for heavier tank designs. (Source: Wikipedia.) |
The Zvezda 1/100 IS-2 'Joseph Stalin' Heavy Tank
Many modellers wax lyrical about the German 'heavies' - I call it 'Tiger love' - but I have always had a bit of a crush on the Soviet IS series of tanks. It was a long lived series which spanned the whole of WW2 and beyond, and was very influential (in the end, more influential than the German heavies) the development of Cold War tanks in both the East and the West.
![]() |
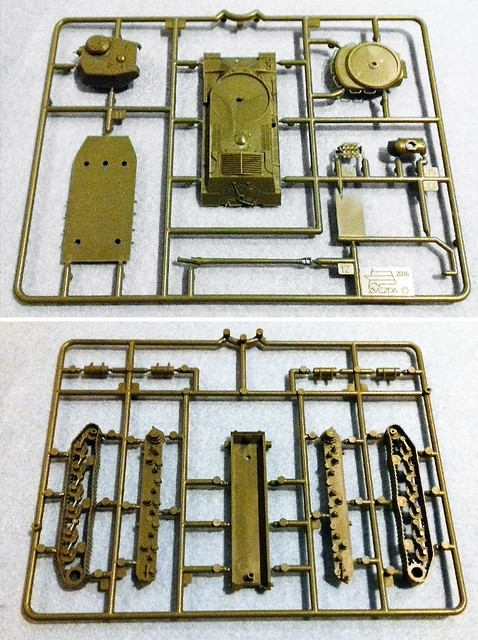
| Just 2 spures with 16 parts in total, not a complex job! (Sorry about the naff photo, the lighting plus my awful phone camera was against me.) |
To be honest, aside from the addition of some small items of storage, there isn't much more I would do to this model (aside from paint it). I've looked at quite a few reference photos now and - for a Soviet tank - the IS-2s seemed to run pretty lean (no great piles of gear strapped to the hull). I'm sure there was cases where the crew added plenty of stowage to the outside, but I'm gonna go with a clean look with this one. This, incidentally, suits this test project as I don't want to over-complicate the process.
The kit is the usual Zvezda 'Art of Tactic' fair with a minimum of parts (just 16) with much of the detail being moulded onto the components.
The detail itself is crisp enough (as usual with Zvezda) but the lack of options or alternative versions is the compromises which keeps the price of this kit low. By contrast the PSC IS-2 pack gives options to build either a IS1, IS85 or a IS2 and comes with a commander figure. BUT, it also comes with 5 tank kits and costs £19.95. So, you pay you're money and takes your choice.
Personally, I find the level of detail on the Zvezda perfectly acceptable for a game of GF9 'TANKS', in fact - for a war-game player rather than a committed modeller - the simplicity of the Zvezda model is actually a positive. If you twisted my arm for a criticism, I suppose - as usual - it might be that the track treads lack detail - but that's the compromise with one-piece tracks.
The end result is a nicely intimidating heavy tank which should put the shivers up even an opposing 'German' player fielding his selection of heavies. Combined with supporting T-34/85s and perhaps a heavy tank destroyer - like the ISU-152 - or more IS-2s, this model will make an excellent spearhead for a late WW2 Soviet assault force.
![]() |
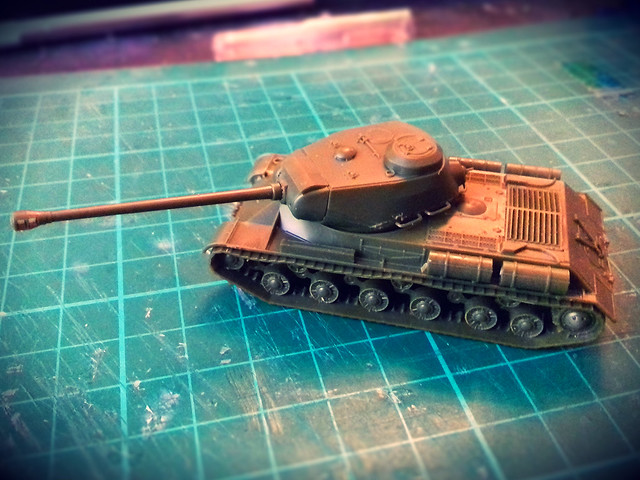
| Ta-Da! Done, I will probably drill out the gun muzzle, but aside from that she's ready for priming. Nice ease start to the year! |
Next: Now to dust off my brushes!
Sunday, 30 July 2017
Scratch Built 'Jungle Hut' - Part 2
Time to think about the roof and this will be a little tricky as I will have to come up with a simple method for modeling a grass or thatched roof. Now, there is numerous way you can model 'thatch' (or other grass-made roofs), including actually using fibers to lay down a mock-thatch, but I really want something 'war game safe' (that can take a lot of handling) and that is quick to apply.
I considered several different ways of modeling 'thatch' and also had several suggestions when I asked for some advice on some of the hobby groups I subscribe to. Fake teddy bear fur was one idea and gardening raffia was another but neither really seemed right and also they sounded a little too fiddly. Still, I decided to try out the raffia as it was easily available in a local store...
It turns out that gluing strips of raffia with PVA is a horrible messy process and I don't really think it was worth the bother. It doesn't look 'scale' for 15mm and takes a while to do. The above photo makes it look a little better than it actually does in reality.
And sooooo...After looking at several interesting YouTube tutorials on the various way that you can model thatch, I am plumping for the following technique...
![]() |
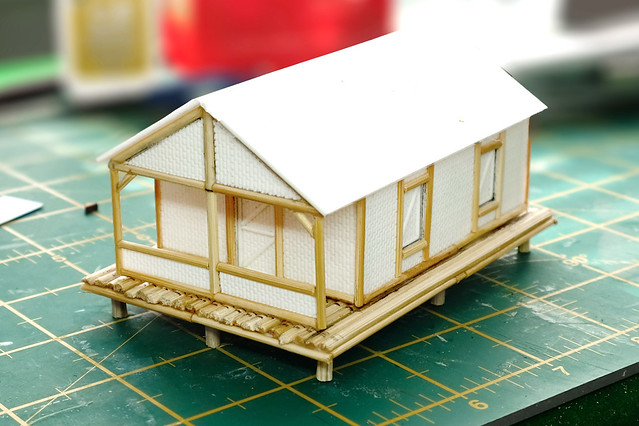
| Quick addition of a couple of rectangles of styrene card to get an idea of some of the dimensions of my hut's roof. |
![]() |
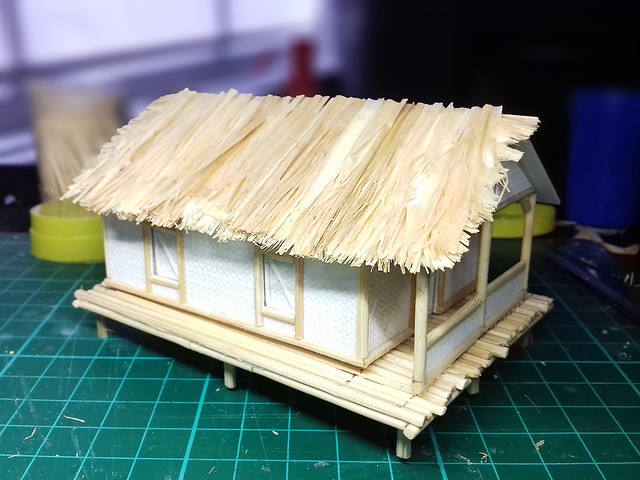
| A little too 'Tiki Bar' for my liking! |
And sooooo...After looking at several interesting YouTube tutorials on the various way that you can model thatch, I am plumping for the following technique...
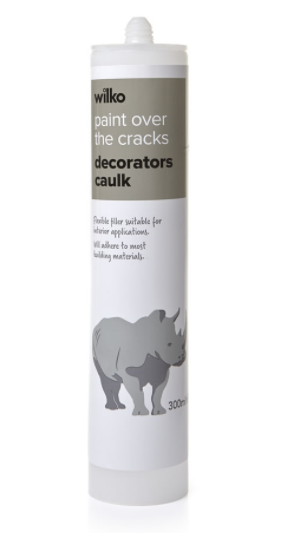
First question (if you are a Brit) may be 'what the heck is caulk'? Now, caulk does exist - much to my surprise - as a recognised British term, I just haven't heard it before (but plumbers and DIY enthusiasts will have). In fact - ramble alert - it is a historically old term which goes back to wooden ship building I believe...Anyway...
These days it is more normally known as an acrylic sealant and can be picked up really cheaply at Wilkos or other hardware stores (the one pictured on the left is just £1, but you will also need to buy one of those metal glue-pushing gun thingies if you don't have one).
Note: I've been told - on the Terrain Tutor's FB Group - NOT to confuse this product with silicone sealant. Acrylic sealant is easy to paint over, while silicone isn't.
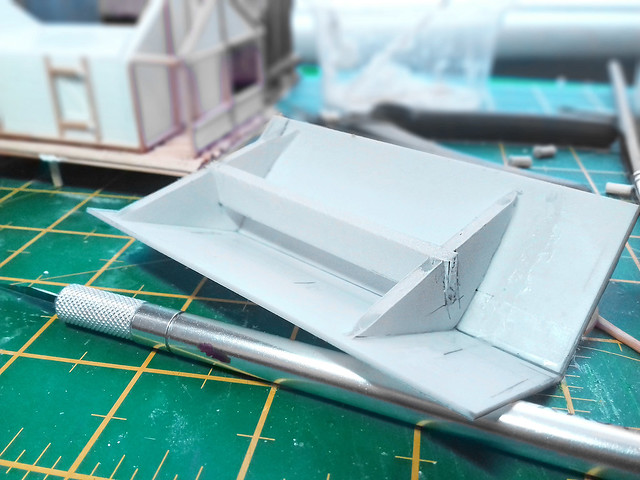
So, before I squirt any caulk in anger, I must make my roof's basic framework. A few bits of plasticard should suffice, as I want a reasonably thin base, but I think that thin card might warp or deform with 'wet' caulk smushed all over it.
The good thing about a very simple base like this is that if things go wrong with my caulk-ing then I haven't lost much...
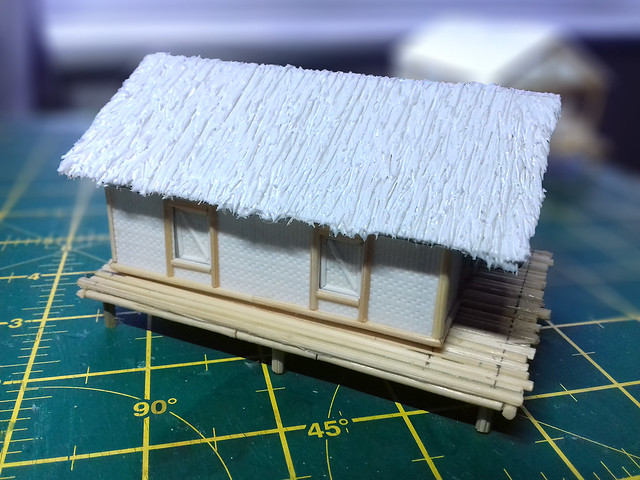
Now, the 'trick' - if you can call it that - to engraving a thatch pattern in caulk is to use a sharp cocktail stick and you will also have to keep cleaning the point as it soon builds up a blob of caulk on the end. So keep drawing you sharp lines and then keep wiping your point clean and you will end up with this (it isn't rocket science and there is no great knack to it)...
One of the good things about caulk - which, by the way, is the consistency of very thick yogurt - is that if you aren't happy with the way things are going you can just wipe it smooth and start again. It takes a while to dry so it remains wet enough to work with for a good amount of time.
Next: Well, hopefully, I can get the three houses for my Island village primed and ready to weather. Though I still have to think about the best way to base them.
These days it is more normally known as an acrylic sealant and can be picked up really cheaply at Wilkos or other hardware stores (the one pictured on the left is just £1, but you will also need to buy one of those metal glue-pushing gun thingies if you don't have one).
Note: I've been told - on the Terrain Tutor's FB Group - NOT to confuse this product with silicone sealant. Acrylic sealant is easy to paint over, while silicone isn't.
So, before I squirt any caulk in anger, I must make my roof's basic framework. A few bits of plasticard should suffice, as I want a reasonably thin base, but I think that thin card might warp or deform with 'wet' caulk smushed all over it.
The good thing about a very simple base like this is that if things go wrong with my caulk-ing then I haven't lost much...
Now, the 'trick' - if you can call it that - to engraving a thatch pattern in caulk is to use a sharp cocktail stick and you will also have to keep cleaning the point as it soon builds up a blob of caulk on the end. So keep drawing you sharp lines and then keep wiping your point clean and you will end up with this (it isn't rocket science and there is no great knack to it)...
One of the good things about caulk - which, by the way, is the consistency of very thick yogurt - is that if you aren't happy with the way things are going you can just wipe it smooth and start again. It takes a while to dry so it remains wet enough to work with for a good amount of time.
Next: Well, hopefully, I can get the three houses for my Island village primed and ready to weather. Though I still have to think about the best way to base them.
Sunday, 16 July 2017
Scratch-Built Jungle 'Hut'
So, I'm making my scratch-built houses a little smaller (I'll still use the Arcane hut, but keep it separate from the rest of the island buildings - I'm thinking of using it as the Japanese HQ objective).
Kappa the Hut (Sorry)!
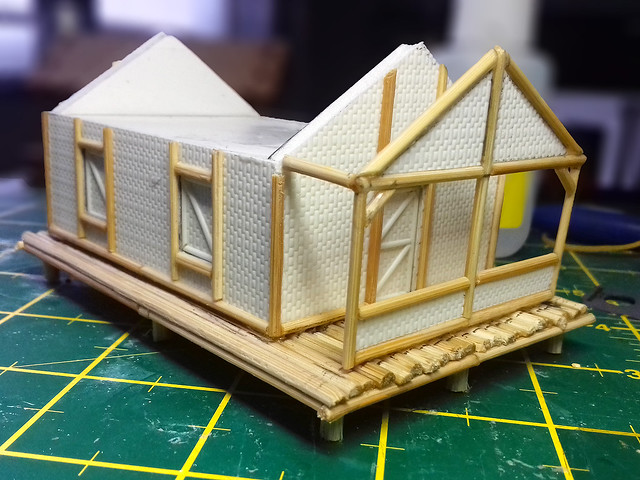
I'll be using 3mm foam board as the main building material for my huts (which we used to call 'Kappa Board' when I was at art school). It's quick and easy to cut out and put together a basic framework for a building with this stuff...
![]() |
| Er, yes...I am using spaghetti as 'bamboo' flooring! |
Cladding the framework - Palm Woven Texture
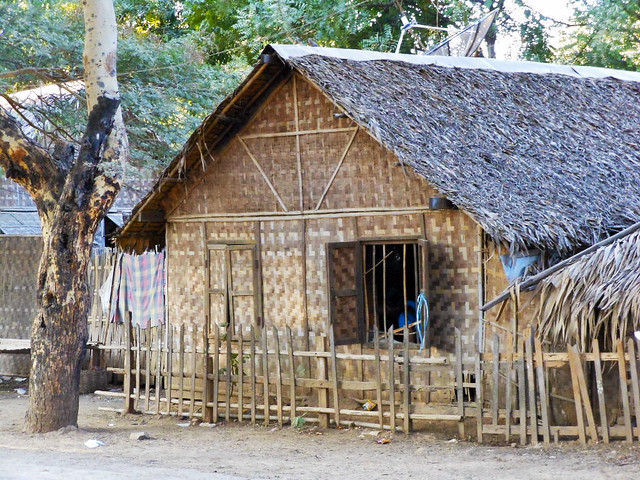
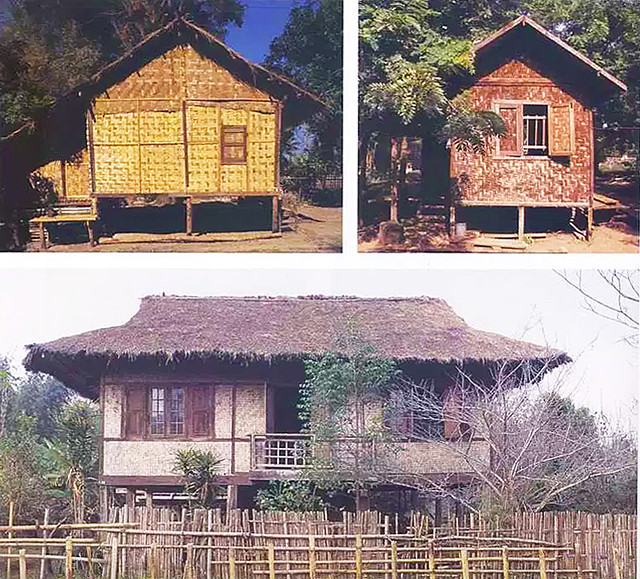
The construction may be simple enough, but to get that native-made look I'm had to do a bit of head scratching. Many of these island (and Far-Eastern) dwellings seem to have woven walls made from dried palm leaf strips (which I believe is very fibrous and strong). Now, how do I get a pattern that looks like it's palm-woven?
Left: Palm-weaving. The newly harvested palm leaves are still green at this point, but eventually, dry out into a khaki beige colour.
Arcane went for a simple engraved checkered design which - in actuality - looked exactly like a 'brick wall' pattern. But it sort of worked (if you half-close your eyes). So, I decided to pinch the idea, tweak it slightly and here's my take on a faux- palm-weave pattern...
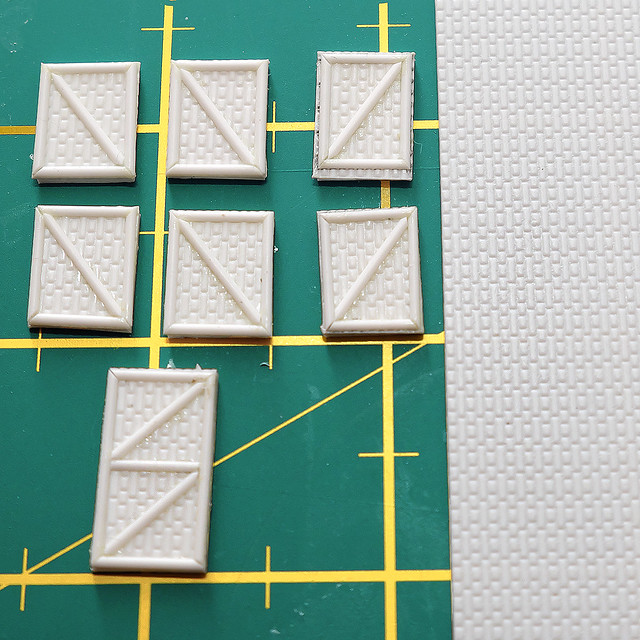
After a good search through all my various textured cards and whatnot, I realised that if I turned a regular 'brick wall' pattern texture vertically it kinda looked like a weave pattern (-ish).
A Note on Construction - 'Solid' versus 'Box'
While the GF9T game is seen as an entry level Segway or introduction to 'Flames of War', there is no infantry - or, indeed, any other vehicles aside from tanks - in GF9 TANKS!
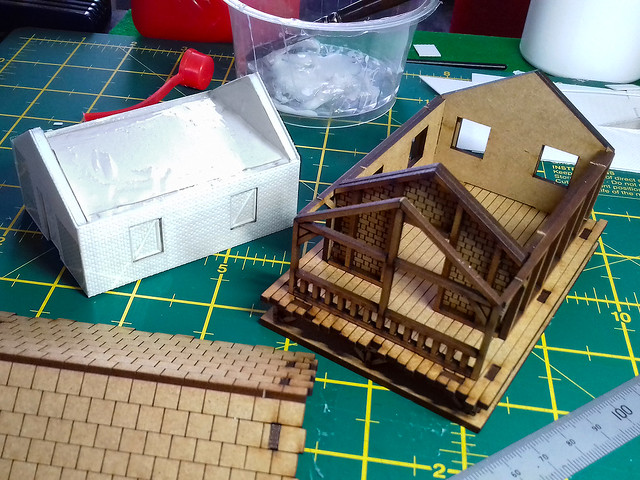
Store bought 15mm buildings intended for FofW are of the opening box type so that you can place infantry inside them, but buildings made for GF9T do not need this facility. Obviously, if you think you might progress onto Flames of War you may want to make your scratch-built houses with removable roofs, but you do not have to. GF9T buildings can be solid (i.e. not openable).
Round or Flat Planks?
One small quandary is whether to make the outer frame and flooring round or flat/square planks. Arcane, naturally, went with flat as this suits laser-cut MDF models, but really native-built palm huts would have been constructed from the natural trunks of trees or palms, so would be round.
As usual, I'm making things up as I go along, but - in theory - this should be a simple enough model for me to get away with it. Once I have completed this first test design the further two huts I require for my game should be easier and faster to put together.
I'm using super glue to stick the wooden frame together and as usual, I'm sticking things to me more than anything else! I must really look into what kind of glue is the best for sticking wooden things together quickly and securely.
Anyway, super glue is doing the job and I was rather pleased with the job I made of the hut's porch...
Though, I am a little unsure just how high I should make the stilts that these houses stand on. I based my initial attempts on the stilts that the Arcane model has, but I'm now thinking these look a little low. I may double the height.
Well, that's it for now. I'll have to put a bit of a spurt on this week as I'm on a tight schedule with this project and I wan to start the jungle scatter foliage this week.
Saturday, 8 July 2017
Arcane 15mm Jungle 'Hut'
With progress being made on the tank models for my planned Pacific Island scenario for my 15mm TANKS! game, it's time to start putting together some of the terrain. (I'm working on some sketches of what the 3" x 3" game mat will look like, with the Japanese defending.)
I am thinking along the lines of including three jungle huts and two Japanese anti-tank bunkers and a collection of scatter foliage to break up the line of sight. I didn't know where to start with the island dwellings, so I relented and spent some money on a pre-build which I intend to use as a template for a couple of scratch built houses/huts.
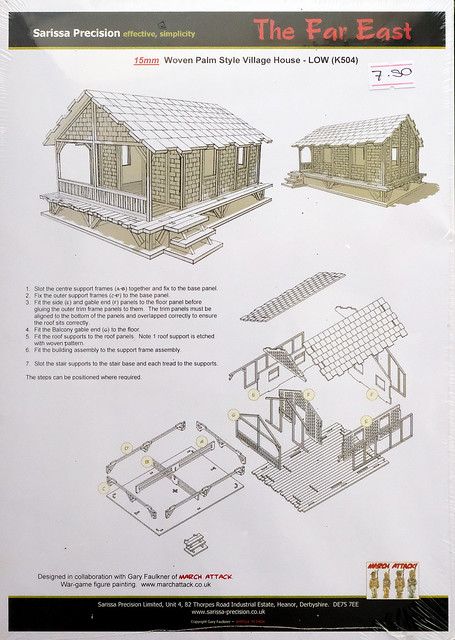
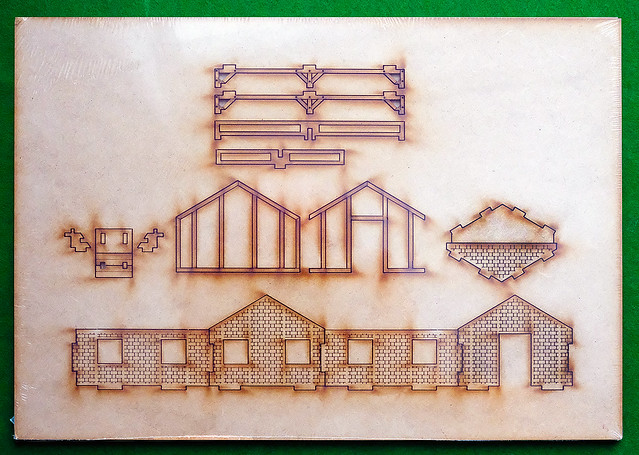
The pre-built model I bought is an Arcane Scenery and Models laser cut MDF Far East or Jungle Small House (£7.50)...
![]() |
| The model comes on two A4 sized 2mm MDF sheets and is quite easy to knockout. |
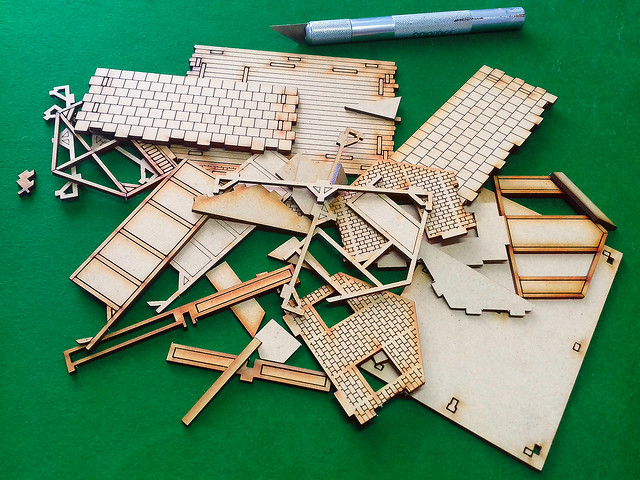
Once you knockout all the parts you end up with a big MDF jigsaw puzzle! But the instructions are good and it's pretty obvious where everything goes...
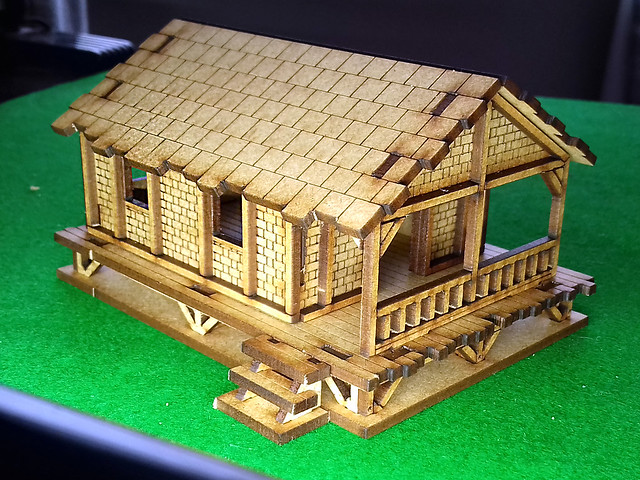
And you quickly pop the model together. The fit and design is very good and PVA glue is only really needed for the external framework (but you can glue the whole thing together if you prefer).
Lasercut MDF models have a tendency to be a little blocky, but this one isn't too bad (the roof is perhaps my only niggle) and - in this case - the bare MDF colour looks exactly right. You could get away without painting this jungle house.
It will be interesting to see if I can replicate this design.
Japanese Bunkers
Galeforce 9 games have some stats for the use of bunkers in one of their Normandy operation expansions (which are a free download from their website), but these stats are for a concrete bunker armed with the formidable German 75mm Pak40. The stats would have to be tweaked for a Japanese earth and log bunker and I will have to figure out what gun would likely be emplaced in them (perhaps the excellent Type 1 47 mm Anti-Tank Gun).
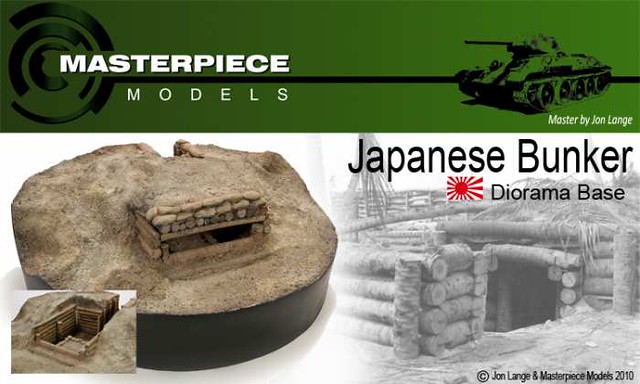
As to the design of the bunkers, I've been looking around for a design I can replicate and fount this one...
![]() |
| This is the Masterpiece 1/35 model, but it will make a good template for a scratch built 1/100 version. |
Way Down Deep in the Middle of the Jungle...
Finally, there is the jungle foliage itself and luckily The TerrainTutor has some excellent 28mm ideas for making wargame jungle 'scatter' that I should be able to scale down for 15mm...
Phew! A lot of work, but let's crack on...
Next: Scratch built Island Dwellings.
Thursday, 6 July 2017
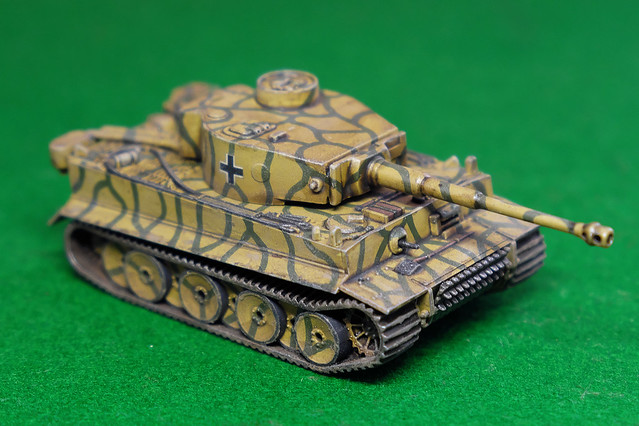
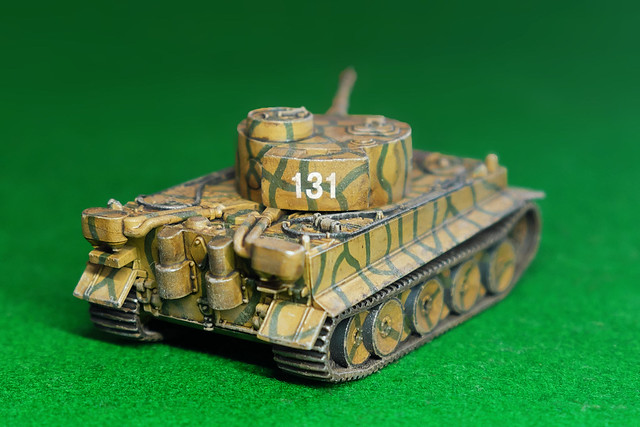
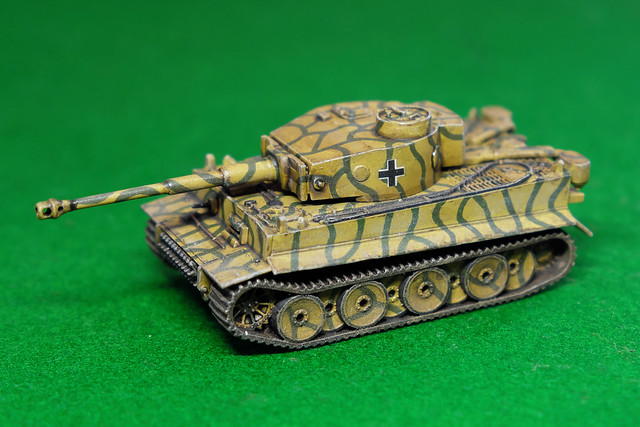
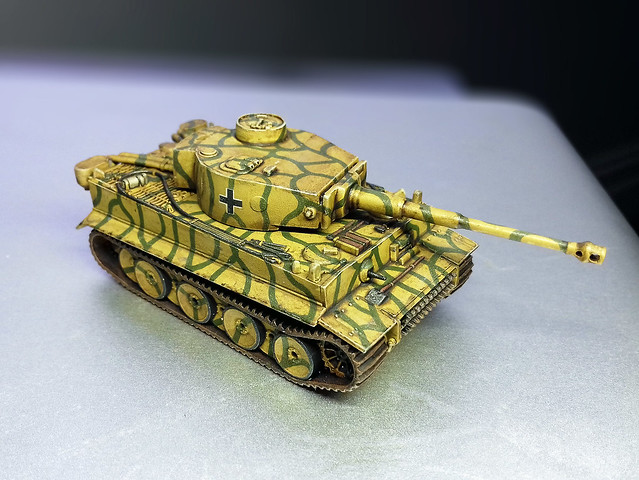
Zvezda 1/100 Tiger I - Finished
Finally managed to get my Kursk Tiger I finished off. Phew, I made a meal out of this one (I blame the wife giving me loads of jobs around the house)!
I'm reasonably pleased with it, but Zvezda's simplified tracks niggle me. Still, that's half my German force done for my TANKS! Kursk scenario, I just need to make a couple of Panzer IVs for cannon fodder! :)
Thursday, 29 June 2017
Quick update on current projects
Taking on a temporary work contract really put the breaks on my model making, but with the contract fulfilled it's time to get back to the real work!
So, here's a quick update on what's going on at the moment...
• Zvezda 1/100 M3 Stuart - Number 2
This is the second of these diddy little tanks for my TANKS! game (early Pacific scenario). It'll end up with the same ad hoc 'mud camo' as the first, ready to hunt Nips!
• Zvezda 1/100 Tiger I
And for my TANKS! Battle of Kursk scenario I am adding the formidable Tiger I model which I have gotten to the weathering stage. It's a bit of a dirty kitty!
This'll compliment my Elefant for the planned game, and I will be adding a couple of Panzer IVs to finish off the German force.
So, here's a quick update on what's going on at the moment...
• Zvezda 1/100 M3 Stuart - Number 2
This is the second of these diddy little tanks for my TANKS! game (early Pacific scenario). It'll end up with the same ad hoc 'mud camo' as the first, ready to hunt Nips!
• Zvezda 1/100 Tiger I
And for my TANKS! Battle of Kursk scenario I am adding the formidable Tiger I model which I have gotten to the weathering stage. It's a bit of a dirty kitty!
This'll compliment my Elefant for the planned game, and I will be adding a couple of Panzer IVs to finish off the German force.
Subscribe to:
Posts (Atom)