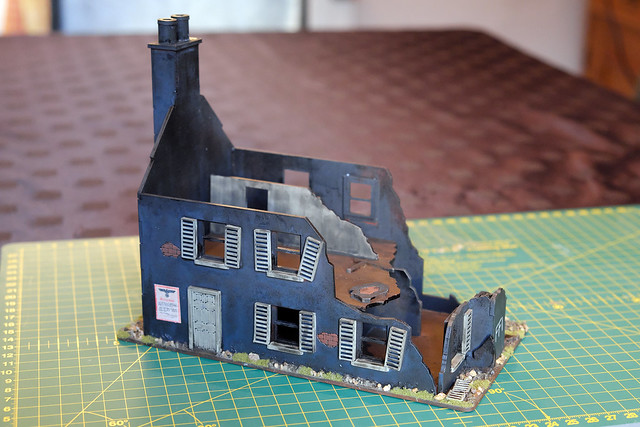
Showing posts with label buildings. Show all posts

Tuesday, 9 June 2020

1/100 Kursk Project - Scenery Pt. 3

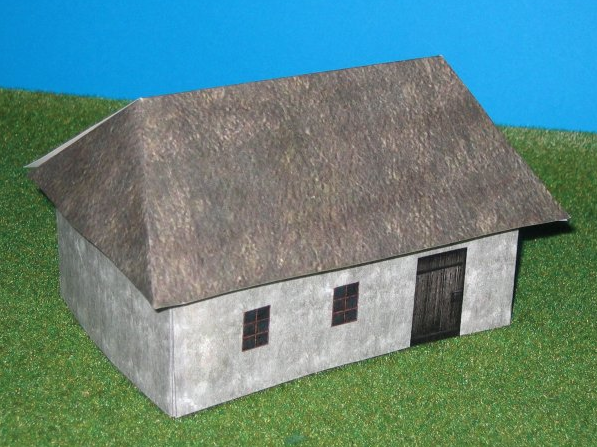
I finished off the 'Rusgorov' paper-craft hamlet models yesterday, and I have to admit that I am quite pleased with them. I was a bit unsure about them at first because they seem to lean towards the fantasy rather than historical end of the hobby, being a little on the stylised and colourful side.

But, in the end, I don't think they look too outlandish or unrealistic...


Building these paper and card models was very enjoyable and I look forward to making some more when the opportunity presents itself. (Predictably, I already have an idea for another project in the back of my mind.) 😊

The purpose of these little buildings are to provide some scenery and tactical cover for my planned Battle of Kursk war-game. GF9 TANKS! is intrinsically a 'line of sight' game and therefore having scenery and objects that can obstruct a direct view between a tank and it's target can help to make the game more interesting and challenging. Well, at least this is what I have come to believe from the games I have played so far and this is why I wanted to include a little Russian hamlet as a key objective in my Kursk themed game.


Well, what else will I include on my game table? I can't just have a village in the middle of nowhere.

I've had a good look at a lot of photographs of the landscape on which the Battle of Kursk took place in 1943 and what strikes you most of all is how well suited the countryside was to 'The Biggest Tank Battle in History'! I suppose that's probably putting the cart before the horse as it was as likely as it was the flat and open nature of the region that made it a obvious choice for a set-piece tank battle.


Obviously, I don't think I'll add rolling hills, dense forests or lakes to my battlefield, rather I'll be constructing a pretty flat board with large grass plains interspersed with the occasional hovel and field. Therefore, any obstructions to line of sight will have to be artificial.

Natural landscape 'To do' list:
- How to make 1/100 scale fields.
- How to make some small dirt roads.

What these obstructions ill be will be the next challenge.


Monday, 1 June 2020

1/100 Kursk Project - Scenery Pt. 2

While still searching for all my tools and materials among the plethora of random junk in my attic I have managed to locate enough of my basic modelling tool set to have a stab at building something. Honestly, nothing is quite where I expected it should be which is very, very frustrating.

Anyway, I found enough bits and pieces to try putting together one of the little houses from the 'Rusgorod: Russian Hovels' paper-craft set I downloaded. I just wanted to see what the little models looked like built and to check that my size reduction from the set's original 28mm scale had worked.


Now, I don't have a great printer, it's just a cheap home-office HP and the resolution isn't fantastic (even when set to 'Best Quality'), but even so I was quite pleased with print-out I got and got down to cutting it out...


This is one 'Russian Hovel No. 1' - out of a set of 6 buildings - and as you can see is a log cabin with a (very) high 'A' frame roof (I know nothing about architecture). I'm not sure how authentic this is, but it looks quite cute and kinda similar to some of the log buildings I've seen in photos of the Russian countryside taken during WW2... So let's go with it!

Well, as you can see, it ain't the most complicated model to put together, the ones I did for my 1/100 Normandy game were a lot more fiddly. But, LOL, I still managed to get myself covered in Pritt Stick! 😂

I put together the inner shell or framework using 3mm Kappa board (as we used to call it in art school) - that's foam board if you prefer - and pasted the print-out onto it. The roof, however, was heavy card stock instead as I didn't want it too think...


For once, all my measurements seemed to be spot on and everything came together without any gaps at the seams.  This may have been to do with my cutting the board fractionally bigger, sticking the print onto it and then trimming off any excess? (For my Normandy card buildings I stuck all the printout onto the heavy card stock AND THEN cut everything out. I think my new way is better.)


Finally, with the walls glued together to form an open box, I cut out a rectangle of foam board for the floor and ground floor roof and then stuck them inside the box. This gave the building extra rigidity.

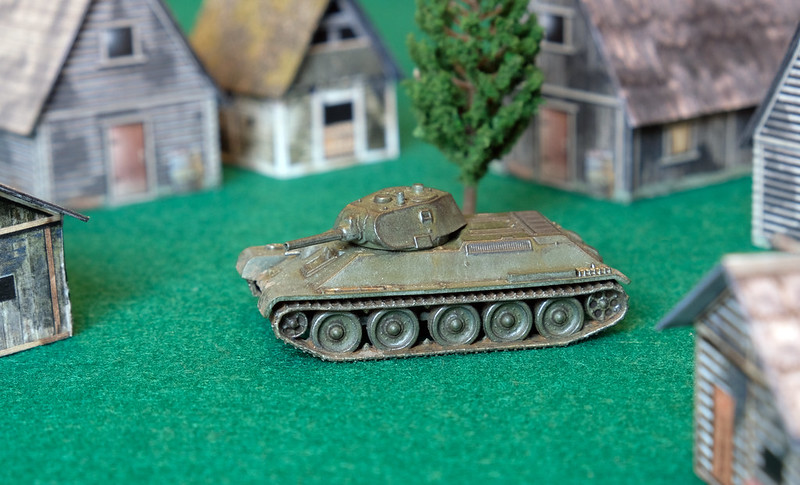
With the roof glued in place to complete the model I could't resist taking a photo of the cabin next to one of my 1/110 T-34s (Early Model)...


I think the scale looks just right - although I don't have any 15mm figures to check for sure - and next to the T-34 the model really does give off that rural Russian vibe.

This - as you can see - was a very quick build and there are a few things I would like to do to improve these models when I start banging out the rest of the set. For example, the exposed white card under the roof doesn't look good, I'll need to colour that (maybe a dark brown. And, also, I'll put on a darker roof cap along the length of the point, just to hide the little cut I made so I could fold the roof.

But, aside from these little niggles I am quite pleased with the model. It's what I was after - something cheap and easy and quick to put together. And I do prefer using foam board in order to create an inner supporting box as I noticed that after a while my 'card only' Normandy houses did warp a bit after being in storage in a cold, damp attic. These new models should last a bit longer.

Now, onto the other five buildings!

-------------------------------------------------------------

'Rusgorod: Russian Hovels' are by Finger and Toe Models and are available from Wargamevault.com ($5 download).


PS... I'm almost tempted to but their onion domed church (above) as well and they also have other houses in the series that are worth a look.

Saturday, 30 May 2020

1/100 Kursk Project - Scenery

I'm pretty much clear on what tank models I need for my GF9 'TANKS!' Battle of Kursk scenario. And what's more I half almost all of them and about 60% of them built...So...

Just what kind of terrain, scenery and scatter should I put together for the battle table?


A lot of the photos I've seen of the battle makes the landscape of the battle look fairly desolate, with large empty plains. But, the battle was actually a series of battles over an enormous front so whatever I produce will simply be a generic representation.

That said, I would like to add some cover - my past games of GF9T! has proven that adding obstacles in a line of sight tabletop war game greatly increases the tactical aspect and excitement (in my opinion). Hills, patches of trees, buildings and even destroyed tanks all provide sneaky patches of cover for tank duels.

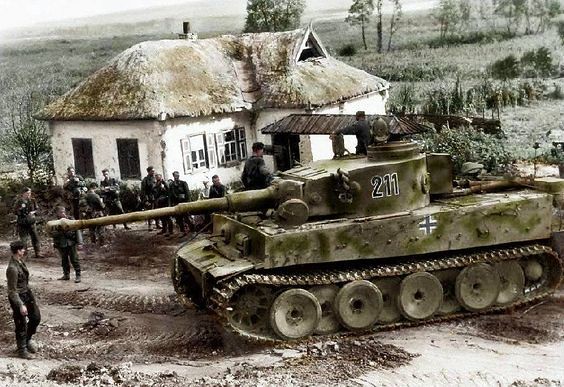
Photo source: German Federal Archive. Photographer: Britting

My first thought is adding a Russian hamlet as both a sub-objective and area of cover. And so, the hunt for 1/100 Russian buildings began.

Note: GF9T! comes with some generic flat printed scenery in the starter box set and technically flat scenery has it's advantages, for starters you can drive your tank right over it easily! BUT, while perfectly serviceable, I found in the games that I played having proper 3D obstacles took a lot of the guess work out of determining just what or was not in 'line of sight'. So I prefer 3D models.

So, then the choice is: 3D printed, MDF laser cut, scratch built, resign moulded or paper-craft buildings???

Some rather nice Red Vectors laser-cut village buildings, but £18? Hmmm.

Out of these scratch built and paper-craft are the cheapest (maybe I should add 'can be the'), while unless you have your own 3D printer (I don't) the other formats mean forking out some dosh (boooo)! That's not to say it would cost a fortune to buy a set of 3D builings in 1/100, the resin ones, in particular, are pretty good value...

Peter Pig's Russian Timber Church (supplied unpainted), just £3.50! Not bad!

But, I'm of the mind that why should I fork out a sum of money for a set of buildings I will only use a couple of times and then have to store away. I'd much rather go for a cheaper and slightly more temporary solution. But that's a matter of your own opinion and choice.

As if to prove me a lair Paperterrain's Russian Hamlet is $20! For a papercraft
set...Mind you, it is a good one, but still. Phew!
After much Googling I eventually came across a rather nice little papercraft set that was definitely in my price range. On Wargamevault.com I found Finger and Toes Model's 'Rusgorod: Medieval Russian Hovels' PDF in 28mm scale.

Now, despite being in 28mm and being described as 'medieval' buildings this attractive little set was a very satisfying $5 - I could go for that, I thought! 28mm 2D models scale very nicely at 50% when printing and even though it says 'medieval' I didn't see much that differentiated them from a 20th century Russian hamlet...

I like the style of these particular models. Yes, they a bit more 'creative' in their decoration, more akin to a fantasy style than a historic one, but I appreciate that extra splash of colour. Some of the 'more historically accurate' models I have seen are a wee bit dull. I concede that's just a realistic fact of life as it was in Russia at this time, extreme poverty saw to that, but GF9 'TANKS!' isn't a serious game - it's war-gaming lite - and a bit of poetic licence in style is in keeping with the spirit of the game.

Anyway, I bought and downloaded the 'Rusgorod Hamlet' set and have done some test printouts to ensure that the scaling from 28mm - 50% - works, and it does.

The original 28mm scale design filled the A4 page. This is what the 50%
reduction looks like, it is now 15mm (1/100) scale and ready to cut out.

Battlefield Deleterious - Scatter Scenery

Quite apart from terrain and buildings, 'scatter' items give the tabletop battlefield a little flavour and provide some extra obstacles or cover.

From the beginning I knew I wanted to maybe add features like a railway line, a fordable stream or a road. While not obstacles in the true sense - being transversable - each of these features does have an effect on vehicle movement. Crossing a wide stream or railway line would slow down tank movement and a good road would speed up movement. However, these are not the the only reasons I wanted to add these - they also allow for the opportunity to add additional 'scatter' objects to the table...

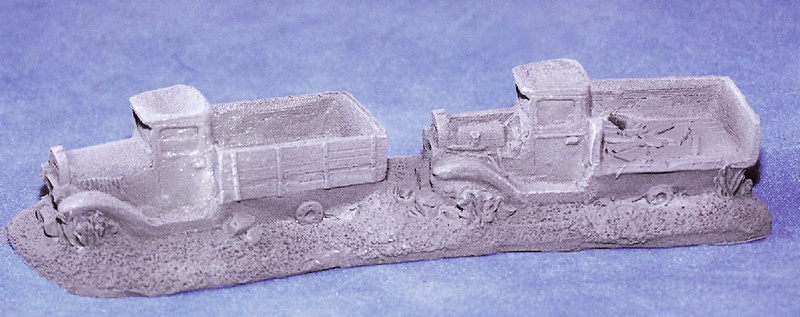
Burnt out GAZ truck convoy by Peter Pig.
Again by Peter Pig, a knocked out Russian T-34 tank!

Something I really fancied putting together was a burnt out truck convoy on the road, this would be very atmospheric, provide cover BUT also stop either participant from doing a rush all the way up the road. Similarly, a destroyed train could provide a good means of tanks crossing otherwise open countryside.

How cool is this? A 15mm derailed train transport. 26 Euros, but so tempting!
This is all going to sound like it's a LOT - houses, destroyed trucks, etc - and there is a danger that I make the table too 'busy', especially if I start adding trees and small hills. So, there will have to be some thought put into what I add with a view to game balance - remembering that the Soviets fought defensively so they will probably need some in-placements for their AT guns and maybe some mine fields.

A lot to think about... (But THAT train, eh?) 😁

Next: Sketching a battlefield plan.

Saturday, 20 January 2018

Stash Update 'Project Kursk' - Part 2


As my tank collection for this project is now into the production phase it's time to think ahead and begin to gather the bits and pieces I need for the playing mat (for a GF9 'TANKS!' game).

Obviously Project Kursk is a 'Russian Front' themed game set in 1943 and although buildings will be sparse for the type of open flat countryside that would be the setting for such a scenario I do want to include a few isolated farm buildings and huts to break up the line of fire. (I will also be including plenty of woodland, but more of that another time.)

I already have a budget option for rural Russian building, as I came across some papercraft designs that are available for free download from the 'Perry's Heroes' site: Eastern Front - Paper Buildings.

As simple and cheap as you can get, but effective for a tabletop game. You will
have to do a bit of math to scale these paper designs for 15mm though.
My only niggle with paper and card models is durability. I'll probably want to play with these a few time for different Soviet games and - crucially - I will want to pack these items of terrain for transportation to my local club. I'm really not so sure how flimsy card models will stand up to being knocked about so I would prefer something along the lines of a MDF building in 15mm (I also ruled out cast resin buildings as, although they are cheap and fairly durable, they are pretty heavy).


Luckily there is no shortage of sources as 15mm wargaming is very popular and the manufacture of laser-cut MDF kits seems to have become a very popular cottage industry...

Star Fort Miniatures make this lovely Ukrainian/Russian rural church
for £14.99 (the roof comes off for infantry placement). They also do a
variety of Russian village dwellings.

Minibits have this 15mm Russian Village set  By Red Vectors for £18.
While all very nice, these would represent a bit of an investment and I have a hankering to make something myself from scratch (to keep costs down). So I plumped to by an single MDF building that I thought was good value from Red Beam Designs and will use that as a scale and style template for my own models.

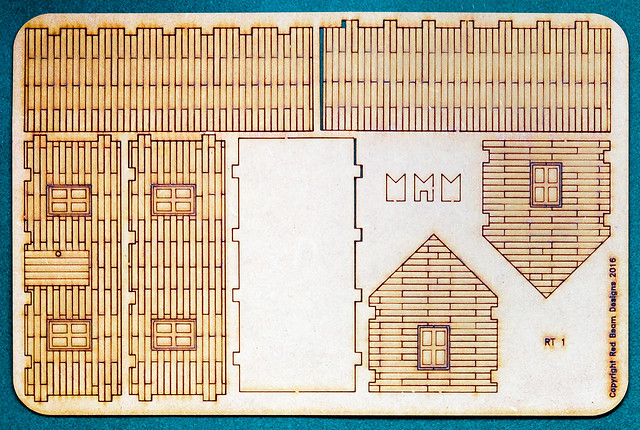
The Red Beam 'Russian Timber house' seems to be a design I could replicate
easily with plasticard strips.
At just £4.45 plus postage it's an affordable investment, and although a very simple design will give me the scale for my own scratch build timber hovels. Red Beam have a few more Russian houses in the series, by the way.

After just a few days the 'kit' arrived (I *think* they are laser-cut to order). It comes on just one small sheet (smelling nicely of burnt, laser cut MDF) of just ten parts, ready to knock-out and assemble...

Sunday, 16 July 2017

Scratch-Built Jungle 'Hut'

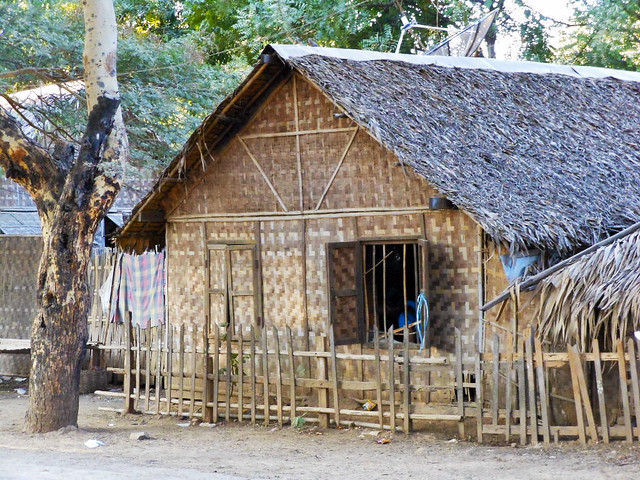
Palm-woven dwelling designs vary across the Far-East and Pacific so I'm
going with a sort of generic impression. I don't want to model a building of
a specific location as I want to re-use these model for any Asia or Oceania
scenario or game.
It was always my attention to scratch-build a couple of island dwellings to compliment my Arcane 15mm laser-cut Jungle house, but the need to make my own buildings may be more necessary than I thought.  As it turns out, I am not quite happy with Arcane's scaling of their house model, I personally feel it is a smidgen bigger than the stated 15mm.

Another of Arcane's 15mm Far-East/Pacific building models. It's a nice model,
for laser-cut MDF, but one compromise is the roof which perhaps should be
palm thatch (which would be very hard to replicate in MDF). I'll probably
rectify this with my models though.
My criteria for judging a 15mm building's scale is quite rudimentary and is based on a 'standard' door dimensions - which I judge to be about 10mm wide and 20mm height at 15mm or 1/100 - and Arcane's doors and windows seem a little too large for my taste (especially next to Zvezda's M3 Stuart tank).

So, I'm making my scratch-built houses a little smaller (I'll still use the Arcane hut, but keep it separate from the rest of the island buildings - I'm thinking of using it as the Japanese HQ objective).

Kappa the Hut (Sorry)!
I'll be using 3mm foam board as the main building material for my huts (which we used to call 'Kappa Board' when I was at art school). It's quick and easy to cut out and put together a basic framework for a building with this stuff...

Er, yes...I am using spaghetti as 'bamboo' flooring!

Cladding the framework - Palm Woven Texture

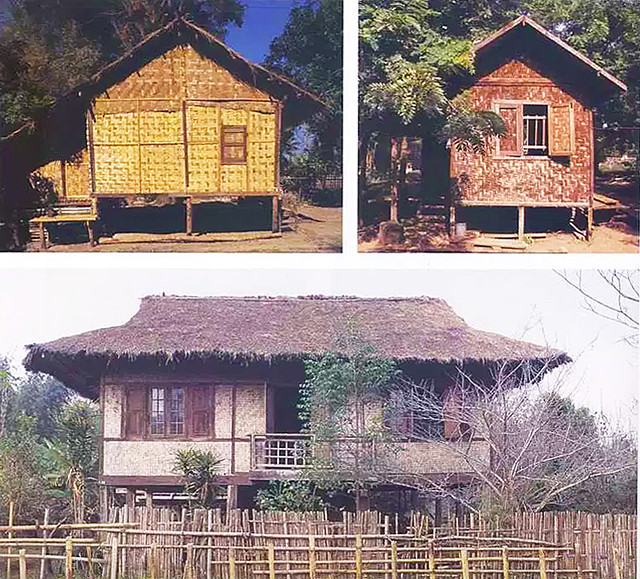
The construction may be simple enough, but to get that native-made look I'm had to do a bit of head scratching. Many of these island (and Far-Eastern) dwellings seem to have woven walls made from dried palm leaf strips (which I believe is very fibrous and strong). Now, how do I get a pattern that looks like it's palm-woven?

Left: Palm-weaving. The newly harvested palm leaves are still green at this point, but eventually, dry out into a khaki beige colour.

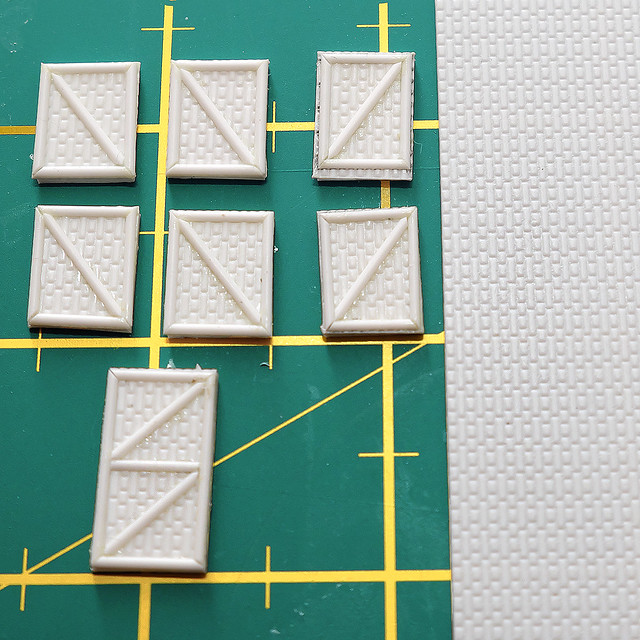
Arcane went for a simple engraved checkered design which - in actuality - looked exactly like a 'brick wall' pattern. But it sort of worked (if you half-close your eyes). So, I decided to pinch the idea, tweak it slightly and here's my take on a faux- palm-weave pattern...


After a good search through all my various textured cards and whatnot, I realised that if I turned a regular 'brick wall' pattern texture vertically it kinda looked like a weave pattern (-ish).

A Note on Construction - 'Solid' versus 'Box'
While the GF9T game is seen as an entry level Segway or introduction to 'Flames of War', there is no infantry - or, indeed, any other vehicles aside from tanks - in GF9 TANKS!

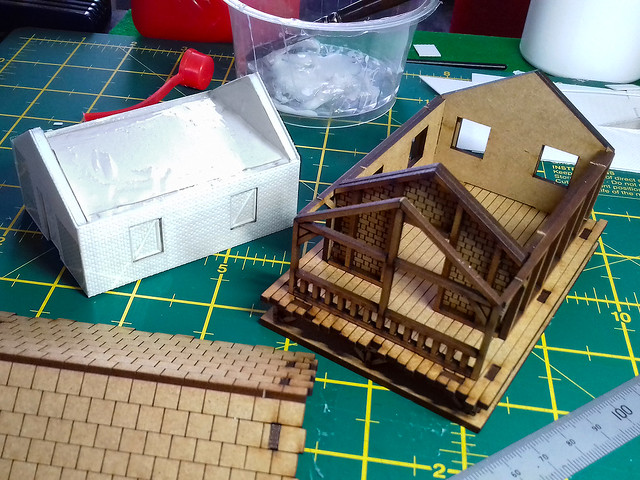
Store bought 15mm buildings intended for FofW are of the opening box type so that you can place infantry inside them, but buildings made for GF9T do not need this facility. Obviously, if you think you might progress onto Flames of War you may want to make your scratch-built houses with removable roofs, but you do not have to. GF9T buildings can be solid (i.e. not openable).

Above: My 'box hut' on the left, compared to the lovely Arcane Far-East house
on the right. The Arcane's removable roof can be seen at the bottom and the
floor planking of the laser-cut model's interior is very nice.
This can make you building designs a lot simpler, particularly when making multi-storey houses.

Round or Flat Planks?
One small quandary is whether to make the outer frame and flooring round or flat/square planks. Arcane, naturally, went with flat as this suits laser-cut MDF models, but really native-built palm huts would have been constructed from the natural trunks of trees or palms, so would be round.

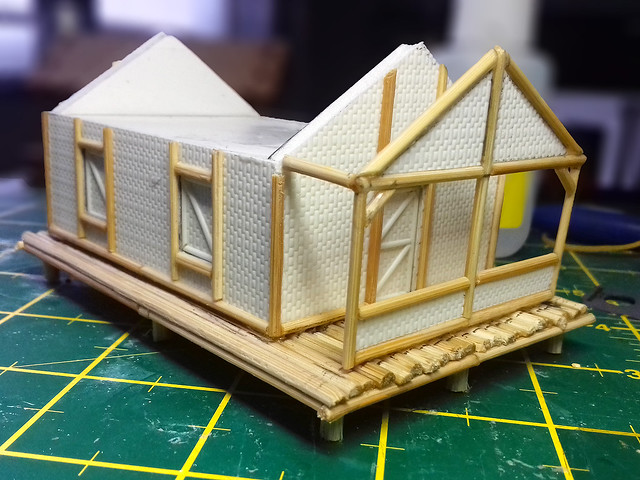
However, finding my cunning spaghetti plan for the wooden planks was a stupid idea I have now returned to bamboo skewers and cocktail sticks...


As usual, I'm making things up as I go along, but - in theory - this should be a simple enough model for me to get away with it. Once I have completed this first test design the further two huts I require for my game should be easier and faster to put together.

I'm using super glue to stick the wooden frame together and as usual, I'm sticking things to me more than anything else! I must really look into what kind of glue is the best for sticking wooden things together quickly and securely.

Anyway, super glue is doing the job and I was rather pleased with the job I made of the hut's porch...


Though, I am a little unsure just how high I should make the stilts that these houses stand on. I based my initial attempts on the stilts that the Arcane model has, but I'm now thinking these look a little low. I may double the height.

Well, that's it for now. I'll have to put a bit of a spurt on this week as I'm on a tight schedule with this project and I wan to start the jungle scatter foliage this week.

Saturday, 22 April 2017

Nostalgic Model Making - Paper Houses

As I'm a bit skint at the moment but wanted some 3D house models for my new 15mm tank tabletop game. I also didn't want to get into building and painting scratch models as I have a sizable cue of projects on my workbench. So, what to do?
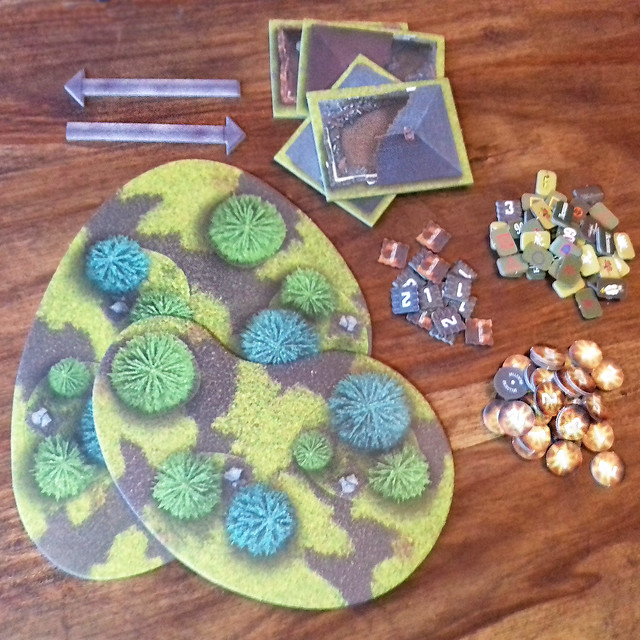
GF9 supplies some flat scenery in its Tanks game to get you
started, but the houses - in particular - just didn't feel right
during my first game.
I had considered making plain featureless 'blocks' to represent buildings, the point being that these scenics provide obstacles to 'line of sight' in the game (I had a problem with the flat 2D scenery that the GF9 Tanks game provided as I felt they sometimes gave a false impression about what was and was not behind cover). This would have been very quick to make, but a bit lacking in 'realism'.

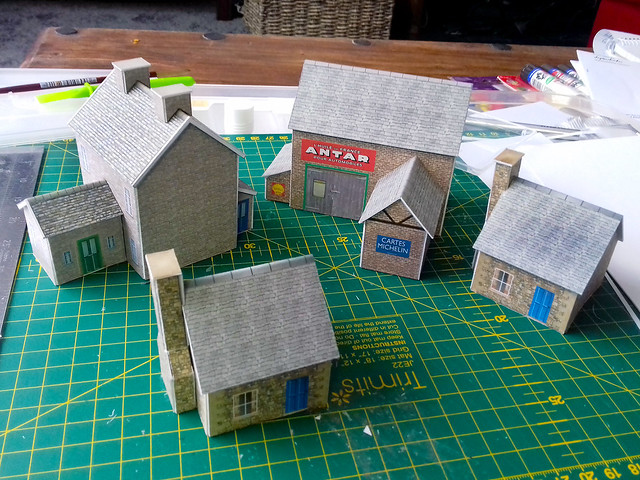
Then I remembered the printed paper models that my father used to make for his model railway layout, some of which were very good indeed. The advantages of these are; they are cheap (sometimes free), they are pre-textured so don't require painting and they are relatively quick to put together (though there are some very sophisticated paper models out there).
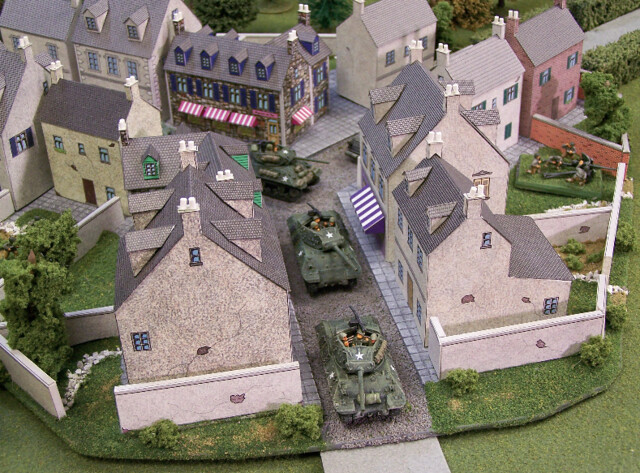
An example of some nice historic paper models by PaperTerrain. Unfortunately,
they charge $18 to download this set, so had to look elsewhere!
Downloading these type of paper designs seemed to be a more satisfying option, and with only a pack of card to buy from my local craft store they exactly suited my budget.

Sourcing The Models
This is one of those areas where the Internet shines after a short Googling session I found a few likely sources for free paper models, but I was most impressed by the range of buildings by Wordsworth Model Railway and their 'Townscene' collection.

WMR's 'Townscene' series of paper models and well-designed models which
represent standard British building types which suit most periods, from the
1930s to present day.
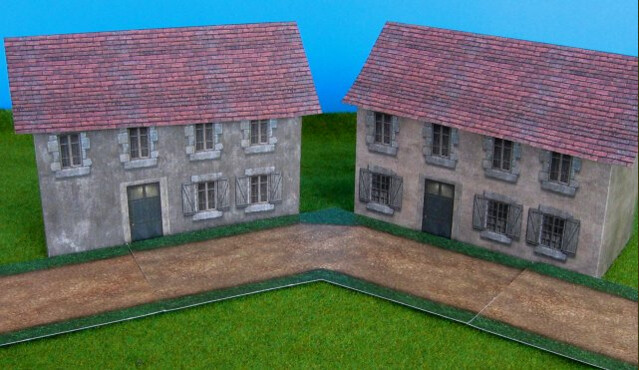
The Townscene houses maybe ostensively 'British' but several of their more rural models - their cottages and stone buildings - are fairly generic and could pass for WW2 era French buildings...
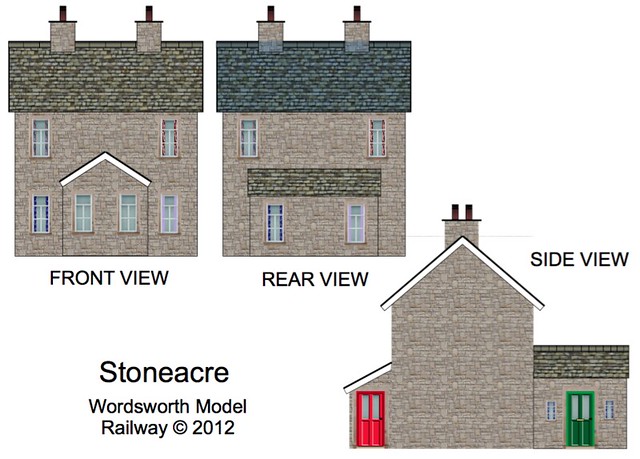
WMR's 'Stoneacre' model is a nice 'two up' house model and was the first
I downloaded and made.
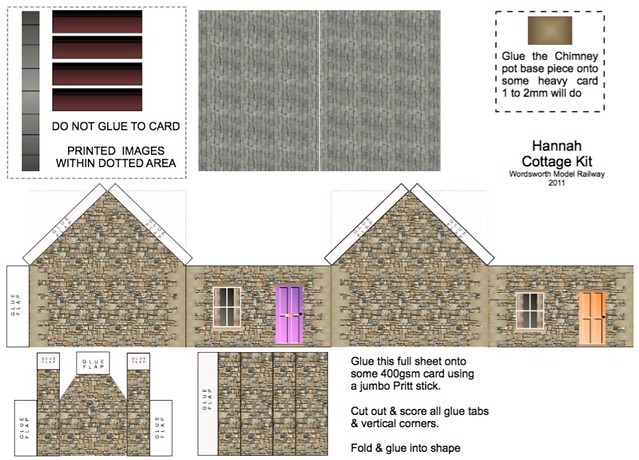
The 'Hannah' cottage kit is their simplest of WMR's model and only takes
minutes to put together!
Making the Paper Models
The only real issue is scale, the WMR models are in 'OO' railway scale (1/76), so I had to do a bit of math to work out the size reduction necessary to make these models suitable for a 15mm game (1/100-ish). In doing so I discovered that 15mm is actually an equivalent to the 'TT' railway scale which is about 1/120 scale, in the British way of calculating it (apparently it varies around the world).

My way of calculating was a bit more 'guestimate' as I happened to find an actual 15mm house model - a particularly badly drawn one which I couldn't use - which gave me the standard scale height for a doorway in this scale. I then used this measurement to determine that I needed to scale down the 'OO' models by 72% (so the doors were 19mm high by 10mm wide, roughly).

A couple of evening later I had these...


I was a little slow at making these as I have never put together a paper model before. But I did get a bit better as I went along and the lovely little garage building went together pretty quickly. There's a bit of a knack to building paper and card buildings and you soon find you own best technique for doing things.

One thing I would say is that your choice of glue and card thickness has a lot to do with how easy you will find these models and how good the end product will look. I tried ordinary 'school' PVA glue and this 'wet' glue soaked the paper and deformed the card, this is why WMR suggests that you use PRITT sticks. I used heavy 410gsm card stock, but this was probably overkill taking into consideration the rescaling I did, so I will try out a test using half that thickness for 15mm in future.

Finally, always use a sharp craft knife blade for your cutting out. A dull blade can drag and tear the paper which is glued onto the card, so you will have to change blades every so often. I used two craft knives, one with a new super sharp blade for cutting and the second with a used and duller blade for scoring the card for folding.

Sod's Law Strikes Again!
When I was searching for suitable buildings for my game I did really want authentic continental house models, but aside from PaperTerrain's costly WW2 French village models I couldn't seem to find any. Which is why I made do with WMR's more rural houses instead.

However, as thing always tend to happen, when I sat down to write this blog entry I was doing some additional web research and guess what? Yes, I found better examples of WW2 rustic building models!


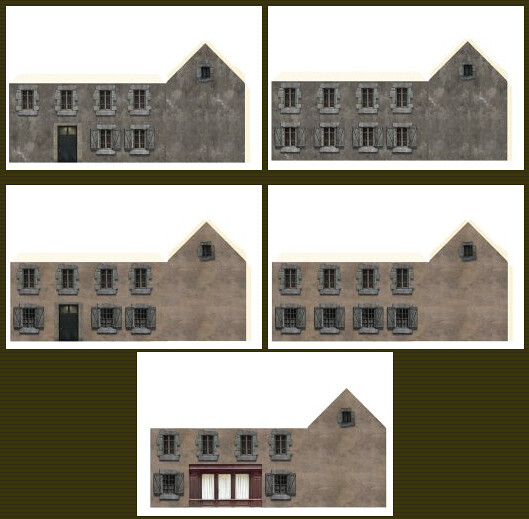
The Perry's Heroes website has a set of 'Western European Buildings' which fit the bill exactly, the only catch being that they seem to be in 28mm scale I think (so I ended up scaling these down in my print dialogue by 48%).

These are actually simpler - so quicker to put together - designs than WMR's, and I had the cafe example put together in about ten minutes (there are no fiddly chimneys, etc). That said, I did take the design into Adobe Photoshop and add some of the French cafe signs that I used for my earlier MDF French building project that I did a week or so back.


I did like the rather more grubby rustic look of these models and the fact that they only composed of two building sides (front and side and a back and side) plus a roof meant you could knock out a whole village in an evening if you want to!

Conclusion
I'm really happy with these little models, they fit my current needs exactly. They are cheap (free), simple and quick to put together and look OK from a tabletop distance. However, one caveat is that if you are playing a wargame like 'Flames of War' you might not find these models useful as the game requires that you be able to place figures inside your buildings!

This wasn't a problem for me, as GF9's 'Tanks' game does not include infantry units, so houses are no more than obstacles to the tanks movement and line of sight, so they can just be solid models.

And, one more thing, I actually found these little models very satisfying to make in of themselves! So I would be happy to look into using these again for when I gat more into 28mm Bolt Action gaming, I would just have to devise a method fro making the roofs removable for placing my little soldiers inside.

NEXT: I set up a test game of Tanks using my new houses!

Friday, 7 April 2017

28mm Buildings - Part 5

Well, I made it...Or them, rather...

I didn't managed to get any more than the just a basic paint job done (and even then I had cut some corners). But, I guess, they don't look too bad...If you half close your eyes!


It was a useful experience and I learned a lot about these type of models. I still wish I had had more time so I could have weathered the models...Maybe next time.

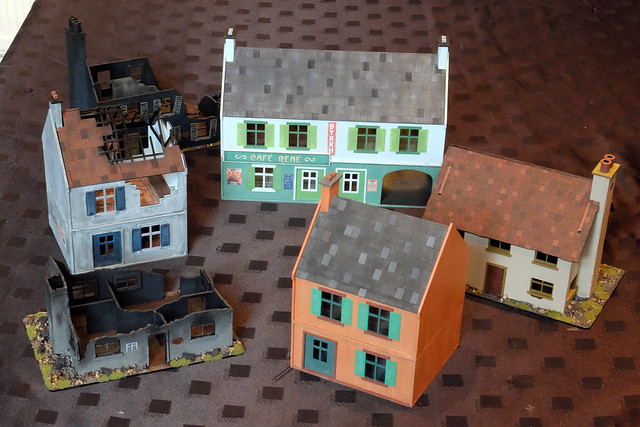
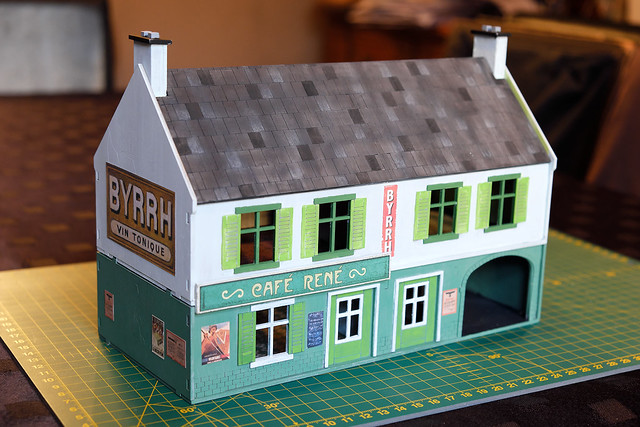
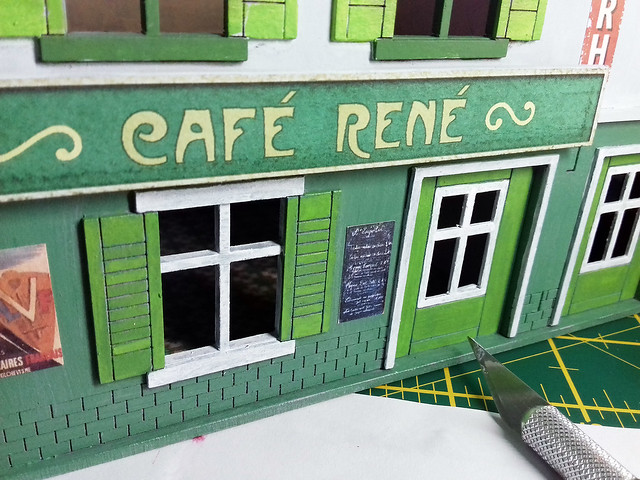
I think my favourite was the 'cafe' model, especially because we decided to have a bit of fun with it...


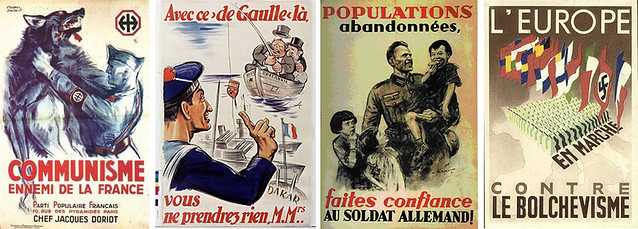
The printed signs and posters livened up the vanilla paint job, I downloaded some of these from the Rapid Fire website (they have a variety of WW2 signs and posters): Rapid Fire - Free Downloads. Others I found on the web by searching for WW2 French posters of the occupation.


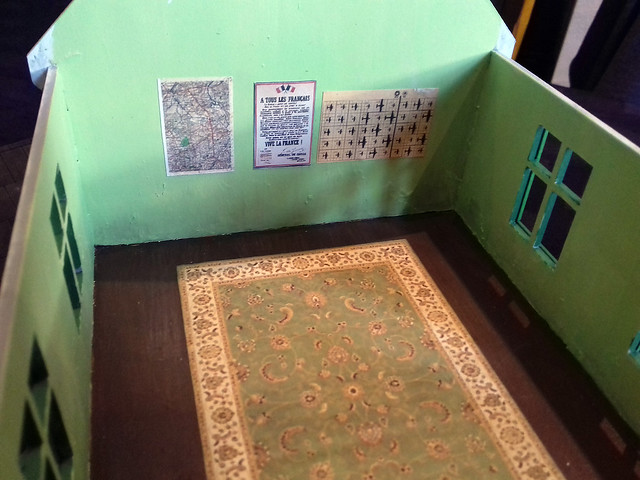
I was rather pleased with this chalkboard menu image (I'm easily pleased). I also found some period maps and an aircraft recognition poster to make a 'French Resistance' room upstairs in Rene's Cafe!

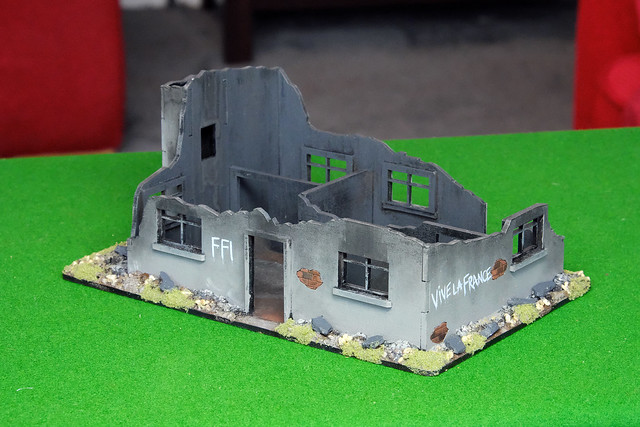
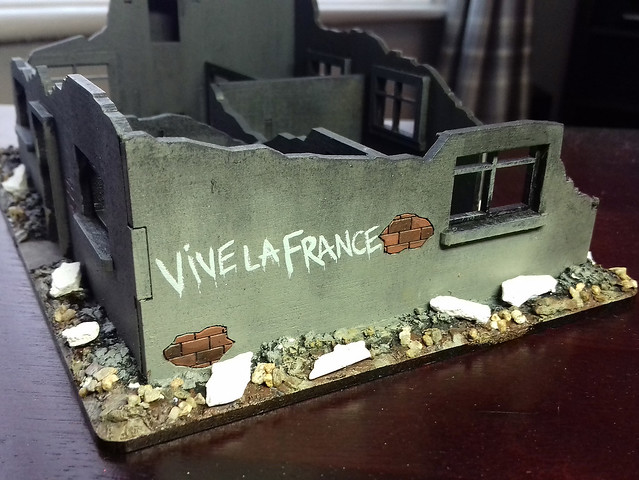
Little touches like this tickle me, so I thought I'd also like to add some resistance graffiti too. The bombed out cottage seemed to be an ideal canvas for some deviant artwork...


An earlier photo where I was still painting some of the 'rubble'.
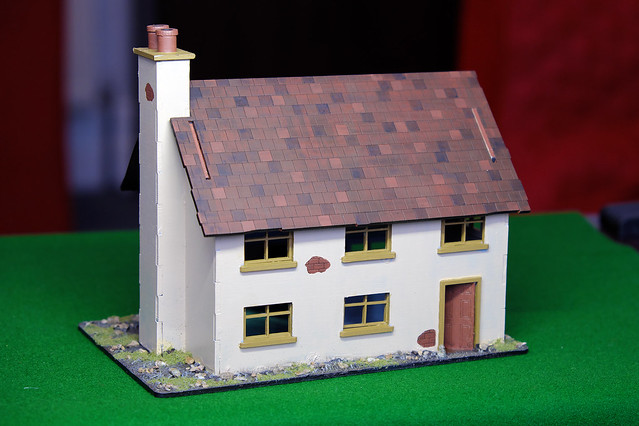
Not every house needed these extra embellishments, I thought this little farmhouse would like quite nice au naturel...


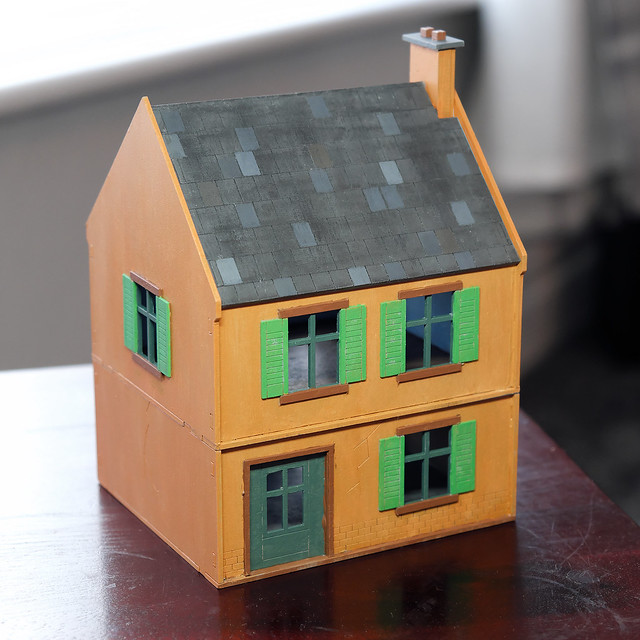
And, of course, there was the original test model I did for this project...


That was four down, two to go, but I was starting to run short of time by this stage. And this is where I started to take some short cuts, just to get the job done in time. So I wasn't altogether happy with these last two...


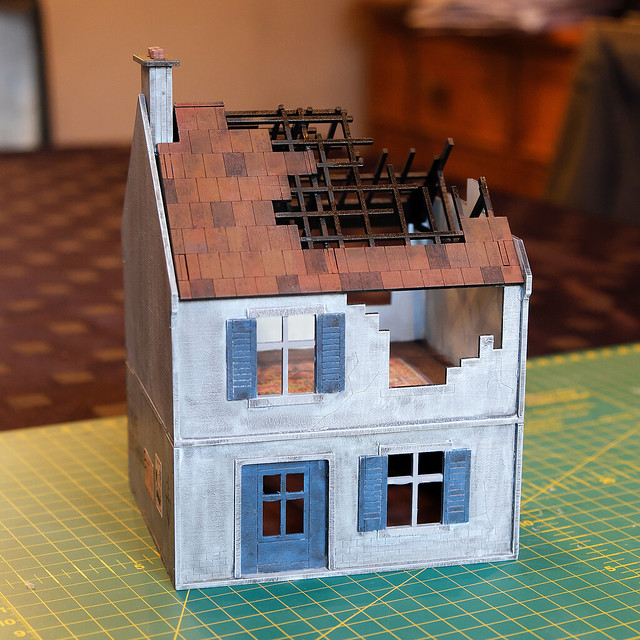
This burned out farmhouse is particularly hokey...I was really pushed for time and only just got this done. I didn't have time for the shading that I applied to the other bomb-ruined house...


I could finish off this - and, indeed, any of the models - later, but, in the meantime, I delivered them as they are to the Scarborough Gaming Society for their demonstration games that they are doing at the Scarborough Science Fiction Festival over the weekend.

Conclusion - What I have learned...
MDF wargame buildings are fun! It's a nice change from 'display modelling' that takes liberties with realism (although I am sure more a 'realistic' job could be done than my hurried examples) and they do have their own challenges which are mainly to do with the way they are designed to be taken apart for play.

In fact, one of the main things to bear in mind when painting and decorating these type of models is that they are designed to be interacted with. Roofs and floors have to be detachable and floor space needs to be clear to allow miniature soldiers to be placed inside. So, there are certain restrictions to what you can do, for example, I couldn't add lots of 'rubble' on the floors of the bomb-ruined houses in case that obstructed play.

Ultimately, unlike display models, these houses are designed to be played with. So too many or too delicately detailed embellishments are perhaps not ideal. (I had to consider that these models are often transported, packed away and unpacked frequently so any ornamentation that could be knocked off probably would be knocked off!)

Painting wise, I learned that MDF is a bit of a paint guzzler! It has been suggested that I may need up to three coats of a primer - or to use a proper MDF sealer - to prevent further paint coats from being soaked up.

But, most of all, I learned that wargaming is a game and is meant to be fun. Obviously, some wargames are intended to be taken a little more seriously, but Bolt Action as a game system isn't necessarily one of them and there is plenty of opportunity for some tongue in cheek adornments.

Finally, the tight schedule for these - totally at odds with my usual tortoise-like work pace - was quite liberating as it took the pressure off me when it came to decisions about when something was finished (and replaced it with a 'that will do' attitude, which was sometimes a good thing and sometimes a bad thing).

I hope to do more of these type of models, in fact, from the client's reaction to these models I am sure there will be more coming my way!