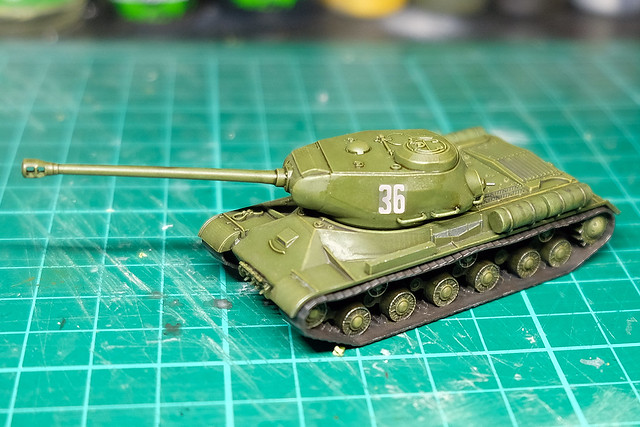
Before I actually get down to the nitty-gritty of painting a camouflage pattern on my IS-2, there is the little matter of applying the decals. There isn't always insignia on WW2 Soviet tanks, in fact sometimes they left the factory and went straight into action 'as was', but more usually at least a vehicle number was applied.
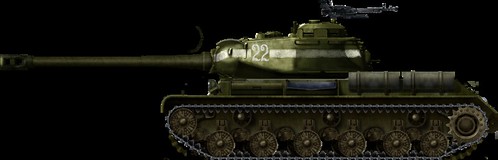
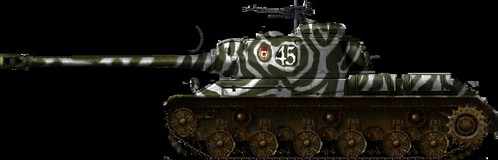
IS-2 model 1943, 88th Independent Guards Heavy Tank Regiment, Berlin, April 1945. Source: Tanks-Encyclopaedia.com
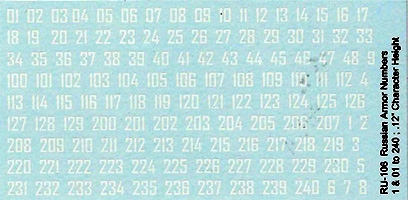
As a graphic designer I really like the Soviet fonts, but finding good decals in 15mm scale can be a little challenging (Zvezda does not supply any with the model). My usual source of smaller scale armour decals is Minibits.netas they have a rather good selection of historic and generic numbers, letters, military emblems and national symbols in 15mm scale.
I had already purchased their 'Russian WWII 'Cryllic style' numbers [1:100-1:76]' decal sheet for my 'Battle of Kursk' project's T-34s and was tempted to use it for my IS-2 as well...
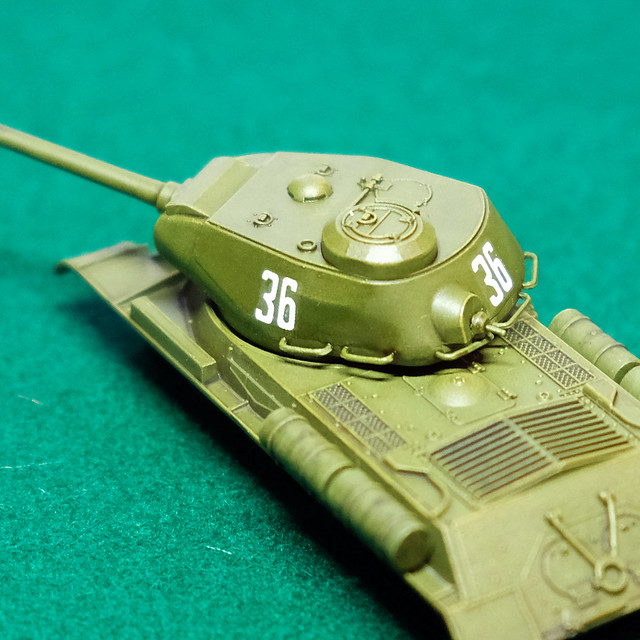
But at the last minute I changed my mind and went hunting through my decal stash for something more suitable for the IS-2's larger turret. I managed to find a nice set of Cyrillic numbers which had been for a 1/72 BA-10 armoured car, but seemed to just the size I was after.
As usual I prepared my model surface for decals by painting on a small area of gloss varnish, just where the numbers would go. Once the varnish was dry, I used some Microscale MicroSet setting solution to seat the decal. I find that MicroSet and MicroSol liquids help prevent silvering and hide the decals carrier film (although it can be clearly seen in the above photo, for now).
Once satisfied the decal is smooth, straight and adhering perfectly I let it dry and the dab on some MicroSol around the edges of the decals carrier film. This should further help the film blend in to the model's base coat and make the decal look like it has been painted on.
I conclude the process with a thin coat of satin varnish, to permanently fix the decal and protect it during the weathering stages.
The Camouflage Pattern
I'd decided that I wanted a winter camo pattern for my IS-2. Should I decide to add more late WW2 Soviet tanks to it (for a game of GF9 'TANKS!') I wanted to distinguish these Soviet vehicles from my mid-war 'Kursk' collection (which will be in plain Russian Green for the summer months of the war).
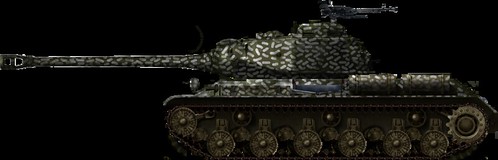
I didn't really want to do an all-over 'white-washed' winter scheme, so looked around for something a little different. Tanks-Encyclopaedia came to my aid with a couple of very nice examples of winter camp schemes...
Initially, I favoured the 'dotty' pattern, but the thought of painting all those on at 15mm scale eventually put me off! The 'snow tiger' pattern won me over as it's just the sort of thing that can be done well with just a brush.
I'll began by sketching out the outlines of the 'snow stripes' using a white chinagraph pencil...
Having broken the ice with this easy little build it's time to see how rusty my brush skills have gotten. I began by having a look back over some of my old 15mm tank posts and realised that I don't really have a set 'process'...I surprised myself to realise that my whole modelling technique is based on 'winging it'! 😀
Well, too late to change my ways now, so lets just see what happens. However, if you'd like to see and example of a more structured process for painting a 15mm IS-2, then have a look at the excellent Herbert Erpaderp's tutorial for some alternative ideas...
And now, on with my very unstructured method...
Base Coat/Priming
I begin with the one procedure that hasn't changed that much over all the vehicles I have made, and that is to prime the tank with a coat of Humbrol's 'Light Olive' Acrylic Aerosol. I've mentioned before that I like this colour as it can be easily modulated to become any of the WW2 Allied 'greens', from British Bronze, to US Olive Drab to Soviet 'Russian Green' (and even Finnish 'Moss Green').
To modify the base olive coat to something a little more deep and rich for Soviet armour I will be trying out a wash of Vallejo's Model Air 'Russian Green [71017]. This paint is really intended for airbrush use and is already pre-diluted so *should* work quite well as a wash (fingers crossed).
The IS-2 hull (at back) has been modulated using Vallejo's Russian Green, while the turret is still in it's primer coat of light olive.
It worked! ...Er, I'm not surprised at all. Cough. The difference is subtle, but a richer and deeper green. It is a little patchy and streaky (being a wash) but I like that as it adds some wear/fading effect to the overall appearance of the tank.
Note: I could also have achieved a similar effect more quickly by simply spraying Vallejo's Acrylic Russian Green Primer on to begin with. But, I can't actually find my bottle of this at the moment, plus I need to reacquaint myself with the workings of my airbrush before I take on a live project with it!
Highlighting and Shading
And so, moving on, I will try out Herbert Erpaderp's suggestion and give my base green a bit of a highlighting with some dry brushing. I'll simply mix some of the Russian Green with some lighter buff paint to produce my highlighting colour. Though, again, I will be going for a subtle effect...
It's very subtle, but the front set of tracks has been highlighted, while the rear set is just flat Russian Green. The hull and turret are highlighted.
Well, I like the effect. Is it too subtle, and will the following shadow wash negate the effect? I guess that's what experimentation is all about though - if it doesn't work I will modify the technique.
The paint I used was Vallejo's Model Color Yellow Ochre [913] as this gives a warmer and more 'sunny' highlight than using straight white. I built up the strength of the ochre, mixing it with the Russian Green paint, until it hit the strength that I was after.
Right...So, the moment of truth, will the shadow wash destroy the 3D highlighting effect I've just created? ------>
The shading wash phase, at this scale this can also pass for pin-washing adding depth to panel lines and joints. Washing is a quicker way of creating depth than outlining each area edge with individually.
Actually, and I am surprised, this worked. Yes, the dark wash (created using Citadel's Agrax Earthshade wash) did darken some of the highlights I had previously applied BUT not so much as to have made the prior highlighting a waste of time. The contrast between the highlighted bits and the base colour areas is still noticeable through the translucent wash.
It is - once again - very subtle so I guess if you wanted something more obvious the trick might be to exaggerate the highlight before applying the dulling wash. I'd do this by dry brushing with an even lighter shade of ochre (bordering on yellow).
The Tracks
Now to to what is perhaps the least satisfying part of the Zvezda model, the tracks. The model has very simplified tracks with practically no tread pattern to speak of, just regularly spaced slats. The challenge here is to make something interesting out of these rather dull and uninspiring components.
The easiest 'cheat' is to disguise the lack of detail by slapping on a thick layer of 'mud' effect (which, I admit, I have resorted to doing before). But, we shall see...
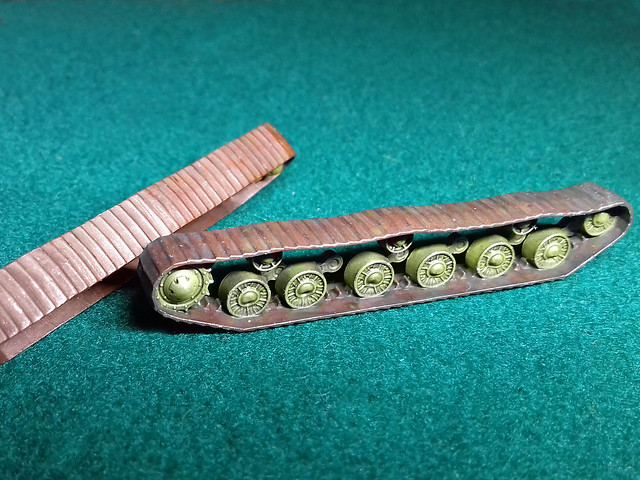
First off, I mixed some Vallejo German Cam. Black Brown [822] with a spot of Vallejo Game Color Silver [052] to make a rusty steel colour. This will be my base coat for my tracks. That done, I'll give them a wash of good old reliable Agrax Earthshade mixed with a little Citadel Nuln Oil to give the tracks a greasy oily look.
Still a bit wet, but hopefully rusty steel looking.
And finally, I'll apply some powdered graphite to give the raised tracks a metallic sheen and also some dots and spots of silver here and there to simulate the raw steel of the tracks showing through where damaged...
Hmmm, tempted to add a mud layer.
Well, that's the base coat painting done. I have some minor detail painting to do on some of the none green parts but otherwise it's onto the decals. Not that there are many (remember, no decals come with the Zvezda kit), the wartime IS-2s seem to have had little more than numbers unless they were a Guards unit.
Hooray, my modelling mojo seems to be returning! 😎
After 2017's recurring illness and major creative doldrums, I feel reenergized for the New Year and forced myself to return to the Scarborough Games Society for its first session. They kicked off the 2018 season with a painting evening, an ideal opportunity for me to dust off my little workbox and get going again.
The SGS is my local port of call for a game of Gale Force 9 'TANKS' - the tabletop tank warfare game - and the addition of a special 'paint night' to their club meetings is a great way to kick start your 'army' construction for a game. Aside from my putting together my practise tank (yes, although it was a 'paint night' model construction is allowed) there were a number of other armies being painted by other members which ranged from historical (e.g. Bolt Action) to fantasy (Warhammer and some very novel 'Toy Soldier' figures).
I decided to start with a very simple 15mm (1/100) Zvezda IS-2 Soviet Heavy tank. Although I have a very large backlog of other projects, I did not want to jump straight back in with an ongoing model until I had gotten some much needed modelling & painting practise again.
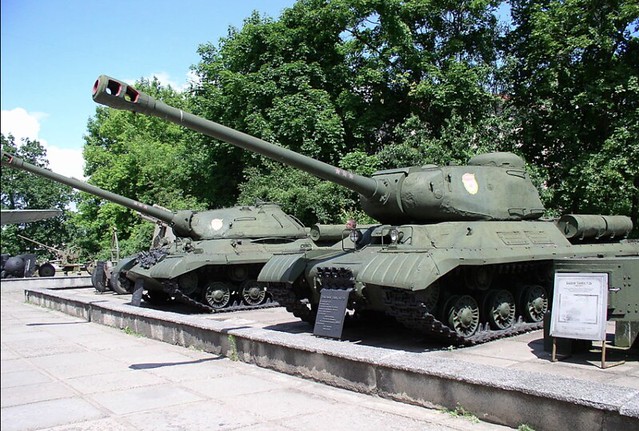
Nice comparison shot of the IS-2 (front) compared to the later IS-3 showing how Soviet tanks were to evolve. The IS-3 arrived just too late for WW2, but gave the West a very nasty shock and initiated a rush for heavier tank designs. (Source: Wikipedia.)
Also, I didn't want to make a mess of one of my 'good' models, so decided to start by making a completely unrelated test model first, before re-embarcking on either my Finnish, Kursk or Pacific projects. I happened to have the IS-2 knocking about my stash so it seemed a good candidate for a guinea pig!
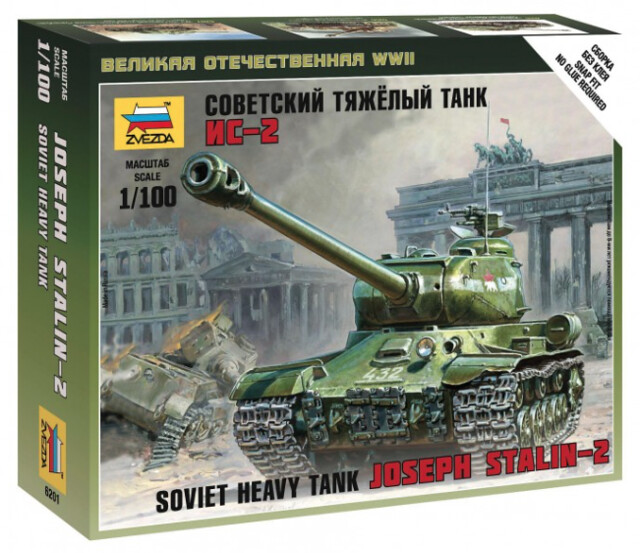
The Zvezda 1/100 IS-2 'Joseph Stalin' Heavy Tank
Many modellers wax lyrical about the German 'heavies' - I call it 'Tiger love' - but I have always had a bit of a crush on the Soviet IS series of tanks. It was a long lived series which spanned the whole of WW2 and beyond, and was very influential (in the end, more influential than the German heavies) the development of Cold War tanks in both the East and the West.
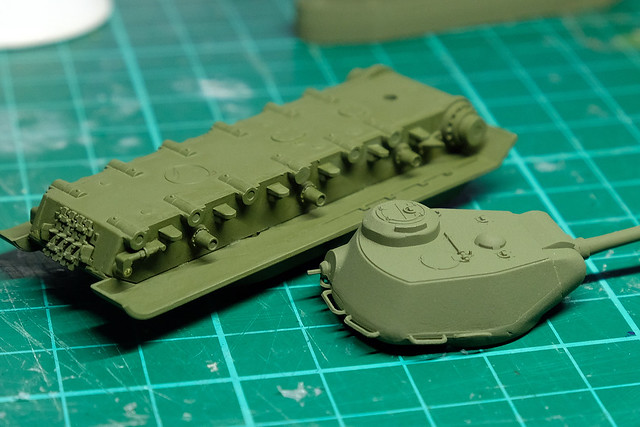
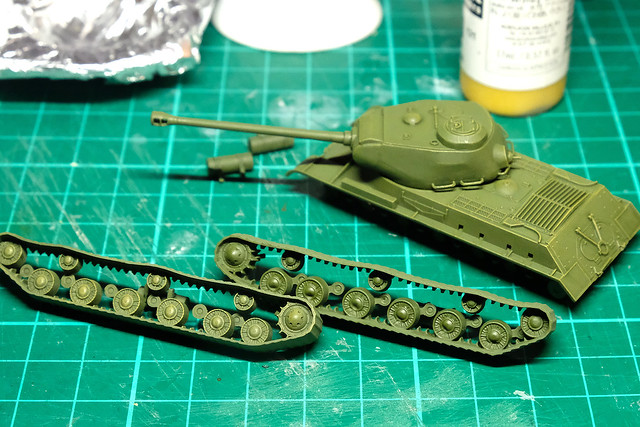
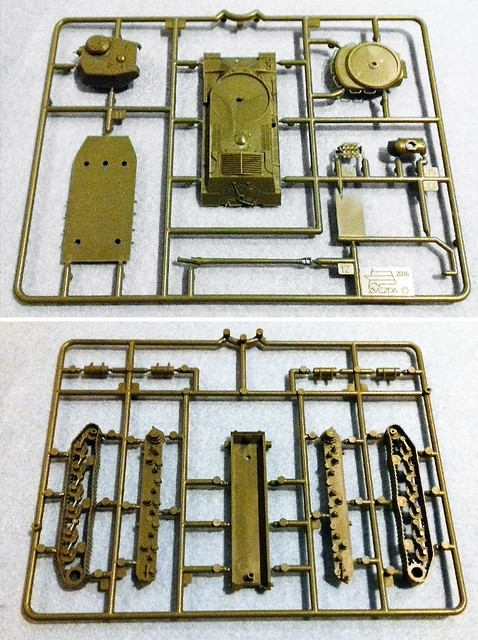
Just 2 spures with 16 parts in total, not a complex job! (Sorry about the naff photo, the lighting plus my awful phone camera was against me.)
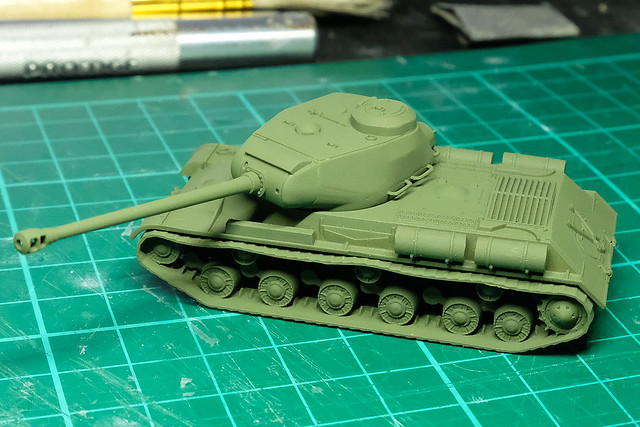
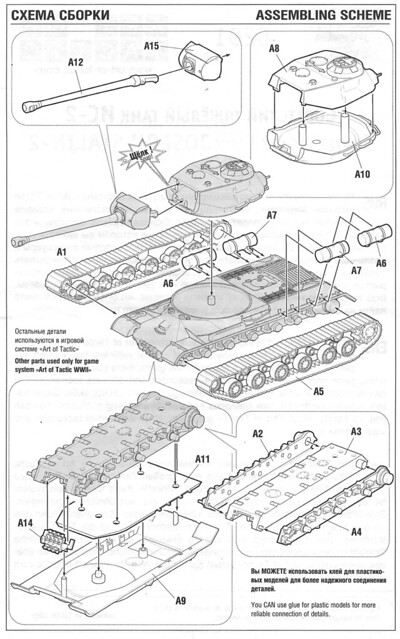
As usual, Zvezda have produced a very simple 'game marker' quality tank kit, with very few parts that simply snap-together quickly. Though, as usual, I took my time about construction as I looked for ways I could improve of modify the basic model.
To be honest, aside from the addition of some small items of storage, there isn't much more I would do to this model (aside from paint it). I've looked at quite a few reference photos now and - for a Soviet tank - the IS-2s seemed to run pretty lean (no great piles of gear strapped to the hull). I'm sure there was cases where the crew added plenty of stowage to the outside, but I'm gonna go with a clean look with this one. This, incidentally, suits this test project as I don't want to over-complicate the process.
The kit is the usual Zvezda 'Art of Tactic' fair with a minimum of parts (just 16) with much of the detail being moulded onto the components.
The detail itself is crisp enough (as usual with Zvezda) but the lack of options or alternative versions is the compromises which keeps the price of this kit low. By contrast the PSC IS-2 pack gives options to build either a IS1, IS85 or a IS2 and comes with a commander figure. BUT, it also comes with 5 tank kits and costs £19.95. So, you pay you're money and takes your choice.
Personally, I find the level of detail on the Zvezda perfectly acceptable for a game of GF9 'TANKS', in fact - for a war-game player rather than a committed modeller - the simplicity of the Zvezda model is actually a positive. If you twisted my arm for a criticism, I suppose - as usual - it might be that the track treads lack detail - but that's the compromise with one-piece tracks.
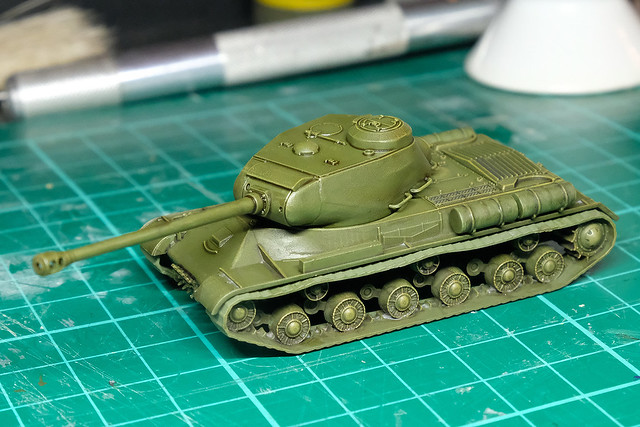
The end result is a nicely intimidating heavy tank which should put the shivers up even an opposing 'German' player fielding his selection of heavies. Combined with supporting T-34/85s and perhaps a heavy tank destroyer - like the ISU-152 - or more IS-2s, this model will make an excellent spearhead for a late WW2 Soviet assault force.
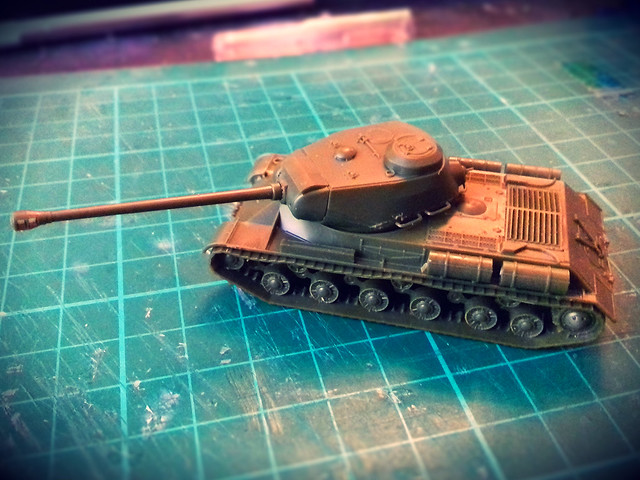
Ta-Da! Done, I will probably drill out the gun muzzle, but aside from that she's ready for priming. Nice ease start to the year!