Showing posts with label scratch build. Show all posts

Sunday, 16 July 2017

Scratch-Built Jungle 'Hut'

Palm-woven dwelling designs vary across the Far-East and Pacific so I'm
going with a sort of generic impression. I don't want to model a building of
a specific location as I want to re-use these model for any Asia or Oceania
scenario or game.
It was always my attention to scratch-build a couple of island dwellings to compliment my Arcane 15mm laser-cut Jungle house, but the need to make my own buildings may be more necessary than I thought.  As it turns out, I am not quite happy with Arcane's scaling of their house model, I personally feel it is a smidgen bigger than the stated 15mm.

Another of Arcane's 15mm Far-East/Pacific building models. It's a nice model,
for laser-cut MDF, but one compromise is the roof which perhaps should be
palm thatch (which would be very hard to replicate in MDF). I'll probably
rectify this with my models though.
My criteria for judging a 15mm building's scale is quite rudimentary and is based on a 'standard' door dimensions - which I judge to be about 10mm wide and 20mm height at 15mm or 1/100 - and Arcane's doors and windows seem a little too large for my taste (especially next to Zvezda's M3 Stuart tank).

So, I'm making my scratch-built houses a little smaller (I'll still use the Arcane hut, but keep it separate from the rest of the island buildings - I'm thinking of using it as the Japanese HQ objective).

Kappa the Hut (Sorry)!
I'll be using 3mm foam board as the main building material for my huts (which we used to call 'Kappa Board' when I was at art school). It's quick and easy to cut out and put together a basic framework for a building with this stuff...

Er, yes...I am using spaghetti as 'bamboo' flooring!

Cladding the framework - Palm Woven Texture
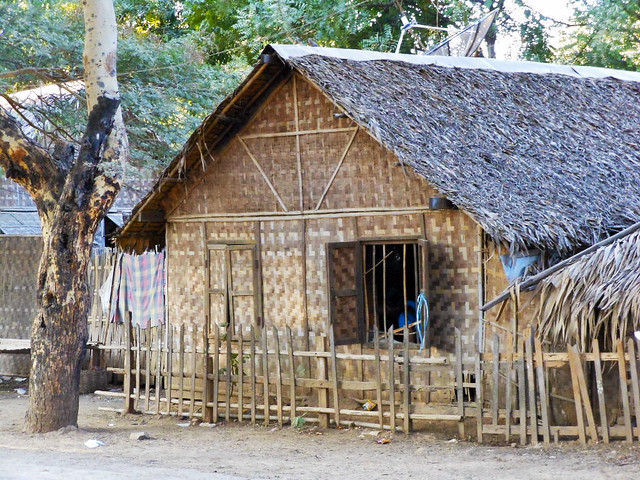
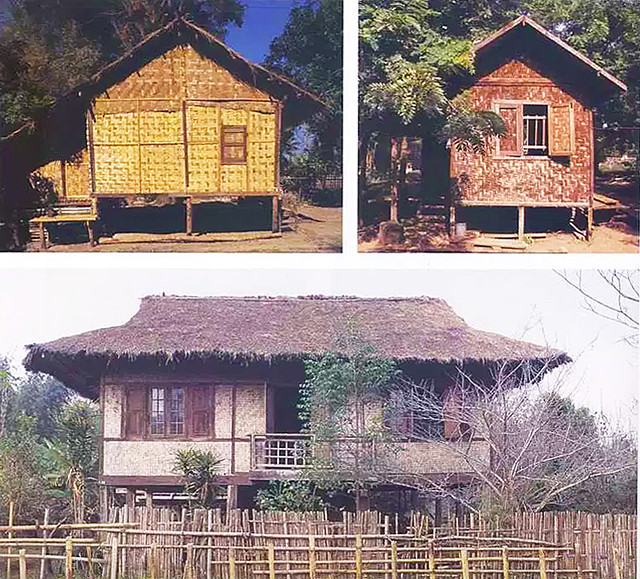
The construction may be simple enough, but to get that native-made look I'm had to do a bit of head scratching. Many of these island (and Far-Eastern) dwellings seem to have woven walls made from dried palm leaf strips (which I believe is very fibrous and strong). Now, how do I get a pattern that looks like it's palm-woven?

Left: Palm-weaving. The newly harvested palm leaves are still green at this point, but eventually, dry out into a khaki beige colour.

Arcane went for a simple engraved checkered design which - in actuality - looked exactly like a 'brick wall' pattern. But it sort of worked (if you half-close your eyes). So, I decided to pinch the idea, tweak it slightly and here's my take on a faux- palm-weave pattern...
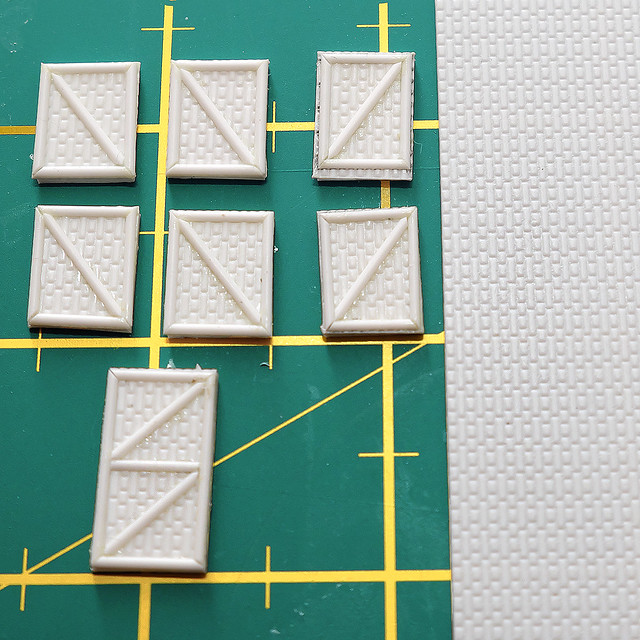

After a good search through all my various textured cards and whatnot, I realised that if I turned a regular 'brick wall' pattern texture vertically it kinda looked like a weave pattern (-ish).

A Note on Construction - 'Solid' versus 'Box'
While the GF9T game is seen as an entry level Segway or introduction to 'Flames of War', there is no infantry - or, indeed, any other vehicles aside from tanks - in GF9 TANKS!

Store bought 15mm buildings intended for FofW are of the opening box type so that you can place infantry inside them, but buildings made for GF9T do not need this facility. Obviously, if you think you might progress onto Flames of War you may want to make your scratch-built houses with removable roofs, but you do not have to. GF9T buildings can be solid (i.e. not openable).
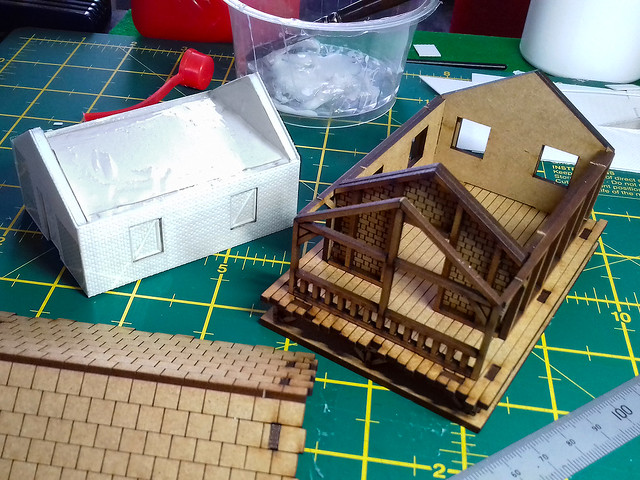
Above: My 'box hut' on the left, compared to the lovely Arcane Far-East house
on the right. The Arcane's removable roof can be seen at the bottom and the
floor planking of the laser-cut model's interior is very nice.
This can make you building designs a lot simpler, particularly when making multi-storey houses.

Round or Flat Planks?
One small quandary is whether to make the outer frame and flooring round or flat/square planks. Arcane, naturally, went with flat as this suits laser-cut MDF models, but really native-built palm huts would have been constructed from the natural trunks of trees or palms, so would be round.

However, finding my cunning spaghetti plan for the wooden planks was a stupid idea I have now returned to bamboo skewers and cocktail sticks...


As usual, I'm making things up as I go along, but - in theory - this should be a simple enough model for me to get away with it. Once I have completed this first test design the further two huts I require for my game should be easier and faster to put together.

I'm using super glue to stick the wooden frame together and as usual, I'm sticking things to me more than anything else! I must really look into what kind of glue is the best for sticking wooden things together quickly and securely.

Anyway, super glue is doing the job and I was rather pleased with the job I made of the hut's porch...
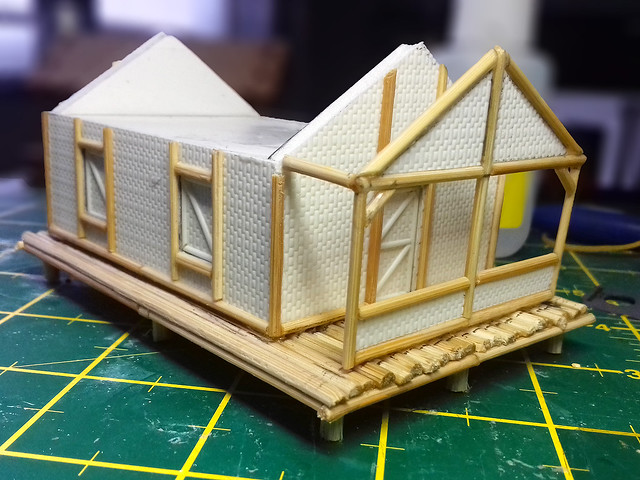

Though, I am a little unsure just how high I should make the stilts that these houses stand on. I based my initial attempts on the stilts that the Arcane model has, but I'm now thinking these look a little low. I may double the height.

Well, that's it for now. I'll have to put a bit of a spurt on this week as I'm on a tight schedule with this project and I wan to start the jungle scatter foliage this week.

Sunday, 20 September 2015

Quick '39 Chevy Truck Part 7

(The idea that was a 'quick' project gets ever more laughable! Once again I apologise for how long it takes me to do things, work and real life have slashed my available free time.)

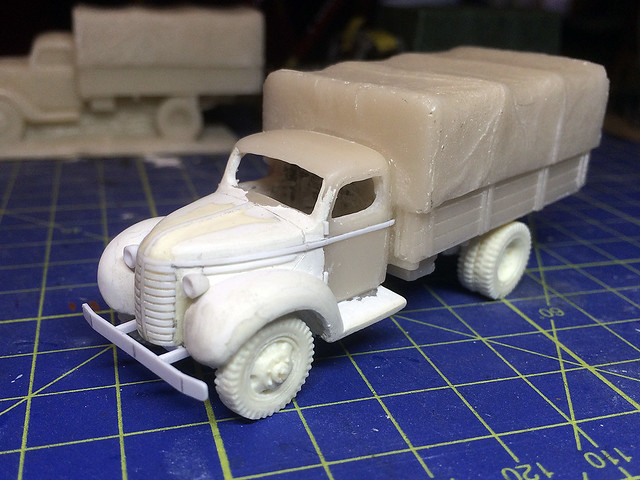
Anyhoo, remember my 'Quick 1939 Chevy Medium Truck' project? Probably not, so I will re-cap - It's another 'kit-bash' hybrid based on Valiant's very nice 1/72 Fordwerkes V3000 resin war-gaming model. In this case I mount a scratch-built Chevy bonnet and wheel arches onto the back-half of the V3000 cab to make a (hopefully) passable 1939 1.5 ton Chevrolet cargo truck.


I had to do a bit of 'cheating' and enlarge the bonnet slightly to get it to mate seamlessly with the V3000 cab, but it looks OK as long as you don't put it side-by-side with a proper 1/72 1.5 ton Chevy truck kit!

Weathering - working with oils
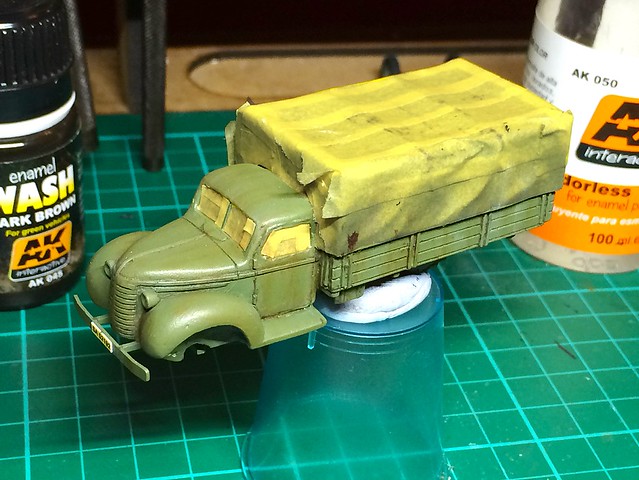
I'm getting my basic 'war game' style of weathering pretty much down pat now. I say 'war game' style because it's a little more exaggerated in it's use of effects than were I doing a display model. The idea is that it looks 'cool' at table-top distance so things like weathering and chipping are a little OTT.

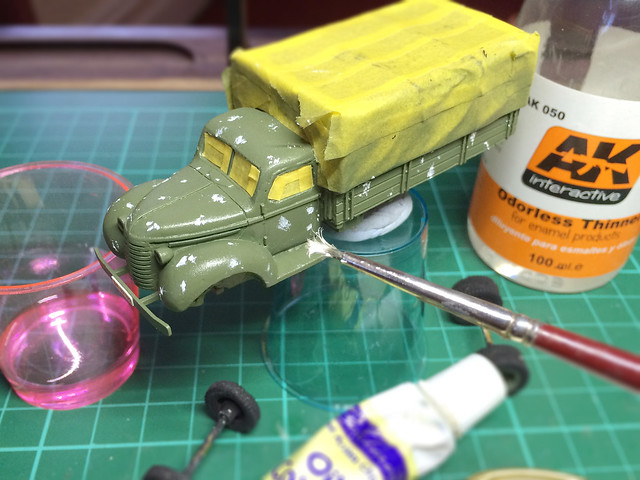
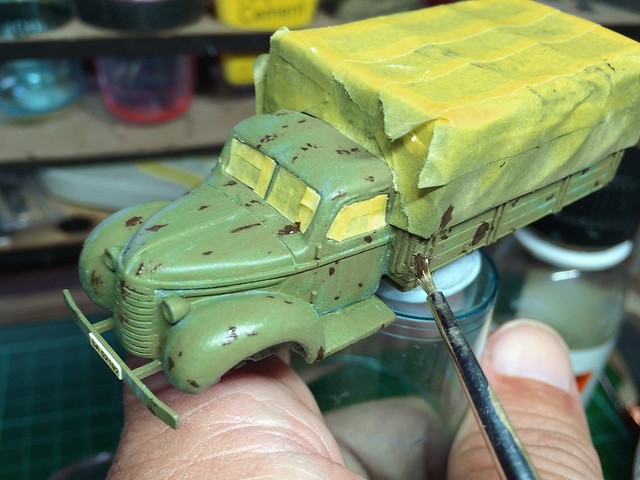
I have developed what I call my 'leopard' technique for weathering with oils where I apply successive layers of coloured spots. I lay down a random spotty pattern of one colour, then I smear it with a wide brush dipped in thinners (but then wiped so it's only just a little wet) to create the streaking effect I'm after...


I usually start with white spots which, when smeared, will (hopefully) create a 'bleached' look on old paintwork. The Finnish army trucks by the end of the war were pretty worn and battered and originally bright paint schemes were faded and patchy.

In all I usually do three different colour schemes of spots, each progressively darker (depending on the truck's base colour). For green vehicles I usually like to end with a oily brown stain effect...


Between each layer of streaking I apply a light coat of Humbrol Satin Acrylic Varnish, this protects the work I have done before I add the next coat of oils (and, obviously, I begin the whole process with a coat of varnish to protect the model's base paint coat).


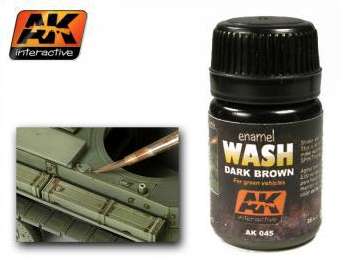
A dusting of varnish is applied again before I go onto the next stage, which is the pin-washing. I use AK Interactive - Enamel Wash: Dark Brown for Green Vehicles and I have found this works best with a gloss varnish base, just to help the enamel wash 'run' into and along all the panel lines detail.

This enamel wash is also great for adding additional grimy streaks on your vehicles. The AK range includes special washes for 'oil streaks', 'grime', 'fuel stains', 'light rust', but this is the one that I used the most.


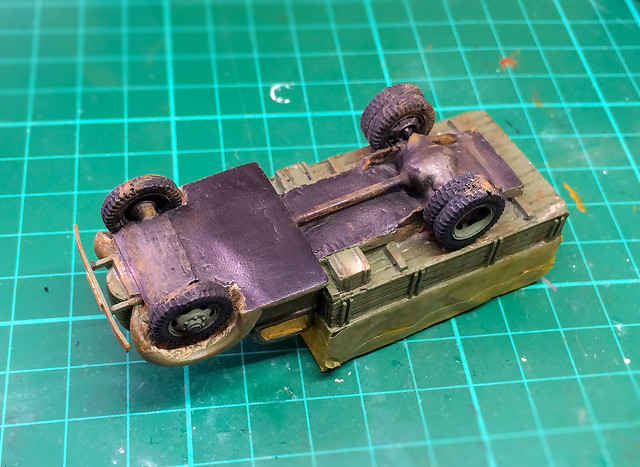
As well as the top of the truck I do some weathering to the underside of the vehicle as I go along. Obviously, this being a war-gaming 'ready to roll' model there isn't so much detail, but I like to give what there is a little treatment as some of it is visible. I begin with some base colour, then weather that before adding some dust and mud effects...


Having finished the weathering of the underside I could finally fix the wheels
in place and cover over the holes I left for the axles. Underside done!
I don't spend too long on the underside as it's not meant to be on display. But having gotten that out the way I turn my attention to the fun bit of weathering (in my opinion) - chipping!


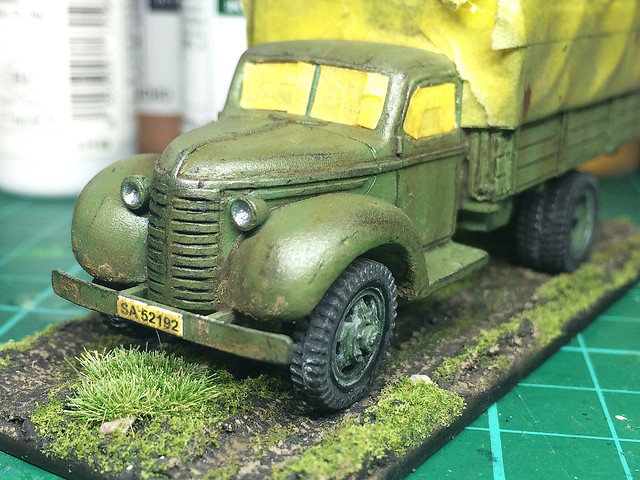
And then I end with some light rust effects and, finally, the addition of a layer of dust and mud. In this case I have decided on a light application of dust and mud.

The final treatment is a coat of satin and matt varnishes. I like to lightly mix the vanish coats as I think vehicles alway look nice with a little sheen to their paintwork - so I give a quick 'puff' of satin to the cab and matt varnish everywhere else. And that's that.

Next: Basing the vehicle.

Monday, 10 March 2014

Next Project - another truck conversion

As the current project nears completion I am starting to think about what's going to be my next victim...Er, I mean subject!

The fact is that I need trucks for my Finnish Army project, a lot of trucks! I want all shapes and sizes of vehicles in order to portray the rather eclectic nature of the Finn's military transport inventory. To this end I am having to think about converting available models to represent some of commercial trucks that were pressed into service at the time.

Trucks like pre-war Fords and Chevrolets were quite common in Finland but are not so easy to acquire from mainstream scale kit manufacturers. Rather like my V3000 project I am having to think about kit-bashing a couple of donor models to make a make and model that I desire.

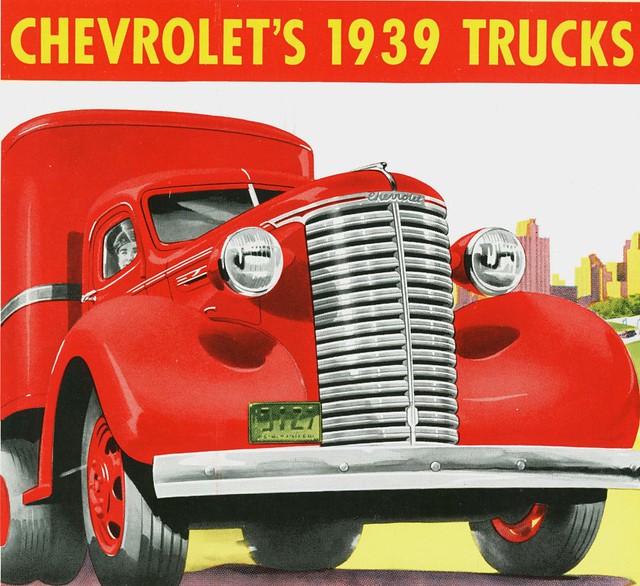
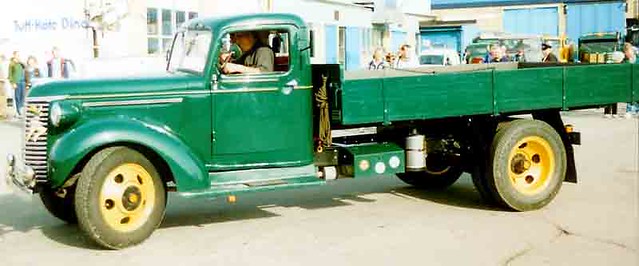
What I am after in this case is a 1939 Chevrolet. It's quite distinctive and differs obviously from the wartime Chevy designs built and used by either the Allies or the Germans!

A beautifully restored 1939 Chevrolet HS Commercial truck. A common
civilian type in Finland in the 1940s. 
As said, while the wartime (1941) Chevrolets are relatively easy to get hold of in 1/72 kit form - they are the truck on which the famous British LRDG patrol truck is based - the earlier commercial version is not.

Left: The more familiar 1941 CC60L 3 ton model Chevrolet, here in the hands of the Germans. It's a rather unpleasant truth that both Ford and Chevrolet made vehicles for both sides during the war by means of their local subsidiaries. Fordwerkes Germany, for example, continued producing Ford designs for the German army throughout the war.

Anyway, I made the mistake of buying the wrong Chevrolet - before I had fully researched the subject - when I ordered a nice resin 'ready to roll' wargame model from Moonlite Modelwerkes...

The 1941 Chevrolet - front - and a 1936 Ford by Moodlite Modelwerks.
This left me in a bit of a quandary as it's a nice little model, but it's no good for my intended use. Quite aside from it being the wrong year it's a solid one-piece resin mould with the cab interior filled in. So, just as with my resin V3000, I decided - somewhat reluctantly - to do a 'cut and shut' job with it and try and mate it to the back end of a spare plastic truck kit.

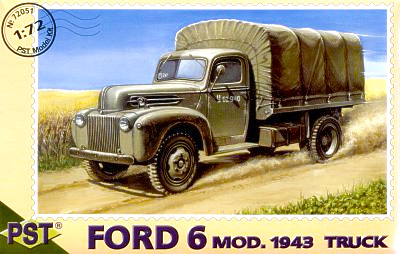
As it happens I have a plastic truck kit which I also bought for my Finnish truck collection but was likewise - as it turned out - the wrong model! This time I bought a 1/72 PST 1943 Ford instead of an earlier version. I got it on a whim as I thought it looked like a pretty cool truck and it was in wide use as a lend-lease vehicle by the Soviets (so I imagined that it could have been captured by the Finns, but in the end there is no evidence of this premise)...

Bummer! (This all taught me to do a bit of research first before buying kits for projects!) Still, I now have a donor for the back end of my 1939 Chevy project (by 'backend' I mean from the rear of the bonnet back including the cab shell).

Now I know this might all sound a bit of a waste of two perfectly good models just to make one half-baked conversion, but I really want to have a 1939 Chevy in my collection and this does seem to be the only way I will get one.

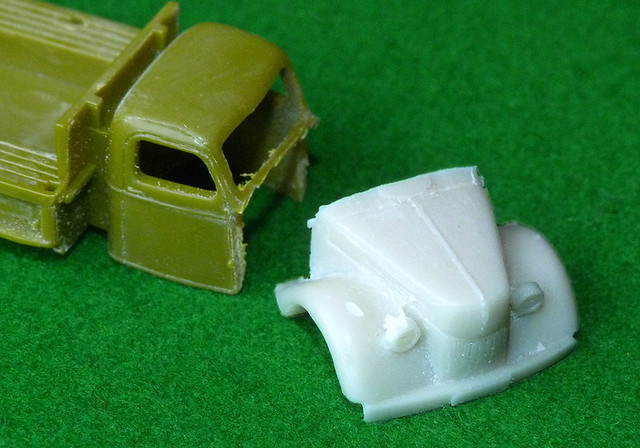
There are problems, the most obvious being that the grill on my Moonlite Chevy is all wrong. I will have to scratch build the 1939 grill onto the 1941 cab and then mate the 1941 cab onto the 1943 back end! ...Following this?

A Finnish wartime model 1939 Chevrolet Commercial front end with some
rather spooky headlight accessories!
So let's start with the initial planning of my next Frankenstein truck shall we?

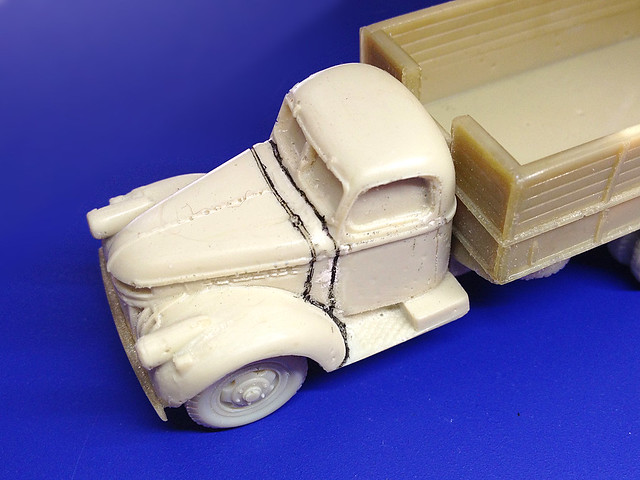
First of all I decide where it would be best to cut my resin model's bonnet. I look for details like panel lines that would hide my surgery and highlight them with a thin marker pen...


Next I will check these shapes against the 1943 Ford truck kit to see where I can most obviously join them together (the seam just in front of the cab window and down the door seems likely). Here's a reminder of how I achieved this when making my V3000 conversion...

My previous Ford V3000 conversion - the same 'cut & shut' process will be
used to create a 1939 Chevrolet in my new project.
The idea, of course, is to find a mutual seam in either component that will make it easy to hide my butchery.

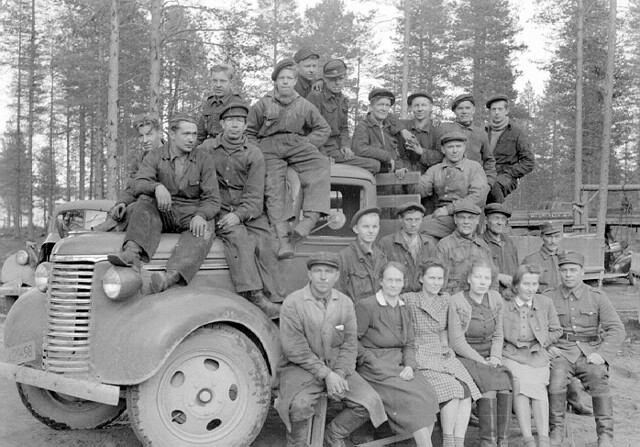
To end this first project post, here's a photo of the 1939 model Chevrolet and some of the Finns who relied on it's hardiness and reliability...


...Now, where's my Dremmel! 

Photo credits: All black and white wartime Finnish photos are courtesy of the SA-kuva web archive: http://sa-kuva.fi/neo

Tuesday, 29 January 2013

I wonder - 1/144 Lysander thoughts


Diagram source: Wikipedia, with my notations in red.

Measurements to 1/144 scale...I wonder?

Link: A useful online tool - Scale-model.nl's Scale calculator