Diary of a novice scale model maker and his adventures in the wacky world of Braille Scale.
Showing posts with label experiment. Show all posts
Sunday, 3 July 2016
You live and learn...Airbrushing fail!
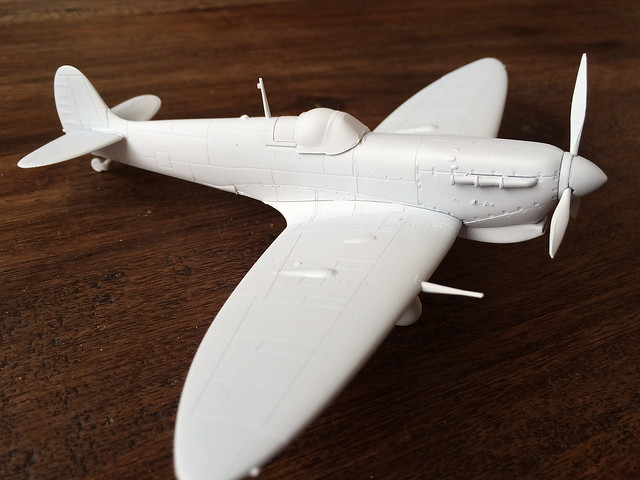
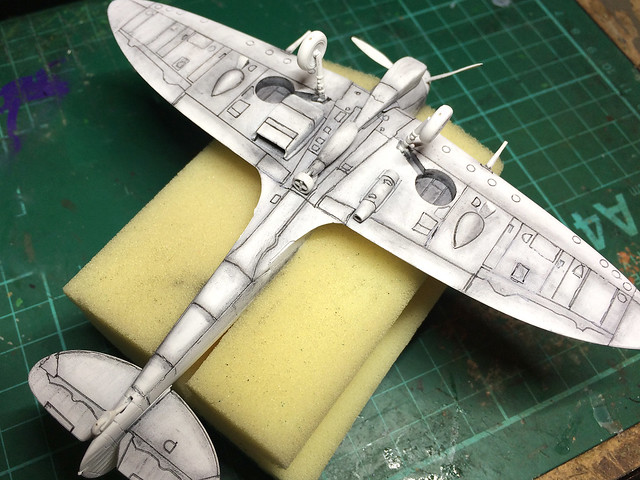
I fancied getting a bit fancy with my Spitfire Vb paint test model and do a bit of pre-shading. It all started out very well, outlining panels and applying powders to get a dirty panel look...
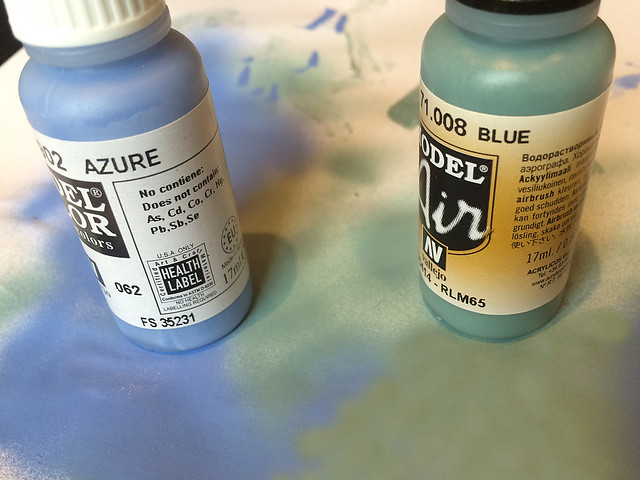
But, unfortunately, there were a couple of flaws in my cunning plan. First of all, I made a schoolboy error in choosing my paint for the underside - though, to be fair, I consulted a couple of forum threads on the subject of WW2 RAF desert schemes and was convinced that VAllejo's Model Air 'Blue' (xxx) was an appropriate colour for the underside of my Spit...Wrong!
Yes, I did think, at the time, 'that looks a little green', but I thought it might dry a little different. It didn't - so I had to rectify my mistake by over-spraying the green with Vallejo's Model Color Azure (proper blue) instead!
Of course, after two coats of colour I had completely obscured my carefully applied pre-shading.
But, hey-ho, that's what a colour test is for I suppose - it would have been worse if this was the actual project model. Also, I have now come to the conclusion that subtle air-brush effects like semi-transparent pre-shading are beyond my entry-level Revell airbrush.
It's a great brush for applying flat coats and a step up from the rattle-cans I used to use, but a bit ham-fisted for anything delicate of that demands fine control.
I'm afraid it's back to the drawing board, and I will revert to my tried and tested post-shading process using powders and oils (which I am quite comfortable with having had some successes using these mediums with my vehicle models).
You live and learn.
Monday, 20 June 2016
'Quick' (Really?) Paint Test
As mentioned in my last post, I'd like to pause my Tiger Cartoon P-40 in order to experiment with some painting techniques and styles. I also mentioned that one of my local stores (Boyes of Yorkshire, England) have had Hobby Boss aircraft kits on discount for a while now (£4.75), making them cheap and cheerful 'guinea pigs' for modelling projects.
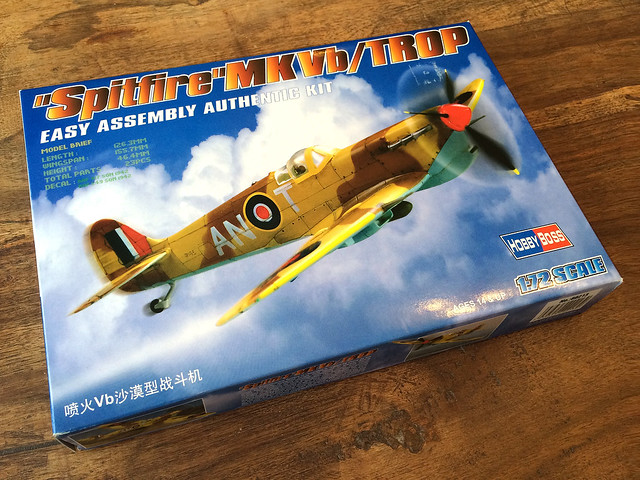
Well, I left work early today and popped down to Boyes only to find that they were having a sale. Not only that but one of the Hobby Boss kits available was a Desert RAF Spitfire Vb (my favourite mark of Spitfire)...
Guess how much? ...Only £2.25!
Now, experienced kit builders might say 'that's about how much some of the Hobby Boss kits are worth' (ironically, their Spitfires, in particular, are dubious representations). But, for a 'test canvas', they are an absolute bargain.
Quite pleased with myself (...And they had a Wildcat and a Tempest too, may have to go back on Wednesday if there are any left!)
By the way, this is quite a nostalgic 'mini-project' as this is the first time I have made a Spitfire since I made one of the venerable Airfix Series 1 Spits when I was a kid!
Oh and, PPS, for those that asked me how Hataka paints go on using a brush, I will be finding out with this kit!
Well, I left work early today and popped down to Boyes only to find that they were having a sale. Not only that but one of the Hobby Boss kits available was a Desert RAF Spitfire Vb (my favourite mark of Spitfire)...
Guess how much? ...Only £2.25!
Now, experienced kit builders might say 'that's about how much some of the Hobby Boss kits are worth' (ironically, their Spitfires, in particular, are dubious representations). But, for a 'test canvas', they are an absolute bargain.
Quite pleased with myself (...And they had a Wildcat and a Tempest too, may have to go back on Wednesday if there are any left!)
By the way, this is quite a nostalgic 'mini-project' as this is the first time I have made a Spitfire since I made one of the venerable Airfix Series 1 Spits when I was a kid!
Oh and, PPS, for those that asked me how Hataka paints go on using a brush, I will be finding out with this kit!
Friday, 4 December 2015
Finnish Camo painting tests - Part 2
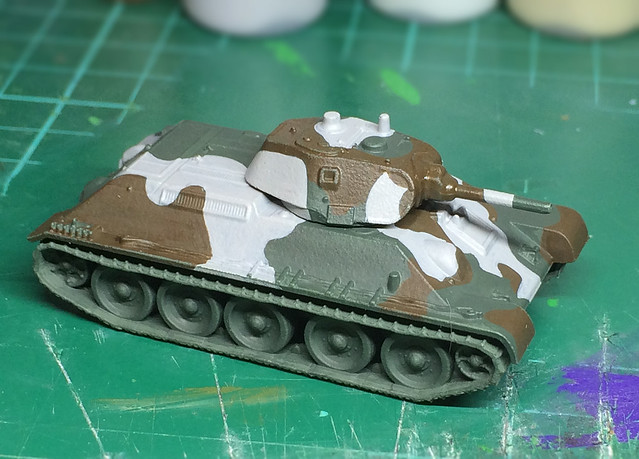
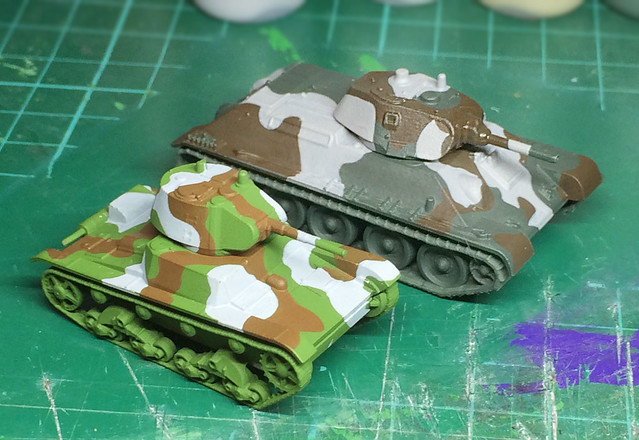
Right, my first test scheme done (though not weathered yet), I'm moving onto the second of the camouflage patterns based on what I believe to be the correct colour set for WW2 Finnish armoured vehicles. This time, it's a more subdued interpretation of the Finn's 3-colour camo based on examples on display in various museums.
[Note: You might ask why I didn't just base my colour scheme on museum exhibits in the fist place - after all if they are in a museum they are bound to be authentic aren't they? Well, that's a can of worms I don't want to open - suffice to say very little original WW2 vintage Finnish paint schemes still exist, and where they do they are often faded and discoloured. So, in short, if you see a nice Finnish camo scheme in a museum the likelihood is that it is a modern repaint. So determining which of the schemes out there are the authentic ones can be a bit tricky.]
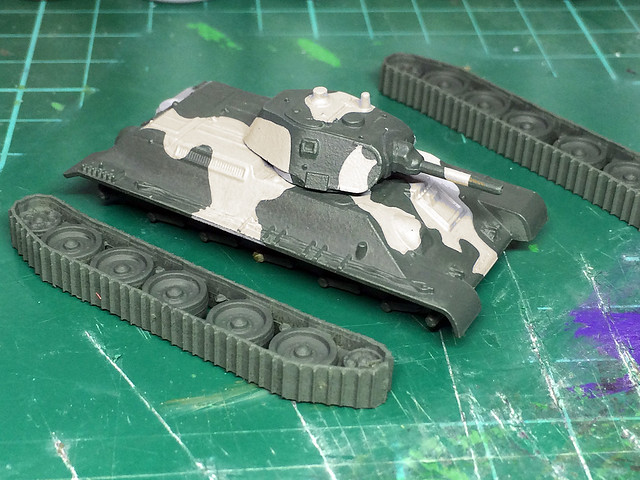
Anyway, 'nuff said - here is my second crack at 'a' Finnish 3-colour camo...(This time using a Zvezda 1/100 T-34 Model 1940 as the test-bed...)
1. Base colours.
The basic colour I'm starting with is the green, and in this case - despite the official description of the Finn's green element being termed 'Moss Green' - research leads me to believe that the actual green of a 1941-45 3-colour Finnish camouflage pattern was a bluish-green.
I began with a primer coat of Humbrol's No. 30 Dark Green Matt acrylic spray, which is a slightly lighter bluish tinged green than my main coat will be. The main coat was then applied and consisted of a mix of Vallejos' [70920] German Uniform and a dash of [70979] German Camo Dark Green.
2. Grey(ish)
Next, I'm trying out a warm grey - which has a hint of oatmeal colour to it - which I have mixed using some Vallejo Model Color [70990] Light Grey and a dash of Vallejo [70884] Stone Grey...
Amusingly, this looks just grey in my photo which just goes to illustrate how tricky colour matching can be when using photography, Changes in light and exposure can 'warm' or 'cool' colours. You'll just have to take my word for it that there is a very subtle hint of Stone Grey (a soft beige) in there.
I am not going as far as some modellers go through and making this part of the 3-colour camo an obvious sandy-beige. Even model manufacturers - like Tamiya - tend to get very 'artistic' when it comes to interpreting this colour (they have gone full-blown sand).
3. 'Sand Brown'
My preference (note wording) for the type of brown which will represent the very loaded description of 'Sand Brown' is more of a mid-chocolate-brown. In my case, I have plumped for Vallejo's Model Color [70941] Burnt Umber...
The only issue I have with this is the shape of this pattern rather than the colours themselves. But apparently this is an authentic pattern so my personal aesthetics have little relevance. The brown turned out looking a little glossy for some reason, but I will be giving it a spray of matt varnish later so that should tone this down.
Well, that is the basic painting tests done, I'll need a little time to reflect on which I prefer. In the meantime, I will finish off the two test models with some weathering as they are quite nice in their own right.
[Note: You might ask why I didn't just base my colour scheme on museum exhibits in the fist place - after all if they are in a museum they are bound to be authentic aren't they? Well, that's a can of worms I don't want to open - suffice to say very little original WW2 vintage Finnish paint schemes still exist, and where they do they are often faded and discoloured. So, in short, if you see a nice Finnish camo scheme in a museum the likelihood is that it is a modern repaint. So determining which of the schemes out there are the authentic ones can be a bit tricky.]
Anyway, 'nuff said - here is my second crack at 'a' Finnish 3-colour camo...(This time using a Zvezda 1/100 T-34 Model 1940 as the test-bed...)
1. Base colours.
The basic colour I'm starting with is the green, and in this case - despite the official description of the Finn's green element being termed 'Moss Green' - research leads me to believe that the actual green of a 1941-45 3-colour Finnish camouflage pattern was a bluish-green.
I began with a primer coat of Humbrol's No. 30 Dark Green Matt acrylic spray, which is a slightly lighter bluish tinged green than my main coat will be. The main coat was then applied and consisted of a mix of Vallejos' [70920] German Uniform and a dash of [70979] German Camo Dark Green.
2. Grey(ish)
Next, I'm trying out a warm grey - which has a hint of oatmeal colour to it - which I have mixed using some Vallejo Model Color [70990] Light Grey and a dash of Vallejo [70884] Stone Grey...
Amusingly, this looks just grey in my photo which just goes to illustrate how tricky colour matching can be when using photography, Changes in light and exposure can 'warm' or 'cool' colours. You'll just have to take my word for it that there is a very subtle hint of Stone Grey (a soft beige) in there.
I am not going as far as some modellers go through and making this part of the 3-colour camo an obvious sandy-beige. Even model manufacturers - like Tamiya - tend to get very 'artistic' when it comes to interpreting this colour (they have gone full-blown sand).
3. 'Sand Brown'
My preference (note wording) for the type of brown which will represent the very loaded description of 'Sand Brown' is more of a mid-chocolate-brown. In my case, I have plumped for Vallejo's Model Color [70941] Burnt Umber...
The only issue I have with this is the shape of this pattern rather than the colours themselves. But apparently this is an authentic pattern so my personal aesthetics have little relevance. The brown turned out looking a little glossy for some reason, but I will be giving it a spray of matt varnish later so that should tone this down.
Well, that is the basic painting tests done, I'll need a little time to reflect on which I prefer. In the meantime, I will finish off the two test models with some weathering as they are quite nice in their own right.
Thursday, 3 September 2015
A better putty - Deluxe Materials
Well, it's been a while - due to several months of intense work stuff and then my summer vacation - but I've dusted off the workbench and I am off and going again...
A better way to fill seams and cracks in models
Since I started modelling again I have been using Milliput two-part putty to fill seam and repair cracks and other damage in my plastic models. Milliput is a great medium, it's easy to work with, is very malleable and it hardens extremely hard - the down side is that it takes up to 8 hours* to dry properly.
* After 3-4 hrs hardening, it needs same amount of time to fully cure, i.e. reach a level of settled hardness to allow for predictable sanding results.
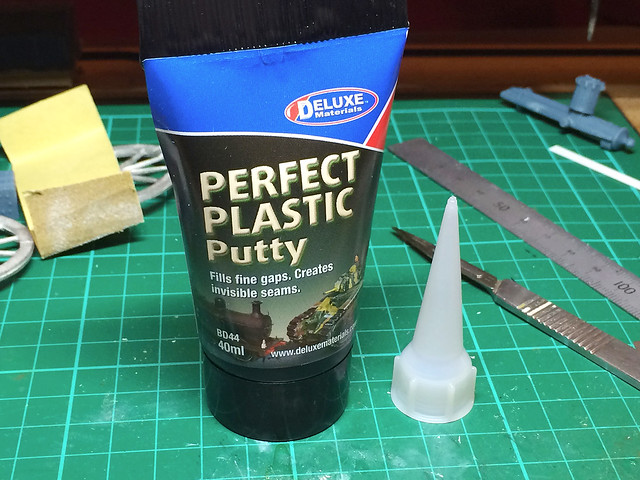
As you can imagine this really makes a dent in your production time. Every repair or fill needed to be left overnight, and if you didn't get it right the first time you had to repeat the process all over again (another 8 hours wait). Very frustrating, so I have been looking for a faster drying alternative and I think I may have found one - Deluxe Material's 'Perfect Plastic Putty'.
Working with 'Perfect Plastic Putty'
A 40ml tube of Perfect Putty is about £5.39, and although thats hard to compare to what you get in a Milliput putty set I think it's a safe guess to say that you do actually get more material using Milliput. But that's not necessarily the most important thing.
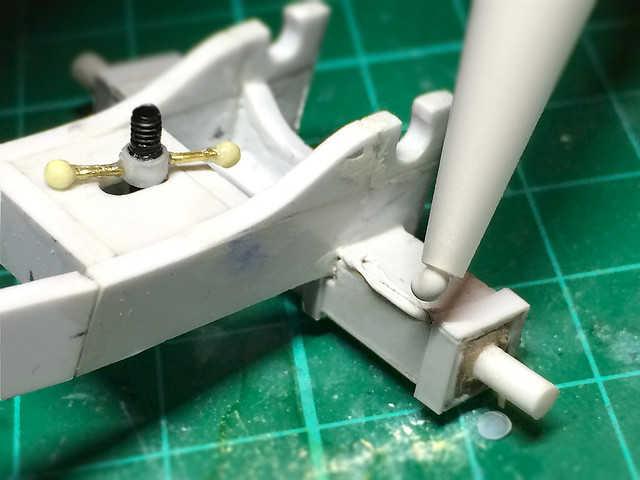
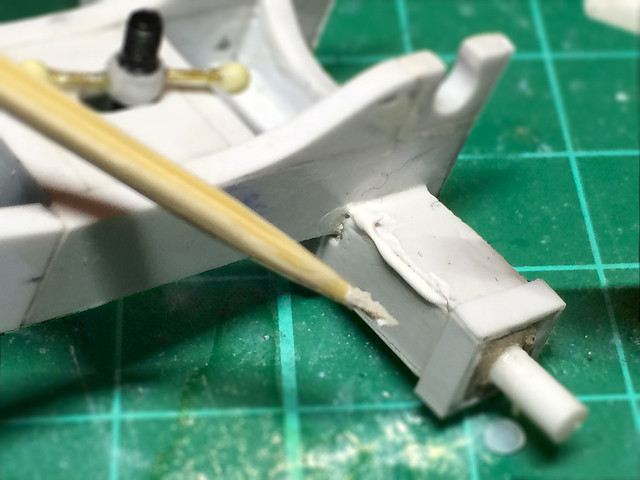
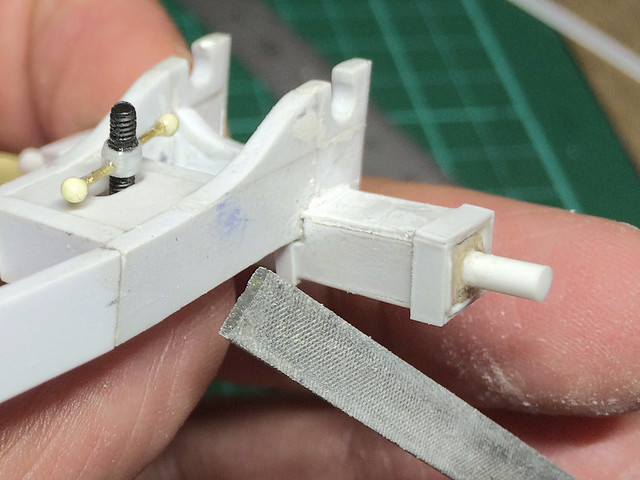
My main concern is drying time, and also comparing the quality of the two putties. So I am trying the Perfect Putty out on a little project I am doing...
First thing that's nice about Perfect Putty is that there is not mixing involved, it's ready to use straight out the tube. Mixing the Milliput can be a little tricky and messy sometimes - if you get the mix wrong it can effect how hard the Milliput drys. Another negative aspect of using Milliput is that you inevitably alway mix up too much (as you don't want to run out), this can lead to a bit of waste - this isn't the case with Perfect Putty.
Which brings us to the most interesting property of a modelling putty (as far as I am concerned) - drying time. As I said, Milliput can take up to 8 hours to harden properly which isn't really convenient, and so my hope is that Perfect Putty speeds up the production time of modelling.
The good news is that my test application of Perfect Putty dried in 20 minutes! This is a huge difference and means that repairs can be done and you can get on with your modelling on the same day. Furthermore, the hardness of Perfect Putty was very good as well - maybe not as hard as Milliput but within half an hour I was sanding and filing my test repairs, that's amazing!
Conclusion - Perfect Putty perfect?
On the surface this little experiment seems to suggest that Perfect Putty is superior to Milliput. It does the job that I mostly use Milliput for - filling seams and cracks in plastic models - but does that mean it has made Milliput obsolete?
No. Perfect Putty is a good filler putty, a perfect filler putty in fact (as far as repairing indentations is concerned). But Milliput has other properties that make it an indispensable part of your modelling tool kit. Milliput has many of the same properties as a clay, it's mouldable, you can sculpt with it, you can use it to build up broken sections of an object. You can't do that with Perfect Putty as it's simply too 'sloppy'. (Edit: 'Sloppy' is perhaps not the right word, it is slightly firm - like cake decorating icing - but it is not runny.)
So, as with so many modelling materials, it is really a case of horses for courses. That said, Deluxe Material's Perfect Plastic Putty is a superb material for one of the most routine jobs in plastic scale modelling - filling gaps and seams. And it does what it does in double quick time! This will be a new standard item in my modelling toolbox. Very impressed.
Link to the UK web site for Deluxe Materials - makers of Perfect Plastic Putty.
A better way to fill seams and cracks in models
Since I started modelling again I have been using Milliput two-part putty to fill seam and repair cracks and other damage in my plastic models. Milliput is a great medium, it's easy to work with, is very malleable and it hardens extremely hard - the down side is that it takes up to 8 hours* to dry properly.
* After 3-4 hrs hardening, it needs same amount of time to fully cure, i.e. reach a level of settled hardness to allow for predictable sanding results.
![]() |
| Milliput is great to work with and hardens wonderfully, but is easy to sand or file. It also produces a very smooth finish. But it does have one drawback... |
Working with 'Perfect Plastic Putty'
A 40ml tube of Perfect Putty is about £5.39, and although thats hard to compare to what you get in a Milliput putty set I think it's a safe guess to say that you do actually get more material using Milliput. But that's not necessarily the most important thing.
My main concern is drying time, and also comparing the quality of the two putties. So I am trying the Perfect Putty out on a little project I am doing...
![]() |
| A 1/32 scratch built artillery carriage I'm working on, and unfortunately I have a couple of gaps in the styrene framework I have made. |
![]() |
| Perfect Plastic Putty looks like PVA glue, but it's a bit more like cake icing in it's firmness (it isn't runny). It will stay where you place it. |
Which brings us to the most interesting property of a modelling putty (as far as I am concerned) - drying time. As I said, Milliput can take up to 8 hours to harden properly which isn't really convenient, and so my hope is that Perfect Putty speeds up the production time of modelling.
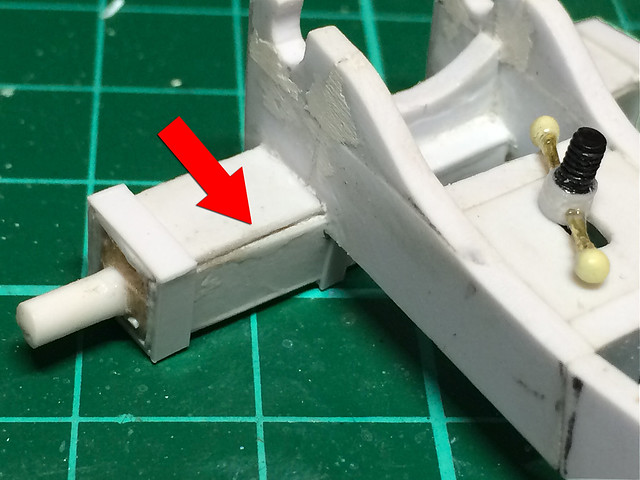
The good news is that my test application of Perfect Putty dried in 20 minutes! This is a huge difference and means that repairs can be done and you can get on with your modelling on the same day. Furthermore, the hardness of Perfect Putty was very good as well - maybe not as hard as Milliput but within half an hour I was sanding and filing my test repairs, that's amazing!
![]() |
| As good a repair as I get with Miliput, and even if it isn't perfect I can reapply Perfect Putty and get on again within half and hour! |
On the surface this little experiment seems to suggest that Perfect Putty is superior to Milliput. It does the job that I mostly use Milliput for - filling seams and cracks in plastic models - but does that mean it has made Milliput obsolete?
No. Perfect Putty is a good filler putty, a perfect filler putty in fact (as far as repairing indentations is concerned). But Milliput has other properties that make it an indispensable part of your modelling tool kit. Milliput has many of the same properties as a clay, it's mouldable, you can sculpt with it, you can use it to build up broken sections of an object. You can't do that with Perfect Putty as it's simply too 'sloppy'. (Edit: 'Sloppy' is perhaps not the right word, it is slightly firm - like cake decorating icing - but it is not runny.)
So, as with so many modelling materials, it is really a case of horses for courses. That said, Deluxe Material's Perfect Plastic Putty is a superb material for one of the most routine jobs in plastic scale modelling - filling gaps and seams. And it does what it does in double quick time! This will be a new standard item in my modelling toolbox. Very impressed.
Link to the UK web site for Deluxe Materials - makers of Perfect Plastic Putty.
Saturday, 18 July 2015
Getting rusty - corrosion experiment part 3
The Hairspray Technique
After Wednesday's marathon 'rust' session I had a little breather. And I promise to keep this blog entry short and sweet!
While both the chemical rusting and 'salt chipping' techniques were new to me I have used the 'hairspray technique' a couple of times and am fairly confident about applying this method for getting a flaking paint effect. Though, again, this will be the first time I have used it at this kind of scale.
But that's what this experimental project is all about, so without further ado...
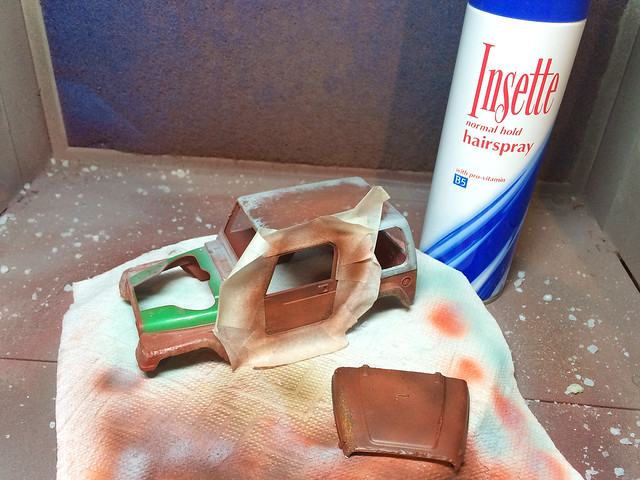
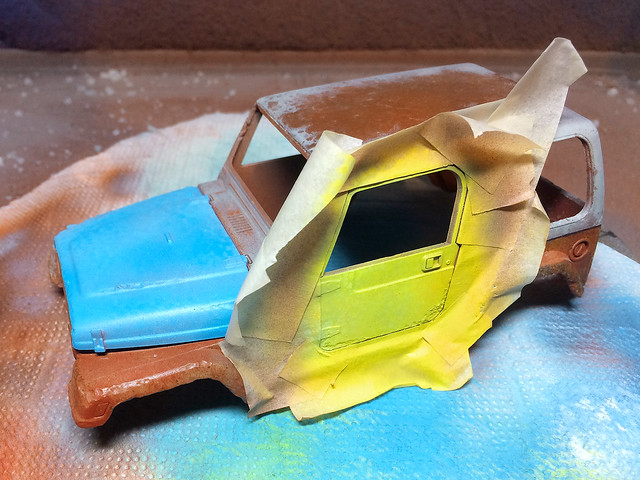
I decided to apply this technique to a couple of specific places - the bonnet (hood) and the left side door - and so began by masking out some of the adjacent areas. I am using the cheapest hairspray I could find and spraying it from the can (rather than decanting it and using my airbrush).
It has been suggested that using a water-based hairspray - rather than this cheap stuff - works better, but I actually could only find one example of this locally and it was quite expensive. But I will try that out at some point, just to compare the results.
I airbrushed on a couple of bright colours which would contrast nicely with the rusty base coat. The choice was a bit random but I suppose it goes with the idea that this car is an old battered wreck.
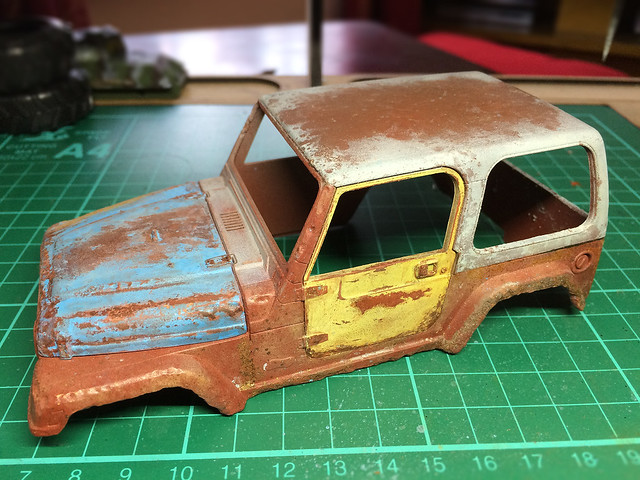
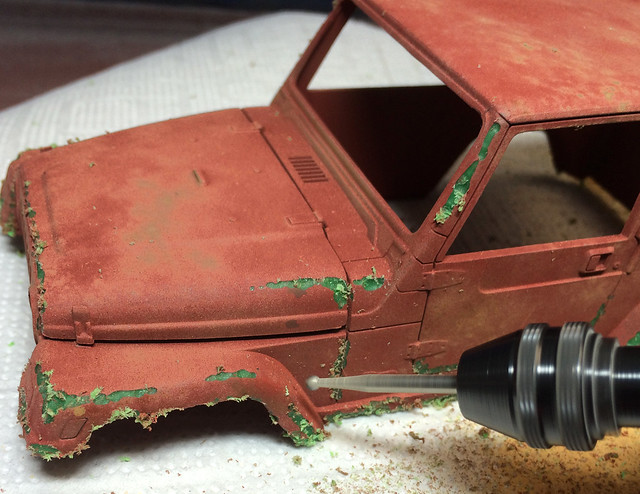
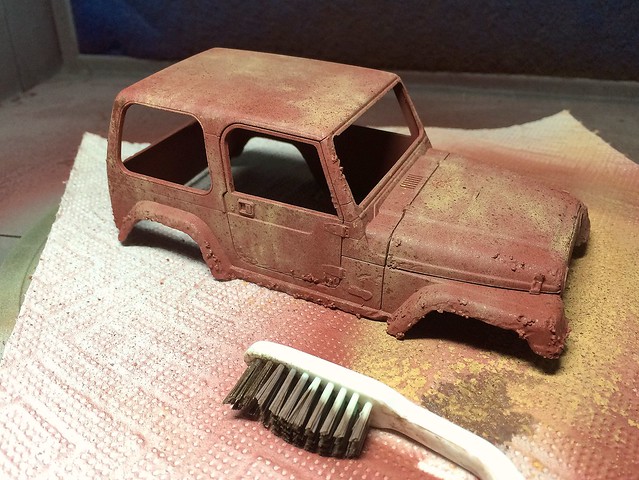
Applying some warn water with a brush I then scratched at the surface with an old stiff toothbrush for the big areas of flaked paint I wanted. Then I changed to a sharpened toothpick for the smaller patches and to break up the areas around the bigger patches so they looked more natural.
Every so often I would stop and dry the area I was working on by pressing a piece of kitchen towel on it. This stopped too much paint flaking away and helped the patch you had just done to dry and adhere properly. I also cleaned away any small flakes that had come away and were sticking up or pushed then back down on the surface if I felt I had flaked off too much paint.
It is, by nature, a bit of a hit and miss effect and proceeding very slowly - and referring to some photographic reference as you go - is the best course.
Once done I did go back over a couple of the patches I felt were over-done with a small paint brush and re-applied spots of the top-coat colour. In this way you can achieve some sort of control and modify the finished look to your tastes.
Finally, once these paint is completely dry I went around certain areas very lightly with a small piece of fine 'wet & dry' Emery Paper to fade the top coat paint and gradiate the effect between the top coat and the rusty base coat. (You can probably see this on the bonnet where the blue paint fades to light blue at the edge of the large central patch.)
And that's that...
Next: Some small finishing tests, weathering effects and one last try with the DM rusting chemical.
After Wednesday's marathon 'rust' session I had a little breather. And I promise to keep this blog entry short and sweet!
While both the chemical rusting and 'salt chipping' techniques were new to me I have used the 'hairspray technique' a couple of times and am fairly confident about applying this method for getting a flaking paint effect. Though, again, this will be the first time I have used it at this kind of scale.
But that's what this experimental project is all about, so without further ado...
I decided to apply this technique to a couple of specific places - the bonnet (hood) and the left side door - and so began by masking out some of the adjacent areas. I am using the cheapest hairspray I could find and spraying it from the can (rather than decanting it and using my airbrush).
It has been suggested that using a water-based hairspray - rather than this cheap stuff - works better, but I actually could only find one example of this locally and it was quite expensive. But I will try that out at some point, just to compare the results.
I airbrushed on a couple of bright colours which would contrast nicely with the rusty base coat. The choice was a bit random but I suppose it goes with the idea that this car is an old battered wreck.
Applying some warn water with a brush I then scratched at the surface with an old stiff toothbrush for the big areas of flaked paint I wanted. Then I changed to a sharpened toothpick for the smaller patches and to break up the areas around the bigger patches so they looked more natural.
Every so often I would stop and dry the area I was working on by pressing a piece of kitchen towel on it. This stopped too much paint flaking away and helped the patch you had just done to dry and adhere properly. I also cleaned away any small flakes that had come away and were sticking up or pushed then back down on the surface if I felt I had flaked off too much paint.
It is, by nature, a bit of a hit and miss effect and proceeding very slowly - and referring to some photographic reference as you go - is the best course.
Once done I did go back over a couple of the patches I felt were over-done with a small paint brush and re-applied spots of the top-coat colour. In this way you can achieve some sort of control and modify the finished look to your tastes.
Finally, once these paint is completely dry I went around certain areas very lightly with a small piece of fine 'wet & dry' Emery Paper to fade the top coat paint and gradiate the effect between the top coat and the rusty base coat. (You can probably see this on the bonnet where the blue paint fades to light blue at the edge of the large central patch.)
And that's that...
Next: Some small finishing tests, weathering effects and one last try with the DM rusting chemical.
Wednesday, 15 July 2015
Getting rusty - corrosion experiment part 2
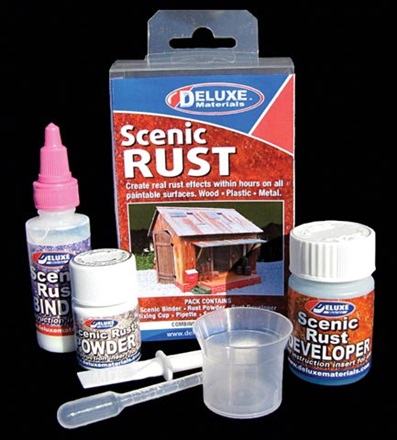
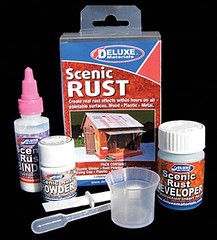
This time I'm looking into a new technique - chemical rusting. So far I have only practised effects using paint, powders and pastels so the idea of creating an effect using a little chemical kit is rather novel. The make of the kit I'm using is Deluxe Material's Scenic Rust Kit.
BUT...Before I start getting all scientific (even my secondary school Chemistry teaching wife showed some mild interest in the aforesaid kit) I want to do some more minor tinkering with the base coat colours that I laid down in Part One of this experiment.
I was talking over the results of 'part one' with my brother and he made some very useful comments about the 'rust' colours and textures I chose and how I used them. We both agreed, I think, that the shades I used were a bit 'off' and the mottling effect too prominent so some toning down - or 'modulation' - was in order...
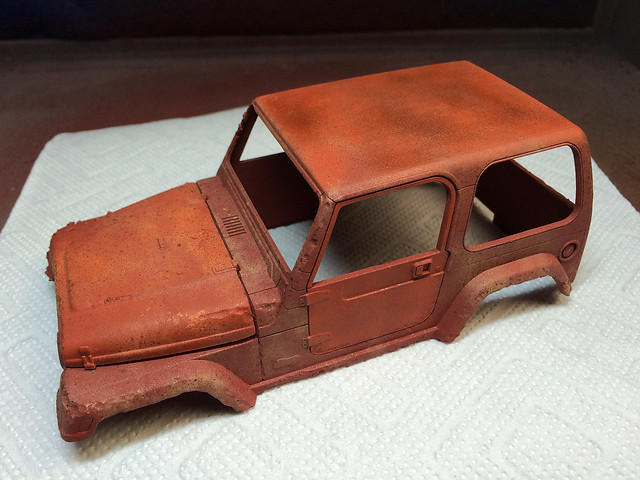
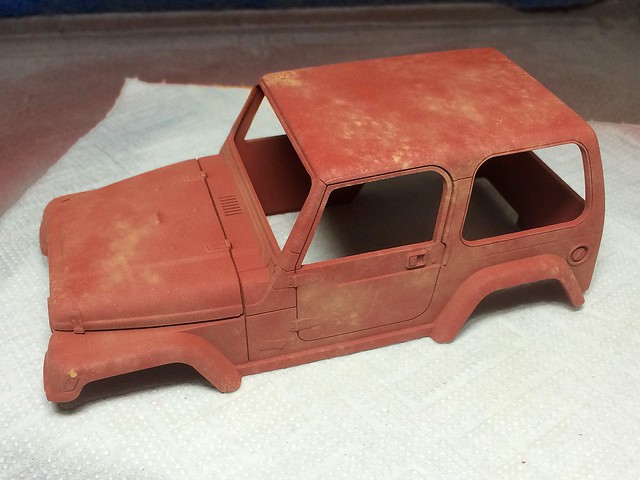
After looking through the available Vallejo paints at my local hobby store my eye settled on their 'Amarantha Red' [829]. It's a wonderful soft coral red with an undertone of orange, and it was this oxidised red/orange tone that - I think - was missing from my first attempt at painting 'rust'.
Some might say that this is 'obvious', but when I first painted my test jeep I was, in fact, quite pleased with my mottled browns. It only became apparent when I specifically checked reference photos from desert locations (on advise from my brother) that my 'rust' wasn't very rusty after all!
Deluxe Material's Scenic Rust Kit...
Right, having sorted out the basic paint layers - and 'yes' that does seem a lot of work for what is simply the underlaying paint coat - I now start thinking about how I will apply DM's rust kit.
Now I have seen tutorials that have used two slightly different ways of using the chemical rusting medium. The first is to apply the DM rust under the top paint coat and flake off the paint to reveal it and the other is to paint your top coat and then to add the DM chemicals.
The difference is that the DM rust effect adds texture as well as rust effect to the model so you might want to have your rust 'bubbling' up from under your top coat paint (as it would in real life) rather than being a more superficial effect. Neither method is right or wrong as far as I can see so I decided to try both approaches.
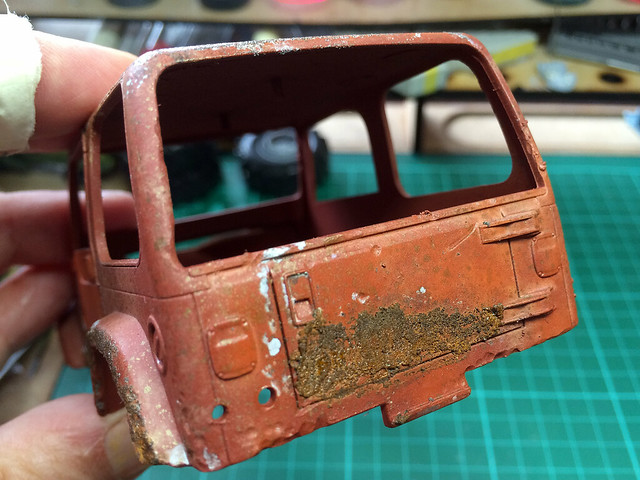
So, I added some of the DM solution to my jeep now and will apply the top coat after having sprayed on some hairspray in order to reveal the chemical rust - and rusty base colours - by means of the good old 'salt chipping technique'.
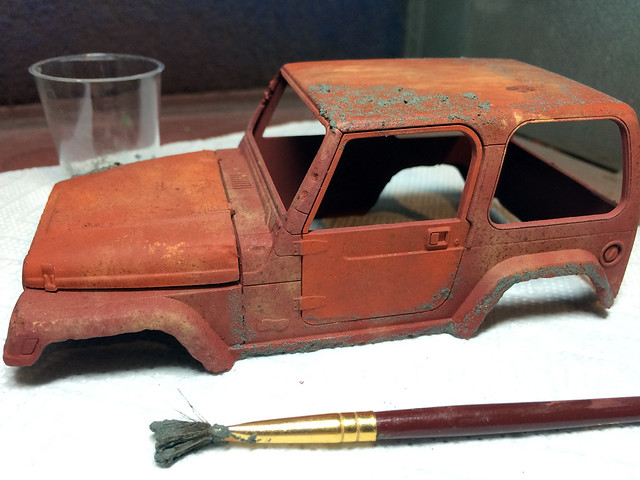
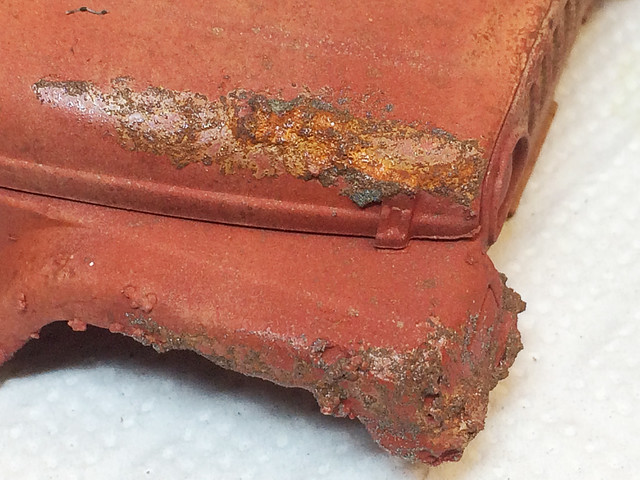
It created a crusty texture effect - perhaps too textured, but I can shave off some of the excess 'clumps' to make it smoother if I want. But in any case, I decided to try again but this time go for a really think application just to see what this would do...
OK, a little OTT for a scale model but this is an experiment after all. Again, I figured I could sand back the amount of texture - but let's see how that looked after the 'developer' chemical was added (and a 8 hour wait)...
Well, rusty yes, but far too thick and too much texture...I'm beginning to have my doubts about this technique (so far I feel I could have achieved the same effect using - cheaper - oxide powders). Still, I am curious to see what this 'rust' looks like after the top coat paint has been airbrushed on.
Salt Chipping Technique
Anyway, while not happy with the DM rust effect I continue to experiment with other rust effect techniques. I will be trying this effect out on the roof of my test vehicle and in preparation I have already masked that area off and applied a light gloss varnish coat to give the base colours a bit of protection (just in case)...
(Note: What you don't see here is that I have re-sprayed and re-painted this roof three times over the last week. It's been a bit of a Goldilocks approach as I have tried bright orange rust effects and medium brown rust effects, but finally I settled on a dark brown rust base effect.)
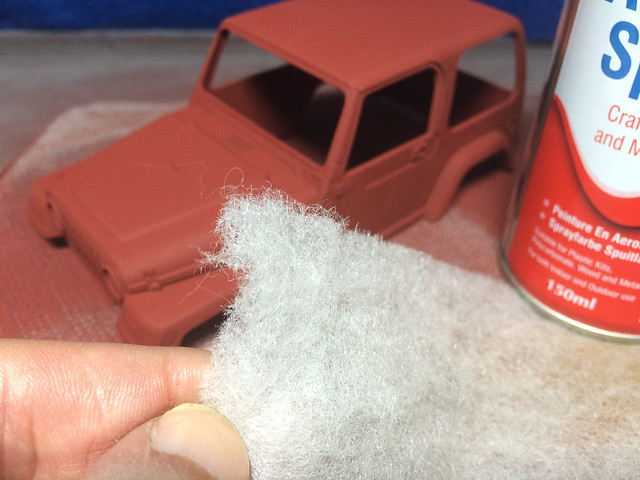
Getting a good 'mottled' paint effect: In part 1 of this experiment I tried using a airbrushing paint through a light dressmaking fabric gauze, which sort of worked but was a bit messy. Since then I have looked at several different materials which might be better suited to this purpose and I came across a synthetic filter material that seems to be ideal.
It's the sort of material you would use as a filter for aquariums and is quite cheap - I trimmed it to make it thinner as 5mm thickness seemed to be ideal for my purposes. It copes with airbrushing better than the more absorbent fabric gauze I was using (which became saturated with paint) and can be used again and again without blocking up, so a small piece goes a long way. It produces a very nice random mottled pattern which seems more subtly than trying to get the same effect by dabbing paint on with a sponge.
Ok, this is turning into a bit of a marathon, so onwards...
After the base colour I sprayed the roof with a light matt varnish coat. I like to apply a varnish layer between different paint effects as it give what I have done some level of protection in case I make a mess of the next effect I put on top. I felt this was particularly important because I was worried about what salt and water might do to my paintwork.
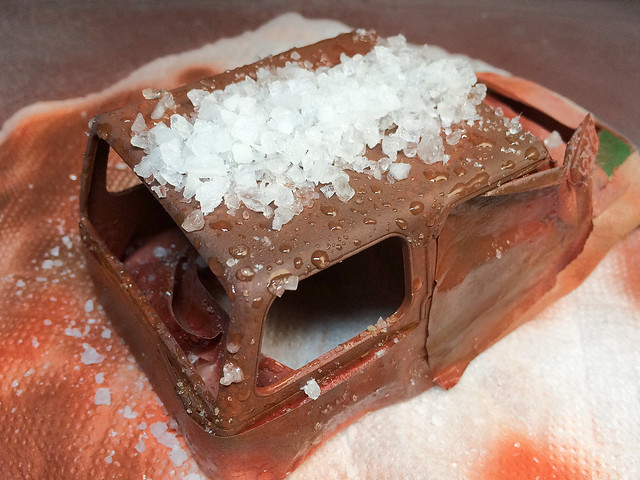
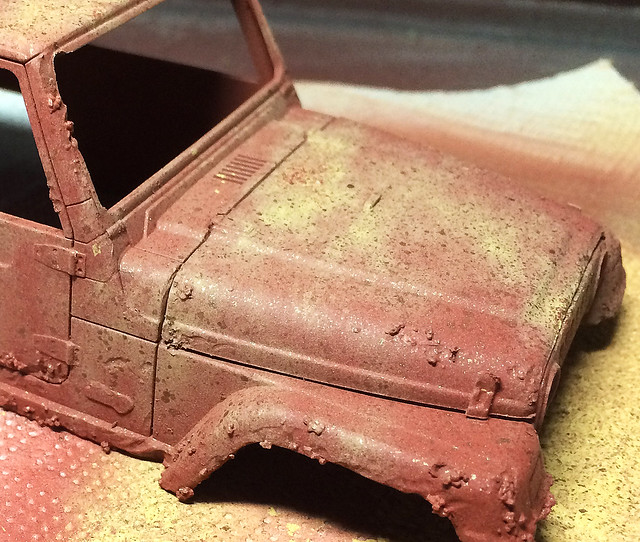
The salt is sprinkled onto the model, having sprayed the area which it will be applied with a misting of water. I used rock salt, but also ground down some to make smaller grains...
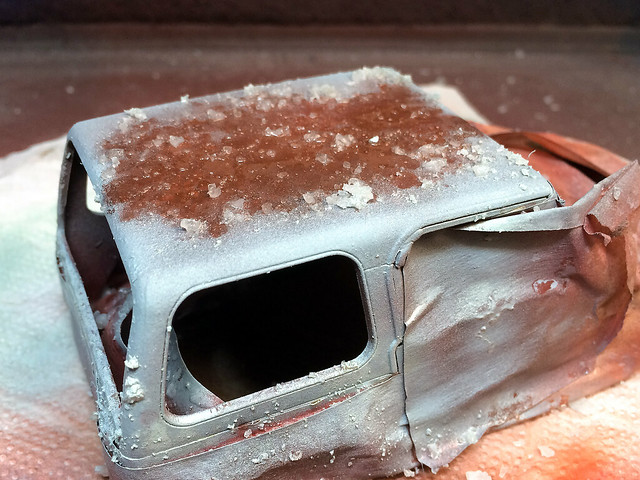
The water sticks the salt granules to the surface of the model temporarily. I found that when I moved on to the next stage - air brushing on my chosen top-coat colour (pale blue) - that the airbrush did blow off some of the salt grains, but I simple threw some salt back on and continued spraying. Once done I started to brush off the salt...
But you will find that you are better taking a fairly stiff toothbrush at the salted surface to get ride of all the salt grains. Some are quite stubborn due to being held in place by the airbrushed layer. After a good brushing this is what you end up with...
Phew! Finally got a rust effect that I'm happy with (I think)!
At this point I was going to also try the hairspray technique but in all honesty I'm losing the will to live after all that...So I'll leave that till next time!
![]() |
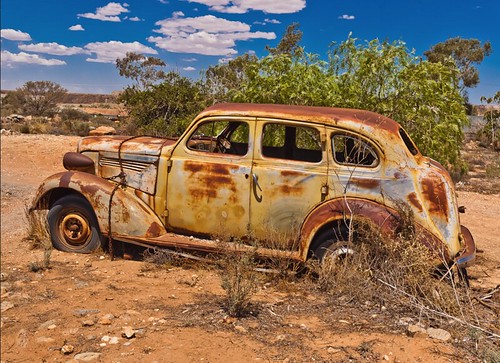
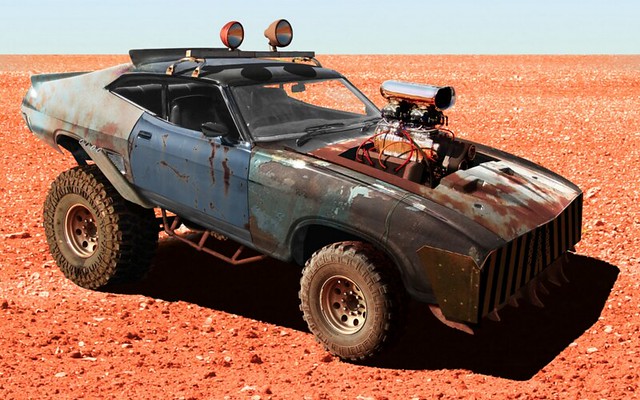
| Love this photo! And it exemplifies the sort of look that I will be going for with my 'Mad Mad' inspired car project, which is the reason why I'm doing this rust and corrosion experiment. Photo credit: 'Car Wreck in Broken Hill, Australia' by Paul's Pictures |
I was talking over the results of 'part one' with my brother and he made some very useful comments about the 'rust' colours and textures I chose and how I used them. We both agreed, I think, that the shades I used were a bit 'off' and the mottling effect too prominent so some toning down - or 'modulation' - was in order...
![]() |
| Before and after colour modulation using a light airbrushing of Vallejo's 'Amarantha Red'. This has toned down the rather unrealistic mottled effect. |
Some might say that this is 'obvious', but when I first painted my test jeep I was, in fact, quite pleased with my mottled browns. It only became apparent when I specifically checked reference photos from desert locations (on advise from my brother) that my 'rust' wasn't very rusty after all!
![]() |
| Another thing I did was to alternate degrees of redness on different panels of the car's bodywork. Some I left browner while other I made more orange. I think this gives it a more interesting look. |
Now I have seen tutorials that have used two slightly different ways of using the chemical rusting medium. The first is to apply the DM rust under the top paint coat and flake off the paint to reveal it and the other is to paint your top coat and then to add the DM chemicals.The difference is that the DM rust effect adds texture as well as rust effect to the model so you might want to have your rust 'bubbling' up from under your top coat paint (as it would in real life) rather than being a more superficial effect. Neither method is right or wrong as far as I can see so I decided to try both approaches.
So, I added some of the DM solution to my jeep now and will apply the top coat after having sprayed on some hairspray in order to reveal the chemical rust - and rusty base colours - by means of the good old 'salt chipping technique'.
It created a crusty texture effect - perhaps too textured, but I can shave off some of the excess 'clumps' to make it smoother if I want. But in any case, I decided to try again but this time go for a really think application just to see what this would do...
OK, a little OTT for a scale model but this is an experiment after all. Again, I figured I could sand back the amount of texture - but let's see how that looked after the 'developer' chemical was added (and a 8 hour wait)...
Well, rusty yes, but far too thick and too much texture...I'm beginning to have my doubts about this technique (so far I feel I could have achieved the same effect using - cheaper - oxide powders). Still, I am curious to see what this 'rust' looks like after the top coat paint has been airbrushed on.
Salt Chipping Technique
Anyway, while not happy with the DM rust effect I continue to experiment with other rust effect techniques. I will be trying this effect out on the roof of my test vehicle and in preparation I have already masked that area off and applied a light gloss varnish coat to give the base colours a bit of protection (just in case)...
(Note: What you don't see here is that I have re-sprayed and re-painted this roof three times over the last week. It's been a bit of a Goldilocks approach as I have tried bright orange rust effects and medium brown rust effects, but finally I settled on a dark brown rust base effect.)
Getting a good 'mottled' paint effect: In part 1 of this experiment I tried using a airbrushing paint through a light dressmaking fabric gauze, which sort of worked but was a bit messy. Since then I have looked at several different materials which might be better suited to this purpose and I came across a synthetic filter material that seems to be ideal.
![]() |
| 'Aqua safe' filter foam sheets. |
Ok, this is turning into a bit of a marathon, so onwards...
After the base colour I sprayed the roof with a light matt varnish coat. I like to apply a varnish layer between different paint effects as it give what I have done some level of protection in case I make a mess of the next effect I put on top. I felt this was particularly important because I was worried about what salt and water might do to my paintwork.
The salt is sprinkled onto the model, having sprayed the area which it will be applied with a misting of water. I used rock salt, but also ground down some to make smaller grains...
The water sticks the salt granules to the surface of the model temporarily. I found that when I moved on to the next stage - air brushing on my chosen top-coat colour (pale blue) - that the airbrush did blow off some of the salt grains, but I simple threw some salt back on and continued spraying. Once done I started to brush off the salt...
But you will find that you are better taking a fairly stiff toothbrush at the salted surface to get ride of all the salt grains. Some are quite stubborn due to being held in place by the airbrushed layer. After a good brushing this is what you end up with...
Phew! Finally got a rust effect that I'm happy with (I think)!
At this point I was going to also try the hairspray technique but in all honesty I'm losing the will to live after all that...So I'll leave that till next time!
Monday, 6 July 2015
Getting rusty - corrosion experiment part 1
![]() |
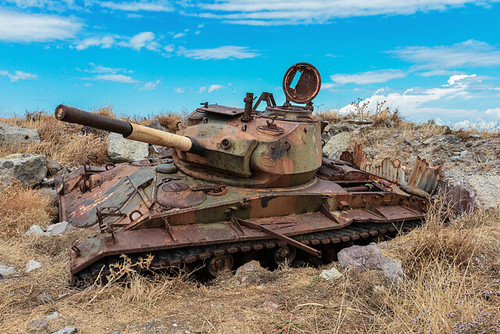
| Rusty M24 Chaffee tank. Photo source: Peter Bromley |
I've dabbled with light rusting techniques in 1/72 but I've always hankered to attempt something a little more adventurous (like all military modellers I will undoubtedly take on the inevitable knocked out tank diorama at some point) and the chance arose when I recently started my 1/25 'Mad Max: Fury Road' themed project.
The larger scale gives me a bigger canvas to work with to try out larger areas of corrosion that is perhaps unachievable on Braille Scale models - unless you rust up a whole small scale vehicle.
I've decided that there will be two parts to my rust experiment; the base coat and preparatory paint effect stage and the second chemical treatment phase.
Stage 1 - Prep and base painting effects...
OK, without further ado, onto my experiment. The first job was to get a 'willing guinea pig' on which I can try out my basic rusting techniques. As usual eBay came up trumps and I found a nice and cheap 1/24 scale toy jeep (which incidentally supplied me with a nice set of off-road wheels which I could use for my Mad Max car project).
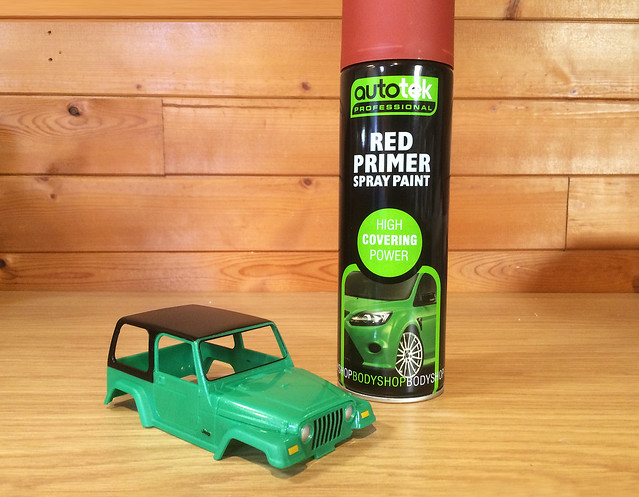
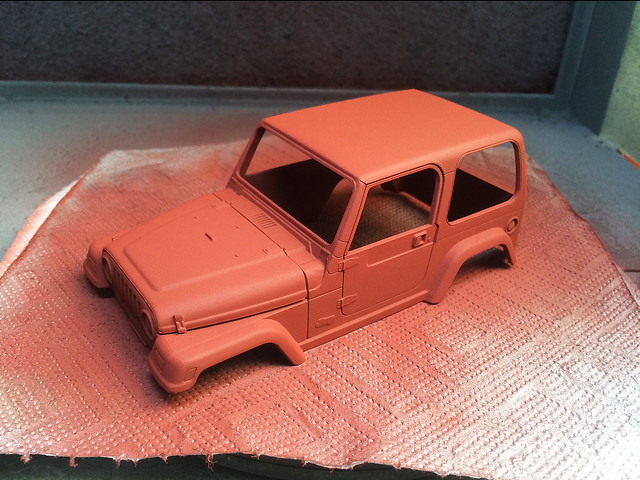
I began by giving the donor body a quick clear with soapy water and a then a light wipe with a tissue dampened with some thinners (to get ride of any lingering grease or finger marks). Then I applied a coat of AutoTek red primer (any car primer will do but the red seems a good base colour for this particular project)...
Note: Before you apply the primer... There is additional work you could do depending just how rusty and old you want your vehicle to look. Going straight for the primer is fine for light or surface rust effects, but if you want that 'junk yard' look you may wish to 'modify' the vehicles bodywork to show the effects of long term neglect!
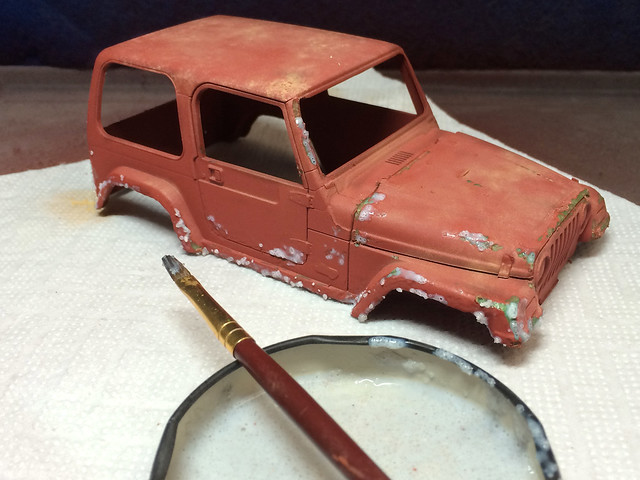
Then, for extra texture, on one side of the car I added a PVA and sand mixture which I dabbed on with a paint brush around the damaged areas...(I only did one side as I am not entirely sure about this technique so I wanted to compare it with a side without the addition of the sand texture.)
It worked rather well and I got a nice random paint pattern...
![]() |
| This is what I was doing before I decided to add extra damage texture after all! |
![]() |
| This is the sand texture side of my test model, still not sure about it. |
I think that's a pretty good base for my rust effects so it's on to the next stage in this project and to start working with the chemical treatment that I purchased. The product I will be using is Deluxe Material's Scenic Rust Kit.
This will be the first time I have used a chemical effect instead of simply painting an effect using acrylic or enamel paints. The advantage of Deluxe Material's method is that is produces real rust and from the examples I have seen the end result looks pretty impressive and realistic (well, it would be as it is real rust)!
The Deluxe Material's web site has a few very useful tutorials on using their products and they also have a pretty interesting video which illustrates their rusting technique...
Next: Deluxe Material's Scenic Rust.
Friday, 6 February 2015
Revell 1/144 P-47 Republic Thunderbolt - Pt. 5
[Sub-title: Humbrol Polished Aluminium Metalcote experiment.]
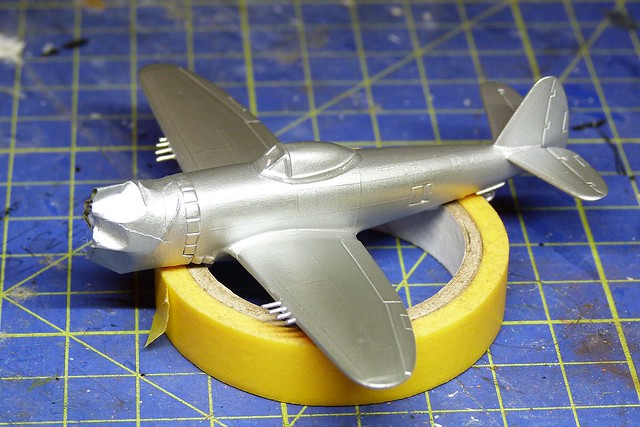
Well, I've polished up the Humbrol Metalcote and it looks OK. See what you think...
It's not a high reflection shine like the Plasti-kote was, but there again this actually worked!
Working with Humbrol Metalcote...
I followed the Humbrol Metacote video tutorial almost exactly - as far as I could tell - but I did not get the same results.
The video shows a result where the sample model did end up with a highly reflective metal shine. As you can see mine was more of a subdued shine, which is quite nice but not quite as good as the Humbrol example.
I found that my initial - perhaps overly cautious - light sprays of the Metalcote did not seem to be thick enough to stand up to the vigorous polish needed to make the paint really shine. So, I took a chance and repeated the process by adding a second round of sprayed coats. (The Humbrol video showed a single round of spray passes - that was a couple of light passes in one direction, covering the model, which were left to dry for half and hour, then followed by another series of light passes in a cross-wise direction. The model was then left to dry over night.)
By the way - don't be tempted to try using a Dremel, or similar hobby tool, to do the polishing. Even if - like me - you have what you think is the appropriate 'soft' polishing discs. My brother was concerned that the high-rev of the Dremel might actually 'melt' or damage the plastic of the kit, but it didn't - what it did do was over-polish and tarnish the Metalcote. It actually turned the Humbrol paint black! I'm afraid this is a job for a soft cloth and plenty of elbow grease.
After leaving my second model over-night again I started the hand-polishing and this time I did get more of a shine. The cloth does show that the polishing does remove a small amount of the paint which is why I reckon giving a double coat helps the process.
In fact, I am tempted to experiment further and give a scrap piece of plastic a triple coat to see what happens. My theory is that the hardier (i.e. 'thicker') the Metalcote application the more aggressively you can polish the paint without being in danger of completely removing the metallic paint. Worth a try.
What next?
Right, back to the model. I'm actually quite please with the actual modelling progress with this - even though all this experimentation has prolonged the actual time it has taken to make this little kit.
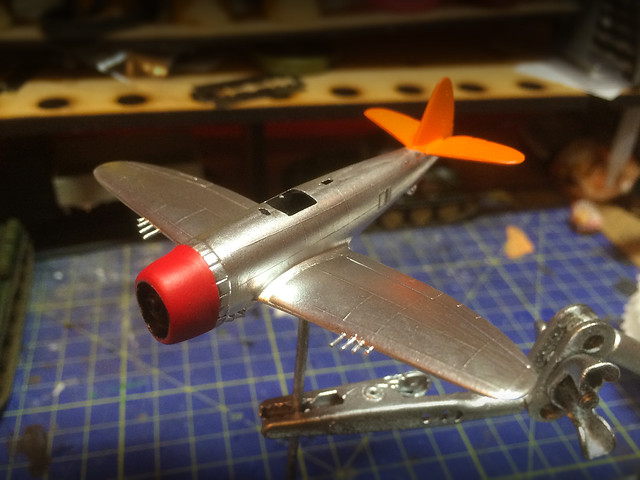
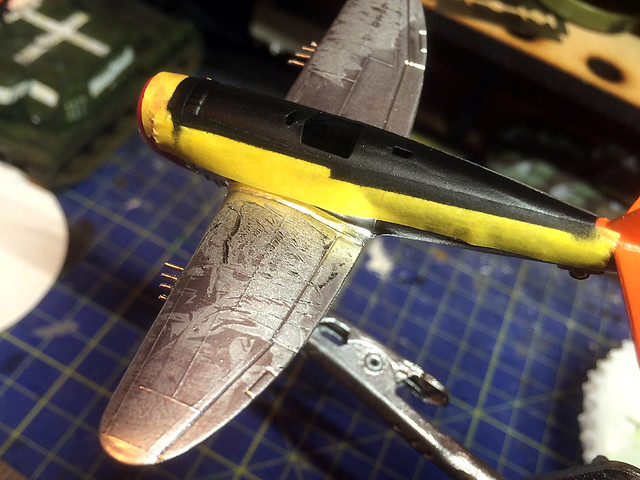
So, now I have to add the colour accents to the model; the red engine cowl, the orange tail and the black anti-dazzle panel on the top of the fuselage.
I have to start thinking about panel shading and 'weathering'. Do I panel shade? (In two minds.)
We shall see in part 6 of this extended experiment.
Well, I've polished up the Humbrol Metalcote and it looks OK. See what you think...
It's not a high reflection shine like the Plasti-kote was, but there again this actually worked!
Working with Humbrol Metalcote...
I followed the Humbrol Metacote video tutorial almost exactly - as far as I could tell - but I did not get the same results.
The video shows a result where the sample model did end up with a highly reflective metal shine. As you can see mine was more of a subdued shine, which is quite nice but not quite as good as the Humbrol example.
I found that my initial - perhaps overly cautious - light sprays of the Metalcote did not seem to be thick enough to stand up to the vigorous polish needed to make the paint really shine. So, I took a chance and repeated the process by adding a second round of sprayed coats. (The Humbrol video showed a single round of spray passes - that was a couple of light passes in one direction, covering the model, which were left to dry for half and hour, then followed by another series of light passes in a cross-wise direction. The model was then left to dry over night.)
By the way - don't be tempted to try using a Dremel, or similar hobby tool, to do the polishing. Even if - like me - you have what you think is the appropriate 'soft' polishing discs. My brother was concerned that the high-rev of the Dremel might actually 'melt' or damage the plastic of the kit, but it didn't - what it did do was over-polish and tarnish the Metalcote. It actually turned the Humbrol paint black! I'm afraid this is a job for a soft cloth and plenty of elbow grease.
After leaving my second model over-night again I started the hand-polishing and this time I did get more of a shine. The cloth does show that the polishing does remove a small amount of the paint which is why I reckon giving a double coat helps the process.
In fact, I am tempted to experiment further and give a scrap piece of plastic a triple coat to see what happens. My theory is that the hardier (i.e. 'thicker') the Metalcote application the more aggressively you can polish the paint without being in danger of completely removing the metallic paint. Worth a try.
What next?
Right, back to the model. I'm actually quite please with the actual modelling progress with this - even though all this experimentation has prolonged the actual time it has taken to make this little kit.
So, now I have to add the colour accents to the model; the red engine cowl, the orange tail and the black anti-dazzle panel on the top of the fuselage.
I have to start thinking about panel shading and 'weathering'. Do I panel shade? (In two minds.)
We shall see in part 6 of this extended experiment.
Sunday, 25 January 2015
Revell 1/144 P-47 Republic Thunderbolt - Pt. 3
[Sub-title: Plasti-Kote experiment No. 2]
Well, here we are, part three of my Plasti-kote P-47 experiment. And despite the disappointment that my Plasti-kote bright metal finish failed to materialise in the hoped for quality I plod on as there are still a few things to learn about this paint.
This time I am looking at masking and how coats of paint applied on top of the Plasti-kote
I was a little worried about masking the Plasti-kote bright metallic as it seemed susceptible to marking and in my first experiment with the toy plane it actually peeled off when I removed the masking tape. However, I am fairly confident that was something to do with the cheap greasy plastic of the toy and won't happen with paint applied to good quality plastic.
But just in case I used as little masking tape as I could and also used my best quality Tamiya modelling masking tape, which is low-tack.
I did have a bit of indecision about whether to mask all non-silver areas before spraying the Plasti-kote. My thinking was that as the Plasti-kote is a gloss that I might be better leaving the black primer exposed for the other paint sections - like the red engine cowl and tail - as I wasn't sure how well water-based acrylics would take to the Plasti-kote. But my initial experiment with the toy plane seemed to belay my fears and show that with care acrylics could be used onto of the bright metallic.
Well, here we are, part three of my Plasti-kote P-47 experiment. And despite the disappointment that my Plasti-kote bright metal finish failed to materialise in the hoped for quality I plod on as there are still a few things to learn about this paint.
This time I am looking at masking and how coats of paint applied on top of the Plasti-kote
I was a little worried about masking the Plasti-kote bright metallic as it seemed susceptible to marking and in my first experiment with the toy plane it actually peeled off when I removed the masking tape. However, I am fairly confident that was something to do with the cheap greasy plastic of the toy and won't happen with paint applied to good quality plastic.
But just in case I used as little masking tape as I could and also used my best quality Tamiya modelling masking tape, which is low-tack.
![]() |
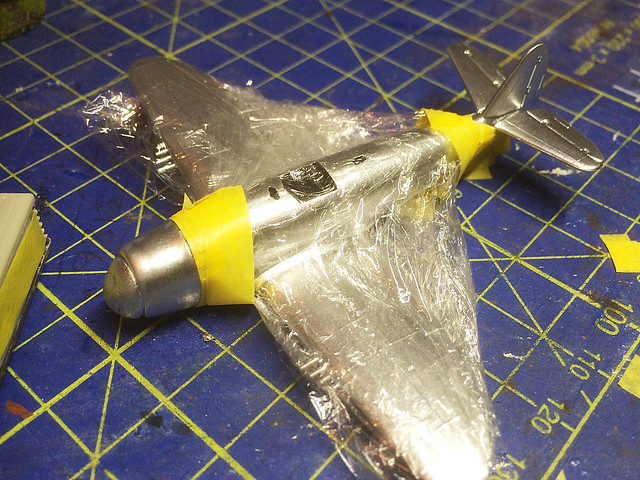
| As usual I use proper masking tape for the actual masking and protect all other areas with cling-film. The cling-film also helps protects the already painted areas. |
Humbrol spray paints have no problem with the Plasti-kote, but air-brushing on acrylics has to be done with some care. You have to get you paint to thinners mix right - in the case of my Vallejo Model Color acrylics this meant I had to add as little water to the mix as I could.
Too much water caused the paint to bead on the surface of the Plasti-kote gloss. The 'neater' the paint mix the better it adhered to the gloss when sprayed onto it. Even so I still had to do the spaying in stages - first spraying a a very thing neat mix lightly to create a base for further light coats. In this way I built up my paint coat onto the Plasti-kote to the desired consistency.
In fact I used the Vallejo Model Colour with only one or two drops of water - just so it would go through my air-brush without choking or splattering. I didn't try Vallejo Model Air paint - which is pre-thinned for airbrushing so can't say how that would fair.
The good news was - with much relief - that when I removed the masking take none of the Plasti-kote paint layer peeled off. There was, however, a little discolouration and marking here and there due to the masking tape gum. This looked like small smudges and dulled the bright metallic shine and could not be 'polished' up again - though I didn't want to rub the Plasti-kote too aggressively.
Experiment over!
Drat! It's a big fat 'fail' for Plasti-kote Bright Metallic I'm afraid (it fell at the final hurdel)!
![]() |
| Plasti-kote Bright Metallic paint does not like cling-film! |
Just when I thought I was going to pull something marginally positive out of this experiment and Plasti-kote turned around and bit me in the ass. Basically the peeling I mentioned that occurred with the first experiment I did was NOT a fluke caused by the cheap plastic of the model I used. Plasti-kote peels big time no matter what preparation...
My guess is that smooth plastic is not a medium that Plasti-kote's Bright Metallic is compatible with. Looking at the Plasti-kote web site it gives a list of materials you can use this paint with and they all appear to be - to one degree or other - porous. The Bright Metallic seems to need a slightly textured surface to adhere to properly.
Of all things it was the kitchen cling-film that caused the peeling you see in the above picture. The sticky plastic seems to have some sort of chemical reaction with the Plasti-kote and despite cling-film not being all that sticky it lifts the metallic paint up like it was designed specifically to do just that!
I'm gutted in a way as it has completely spoiled the model - I suppose I could try cleaning the paint off the wing but as I have found out what I wanted to about the plaintive unsuitability of Plasti-kote's Bright Metallic spray as a modelling medium I hardly feel I want to. It would just be a bodge-up job at best. (But I may feel different once I have slept on it.)
Elsewhere, the masking tape also lifted some flecks of the metallic paint and otherwise discoloured other areas. It was like Plasti-kote was just bidding it's time waiting to show it's flaws right at the last minute!
This seems a lot of work just to find out what others have already said, that Plasti-kote Bright Metallic paint is not for serious modellers. But at least now I know exactly why (and you do to).
Next: Not sure if there will be a next - at least it was just one Pound (£) I wasted! May do a de-brief of what I think of the Revell Micro-Wings P-47 though.
Subscribe to:
Posts (Atom)