Showing posts with label repairs. Show all posts

Tuesday, 2 March 2021

Emperor Augustus Bust Model

 As I've mentioned before, one of the main reasons I take so long to complete projects is because I tend to jump between multiple projects, going from one job to another depending on how I feel at the time. And sometime I might not even get back to a particular project for quite some time (I'm looking at you K7 truck)! 😄

Anyway, today I'm working a new 3D bust model, another classic Roman statuette of an Emperor  - Augustus (I am a big 'I, Claudius' fan and particularly enjoyed Brian Blessed's portrayal of the Emperor who gave us the name for August)!

Above: A statue of the first Roman Emperor Augustus (r. 27 BC - 14 AD) as
a younger Octavian, this sculpted artwork dated to around 30 BC. It is located
in the Museo Capitolino of Rome, Italy. [Credit: Wikipedia.]

I was kinda drawn to this new project as I'm just reading John Williams's 'Augustus' - 'A brilliant and beautifully written novel in the tradition of Robert Graves’ I, Claudius, Augustus is a sweeping narrative that brings vividly to life a compelling cast of historical figures through their letters, dispatches, and memoirs.'

Modelling Challenge
This will be my third 3D printed bust and I've still got lots to learn about the technicalities of preparing and setting up 3D files for printing. One of the issues I'm trying to make sense of is how the orientation of the model file on the printing plate can effect the quality of the print. Additionally, I want to find out more about how supports can be set up to get the best results.

So, this time around I'm changing the orientation of the model on the bed AND trying out a different type of support (and number of supports)...

The bazzilions of 'legs' look rather disconcerting and I did worry that having so many supports might affect the quality of the print, what with all the contact points from all the supports. And as it trned out, I was right to worry...

The result looks bad, but in a way it is quite positive as well because I feel that I am getting a sense for how things work. The fact that I had a 'premonition' that there were going to be problems means that I might be getting better able to avoid them in the future (maybe). So, I'm not too down.

Another positive was that - as I had hoped - the unsupported front of the bust printed out perfectly...


And even though the back of the head was a bit of a mess, it was the back of the head AND after a bit of a clean up I could see that it might be fixable...

So I got out my MILLIPUT putty and had a bash at recreating the damaged hair. I had to use my imagination a bit but - as I said - it is on the back of the statuette so I wasn't too worried...


My 'hair' attempt is a little prominent so I shall give it a bit of a sand to help blend it back into the rest of the model. Even so, it does feel good that I can deal with problems like this wen they occur. I'll just carry on experimenting with my prints and try to get better and better at preparing my models so that they have the least amount of problems.

Here's the completed model, though I might add a small plinth to it later...

Saturday, 13 February 2021

When is a Kit Not a Kit?

 OK, this sorta has me scratching my head a bit. Is a multipart 3D model a kit?

The reason this is confusing me a little is that there seems to be a pretty distinct demarcation line in the modelling world between a 'kit' and a 3D printed model. But let me explain my quandry...

Busted!
It had to happen. So far my 3D printing adventures have been pretty much disaster free, that was until I took on something a little more complex and a little larger than my normal print models. As a history fan I was very taken by some of the classical statues and busts that are available over on the  THINGYVERSE 3D model repository so I - nervously - attempted a scaled down test of Emperor Claudius...

As you can see from the above photo of the finished print, everything when surprisingly well and I was very pleased with the quality of the result. So much so, in fact, that I was very keen to try another (though these are very long prints - around 9 hours or more for a 10cm high bust) and I decided I would do a series of classical busts.

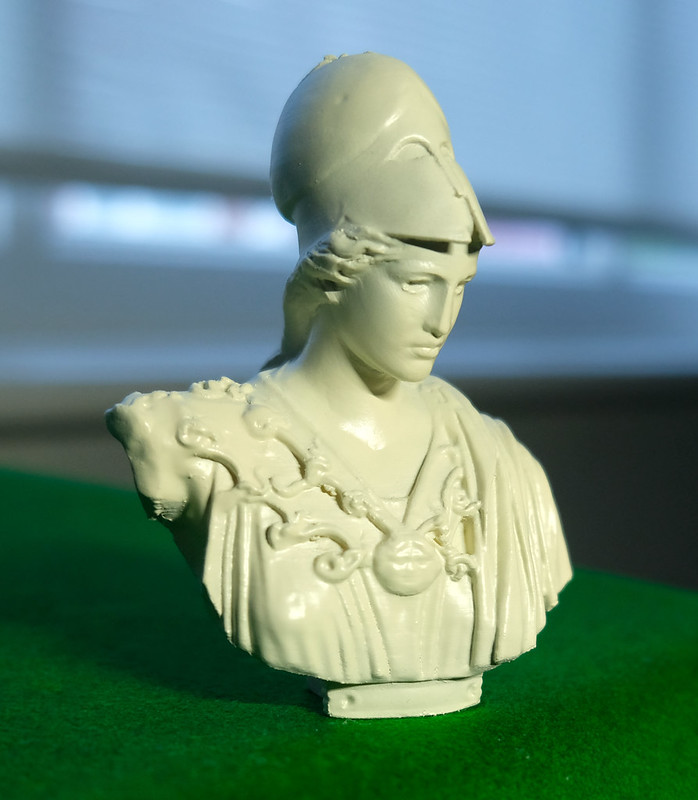
My next attempt was a miniature version of the famous Athena of Velletri (a copy of which is in the Louve) and I set the print settings up exactly as I did with my Claudius hoping that I would get the same excellent print results...Oh dear...


Much to my horror after 11 HOURS of printing - where everything seemed to be going just fine - I noticed that something wasn't quite right. And sure enough, when the print ended and I removed the network of supports that encased the print there was a prominent defect across the shoulders, neck and chin of the bust.

So, How Do I Recover from a Print Disaster?
As is obvious, I am new to the world of 3D printing, were I not new I might have the experience to have avoided such a frustrating failure. But, trawling some of the 3D printing forums I notice that I am not the only one who has these 'oopsies', it seems to be a common pitfall for all new printers.

However, here's where my background in plastic scale model making perhaps makes the difference...

I note that for many 3D print novices there seems to be this notion that the goal is to produce the 'perfect print' and - yes - that is a nice idea but when there are so many things that can go wrong having a strategy for when things go wrong seems only sensible. Too often I have seen examples where novice printers simply try, try and try again - always in search of that illusive golden print!

That was not my instinct, for me the kit makers philosophy of 'how can I save this model' kicked in. As much as anything else I just couldn't bear the idea of abandoning 11 hours 'work' and the 7 meters of PLA filament that had been used to make a model that was 75-80% perfect... What could I do to rectify the 15-20%.

Repairing a 3D Print
As I said, it seems to me (though this probably isn't completely true) that many 3D newbies are after perfection and some maybe don't have the modelling skills required to make pleasing repairs. It seemed quite natural to me - a modeller - to want to 'make good' the bad bits in my print. So, my first idea was to simply cut out some of the duff parts and replace them with nicely printed pieces...

Luckily doing this is made pretty easy using the 'slicer' software (Flashforge Flashprint) - this is a program that prepares 3D models by dissecting the model and translating it so that a 3D printer can make up the model from extruding (squirting out) layers of molten PLA filament! 😁

As it turned out, it was a little more complex than that (isn't it always with me). And, just to make things a little more interesting I decided to experiment with cutting up parts even further to see if I could get the best quality prints that I could...

To be honest, it just meant that I had to sit down and do some serious planning about how all the parts would come together... Like a kit!

I find it interesting that there seems to be some sort of perceived division between traditional kits and the new craft of 3D printing. There is a area of cross-over. In fact, looking into it further I discovered that people like me who have a small 3D printer often use the work-around of cutting up large prints into smaller components and then reassembling the output into a large model that they otherwise could not print. In other words, they make kits.

Parts made I then had to stick them together - using superglue, although I was not quite sure what was the best thing to use for PLA - and there were a few little gaps here and there that needed to be filled and smoothed away using fine white Milliput putty...

Originally my idea was to have the bust model I am doing as they came off the printer in plain white PLA. My Claudius figurine looked great, but with the obvious repairs in my Athens (as it turns out there is 'white' and then there's 'white) I rethought this idea. Actually, the starkness of the white PLA was a little to intense - even my wife and daughter commented that it was 'too much'. And so, I decided to give the model a coat of paint.

To help disguise and cracks I first primed Athena with some of the new filler/primer spray I have bought - this settles into any small lines - and then I use an off-white colour to give the bust a marble look. I was very pleased with the final outcome (especially as the Rust-Oleum Painter's Touch 'Ivory Beige' spray turned out to be a satin paint)...

Thursday, 3 September 2015

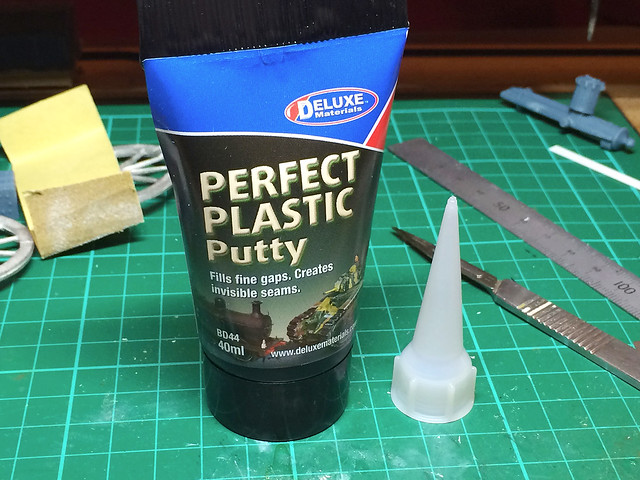
A better putty - Deluxe Materials

Well, it's been a while - due to several months of intense work stuff and then my summer vacation - but I've dusted off the workbench and I am off and going again...

A better way to fill seams and cracks in models
Since I started modelling again I have been using Milliput two-part putty to fill seam and repair cracks and other damage in my plastic models. Milliput is a great medium, it's easy to work with, is very malleable and it hardens extremely hard - the down side is that it takes up to 8 hours* to dry properly.

* After 3-4 hrs hardening, it needs same amount of time to fully cure, i.e. reach a level of settled hardness to allow for predictable sanding results.

Milliput is great to work with and hardens wonderfully, but is easy to sand or
file. It also produces a very smooth finish. But it does have one drawback...
As you can imagine this really makes a dent in your production time. Every repair or fill needed to be left overnight, and if you didn't get it right the first time you had to repeat the process all over again (another 8 hours wait). Very frustrating, so I have been looking for a faster drying alternative and I think I may have found one - Deluxe Material's 'Perfect Plastic Putty'.

Working with 'Perfect Plastic Putty'
A 40ml tube of Perfect Putty is about £5.39, and although thats hard to compare to what you get in a Milliput putty set I think it's a safe guess to say that you do actually get more material using Milliput. But that's not necessarily the most important thing.


My main concern is drying time, and also comparing the quality of the two putties. So I am trying the Perfect Putty out on a little project I am doing...

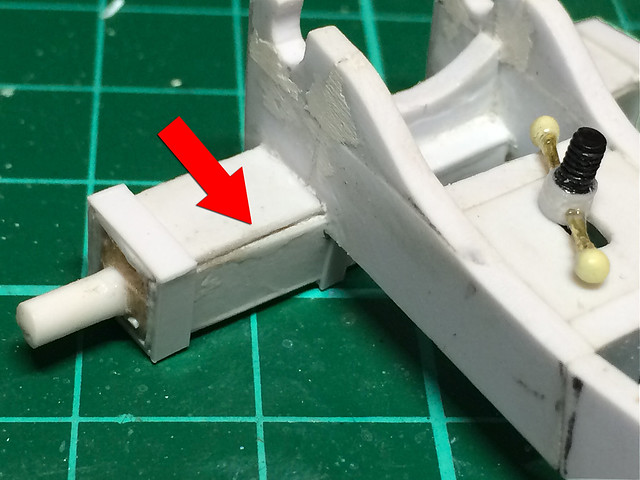
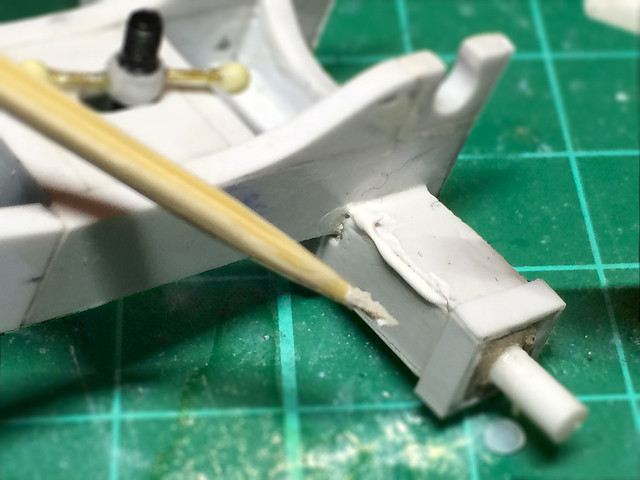
A 1/32 scratch built artillery carriage I'm working on, and unfortunately I have
a couple of gaps in the styrene framework I have made.
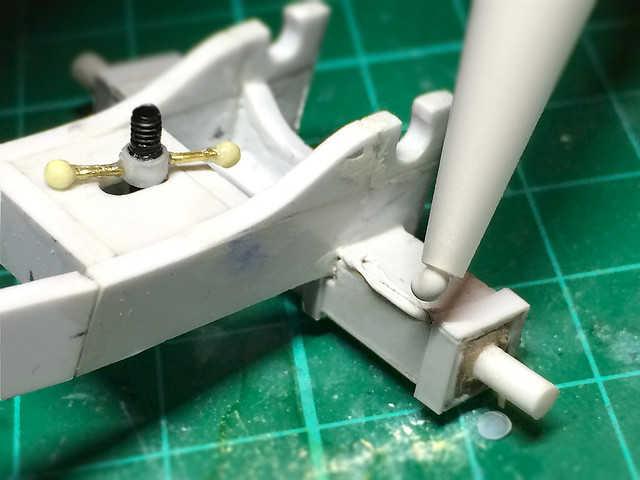
Perfect Plastic Putty looks like PVA glue, but it's a bit more like cake icing in
it's firmness (it isn't runny). It will stay where you place it.
First thing that's nice about Perfect Putty is that there is not mixing involved, it's ready to use straight out the tube. Mixing the Milliput can be a little tricky and messy sometimes - if you get the mix wrong it can effect how hard the Milliput drys. Another negative aspect of using Milliput is that you inevitably alway mix up too much (as you don't want to run out), this can lead to a bit of waste - this isn't the case with Perfect Putty.

Once applied you can start filling and smoothing out the putty. But bear in mind
that unlike Milliput it's a lot softer. You almost have to 'trowl' or skim it on like
plaster or Pollyfilla, then sand it smooth when dry.
Working with Perfect Putty once it's out the tube is relatively easy, although as a 'liquid' it's not quite as well behaved as a true putty (like Milliput) can be. It's a little smushy! It's reminds me a bit of Pollyfilla in that it has to be smeared onto the area you want to repair and the neatening up is mostly done once it is dry and you sand it smooth. With Milliput putty you can do a certain amount of smoothing off when it's still 'soft' - you can even smooth off soft Milliput with water (as you would a clay).

Which brings us to the most interesting property of a modelling putty (as far as I am concerned) - drying time. As I said, Milliput can take up to 8 hours to harden properly which isn't really convenient, and so my hope is that Perfect Putty speeds up the production time of modelling.

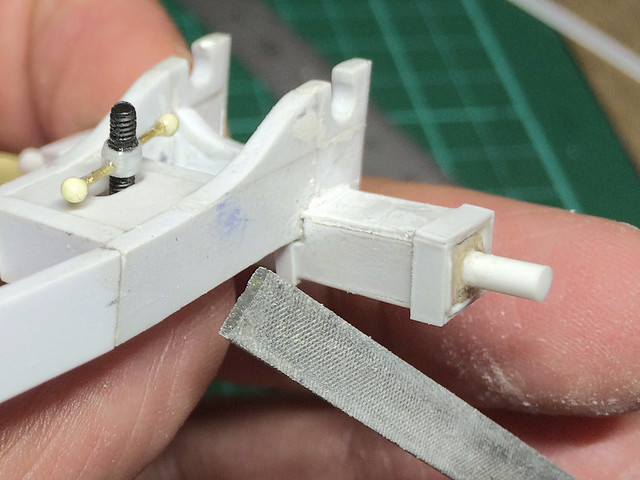
The good news is that my test application of Perfect Putty dried in 20 minutes! This is a huge difference and means that repairs can be done and you can get on with your modelling on the same day. Furthermore, the hardness of Perfect Putty was very good as well - maybe not as hard as Milliput but within half an hour I was sanding and filing my test repairs, that's amazing!

As good a repair as I get with Miliput, and even if it isn't perfect I can reapply
Perfect Putty and get on again within half and hour!
Conclusion - Perfect Putty perfect?
On the surface this little experiment seems to suggest that Perfect Putty is superior to Milliput. It does the job that I mostly use Milliput for - filling seams and cracks in plastic models - but does that mean it has made Milliput obsolete?

No. Perfect Putty is a good filler putty, a perfect filler putty in fact (as far as repairing indentations is concerned). But Milliput has other properties that make it an indispensable part of your modelling tool kit. Milliput has many of the same properties as a clay, it's mouldable, you can sculpt with it, you can use it to build up broken sections of an object. You can't do that with Perfect Putty as it's simply too 'sloppy'. (Edit: 'Sloppy' is perhaps not the right word, it is slightly firm - like cake decorating icing - but it is not runny.)

So, as with so many modelling materials, it is really a case of horses for courses. That said, Deluxe Material's Perfect Plastic Putty is a superb material for one of the most routine jobs in plastic scale modelling - filling gaps and seams. And it does what it does in double quick time! This will be a new standard item in my modelling toolbox. Very impressed.

Link to the UK web site for Deluxe Materials - makers of Perfect Plastic Putty.