Showing posts with label X-Ref: REV/144P47/0115. Show all posts

Saturday, 14 February 2015

Revell 1/144 P-47 Republic Thunderbolt - Debrief


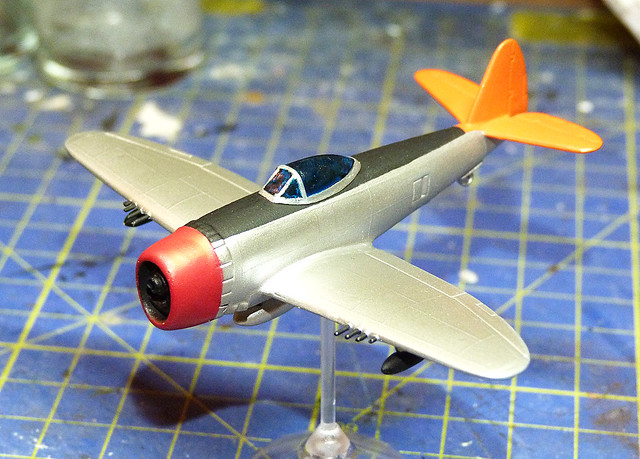
Finished! That was a LOT of time to do a little 1/144 scale 'easy build' kit. But experimental diversions aside what was the Revell Micro-Wings P-47 like to make?

I think the first thing to mention is this range of 1/144 Revell kits dates back to the 1970s and are re-issues of these venerable models. So, as you night expect, fit and quality aren't exactly up to today's expectations. To put it politely, component fit is somewhat vague.

Now, this might normally be something of an issue were it not for the fact that even at full price these little kits cost only £2.95 each. So, really, you have to give them some leeway in terms of value for money...These are not Eduard or Eastern Express 1/144 models - but neither is the price.

These little kits are ideal for beginners or even more experienced modellers who want to try out new techniques without ruining a full-sized and full-priced model. You just have to be aware that some amount of filling and sanding will be required if you want to complete these models with any degree of real satisfaction.
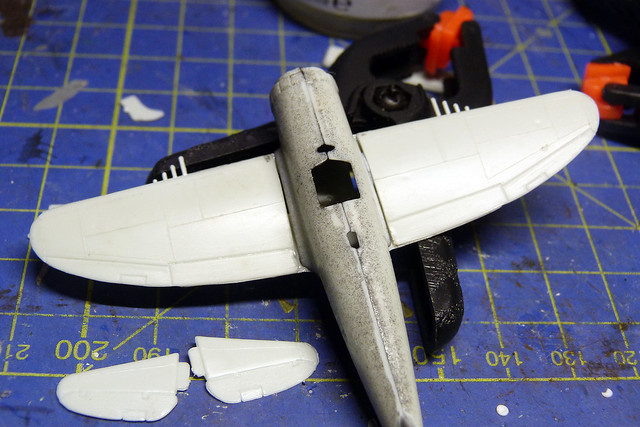

There are quite a few gaps in seams and an amount of flash to have to clean up. This is a little annoying as part of the whole premise behind these models is ease and quickness of completion. Even the most undemanding beginner will find some of the ill-fitting parts annoying.

Another frustrating aspect of these kits is that they seem to be designed *only* to be made with the landing gear down. This fits in with the lack of a pilot figure, as if the plane is meant to be parked on a runway and yet Revell supplies a 'in-flight' stand with the kit!

If - like me - you want to make the plane as an 'in flight' model you will have to modify the undercarriage arrangement and think about what you will do with the canopy...
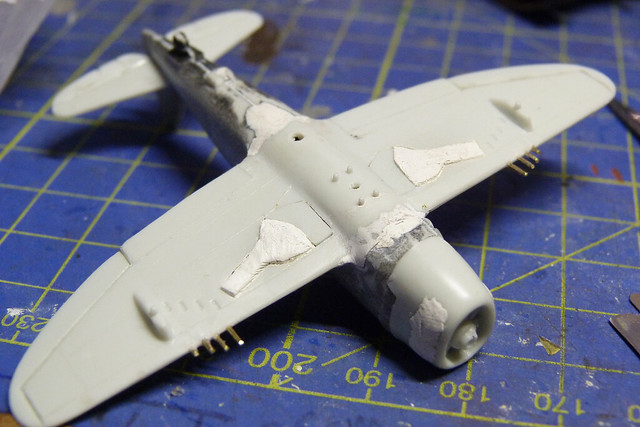

With no cockpit detail of pilot your choice of modelling these planes in flying mode means they would look a little strange - I mean, who's flying the darn thing?

Anyway, this conundrum aside for a moment - let's talk about accuracy...
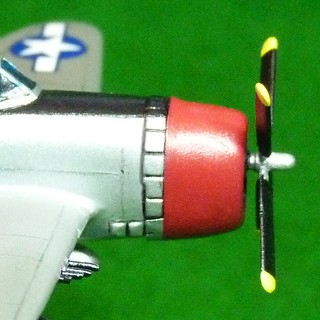
Even though - at just 1/144 scale - I suppose 'something has to go' by way of detail and bearing in mind these are not premium priced precision scale models you can't moan too much at some inaccuracies. Overall what you get is a small representation of a historic aeroplane that resembles the original sufficiently to satisfy the complete beginner. As these are the intended consumers for this range then I guess you could say 'job done' Revell.

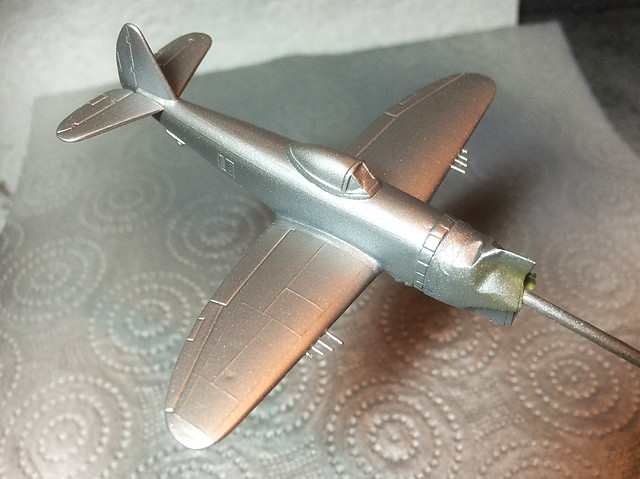
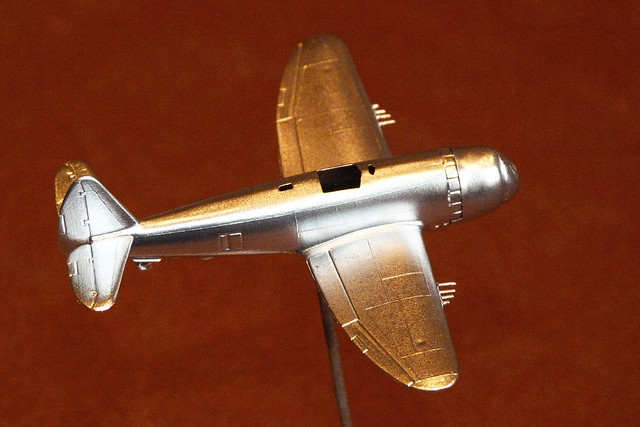
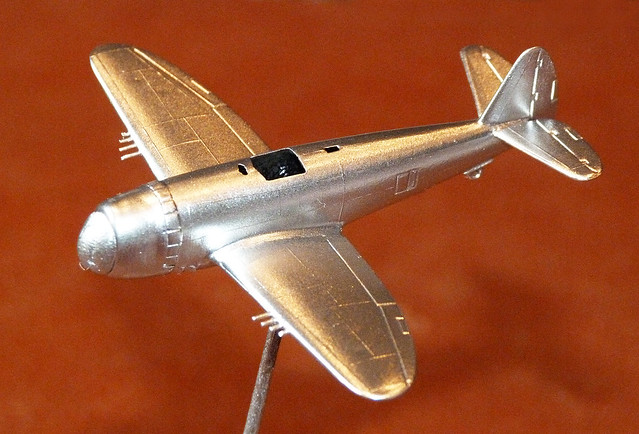
Left: Perhaps the biggest fault in the Revell model is the poor shape of the engine cowl.

From my point of view the three issues I would highlight are the mis-shaped engine cowl, the abysmal propeller and - least serious - the raised panel lines. In particular, as the P-47's 'nose' is one of it's notable features the fact that the shape is incorrect was a disappointment - it's just slightly out, but it niggled me.
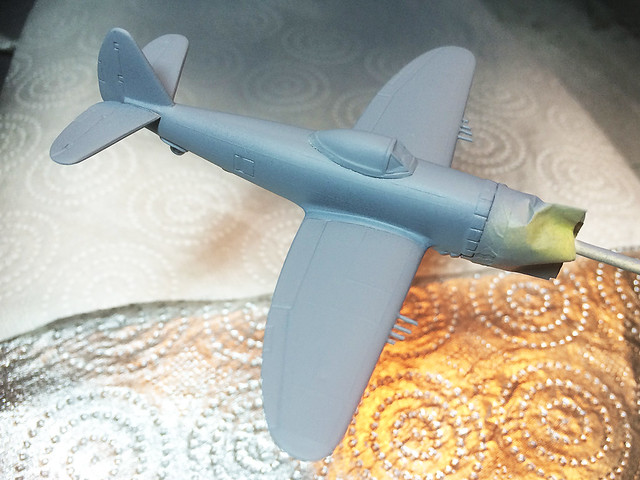

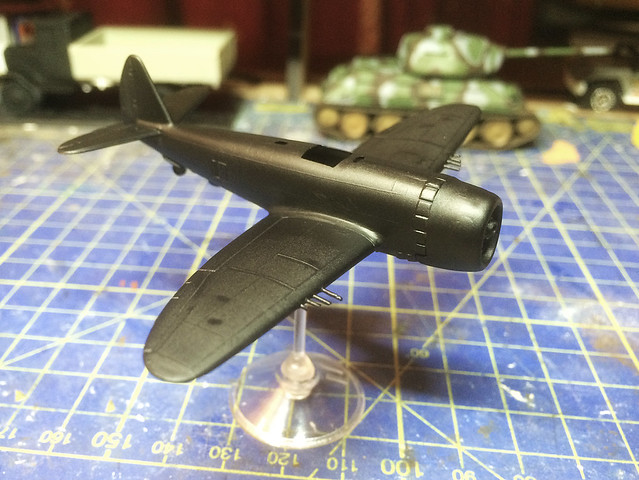
Having filled, sanded, modified and corrected the P-47 actually didn't look too bad once the base primer was applied. In the end I decided to paint the canopy, thus disguising the lack of a pilot!

Which brings up to the paint scheme...

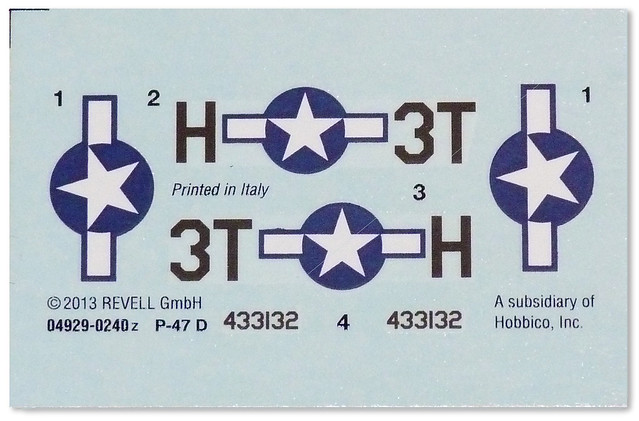
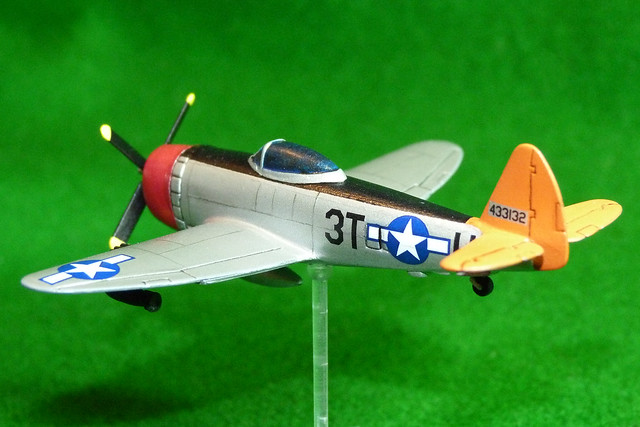
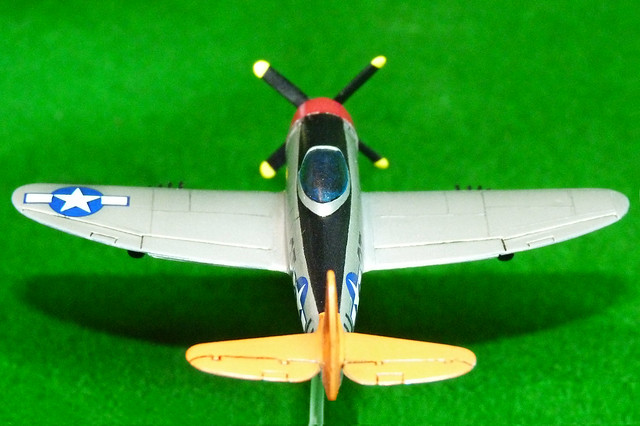
Revell just supplies a single colour/decal scheme for this Thunderbolt - it's pretty enough, though, and simple for the beginner to handle. Best of all the decals are of good quality and are printed well, in particular I was very please with how opaque the white areas were in the decals.
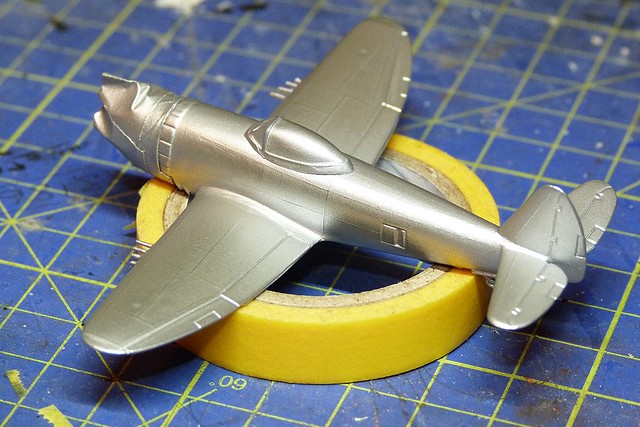

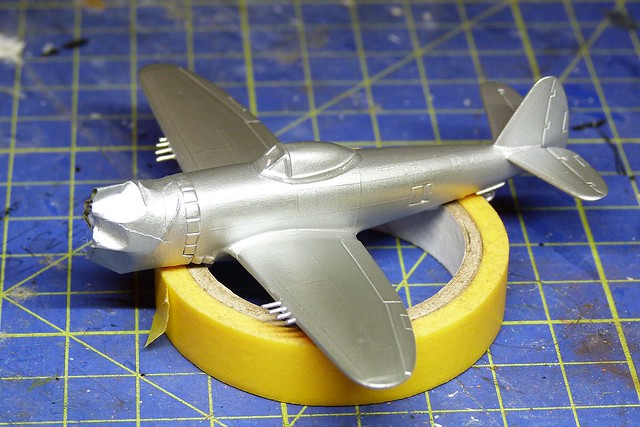
I laid down a coat of Humbrol's Aluminium Metalcote spray, this went on OK though - as an aerosol can paint - was quite textured and not as highly reflective as some of the specialist modelling metallic effects, like Alclad. But - again - for a beginner this is perhaps the easiest and cheapest way to get a bare metal finish on your kit.
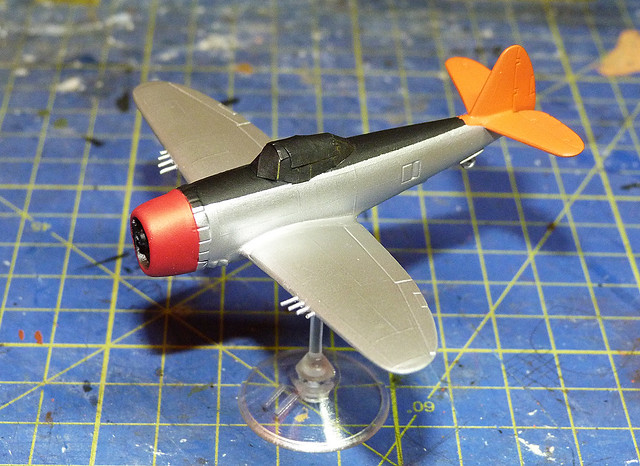

As I said, the colour scheme is nice and simple for the beginner, large colour blocks that are easily masked for spraying or brush painting. Once these are done a gloss varnish will make the application of the decals easy.

And that, as they say, is about that. Easy really - an uncomplicated project (which I managed to make complicated - but that's me) and in the end a satisfactorily attractive end product.

(I didn't really bother with weathering - I just highlighted some of the panel lines by accentuating them with a graphite pencil. I also pin-washed the flaps and elevators. That's all.) 

I find myself actually inclined to recommend these Revell kits. They are fun and useful models, both for the beginner and more experience modeller, as they have something to offer either level of model-maker. Simplicity for beginner and a cheap and handy testbed for the more ambitious or meticulous modeller.

Friday, 13 February 2015

Revell 1/144 P-47 Republic Thunderbolt - Pt. 7

[Sub-title: Humbrol Polished Aluminium Metalcote experiment.]

Getting there (finally)! I've applied the decals which is always a nice stage to get to - it's like you've reached the summit of a hill and now it's the easy coasting to the end of the journey.

The Revell decals are very nice and slid off the backing paper very easily and lay on the surface without tearing. The colour was rich and - importantly - the white was nice and opaque. I used Microscale MicroSet to help attach the decals and conform to the raised panel lines of the kit.


Obviously there aren't a lot of decals and it didn't take long to apply them. The main problem I had with them - as usual - was getting them to sit straight, it takes me a while to position decals in what I think is 'level'. It's one of those things that's a matter of personal perspective (literally) and unfortunately, sometimes, when I look at decals I thought were straight the next day they don't appear as straight or level as I thought I had them!

Still, MicroSet is just as good at lifting decals for repositioning again as it is for adhering decals to the surface of your model. MicroSol, on the other hand - while softening decals to make them conform to deep ridges or lines in your model - does stick decals down more permanently or softens decals so much that they are in danger of disintegrating if you try to lift them off again (so if using MicoSol try hard to get it right the first time)!

And so...I'll give the model another light coat of Humbrol's acrylic Satin Varnish spray, just to help settle the decals onto the surface. Once it's dry I can think about pin-washing and weathering. Also, I'll starting to think about the dreadful propeller and what to do with it.

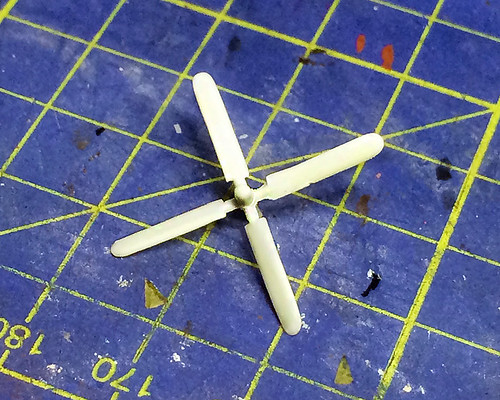
The prop is - to be honest - the worst part of the kit. It's so deformed and flash ridden that it's hardly recognisable as the P-47's distinctive 'paddle prop'.

The Thunderbolt series used - I believe - three different designs of prop and guess what? Yep, the Revell P-47 prop doesn't look exactly like any one of them! It vaguely resembles one of the Curtis designed 'paddle' props but the prop hub suggests the Hamilton prop - If I had to choose (and bearing in mind this is a P-47 'D' model) I'd say this was a badly done Curtis type prop.

I was very tempted to dispose of this part and instead make a fake 'rotating' prop out of a disc of transparent plastic (as this model is supposed to be in flight). I still may, it's - excuse the pun - 'up in the air' at the moment!

Bit of a shoddy 'snap' of the painted prop - painting has not
improved the look of it all that much!
Next: Last leg - as I decide how much post-production work to do (pin-washing, weathering, etc). Oh, and what to do about that darned prop!

Sunday, 8 February 2015

Revell 1/144 P-47 Republic Thunderbolt - Pt. 6

[Sub-title: Humbrol Polished Aluminium Metalcote experiment.]

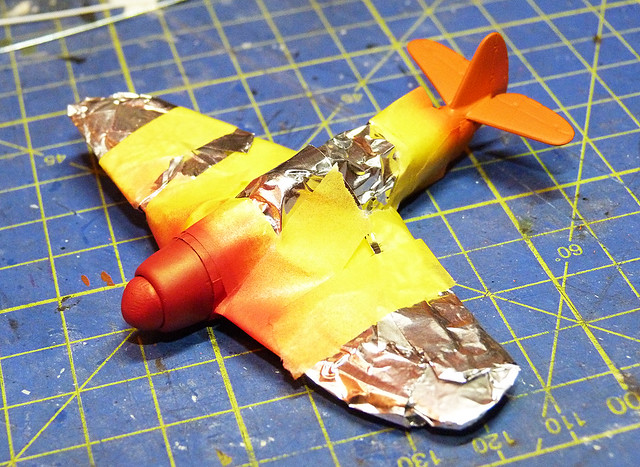
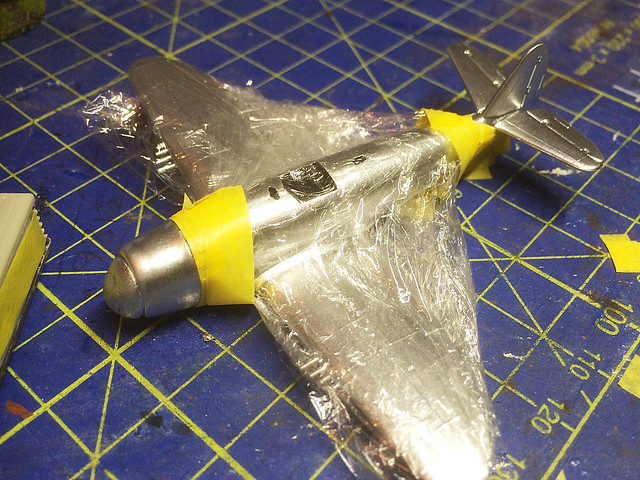
I have been using kitchen cling-film as a masking medium - it wraps round awkward shapes nicely and is self-adhesive making the process easy. However, after my bad experience with it during my Plati-kote experiment I have turned to an alternative material for masking...Kitchen tin-foil (so didn't go too far from the kitchen then)!


Like cling-film kitchen foil wraps around odd-shaped objects easily and quickly. Important as I find masking a tedious task. I just have to tape down the foil to hold it in place, though obviously on bigger models I wouldn't have to mask the whole model!

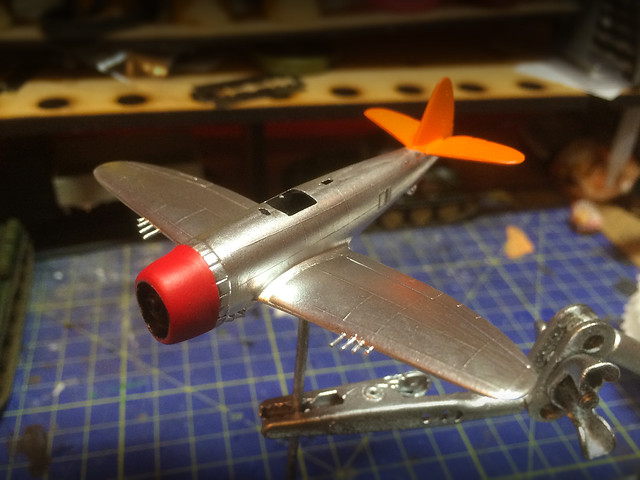
Anyway, we're back on track - my P-47 has an acceptable basic paint scheme...


It's amusing to think that if I hadn't been messing around experimenting with different paints and techniques I could have finished this kit in just a couple of days, instead of the drawn out saga it's ended up being. (I intend to test out this theory once I have completed this project as I bought several of the Revell MicroWings kits while they were on offer.)

Anyway, at this point of the modelling process I would be thinking of applying a coat of varnish - satin or gloss - of maybe even Pledge Klear prior to decaling. But how will Metalcote react to a coat of varnish?

According to what I have read Metalcote needs to be varnished as it drys with a light texture - like a matt coat - and so will have problems (like 'silvering') when the decals are applied. But this idea caused me some concern as I remember what happened when I tried using varnish during my earlier Plasti-kote experiment - it completely tarnished the shiny coat and left it a dull matt silver.

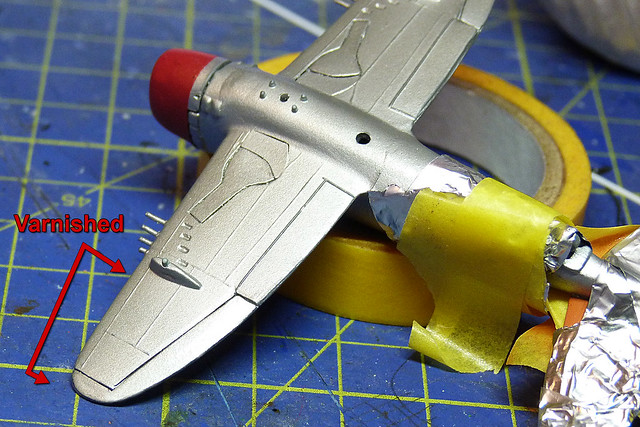
Therefore, I decided to try out a small area on the lower wing as a test patch for glossing...

What am I looking at? Well, the fact you can't see anythings is actually a good
thing! The varnish hasn't discoloured the Metalcote silver. (Oh, and you can see
the bodge I made of the retracted undercarriage - doesn't look too bad.)
As you can see from the above picture Humbrol Gloss Varnish acrylic sprayed over Humbrol Aluminium Metalcote doesn't have a detrimental affect on the metallic coat at all. Super!

...So it's on with the next step which is the painting of the canopy.

I wanted to try a dark canopy - rather than a sky-blue one which some people prefer - and so started with a matt black base. Onto this I started painting on layers of deep blue artist's ink and leaving it to dry after each layer until I got a deep rich and translucent royal blue effect. Onto this I added a wash of white ink, and then another deep blue coat on top of this...


I'll let this coat dry again and have a further play with the canopy scheme as I think I can improve it. Once I'm happy with that it will be time to gloss varnish the whole model ready to add the decals.

Friday, 6 February 2015

Revell 1/144 P-47 Republic Thunderbolt - Pt. 5

[Sub-title: Humbrol Polished Aluminium Metalcote experiment.]

Well, I've polished up the Humbrol Metalcote and it looks OK. See what you think...


It's not a high reflection shine like the Plasti-kote was, but there again this actually worked!

Working with Humbrol Metalcote...
I followed the Humbrol Metacote video tutorial almost exactly - as far as I could tell - but I did not get the same results.

The video shows a result where the sample model did end up with a highly reflective metal shine. As you can see mine was more of a subdued shine, which is quite nice but not quite as good as the Humbrol example.

I found that my initial - perhaps overly cautious - light sprays of the Metalcote did not seem to be thick enough to stand up to the vigorous polish needed to make the paint really shine. So, I took a chance and repeated the process by adding a second round of sprayed coats. (The Humbrol video showed a single round of spray passes - that was a couple of light passes in one direction, covering the model, which were left to dry for half and hour, then followed by another series of light passes in a cross-wise direction. The model was then left to dry over night.)

By the way - don't be tempted to try using a Dremel, or similar hobby tool, to do the polishing. Even if - like me - you have what you think is the appropriate 'soft' polishing discs. My brother was concerned that the high-rev of the Dremel might actually 'melt' or damage the plastic of the kit, but it didn't - what it did do was over-polish and tarnish the Metalcote. It actually turned the Humbrol paint black! I'm afraid this is a job for a soft cloth and plenty of elbow grease.

After leaving my second model over-night again I started the hand-polishing and this time I did get more of a shine. The cloth does show that the polishing does remove a small amount of the paint which is why I reckon giving a double coat helps the process.


In fact, I am tempted to experiment further and give a scrap piece of plastic a triple coat to see what happens. My theory is that the hardier (i.e. 'thicker') the Metalcote application the more aggressively you can polish the paint without being in danger of completely removing the metallic paint. Worth a try.

What next?
Right, back to the model. I'm actually quite please with the actual modelling progress with this - even though all this experimentation has prolonged the actual time it has taken to make this little kit.

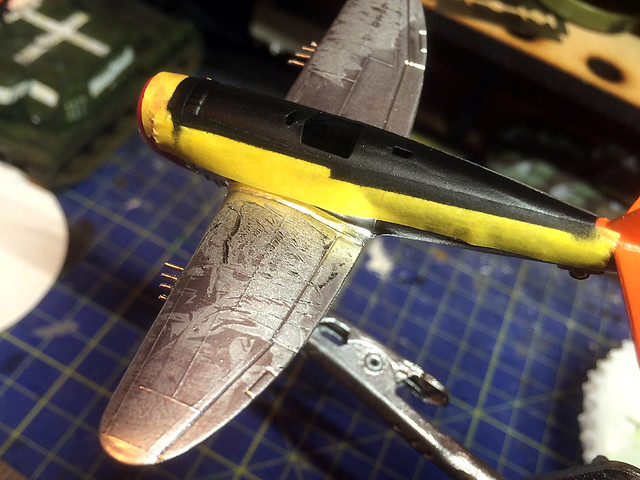
So, now I have to add the colour accents to the model; the red engine cowl, the orange tail and the black anti-dazzle panel on the top of the fuselage.

I have to start thinking about panel shading and 'weathering'. Do I panel shade? (In two minds.)

We shall see in part 6 of this extended experiment.

Sunday, 1 February 2015

Revell 1/144 P-47 Republic Thunderbolt - Pt. 4

[Sub-title: Humbrol Polished Aluminium Metalcote experiment.]

Not looking very nice at the moment my P-47 has had it's disastrous first paint
coat stripped back to the black primer coat. (I left the tail as that looked OK.)
Having had a bit of a 'time out' to lick my wounds I had a bit of a think and did some more research. My main reason for looking at something cheap and easily available like Plasti-kote was that all the other means of achieving a polished reflective metal paint coat seemed to be specialist modelling mediums that were fairly expensive, complicated to apply or hard to get hold of. But as the Plasti-kote was an abysmal 'fail' it was back to the drawing board.

Quite by chance I came across a product by Humbrol - of all people - called 'Metalcote' that seemed to fit the bill as being cheap, easy to use (just a couple of coats of spray) and wonders necver cease as it was available in one of my local stores. So it would seem churlish not to give the stuff a go!

So here we are again, but with a less than pristine base coat (I tried my best to clean up the weary P-47 test model ). The Humbrol Metalcote tutorial that I found suggested that you prime with grey, so I decided to give that a go. I know from experience that a grey primer does help highlight any flaws in your model preparation and although I had already primed (with black) I wanted to follow the Humbrol instructions exactly. Here's the video, it's quite informative...


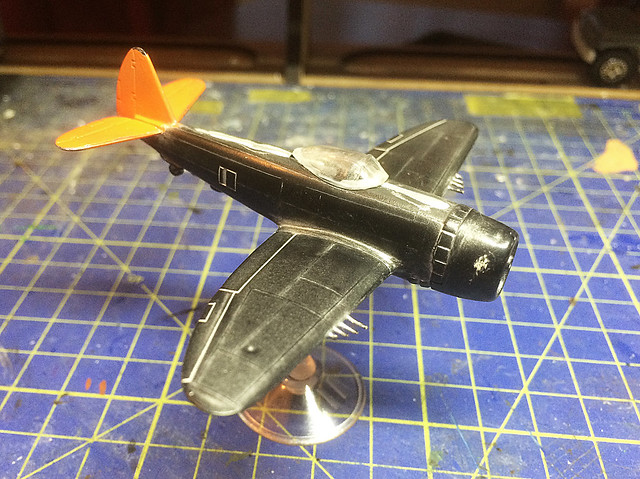
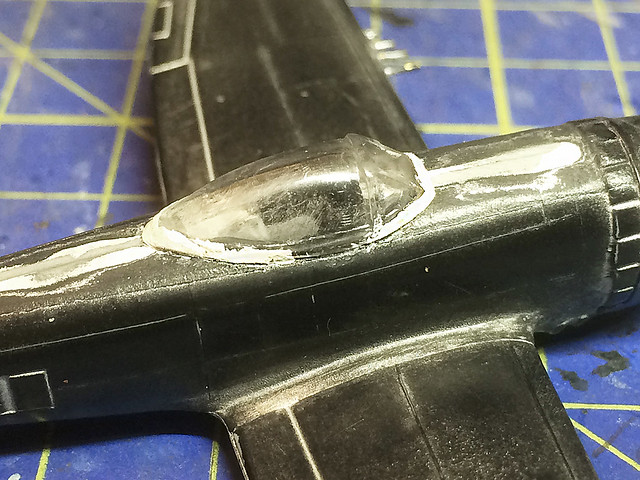
I went as far as to buy the proper Humbrol grey primer spray used in the video. I masked off the orange tail - as that looked alright - and I used this opportunity to attach the canopy this time. I have decided to spray the plane and canopy all in one and then paint the canopy. I have to say that the Revell canopy wasn't the best fit by any means and I had to resort to some filling to get the windshield to fit flush with the fuselage (but even so it was a bit of a bodge).


I'm a little unsure just how to paint the canopy - in the style of war gaming aircraft - as I don't have much experience in this technique. Most seem to go for a plain sky blue scheme, some others paint the canopy with a nicely shaded pattern with white at the edges to deep blue in the middle, or variations thereof...

Example of small model with a painted and shaded canopy scheme.
Credit: Rust and the City Blog
So this part will be a sort of experiment within an experiment!

Anyway, onwards. In the end I decided to strip off the orange paint on the tail as well as I'm trying to make a clean start of things. The Humbrol Grey Acrylic Primer spray goes on very nicely, but even so I was nervous that any of the previous paint layers would spoil the new coat...


Not bad! Very happy with that, it does give me a nice smooth base for further coats and I was glad to see that my cleaning and sanding of the previous paint had not adversely affected this next stage. There were no noticeable blemishes or 'bumps' where bits of stubborn paint remained.

A good start. But now onto the Humbrol Metalcote. I watched the Humbrol tutorial several times and tried my best to follow the techniques shown in the video. Spraying from a can is always a bit of a lottery and quality of coverage can be effected by many factors; whether the can is new, whether the spray nozzle is clean, the distance at which you spray and the speed and regularity with which you spay.

Spray too close and the coat will be too thick (the Humbrol video recommends a distance of 20cm), spraying too long in one area has the same affect. Use an old can or a can with a old or dirty nozzle and you might get 'splutter'. A steady speed and spray pattern can also help produce a better coat - as commonly known, a couple of thinner coats is better than one thick coat...


I followed the spray pattern shown in the Humbrol video, two light passes over the model in one direction - allow this coat to dry for 30 minutes or so then spray another two light passes over the model in a cross-wise direction (so twice 'up and down' followed by twice 'left to right' for example).

It didn't look half bad, certainly a much better quality coverage than the Plasti-kote Bright Metallic paint that I first tried. Not too thick and nice and smooth.

At this point the Humbrol Metalcote is a dull silver but with flecks of reflective particles all over.

Next: Hopefully in the final part of my experiments I will be buffing up the Humbrol paint to produce a polished aluminium effect. Fingers crossed!

Sunday, 25 January 2015

Revell 1/144 P-47 Republic Thunderbolt - Pt. 3

[Sub-title: Plasti-Kote experiment No. 2]

Well, here we are, part three of my Plasti-kote P-47 experiment. And despite the disappointment that my Plasti-kote bright metal finish failed to materialise in the hoped for quality I plod on as there are still a few things to learn about this paint.

This time I am looking at masking and how coats of paint applied on top of the Plasti-kote

I was a little worried about masking the Plasti-kote bright metallic as it seemed susceptible to marking and in my first experiment with the toy plane it actually peeled off when I removed the masking tape. However, I am fairly confident that was something to do with the cheap greasy plastic of the toy and won't happen with paint applied to good quality plastic.

But just in case I used as little masking tape as I could and also used my best quality Tamiya modelling masking tape, which is low-tack.

As usual I use proper masking tape for the actual masking and protect all other
areas with cling-film. The cling-film also helps protects the already painted areas.
I did have a bit of indecision about whether to mask all non-silver areas before spraying the Plasti-kote. My thinking was that as the Plasti-kote is a gloss that I might be better leaving the black primer exposed for the other paint sections - like the red engine cowl and tail - as I wasn't sure how well water-based acrylics would take to the Plasti-kote. But my initial experiment with the toy plane seemed to belay my fears and show that with care acrylics could be used onto of the bright metallic.

Humbrol spray paints have no problem with the Plasti-kote, but air-brushing on acrylics has to be done with some care. You have to get you paint to thinners mix right - in the case of my Vallejo Model Color acrylics this meant I had to add as little water to the mix as I could.

Too much water caused the paint to bead on the surface of the Plasti-kote gloss. The 'neater' the paint mix the better it adhered to the gloss when sprayed onto it. Even so I still had to do the spaying in stages - first spraying a a very thing neat mix lightly to create a base for further light coats. In this way I built up my paint coat onto the Plasti-kote to the desired consistency.


In fact I used the Vallejo Model Colour with only one or two drops of water - just so it would go through my air-brush without choking or splattering. I didn't try Vallejo Model Air paint - which is pre-thinned for airbrushing so can't say how that would fair.

The good news was - with much relief - that when I removed the masking take none of the Plasti-kote paint layer peeled off. There was, however, a little discolouration and marking here and there due to the masking tape gum. This looked like small smudges and dulled the bright metallic shine and could not be 'polished' up again - though I didn't want to rub the Plasti-kote too aggressively.

Experiment over!
Drat! It's a big fat 'fail' for Plasti-kote Bright Metallic I'm afraid (it fell at the final hurdel)!

Plasti-kote Bright Metallic paint does not like cling-film!
Just when I thought I was going to pull something marginally positive out of this experiment and Plasti-kote turned around and bit me in the ass. Basically the peeling I mentioned that occurred with the first experiment I did was NOT a fluke caused by the cheap plastic of the model I used. Plasti-kote peels big time no matter what preparation...

My guess is that smooth plastic is not a medium that Plasti-kote's Bright Metallic is compatible with. Looking at the Plasti-kote web site it gives a list of materials you can use this paint with and they all appear to be - to one degree or other - porous. The Bright Metallic seems to need a slightly textured surface to adhere to properly.

Of all things it was the kitchen cling-film that caused the peeling you see in the above picture. The sticky plastic seems to have some sort of chemical reaction with the Plasti-kote and despite cling-film not being all that sticky it lifts the metallic paint up like it was designed specifically to do just that!

A beginner's mistake - trying to spray over another coat of Plati-kote in the vain
hope it would cover up the flaked paintwork showed why multiple coats of this
paint are not a good idea! Still, the area where the masking tape took off the red
engine cover paint looks a nice effect! LOL
I'm gutted in a way as it has completely spoiled the model - I suppose I could try cleaning the paint off the wing but as I have found out what I wanted to about the plaintive unsuitability of Plasti-kote's Bright Metallic spray as a modelling medium I hardly feel I want to. It would just be a bodge-up job at best. (But I may feel different once I have slept on it.)

Elsewhere, the masking tape also lifted some flecks of the metallic paint and otherwise discoloured other areas. It was like Plasti-kote was just bidding it's time waiting to show it's flaws right at the last minute!

This seems a lot of work just to find out what others have already said, that Plasti-kote Bright Metallic paint is not for serious modellers. But at least now I know exactly why (and you do to).

Next: Not sure if there will be a next - at least it was just one Pound (£) I wasted! May do a de-brief of what I think of the Revell Micro-Wings P-47 though.

Revell 1/144 P-47 Republic Thunderbolt - Pt. 2

[Sub-title: Plasti-Kote experiment No. 2]

Right, it's crunch time...

But before I get to the nerve-wracking Plasti-kote spraying I have to lay down the primer coat. I'm sticking with Halford's enamel car touch up spray, I think it does a satisfactory job (I haven't tried a specialist primer which you apply with an airbrush yet, I'll use up the last of the Halford's first).


Black does look nice doesn't it? (Note to myself: Must do a night fighter at some point! Airfix has just released a new tooling of it's 1/72 Boulton Paul Defiant. Hmmmm...)

Anyway, one little quandary was the canopy. As mentioned in the initial post, there is no pilot or cockpit detail and as I want this model 'in flight' I am going to disguise this fact by painting a faux-canopy (in war-game fashion). Not having done this before I wasn't sure at what point to affix the canopy to the plane - thinking about it now I wish I had attached it before priming so that it was a flush and integral component. Ah, well - you live and learn!

The Plasti-kote coat! (Du-du-duuuuh!)
Now, one thing - I'm having a right kerfuffle photographing 'chrome' finished. I really should set ip my mini-studio lighting, but I can't be bothered raking through our attic to find them. So, the following photos are a little hit and miss.

Well, here we go...Fingers crossed...

First, a bit darker (high flash) to bring out the reflections...
And then lighter to show the texture.
Now, I'm a little disappointed and mildly pleased at the same time (but more disappointed).

In my first test I mentioned that I thought that the best way to achive a smooth, high reflection finish with Plasti-kote Brilliant metalic was to spray one, fast pass and hope for the best coverage (just touching up any small imperfections and spotty coverage with a light focused spray). This time however - as this is all about experimentation - I decided to gamble and follow Plasti-kote's own suggestions about a second coat (thereby ensuring total coverage).

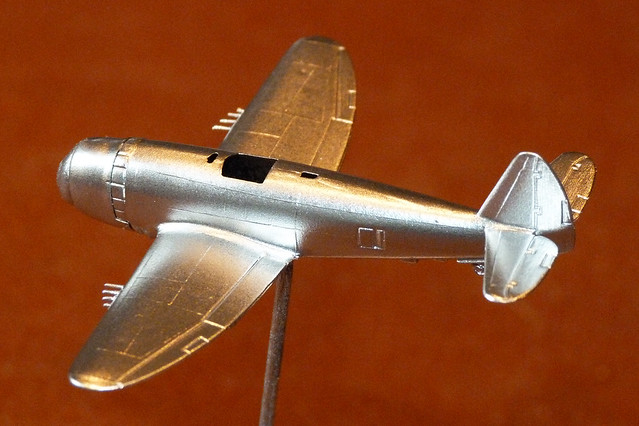
I had read that additional spray coats with this sort of bright metallic paint resulted in subsequently duller finishes. This seems to be true - although the 2-coat finish isn't all that bad, it's not 'chrome' but rather what I would call 'polished steel'.

Actually, there is rather a nice effect if you look close - it is like a machine polished surface...

If I were doing a 1/72 model of Lindbergh's 'Spirit of St. Louis' this might be a nice effect!
But...There is also a less desirable 'speckling'. And remember, you cannot 'smooth out' this unwanted texture by adding a gloss varnish - you cannot varnish Plasti-kote Bright Metallic.

Obviously, at a distance the finish looks acceptable, certainly for a war-game modeller who might simply want the look of high-polish quickly. But for the (ambitious) display modeller this quality of finish would be totally unacceptable.

In short, my 'one pass' theory is probably correct - but trying to get a good coverage with just one coat is, as I mentioned after experiment No. 1, down to pure luck (which isn't what you really want to rely on as a modeller).

Conclusion
OK. I'll put this one down as a 'fail'. Maybe a bit harsh and not a total loss as this was an experiment after all, but the texture just doesn't work for me I'm afraid.


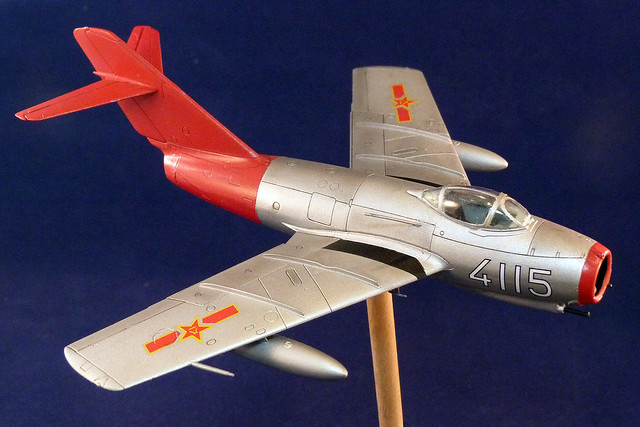
Looking back at my Hobby Boss Mig-15 - which I did with just normal Humbrol acrylic silver spray - I think I preferred the duller but smoother silver finish...


Amusingly - re-reading my Mig-15 blog post - I do mention that I didn't enjoy working with a silver finish. Little has changed it seems.

But, I think my mind is made up that if I do want a professional looking high reflection and smooth finish and it's a display model it really is worth going the extra yard and using one of the specialist modelling metal finish mediums, like Alcad. Horses for courses.

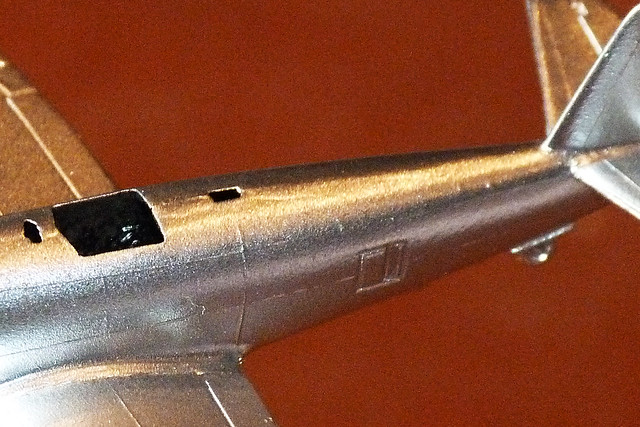
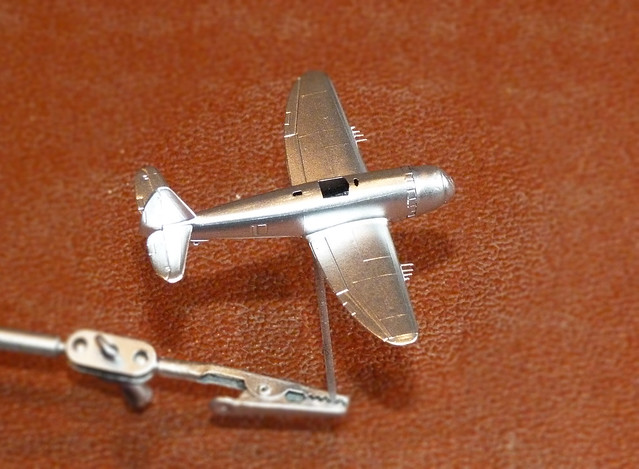
At a distance look...At this distance the spotty texture isn't as obvious. But it's still there!
What next?
Well, naturally, I want to finish the P-47 model off, and there are still some things to learn about Plasti-kote - like how does it handle masking?

So, in the third and final part of this experiment I will adding the remaining areas of colour, the canopy and the decals.

Saturday, 24 January 2015

Revell 1/144 P-47 Republic Thunderbolt - Pt. 1

[Sub-title: Plasti-Kote experiment No. 2]


My initial experiments with Plasti-kote's Brilliant Metallic spray paint convinced me there was a certain merit to the paint. Unfortunately the subject that I used for the tests was a rather cheap and nasty toy plane, the surfaces of which prevented me from getting a clear idea about just how smooth the Plasti-kote could be applied. So I decided a second test was warranted.

I wanted to use a proper injection-moulded plastic kit as the guinea pig this time, but - of course - still didn't want to go to the bother and expense of using one with which I has some sort of emotional or financial investment. I wanted something cheap and cheerful that I wouldn't be too concerned about if something went wrong.

Not the scheme included in the Revell kit instructions I'm afraid, but the only colour reference
I could find of a P-47 of the US 9th Air Force. Picture source: Wings Pallette.
As it happens a local store was selling an enormous pile of Revell Micro-Wings models - an over-stock I presume - at the knock down price of just £1 a piece. And although these are diminutive 1/144 scale aircraft I reckoned they would be simple, quick and easy test beds for painting practise.

I picked out one particular model which had a bare-metal scheme, the Republic P-47 Thunderbolt or 'Jug' as it was nicknamed by it's pilots. (Not a mirror-finish, I know, but it was the closest they did.)

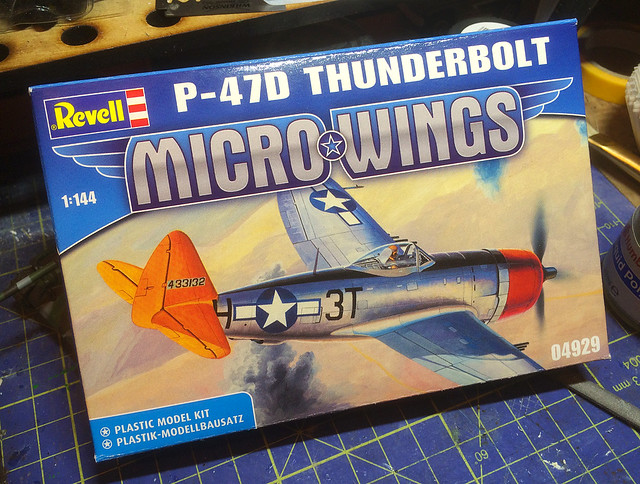
The Revell 'Micro-Wings' 1/144 scale P-47 Thunderbolt
I enjoyed making the two 'micro-scale' scale aircraft I have done already - an Eduard Me109 and a Tamiya IL-28 Beagle - so I was curious to see just what kind of quality the Revell 'Micro-Wings' kits could be. To be honest, for a quid I wasn't expecting much!

Left: The contents of the 1/144 Revell P-47 kit. Just one main sprue with 16 parts. Not a complex build then! Picture credit: www.ipmsdeutschland.de/ (As I forgot to take a snap of before I cracked on with construction!)

I believe these mini-kits are aimed at the younger modeller/collector as they are quite simplified. The exterior detail is cursory and there is no interior detail at all - no cockpit, no seat and no pilot. Still that was ideal for my purposes, simpler the better.

By default Revell guides you towards building the aircraft with the undercarriage down and yet supplies you with an ‘in flight’ stand. I wanted to model this fighter ‘in flight’ so the stand is handy but that does mean you will have to modify the under-carriage (more on that later).

And that is all there is to it!
A related issue, which bears considering before you jump into the build, is the lack of a pilot. Again, if you decide to build the aircraft ‘in flight’ the absence of a pilot will look a little strange. Therefore, you will have to decide whether to make your own tiny pilot (a pain) or paint the canopy so that it is not transparent. Some like a ‘display canopy’ (a painted windscreen) and it is a convention in war-gaming and as this has no impact on the purpose of the kit for me I decided to paint mine.

There is just one set of decals and one associated colour scheme (printed on the front of the box). The monochrome printed instructions advise you on the specifics of this scheme and decal layout. Again, this is sort of irrelevant to me as this will be a quick build and I’m not bothered about representing a specific type or unit.

P-47D-30-RA, “3T-H”, 22nd Fighter Squadron - 36th Fighter Group, 9th US Air Force, 1944
Construction - the nitty (and very) gritty
I could tell - even while still on the sprue - that the quality of the moulding was ‘vague’. There was some flash and - unfortunately - a few ‘sink holes’ generated by the moulding process. I immediately acknowledged - much to my chagrin - that there would have to be some filling.

I know this is just an experimental project and build quality is of secondary importance, but I just can’t bring myself to bodge together a rickety and sloppy model.

The dirty fuselage is a result of spraying the interior black, in case I use the canopy as is.
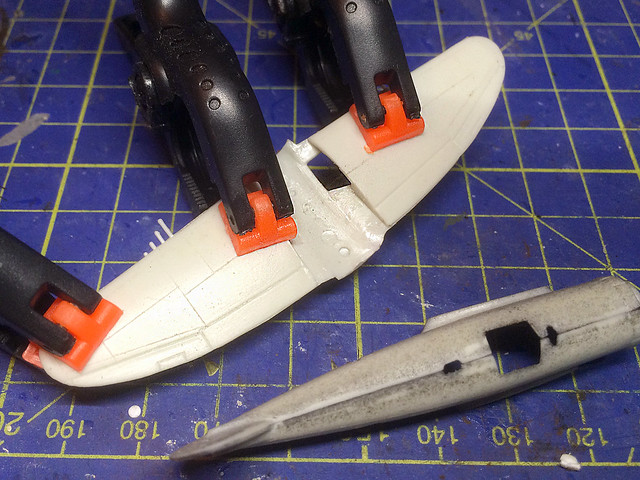
Anyway, on with the building. Fuselage and wing sections needed clamping to encourage a successfully mating of the various halves, but there was a tiny bit of overlap on either sets of components. Nothing some sanding couldn’t rectify but on the fuselage the central seam would need some filling and sanding to try and produce a seamless join.

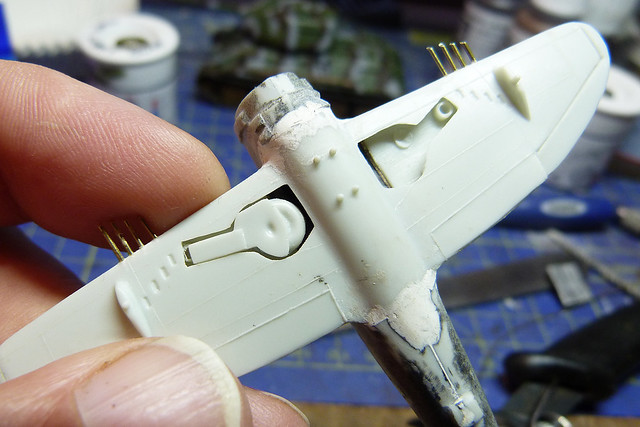
The next glaring fit related issue was when I moved on to join the wing section to the fuselage. There was a obvious gap at the wing roots and underneath which would also need some filler putty. (I kept reminding myself that this was suppose to be a ‘quick build’!)


However, there are not many external parts, just a couple of bombs and a central drop tank and they are all one-piece components. But, unfortunately the flimsy .50 cal machine-guns became a victim of my rough treatment and very soon broke off, so I quickly replaced them by drilling some holes and popping in some replacement brass rods.

The next major issue was - as noted before - the fact that I wanted the undercarriage up. I first of all tried fitting the supplied landing gear and gear doors in the ‘up’ position but found the fit left a lot to be desired…


I managed to make the gear doors fit (after a little filling) but the landing gear had to be scrapped and instead I filled the vacant holes with some Milliput putty, fashioned roughly into shape. Once completely dry I would sand these rudimentary landing gear covers flush with the wings.


Finally, there was the fitting of the distinctive engine cowl. This big oval cover, sadly, suffered from some sink holes on either side which had to be filled and smoothed out. 

I decided to fit this in place and paint it BEFORE fitting the prop (the instructions suggest fitting the prop to the cowl and fixing it in place by gluing on a plastic collar so that the prop would spin freely). I don’t mind the prop not spinning and it would make painting the engine and prop easier if I fit this after fitting the cowl.


At this point - were I a rivet-counting aircraft geek - I would point out the very shoddy job that has been done with the shape of the prop. It was also sightly deformed, but there again am I bothered? 

So, that was the major construction completed and the various ill-fitting seams and sink holes filled and sanded…


Now, onto the actual painting and the scary Plasti-kote application…Gulp!

See you in part 2 of this post (or if it never appears you will know that the Plasti-kote spraying was a disaster!)

;)