After Wednesday's marathon 'rust' session I had a little breather. And I promise to keep this blog entry short and sweet!
While both the chemical rusting and 'salt chipping' techniques were new to me I have used the 'hairspray technique' a couple of times and am fairly confident about applying this method for getting a flaking paint effect. Though, again, this will be the first time I have used it at this kind of scale.
But that's what this experimental project is all about, so without further ado...
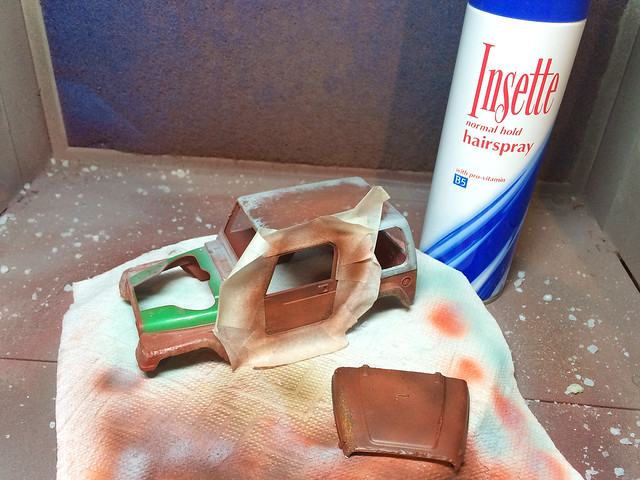
I decided to apply this technique to a couple of specific places - the bonnet (hood) and the left side door - and so began by masking out some of the adjacent areas. I am using the cheapest hairspray I could find and spraying it from the can (rather than decanting it and using my airbrush).
It has been suggested that using a water-based hairspray - rather than this cheap stuff - works better, but I actually could only find one example of this locally and it was quite expensive. But I will try that out at some point, just to compare the results.
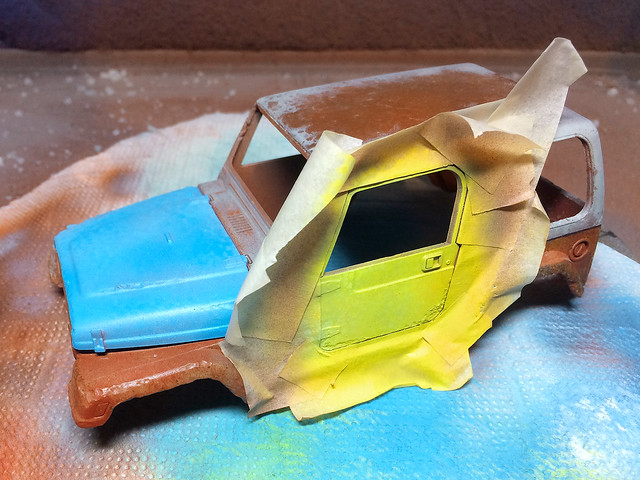
I airbrushed on a couple of bright colours which would contrast nicely with the rusty base coat. The choice was a bit random but I suppose it goes with the idea that this car is an old battered wreck.
Applying some warn water with a brush I then scratched at the surface with an old stiff toothbrush for the big areas of flaked paint I wanted. Then I changed to a sharpened toothpick for the smaller patches and to break up the areas around the bigger patches so they looked more natural.
Every so often I would stop and dry the area I was working on by pressing a piece of kitchen towel on it. This stopped too much paint flaking away and helped the patch you had just done to dry and adhere properly. I also cleaned away any small flakes that had come away and were sticking up or pushed then back down on the surface if I felt I had flaked off too much paint.
It is, by nature, a bit of a hit and miss effect and proceeding very slowly - and referring to some photographic reference as you go - is the best course.
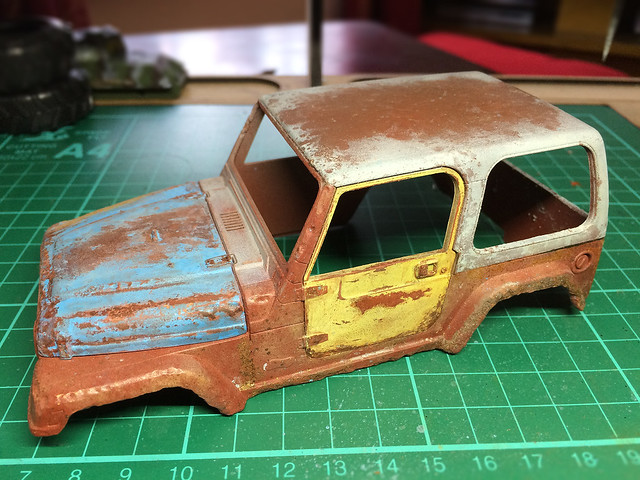
Once done I did go back over a couple of the patches I felt were over-done with a small paint brush and re-applied spots of the top-coat colour. In this way you can achieve some sort of control and modify the finished look to your tastes.
Finally, once these paint is completely dry I went around certain areas very lightly with a small piece of fine 'wet & dry' Emery Paper to fade the top coat paint and gradiate the effect between the top coat and the rusty base coat. (You can probably see this on the bonnet where the blue paint fades to light blue at the edge of the large central patch.)
And that's that...
Next: Some small finishing tests, weathering effects and one last try with the DM rusting chemical.
No comments:
Post a Comment