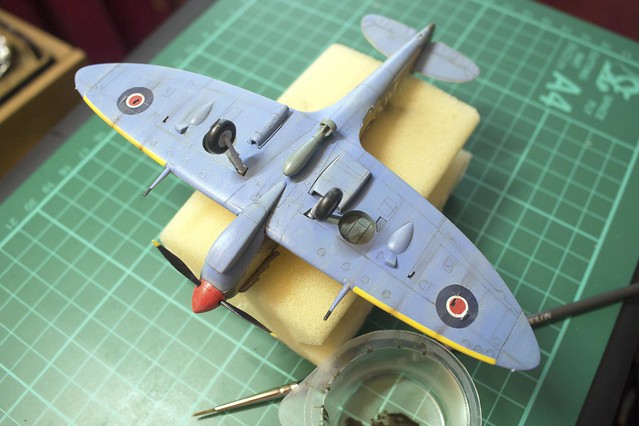
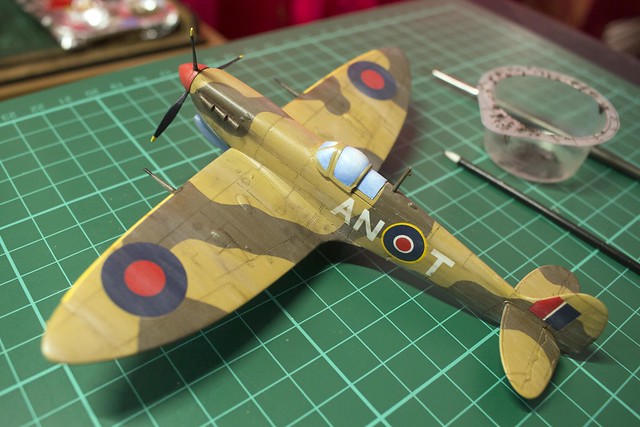
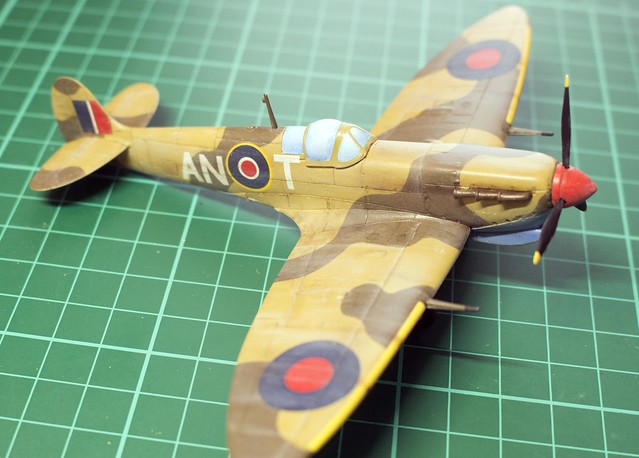
Decal time!
As usual, I am dreading working with the Hobby Boss decals - they can be a nightmare.
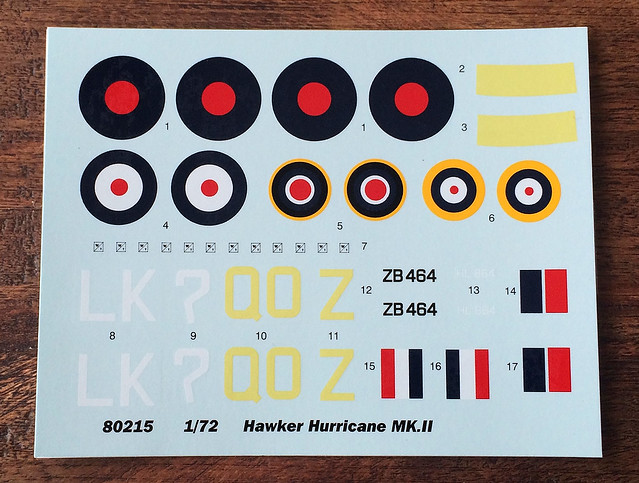
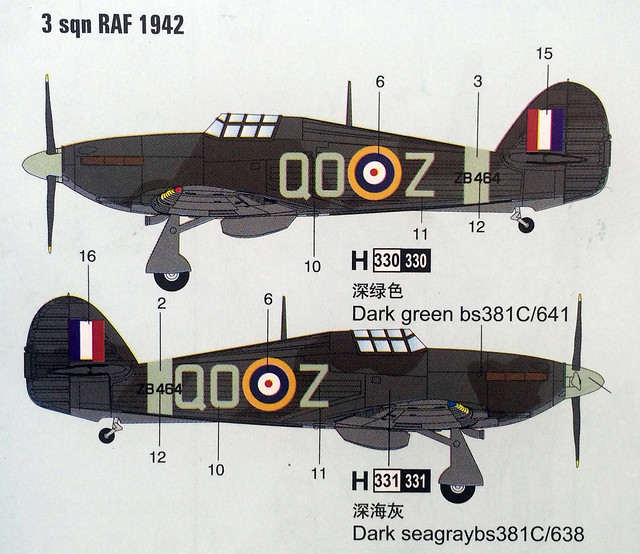
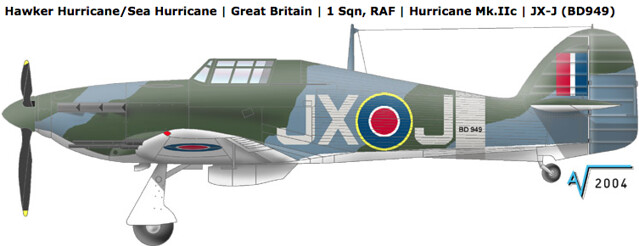
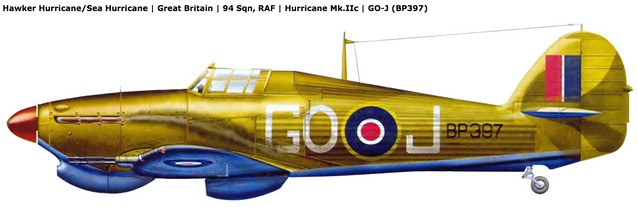
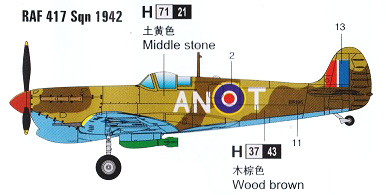
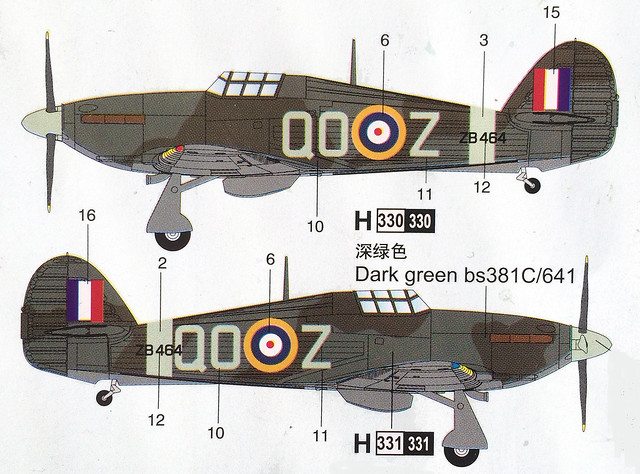
But before I even start I have a criticism! Take note of the 'Lemon Yellow' decals - the identification letters and fuselage band - these are completely the wrong colours for RAF aircraft of this period. They should, actually, be the RAF's 'Sky Type S' (a light blue-green shade of grey) and, ironically, Hobby Boss has this colour right in their colour instructions (note the propeller boss, aircraft ID letters and fuselage 'band')...
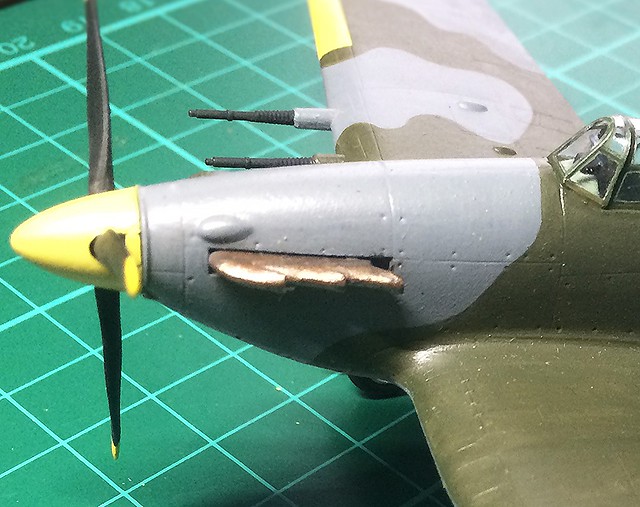
So, what I have done is to modify the colour of my propeller boss to match HB's incorrect 'lemon yellow' decals by painting it lemon yellow too...
Bit annoying, but cheaper than buying a set of third-party Hurricane decals in the correct colour. I'll just have to accept that the finished model will be that much less authentic. So, let's get on with applying the darn things...
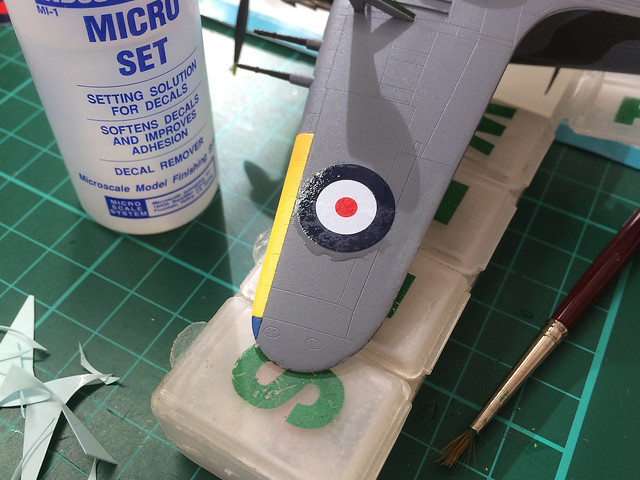
Microset solution really helps out and is a little less aggressive than Microsol. I've had these type of cheap Hobby Boss decals actually melt when trying to apply them using Microsol, so I'm erring on the side of caution here.
This worked pretty well, however, once applied the poor quality of the Hobby Boss decals became apparent...
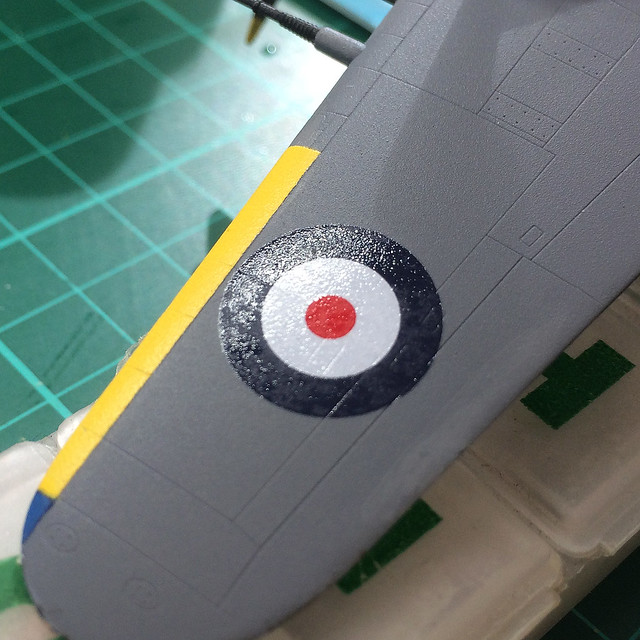
Now, I had the same problem with the previous Hobby Boss model (their 'easy build' Spitfire Vb) and I found that applying a coat of spray varnish alleviated some of the 'wrinkliness' - it's the best you can do, they won't be perfect.
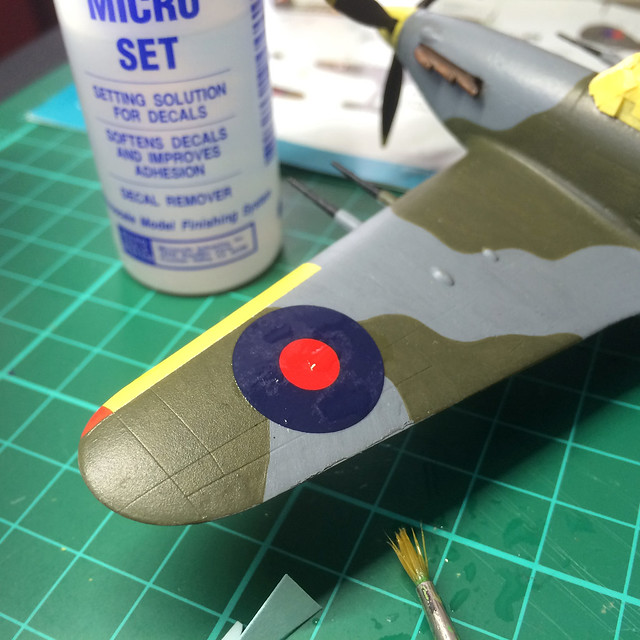
For me, the biggest challenge with military aircraft decals is the plane's ID letters. Lining them up and getting them to look 'straight' on the fuselage can be a wee bit difficult sometimes. But, then, I'm a bit of a fuss-pot and a worrier who will stare at something like this and convince myself it's not straight when it quite possibly is!
To add to my personal woes, Hobby Boss have provided a set of decals for the fuselage colour bands. Now, I could have (and maybe should have) dumped these and painted on the band instead, but I wanted to try out all the HB decals for this model, so here we go...
Honest;y, I don't know how aircraft modellers do it - it' took me ages to apply the ID letters and I still don't think they are straight! (This is why I like vehicles!)
The HB fuselage 'ring' decal is a little wobbly too, but that's more to do with their horrible two-part decal than my application. I did my best with it but will still end up straightening the edges using a brush and some paint. However, now these decals are on you can clearly see the inaccurate 'lemon yellow' colour I complained about earlier...And one more thing...
WARNING: As I have noted before with Hobby Boss 'Easy Build' series decals - these 'budget' decals do not work well with MICROSCALE'S MICRO SOL. It actually melts them!
Micro Set seems to work fine, but the more aggressive Micro Sol (designed to soften decals) caused the decals to 'bubble' and disintegrate with just a small application.
Diary of a novice scale model maker and his adventures in the wacky world of Braille Scale.
Showing posts with label aircraft. Show all posts
Wednesday, 7 September 2016
Friday, 19 August 2016
Canopy complete - Phew!
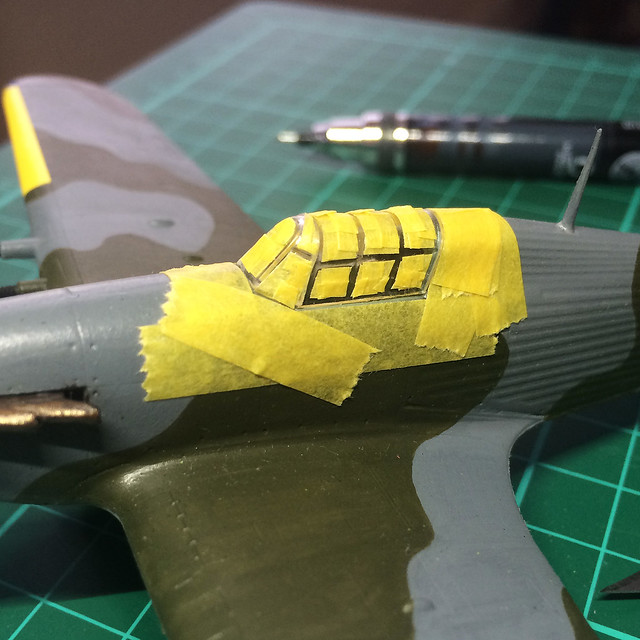
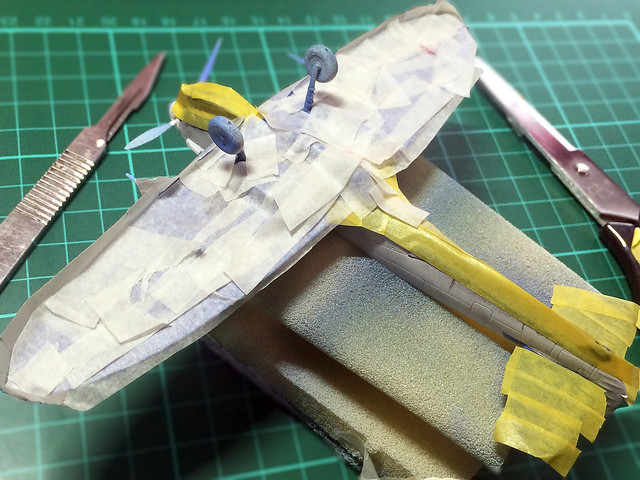
My least favourite modelling job - painting canopy frames on aircraft. I don't really do enough aircraft to practise this skill to get to the skill level I would prefer. So, in this case, I was just happy to get the darn thing done. I went down the masking route...
I know some experienced aircraft modellers will probably say that I could have done this job more quickly and easily by painting the canopy frame freehand, but I'm afraid my hands are too shaky and so I copped out!
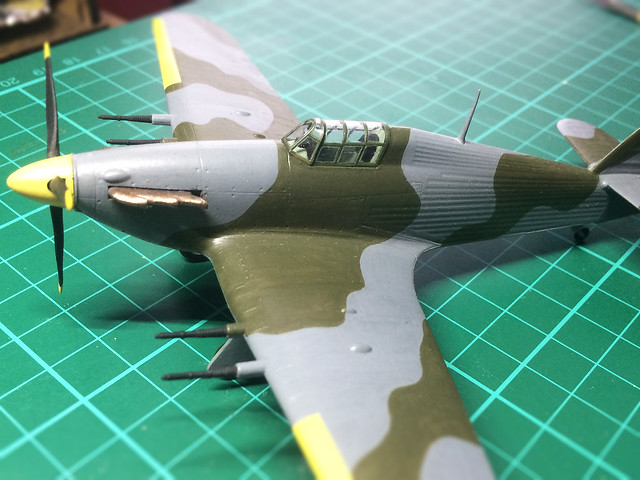
Once masked I gave the canopy a couple of light sprays of Humbrol's Dark Green. Then I removed the masking tape and touched up by hand (I felt up to that)...
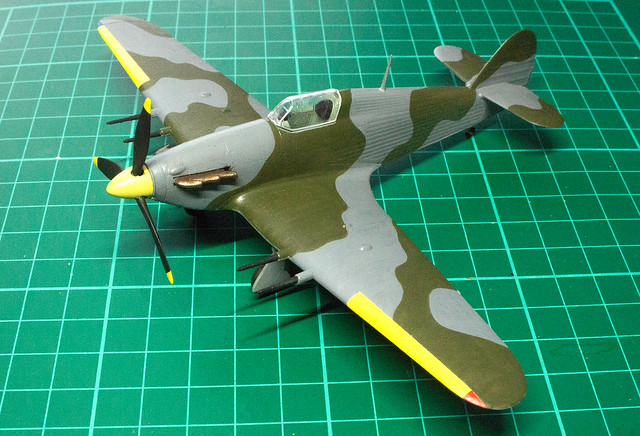
Not perfect, but acceptable for what is - after all - just a paint test model. As usual, photography flatters the results!
That out the way, I can re-mask the canopy so I can gloss the rest of the model ready for the application of Hobby Boss's dreaded decals! Will the third time be the charm? We shall see.
I know some experienced aircraft modellers will probably say that I could have done this job more quickly and easily by painting the canopy frame freehand, but I'm afraid my hands are too shaky and so I copped out!
Once masked I gave the canopy a couple of light sprays of Humbrol's Dark Green. Then I removed the masking tape and touched up by hand (I felt up to that)...
Not perfect, but acceptable for what is - after all - just a paint test model. As usual, photography flatters the results!
That out the way, I can re-mask the canopy so I can gloss the rest of the model ready for the application of Hobby Boss's dreaded decals! Will the third time be the charm? We shall see.
Friday, 5 August 2016
Hobby Boss 1/72 Hawker Hurricane Mk. IIC - Part 5
Basic painting done! I like getting to the end of a phase of work. I haven't been happy with the painting with this, but let's put that behind us now...
I've test fitted the canopy, but before I glue it on permanently I'll weather the cabin interior and dip the canopy in a bath of Pledge Klear. The painting of the canopy frame will be a separate job and I will have to do a bit of masking to do this.
The next major stage is the glossing prior to applying the decals. Adding the Hobby Boss decals makes me a little nervous as I've had some bad experiences with them in the past. So fingers crossed!
I've test fitted the canopy, but before I glue it on permanently I'll weather the cabin interior and dip the canopy in a bath of Pledge Klear. The painting of the canopy frame will be a separate job and I will have to do a bit of masking to do this.
The next major stage is the glossing prior to applying the decals. Adding the Hobby Boss decals makes me a little nervous as I've had some bad experiences with them in the past. So fingers crossed!
Wednesday, 3 August 2016
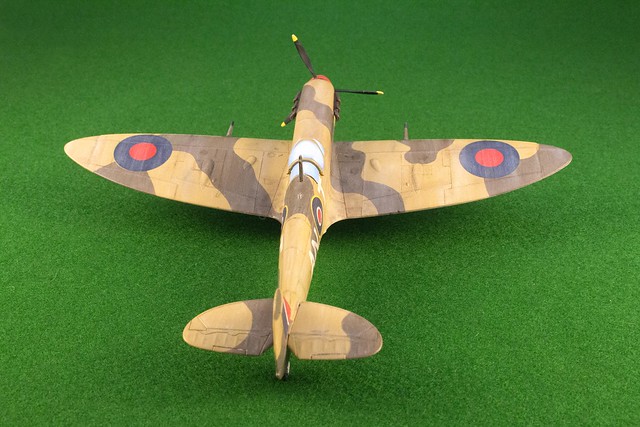
Hobby Boss 1/72 Spitfire Vb (Trop) complete.
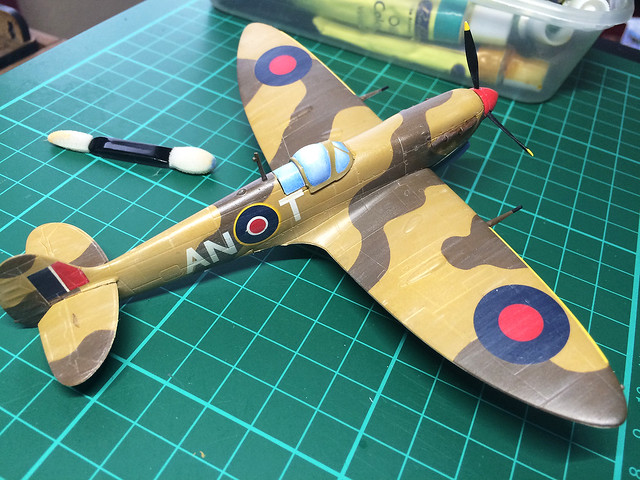
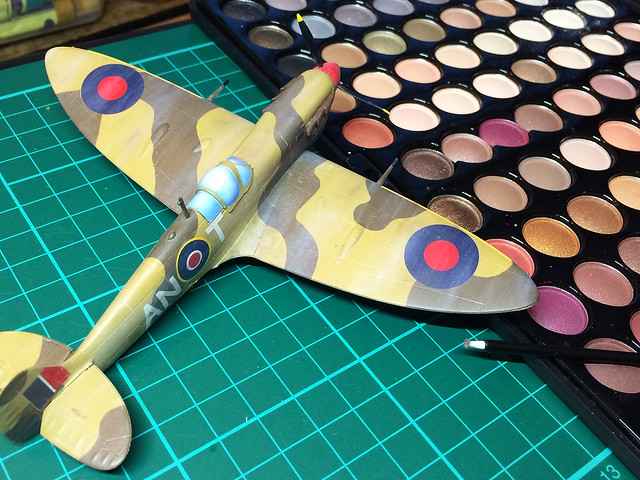
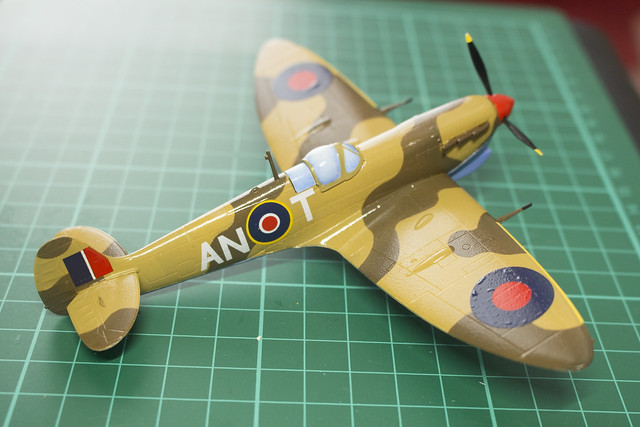
Finally got round to taking the completion photos of my Hobby Boss desert Spit. Despite this just being a 'painting test' it turned out OK and so is worth a look...
Conclusion
As I said, this was just a painting test - a practise paint job on a cheap kit before I took on a 'serious' project - but, for all that, it's turned out OK I think. I was particularly pleased with my 'eyeshadow' weathering.
As to the kit itself, it's actually an alright beginner's 'easy build', the most obvious flaw being the over-seized canopy (which is why I painted it 'wargame model style'). Minor niggles were the over-simplified undercarriage - which were designed only to be made in the 'down' position - and the very spindly propellors.
Still, as I bout this kit for just £2.95 I can't really complain all that much can I?
![]() |
| Probably the most flattering shot as it makes the horrible canopy look 'OK'! |
![]() |
| Classic Spitfire 'take off' shot. |
![]() |
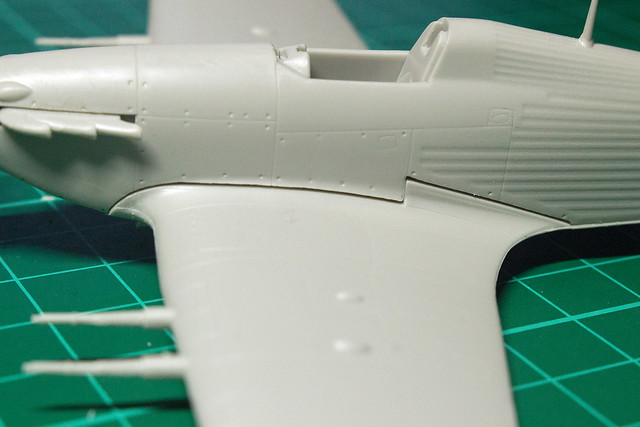
| The least flattering angle, as you can see the flaw with the canopy. I took the opportunity to drill out the wing MGs, which look quite nice. |
As I said, this was just a painting test - a practise paint job on a cheap kit before I took on a 'serious' project - but, for all that, it's turned out OK I think. I was particularly pleased with my 'eyeshadow' weathering.
As to the kit itself, it's actually an alright beginner's 'easy build', the most obvious flaw being the over-seized canopy (which is why I painted it 'wargame model style'). Minor niggles were the over-simplified undercarriage - which were designed only to be made in the 'down' position - and the very spindly propellors.
Still, as I bout this kit for just £2.95 I can't really complain all that much can I?
Tuesday, 2 August 2016
Hataka trauma over!
Hobby Boss 1/72 Hawker Hurricane Mk. IIC - Part 4
Phew! This is as much as I'm doing with Hakata paints (bored now), but I have learned a few things...
Once again, I have to thank the very helpful and friendly guys over on Facebook's 'The Plastic Scale Model Making Group' (Closed Group, you need to ask to join) with whom I've had a very lively and informative discussion about Hataka paints. The upshot of this conversation was 'it's not just me' (which is nice to know) as quite a few people have found this make of acrylic paints 'tricky' to use (and to be fair, a couple have actually mastered them).
The general consensus is that - to brush-apply Hataka acrylics - you do need to use multiple thin coats of paint. This is in line with what I have found - I made an utter mess of the 'Ocean Grey' areas of the camo scheme by trying to apply it like I would have with enamels.
What will be interesting now is how the proceeding decaling and weathering stages will affect how my shoddy brush painting looks!
Phew! This is as much as I'm doing with Hakata paints (bored now), but I have learned a few things...
Once again, I have to thank the very helpful and friendly guys over on Facebook's 'The Plastic Scale Model Making Group' (Closed Group, you need to ask to join) with whom I've had a very lively and informative discussion about Hataka paints. The upshot of this conversation was 'it's not just me' (which is nice to know) as quite a few people have found this make of acrylic paints 'tricky' to use (and to be fair, a couple have actually mastered them).
The general consensus is that - to brush-apply Hataka acrylics - you do need to use multiple thin coats of paint. This is in line with what I have found - I made an utter mess of the 'Ocean Grey' areas of the camo scheme by trying to apply it like I would have with enamels.
What will be interesting now is how the proceeding decaling and weathering stages will affect how my shoddy brush painting looks!
Monday, 1 August 2016
I still hate Hataka paints!
Hobby Boss 1/72 Hawker Hurricane Mk. IIC - Part 3
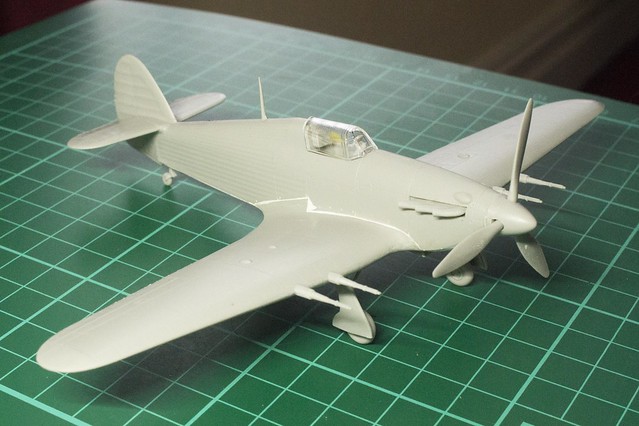
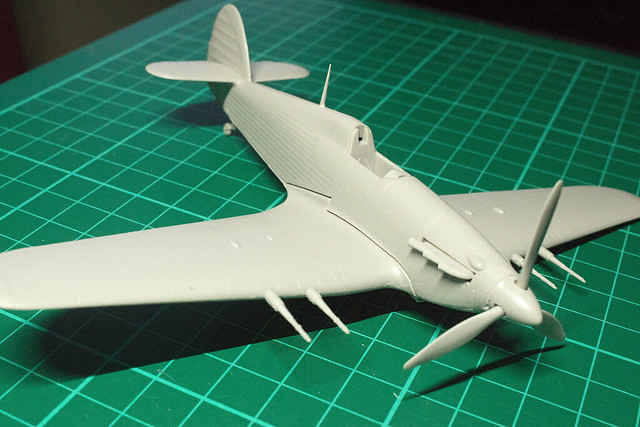
The final parts of the easy build kit went together very quickly and with no real bother. I did have to fill the unsightly gap where the fuselage joins the one-piece wing component.
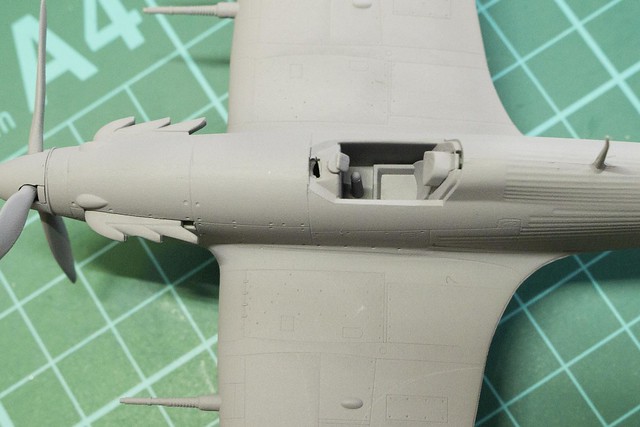
One other detail that's worth mentioning is the cockpit, or rather the lack of detail therein. It is better than Hobby Boss's Easy Build Spitfire that I recently made (which was nothing more than an empty slot), but that's not saying much. Still, here's what you get...
Not much to see, really. A seat, a headrest, a very rudimentary (and incorrect) joystick and a simple gunsight. I'm hoping that once the canopy is on that this poor detail will not be so noticeable.
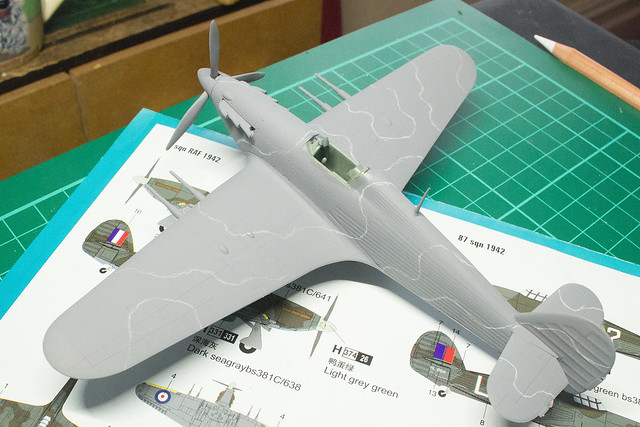
Now, having primed the model with Humbrol Spray Acrylic Primer I started marking out the camouflage pattern using a white pencil crayon...
As this model is a painting test to see how easily Hataka paints are applied by brush I'm applying the camo scheme freehand, but some faint guidelines will help me paint a fairly realistic pattern. Hopefully.
I wasn't all that impressed with how the Hataka acrylic paints went on using an airbrush, so let's see if they brush on any better...
Nope! Not liking this!
Maybe it's just me, maybe I just don't like brush painting (large areas), but Hataka paints continue to be a challenge. However, I have learned a couple of things...
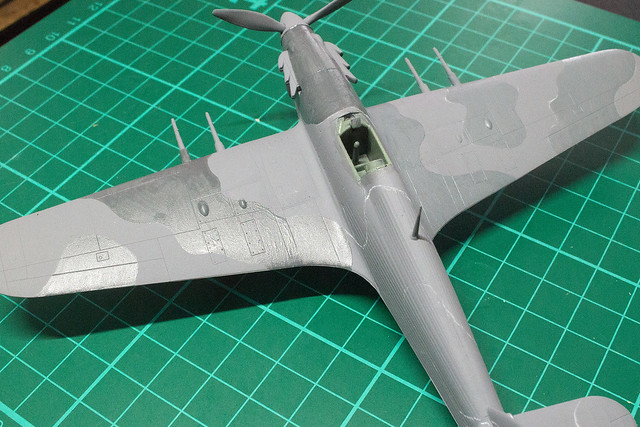
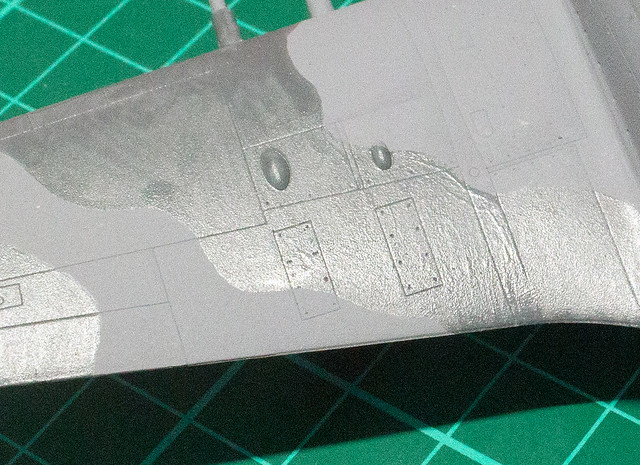
First of all, mix Hataka paints well - I mean really well. On my first attempt, I shook the Hataka paint bottle the same amount of time I do with my Vallejo paints, about 30-40 seconds (really hard). But this still resulted in a milky solution where the paint binder was not completely mixed with the paint. This resulted in a streaky and glossy 'paint' (see left wing)...
Learning from this I shook and shook and shook the Hataka paint, ensuring that the ball-bearing that they put in their bottles was floating free in the bottle (it sometimes sticks to the side if you leave the bottles unused for a while). This time, I shook the bottle for well over a minute, and the difference was marked.
The binder was properly mixed, this time, the paint was easier to apply and not quite so streaky. BUT, there was also a marked colour change in the paint compared to the colour I expected (see the right wing of the above photo). I was expecting Hataka's 'Ocean Grey' to be a darker grey (based on the Hobby Boss paint instructions), but it turned out not that much darker than the primer I sprayed on.
The Hobby Boss paint instructions indicate a mid-charcoal grey for the fuselage, but checking online references (see above photo) it looks like Hataka is closer to the correct shade of grey. So, once again, while using Hataka paints are a challenge (at least for me, it seems) they are very good renditions of the correct original paint schemes.
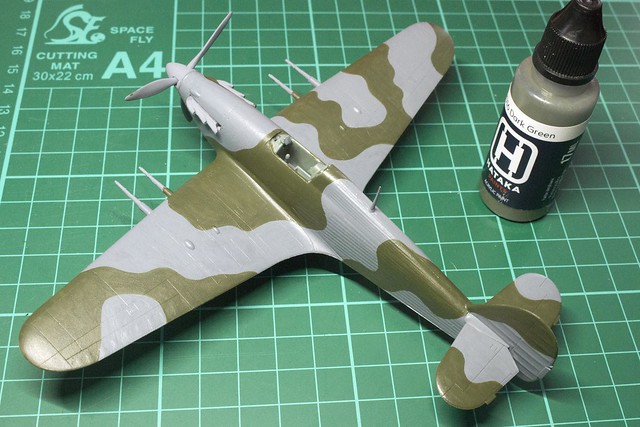
And, onto the 'Dark Green'
Despite my problems, I decided that as I've gone this far I might as well complete the model and the test (I was tempted to just respray the model, but resisted)!
So...It's shake, shake, shake, shake that Hataka paint!
While still not happy, I seem to be getting the measure of brush applying Hataka paints. Unlike when airbrushing, do not attempt to use Humbrol Acrylic Thinners but instead just use ordinary tap water to get the paint to a useable consistency. I have also settled on applying two thinner coats of paint rather than trying to get a good coat with one coat.
The Hataka paint has a tendency to dry fast (as I discovered to my horror when using with an airbrush) so you have to watch our for drying stains where you are brushing over already drying paint. Two light coats helps with that issue as well.
Even so, I found I had to be reasonably speedy in applying my coats and I took the precaution of applying the paint in zones - filling in panels so that the edge of my completed areas did not show up under the next brushed section. Stop and start mid panel and you are liable to see where you stopped underneath the next coat.
The effect is still a little streaky for my tastes - I cannot say that brush painting or Hataka paints have grown on me any!
The final parts of the easy build kit went together very quickly and with no real bother. I did have to fill the unsightly gap where the fuselage joins the one-piece wing component.
One other detail that's worth mentioning is the cockpit, or rather the lack of detail therein. It is better than Hobby Boss's Easy Build Spitfire that I recently made (which was nothing more than an empty slot), but that's not saying much. Still, here's what you get...
Not much to see, really. A seat, a headrest, a very rudimentary (and incorrect) joystick and a simple gunsight. I'm hoping that once the canopy is on that this poor detail will not be so noticeable.
Now, having primed the model with Humbrol Spray Acrylic Primer I started marking out the camouflage pattern using a white pencil crayon...
As this model is a painting test to see how easily Hataka paints are applied by brush I'm applying the camo scheme freehand, but some faint guidelines will help me paint a fairly realistic pattern. Hopefully.
I wasn't all that impressed with how the Hataka acrylic paints went on using an airbrush, so let's see if they brush on any better...
Nope! Not liking this!
Maybe it's just me, maybe I just don't like brush painting (large areas), but Hataka paints continue to be a challenge. However, I have learned a couple of things...
First of all, mix Hataka paints well - I mean really well. On my first attempt, I shook the Hataka paint bottle the same amount of time I do with my Vallejo paints, about 30-40 seconds (really hard). But this still resulted in a milky solution where the paint binder was not completely mixed with the paint. This resulted in a streaky and glossy 'paint' (see left wing)...
Learning from this I shook and shook and shook the Hataka paint, ensuring that the ball-bearing that they put in their bottles was floating free in the bottle (it sometimes sticks to the side if you leave the bottles unused for a while). This time, I shook the bottle for well over a minute, and the difference was marked.
The binder was properly mixed, this time, the paint was easier to apply and not quite so streaky. BUT, there was also a marked colour change in the paint compared to the colour I expected (see the right wing of the above photo). I was expecting Hataka's 'Ocean Grey' to be a darker grey (based on the Hobby Boss paint instructions), but it turned out not that much darker than the primer I sprayed on.
![]() |
| Hobby Boss paint instructions... |
![]() |
| The correct RAF 'Ocean Grey'. Source: Wings Palette |
And, onto the 'Dark Green'
Despite my problems, I decided that as I've gone this far I might as well complete the model and the test (I was tempted to just respray the model, but resisted)!
So...It's shake, shake, shake, shake that Hataka paint!
While still not happy, I seem to be getting the measure of brush applying Hataka paints. Unlike when airbrushing, do not attempt to use Humbrol Acrylic Thinners but instead just use ordinary tap water to get the paint to a useable consistency. I have also settled on applying two thinner coats of paint rather than trying to get a good coat with one coat.
The Hataka paint has a tendency to dry fast (as I discovered to my horror when using with an airbrush) so you have to watch our for drying stains where you are brushing over already drying paint. Two light coats helps with that issue as well.
Even so, I found I had to be reasonably speedy in applying my coats and I took the precaution of applying the paint in zones - filling in panels so that the edge of my completed areas did not show up under the next brushed section. Stop and start mid panel and you are liable to see where you stopped underneath the next coat.
The effect is still a little streaky for my tastes - I cannot say that brush painting or Hataka paints have grown on me any!
Tuesday, 26 July 2016
Hobby Boss 1/72 Hawker Hurricane Mk. IIC - Part 2.5
Oh, bugger!
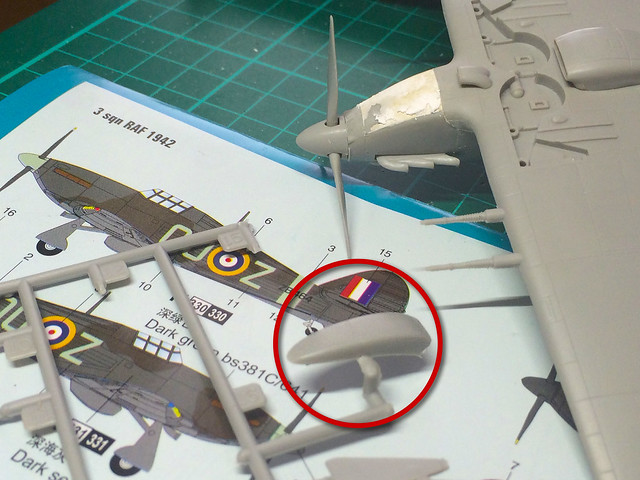
When I bought this Hobby Boss Hurricane Mk. IIC (European Theatre) I did think 'wish it had been the desert version' to match my Hobby Boss desert Spitfire. The desert Hurricane - Mk. IIC 'Trop' - has a distinctive enlarged air-intake 'chin', which the European Hurricane didn't have...
The Hobby Boss Hurricane kit only comes with two paint schemes, both European aircraft, so I thought - naturally - that they had missed a trick by not including the desert version option. Well, that was until I started building the kit, and then I found this...
Du-oh! If only I had checked the sprue before I begun I could have made the desert version after all. I did wonder why the I had to fill the model's 'chin' with putty to fill out the shape. Grrrr.
Still, to make the desert version I would have had to had bought a third-party set of decals.
Missed opportunity.
When I bought this Hobby Boss Hurricane Mk. IIC (European Theatre) I did think 'wish it had been the desert version' to match my Hobby Boss desert Spitfire. The desert Hurricane - Mk. IIC 'Trop' - has a distinctive enlarged air-intake 'chin', which the European Hurricane didn't have...
The Hobby Boss Hurricane kit only comes with two paint schemes, both European aircraft, so I thought - naturally - that they had missed a trick by not including the desert version option. Well, that was until I started building the kit, and then I found this...
Du-oh! If only I had checked the sprue before I begun I could have made the desert version after all. I did wonder why the I had to fill the model's 'chin' with putty to fill out the shape. Grrrr.
Still, to make the desert version I would have had to had bought a third-party set of decals.
Missed opportunity.
Monday, 25 July 2016
Hobby Boss 1/72 Hawker Hurricane Mk. IIC - Part 2
In common with the other 'easy build' Hobby Boss models I've made, this isn't going to take long to put together. In fact, all I've done is the first of the instruction's panels and I've most of the way there already!
It's a nice clean model, not much flash and the detail is quite sharp and well moulded. However, Hobby Boss's joins let them down again...Where's my modelling putty?
That was a real shame really, as - otherwise - this model is quite a nice rendition of a Hawker Hurricane. Someone has told me that the fuselage is a little too skinny, but I'm afraid I just don't know that much about the Hurricane to say.
And with that, I will have to find my putty and get cracking...
Sunday, 24 July 2016
Hobby Boss 1/72 Spitfire Mk. Vb - Part 5
Continuing on with the first stages of the weathering of my desert Spitfire, I've applied the 'bleaching' on the top-side of the model using oil paints...
Once this was done, I decided I wanted to apply a little more bleaching - best to do a little at a time so that it's easier to gauge when 'enough is enough'. But, this time, I decided to turn to the eyeshadow makeup medium that I started using recently...
That's better - I'll stop there. I have to bear in mind that there are proceeding stages of weathering (shading, pin-washing, chipping and highlighting), so the overall effect will be cumulative so easy does it).
Pin washing...How much?
I'm not quite sure how much or how aggressive my pin-washing should be on an aircraft. Looking around at what other aircraft modellers are doing the intensity of pin-washing seems to vary enormously - from modellers who deem it completely unnecessary, to others who pin-wash heavily - to the point that they nearly outline ever panel in near-black!
I'm going to try out the middle ground, with some mild pin-washing in a subtle complementary colour...
I'll stop there, I've tried to be subtle, not aggressively outlining every panel. I used AK Interactive's Enamel Wash Dark Brown as this is my tried and tested 'go to' product for pin-washing. I like it's greasy brown colour whatever the base colour as it's about adding grime into recesses.
You'll notice I also used the AK wash to add darker streaks and some light 'shading' to accentuate panel shapes. It's not such a delineating a technique as pre-shading, which precisely marks out the division between each panel with subtle shading, but the translucent 'grid' effect pre-shading creates is not to everyone's taste.
Highlighting - accentuating panel contrast
As it stands, the effect is a little 'flat' so the final stage of this shading stage is adding the highlights. By adding some very light, contrasting colours, I hope to give the surface an enhanced 3-dinesional aspect or depth. Well, that's the theory anyway.
I'll be using coloured pencils for this, with the ability to sharpen pencils to a very sharp, precise point I should be able to add very delicate highlight lines around small areas...
Well, that's about it I think. I could add some chipping, but I don't think it really needs it. All I really need to do now is seal my weathering by giving it a very light coat of matt or satin varnish and I think I'll call it quits on this one.
Next: Completion photos.
Once this was done, I decided I wanted to apply a little more bleaching - best to do a little at a time so that it's easier to gauge when 'enough is enough'. But, this time, I decided to turn to the eyeshadow makeup medium that I started using recently...
That's better - I'll stop there. I have to bear in mind that there are proceeding stages of weathering (shading, pin-washing, chipping and highlighting), so the overall effect will be cumulative so easy does it).
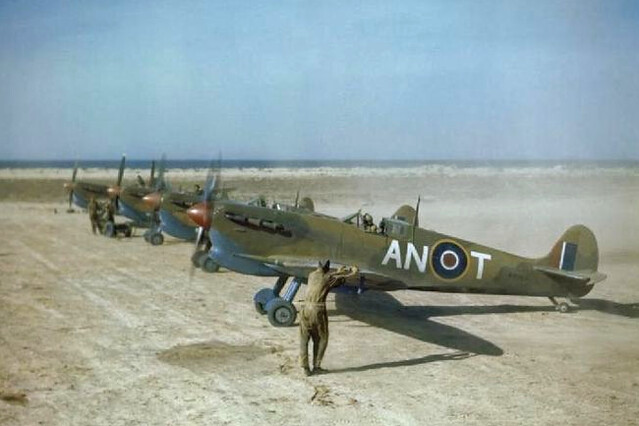
![]() |
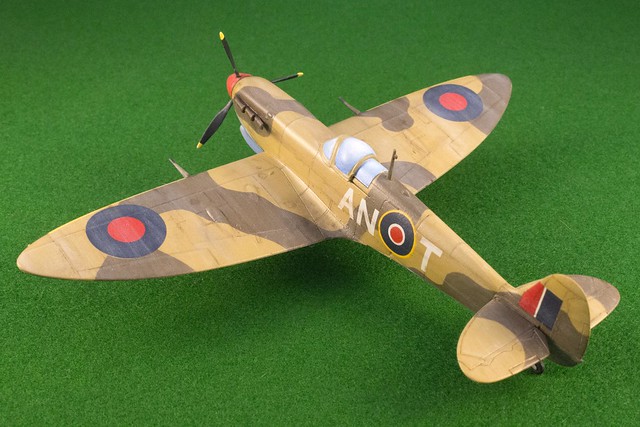
| Oh, look who it is! AN-T - RCAF Spits in Tunisia, 1943. |
Pin washing...How much?
I'm not quite sure how much or how aggressive my pin-washing should be on an aircraft. Looking around at what other aircraft modellers are doing the intensity of pin-washing seems to vary enormously - from modellers who deem it completely unnecessary, to others who pin-wash heavily - to the point that they nearly outline ever panel in near-black!
I'm going to try out the middle ground, with some mild pin-washing in a subtle complementary colour...
I'll stop there, I've tried to be subtle, not aggressively outlining every panel. I used AK Interactive's Enamel Wash Dark Brown as this is my tried and tested 'go to' product for pin-washing. I like it's greasy brown colour whatever the base colour as it's about adding grime into recesses.
You'll notice I also used the AK wash to add darker streaks and some light 'shading' to accentuate panel shapes. It's not such a delineating a technique as pre-shading, which precisely marks out the division between each panel with subtle shading, but the translucent 'grid' effect pre-shading creates is not to everyone's taste.
Highlighting - accentuating panel contrast
As it stands, the effect is a little 'flat' so the final stage of this shading stage is adding the highlights. By adding some very light, contrasting colours, I hope to give the surface an enhanced 3-dinesional aspect or depth. Well, that's the theory anyway.
I'll be using coloured pencils for this, with the ability to sharpen pencils to a very sharp, precise point I should be able to add very delicate highlight lines around small areas...
Well, that's about it I think. I could add some chipping, but I don't think it really needs it. All I really need to do now is seal my weathering by giving it a very light coat of matt or satin varnish and I think I'll call it quits on this one.
Next: Completion photos.
Friday, 22 July 2016
Hobby Boss 1/72 Spitfire Mk. Vb - Part 4 (ish)
Losing track of installments now, what with all the little niggling hic-cups. But, back on course now...
Weathering - bleaching and staining with oils
My post-shading attempt having failed I will have to do all my shading 'post' and I'm simply going to follow the same steps as I have with my vehicles. Not being all that experienced with aircraft models I'm playing things by ear.
So, as usual, I'm starting by 'bleaching and staining' using oil paints. As this is a desert aircraft I'm assuming there was certain amount of sand and sun damage to any paintwork.
While I don't know that much about the RAF's Desert Airforce I do remember what Derek Robinson wrote in his story of WW2 North African air warfare - 'A Good Clean Fight'. He described the effect that the desert had on aircraft, he said that they looked like they had been 'sanded'.
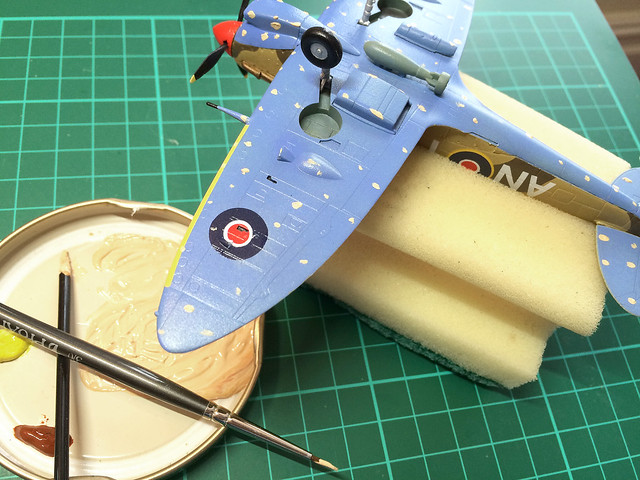
I mixed some of my oils into a cream colour - I was hoping that this would give a sandy tone to the weathered underside...
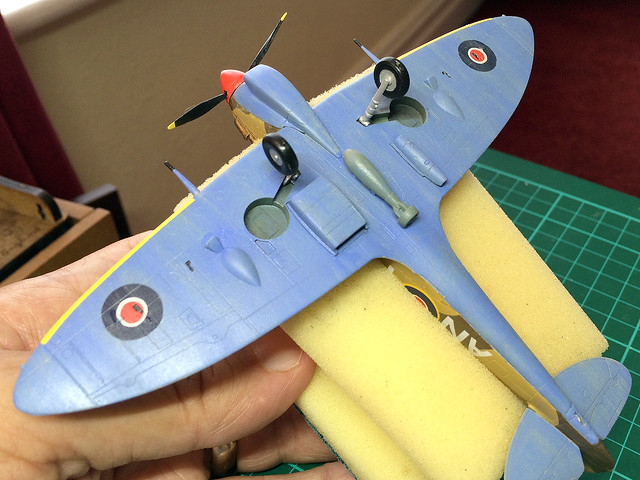
Then using a brush wetted with thinners I smeared the paint across the model, giving the surface blue a faded and blemished look (hopefully)...
The effect is subtle, but the original Vallejo Azure Blue has been toned down quite a bit. Of course, depending on how beat up you want your model you could add more spots of poil paint and more streaks. If I want darker stains I'll add some small darker brown spots and smear them.
A quick, light coat of Humbrol Matt acrylic varnish should seal the oil paints (which would smear if not sealed) and then I can move on - add additional weathering or apply shading or highlighting.
Next: The top side - same treatment, but with slightly darker coloured oils.
Weathering - bleaching and staining with oils
My post-shading attempt having failed I will have to do all my shading 'post' and I'm simply going to follow the same steps as I have with my vehicles. Not being all that experienced with aircraft models I'm playing things by ear.
![]() |
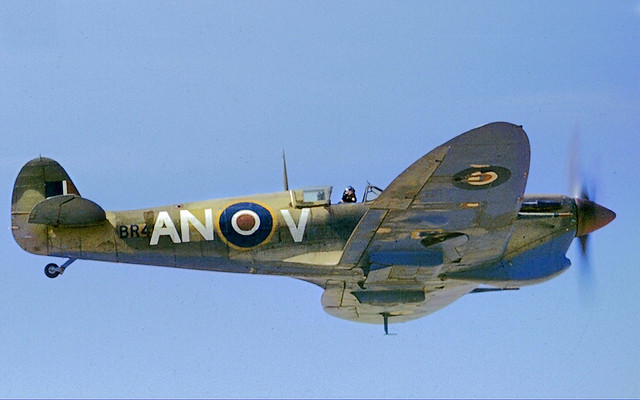
| RCAF Spitfire Mk V, 1943, No 417 Squadron, flying over the Tunisian desert. |
While I don't know that much about the RAF's Desert Airforce I do remember what Derek Robinson wrote in his story of WW2 North African air warfare - 'A Good Clean Fight'. He described the effect that the desert had on aircraft, he said that they looked like they had been 'sanded'.
I mixed some of my oils into a cream colour - I was hoping that this would give a sandy tone to the weathered underside...
Then using a brush wetted with thinners I smeared the paint across the model, giving the surface blue a faded and blemished look (hopefully)...
The effect is subtle, but the original Vallejo Azure Blue has been toned down quite a bit. Of course, depending on how beat up you want your model you could add more spots of poil paint and more streaks. If I want darker stains I'll add some small darker brown spots and smear them.
A quick, light coat of Humbrol Matt acrylic varnish should seal the oil paints (which would smear if not sealed) and then I can move on - add additional weathering or apply shading or highlighting.
Next: The top side - same treatment, but with slightly darker coloured oils.
Wednesday, 20 July 2016
British weather throws me a curved ball!
If there is one thing that you usually don't have to worry about - here in the UK - it's extremes of weather. But occasionally - very occasionally - the weather throws a wobbly and teases us with a sunny day, just to show us what we are missing!
Yesterday was just such a day. In fact, it wasn't just sunny - it was neigh-on Mediterranean, with temperatures that had us poor old Brits running for the nearest chip shop or for the kitchen to make an emergency boiling hot mug of tea!
The upshot of this was rather unfortunate as I had picked yesterday to gloss my freshly decaled Hobby Boss Spitfire Vb. I sprayed the model - to seal the decals - as usual, but when I returned to my attic workspace the room was like an OVEN, and this had happened...
The gloss on top of these decals looks like it had actually boiled! (I presume this is the result of spraying on acrylic gloss when the room temperature is far too high.)
This is a great shame as the model was coming along nicely...
I suppose it's lucky that this was just a paint test model and not the 'real thing' - I would have been really gutted then. Just Googling to see if there are any remedies...I'll update this post if I come across any.
Boo-hoo!
The Solution - was a solution!
Glad to say that I have somewhat rectified the 'bubbles' in my decals problem. It's not perfect but it's miles better than it was...
A great big thank you to the members of The Plastic Scale Model Making Group on Facebook who's members helped me out of my predicament.
To get rid of my bubbles it was recommended that I use a sharp pin or sewing needle and to prick each bubble. Then, having holed each little bump I applied a couple of coats of Microscale's Micro Sol. This shrunk the bumps down and smoothed out the wrinkled decals.
Phew!
Yesterday was just such a day. In fact, it wasn't just sunny - it was neigh-on Mediterranean, with temperatures that had us poor old Brits running for the nearest chip shop or for the kitchen to make an emergency boiling hot mug of tea!
The upshot of this was rather unfortunate as I had picked yesterday to gloss my freshly decaled Hobby Boss Spitfire Vb. I sprayed the model - to seal the decals - as usual, but when I returned to my attic workspace the room was like an OVEN, and this had happened...
The gloss on top of these decals looks like it had actually boiled! (I presume this is the result of spraying on acrylic gloss when the room temperature is far too high.)
This is a great shame as the model was coming along nicely...
I suppose it's lucky that this was just a paint test model and not the 'real thing' - I would have been really gutted then. Just Googling to see if there are any remedies...I'll update this post if I come across any.
Boo-hoo!
The Solution - was a solution!
Glad to say that I have somewhat rectified the 'bubbles' in my decals problem. It's not perfect but it's miles better than it was...
A great big thank you to the members of The Plastic Scale Model Making Group on Facebook who's members helped me out of my predicament.
To get rid of my bubbles it was recommended that I use a sharp pin or sewing needle and to prick each bubble. Then, having holed each little bump I applied a couple of coats of Microscale's Micro Sol. This shrunk the bumps down and smoothed out the wrinkled decals.
Phew!
Sunday, 17 July 2016
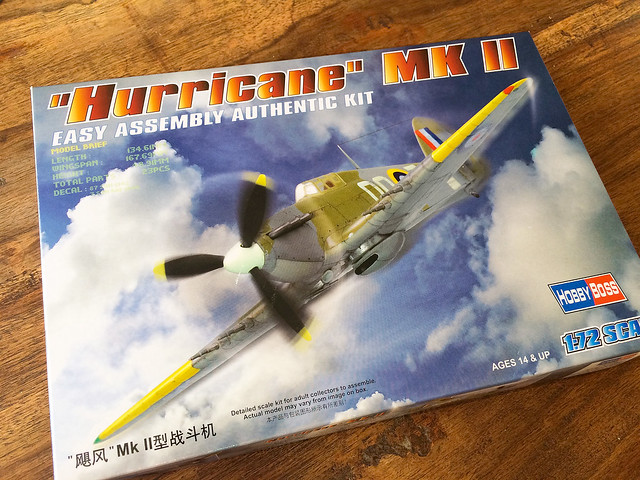
Hobby Boss 1/72 Hawker Hurricane Mk. IIC - in the box
Just a quick overview of the box contents of Hobby Boss's easy build Hurricane...
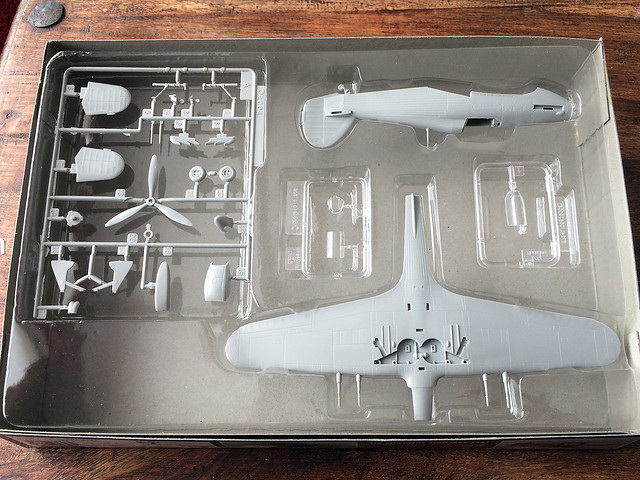
For my £4.75 I got 22 components, well protected inside a clear plastic inner case. To be honest, I think this is a bit of overkill and a waste of packaging. But it does keep all the parts pristine.
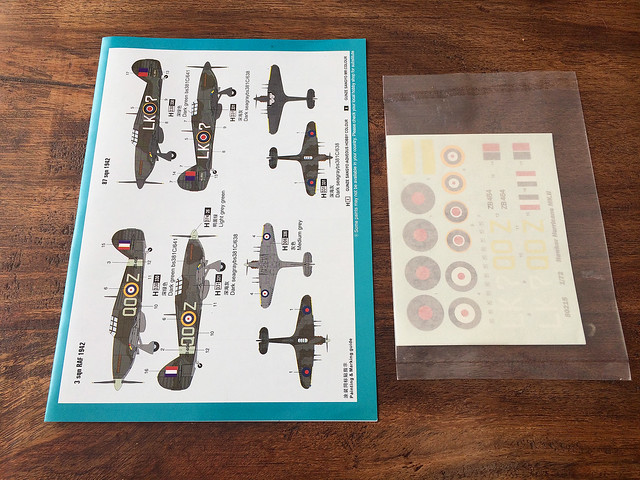
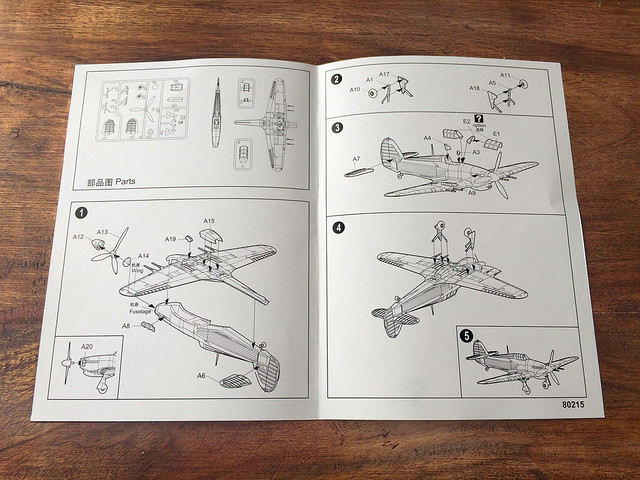
As usual, Hobby Boss does do a nice job with the instruction sheet, it's well printed - in colour - and the colour scheme directions are nicely illustrated. There is an option for two different RAF schemes, both European theatre...(Pity there isn't an overseas option.)
I'm a little unhappy with the colour reproduction of the included decals - some colours are just plain wrong (the registration numbers and fuselage ring of the first option are way off). But then, Hobby Boss decals are fast turning out to be my nemesis - they have a cheap and nasty glossy finish to them and don't like aggressive products like Microscale's MICRO SOL.
Finally, we have the instructions themselves. I do like the quality of the little colour printed leaflet that HB gives you - I wish other manufacturers would print their instructions to such quality. But, there again, in this instance the instructions are a little excessive as you could put this kit together without any diagrams at all!
My first impressions - prior to actual assembly - are that this kit looks quite nice. Again, Hobby Boss have made a nice job of the panel lines - neither too deep or too shallow. And there is nothing that immediately stands out as being particularly bad (unlike their Spitfire).
So, it's onto the construction, and I'm feeling quite positive.
For my £4.75 I got 22 components, well protected inside a clear plastic inner case. To be honest, I think this is a bit of overkill and a waste of packaging. But it does keep all the parts pristine.
As usual, Hobby Boss does do a nice job with the instruction sheet, it's well printed - in colour - and the colour scheme directions are nicely illustrated. There is an option for two different RAF schemes, both European theatre...(Pity there isn't an overseas option.)
I'm a little unhappy with the colour reproduction of the included decals - some colours are just plain wrong (the registration numbers and fuselage ring of the first option are way off). But then, Hobby Boss decals are fast turning out to be my nemesis - they have a cheap and nasty glossy finish to them and don't like aggressive products like Microscale's MICRO SOL.
Finally, we have the instructions themselves. I do like the quality of the little colour printed leaflet that HB gives you - I wish other manufacturers would print their instructions to such quality. But, there again, in this instance the instructions are a little excessive as you could put this kit together without any diagrams at all!
My first impressions - prior to actual assembly - are that this kit looks quite nice. Again, Hobby Boss have made a nice job of the panel lines - neither too deep or too shallow. And there is nothing that immediately stands out as being particularly bad (unlike their Spitfire).
So, it's onto the construction, and I'm feeling quite positive.
Saturday, 16 July 2016
Don't ask me why! Another Hobby Boss.
Really, I don't know why I bought this today...HB's Spitfire was bad enough, but having bought a Spit I found I was uncontrollably drawn to their Hurricane. You just can't seem to build a Spit without also building a Hurri'!
Let's just hope it ain't as bad as their Spitfire was. A big plus, though, is this is the wonderful Mk. IIC with the quad 20mm cannon!
Friday, 8 July 2016
Hobby Boss 1/72 Spitfire Mk. Vb - Part 3 (ish)
Having remedied my airbrush fiasco which is the underside of this model (finally applied the right blue), I'm on with the masking ready to begin the top-side of the fuselage. At least, this time, I am pretty darn sure I am using the correct colour - Vallejo Model Color 'Middle Stone'...
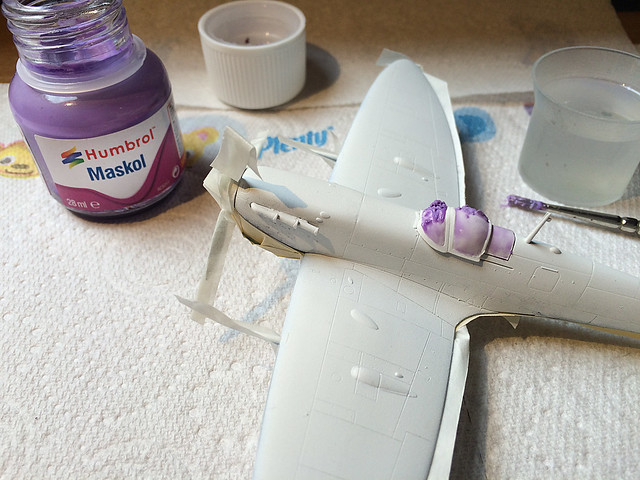
But, before I start spraying, I had to come up with a plan for masking the cockpit windscreen. I usually just use tape, but with the framework around the 'glass' needing to be painted I decided to give a liquid masking fluid a try - Humbrol's Maskol (this is a frst for me).
I have to say, it's a bit tricky to use as you have to work out the best dilution to make it flow. In it's 'neat' state Maskol is like a laytex gum (for want of a better word). Humbrol - in ther tutoral video which I will embed below - suggest that it be thinned for painting on using tap water. While this seemed to work - to an extent - I still found that it dried pretty quickly into small globules of gummy blobs. (Humbrol says it's suitable for airbrushing, but you wouldn't catch me trying it!)
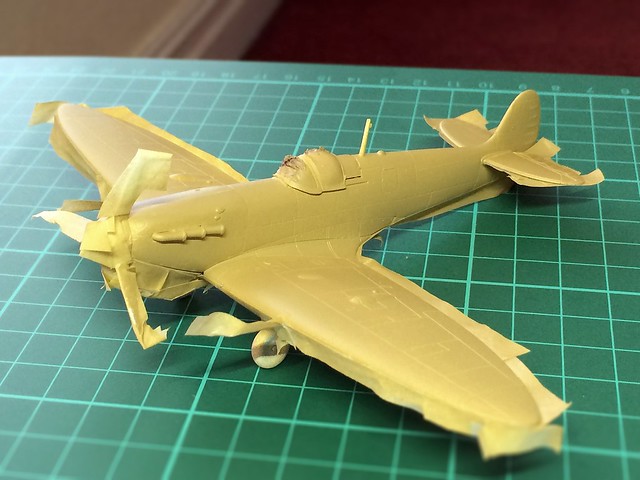
Anyway, the canopy protected I got on with applying the upper-surface base colour. It's called 'Middle Stone' and I thought it would be a sort of sandy yellow, but instead - at least with Vallejo's take on 'Middle Stone' - I got something that was very 'caramel' (or diarrhea) coloured...
![]() |
| It looks a bit fudged...Hahaha, sorry, couldn't resist! |
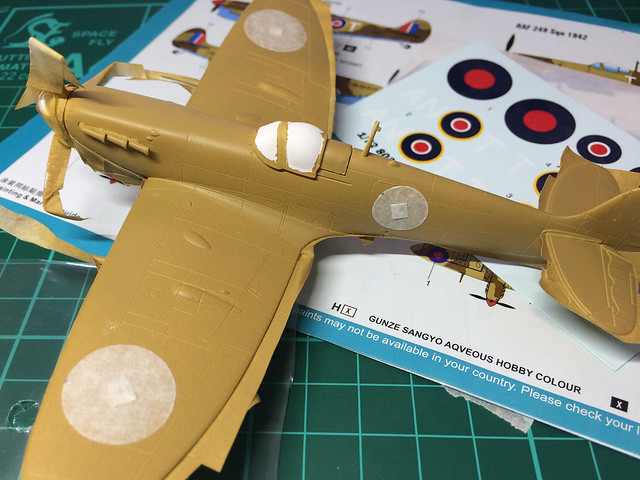
I'll be blanking out the roundel positions, so no painted camo pattern shows through the decals (another first for me). Whether this is absolutely necessary in this case is debatable, the reason for doing this - usually - is so any paint pattern does not show through thin decals (especially if they contain white)...
![]() |
| This is a better representation of what the 'Middle Stone' looks like. |
Many, more experienced, aircraft modellers go to the trouble of copy-enlarging the kit paint instructions so that they can be used as a 1:1 paint template. I will have to try this out at one point, but - again - as this is just a paint test I'm not going to go that far.
The second camo colour is 'Wood Brown' - according to the Hobby Boss instructions - and I have bought Vallejo's Model Air 'Dark Earth' [029], fingers crossed it is a good match...
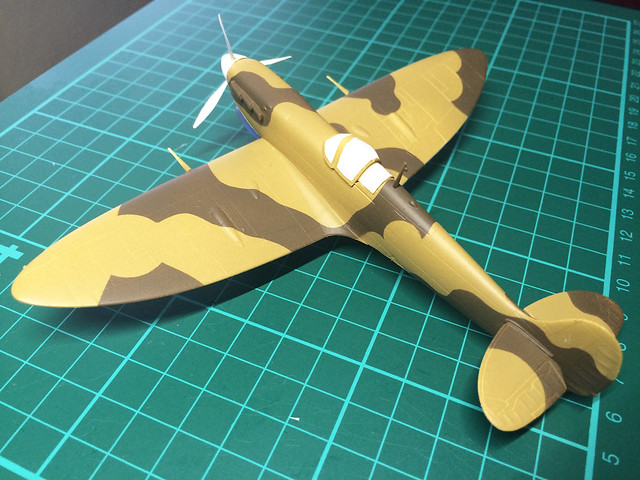
Hmmm, very flat and hard-edged. Not sure I like this very hard scheme, a softer edge might have been better, which I could have done using the BluTack masking method (my airbrush is not up to fine free-hand work).
Well, that's that for now. Next, I'll tidy up a few bits and paint the smaller parts (like the prop and the canopy) prior to glossing.
Subscribe to:
Posts (Atom)