Showing posts with label Revell. Show all posts

Tuesday, 4 August 2015

1/25 'Mad Max' Willy's Hot Rod - Part 5

Modifying the original Revell chassis for the new wheels
As usual, this 'straight forward job' has turned out not to be straight forward at all. Why do I continually underestimate what a job entails? Lack of experience I suppose...

I was hoping that the larger wheels I had found would fit onto the existing body and chassis with a minimal amount of modification. I just wanted to enlarge the body's wheel arches to allow for the chunkier tyres, but that was wishful thinking on my part. What I was trying to avoid was a 'monster truck' scenario where the suspension was jacked up and the body raised above the axels.
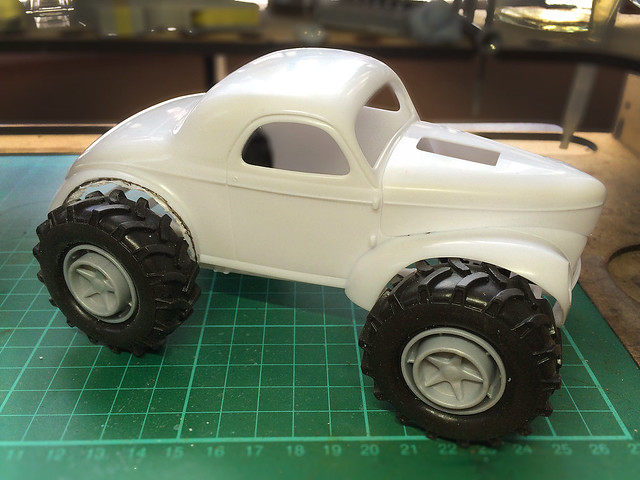
This is where I left off...I test fitted the chassis - as is - to the body. It was at this
point it became obvious that there just wasn't enough clearance between the new
wheels and the body. So I had to rethink how I was going to do this model.

I have worked out something of a compromise where I raised the car's body only a little, but enough to provide enough clearance between the wheels and the wheel arches to look reasonably feasible (if not entirely realistic). To do this I would have to add some blocks between the body and the chassis and also chop the length of the chassis to reduce the wheel-base slightly (because the wheels are larger).

Cut and shutOk, shortening the chassis first - as this will change the location of where the chassis attaches to the new raising blocks. I estimated that I needed to shorten the chassis by only about 3mm...
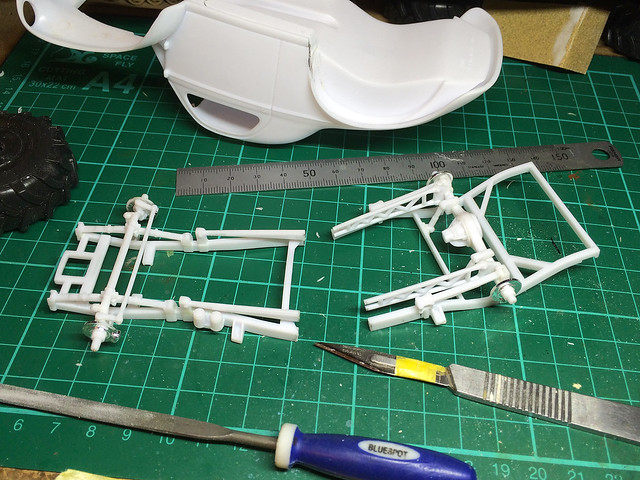

In effect this would allow me to reposition the axels closer together to recenter the new wheels within the enlarged wheel arches (moving the front axel back and the back axel forward slightly).
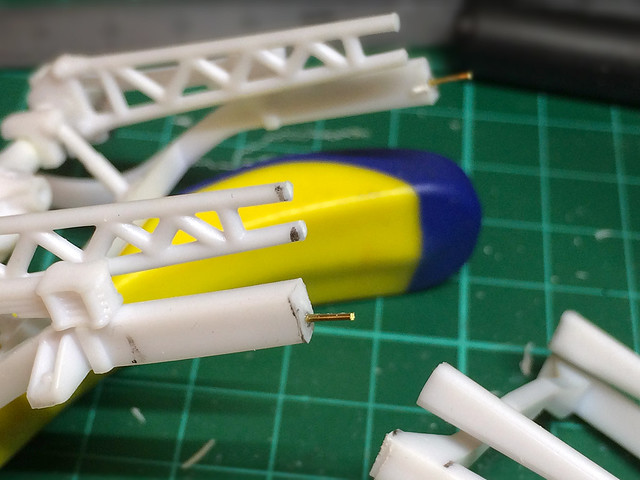

Having done the cut, it's time to do the shut. I strengthened the join with some brass rod then glued the two halves of the chassis back together...
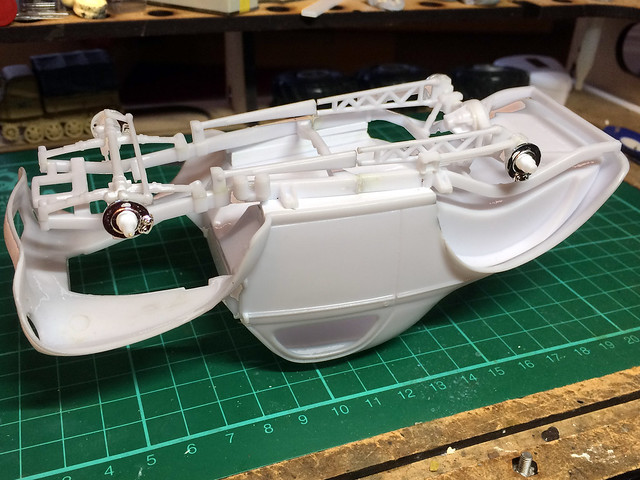

You'll see from the above photo how much higher the chassis is sitting above the body of the car now (when upside-down like this). Also if you look at the front you can see how much I have moved the chassis/front axel back. I now have to think about how I will attach the chassis to the body of the car...

The green box shows the front attachment point, that's OK where it is. The red
Is the cut'n'shut where I removed 3mm of chassis. And finally the blue indicates
where I will have to move the rear attachment point forward about 4mm.

Once the chassis is glued back together properly I have to make some proper support posts to join the body and chassis together. The body will now sit 6.5mm above the chassis, now I'm not a car mechanic - in fact I don't even drive - so my 'engineering' will probably be far from realistic. I'm just going to make some plastic 'stilts' on which the body will sit on...
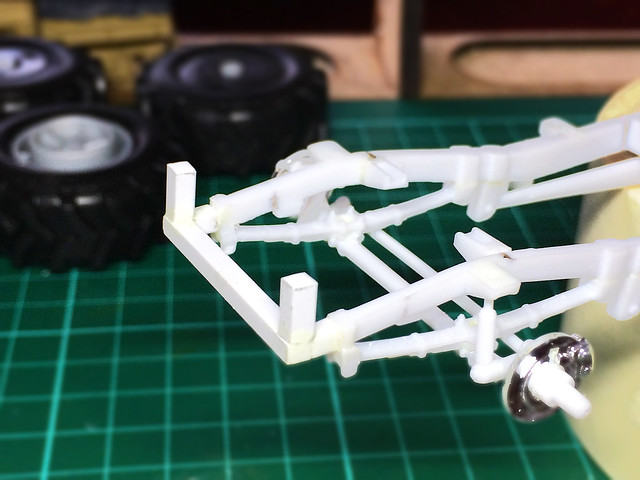
Yeah...Not very sophisticated, but it works. I've stuck eight of these little posts
to the chassis which raises the car body up 6.5mm.

Having got the car body siting on the chassis properly I now have to turn my attention to how the V8 engine will fit onto the chassis. Essentially its the same problem as above - I will have to make 'spacers' or 'risers' to compensate for the extra space created by raising the body over the chassis. The engine will have to be lifted the same 6.5mm to sit as it was intended inside the engine bay of the car's body (otherwise the V8's blower will not protrude out the top of the bonnet properly)...

Er, oops! Solving one problem simply creates another. Raising the car's body
off the chassis means that the V8 engine is now too low and the blower no
longer protrudes - as it should - out the top of the bonnet. Bummer!

The same is true for the other engine components - like the radiator - and I will have to raise all these up because of the chassis modifications.

Phew! And that's the chassis modifications complete and it's ready to paint. Although it also became apparent - while doing the above test fitting - that I needed to now move the engine forward to compensate for my moving the chassis back (shortening it)! Every modification seems to result in a knock on effect!

Right, everything has been moved, raised, cut, shut, shifted, tweaked and otherwise
mucked about with. Now I have to tidy up, sand smooth and paint.

And that's that for now.

Next: The big job - modifying the Willy's Coupe bodywork for that 'Mad Max' look!

Friday, 10 July 2015

1/25 'Mad Max' Willy's Hot Rod - Part 4

It's all about the wheels in this blog entry. Just to quickly re-cap - I'm not using the Hot Rod style wheels that came with the Revel kit, I have found some nice big fat off-road wheels that I'm going to mount on the model instead. The catch is that I will have to modify the car's body to get them to fit.

So, first things first, I need to work out how much I need to trim off the existing wheel arches to get the fat wheels to attach to the axels.


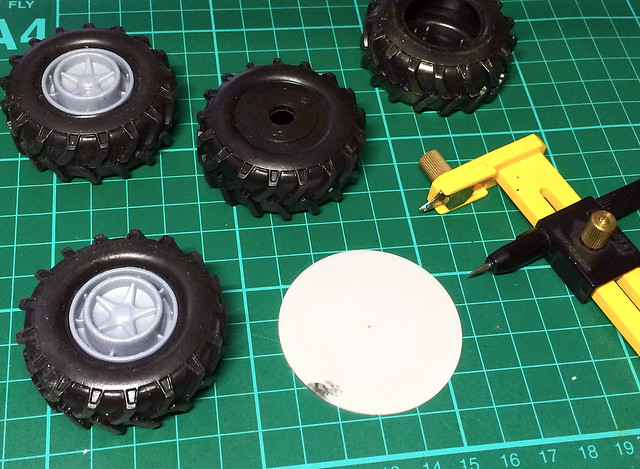
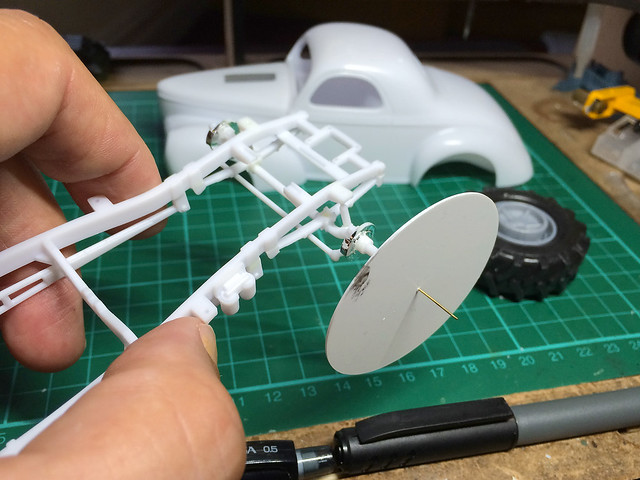
Rather that trying to draw round the new tyres (with their knobbly tread) I decided to make a template disc - the same diameter as the new wheels - and fix it on a extension to the axel so I knew the disc was perfectly centred...


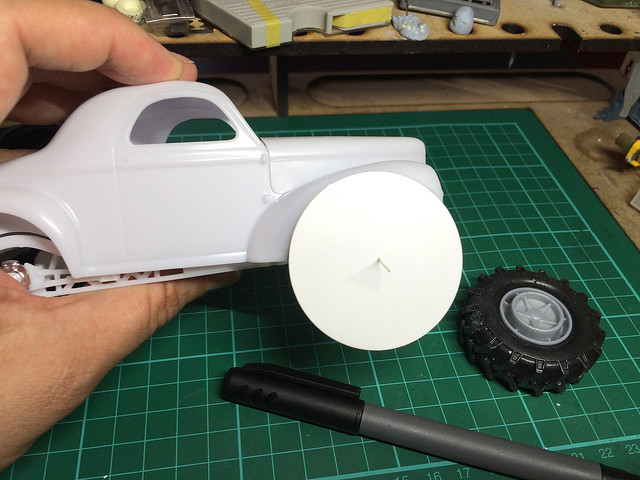
I could then attach the body shell onto the chassis and get a perfect idea about where and how much plastic I would have to remove from the wheel arches....


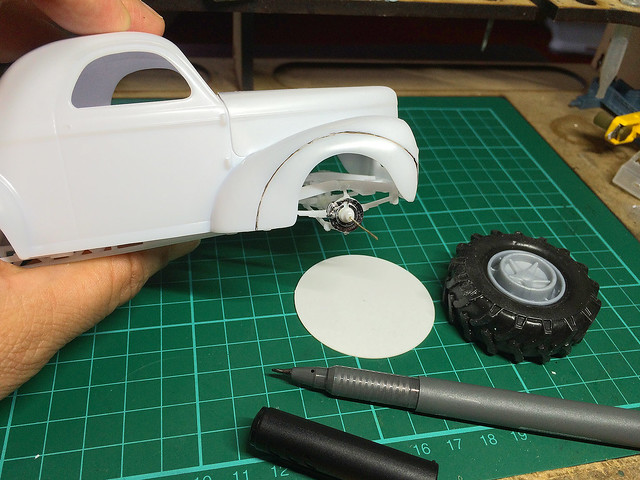
And finally, it was just a case of drawing around the template. This would provide me with an accurate guide indicating where I should trim off the excess wheel arch...


And now the scary part!
No matter how careful you think you are being you still have a nagging worry that you are going to mess up and cut too much or in the wrong place or slip and ruin the bodywork completely!

So, trying not to tremble, I carefully used my Dremmel (with a cutting disc) to slowly trim away the unwanted plastic up to within a couple on millimetres of my guide line. After that I will file and sand up to the line...


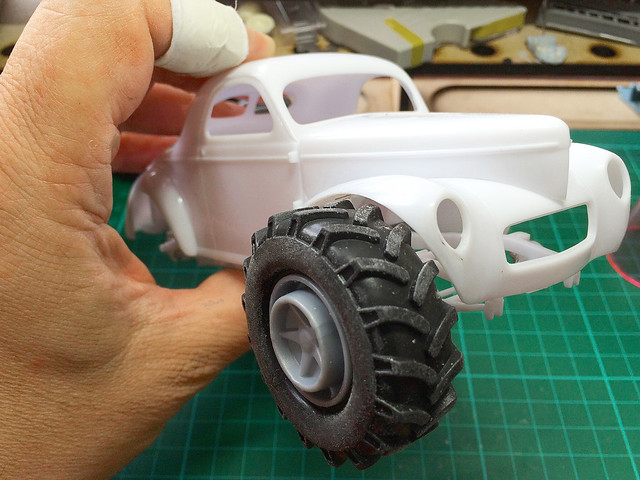
Well, nothing goes quite to plan...It turns out that my big new wheels are very big indeed and to get enough 'breathing space' around them I had to remove far more of the wheel arch than I expected. I also will have to think about raising the bodywork up off the chassis slightly (a minor job).


There was a lot more trial and error involved in this modification than I had imagined there would be. I had to keep checking the fit and then trim a bit more and a bit more off the body. But, finally, I managed to get an acceptable size and shape of wheel-arch that accommodated the big fat tyres!


It looks a bit mad...But that seems appropriate to the nature of the project. So, having done one wheel arch I now have three more to go. Phew!

Next: Finishing the chassis and mounting the engine.

Sunday, 5 July 2015

1/25 'Mad Max' Willy's Hot Rod - Part 3


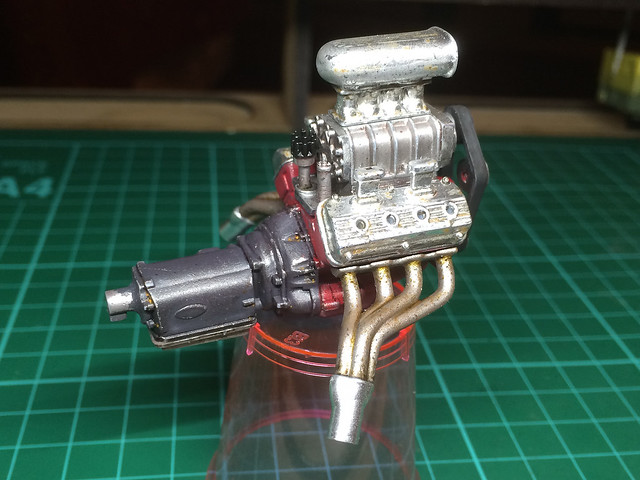
Having completed the work on the V8 engine I decided to add some tiny 'improvements'. At this stage the engine is 'complete' as far as the Revell instructions is concerned, but a quick look at any reference photos will make it immediately clear there are some parts which are obviously missing.


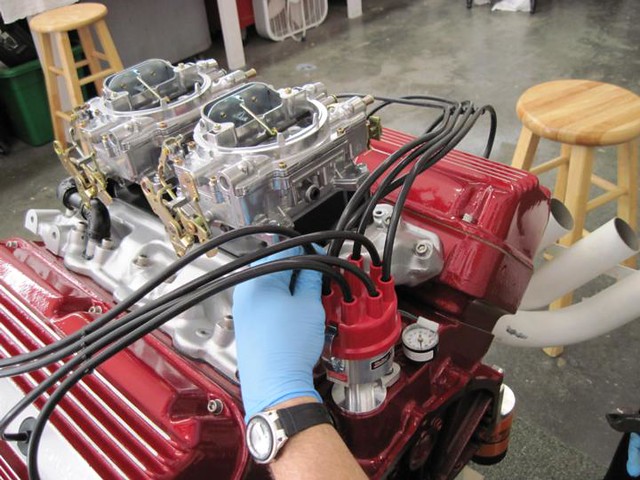
Principal among these are the 'cables' (?) that go from the valve cases at the sides to the distributer at the rear of the engine...


All this means is a fairly simple job of adding a few wires to represent these cables. The above reference photo gives a very useful idea in which order the cables are arranged and how they go into the distributer itself.

Anyway, while I look for a suitable wire that I can connect to the distributer (I tried normal electrical wire but it was too thick) I will move onto the next big job - the car's chassis.

The chassis construction
Now...This is where things get a wee bit tricky. The Revell instructions suggest you to start on the car's interior 'bucket' next (the driving compartment) BUT I have a particular design in mind for my Mad Max themed conversion so I'll have to abandon the instructions at this point.

Ooooooow...Look at those chunky wheels! I like that idea.
I decided that I would like to give my hot rod a beach-buggy type of look, with nice fat off-road wheels. The problem being that the chassis is designed for a set of small 'skinny' wheels at the front and big fat 'slicks' at the back - so I'm having to play about a bit to make sure my big chunky off-road wheels don't screw up how the body and interior fit on the chassis frame.


Getting hold of the new chunky wheels was surprisingly easy - I found a appropriately sized toy car with big aggressive looking wheels in my local pound store! But, will they work with the chassis?

I made up the chassis as Revel recommended as I guess the only way I will know if my idea will work is to try it! From a point of view of 'realism' I am sure mating off-road chubby wheels to a hot road drag racing chassis frame is not correct. Done properly I should have a reinforced chassis with heavy duty suspension (like a 4x4) really or maybe even a raised suspension like a monster truck...But this is a fantasy build I suppose, so 'realism' is secondary.

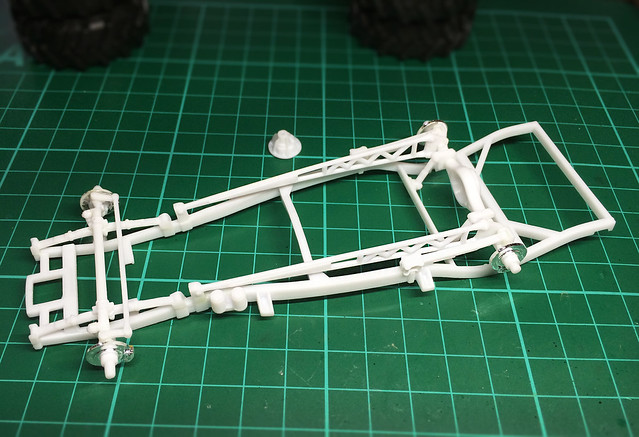
The Revell Willy's 1941 Coupe chassis assembled.
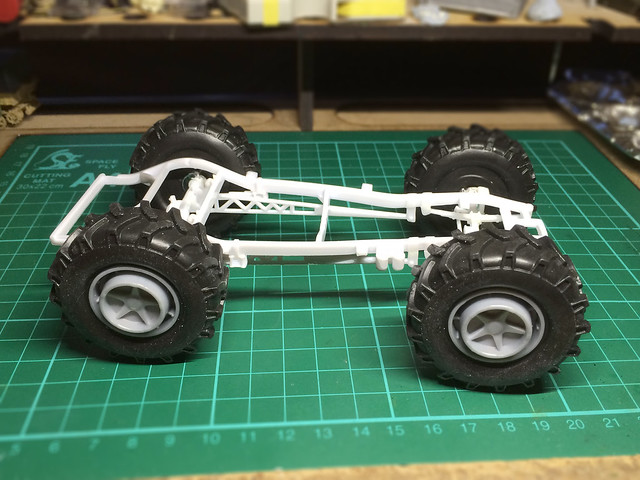
In the end I only had to do a small amount of modification on the chassis to get
the new chunky wheels to fit. Just some minor trimming to raise the front axel.
Fitting the big chunkies to the chassis was the easy part, now comes the 'tricky' bit I mentioned at the beginning of this section - fitting the driving compartment and car body onto the chassis with it's new monster wheels!

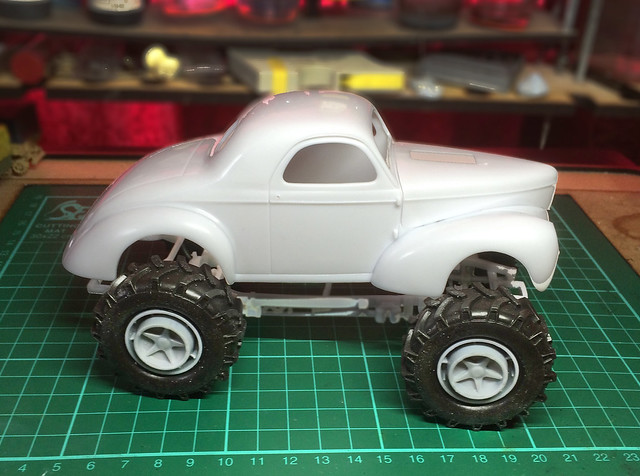
This is a 'suck it and see' modelling moment - I'll drop the body on top of the chassis and try and work out what modification I would need to make to the bodywork in order to make it fit snugly onto the chassis...

I want the body to fit onto chassis, not sit high like this as if it was a monster
truck! This means I will have to enlarge the wheel arches...A lot!
Now, obviously, the cars wheel arches need to be dramatically enlarged to make room for the chunky tyres. So carefully does it - it's a case of draw a line where you think the modified wheel-arch should be then trim a bit and test for fit, then trim some more, then test, etc, etc...

So, hopefully, the next time you see this I will have the body on...Now, where's my Dremmel!

Next: Main bodywork modifications for 'Mad Max' them and painting the chassis and wheels.

Saturday, 14 February 2015

Revell 1/144 P-47 Republic Thunderbolt - Debrief


Finished! That was a LOT of time to do a little 1/144 scale 'easy build' kit. But experimental diversions aside what was the Revell Micro-Wings P-47 like to make?

I think the first thing to mention is this range of 1/144 Revell kits dates back to the 1970s and are re-issues of these venerable models. So, as you night expect, fit and quality aren't exactly up to today's expectations. To put it politely, component fit is somewhat vague.

Now, this might normally be something of an issue were it not for the fact that even at full price these little kits cost only £2.95 each. So, really, you have to give them some leeway in terms of value for money...These are not Eduard or Eastern Express 1/144 models - but neither is the price.

These little kits are ideal for beginners or even more experienced modellers who want to try out new techniques without ruining a full-sized and full-priced model. You just have to be aware that some amount of filling and sanding will be required if you want to complete these models with any degree of real satisfaction.


There are quite a few gaps in seams and an amount of flash to have to clean up. This is a little annoying as part of the whole premise behind these models is ease and quickness of completion. Even the most undemanding beginner will find some of the ill-fitting parts annoying.

Another frustrating aspect of these kits is that they seem to be designed *only* to be made with the landing gear down. This fits in with the lack of a pilot figure, as if the plane is meant to be parked on a runway and yet Revell supplies a 'in-flight' stand with the kit!

If - like me - you want to make the plane as an 'in flight' model you will have to modify the undercarriage arrangement and think about what you will do with the canopy...


With no cockpit detail of pilot your choice of modelling these planes in flying mode means they would look a little strange - I mean, who's flying the darn thing?

Anyway, this conundrum aside for a moment - let's talk about accuracy...

Even though - at just 1/144 scale - I suppose 'something has to go' by way of detail and bearing in mind these are not premium priced precision scale models you can't moan too much at some inaccuracies. Overall what you get is a small representation of a historic aeroplane that resembles the original sufficiently to satisfy the complete beginner. As these are the intended consumers for this range then I guess you could say 'job done' Revell.

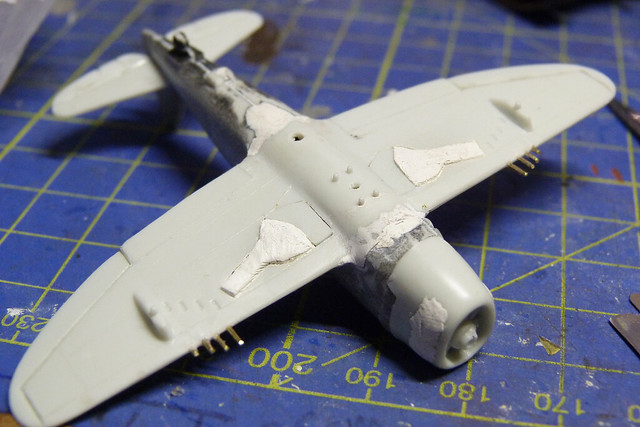
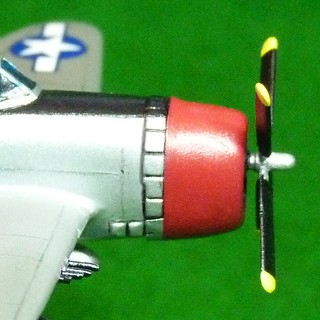
Left: Perhaps the biggest fault in the Revell model is the poor shape of the engine cowl.

From my point of view the three issues I would highlight are the mis-shaped engine cowl, the abysmal propeller and - least serious - the raised panel lines. In particular, as the P-47's 'nose' is one of it's notable features the fact that the shape is incorrect was a disappointment - it's just slightly out, but it niggled me.


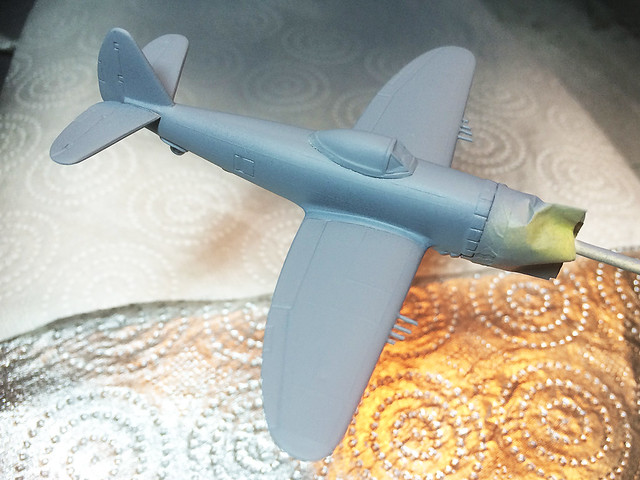
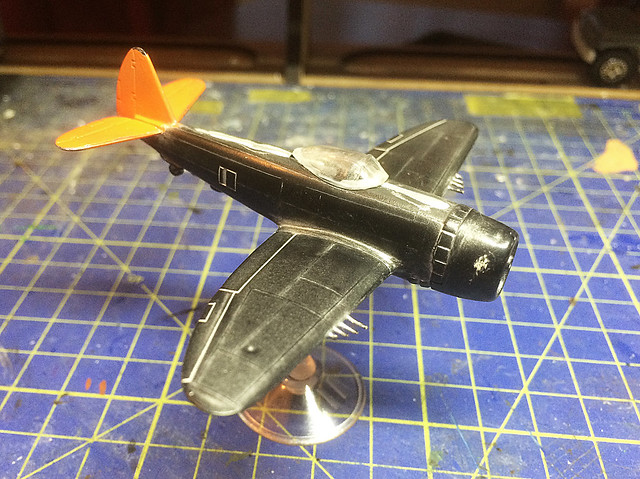
Having filled, sanded, modified and corrected the P-47 actually didn't look too bad once the base primer was applied. In the end I decided to paint the canopy, thus disguising the lack of a pilot!

Which brings up to the paint scheme...

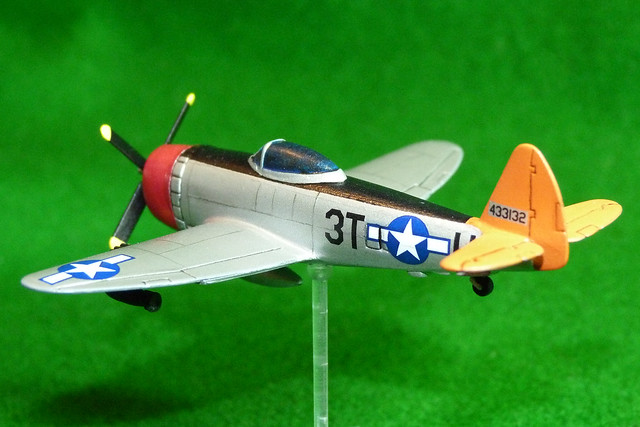
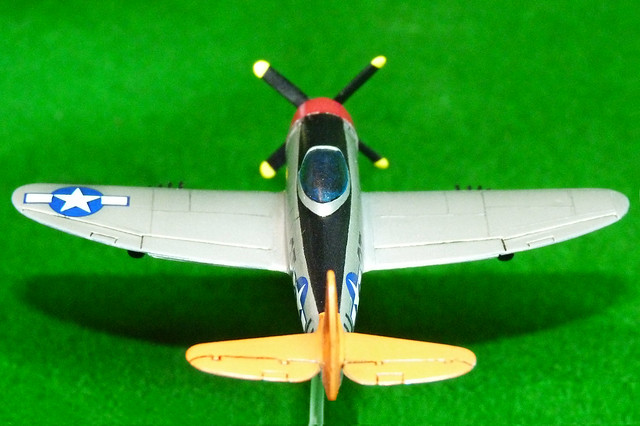
Revell just supplies a single colour/decal scheme for this Thunderbolt - it's pretty enough, though, and simple for the beginner to handle. Best of all the decals are of good quality and are printed well, in particular I was very please with how opaque the white areas were in the decals.


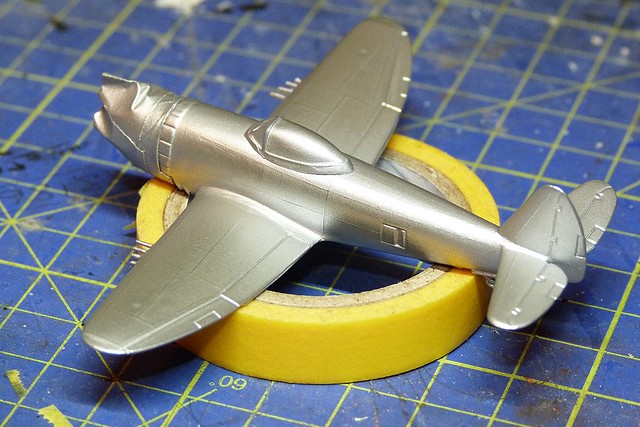
I laid down a coat of Humbrol's Aluminium Metalcote spray, this went on OK though - as an aerosol can paint - was quite textured and not as highly reflective as some of the specialist modelling metallic effects, like Alclad. But - again - for a beginner this is perhaps the easiest and cheapest way to get a bare metal finish on your kit.


As I said, the colour scheme is nice and simple for the beginner, large colour blocks that are easily masked for spraying or brush painting. Once these are done a gloss varnish will make the application of the decals easy.

And that, as they say, is about that. Easy really - an uncomplicated project (which I managed to make complicated - but that's me) and in the end a satisfactorily attractive end product.

(I didn't really bother with weathering - I just highlighted some of the panel lines by accentuating them with a graphite pencil. I also pin-washed the flaps and elevators. That's all.) 

I find myself actually inclined to recommend these Revell kits. They are fun and useful models, both for the beginner and more experience modeller, as they have something to offer either level of model-maker. Simplicity for beginner and a cheap and handy testbed for the more ambitious or meticulous modeller.


Friday, 13 February 2015

Revell 1/144 P-47 Republic Thunderbolt - Pt. 7

[Sub-title: Humbrol Polished Aluminium Metalcote experiment.]

Getting there (finally)! I've applied the decals which is always a nice stage to get to - it's like you've reached the summit of a hill and now it's the easy coasting to the end of the journey.

The Revell decals are very nice and slid off the backing paper very easily and lay on the surface without tearing. The colour was rich and - importantly - the white was nice and opaque. I used Microscale MicroSet to help attach the decals and conform to the raised panel lines of the kit.


Obviously there aren't a lot of decals and it didn't take long to apply them. The main problem I had with them - as usual - was getting them to sit straight, it takes me a while to position decals in what I think is 'level'. It's one of those things that's a matter of personal perspective (literally) and unfortunately, sometimes, when I look at decals I thought were straight the next day they don't appear as straight or level as I thought I had them!

Still, MicroSet is just as good at lifting decals for repositioning again as it is for adhering decals to the surface of your model. MicroSol, on the other hand - while softening decals to make them conform to deep ridges or lines in your model - does stick decals down more permanently or softens decals so much that they are in danger of disintegrating if you try to lift them off again (so if using MicoSol try hard to get it right the first time)!

And so...I'll give the model another light coat of Humbrol's acrylic Satin Varnish spray, just to help settle the decals onto the surface. Once it's dry I can think about pin-washing and weathering. Also, I'll starting to think about the dreadful propeller and what to do with it.

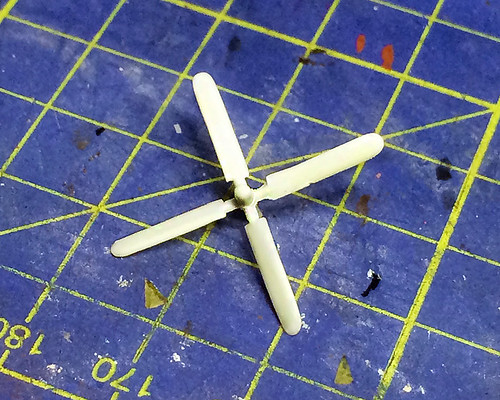
The prop is - to be honest - the worst part of the kit. It's so deformed and flash ridden that it's hardly recognisable as the P-47's distinctive 'paddle prop'.

The Thunderbolt series used - I believe - three different designs of prop and guess what? Yep, the Revell P-47 prop doesn't look exactly like any one of them! It vaguely resembles one of the Curtis designed 'paddle' props but the prop hub suggests the Hamilton prop - If I had to choose (and bearing in mind this is a P-47 'D' model) I'd say this was a badly done Curtis type prop.

I was very tempted to dispose of this part and instead make a fake 'rotating' prop out of a disc of transparent plastic (as this model is supposed to be in flight). I still may, it's - excuse the pun - 'up in the air' at the moment!

Bit of a shoddy 'snap' of the painted prop - painting has not
improved the look of it all that much!
Next: Last leg - as I decide how much post-production work to do (pin-washing, weathering, etc). Oh, and what to do about that darned prop!

Sunday, 8 February 2015

Revell 1/144 P-47 Republic Thunderbolt - Pt. 6

[Sub-title: Humbrol Polished Aluminium Metalcote experiment.]

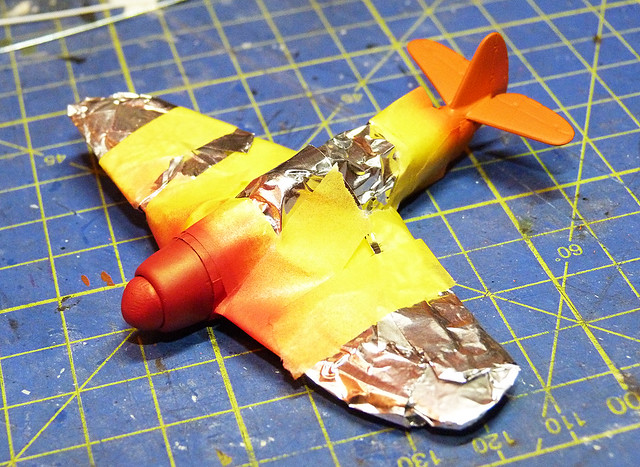
I have been using kitchen cling-film as a masking medium - it wraps round awkward shapes nicely and is self-adhesive making the process easy. However, after my bad experience with it during my Plati-kote experiment I have turned to an alternative material for masking...Kitchen tin-foil (so didn't go too far from the kitchen then)!


Like cling-film kitchen foil wraps around odd-shaped objects easily and quickly. Important as I find masking a tedious task. I just have to tape down the foil to hold it in place, though obviously on bigger models I wouldn't have to mask the whole model!

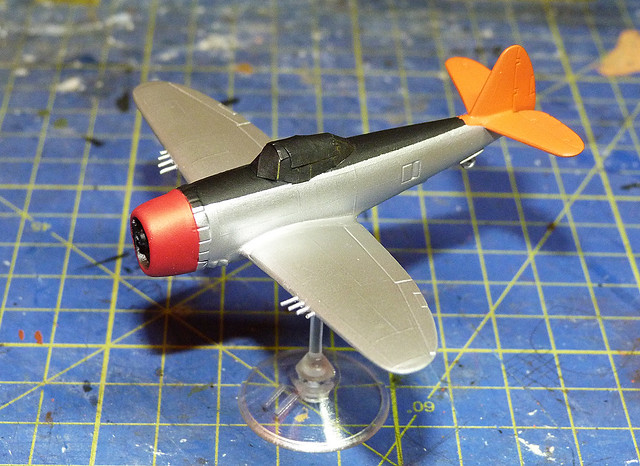
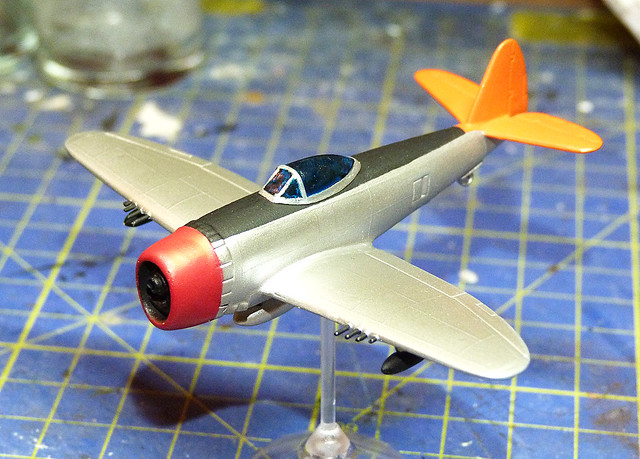
Anyway, we're back on track - my P-47 has an acceptable basic paint scheme...


It's amusing to think that if I hadn't been messing around experimenting with different paints and techniques I could have finished this kit in just a couple of days, instead of the drawn out saga it's ended up being. (I intend to test out this theory once I have completed this project as I bought several of the Revell MicroWings kits while they were on offer.)

Anyway, at this point of the modelling process I would be thinking of applying a coat of varnish - satin or gloss - of maybe even Pledge Klear prior to decaling. But how will Metalcote react to a coat of varnish?

According to what I have read Metalcote needs to be varnished as it drys with a light texture - like a matt coat - and so will have problems (like 'silvering') when the decals are applied. But this idea caused me some concern as I remember what happened when I tried using varnish during my earlier Plasti-kote experiment - it completely tarnished the shiny coat and left it a dull matt silver.

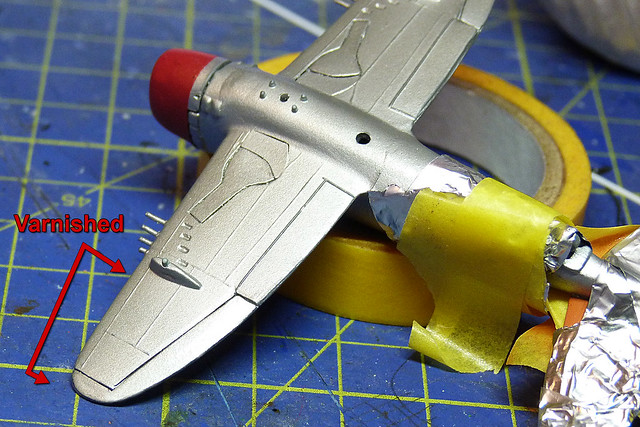
Therefore, I decided to try out a small area on the lower wing as a test patch for glossing...

What am I looking at? Well, the fact you can't see anythings is actually a good
thing! The varnish hasn't discoloured the Metalcote silver. (Oh, and you can see
the bodge I made of the retracted undercarriage - doesn't look too bad.)
As you can see from the above picture Humbrol Gloss Varnish acrylic sprayed over Humbrol Aluminium Metalcote doesn't have a detrimental affect on the metallic coat at all. Super!

...So it's on with the next step which is the painting of the canopy.

I wanted to try a dark canopy - rather than a sky-blue one which some people prefer - and so started with a matt black base. Onto this I started painting on layers of deep blue artist's ink and leaving it to dry after each layer until I got a deep rich and translucent royal blue effect. Onto this I added a wash of white ink, and then another deep blue coat on top of this...


I'll let this coat dry again and have a further play with the canopy scheme as I think I can improve it. Once I'm happy with that it will be time to gloss varnish the whole model ready to add the decals.

Friday, 6 February 2015

Revell 1/144 P-47 Republic Thunderbolt - Pt. 5

[Sub-title: Humbrol Polished Aluminium Metalcote experiment.]

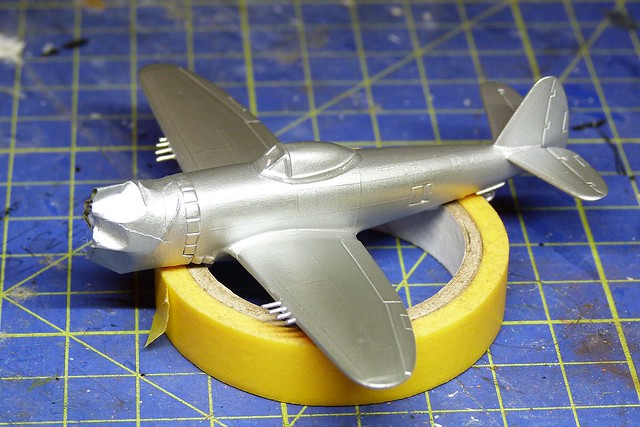
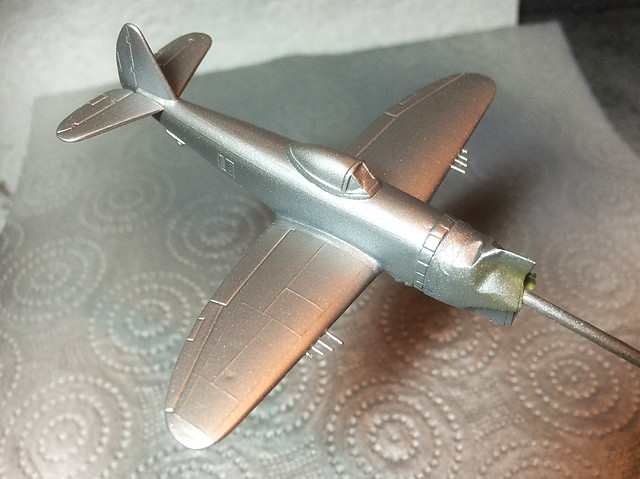
Well, I've polished up the Humbrol Metalcote and it looks OK. See what you think...


It's not a high reflection shine like the Plasti-kote was, but there again this actually worked!

Working with Humbrol Metalcote...
I followed the Humbrol Metacote video tutorial almost exactly - as far as I could tell - but I did not get the same results.

The video shows a result where the sample model did end up with a highly reflective metal shine. As you can see mine was more of a subdued shine, which is quite nice but not quite as good as the Humbrol example.

I found that my initial - perhaps overly cautious - light sprays of the Metalcote did not seem to be thick enough to stand up to the vigorous polish needed to make the paint really shine. So, I took a chance and repeated the process by adding a second round of sprayed coats. (The Humbrol video showed a single round of spray passes - that was a couple of light passes in one direction, covering the model, which were left to dry for half and hour, then followed by another series of light passes in a cross-wise direction. The model was then left to dry over night.)

By the way - don't be tempted to try using a Dremel, or similar hobby tool, to do the polishing. Even if - like me - you have what you think is the appropriate 'soft' polishing discs. My brother was concerned that the high-rev of the Dremel might actually 'melt' or damage the plastic of the kit, but it didn't - what it did do was over-polish and tarnish the Metalcote. It actually turned the Humbrol paint black! I'm afraid this is a job for a soft cloth and plenty of elbow grease.

After leaving my second model over-night again I started the hand-polishing and this time I did get more of a shine. The cloth does show that the polishing does remove a small amount of the paint which is why I reckon giving a double coat helps the process.


In fact, I am tempted to experiment further and give a scrap piece of plastic a triple coat to see what happens. My theory is that the hardier (i.e. 'thicker') the Metalcote application the more aggressively you can polish the paint without being in danger of completely removing the metallic paint. Worth a try.

What next?
Right, back to the model. I'm actually quite please with the actual modelling progress with this - even though all this experimentation has prolonged the actual time it has taken to make this little kit.

So, now I have to add the colour accents to the model; the red engine cowl, the orange tail and the black anti-dazzle panel on the top of the fuselage.

I have to start thinking about panel shading and 'weathering'. Do I panel shade? (In two minds.)

We shall see in part 6 of this extended experiment.

Sunday, 1 February 2015

Revell 1/144 P-47 Republic Thunderbolt - Pt. 4

[Sub-title: Humbrol Polished Aluminium Metalcote experiment.]

Not looking very nice at the moment my P-47 has had it's disastrous first paint
coat stripped back to the black primer coat. (I left the tail as that looked OK.)
Having had a bit of a 'time out' to lick my wounds I had a bit of a think and did some more research. My main reason for looking at something cheap and easily available like Plasti-kote was that all the other means of achieving a polished reflective metal paint coat seemed to be specialist modelling mediums that were fairly expensive, complicated to apply or hard to get hold of. But as the Plasti-kote was an abysmal 'fail' it was back to the drawing board.

Quite by chance I came across a product by Humbrol - of all people - called 'Metalcote' that seemed to fit the bill as being cheap, easy to use (just a couple of coats of spray) and wonders necver cease as it was available in one of my local stores. So it would seem churlish not to give the stuff a go!

So here we are again, but with a less than pristine base coat (I tried my best to clean up the weary P-47 test model ). The Humbrol Metalcote tutorial that I found suggested that you prime with grey, so I decided to give that a go. I know from experience that a grey primer does help highlight any flaws in your model preparation and although I had already primed (with black) I wanted to follow the Humbrol instructions exactly. Here's the video, it's quite informative...


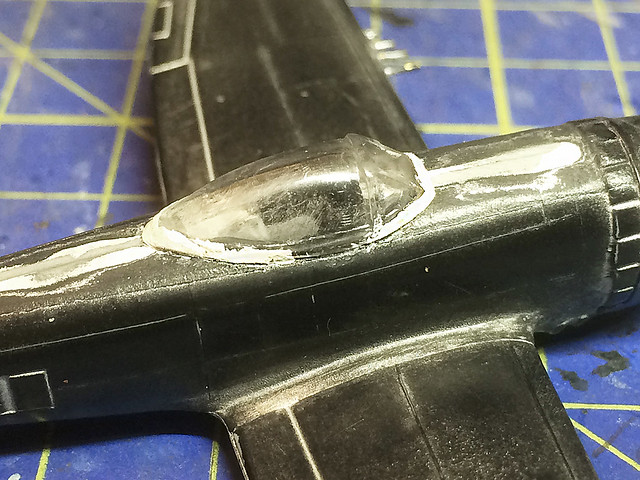
I went as far as to buy the proper Humbrol grey primer spray used in the video. I masked off the orange tail - as that looked alright - and I used this opportunity to attach the canopy this time. I have decided to spray the plane and canopy all in one and then paint the canopy. I have to say that the Revell canopy wasn't the best fit by any means and I had to resort to some filling to get the windshield to fit flush with the fuselage (but even so it was a bit of a bodge).


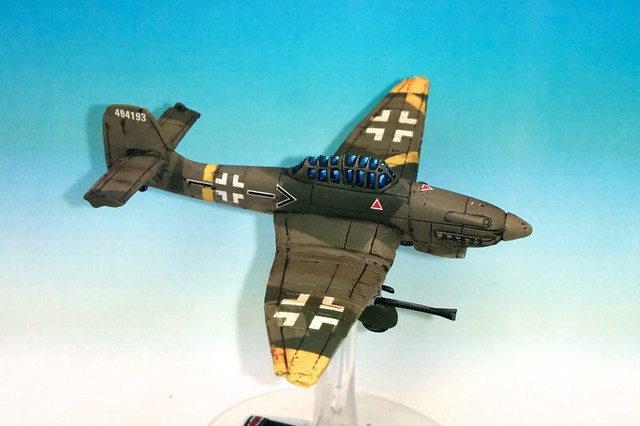
I'm a little unsure just how to paint the canopy - in the style of war gaming aircraft - as I don't have much experience in this technique. Most seem to go for a plain sky blue scheme, some others paint the canopy with a nicely shaded pattern with white at the edges to deep blue in the middle, or variations thereof...

Example of small model with a painted and shaded canopy scheme.
Credit: Rust and the City Blog
So this part will be a sort of experiment within an experiment!

Anyway, onwards. In the end I decided to strip off the orange paint on the tail as well as I'm trying to make a clean start of things. The Humbrol Grey Acrylic Primer spray goes on very nicely, but even so I was nervous that any of the previous paint layers would spoil the new coat...


Not bad! Very happy with that, it does give me a nice smooth base for further coats and I was glad to see that my cleaning and sanding of the previous paint had not adversely affected this next stage. There were no noticeable blemishes or 'bumps' where bits of stubborn paint remained.

A good start. But now onto the Humbrol Metalcote. I watched the Humbrol tutorial several times and tried my best to follow the techniques shown in the video. Spraying from a can is always a bit of a lottery and quality of coverage can be effected by many factors; whether the can is new, whether the spray nozzle is clean, the distance at which you spray and the speed and regularity with which you spay.

Spray too close and the coat will be too thick (the Humbrol video recommends a distance of 20cm), spraying too long in one area has the same affect. Use an old can or a can with a old or dirty nozzle and you might get 'splutter'. A steady speed and spray pattern can also help produce a better coat - as commonly known, a couple of thinner coats is better than one thick coat...


I followed the spray pattern shown in the Humbrol video, two light passes over the model in one direction - allow this coat to dry for 30 minutes or so then spray another two light passes over the model in a cross-wise direction (so twice 'up and down' followed by twice 'left to right' for example).

It didn't look half bad, certainly a much better quality coverage than the Plasti-kote Bright Metallic paint that I first tried. Not too thick and nice and smooth.

At this point the Humbrol Metalcote is a dull silver but with flecks of reflective particles all over.

Next: Hopefully in the final part of my experiments I will be buffing up the Humbrol paint to produce a polished aluminium effect. Fingers crossed!