Well, I've polished up the Humbrol Metalcote and it looks OK. See what you think...

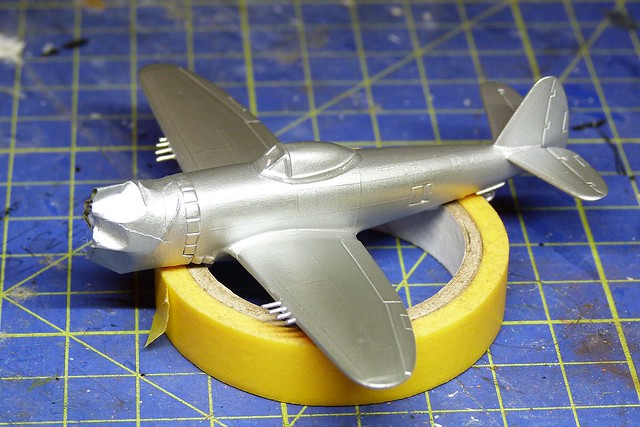
It's not a high reflection shine like the Plasti-kote was, but there again this actually worked!
Working with Humbrol Metalcote...
I followed the Humbrol Metacote video tutorial almost exactly - as far as I could tell - but I did not get the same results.
The video shows a result where the sample model did end up with a highly reflective metal shine. As you can see mine was more of a subdued shine, which is quite nice but not quite as good as the Humbrol example.
I found that my initial - perhaps overly cautious - light sprays of the Metalcote did not seem to be thick enough to stand up to the vigorous polish needed to make the paint really shine. So, I took a chance and repeated the process by adding a second round of sprayed coats. (The Humbrol video showed a single round of spray passes - that was a couple of light passes in one direction, covering the model, which were left to dry for half and hour, then followed by another series of light passes in a cross-wise direction. The model was then left to dry over night.)
By the way - don't be tempted to try using a Dremel, or similar hobby tool, to do the polishing. Even if - like me - you have what you think is the appropriate 'soft' polishing discs. My brother was concerned that the high-rev of the Dremel might actually 'melt' or damage the plastic of the kit, but it didn't - what it did do was over-polish and tarnish the Metalcote. It actually turned the Humbrol paint black! I'm afraid this is a job for a soft cloth and plenty of elbow grease.
After leaving my second model over-night again I started the hand-polishing and this time I did get more of a shine. The cloth does show that the polishing does remove a small amount of the paint which is why I reckon giving a double coat helps the process.

In fact, I am tempted to experiment further and give a scrap piece of plastic a triple coat to see what happens. My theory is that the hardier (i.e. 'thicker') the Metalcote application the more aggressively you can polish the paint without being in danger of completely removing the metallic paint. Worth a try.
What next?
Right, back to the model. I'm actually quite please with the actual modelling progress with this - even though all this experimentation has prolonged the actual time it has taken to make this little kit.
So, now I have to add the colour accents to the model; the red engine cowl, the orange tail and the black anti-dazzle panel on the top of the fuselage.
I have to start thinking about panel shading and 'weathering'. Do I panel shade? (In two minds.)
We shall see in part 6 of this extended experiment.
No comments:
Post a Comment