Showing posts with label X-Ref: CAMO/FINTEST/1114. Show all posts

Friday, 4 December 2015

Finnish Camo painting tests - Part 2

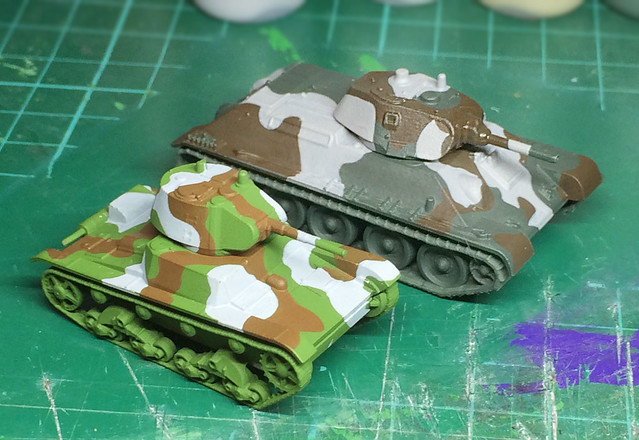
Right, my first test scheme done (though not weathered yet), I'm moving onto the second of the camouflage patterns based on what I believe to be the correct colour set for WW2 Finnish armoured vehicles. This time, it's a more subdued interpretation of the Finn's 3-colour camo based on examples on display in various museums.

[Note: You might ask why I didn't just base my colour scheme on museum exhibits in the fist place - after all if they are in a museum they are bound to be authentic aren't they? Well, that's a can of worms I don't want to open - suffice to say very little original WW2 vintage Finnish paint schemes still exist, and where they do they are often faded and discoloured. So, in short, if you see a nice Finnish camo scheme in a museum the likelihood is that it is a modern repaint. So determining which of the schemes out there are the authentic ones can be a bit tricky.]

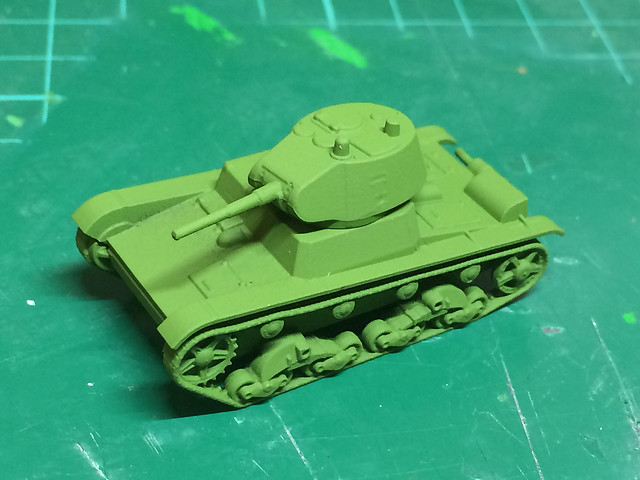
Anyway, 'nuff said - here is my second crack at 'a' Finnish 3-colour camo...(This time using a Zvezda 1/100 T-34 Model 1940 as the test-bed...)

1. Base colours. 
The basic colour I'm starting with is the green, and in this case - despite the official description of the Finn's green element being termed 'Moss Green' - research leads me to believe that the actual green of a 1941-45 3-colour Finnish camouflage pattern was a bluish-green.


I began with a primer coat of Humbrol's No. 30 Dark Green Matt acrylic spray, which is a slightly lighter bluish tinged green than my main coat will be. The main coat was then applied and consisted of a mix of Vallejos' [70920] German Uniform and a dash of [70979] German Camo Dark Green.

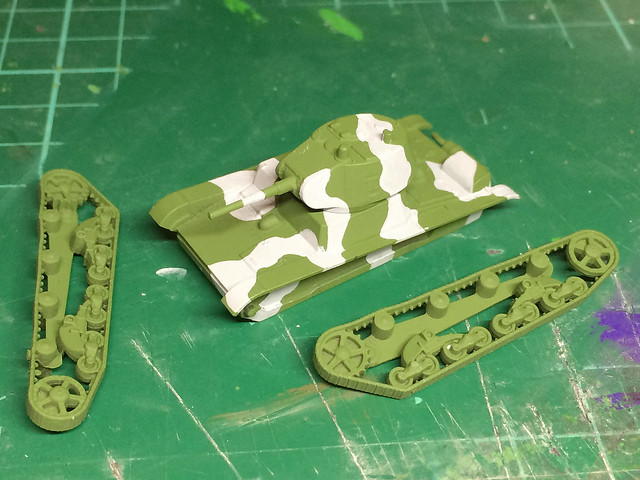
2. Grey(ish)
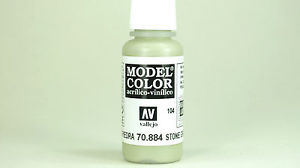
Next, I'm trying out a warm grey - which has a hint of oatmeal colour to it - which I have mixed using some Vallejo Model Color [70990] Light Grey and a dash of Vallejo [70884] Stone Grey...
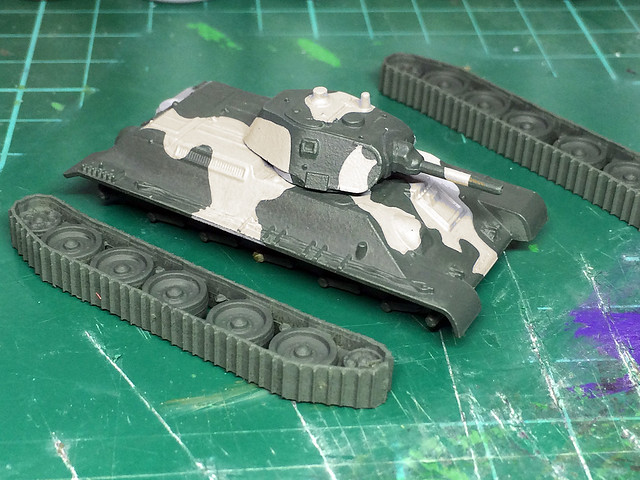


Amusingly, this looks just grey in my photo which just goes to illustrate how tricky colour matching can be when using photography, Changes in light and exposure can 'warm' or 'cool' colours. You'll just have to take my word for it that there is a very subtle hint of Stone Grey (a soft beige) in there.

I am not going as far as some modellers go through and making this part of the 3-colour camo an obvious sandy-beige. Even model manufacturers - like Tamiya - tend to get very 'artistic' when it comes to interpreting this colour (they have gone full-blown sand).

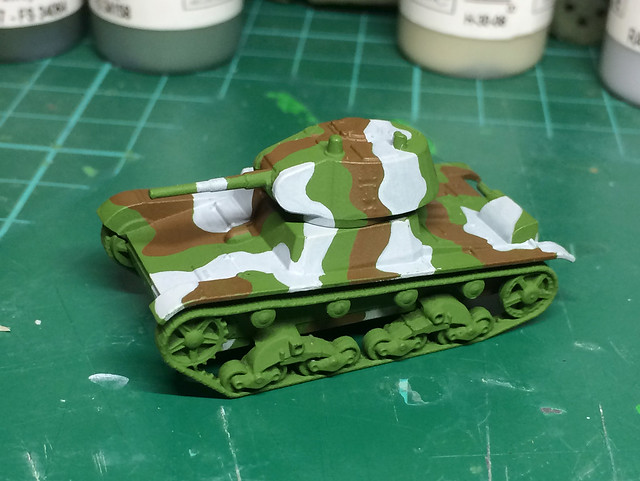
3. 'Sand Brown'
My preference (note wording) for the type of brown which will represent the very loaded description of 'Sand Brown' is more of a mid-chocolate-brown. In my case, I have plumped for Vallejo's Model Color [70941] Burnt Umber...
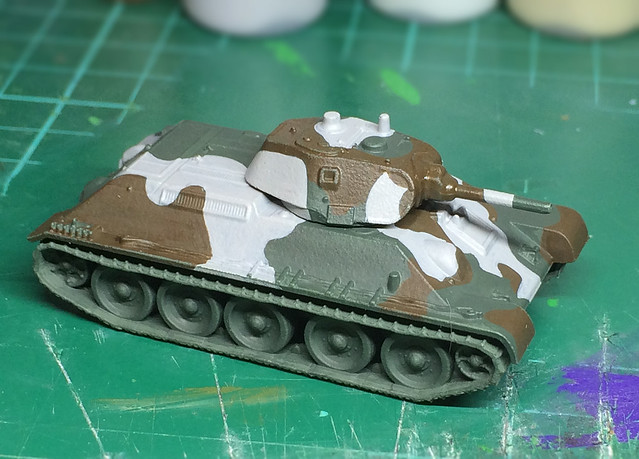

The only issue I have with this is the shape of this pattern rather than the colours themselves. But apparently this is an authentic pattern so my personal aesthetics have little relevance. The brown turned out looking a little glossy for some reason, but I will be giving it a spray of matt varnish later so that should tone this down.

Well, that is the basic painting tests done, I'll need a little time to reflect on which I prefer. In the meantime, I will finish off the two test models with some weathering as they are quite nice in their own right.

Finnish camo painting tests - Part 1

I've done several posts about my attempts to understand the Finnish 3-Colour camouflage. I am hoping this is my final tussle with the issue. On the face of it, the job of painting a model of a piece of Finnish WW2 armour should be fairly straightforward - but as I have mentioned before there are a lot of varying interpretations of what is meant by the well-known colour recipe of Grey, Moss Green and Sand Brown. Here are two examples of how this simple recipe can get a little complicated...

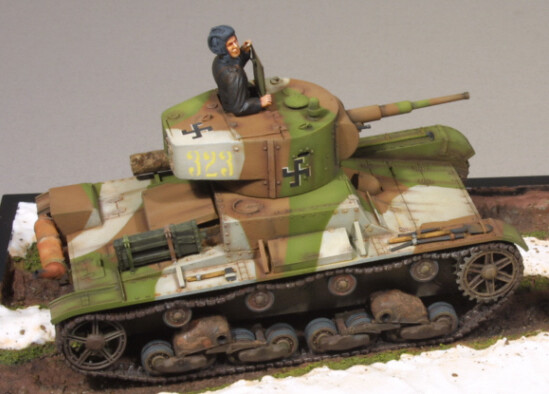
This wonderful Finnish T-26 is by Ray Peterson. The colours - even though
weathered - are still quite vivid renditions of the Finnish 3-colour format.
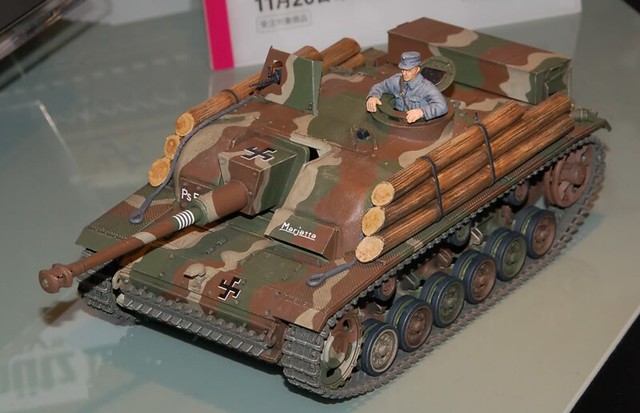
On the other hand, here is an example of Tamiya's relatively new Finnish 'Sturmi'
Stug. This is one of Tamiya's own demo models (photo by Jens H. Brandal). As
you can see, it's quite a contrast to the T-26's colour scheme.
I decided that the easiest way to get a handle of what might look right would be simply to try out a few test models. This might sound a bit drastic but Zvezda makes some very cheap 1/100 models (£2.50) that are ideal for practising and experimenting with colours schemes and weathering techniques before applying them to your full-sized models.

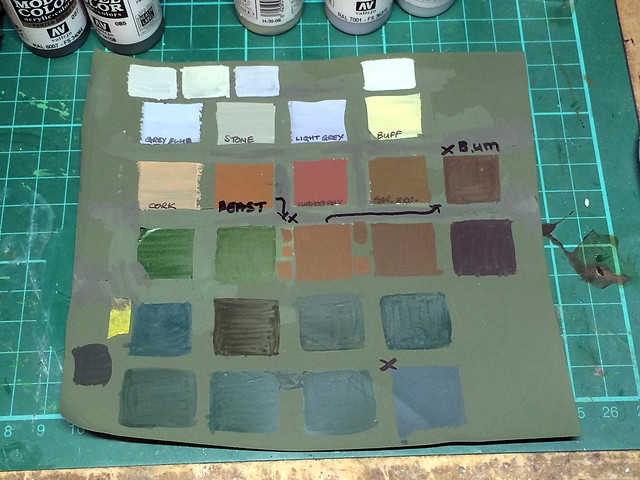
First of all, I created a set of colour swatches so I could see some of the possibilities
available to me. As usual, the colours indicated on the bottles or in manufacturers
literature don't precisely match what comes out the bottles. Colours also 'change'
depending on what other colours they are painted onto so seeing my choices on
a mid-olive was quite an important starting point.
Reference source notes: This first variation attempt at the Finnish 3-colour camo is based upon modellers reference guides, the painting instruction of some model manufacturers and their box art and upon the work of other modellers. It's a vivid interpretation but in a literal sense conforms to the official description of the Finnish colours as being 'Moss Green', 'Sand Brown' and 'Grey'...


So, let's have a go...

I happened to already have an example of Zvezda's 1/100 scale T-26 light tank. This snapped together in less than a minute and I began my painting test with 'a' version of the Finnish Moss Green. I used Humbrol's acrylic 'Grass Green'...


This is pretty striking compared to the usual military olive drab or dark green. However, part of this experiment is to see how these various colour combinations or choices changes during weathering.

After the Moss Green I added the Grey element of the camo pattern. My choice for this was Vallejo's Model Color Pale Grey Blue [907]...


And finally, I added the 'Sand Brown' - which I interpreted in the form of Vallejo's Game Color Beasty Brown [72043] mixed with a little Model Color Burnt Umber [70941] to create a brown somewhere between the two browns used in the example models I show at the top of the page...


Well, that's my first attempt. Not so sure about the vivid green, but we shall see after the weathering stage (it might tone it dow a bit). The grey is a bit bright as well (in its pristine form) but I am quite happy with the brown.

Next I shall try out my alternative scheme - which will be a little more subdued - and then I can compare the looks and choose what I think it the most authentic.

Wednesday, 3 December 2014

Finnish Three-Colour camo test - Part 3


Well, I finished my paint test. Paint application problems aside - which resulted in this patchy finish - I did manage to learn what I needed in order to undertake a 'live' project.

While I found that the BluTack method of masking easier to apply the hard-edged finish produced by the masking tape method was preferable. It produced a camo pattern closer to the original Finnish scheme, it's just a bit fiddlier and time consuming to apply.

Properly priming the model before beginning is essential. The basic colour layer needs to be a firm foundation onto which you can apply the subsequent layers of your camo scheme. There again my choice of cheap plastic toy as a canvas probably didn't do me any favours.

I've settled on a palette of colours which I think are as close to the original Finnish 3-colour pattern as I'm going to get. My 'Green Tank' [test 1] turned out to be the better interpretation of the Finnish scheme, with the flatter green, lighter grey and chocolate brown that wasn't so red.

One final 'trick' I learned was how to mix Vallejo's Model Colour paint correctly for airbrushing (rather than relying on their Model Air paints straight out the bottle). I bought a bottle of Vallejo's special Airbrush Thinner [71.161] and mixed this with my paint 1:1. It went through my airbrush very nicely and I found that my air brush didn't clog as easily as it did with 'straight' Model Air (so I will start adding some thinners to that too in future).

(There is another product on the market described as a 'flow aid' which retards the paints drying so it is less likely to clog. That may be worth a try if I continue to have problems with Vallejo paints becoming too gloopy in my airbrush.)

My green was - as I mentioned in my last post - Humbrol's No. 86 Light Olive, while the grey was Vallego's Model Air Pale Blue Grey and my chocolate brown was a mix of two Vallejo Model Color paints. I mixed 2/3rds German Camo Black Brown [822] with 1/3rd Burnt Umber [941], this gave me a satisfactory dull, flat dark brown.

...So there you have it. This post is probably more interesting to me - as an experiment - than it is to you as a reader. I'm sure this exercise was all a pretty obvious really, but it was useful practise before I undertake the real thing!

Monday, 1 December 2014

Finnish Three-Colour camo test - Part 2

Well, I had a little problem, but funnily enough it wasn't the problem I had expected when I started this experiment. While primarily concerned with creating good accurate colours and neat camo patterns the problem that I came across was a elementary one of good application of paint.

On the other models I have made so far I have become accustomed with being able to get away with just using a spray of Humbrol's acrylic paint as a base layer. This is a fudge and not really good practise I suppose, as the following results show...

Technique 1 - Green Tank (Masking tape method)
Really you should prime plastic models with a good enamel primer - something like Halford's automotive spray paint is good (in a colour to your liking). Not doing so was my downfall in this case as the very cheap greasy plastic used for these toys (similar to that used for soft plastic toy soldiers) is very choosy about what paints you can use with it and using the wrong paint can result in flaking...

Peeling off the masking material also - annoyingly - peeled of bits of my base paint.
Basic painting lessons aside I was actually mildly pleased with the job I made of air-brushing the first camo colour on this tank. This was the tank masked using a simple masking tape technique, so it's a hard-edged effect.

In this case I removed the first set of masks after spraying on the grey pattern over the base green layer. So, next, I will re-mask ready to spray the final brown pattern.

Technique 2 - Grey Tank (BluTack method)
Because the BluTack method means I do not remove any of the masks until all the colours have been applied I did not notice my flaking problems right until the end.

What I decided to do - on both models - to rectify the flaking paint problem was to simply touch up the patches where the plastic was showing through by slapping one a bit of paint. Not idea but I am banking on not having this same problem on future models by using an enamel base.

The paint peeled off with this BluTack method too - but I then touched up the
model with the closest shade of acrylics that I had to hand.
Once again, I was relatively pleased with the actual air-brushing - this time a soft-edged effect - it wasn't perfect but I am still not very experienced and hopefully my air-brushing will improve with practise.

Unfortunately, where I had to touch up the paint job I lost some of the soft-edged effect, so it's a little shoddy now. (Also, just to get the job done, I used whatever colour I had to hand, so they weren't an exact match for the Vallejo Model Air colours...Another lesson, which I will discuss next.)

Lessons learned
OK, from this part of the experiment I learned a few things, which I will rectify when it comes to doing the real Finnish tank models.

• Correct Priming: I need to correctly prime my projects with enamel to prevent chipping and flaking while masking.
• Colour matching for touching up: Because I am using Vallejo's Model Air colours for air-brushing - rather than thinning down normal acrylics - I have to make sure I buy the complementary Vellejo Model Colour so I can touch up any bloopers or smudges.

Vallejo Model Air is made specifically for air-brushing and is a pre-thinned
paint, so if you want to touch up or brush paint you should buy the equivalent
colour in their Model Color range to match.
But also, more generally...

• I preferred the hard-edged effect [1], I think this was closer to the original Finnish schemes.
• I like the colours on the Green Tank [1] better so far, the Grey Tank [2] colour are a bit dark in my opinion.

Tank 1 - 'Green Tank' - Finnish colour scheme:
Base 'Moss Green' - Humbrol's Light Olive Matt [86]
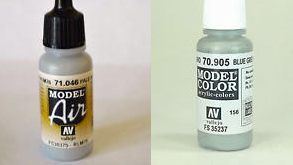
Camo Grey - Vallejo's Pale Blue Grey [Model Air 046/Model Color 907]
Camo Brown - Unfortunately I couldn't managed to get just the right brown 'out the bottle' (I tried have a dozen different browns from the Vallejo range), so I'm having to mix two colours. These are: [941] Burnt Umber and [822] German Camo Black Brown. Hopefully I can thin this for airbrushing.

Next...
So, I still have to finish off the Green Tank test and I think I will try a light coat of varnish before applying the final mask. Hopefully this will protect the current layers and will prevent chipping when I remove the next mask. Fingers grossed.

Friday, 28 November 2014

Finnish Three-Colour tank Camouflage experiment

It's approaching that time when I have to leave the comparatively comfortable world of plain old green trucks and try my hand at some 3-colour camo! Eeek!

A very nice example of the Finnish 3-colour camo done right(ish). While being
nicely applied there is some question over the use of the 'buff' colour, which
is supposed to be a 'grey' colour but opinions differ (even among experts).
Picture source: 
Stephen Brezinski, www.onthewaymodels.com
My Finnish 'Heavy' Tank Company rumbles inextricably closer to my workbench as it works it's way down the cue of projects and it's a job I have not been looking forward to. As a Kitnoob I still haven't had a lot of experience with the masking technique involved with a multi-colour camo scheme and what's worse is that the two early attempts at this ended in failure...

My very first attempt at 3-colour Finnish camo was with this poor old Pegasus
KV-1. What a mess! A mix of bad masking and too thick an application of spray paint.
So, before I undertake this process again I thought I would seek out a 'practise victim', a model that I didn't mind sacrificing to the god of bodged paint jobs!

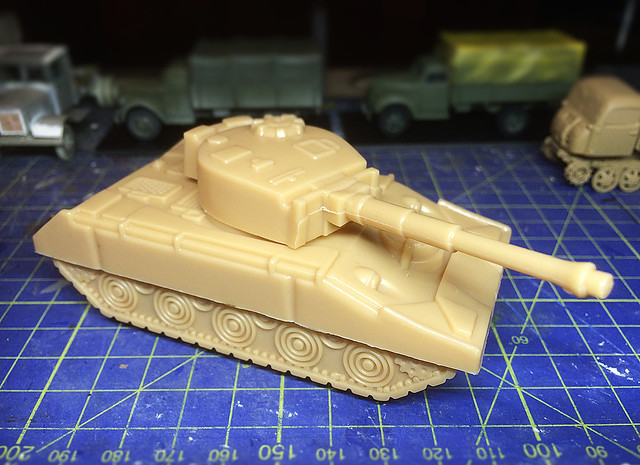
I picked up a pack of plastic soldiers and tanks at my local Pound Store as the tanks included in the cheap and nasty play set looked like they might has some merit for just this sort of painting experiment. The tanks were hardly accurate or complex models, but in this case that suited me fine...


Now, to nitty gritty. World War 2 Finnish Three-Colour camoflague is described repeatedly as having been 'grey, brown and Moss Green' in various reference publications, typical of these is this description in Osprey's 'Tanks of Hitler's Eastern Allies 1941-45' [Page 38]...

"In the spring of 1943, the summer scheme of dark green overall was superseded by a three-color camouflage scheme of moss green (~FS 34083), grey (~FS36306), and sand brown (~FS 30040). In spite of its official name, the sand brown was in fact a dark brown." [www.ospreypublishing.com]
The mis-application of buff instead of the grey by so many modellers is a little baffling. I *think* the confusion may have come about for two reasons; first the designation of 'sand brown' which people mis-interpreted as being the lightest of the three colours used and secondly because in certain light the richness of the dark brown may have made the grey look a 'warmer' shade (in art and design this effect is called simultaneous contrast).

The situation has not been helped by the illustrators of reference books (and even some armour museums) perpetuating the mistake by painting the grey as a 'sand brown'.

This is a typical example of the confusing colour advice that is out there for
Finnish 3-colour camo. This 'authentic' paint set by Lifecolor clearly denotes
the use of 'UA 244 Harmma No1 Grey' and yet look at the colour swatch for
in the refernce chart (and the light shade in the camo on the StuG).
Of course, some might argue - conversely - that the mis-designation lays in the lightest colour being called 'grey' - as in the Lifecolor case above - but the real colour used being a buff colour!

Last word: Confused? Well, please refer to this reference page on Andreaslarka.net for both a level of clarification AND also a nice example of the simultaneous contrast effect (and poor lighting) at work. Is it a light creamy-buff or is it grey - you decide! (Hint: Compare the 'grey' that's next to the brown and then compare it again when it's next to the green.) Link: Finnish T-34 m1941 # Ps. 231-1 reference photos.

Anyway - that conundrum out the way, lets talk painting....

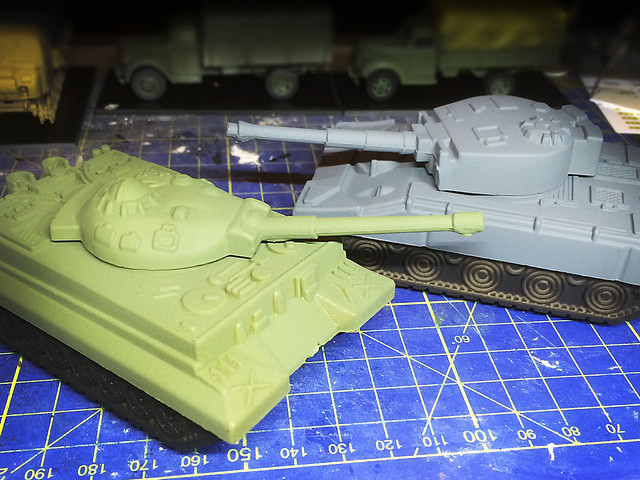
I decided to use both toy tanks from the set so I could try out variations in techniques. So teh first job was to base coat the little blighters.


The plan is to use the BluTack masking technique on the grey panzer (for a soft edged effect) and a straight forward masking tape method for the green tank (for a hard edged look).

I have a few pictures of Finnish three-colour camo patterns to use as guides for how I arrange my masking materials on the tanks....
A Finnish T-28 in 3-colour camo.
Picture source: Armchairgeneral.com
In both cases I will begin by masking out the two base colours - green and grey. Then I will spray the next colour, then mask that out and then spray on the final colour. The other way of doing this is to mask one colour, then remove all the masking material then mask for the next colour, then remove that and then mask for the third. Here's a video which shows this second method in action (you can skip through the video to the main..


BluTack and masking tape at the ready!

Technique 1 - Masking tape/hard edge
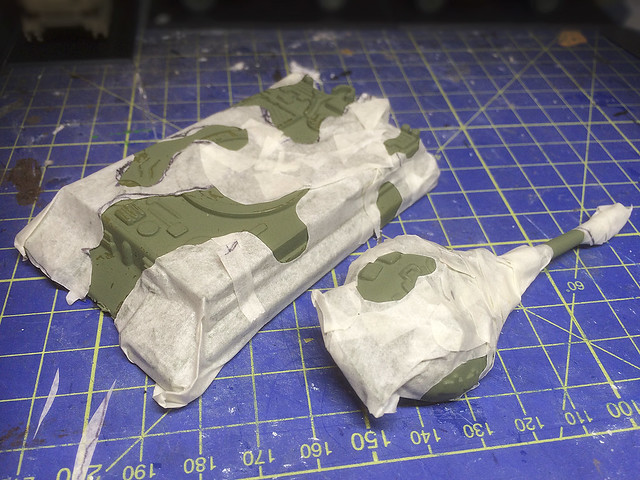
OK, green tank gets the masking tape method. I mask off to spray one colour at a time (in this case I ready to spray the grey layer)...


I will spray, then remove the masking tape before masking for the final colour - brown. This should produce a clean hard edge between the colours - looking at the reference I have it seems the Finns painted hard edges to their camo patterns so this method should be more authentic.

Technique 2 - BluTack/soft edge
Grey panzer (it's supposed to be a Tiger turret I think) get's the soft edge approach. In this method I mask out to spray the brown layer, but instead of removing this mask when done to apply the next mask I simply ADD another mask on top of parts of the brown layer I want to keep and then spray the green over the areas I leave unmasked.


The rounded edges to the BluTack masks should help produce the soft edge when spraying. Although this isn't perhaps appropriate for Finnish armour I want to practice spraying a soft edge 3-colour camo (as I have a German StuG in the pipeline).

Next: The second and third of the camo colours and the un-masking!