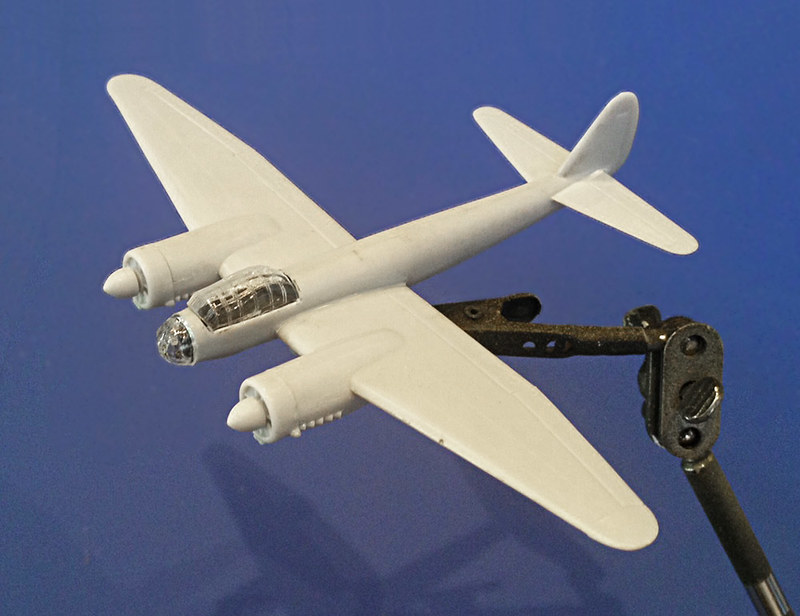
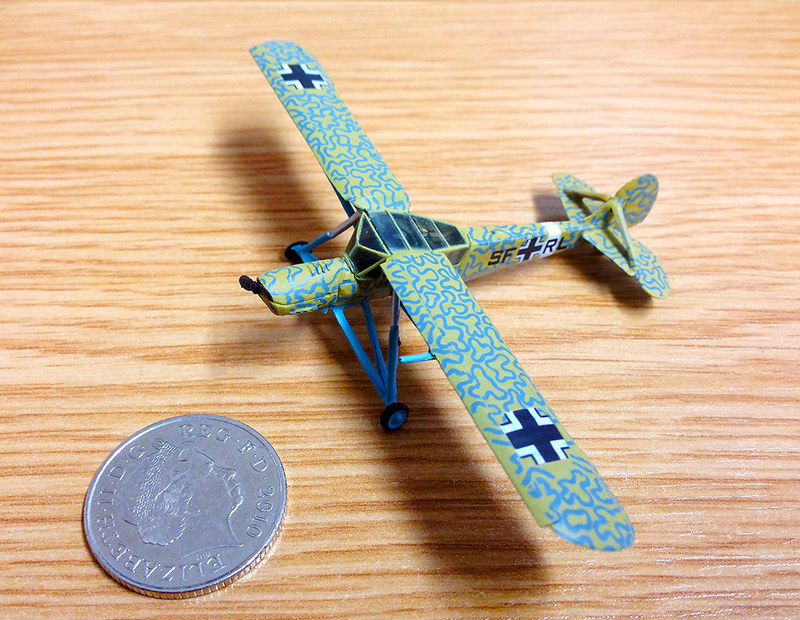
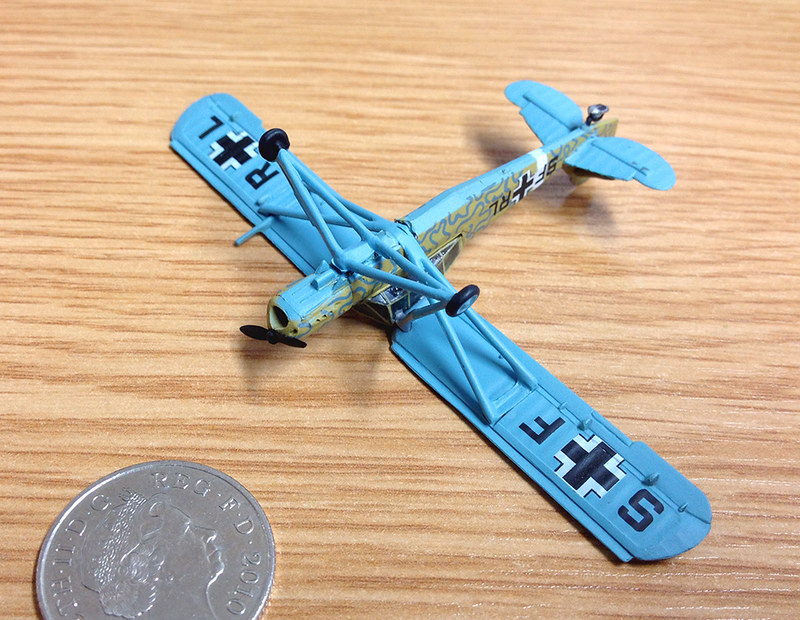
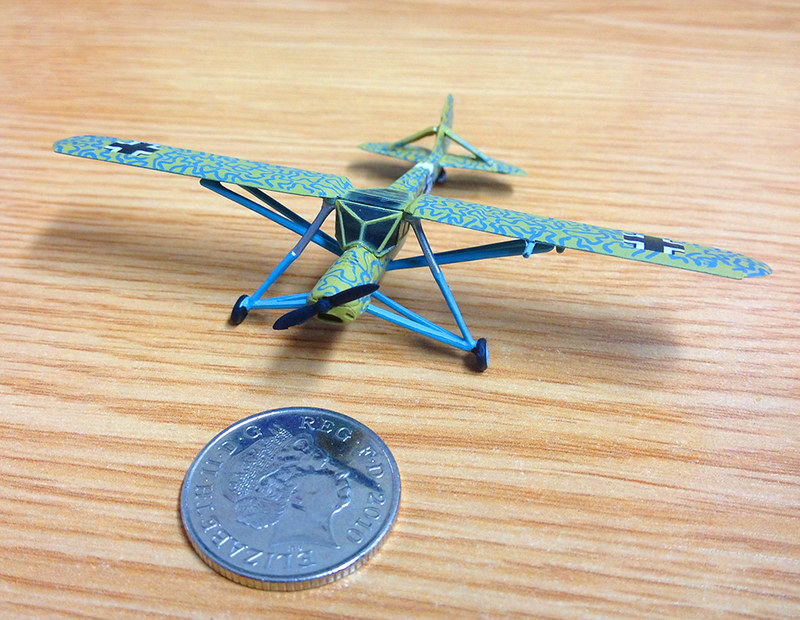
Well, construction complete, though I have left off some of the minor and tiny parts - such as machine guns - until the main base coat painting is done.
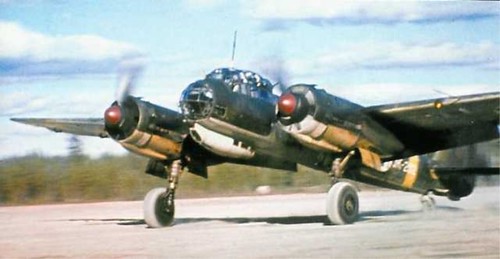
It's a nice looking plane isn't it? I hope my painting can do it justice, I will start by spraying the underside with my Tamiya AS-5 Light Blue for the Luftwaffe RLM 65. All I masked out at this stage was the canopies.
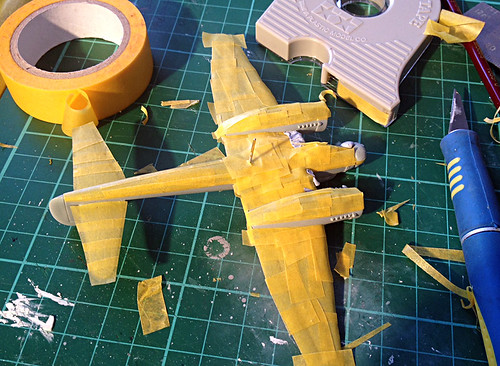
The basic green was done with Humbrols lovely Dark Green spray (N0. 30) and there was plenty of masking to do to create a nice hard demarkation between the lower surface blue and the upper green. I do like masking, it's very relaxing!
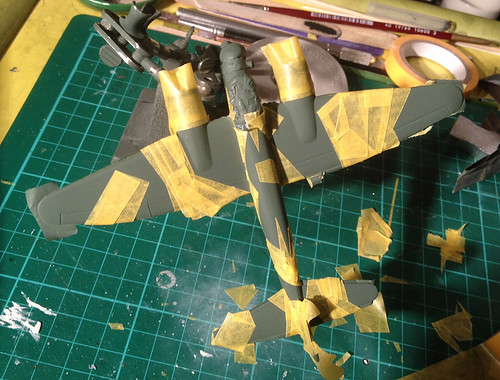
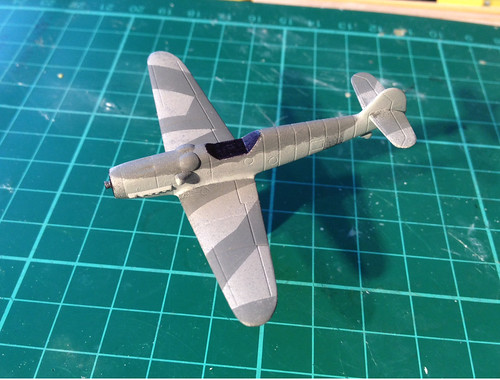
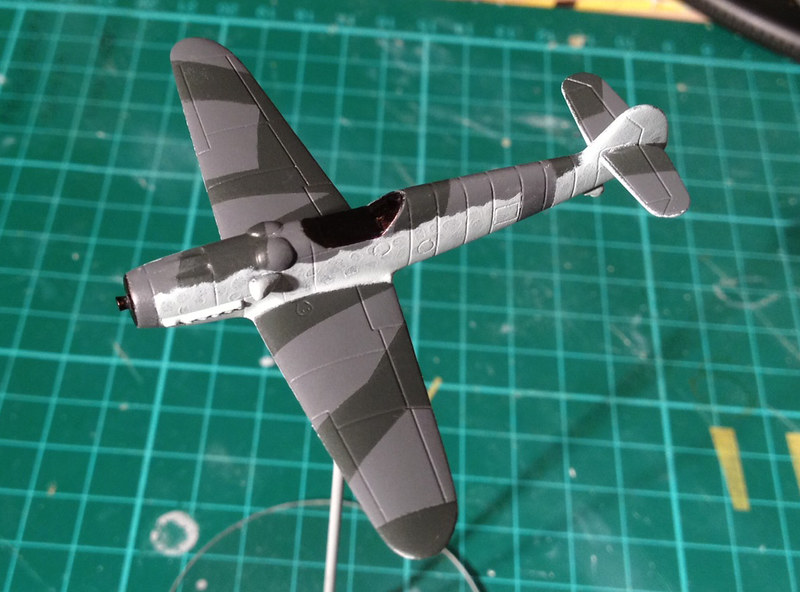
And finally we get to the groovy bit - the splinter camo...
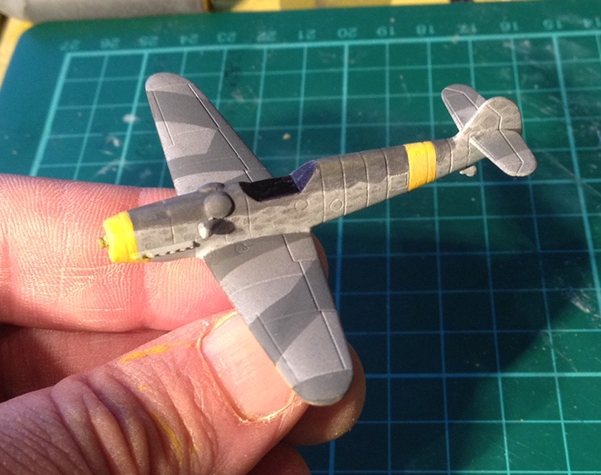
Unfortunately I didn't have a good match for the RML71 (Dark Green) for the splinter camo, so I used the nearest thing I had in my paint box - Tamiya's AS-4 Grey Violet. But with some weathering it should look OK I think...
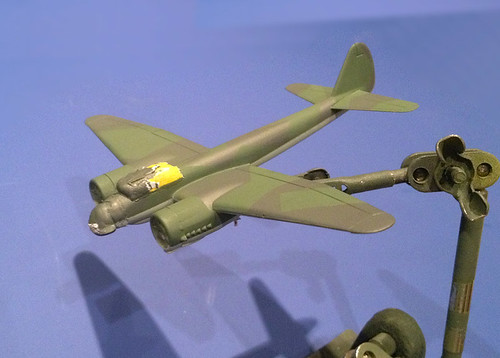
The canopies still have their masking on as I don't want these to be spoilt when I varnish later on. I will paint the canopy frame last - perhaps with enamels.
Well, there we go. Now onto the touching up before I gloss varnish for the decal stage.
Diary of a novice scale model maker and his adventures in the wacky world of Braille Scale.
Thursday, 28 February 2013
Wednesday, 27 February 2013
Eduard 1/144 Me 109 G-6 Pt. 9 - Bugger!
I've put my Me 109 on the back burner as I get the other aircraft in my Finnish air group to a similarly near completed state (I hope to finish all three at the same time). But putting this model to one side had an unfortunate result - I lost the propeller!
Don't ask me how, I do use a project box for each model but it still went astray. So I had to make a replacement prop spinner, luckily I had couple of spare props in my Minicraft JU-88, though I had to sand the bomber's larger spinner down quite a bit...
I hope my new spinner looks OK. But this is another issue that illustrates the point that I need to get myself set-up with a special place for making my models, and not just a wobbly tray sat on my knee!
Tuesday, 26 February 2013
Minicraft 1/144 JU-88 Pt. 3 – Camo research
Luckily for me the JU-88 in Finnish service seems to be quite a popular subject for modellers and a lot of good information is available about colouring and decals.
Finnish JU-88s seem to come in two 'flavours' - those that stuck with the standard German splinter camo and those that adopted a slightly modified version of this scheme. Either way the colours seem to be the normal German combinations of RLM71 (dark gren), RLM70 (mid green) and TLM65 (mid blue).
I've made this quick sketch to illustrate this scheme...
The underside was all mid blue but displayed the normal Eastern Front yellow sections at the wing tips and underside of the engine nacelles.
I won't be buying special paints for the top side pattern but using what I have in my paint box by way of Humbrol spray cans (their Light Olive and Dark Green) as I think I have fairly good matches for these colours. Especially if I weather them a bit.
I have to say that the German splinter pattern camo design must be the model newbie's favourite camo scheme! Nice uncomplicated strips of masking tape seem to get you a passable impression no matter your skill level! (Famous last words yet again!)
War gaming 'lite' - with War Stories
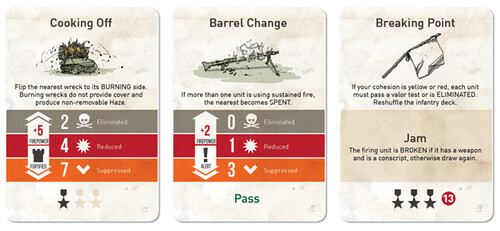
I picked this news up from Kampfgruppe 144 blog - it concerns a neat little 'newbie friendly' card based war game system called 'War Stories' that's compatible with 1/144 miniatures. This is of interest to me because - to be frank - all the war gaming rules I've looked at so far are a little intimidating...I never even played Dungeons & Dragons when I was a kid and have missed out on the whole dice rolling table top games thing!
To me this seems like an easy entry system, ideal for a complete novice like me to pick up in isolation - there may even be some wiggle room for solo play (maybe) - and may get me started in the hobby with some baby steps.
The important thing here is this is what's called a 'Kickstarter' project - it is NOT in production yet, the company are using the Kickstarter web site to raise capital in order to be able to launch the game. Having said that this product is in an advanced state of development - it actually seems fully fleshed out - and they are also a good ways towards their target funding.
I'll be donating a few dollars towards this and although - initially - the two scenarios mentioned are Soviet and American based I note they mention the British in their bumf at various points so am pretty sure a Brit senario will quickly follow.
Anyway, I found this interesting. I know it might be a little too simple for all you dice rolling and tape measure vetrans out there, but I think it has a place in the market.
Developed by Conquistador Games
Kickstarter page: http://www.kickstarter.com/projects/1893407396/war-stories
The developers web site: http://www.cqgames.com/
Monday, 25 February 2013
Minicraft 1/144 JU-88 Pt. 2 – Construction
Being a 1/144 kit there aren’t that many stages or parts to this kit so it doesn’t actually take long to pop this model together. Maybe this is why 1/144 is growing on me?
Anyway, there are no tricky issues to worry about, the design of this kit’s construction is well designed and there’s hardly any flash worth mentioning. However, I was rather surprised that a couple of the main parts didn’t fit as snuggly as I had expected.
In particular it is worth mentioning the engine nacelles. Each engine housing comes in two halves, you glue these two pieces together and then glue this unit to the underside of the wing mating with the upper engine cowling. Well, it’s enough to say that some filling will be required, particularly in the resultant seam under the wing.
Above: The worst fitting parts were the engine nacelles. You can see the gaps here, but
basically if you get them to fit at the back a gap (like above) opens at the front, and vice
versa. Nothing some filler and sanding can't fix easily though.
basically if you get them to fit at the back a gap (like above) opens at the front, and vice
versa. Nothing some filler and sanding can't fix easily though.
...But it could have been worse I suppose, I was just a bit disappointed.
The rest of the parts – including the major fuselage halves – go together OK, with just a modicum of sanding. There was no warping or huge gaps
The main options you have with this kit are whether to have the undercarriage up or down and whether to add the external – wing mounted – bomb load.
One nice touch, which I think is worth mentioning for the war game modeler, is the inclusion of two extra propeller bosses. Aside from the normal bosses with propellers attached, which you’d expect, there are also two with no props so you can model the plane ‘in flight’! This makes it easier for me to add my fake prop spinner.
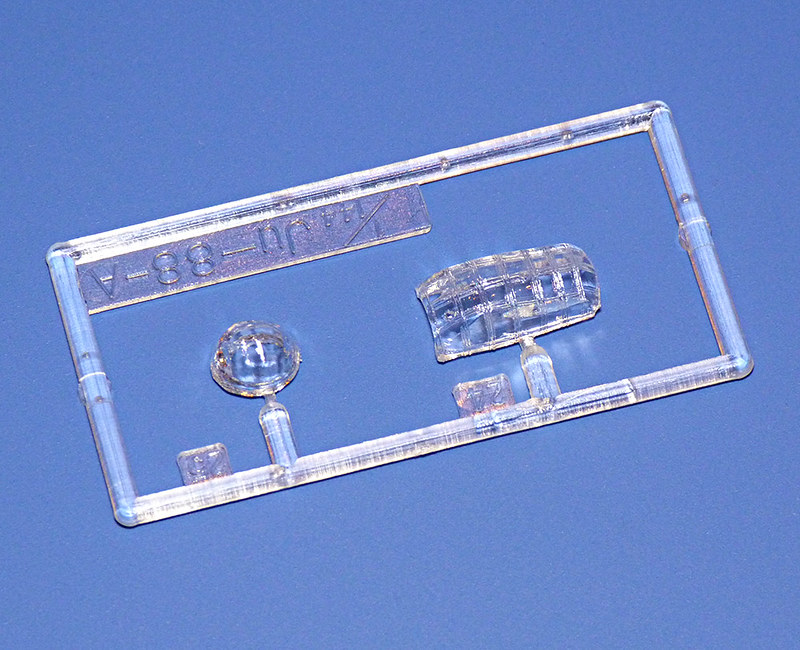
In this instance I have decided to fit my canopies at the construction phase – and mask them out for painting – and so I have dry fitted to make sure there are no problems with size or shape, no problems there. But, you need to be careful when fitting the lower nose gun nacelle - this sits slightly to the left of the center line at the front, but there is no reference holes for you to place this in the correct place. I referenced photos on the Web for the approximate placement (note that this part appears to be quite simplified compared to the real thing).
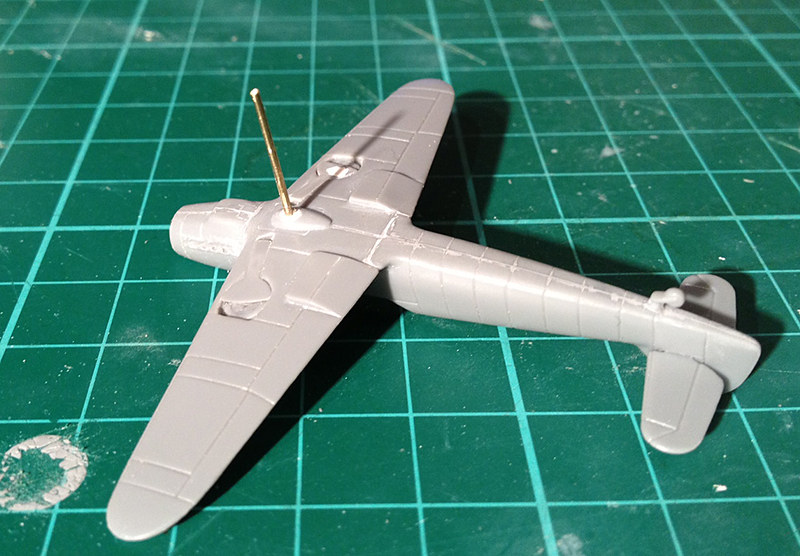
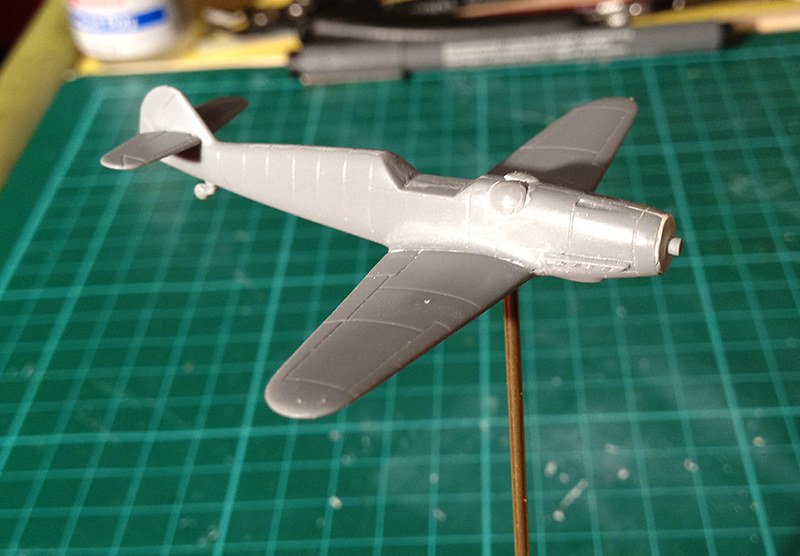
Finally, I drilled a small hole in the center of the lower fuselage, just between the back of the wings, to accommodate the short rod I am using to mount the plane on my homemade stand. However, before I fitted the two fuselage halve together I inserted a block of Milliput model putty to act as a firm anchor point for my stand rod.
Next: Straight on with choosing a Finnish camo scheme, masking and starting the painting.
Saturday, 23 February 2013
Minicraft 1/144 JU-88 (Finnish) Pt.1 - Introduction
Well, I decided I was on a roll (of sorts), so it's straight on with the final aircraft for my late 1943/1944 Finnish war game army air group. This is my bomber, the notorious Junkers JU-88.
Background - The Finnish '88
23 JU-88s were bought from Germany in 1943 - presumably to bolster more obsolete types then in service like the Bristol Blenhiems and Dornier Do 17. Small in numbers they may have been but as usual the Finns got a lot of bang for their bucks (Marrka?) and they devised novel tactics to make up for the Soviet's numerical supremacy.
One cunning tactic was that the Finnish bombers would drop into Soviet bomber formations returning to their bases and rather unsportingly bomb the unsuspecting airfields, destroying aircraft and supplies on the ground!
The Minicraft Model
Well, I was completely impressed with this kit as soon as I opened the box. All sprues were bagged up nicely and there was a very useful A4 set of instructions. The model comes with two colour scheme suggestions and decals, one for a Luftwaffe example and the other Hungarian.
The quality of plastic and mouldings is very good - although I can't say about fit until the next post - and the parts have delicate detail, with raised panel lines and seams - nice.
I was also impressed with the level of detail and the number of parts. I think this kit would give some 1/72 models a run for their money. And talking about 1/72 scale, the main thing that caught my eye was the size of this 1/144 plane - it must be as big as a 1/72 WW2 fighter and will dwarf both my single engine Finnish planes.
Optional parts are provided so that you can build the undercarriage up or down, but other parts are simplified - notably the cockpit, which is the blanked off type I'm afraid (or am I relieved).
Finally, I was glad to see that Minicraft had exaggerated the canopy framework just a bit. This will give a newbie like myself a reasonable chance at painting reasonable looking and neat canopies.
Well, that's the unboxing - all good so far - so it's onto the construction.
Featured work - Paul's Super Tweet
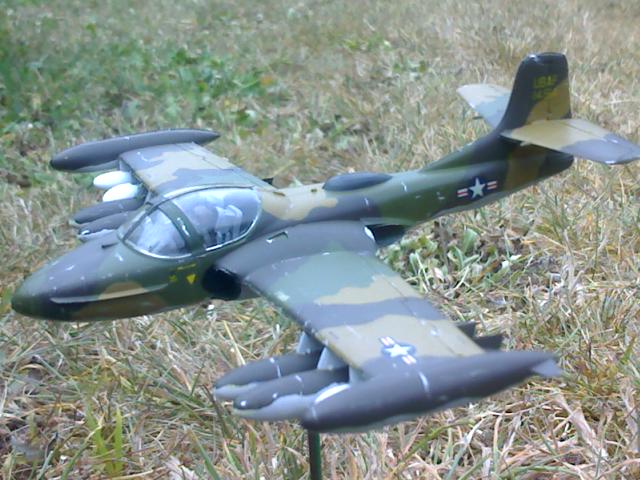
I love ground attack aircraft, I always have, and one day I will no doubt start a project based on my favourites. So I was really excited when Paul over at the Plastic Warriors blog posted up his Cessna A-37 Dragonfly build...
What I especially like about Paul's Dragonfly is his chipping. Weathering an aircraft model is something that has only recently occurred to me (during my 1/144 Me 109 build) as when I was a kid I always built and painted my aircraft kits pristine, without even panel lining.
The other thing about Paul's project that interested me was it reminded me of my old infatuation with the Vietnam air war. When I was young I built an Airfix AC 47 Gunship - or 'Spooky' - and I always wanted to have a go at my favourite aircraft of this conflict, the Douglas A-1 Skyraider.
Anyway, lovely model and a really nice paint job.
You can see more on Paul's blog: A-37 'Super Tweet' Complete
Friday, 22 February 2013
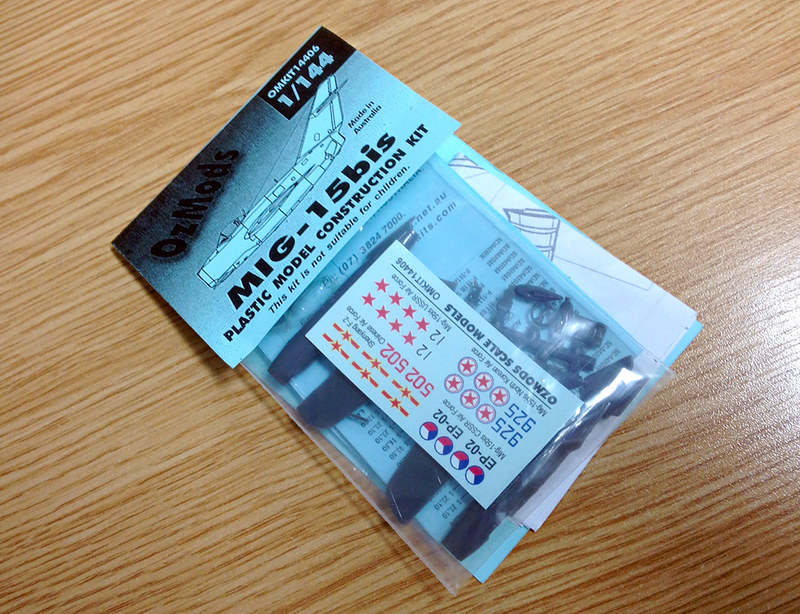
Stash update - OzMods 1/144 MIG-15
A friend of mine at work handed me a little packet today, it contained a OzMods 1/144 MIG-15bis model (which was surplus to his requirements). A nice way to start a Friday!
This will be a nice diversion when I get tired of WW2 stuff, and I have always liked the Korean War fighter aircraft.
This will be a nice diversion when I get tired of WW2 stuff, and I have always liked the Korean War fighter aircraft.
WTM 1/144 Fieseler Fi 156 Storch Pt. 5 - Fake prop
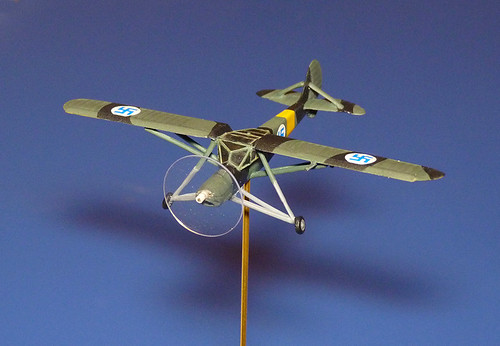
Another small step towards completion, but I'm quite pleased with this - it's my fake prop...
It isn't quite finished, but I was so glad to get a decent circle of plastic cut that I'm posting this up anyway. So, a bit of touching up and that's that really. An enjoyable little project and a nice little plane.
It isn't quite finished, but I was so glad to get a decent circle of plastic cut that I'm posting this up anyway. So, a bit of touching up and that's that really. An enjoyable little project and a nice little plane.
Thursday, 21 February 2013
Airbrush Cleaning Pot
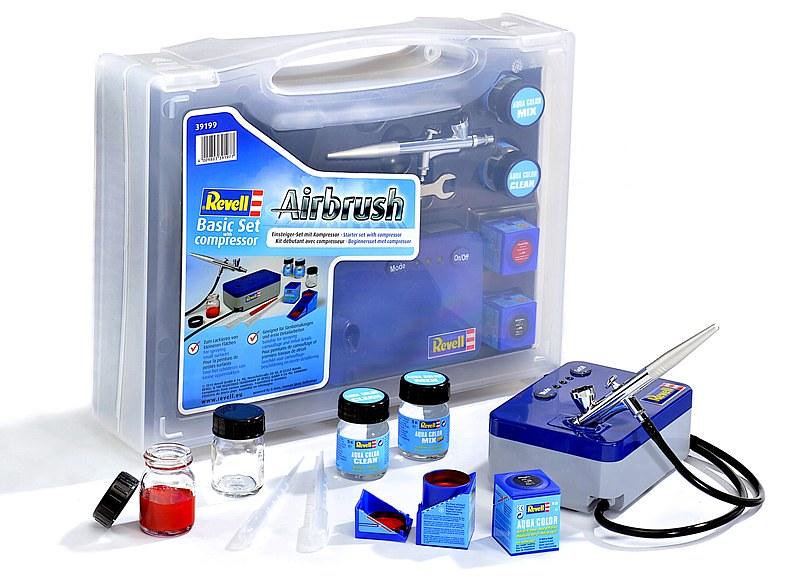
With something as tricky looking - to a beginner like myself - as airbrushing I think it's worth spending some time readying up on the subject and collecting together all te right tools for the job. The first thing that I thought when I bought my airbrush was 'I bet this get's mucky quick'!
The last thing I want is for a delicate piece of kit like an airbrush to get blocked up with gunk and to stop working, or spoil a nice paint job because of contaminated paint. So the first accessory I bought was a cleaning pot.
(I know - wow, I really talk about exciting stuff!)
At first I was going to buy the Revell cleaning pot to go with my Revell airbrush kit, but when I saw the price I decided to look elsewhere (it's been an expensive month). Good old eBay came up with a nice alternative - the '3 in One Cleaning Pot' (unbranded) - for 8 squids (worth paying if it protects my expensive kit).
I must admit I got a shock when it arrived the other day as I was expecting something a lot smaller (about the size of a jar of Doretto dip) and what I got was a small vase! :)
Anyway, you can get a sense of scale - and how to use the kit - from this very instructive video...
WTM 1/144 Fieseler Fi 156 Storch Pt. 4 - Decals
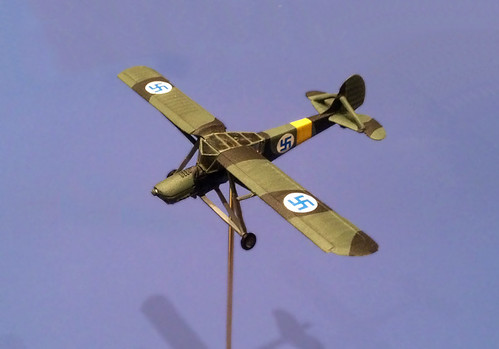
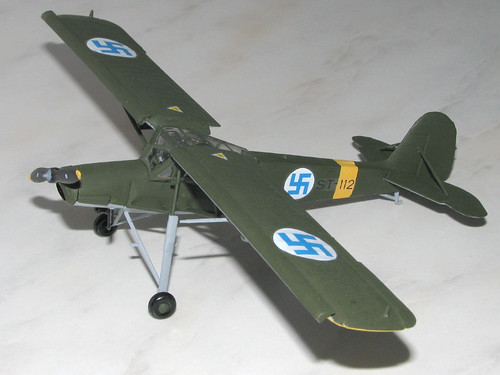
Making the most of my sick day at home I rattled together the decal and weathering stage of this model. One change I have made from my earlier plan is to apply a camo pattern...
I came across this scheme online, it represents a Finnish Storch - ST-112 - from 1944. As this is the period of WW2 I am interested in for my Finnish war game army I couldn't resist applying this pattern to my Storch.
I'm not doing much more to this model, simply making the fake 'flying' prop and making a new stand for it. Hopefully I will have this in the bag at the weekend.
If you ask me which I enjoyed making more, the Eduard 1/144 kit or this ready made conversion I would have to say the kit. In the end there were lots of niggling little rough edges to this 'off the hanger' (pun for Tim) model. But I realise this model does fulfil my requirements for a war game toy.
Wednesday, 20 February 2013
Eduard 1/144 Me 109 G-6 - Part 8
Panel line detailing with charcoal
One of the advantages of being off work for a couple of days with a stomach bug (to put it mildly) is that I have had time to do a wee bit of model stuff between trips to the bathroom!
The Eduard Me 109 has quite deep panel line details - in fact some online reviews note that these 'features' are a little too deep - and I wanted to use these for trying out a technique I read about. I am using some charcoal filings to dust into the grooves and seam lines of my aircraft.
Now a couple of things. First of all this technique is normally done using artists Conte crayons and not charcoal. These two art mediums a distant relative but charcoal is a lot more messy and tends to spread around a lot more - Conte granules being a little more stable. But unfortunately in my hometown the last proper art store closed last year and proper Conte crayons were not available to me - this time.
Charcoal tends to go everywhere - and you end up with your fingers covered in the dust, so you have to be careful that you do not end up with unwanted finger prints on your model. luckily, however, if you do this work on top of a thin gloss varnish layer as I have the dust is easy to erase with an artists putty rubber or BluTac.
I know this is just a small stage on from my last report about this project but I thought the technique was interesting enough to warrant it's own post. Judge for yourself how effective it was - though, as usual, as a newbie I have probably exaggerated the effect...
One of the advantages of being off work for a couple of days with a stomach bug (to put it mildly) is that I have had time to do a wee bit of model stuff between trips to the bathroom!
The Eduard Me 109 has quite deep panel line details - in fact some online reviews note that these 'features' are a little too deep - and I wanted to use these for trying out a technique I read about. I am using some charcoal filings to dust into the grooves and seam lines of my aircraft.
Above: I use a cheap nail file to sand off the charcoal stick's granules, then apply
them to the model's seam lines sing a nice pointy brush.
them to the model's seam lines sing a nice pointy brush.
Now a couple of things. First of all this technique is normally done using artists Conte crayons and not charcoal. These two art mediums a distant relative but charcoal is a lot more messy and tends to spread around a lot more - Conte granules being a little more stable. But unfortunately in my hometown the last proper art store closed last year and proper Conte crayons were not available to me - this time.
Charcoal tends to go everywhere - and you end up with your fingers covered in the dust, so you have to be careful that you do not end up with unwanted finger prints on your model. luckily, however, if you do this work on top of a thin gloss varnish layer as I have the dust is easy to erase with an artists putty rubber or BluTac.
I know this is just a small stage on from my last report about this project but I thought the technique was interesting enough to warrant it's own post. Judge for yourself how effective it was - though, as usual, as a newbie I have probably exaggerated the effect...
Tuesday, 19 February 2013
WTM 1/144 Fieseler Fi 156 Storch - Part 3
Olive Drab coat
One of the good things about converting ready made models is that I feel less obliged to fiddle round adding extra detail and what not. So things are toodling along nicely with this one. First things first, masking the grey lower surfaces and choosing a suitable Olive Drab for the uppers...
I have made a series of green paint swatches and I chose what I think is the nearest match for the reference material I have - Humrol's No. 30 Dark Green spray (on right).
I still haven't got my new airbrush running yet - I want to try out a few learning exercises first - so it's business as usual with my rattle cans.
So, at this point I have the base coat down - a little light but passable - and I now have to touch in the fier details, such as the canopy framework, which still has it's original German tan.
Next: Touching up details and adding decals.
Sunday, 17 February 2013
WTM 1/144 Fieseler Fi 156 Storch - Part 2
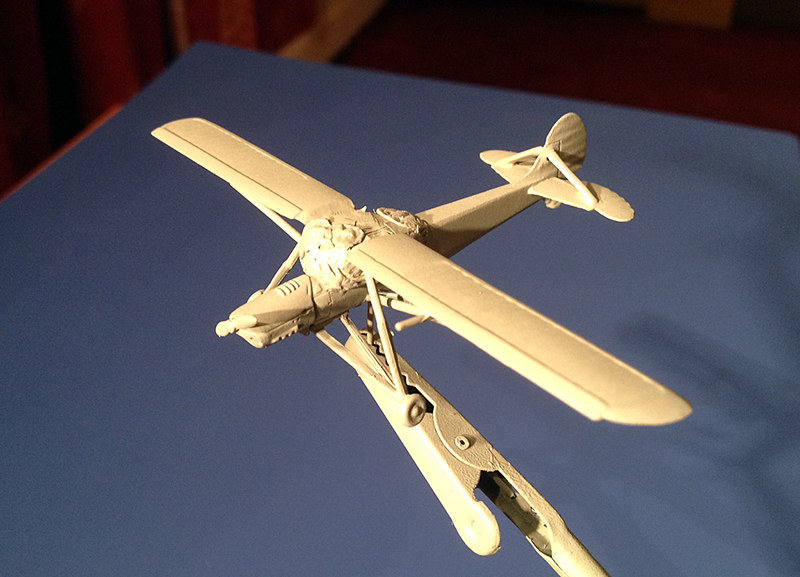
Right, having drilled a wee hole and glued in my stand attachment rod I masked off the canopy. Then I decided a Humbrol grey primer was a good idea, to help cover the dazzling German camo, it's decals and provide the grey of the Finnish Storch's lower surfaces.
I did minimal touching up of the WTM model, just sanding down some noticeable seams but doing no filling whatsoever. This is a war game model after all.
Once dry I shall start masking off the lower surfaces so I can spray on the Olive Drab (Humbrol Light Olive) uppers.
I did minimal touching up of the WTM model, just sanding down some noticeable seams but doing no filling whatsoever. This is a war game model after all.
Once dry I shall start masking off the lower surfaces so I can spray on the Olive Drab (Humbrol Light Olive) uppers.
Eduard 1/144 Me 109 G-6 - Part 7
Sunday is, naturally a good day for relaxing and getting some model making done. Tim may be glad to see that I've wacked on the decals on my Finnish Me 109...
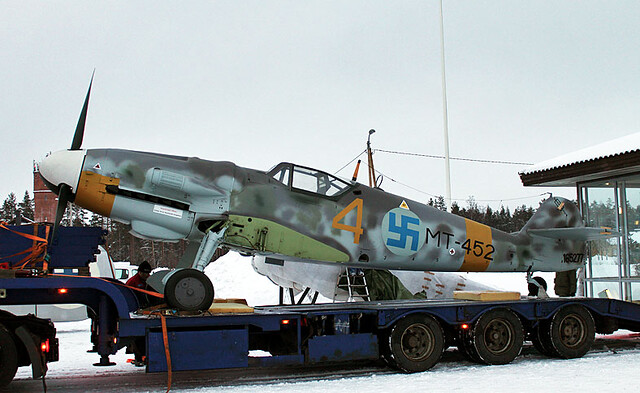
Now, unfortunately, the only 1/144 scale World War 2 Finnish Air Force decals that I was able to find were the more common hakenkreuz with the white background circle. By 1944 the Finn's Me 109s were sporting their swastikas with a grey-blue background. So, I've had to make do.
Also, I'm afraid I am not going to send myself cross-eyed by trying to do the teeny-weeny aircraft numbering. :)
Anyway, it's getting there. As Tim Gow was hinting - I think - models look loads better once you get the decals on. So, it's onto the prop and the canopy.
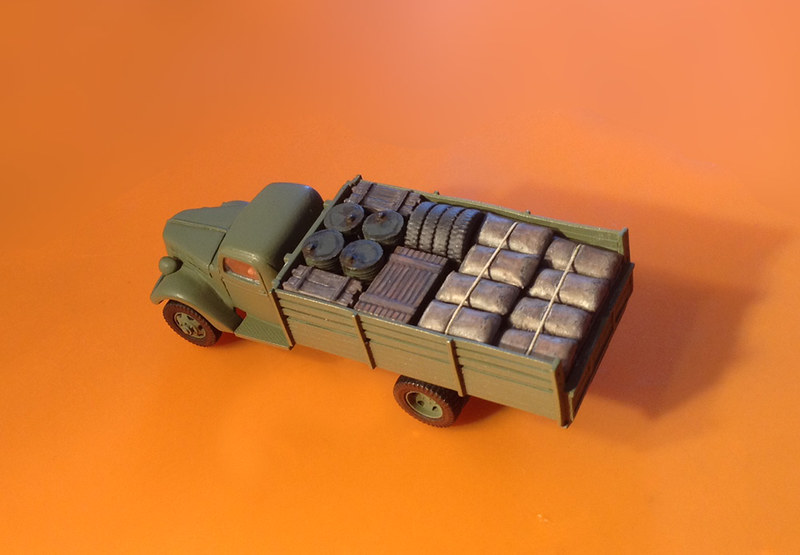
Cheap Ford-Werke V3000 (Pt.10) - Cargo Pt.3
(Building a Rapid Fire! Finnish Army HQ Part 12)
Grabbed some of my dwindling free time to finnish off my V3000's cargo...
Not actually much left to do now really. I want to make a couple of tiny windscreen wipers, but that's a doddle even for me (famous last words).
The main event is the pin-washing and weathering of the truck itself. Really looking forward to this.
Friday, 15 February 2013
WTM 1/144 Fieseler Fi 156 Storch
Remember my quandary over whether to splash out the cash for the lovely Fox One 1/144 Westland Lysander? Well I solved this problem when I found a far cheaper alternative in the World Tank Museum's 1/144 Fieseler Fi 156 Storch.
This little recce plane is for my Rapid Fire! based Finnish (late war) army group and under the RF! rules I just need one unarmed observation aircraft. The Lysander would have been great but at £24 plus postage from Japan it would have cost double the cost of the rest of my 1/144 Finnish air group put together! Luckily I came across the World Tank Museum Storch on eBay at just £6 and after a quick check I confirmed that the Finns did have two of these German aircraft in their inventory.
It's a bit of a fudge - the Storch being a liaison and not specifically a recce aircraft - but the price sealed the deal for me.
The only slight issue with this model is that it comes in a snazzy German camo scheme and decals, but I reckon a quick over-spray will soon sort this out. The other issue is that I cannot find any colour reference for a Finnish scheme for this type - not surprising as there were only two I suppose.
What I will do is use the generic Finnish 3 colour - dark olive, green and sky blue - camo that seems to have been their default scheme (based on Signal's 'Finnish Air Force 1939-45' colour plates).
The WTM model itself is a lovely little thing (for £6), and though you can pick up a Zvesda or Revell 1/144 kit for just £3 I don't begrudge the extra money for this ready made model. There are a few little seam marks but nothing too bad. Overall I am very pleased.
NEXT: A bit of sanding and then over-spraying.
UPDATE: Happened to find this (confirmed by another shot I found of a museum example)...
Just plain olive drab on top then.
Thursday, 14 February 2013
Valentines Day present!
Unexpected Valentines Day gift from my lovely (long suffering) wife...
I'm not quite sure she should be encouraging me...Unless what's she's saying is she wants to get rid of me even more?
A whole new world of being able to mix up exactly the colours I am after! :)
I'm not quite sure she should be encouraging me...Unless what's she's saying is she wants to get rid of me even more?
A whole new world of being able to mix up exactly the colours I am after! :)
Wednesday, 13 February 2013
Eduard 1/144 Me 109 G-2 - Part 6
More painting (mis)adventures...
So you won't be surprised that my progress with this little project is crawling along at a snails pace. Looking at other model blogs you see projects that are done and dusted in a couple of posts...Well, not here. Today I present a change of tone on my Finnish Me 109...
I've gone gray. Not as pretty as the Luftwaffe RML 74/75/76 but closer to the Finnish subdued camo that I'm seeing in the available reference material...
Source: Antti Lappalainen
1/144 is a really funny scale to work with, it's like painting a bird house with a paint roller. I've learned a lot about how not to do things with this model and I want to do more. When I started I got some advice from Tim Gow of Megablitz to go with brushes rather than a spray - I now see why (as usual I like to understand why by experimentation).
This small scale requires no less planning than a larger model, and maybe even more as you have to understand what techniques do and do not transfer down from larger scales (again, something Tim pointed out to me).
I'm finishing this up with some more experimentation and just putting this one down to experience. Just too many new things going on in one project for my liking and I'm not satisfied with the quality of the job I've done. I've ordered a cheaper Zvesda 1/144 Me 109 F and have planned this one using what I have learned so far.
UPDATE: Egged on by Tim Gow...
Tuesday, 12 February 2013
Ongoing and what's next?
Just a little note to myself so I keep focused.
The two current jobs I'm undertaking at the moment are the 1/144 Me 109 and the 1/72 Ford Werkes V3000. But while in between work on these I am trying to source parts to finish off my two early attempts at Sherman tanks (looking for some better tracks which I put 'somewhere safe')!

Above: The current state of play with my V3000, I am about to paint the cargo, so
really I am not too far off finishing this one (whoopee)!
But what next?
Thinking about the next major project, I should crack on with my Finnish HQ Company and a have a few options which are already in my stash...
None of these are too difficult and where there is a bit of conversion work (the Renault) it is pretty basic stuff.
Anyone any preferences?
The two current jobs I'm undertaking at the moment are the 1/144 Me 109 and the 1/72 Ford Werkes V3000. But while in between work on these I am trying to source parts to finish off my two early attempts at Sherman tanks (looking for some better tracks which I put 'somewhere safe')!

Above: The current state of play with my V3000, I am about to paint the cargo, so
really I am not too far off finishing this one (whoopee)!
But what next?
Thinking about the next major project, I should crack on with my Finnish HQ Company and a have a few options which are already in my stash...
- Commanders staff car (Wespe Models Opel Kapitan conversion)
- Engineers truck (Academy Opel Blitz - nice straight build)
- Renault Light Truck & 20mm AA gun (Valiant resin plus Zvesda gun)
None of these are too difficult and where there is a bit of conversion work (the Renault) it is pretty basic stuff.
Anyone any preferences?
Monday, 11 February 2013
Eduard 1/144 Me 109 G-2 - Part 5
Painting (mis)adventures
Hmmm, I'm not really sure how this is going. I've had a few disasters with this one along the way.
First lesson - trying to get nice blended effects at 1/144 is NOT for a novice and certainly not for a first model at this scale (I cocked that up). On the other hand I'm pleased with the splinter camo pattern.
Anyway, I have a lot of tidying up to do.
The scary bit is the next stage where I am supposed to tone down the whole scheme with a subtle coating of grey, so everything looks weathered and more subdued. Like this...
Ah well, onwards and upwards!
Hmmm, I'm not really sure how this is going. I've had a few disasters with this one along the way.
First lesson - trying to get nice blended effects at 1/144 is NOT for a novice and certainly not for a first model at this scale (I cocked that up). On the other hand I'm pleased with the splinter camo pattern.
Anyway, I have a lot of tidying up to do.
The scary bit is the next stage where I am supposed to tone down the whole scheme with a subtle coating of grey, so everything looks weathered and more subdued. Like this...
Chuck Norris - Dremel tamer!
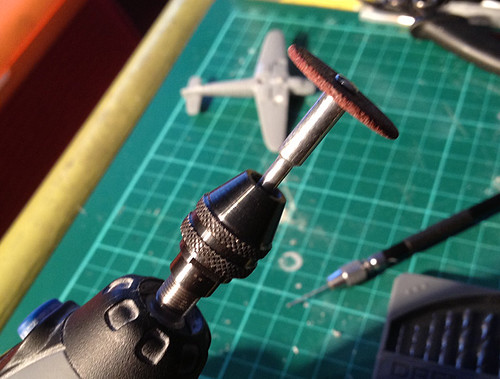
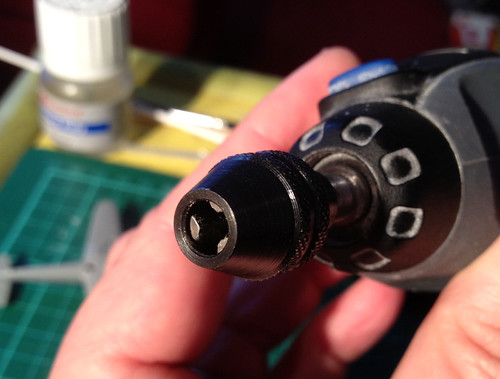
Dremel 4486 MultiPro Keyless Chuck
One of my favorite all-round tools is without doubt my Dremel. Even before I started model making again this mini multi-purpose power tool was a godsend for household DIY. For modeling it takes the hard work out of sanding, cutting and drilling.
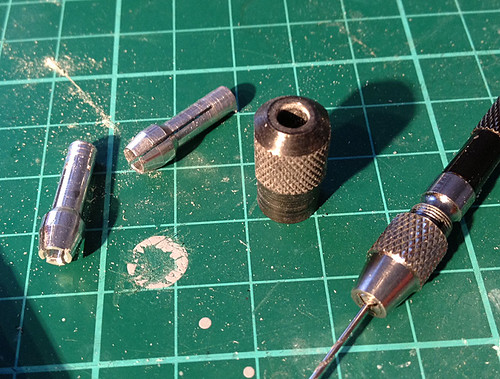
But the Dremel does have it’s Achilles Heel, that is the horrible bit collar system. Every time you want to change a tool you invariably have to fiddle about changing the bit collar – which holds the tool tightly inside the chuck sleeve – to the right size. And these things are just the sorts of objects that go astray too.
Above: The dreadful Dremel collar sleeves - one for 'small' bits and the other
for 'big' tools - and the screw chuck. A diabolical system.
for 'big' tools - and the screw chuck. A diabolical system.
Well, talking about things that go astray, I just had to order another one of the small Dremel chuck spanners – which you need to tighten and untighten the bit collar – and while I was shopping for this I came across the answer to all my Dremel prayers, a proper mini adjustable drill chuck!
This adjustable chuck is exactly the same as the ones that you have on your full-sized power drill, it screws and unscrews to allow you to fit tool bits of practically any size. No bit collar needed! Whoo-hoo!
OK, I am perhaps making a meal of this, but any Dremel users out there will appreciate the significance and convenience of this small accessory and what a boon it is.
I’ve been using this new adjustable chuck for about a week now and it make changing out tools a lot quicker. In actual fact it’s solved two Dremel solutions in one really, as I find I can hand tighten this chuck enough to be able to dispense with the Dremel chuck spanner too (another part which tends to go missing just when you need it).
This chuck was just £7.04 from Amazon and is well worth it.
One last note. For modeling I tend to use very, very small drills and the old Dremel collar system was never small enough to allow me to use micro drill bits, but this adjustable chuck does.
Sunday, 10 February 2013
More unfinished business - another Sherman
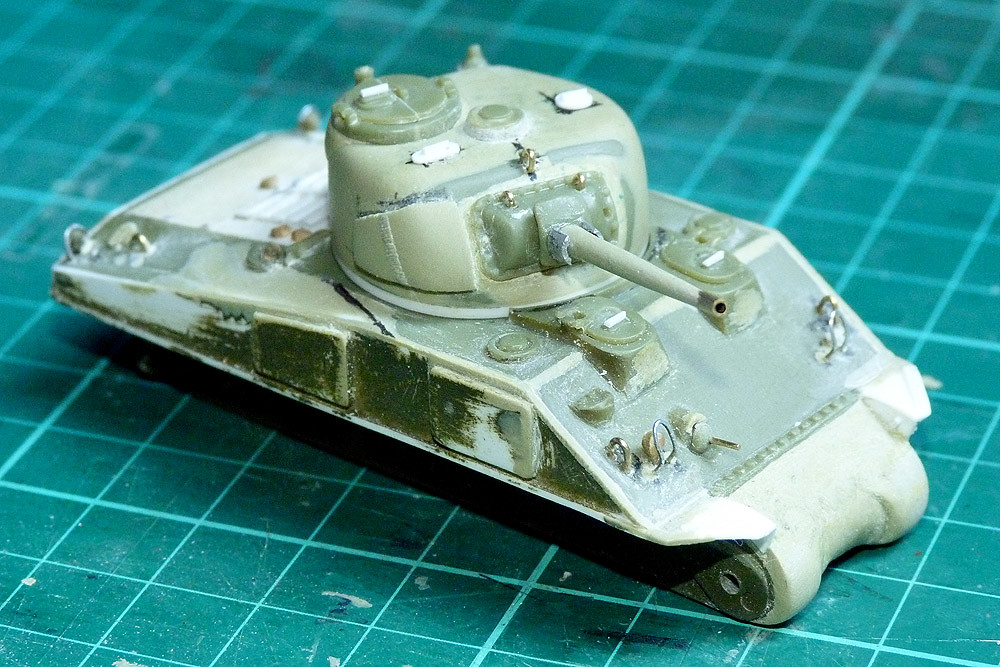
Having found my Airfix 1/76 M4 Sherman I thought I would have a rummage around to see what else I squirreled away until I got better at painting models. Well, surprise surprise, I found another Sherman!
This one was done after my initial Airfix M4 and I put a lot of what I learned about detailing into practise with this conversion. The base model is a Armourfast M4 which I pimped out with a lot of extra scratch built parts and some lovely third party decals (Bison's 37th US Tank Battalion, 1944).
Again, I stopped work on this because I knew I was not up to the pin-washing and weathering techniques at that point. Since then I have done several practice models specifically to learn about finishing off my models.
Funnily enough the part of this model I am most proud of is the work I did on the rear of the tank. Armourfast didn't include any hull details on the back - aside from a hatch - and the suspension, exhaust system and hatch hinges were absent. And so...
As with the Airfix Sherman the main construction left to do is to find a suitable way of improving the track treads (having a further rummage through my draws today for some donor tracks). After that it's just a matter of doing the pin-washing and weathering.
You can see the 'story so far' on this build here: Flickr - Armourfast (HAT) 1:72 Sherman M4
Friday, 8 February 2013
Eduard 1/144 Me 109 G-2 - Part 4
Making a stand
For once I've tried - very hard - to do something as simple as I can. Not easy as when I looked around to see how war gamers made thier flight stands I saw some pretty nifty - and relatively complicated - stands made from telescopic radio ariels and little magnets and such like fancy stuff...
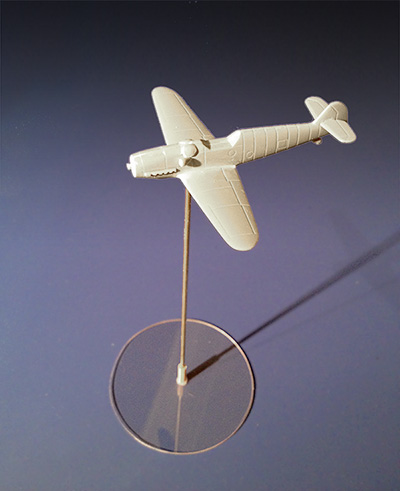
Well, I've stuck me little Me 109 on a pole! :)
My one concession to my tinkering side was that I wanted to be able to remove my plane from it's stand so I could put it on a different height of stand, and so...
First of all I installed a thin rod into the bottom of my 109...
This would slip inside a hollow rod...
I made the base out of some transparent plastic (stupidly I decided to try and cut a circle - idiot that I am)...
I'll paint the rod sky blue I suppose.
Er, well...That's it really. I can change out the stand for something higher or lower, or if I bend the main rod I could have the plane in a dive.
<-- Previous post in this project
Thursday, 7 February 2013
Unfinished business - 1/76 Airfix Sherman Pt. 1
One of the reasons I restarted modelling again about a year or so ago was because I just happened to have a collection of Airfix kits in my attic (left by one of my daughter's ex-boyfriends). It seemed to be an opportunity to start a new hobby with the minimum of outlay so I cracked open the box - the Airfix D-Day set - and took out the first kits that came to hand.
Well, I soon learned that I didn't know that much about making kits, or painting them, and these early attempts at my new hobby have languished unfinished in a draw while I went back to the beginning again and practised basic model techniques from scratch.
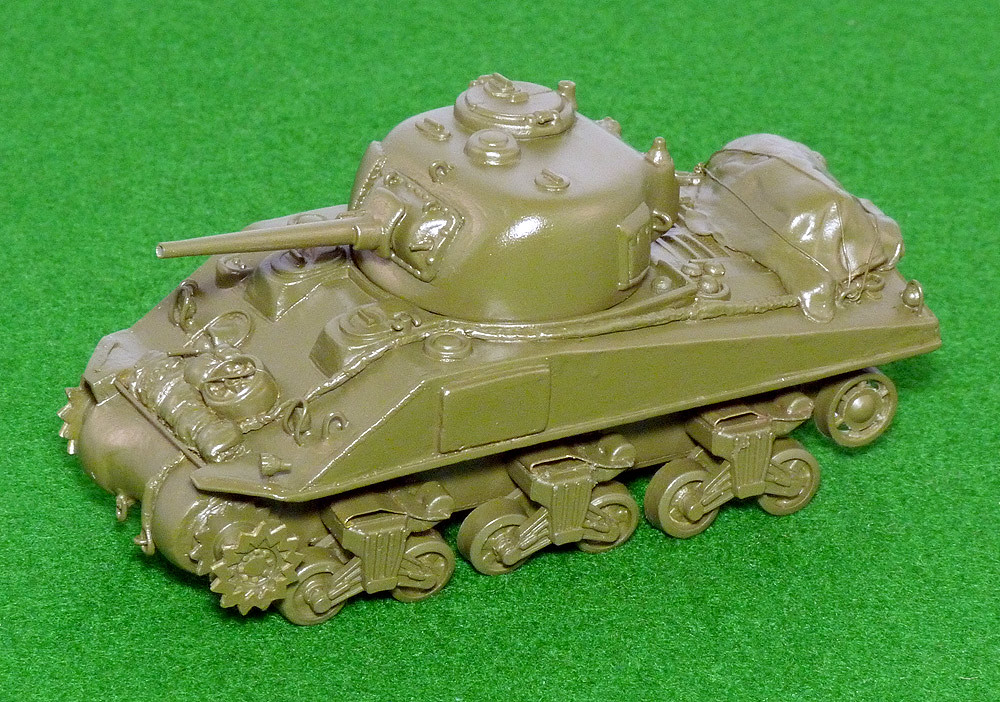
Among these early amateurish attempts was an Sherman tank - the (in)famous Airfix M4 with it's undersized turret and questionable tracks. I came across it again while looking for something else and I realised that it was time I finished this little cutey off...
Now I bit off more that I could chew with this one as I jumped straight in and attempted a bit of a conversion job - I tried to improve the undersized turret and I turned the Airfix M4 version into an M4A2 version by building a whole new engine deck from scratch!
You can catch up with the whole 'story so far' by looking at the Flickr photo diary I did of this hatchet job: Airfix 1/76 scale Sherman M4 Tank gallery (opens in new browser window).
Even though I am still a kit noob I can see a lot of things in this kit that I would do differently now, but I still think there are a few bits of my work that I am proud of, especially as they were such early attempts. For example, I was particularly pleased with how the stowage turned out...
Anyway, I think I've got to the point where I can do the final stages of this build justice (I am more confident about my painting skills now), so this weekend I will get the tracks on and get some other finishing touches on the go.
Subscribe to:
Comments (Atom)
