Showing posts with label X-Ref: CON/easy39Chevy/0914. Show all posts

Sunday, 11 October 2015

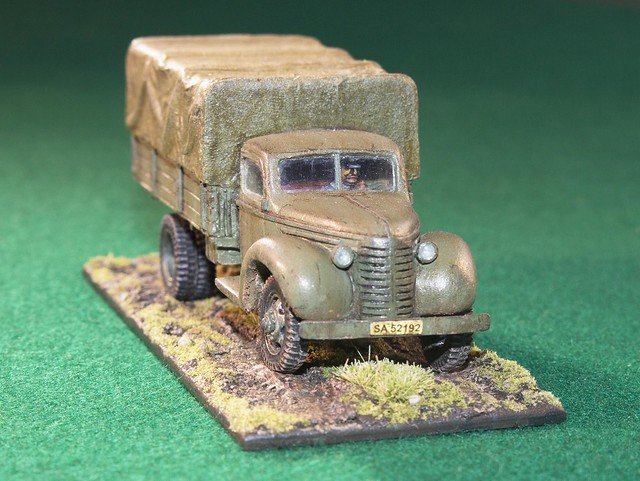
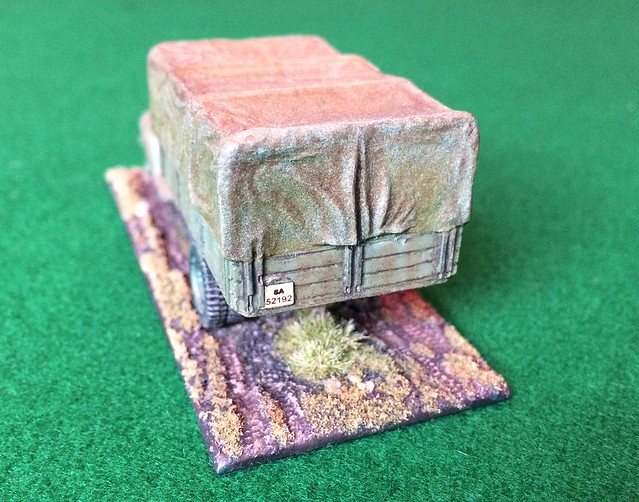
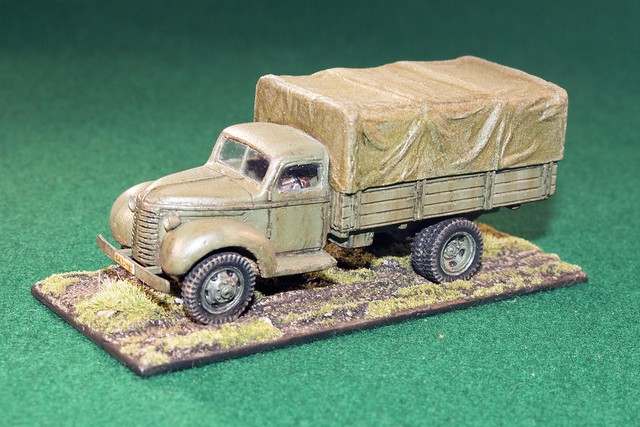
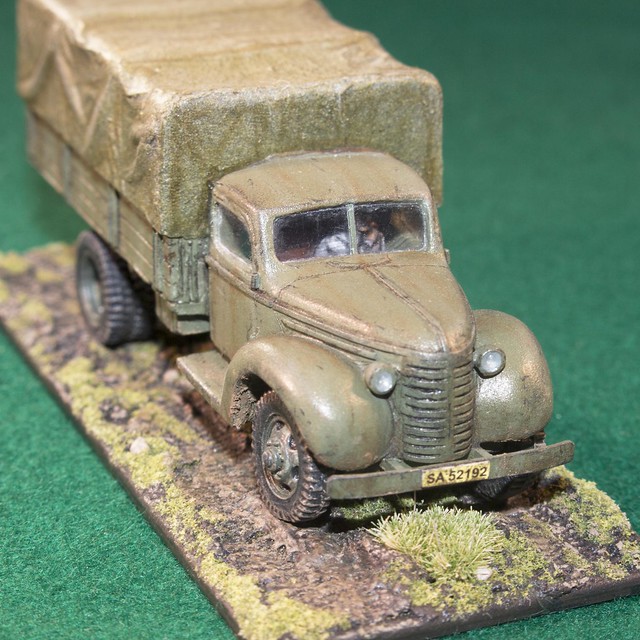
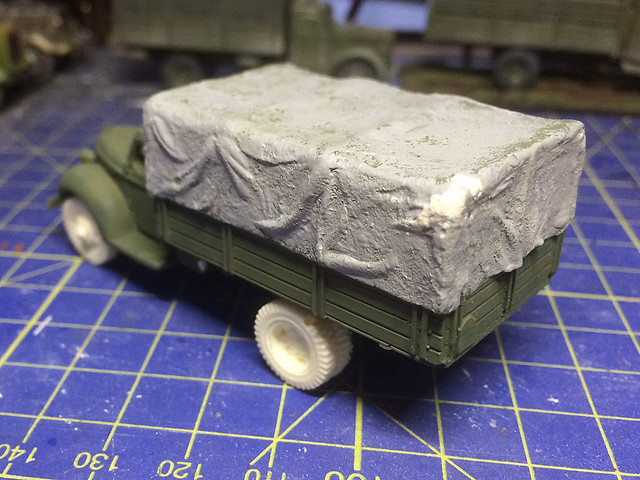
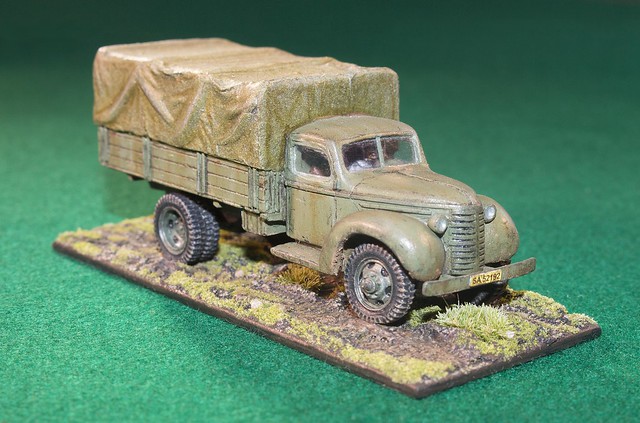
Quick '39 Chevy Truck Complete

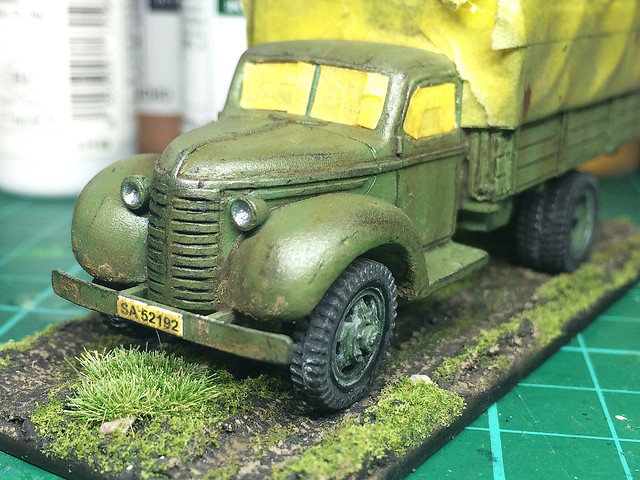
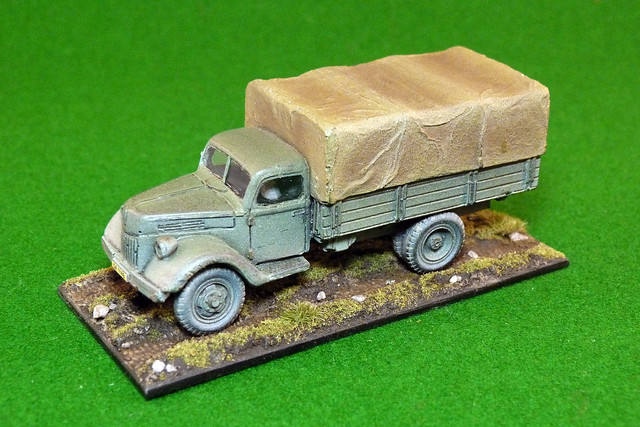
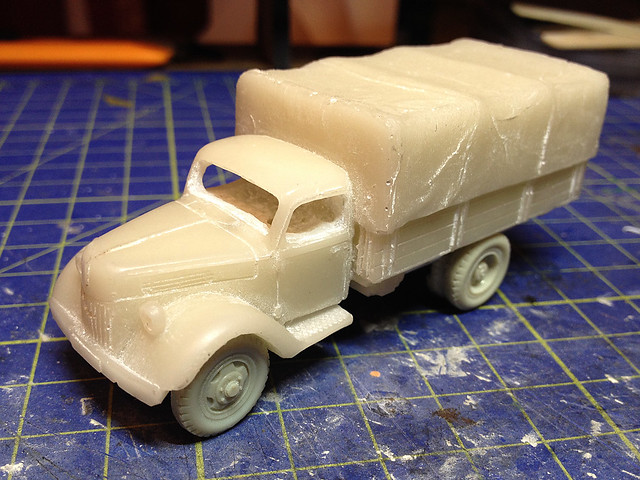
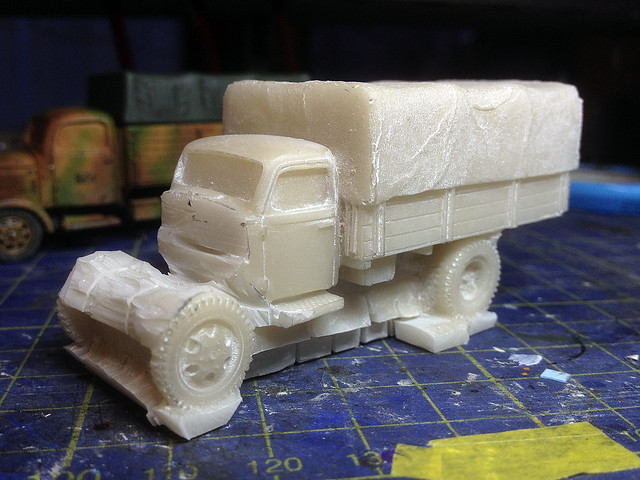
Hooray! It's finished. It's a bit rough round the edges but I think that's probably normal for this sort of conversion (from a resin one-piece model).


Thursday, 8 October 2015

Quick '39 Chevy Truck Part 9

Oooooo...Getting so close to finishing!


It's all about the minor jobs at this stage; touching up, checking for any mistakes, creating the headlamp 'glass', de-masking the windshields and then finally giving the model a last coat of matt varnish.

Next time you see this it should be the completion photographs. Hooray!

Sunday, 20 September 2015

Quick '39 Chevy Truck Part 7

(The idea that was a 'quick' project gets ever more laughable! Once again I apologise for how long it takes me to do things, work and real life have slashed my available free time.)

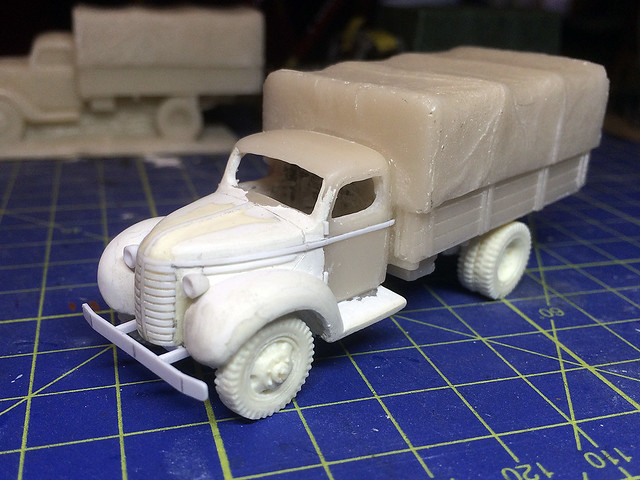
Anyhoo, remember my 'Quick 1939 Chevy Medium Truck' project? Probably not, so I will re-cap - It's another 'kit-bash' hybrid based on Valiant's very nice 1/72 Fordwerkes V3000 resin war-gaming model. In this case I mount a scratch-built Chevy bonnet and wheel arches onto the back-half of the V3000 cab to make a (hopefully) passable 1939 1.5 ton Chevrolet cargo truck.


I had to do a bit of 'cheating' and enlarge the bonnet slightly to get it to mate seamlessly with the V3000 cab, but it looks OK as long as you don't put it side-by-side with a proper 1/72 1.5 ton Chevy truck kit!

Weathering - working with oils
I'm getting my basic 'war game' style of weathering pretty much down pat now. I say 'war game' style because it's a little more exaggerated in it's use of effects than were I doing a display model. The idea is that it looks 'cool' at table-top distance so things like weathering and chipping are a little OTT.

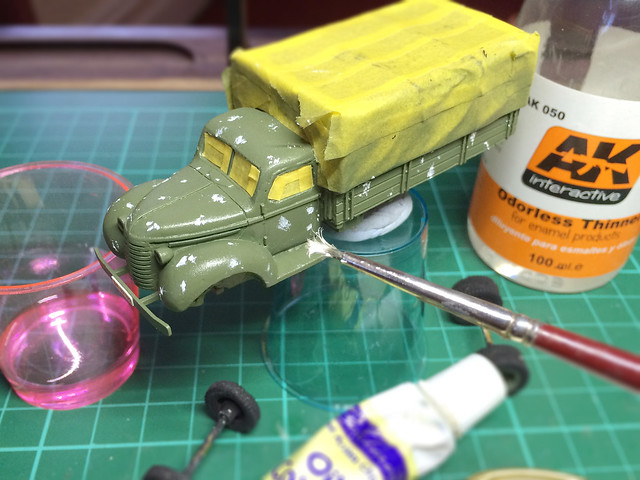
I have developed what I call my 'leopard' technique for weathering with oils where I apply successive layers of coloured spots. I lay down a random spotty pattern of one colour, then I smear it with a wide brush dipped in thinners (but then wiped so it's only just a little wet) to create the streaking effect I'm after...


I usually start with white spots which, when smeared, will (hopefully) create a 'bleached' look on old paintwork. The Finnish army trucks by the end of the war were pretty worn and battered and originally bright paint schemes were faded and patchy.

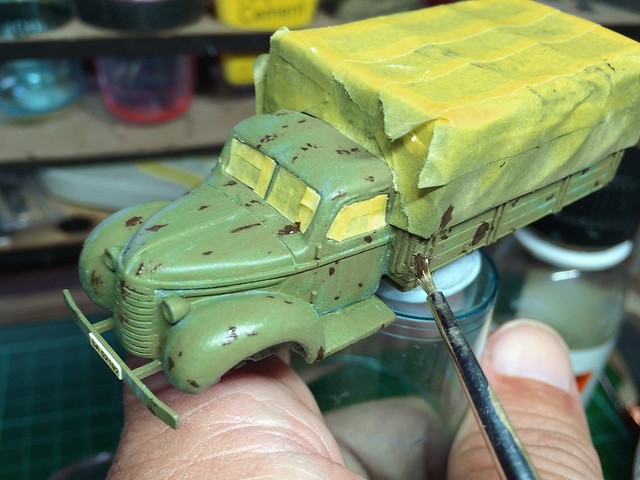
In all I usually do three different colour schemes of spots, each progressively darker (depending on the truck's base colour). For green vehicles I usually like to end with a oily brown stain effect...


Between each layer of streaking I apply a light coat of Humbrol Satin Acrylic Varnish, this protects the work I have done before I add the next coat of oils (and, obviously, I begin the whole process with a coat of varnish to protect the model's base paint coat).


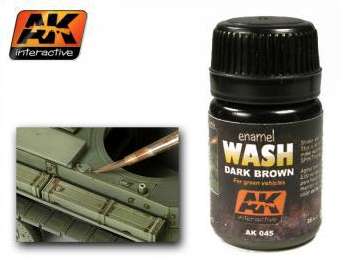
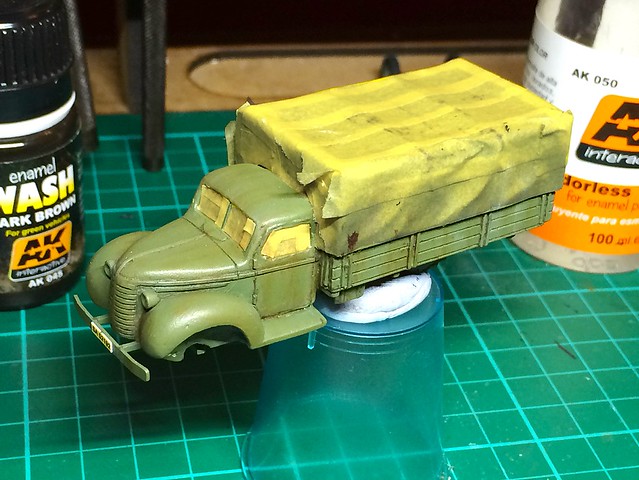
A dusting of varnish is applied again before I go onto the next stage, which is the pin-washing. I use AK Interactive - Enamel Wash: Dark Brown for Green Vehicles and I have found this works best with a gloss varnish base, just to help the enamel wash 'run' into and along all the panel lines detail.

This enamel wash is also great for adding additional grimy streaks on your vehicles. The AK range includes special washes for 'oil streaks', 'grime', 'fuel stains', 'light rust', but this is the one that I used the most.


As well as the top of the truck I do some weathering to the underside of the vehicle as I go along. Obviously, this being a war-gaming 'ready to roll' model there isn't so much detail, but I like to give what there is a little treatment as some of it is visible. I begin with some base colour, then weather that before adding some dust and mud effects...
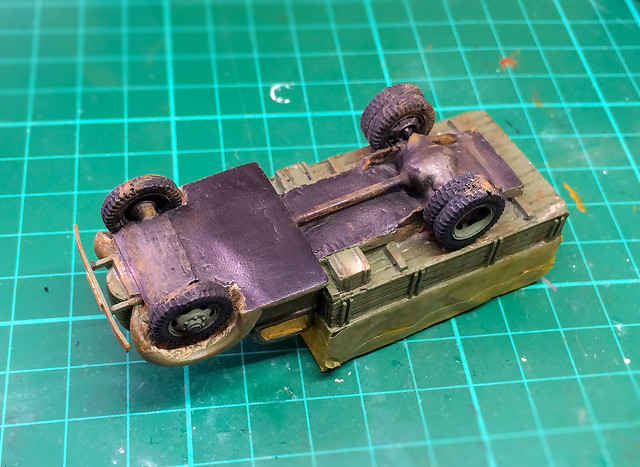

Having finished the weathering of the underside I could finally fix the wheels
in place and cover over the holes I left for the axles. Underside done!
I don't spend too long on the underside as it's not meant to be on display. But having gotten that out the way I turn my attention to the fun bit of weathering (in my opinion) - chipping!


And then I end with some light rust effects and, finally, the addition of a layer of dust and mud. In this case I have decided on a light application of dust and mud.

The final treatment is a coat of satin and matt varnishes. I like to lightly mix the vanish coats as I think vehicles alway look nice with a little sheen to their paintwork - so I give a quick 'puff' of satin to the cab and matt varnish everywhere else. And that's that.

Next: Basing the vehicle.
Tuesday, 18 November 2014

Quick '39 Chevy Truck Part 7

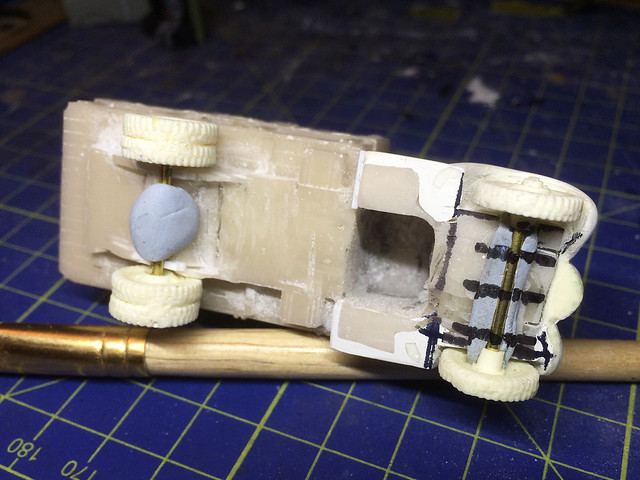
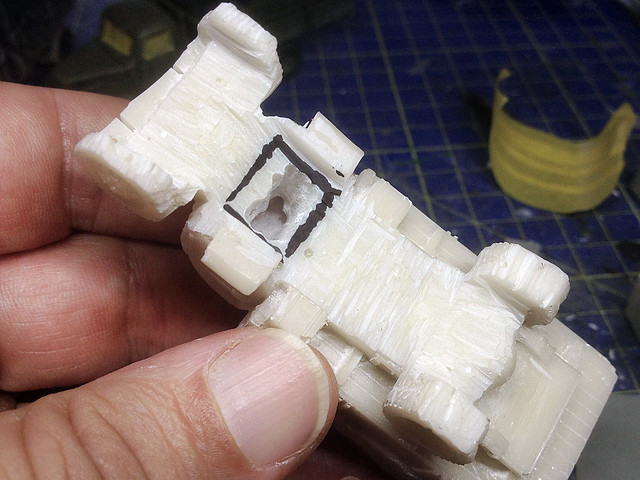
Progressing between other jobs, I have now 'closed up' the hole I made in order to excavate the cab interior of my solid resin Valiant truck model. I have also made some very rudimentary underside detail including a simple driveshaft.

Obviously as this part of the model will be conveniently hidden I don't have to do too much to this area, but I did want to neaten it up. I've also tried to make slots to securely hold the axels in place, just to make sure the wheels are all nice and level...


But...I haven't finished with the underside of this truck yet. I haven't fixed the axels into place as I want to add 'mud' and other weathering effects to the underside before fixing the wheels permanently into place. Getting into the underside of the mudguards - for example - is a bit tricky with the wheels attached.

First job is to spray the underside with a coat of the base - Light Olive - colour and then give the whole truck a light coat of satin varnish before moving on to the basic pin-washing phase.

Ready to begin pin-washing. My Chevy now has a windscreen and I've just
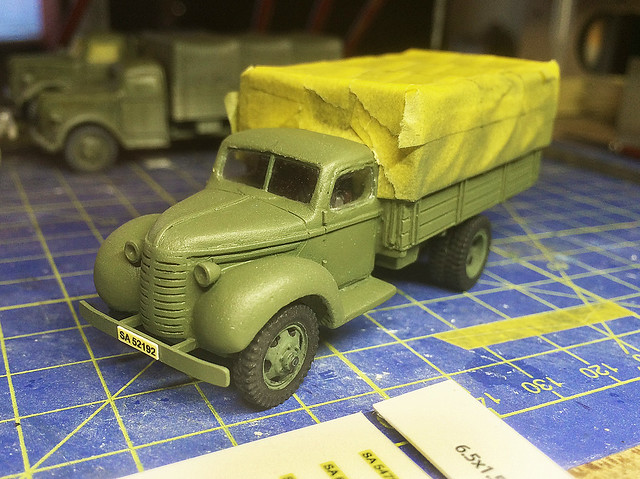
applied the Finnish 'SA' number plates.
I then go through my tried and tested process of pin-washing, dusting, weathering, chipping and then highlighting. I seem to have this procedure off-pat now, well at least for olive drab vehicles.

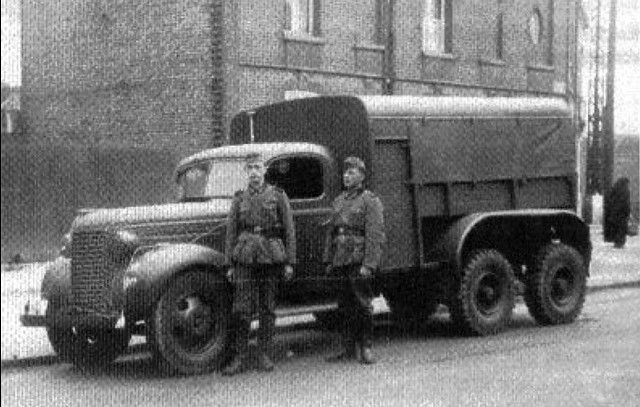
Above: Here's an interesting shot of a 1939 model Chevrolet truck in German Army service. The caption read: "Truck, type VD, converted with the Trado kit. The captured vehicles were still years in the German army." I think what the bad Google translation means is that the Germans kept captured Allied - in this case Dutch - vehicles in service for many years. I'm not sure what a 'Trado kit' is, but at a guess maybe it's the addition of the rear duel axel modification (which wasn't standard with '39 Chevrolet models but I believe was made by the Dutch DAF company for the German army).

Next: Pin-washing and weathering.

Sunday, 26 October 2014

Quick '39 Chevy Truck Part 6

I began the base paint coat but soon found I wasn't happy with the tilt canvas. In order to make this truck look a little different from the other versions of the Valiant model I have I decided I needed to modify the canvas folds, just to make each version look a little more individual.

Using Milliput putty to add extra folds was easy enough, but then I found I needed to blend the additional detail in by using Mr. Surfacer with a stippling texture.


Once dry I gave the tilt quick spray of the Humbrol Light Olive base colour and then slapped on a sepia wash...


So, all the upper body base colours are done now but I have to install the driver and finish off the underside details. This means I might have to put in the windows now while I can still access the cab interior through the hole I made in the bottom of the cab.

- I'm undecided which stage in the modelling is best to install windows in my trucks. I've tried leaving fitting the windshields until last, but on my YaG-6 model I fitted the windows quite early, but this time I'm putting them in during this mid-way stage. To be honest I think it might be different each time depending on the model. -

Anyway, once the windows are done I'll mask them out (just to be safe) and then start the pin-washing stage.

Saturday, 18 October 2014

Quick '39 Chevy Truck Part 5

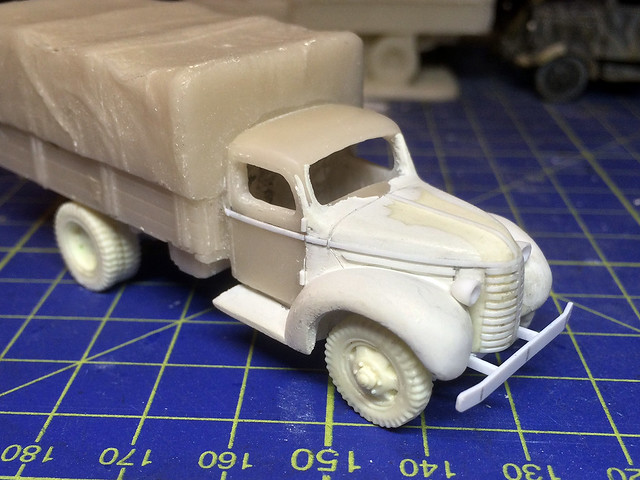
Completed the major work on this model with the final shaping and detailing of the bonnet, grill and fender assemblies. There turned out to be a lot more sanding to do than I imagined!


I'm really pleased with the final shape of the fenders, I managed to get the big rounded mud-guards looking about spot on (in my humble opinion, though they are a little too large). I guess you could say that all this work is a bit over-the-top when you consider that the overall cab shape is wrong for the '39 Cheverolet truck (being based on my Valiant Ford V3000 truck), but it looks passably like a Chevy!

Having got the truck cab sorted it was time to work out how to attach the new resin wheels that my brother had sent me to the chassis...


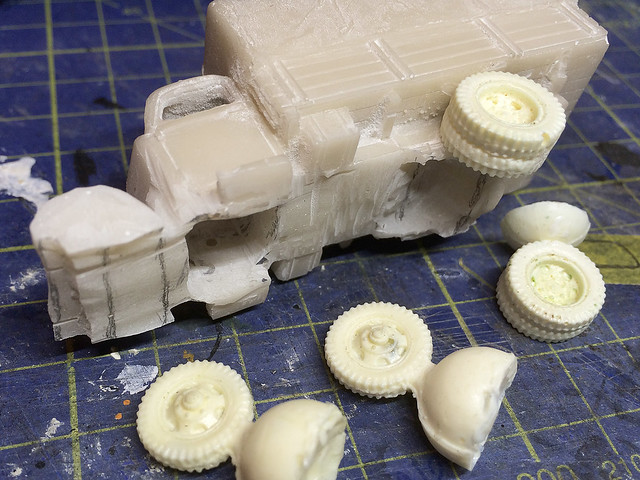
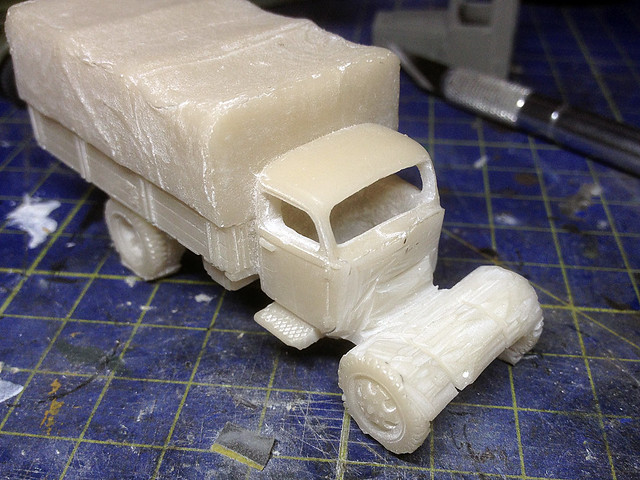
It's a bit of a fudge but I made a pair of axels out of some spare brass rods and attached them to the underside of the truck with some BlueTac so I could work out how to fit them correctly into position. I trimmed and sanded off the resin of the original chassis to make some rudimentary slots into which the axels could fit. I kept checking how the wheels fitted in relation to the flatbed and the fenders to ensure they were both centred properly and sat at the right height and were level.


Eventually it all came good(ish). The wheels look like they are in the right place and are secure, but I will put off fitting them permanently until I have finished off the cab detailing and have the cab interior installed.

The detailing includes all the fine panel lines around the engine hood and cleaning up the grill. Obviously I will be simplifying the detail, just adding a few bits and pieces to get the mock Chevrolet look I'm after.


So, there we go - a mock Chevrolet Model 1939 truck, of sorts. The main problem is that it's a bit too big, the original Chevy was a 1.5 ton truck based on Chevrolet's 1 ton pick-up truck cab - while my conversion is based on the 2 ton Ford V3000 which was a proper medium truck.

But, hey ho. It'll do in the absence of a proper 1/72 scale model of this vehicle (Minarions are working on a 1/72 scale Model 1937 Chevrolet which should be available in April of next year).

Next: Painting.

Thursday, 9 October 2014

Quick '39 Chevy Truck Part 4

Busy week - life get's in the way of hobbies! But I did manage to get a little bit done on my Chevy.


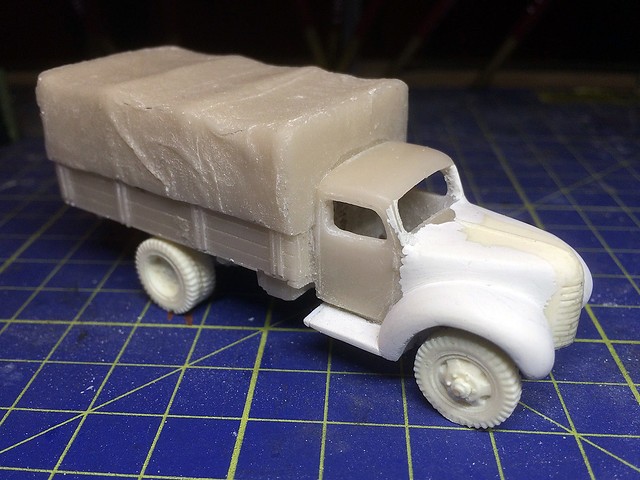
I made the resin Chevy bonnet for a PST 1/72 Ford 1943 truck kit which was a little narrower than the Valiant V3000 truck model. So I had to bulk out the new model with extra Milliput putty. This will need to be sanded smooth and then the details (like panel lines) added. But at least the bonnet fits now.

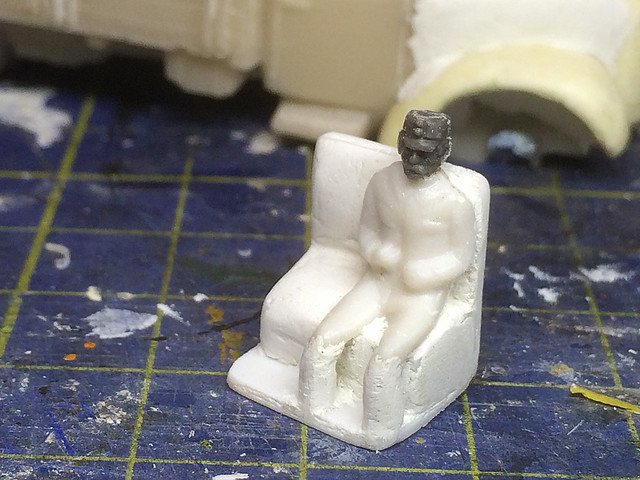
Next I made a very basic cab interior for the driver. Just a simple bench seat and floor...


Next: I'll work on the bonnet to make it a little more attractive than it is at the moment!

Monday, 6 October 2014

Quick '39 Chevy Truck Part 3

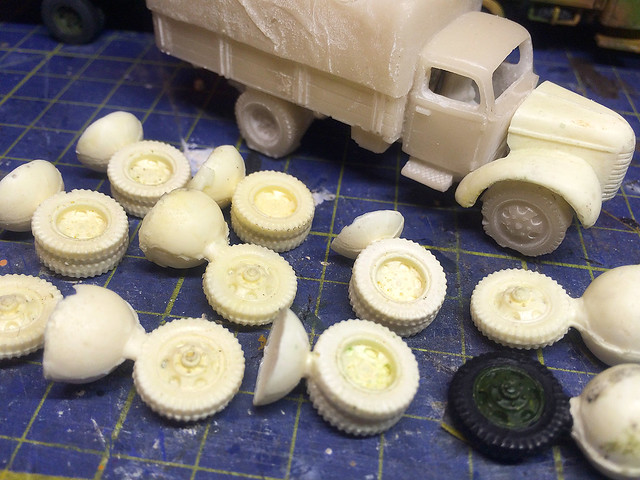
Oh! Look what the postman brought me. Lots of wheels!
Moving on...Or maybe moving sideways really. I've taken a diversion in this 'straight forward' project. Originally I had intended to keep the resin wheels that came with this 'ready to role' model, but it wasn't to be.

My brother has been busy with his resin experiments again and he sent me a lovely batch of truck wheels. I couldn't resist trying these out on my Chevy, so it was off with the old wheels and on with the new ones...


Had I been a little more careful I could have retained the original wheels, but inevitably I nicked them while I was using the Dremmel to cut away the excess resin attached to the underneath of the chassis. Adding these new resin wheels solves this problem which I would have had to otherwise repair using Milliput putty. It would have been do-able, but having the new wheels just seemed to be too good an opportunity to pass up.


I'm really pleased with my brother's wheels and they add to the effect I am trying to achieve - turning a solid one-piece model into one that looks a bit more like a multi-part kits so it blends in with the rest of my multi-part kits.

Next: Joining the Chevy bonnet component to the cab.

Saturday, 27 September 2014

Quick '39 Chevy Truck Part 2

Now the hard part! My first Valiant resin Ford V3000 conversion was done by just cutting out the top half of the solid resin cab interior to make it look like there was an 'inside'...


My 'Quick resin V3000' was a cheat with only the top half the cab drilled out.
Could I do any better this time?
It was a quick solution to the problem - how to make  a solid resin model look more like a multipart kit - and was adequate, but I wasn't all together satisfied with the result.

One of my readers suggested that I could improve the conversion - the next time - by excavating the whole of the cab by drilling in through the bottom of the model. So this is what I decided to try out with this 'Chevy' conversion of the Valiant model.

First I drilled a few pilot holes in through the front windscreen to mark the 'top' of the cab so that when I drilled in via the bottom of the cab I didn't drill straight up and through the roof! Then I marked out a 'safe zone' on the underside of the cab, the extent of the cab interior I intended to drill out...


I had to be very, very careful when using my Dremmel, so I started drilling out a hole from the centre of the cab outwards towards where I wanted the walls of the cab interior to be. All the time keeping an eye on where the drill was coming out using the pilot holes I had drilled to mark the roof of the cab.

Once I had drilled out the interior as close to the walls of the cab that I dared I changed from a drill bit in my Dremmel to a reaming bit (a small rotating cutting tool that cuts horizontally) to slowly shave the thickness of the walls down until I was happy. I also used the reaming tool to tidy and square up the hole I had drilled out.

I then used a craft knife and files to precisely finish off the interior and make sure the cab windows were neatly shaped...


Obviously this still isn't perfect, the cab walls are still a little on the thick side but I didn't want to risk accidentally drilling right through a door or something so erred on the side of safety. But I reckon this won't look so bad once the interior is painted and I fit the windows.

To finish off the cab interior I will - of course - have to add a new cab floor, with a seat and a driver in place. But I am quite happy as this was - I hope - the worst bit of the job, everything else should be plain sailing!

Next: The cab interior.

Monday, 22 September 2014

Quick model 1939 Chevrolet conversion - Part 1

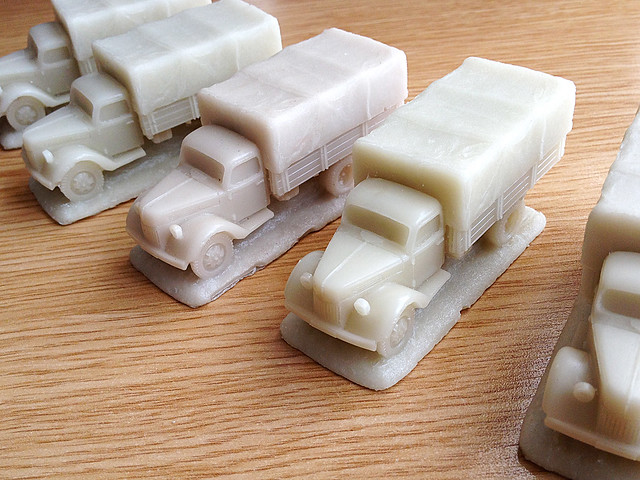
My brace of Valiant resin Ford V3000s...Can I make a Chevy '39 from one of these?
I'm on a bit of a mission now to complete as many of the Finnish trucks I need for my Continuation War project. So, I decided to put together some parts I had laying on my workbench as an exercise in building a 'quick' (for me) model.

What I'm doing is taking one of the Valiant resin 'ready to roll' Ford V3000s I bought and slapping my resin Chevy 39 bonnets on it. Bang! Model 1939 Chevrolet.

I made these 1939 Chevy bonnets, can I get one to fit onto a Valiant model truck?
Technically this should be a pretty easy project - how many times have I said that though? I just saw the existing Ford bonnet off my resin Valiant model and replace it with the resin Chevy bonnet I made. So, first things first, lets get the Dremmel out and begin Frankensteining  this baby!


As well as cutting off the truck bonnet I also started removing the integral resin base. I'll be converting the truck's cab into one that has interior detail (like I did with my 'Quick Valiant Ford V3000' project).

I'm going to try and improve on the way I modified the last Valiant Ford conversion I did. I think I can make a better job of removing the integral resin base while leaving more of the chassis detail. I also want to excavate the cab interior by going in through the bottom of the model (rather than simply drilling out the upper cab like I did with the 'Quick V3000' I did).

In a way this was the easy bit. Tidying up the jagged join will be a bit harder.
Fitting the Chevy bonnet on was easy enough, I just kept chipping away until I got teh two parts to fit. But there will still have to be a fair bit of Milliput putty work to mate the two parts together so you can't see the join.

Next: Excavating the cab interior.