Showing posts with label fantasy. Show all posts

Thursday, 7 January 2021

3D (Physical) Modelling, Getting Started

 So much to learn! Arrrrgggg! 😲

...In the background I am slowly learning to 3D model from a software perspective BUT I am also intrigued by the modelling aspects of 3D printing in a more tangible sense. What can I do with a PLA printed model? Can I sand it? Can I paint it? Etc, etc... 

This just shows what a complete noob I am to the world of 3D printing. I don't even completely understand the properties of the print material, whether it be PLA, PLA+, PETG or ABS (to name but a few types of filament). I'm still trying to learn the pros and cons of each, but - in the meantime - I'm sticking to the basic - jack of all trades-ish - PLA!

Anyway, I needed a test project to try out modelling craft skills on a PLA model and I settled on this little chap...

Baby-Groot seemed a good test piece as he'll make a nice birthday present for my daughter (the model is actually a small plant pot for an 'air plant'). 

I was VERY pleased with this model - the first medium sized print I have done and only the third print in total - though the candy red filament that came with the printer to get you started is a little gaudy. I'd really like to get a nice neutral grey or even black PLA for future models.

Anyhoo... The quality of resolution of the print was a lot better than I expected. Yes, close-up you see that characteristic 'stepping' pattern that 3D prints inherently create when building up the layers of filament, but the models I have created so far have been a lot smoother than I expected AND these have been set to print on the 'standard' quality setting and not 'high'! 

To further smooth out the prints I wondered how priming would affect the surface of the model (I also was keep to get a better look at the general detail as the candy red filament kinda hid some of the finer detail as it was so garish)...

Using a grey primer spray certainly  showed just how well the Flashforge Adventurer 3 could render models and the layer of paint did help smooth out some of the print pattern (and it worked very well with the PLA). I did a bit of further research and I discovered that you can buy what's called a filler/primer spray, this is a slightly more gloopy primer paint that can fill in some small imperfections and gives a smoother surface (allegedly). That may be worth a try in the future - hopefully it won't fill in detail so much as to obscure it (we shall see)...

I then added my first paint 'base' layer, naturally I went for a medium 'wood' colour. For some reason this particular brand of paint came out a little glossy - which was annoying - but it does make the 3D model look rather nice.

However, I decided that this mid-colour was still a bit too light and so I ended up experimenting with some darker washes and dry brushing - just as I used to do with my plastic kit models - to darken and give the wood effect some depth...

Pretty good, eh? (If I say so myself.) One thing that concerned me about using a liquid shadow wash - was whether the thinned paint would highlight the 3D stepping pattern by seeping in between the print layers. But, the good news is that while it did the layers of filler and base paint smoothed out these layer lines just enough to not make this such a big deal - you just need to go easy with your wash and dry-brushing.

[Note: You will have noticed that my single Baby-Groot has suddenly become three Baby-Groots! 😁 This was because of a unintended effect of having a 3D printer - as I found that all of a sudden I had family members asking me if I could 'just print me a copy' of whatever it was I was printing! 😐]

I finished the model off by painting in in the eyes and that's fairly much it...

All in all, this has been a very interesting and informative first exercise. Working with a 3D printed model is very similar to how you might go about working with a plastic kit - though you have to be wary of the printing pattern and try to alleviate it - either by sanding and filling the model OR by printing it out at a higher resolution.

Next I will be looking more into creating a scale model print and how I go about creating a tiny recreation of a real world object.

Tuesday, 4 August 2015

1/25 'Mad Max' Willy's Hot Rod - Part 5

Modifying the original Revell chassis for the new wheels
As usual, this 'straight forward job' has turned out not to be straight forward at all. Why do I continually underestimate what a job entails? Lack of experience I suppose...

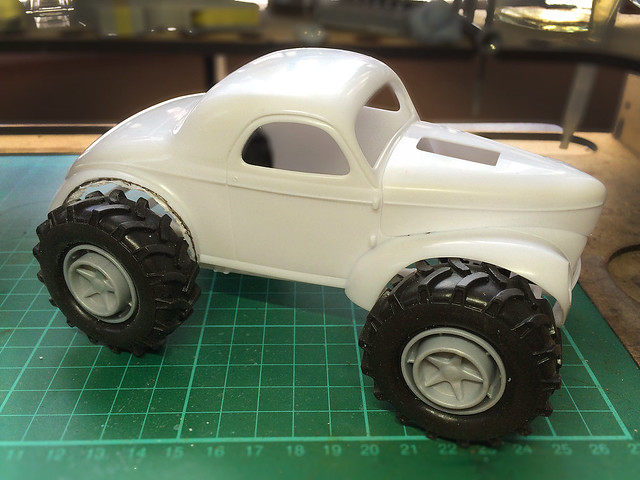
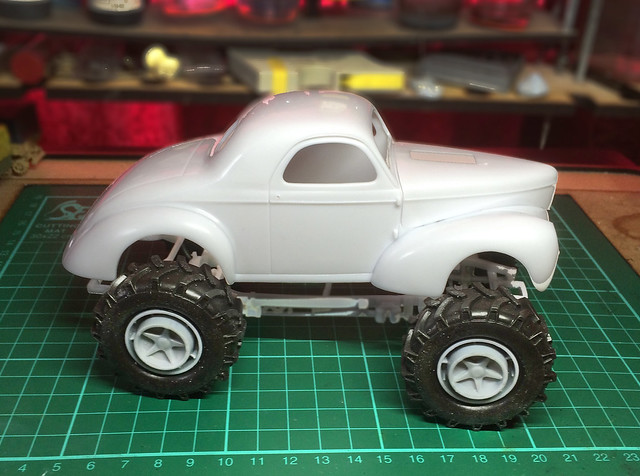
I was hoping that the larger wheels I had found would fit onto the existing body and chassis with a minimal amount of modification. I just wanted to enlarge the body's wheel arches to allow for the chunkier tyres, but that was wishful thinking on my part. What I was trying to avoid was a 'monster truck' scenario where the suspension was jacked up and the body raised above the axels.

This is where I left off...I test fitted the chassis - as is - to the body. It was at this
point it became obvious that there just wasn't enough clearance between the new
wheels and the body. So I had to rethink how I was going to do this model.

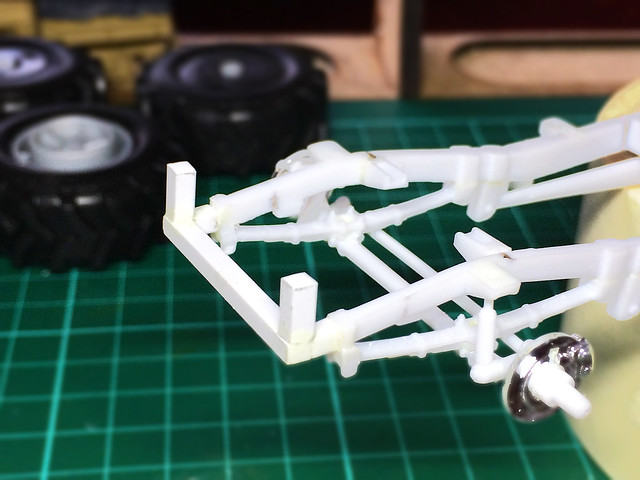
I have worked out something of a compromise where I raised the car's body only a little, but enough to provide enough clearance between the wheels and the wheel arches to look reasonably feasible (if not entirely realistic). To do this I would have to add some blocks between the body and the chassis and also chop the length of the chassis to reduce the wheel-base slightly (because the wheels are larger).

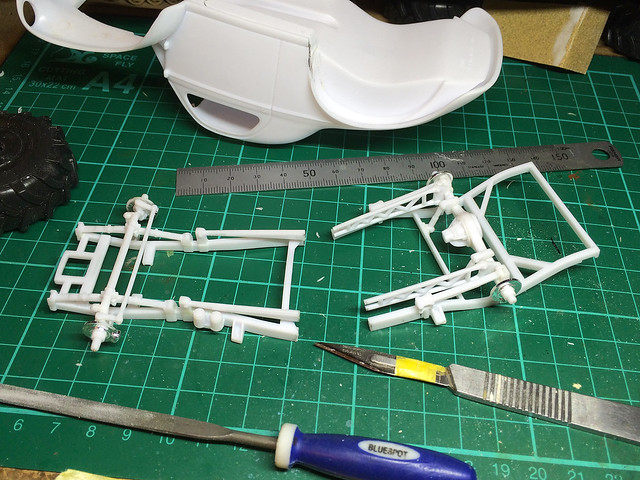
Cut and shutOk, shortening the chassis first - as this will change the location of where the chassis attaches to the new raising blocks. I estimated that I needed to shorten the chassis by only about 3mm...


In effect this would allow me to reposition the axels closer together to recenter the new wheels within the enlarged wheel arches (moving the front axel back and the back axel forward slightly).


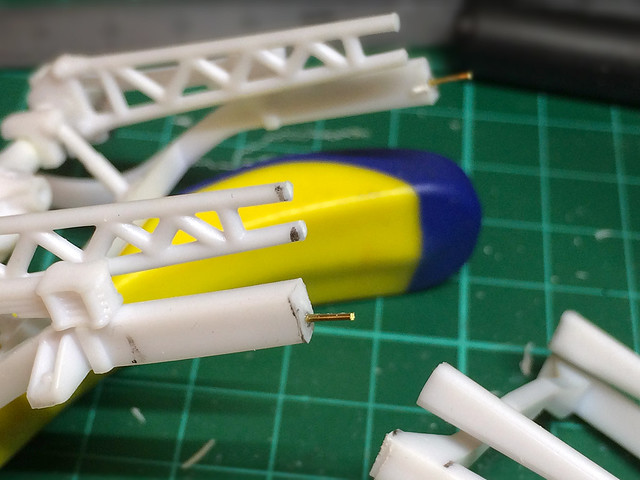
Having done the cut, it's time to do the shut. I strengthened the join with some brass rod then glued the two halves of the chassis back together...


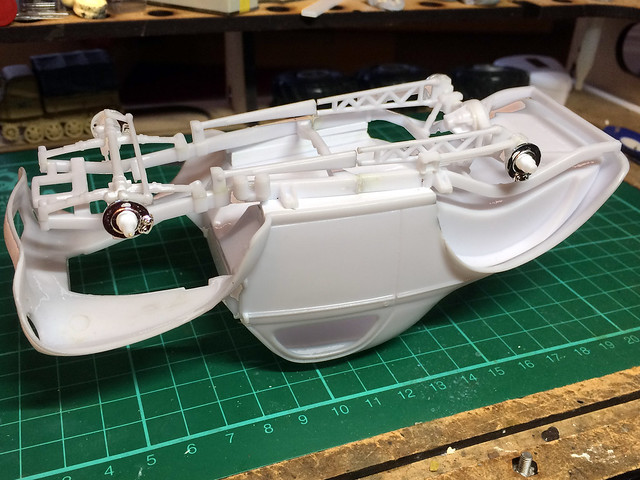
You'll see from the above photo how much higher the chassis is sitting above the body of the car now (when upside-down like this). Also if you look at the front you can see how much I have moved the chassis/front axel back. I now have to think about how I will attach the chassis to the body of the car...

The green box shows the front attachment point, that's OK where it is. The red
Is the cut'n'shut where I removed 3mm of chassis. And finally the blue indicates
where I will have to move the rear attachment point forward about 4mm.

Once the chassis is glued back together properly I have to make some proper support posts to join the body and chassis together. The body will now sit 6.5mm above the chassis, now I'm not a car mechanic - in fact I don't even drive - so my 'engineering' will probably be far from realistic. I'm just going to make some plastic 'stilts' on which the body will sit on...

Yeah...Not very sophisticated, but it works. I've stuck eight of these little posts
to the chassis which raises the car body up 6.5mm.

Having got the car body siting on the chassis properly I now have to turn my attention to how the V8 engine will fit onto the chassis. Essentially its the same problem as above - I will have to make 'spacers' or 'risers' to compensate for the extra space created by raising the body over the chassis. The engine will have to be lifted the same 6.5mm to sit as it was intended inside the engine bay of the car's body (otherwise the V8's blower will not protrude out the top of the bonnet properly)...

Er, oops! Solving one problem simply creates another. Raising the car's body
off the chassis means that the V8 engine is now too low and the blower no
longer protrudes - as it should - out the top of the bonnet. Bummer!

The same is true for the other engine components - like the radiator - and I will have to raise all these up because of the chassis modifications.

Phew! And that's the chassis modifications complete and it's ready to paint. Although it also became apparent - while doing the above test fitting - that I needed to now move the engine forward to compensate for my moving the chassis back (shortening it)! Every modification seems to result in a knock on effect!

Right, everything has been moved, raised, cut, shut, shifted, tweaked and otherwise
mucked about with. Now I have to tidy up, sand smooth and paint.

And that's that for now.

Next: The big job - modifying the Willy's Coupe bodywork for that 'Mad Max' look!

Friday, 10 July 2015

1/25 'Mad Max' Willy's Hot Rod - Part 4

It's all about the wheels in this blog entry. Just to quickly re-cap - I'm not using the Hot Rod style wheels that came with the Revel kit, I have found some nice big fat off-road wheels that I'm going to mount on the model instead. The catch is that I will have to modify the car's body to get them to fit.

So, first things first, I need to work out how much I need to trim off the existing wheel arches to get the fat wheels to attach to the axels.


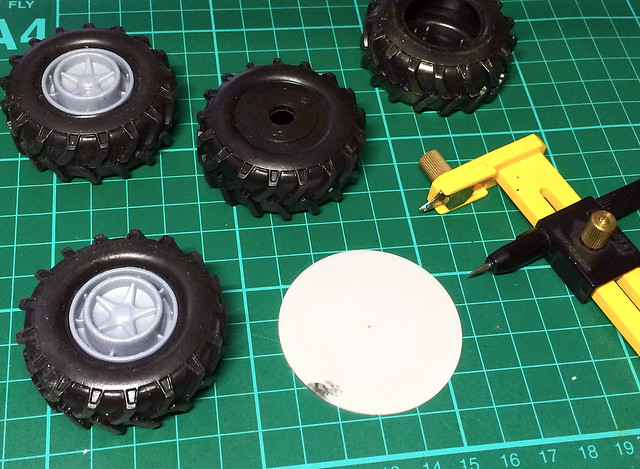
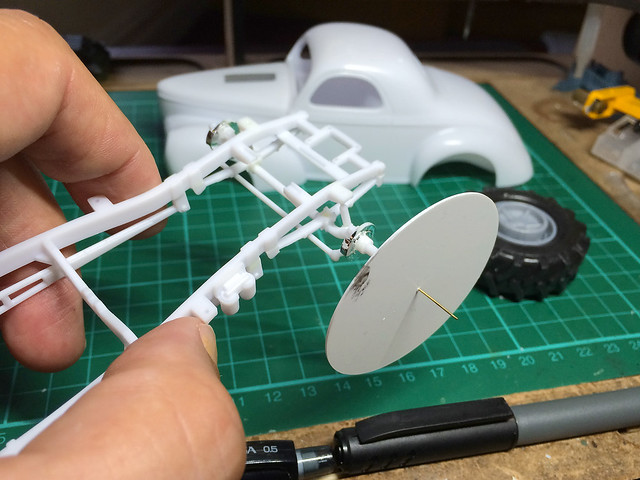
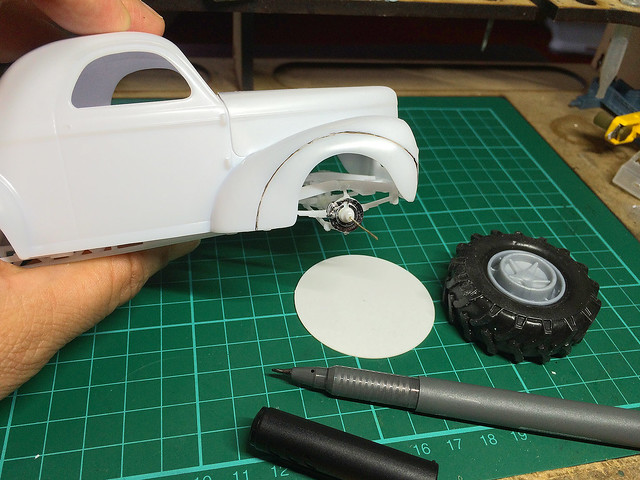
Rather that trying to draw round the new tyres (with their knobbly tread) I decided to make a template disc - the same diameter as the new wheels - and fix it on a extension to the axel so I knew the disc was perfectly centred...


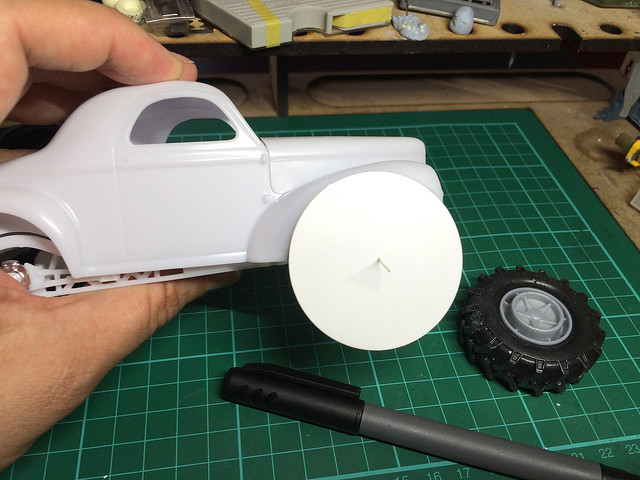
I could then attach the body shell onto the chassis and get a perfect idea about where and how much plastic I would have to remove from the wheel arches....


And finally, it was just a case of drawing around the template. This would provide me with an accurate guide indicating where I should trim off the excess wheel arch...


And now the scary part!
No matter how careful you think you are being you still have a nagging worry that you are going to mess up and cut too much or in the wrong place or slip and ruin the bodywork completely!

So, trying not to tremble, I carefully used my Dremmel (with a cutting disc) to slowly trim away the unwanted plastic up to within a couple on millimetres of my guide line. After that I will file and sand up to the line...


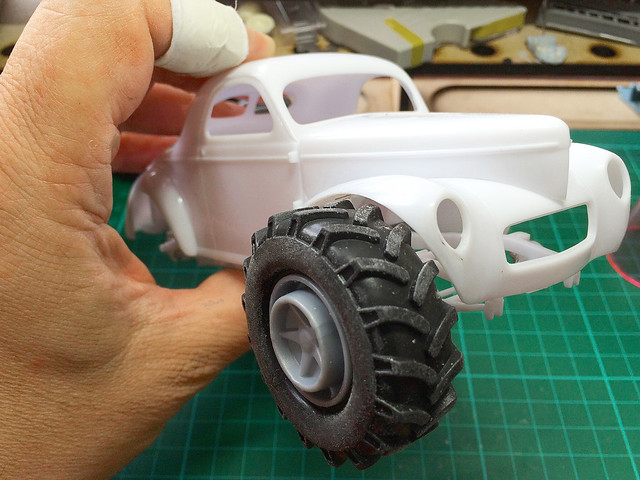
Well, nothing goes quite to plan...It turns out that my big new wheels are very big indeed and to get enough 'breathing space' around them I had to remove far more of the wheel arch than I expected. I also will have to think about raising the bodywork up off the chassis slightly (a minor job).


There was a lot more trial and error involved in this modification than I had imagined there would be. I had to keep checking the fit and then trim a bit more and a bit more off the body. But, finally, I managed to get an acceptable size and shape of wheel-arch that accommodated the big fat tyres!


It looks a bit mad...But that seems appropriate to the nature of the project. So, having done one wheel arch I now have three more to go. Phew!

Next: Finishing the chassis and mounting the engine.

Sunday, 5 July 2015

1/25 'Mad Max' Willy's Hot Rod - Part 3


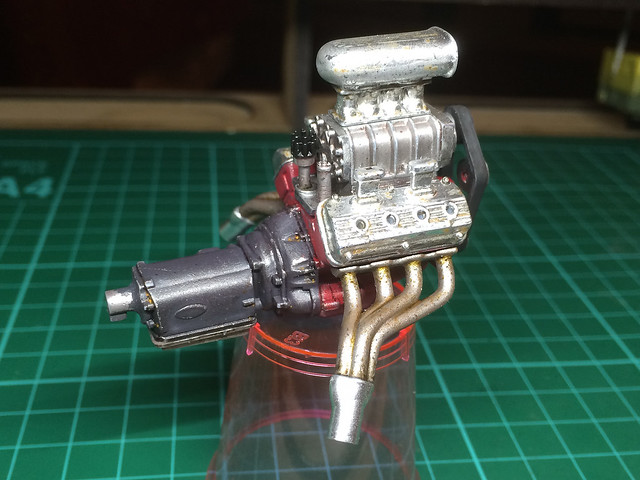
Having completed the work on the V8 engine I decided to add some tiny 'improvements'. At this stage the engine is 'complete' as far as the Revell instructions is concerned, but a quick look at any reference photos will make it immediately clear there are some parts which are obviously missing.


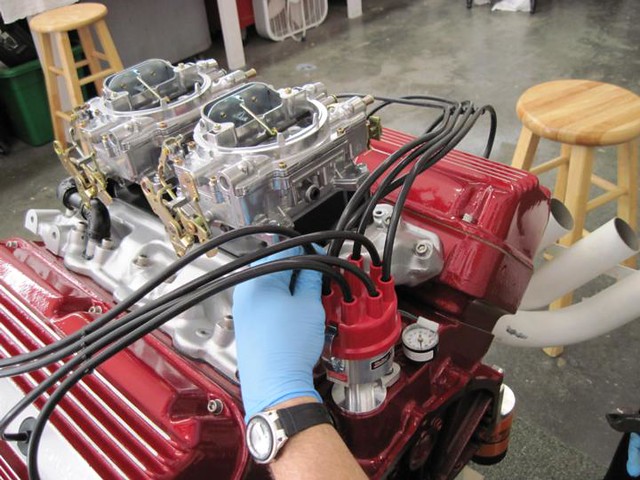
Principal among these are the 'cables' (?) that go from the valve cases at the sides to the distributer at the rear of the engine...


All this means is a fairly simple job of adding a few wires to represent these cables. The above reference photo gives a very useful idea in which order the cables are arranged and how they go into the distributer itself.

Anyway, while I look for a suitable wire that I can connect to the distributer (I tried normal electrical wire but it was too thick) I will move onto the next big job - the car's chassis.

The chassis construction
Now...This is where things get a wee bit tricky. The Revell instructions suggest you to start on the car's interior 'bucket' next (the driving compartment) BUT I have a particular design in mind for my Mad Max themed conversion so I'll have to abandon the instructions at this point.

Ooooooow...Look at those chunky wheels! I like that idea.
I decided that I would like to give my hot rod a beach-buggy type of look, with nice fat off-road wheels. The problem being that the chassis is designed for a set of small 'skinny' wheels at the front and big fat 'slicks' at the back - so I'm having to play about a bit to make sure my big chunky off-road wheels don't screw up how the body and interior fit on the chassis frame.


Getting hold of the new chunky wheels was surprisingly easy - I found a appropriately sized toy car with big aggressive looking wheels in my local pound store! But, will they work with the chassis?

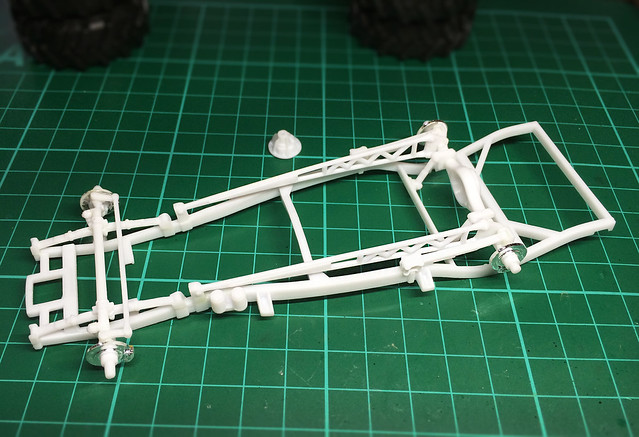
I made up the chassis as Revel recommended as I guess the only way I will know if my idea will work is to try it! From a point of view of 'realism' I am sure mating off-road chubby wheels to a hot road drag racing chassis frame is not correct. Done properly I should have a reinforced chassis with heavy duty suspension (like a 4x4) really or maybe even a raised suspension like a monster truck...But this is a fantasy build I suppose, so 'realism' is secondary.

The Revell Willy's 1941 Coupe chassis assembled.
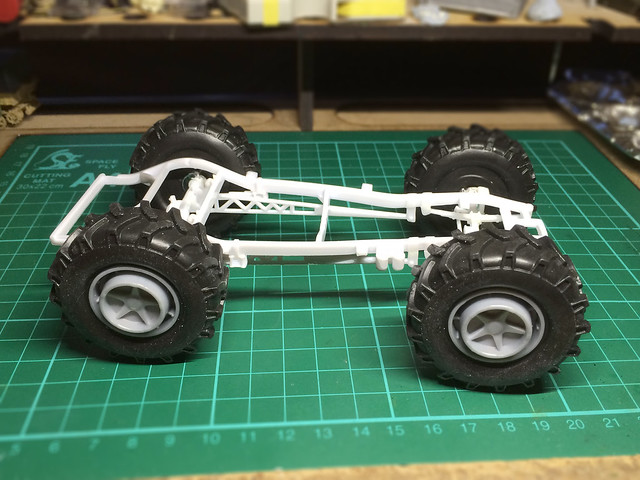
In the end I only had to do a small amount of modification on the chassis to get
the new chunky wheels to fit. Just some minor trimming to raise the front axel.
Fitting the big chunkies to the chassis was the easy part, now comes the 'tricky' bit I mentioned at the beginning of this section - fitting the driving compartment and car body onto the chassis with it's new monster wheels!

This is a 'suck it and see' modelling moment - I'll drop the body on top of the chassis and try and work out what modification I would need to make to the bodywork in order to make it fit snugly onto the chassis...

I want the body to fit onto chassis, not sit high like this as if it was a monster
truck! This means I will have to enlarge the wheel arches...A lot!
Now, obviously, the cars wheel arches need to be dramatically enlarged to make room for the chunky tyres. So carefully does it - it's a case of draw a line where you think the modified wheel-arch should be then trim a bit and test for fit, then trim some more, then test, etc, etc...

So, hopefully, the next time you see this I will have the body on...Now, where's my Dremmel!

Next: Main bodywork modifications for 'Mad Max' them and painting the chassis and wheels.

Sunday, 21 June 2015

1/25 'Mad Max' Willy's Hot Rod - Part 1

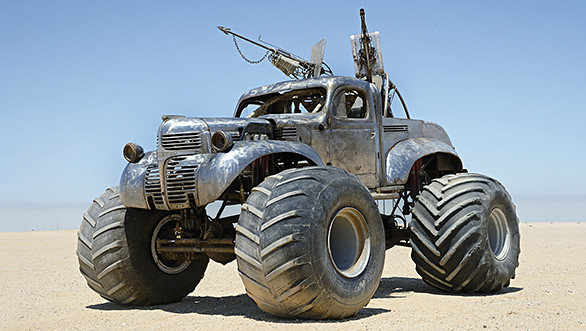
And so my biggest model to date begins. Inspired by the movie 'Mad Max: Fury Road' I decided to take part in a group build by the Hull Scale Model Club and build a 'Mad Max' car!

An example of a real Willy's 1941 Coupe Hot Rod, which my Revell 1/25 kit is
based upon. This one has a nice view of that lovely chromed engine and blower.

There are no rules - it doesn't have to be exactly one of the cars from the movie, just a car 'in the style of' the movies theme. So this is a chance for me to go a bit wild and use my imagination. But, also, this project gives me a chance to try out some new techniques which I might not otherwise get a chance to do making military vehicles.

So, today I am working on the first part of the construction instructions - the engine.

Despite the fictional/fantasy them of the project I couldn't resist doing some research into the Revel model and Willy's Couple car itself. The first thing I discovered was that the engine in the kit (which apparently is the wrong engine by the way) is a V8 Hemi engine with blower, which looks like this...

3D artwork by SamCurry, Deviantart.com
Beautiful stuff...But probably a bit too pristine for a Mad Max themed car.

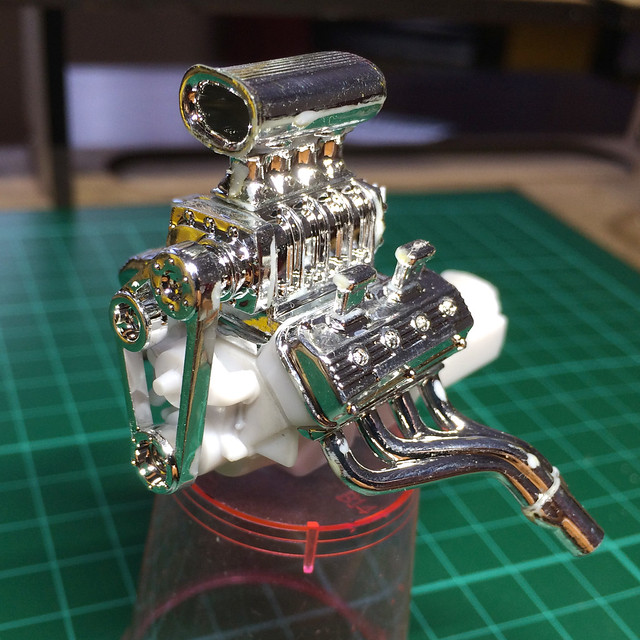
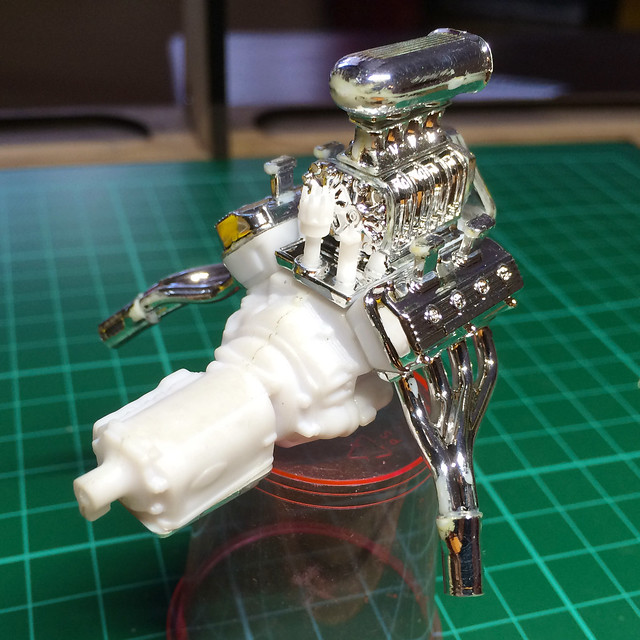
The Revell kits does - in my novice opinion - make a lovely job of recreating this engine in plastic, with moderate detail and some very impressive chromed parts...


I have already put together the two part main engine block (top of photo) and I have taken the precaution of numbering the other components before removing them from the sprue as I know noting about engines and don't want to get the assembly wrong! In truth I am not even sure what the correct name is for ten various parts...5 points off my 'Manly Man Score'. ;)

Now there are two points to take into consideration here; I could 'accurise' this engine by scratch making some of the smaller parts that Revell has not included (I'm thinking of all those wires or tubes in my reference picture) but also I am looking at those chromed parts and wondering if they suit the theme of my model?

If you take a look at one of the actual Mad Max: Fury Road car engines it certainly isn't as pristine a condition as the Revell model engine will be...


So, at some point soon I will have to decide what to do about those lovely chrome parts - 'weather them' or completely repaint them? It might be a shame to completely do away with the nice chrome job that's been done on these parts, s I've been having a look online at some real chrome parts that have suffered pitting and corrosion to see what they might look like...


Luckily, that legendary Hot Rod car model maker 'Doctor Cranky' has some tutorial videos specifically on weathering (pitting) chrome parts...


But while I let all that sink in - and do some planning - let's get on with the rest of the basic kit engine construction. It's a pretty simple and straight forward construction but with the issue of what effects I will eventually apply to the chromed parts I have only glued on these components using PVA glue.

In this way I can examine the finished engine and plane how to tackle the painting effects but still remove the chromed parts so I can paint the plain white plastic parts separately if I want (I will only glue the chrome parts on permanently when I decide on how I am painting the engine as a whole).


Well, that looks pretty neat doesn't it? Hope my painting can do this nice model engine justice.

One thing I noticed was that despite the nice chroming job done by Revell the small fly in the ointment is that when you cut these parts off the sprues you inevitably chip away at some of the chrome coating where you have to trim off the left over sprue. This is unavoidable and means that is you wanted the pristine chromed effect you would have to find a way to touch up these blemished with some sort of high shine metallic paint.

Luckily for me, if I do weather the chrome so it's pitted these slight imperfections can be easily camouflaged.

So that's it, stage one of the Willy's Coupe complete. Next I move onto what I believe the drag racers call the 'bucket' - the car's interior where the driver sits.

Tuesday, 7 February 2012

Featured work - Fantastic fantasy


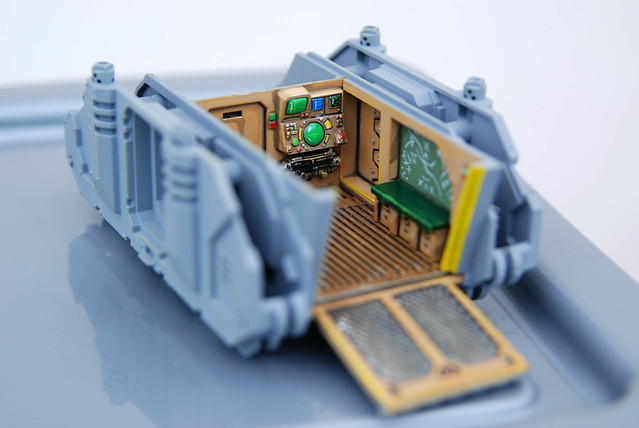
My blog is ostensibly about factual military subjects, but I couldn't resist featuring this bit of fantasy modelling by a good friend of mine and his son. This Games Workshop Warhammer 40,000 personell carrier is fantastic. What struck me was the level of detailing on the inside of the vehicle, particularly the tactical map drawn on the 'chalk board'!


More fantasy work by the father and son duo can be seen here: JoeJoeBinks Set

Cheers Mike!