Showing posts with label car. Show all posts

Tuesday, 4 August 2015

1/25 'Mad Max' Willy's Hot Rod - Part 5

Modifying the original Revell chassis for the new wheels
As usual, this 'straight forward job' has turned out not to be straight forward at all. Why do I continually underestimate what a job entails? Lack of experience I suppose...

I was hoping that the larger wheels I had found would fit onto the existing body and chassis with a minimal amount of modification. I just wanted to enlarge the body's wheel arches to allow for the chunkier tyres, but that was wishful thinking on my part. What I was trying to avoid was a 'monster truck' scenario where the suspension was jacked up and the body raised above the axels.
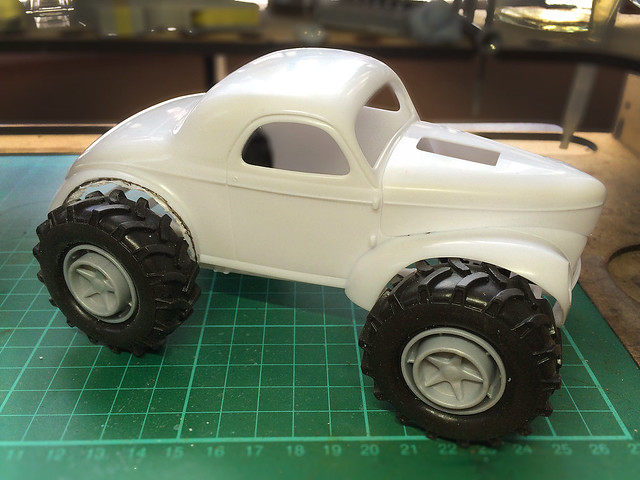
This is where I left off...I test fitted the chassis - as is - to the body. It was at this
point it became obvious that there just wasn't enough clearance between the new
wheels and the body. So I had to rethink how I was going to do this model.

I have worked out something of a compromise where I raised the car's body only a little, but enough to provide enough clearance between the wheels and the wheel arches to look reasonably feasible (if not entirely realistic). To do this I would have to add some blocks between the body and the chassis and also chop the length of the chassis to reduce the wheel-base slightly (because the wheels are larger).

Cut and shutOk, shortening the chassis first - as this will change the location of where the chassis attaches to the new raising blocks. I estimated that I needed to shorten the chassis by only about 3mm...
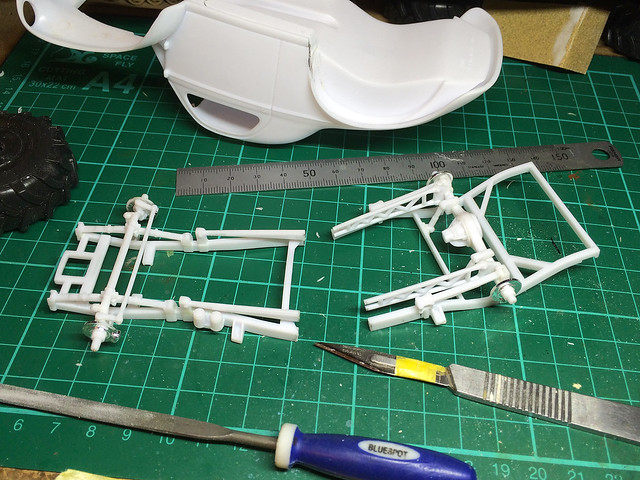

In effect this would allow me to reposition the axels closer together to recenter the new wheels within the enlarged wheel arches (moving the front axel back and the back axel forward slightly).
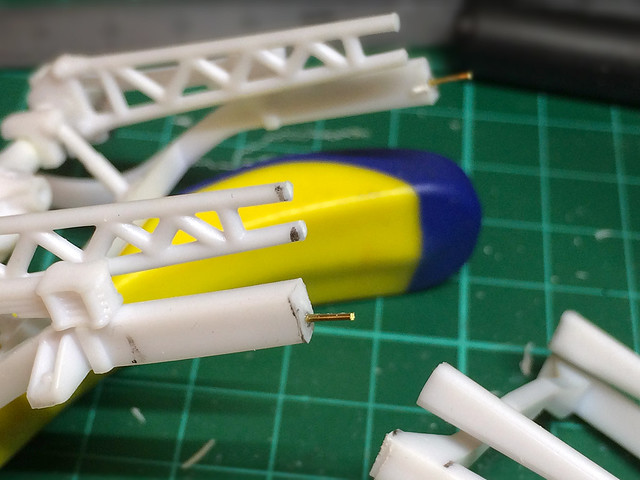

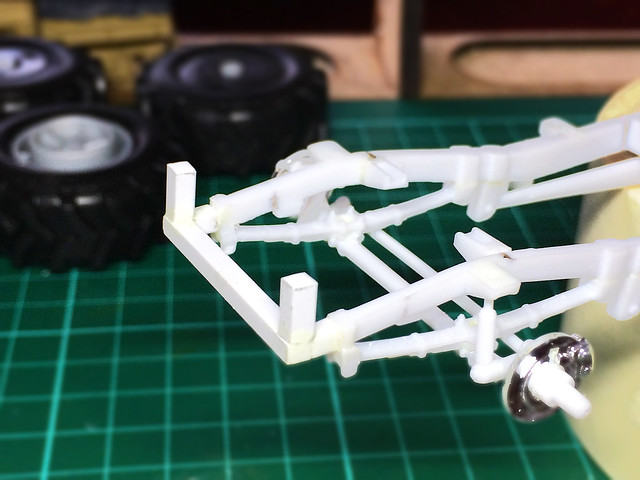
Having done the cut, it's time to do the shut. I strengthened the join with some brass rod then glued the two halves of the chassis back together...
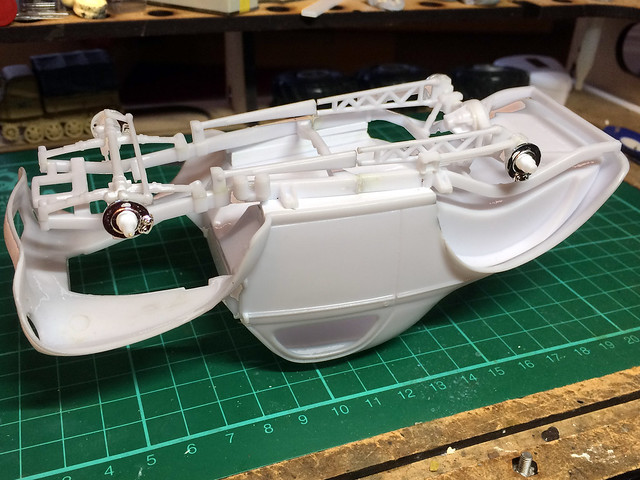

You'll see from the above photo how much higher the chassis is sitting above the body of the car now (when upside-down like this). Also if you look at the front you can see how much I have moved the chassis/front axel back. I now have to think about how I will attach the chassis to the body of the car...

The green box shows the front attachment point, that's OK where it is. The red
Is the cut'n'shut where I removed 3mm of chassis. And finally the blue indicates
where I will have to move the rear attachment point forward about 4mm.

Once the chassis is glued back together properly I have to make some proper support posts to join the body and chassis together. The body will now sit 6.5mm above the chassis, now I'm not a car mechanic - in fact I don't even drive - so my 'engineering' will probably be far from realistic. I'm just going to make some plastic 'stilts' on which the body will sit on...
Yeah...Not very sophisticated, but it works. I've stuck eight of these little posts
to the chassis which raises the car body up 6.5mm.

Having got the car body siting on the chassis properly I now have to turn my attention to how the V8 engine will fit onto the chassis. Essentially its the same problem as above - I will have to make 'spacers' or 'risers' to compensate for the extra space created by raising the body over the chassis. The engine will have to be lifted the same 6.5mm to sit as it was intended inside the engine bay of the car's body (otherwise the V8's blower will not protrude out the top of the bonnet properly)...

Er, oops! Solving one problem simply creates another. Raising the car's body
off the chassis means that the V8 engine is now too low and the blower no
longer protrudes - as it should - out the top of the bonnet. Bummer!

The same is true for the other engine components - like the radiator - and I will have to raise all these up because of the chassis modifications.

Phew! And that's the chassis modifications complete and it's ready to paint. Although it also became apparent - while doing the above test fitting - that I needed to now move the engine forward to compensate for my moving the chassis back (shortening it)! Every modification seems to result in a knock on effect!

Right, everything has been moved, raised, cut, shut, shifted, tweaked and otherwise
mucked about with. Now I have to tidy up, sand smooth and paint.

And that's that for now.

Next: The big job - modifying the Willy's Coupe bodywork for that 'Mad Max' look!

Sunday, 5 July 2015

1/25 'Mad Max' Willy's Hot Rod - Part 3


Having completed the work on the V8 engine I decided to add some tiny 'improvements'. At this stage the engine is 'complete' as far as the Revell instructions is concerned, but a quick look at any reference photos will make it immediately clear there are some parts which are obviously missing.


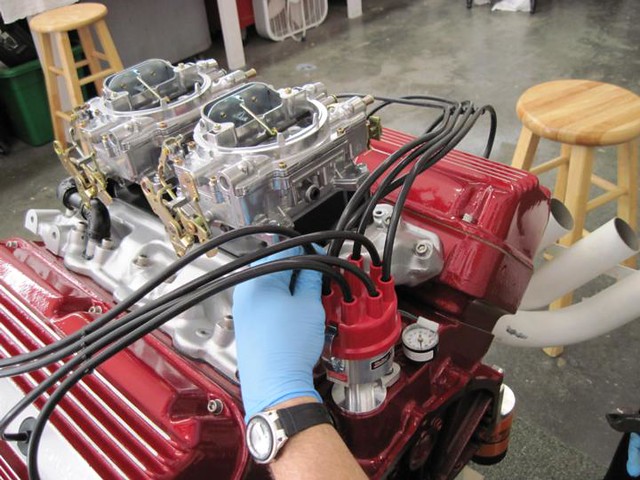
Principal among these are the 'cables' (?) that go from the valve cases at the sides to the distributer at the rear of the engine...


All this means is a fairly simple job of adding a few wires to represent these cables. The above reference photo gives a very useful idea in which order the cables are arranged and how they go into the distributer itself.

Anyway, while I look for a suitable wire that I can connect to the distributer (I tried normal electrical wire but it was too thick) I will move onto the next big job - the car's chassis.

The chassis construction
Now...This is where things get a wee bit tricky. The Revell instructions suggest you to start on the car's interior 'bucket' next (the driving compartment) BUT I have a particular design in mind for my Mad Max themed conversion so I'll have to abandon the instructions at this point.

Ooooooow...Look at those chunky wheels! I like that idea.
I decided that I would like to give my hot rod a beach-buggy type of look, with nice fat off-road wheels. The problem being that the chassis is designed for a set of small 'skinny' wheels at the front and big fat 'slicks' at the back - so I'm having to play about a bit to make sure my big chunky off-road wheels don't screw up how the body and interior fit on the chassis frame.


Getting hold of the new chunky wheels was surprisingly easy - I found a appropriately sized toy car with big aggressive looking wheels in my local pound store! But, will they work with the chassis?

I made up the chassis as Revel recommended as I guess the only way I will know if my idea will work is to try it! From a point of view of 'realism' I am sure mating off-road chubby wheels to a hot road drag racing chassis frame is not correct. Done properly I should have a reinforced chassis with heavy duty suspension (like a 4x4) really or maybe even a raised suspension like a monster truck...But this is a fantasy build I suppose, so 'realism' is secondary.

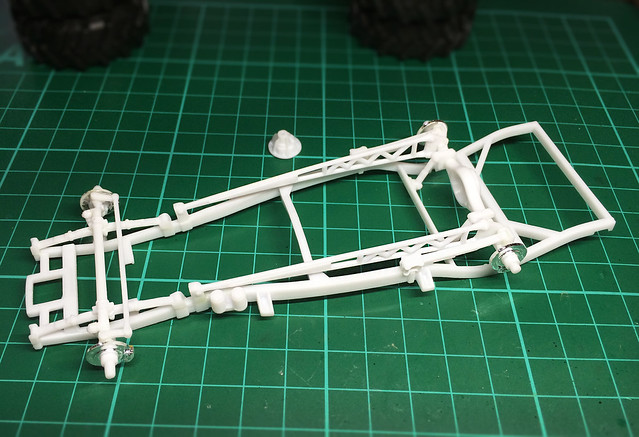
The Revell Willy's 1941 Coupe chassis assembled.
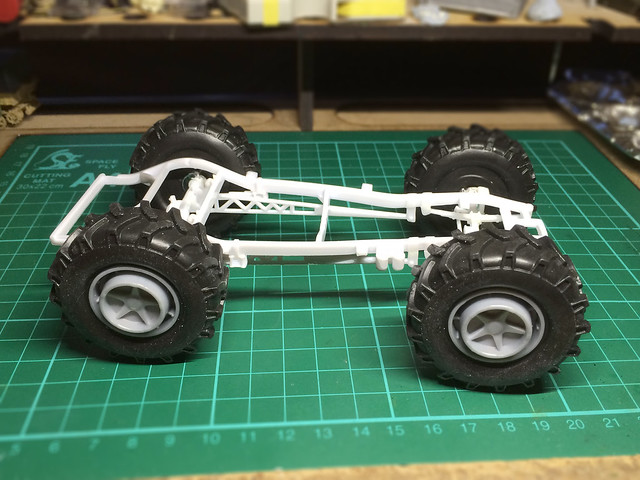
In the end I only had to do a small amount of modification on the chassis to get
the new chunky wheels to fit. Just some minor trimming to raise the front axel.
Fitting the big chunkies to the chassis was the easy part, now comes the 'tricky' bit I mentioned at the beginning of this section - fitting the driving compartment and car body onto the chassis with it's new monster wheels!

This is a 'suck it and see' modelling moment - I'll drop the body on top of the chassis and try and work out what modification I would need to make to the bodywork in order to make it fit snugly onto the chassis...

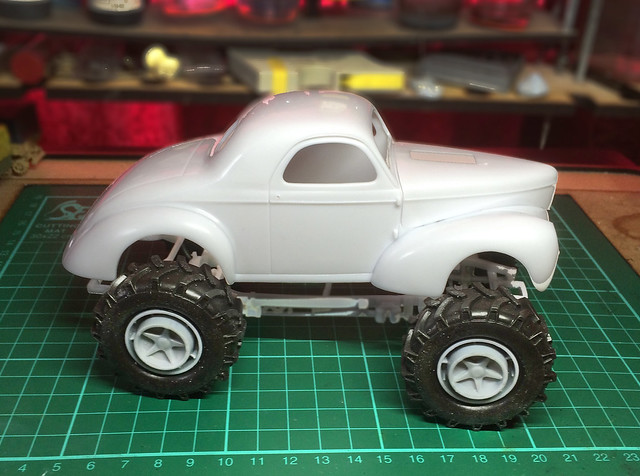
I want the body to fit onto chassis, not sit high like this as if it was a monster
truck! This means I will have to enlarge the wheel arches...A lot!
Now, obviously, the cars wheel arches need to be dramatically enlarged to make room for the chunky tyres. So carefully does it - it's a case of draw a line where you think the modified wheel-arch should be then trim a bit and test for fit, then trim some more, then test, etc, etc...

So, hopefully, the next time you see this I will have the body on...Now, where's my Dremmel!

Next: Main bodywork modifications for 'Mad Max' them and painting the chassis and wheels.

Tuesday, 23 June 2015

1/25 'Mad Max' Willy's Hot Rod - Part 2

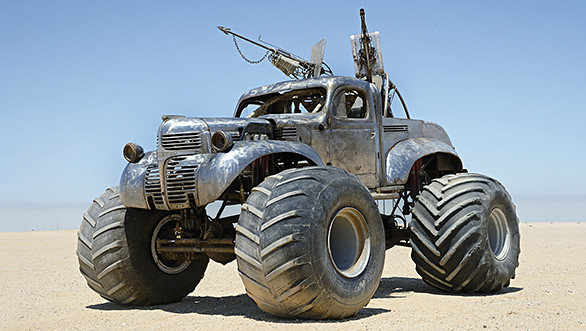
Not how my 'Mad Max' car will look exactly, but inspiration!

I was hoping to move quickly on to the next stage of this kit's construction - the interior cab - but I decided that the engine is going to be a lot more of a feature of the finished model than I first imagined. By default the Revell Willy's Coupe model has the engine mostly hidden away under a bonnet, but this seems such a shame - as it's such an attractive component of the kit - that I have decided that my design for this car shall do away with the bonnet (or hood) altogether.

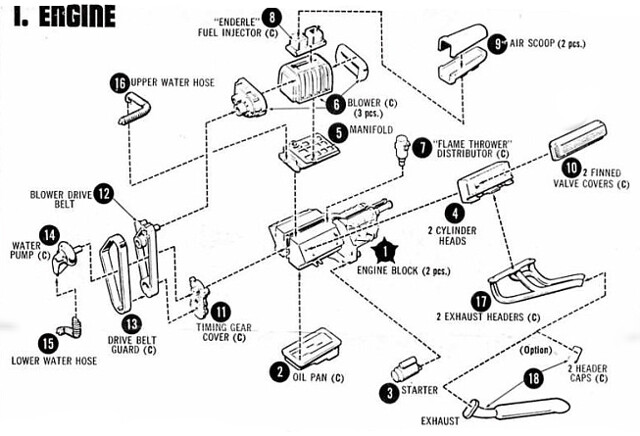
I don't know anything about car engines and this is a major problem when you
take on the building of a car model, especially when it has a detailed engine. The
main problem I had was not knowing the proper names for all the parts, the Revell
instructions didn't include these - luckily I found some similar instructions that did.

The upshot of this is that I now have to give the engine extra attention as it will be on show. But this adds a new set of problems (typically) as I now feel obliged to at least have a go at doing some minor detailing and paint the engine somewhat more accurately than I was originally going to. This also entailed my learning the names of the various parts of the engine so I could more easily research the parts for photographic reference.

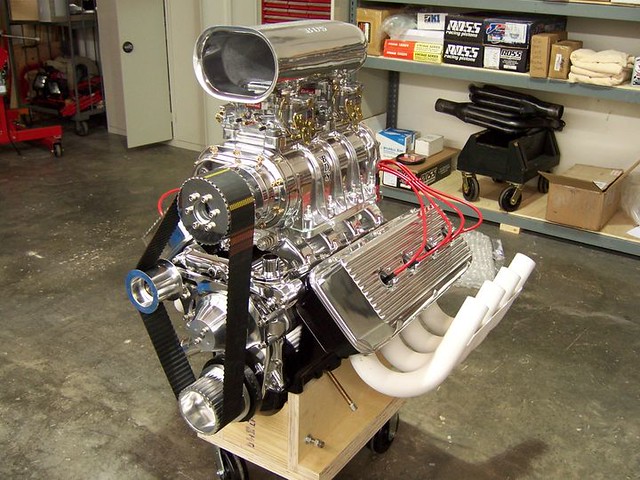
Thanks to Google I managed to actually find the actual engine that this model's power unit is based on. It turns out it is what is called a 'Blown 391 Hemi'...


Obviously, this has the same issue as my original kit parts - it's far to shiny and pristine! What I want is a photo of this engine, but one that shows a well used and less polished example. Luckily Google comes to my rescue once more...


This reference gives me a better idea about how I will treat the various parts of my engine (though I do want to keep a couple of chromed parts, but will weather them). So, ironically, I have to take a step back to move forward and I begin by disassembling the engine again...

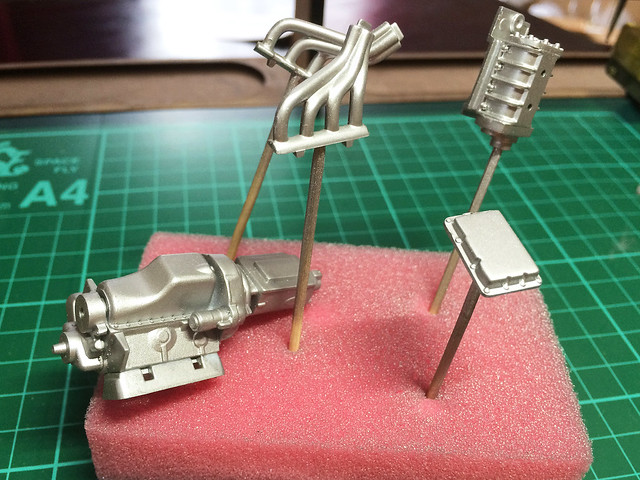
I'm putting a lot of thought into how I will paint the engine now - as it will be on
show - so I am choosing a colour or effect for each individual part. I have already
primed the engine block (top right) with a flat aluminium paint.

However, I had anticipated this and had used PVA glue to temporarily glue some of the parts together. This turned out to be such a good move that I will use this technique again to 'test fit' future models - a very useful thing to do so you can examine fit and see if there will be any construction problems before gluing the parts together permanently. (I used craft PVA this time, which isn't the stickiest available, so I will look for a PVA that is a little more instantly tacky.)

I started my painting by spraying the flat aluminium parts using a Humbrol acrylic aerosol. I hope to dull these down and weather them so they get a bit more grimy! (I gave the engine block another quick coat.)


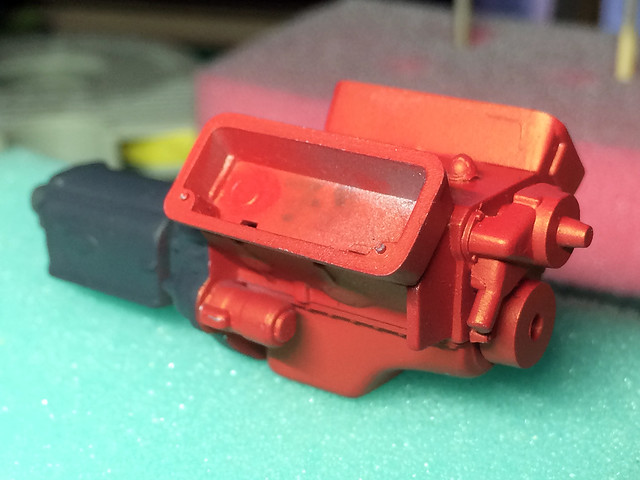
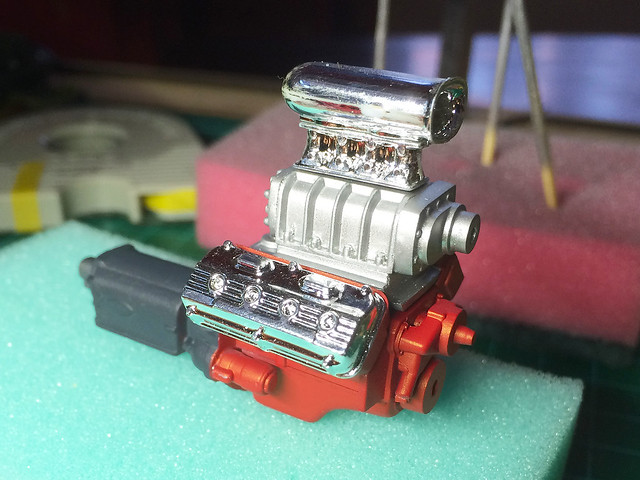
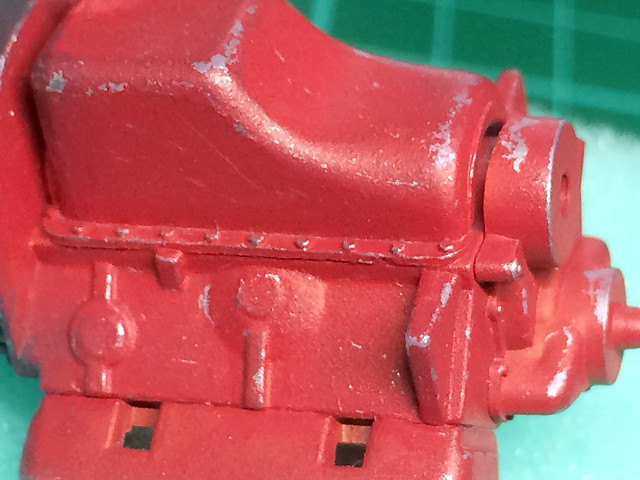
Next I started work on the final colours for the engine block. The main block will be a nice red over the aluminium, the rear gearbox will be a dull mid grey (these seem to be quite popular colours for the Hemi engines). I'll be using the hairspray technique to chip and flake the top coat colours (red/grey) so that the dull aluminium base colour shows through in places where the engine would be worn...


A light coat - just a couple of quick passes- of an aerosol hair spray over the silver base and then allowed to dry for about 10 minutes or so. Then I airbrushed the top-colour over the dry hairspray - I used a fairly 'dry' (or undiluted) paint mix without too much thinners as I have found that if you spray paint that is too 'wet' (too thinned) then the paint tends to run or 'crack' because of the hairspray.

You don't want the paint to 'crack' until you reactivate it later when you apply water to the top coat with a small brush in order to get the flaked paint effect that the hairspray technique is designed to produce.


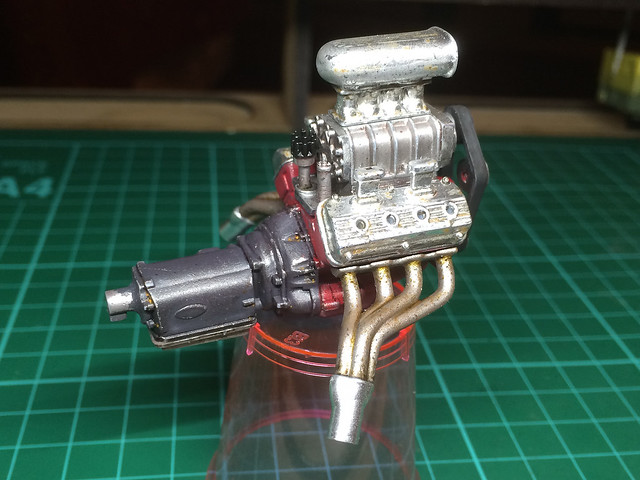
I couldn't resist popping together some of the parts to get an impression of what the finished engine would look like. The flat aluminium colour really contrasts nicely with the high shine chrome parts.

All the components of the engine are now in their base colours and ready to put back together again ready to shade and weather. And that's whats next...

Update: Woke up this morning to find the progress I made before bed last night (either that or the 'hairspray technique' elves had visited in the night)! Quite pleased - having a smug mug of tea to celebrate - as I seem to have cracked this effect (excuse the pun)...


Now the first time I tried this effect I didn't have an airbrush and this seems to be the game changer if you want to do this effect properly. I wasn't happy with the result the first time I tried it using rattle-can spray paints but it seems that was because they spray on a layer of paint that is too thick. The airbrushed top-coat on this V8 engine really 'chipped' away just as the tutorials say it should - the thinner paint coat giving way with ease and far more subtly than with aerosol paints.

(I'm glad this worked as the hairspray technique is pretty fundamental to doing a rusty model car - so this was a useful test.)

Right...Now it's onto the usual weathering techniques - pin-washing and streaking with oils and washes - to finish off the weathering on the engine block.

Sunday, 21 June 2015

1/25 'Mad Max' Willy's Hot Rod - Part 1

And so my biggest model to date begins. Inspired by the movie 'Mad Max: Fury Road' I decided to take part in a group build by the Hull Scale Model Club and build a 'Mad Max' car!

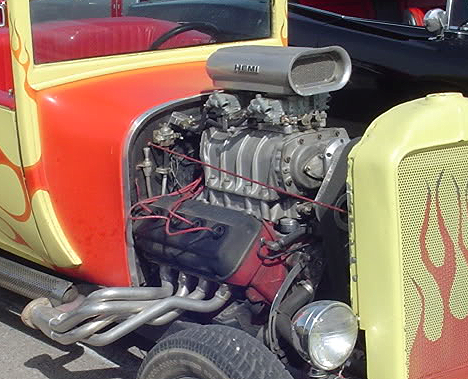
An example of a real Willy's 1941 Coupe Hot Rod, which my Revell 1/25 kit is
based upon. This one has a nice view of that lovely chromed engine and blower.

There are no rules - it doesn't have to be exactly one of the cars from the movie, just a car 'in the style of' the movies theme. So this is a chance for me to go a bit wild and use my imagination. But, also, this project gives me a chance to try out some new techniques which I might not otherwise get a chance to do making military vehicles.

So, today I am working on the first part of the construction instructions - the engine.

Despite the fictional/fantasy them of the project I couldn't resist doing some research into the Revel model and Willy's Couple car itself. The first thing I discovered was that the engine in the kit (which apparently is the wrong engine by the way) is a V8 Hemi engine with blower, which looks like this...

3D artwork by SamCurry, Deviantart.com
Beautiful stuff...But probably a bit too pristine for a Mad Max themed car.

The Revell kits does - in my novice opinion - make a lovely job of recreating this engine in plastic, with moderate detail and some very impressive chromed parts...


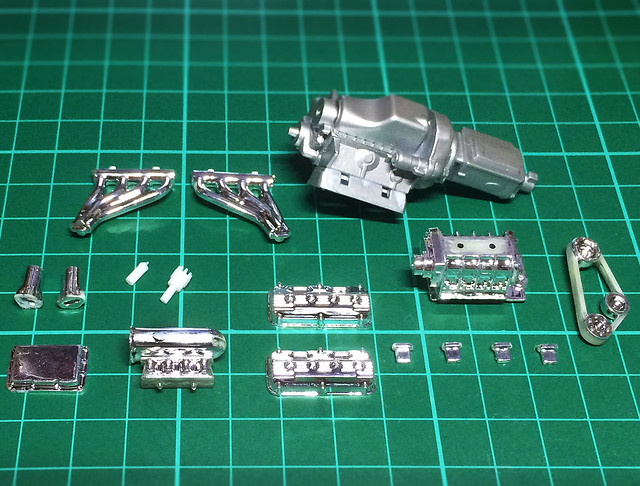
I have already put together the two part main engine block (top of photo) and I have taken the precaution of numbering the other components before removing them from the sprue as I know noting about engines and don't want to get the assembly wrong! In truth I am not even sure what the correct name is for ten various parts...5 points off my 'Manly Man Score'. ;)

Now there are two points to take into consideration here; I could 'accurise' this engine by scratch making some of the smaller parts that Revell has not included (I'm thinking of all those wires or tubes in my reference picture) but also I am looking at those chromed parts and wondering if they suit the theme of my model?

If you take a look at one of the actual Mad Max: Fury Road car engines it certainly isn't as pristine a condition as the Revell model engine will be...


So, at some point soon I will have to decide what to do about those lovely chrome parts - 'weather them' or completely repaint them? It might be a shame to completely do away with the nice chrome job that's been done on these parts, s I've been having a look online at some real chrome parts that have suffered pitting and corrosion to see what they might look like...


Luckily, that legendary Hot Rod car model maker 'Doctor Cranky' has some tutorial videos specifically on weathering (pitting) chrome parts...


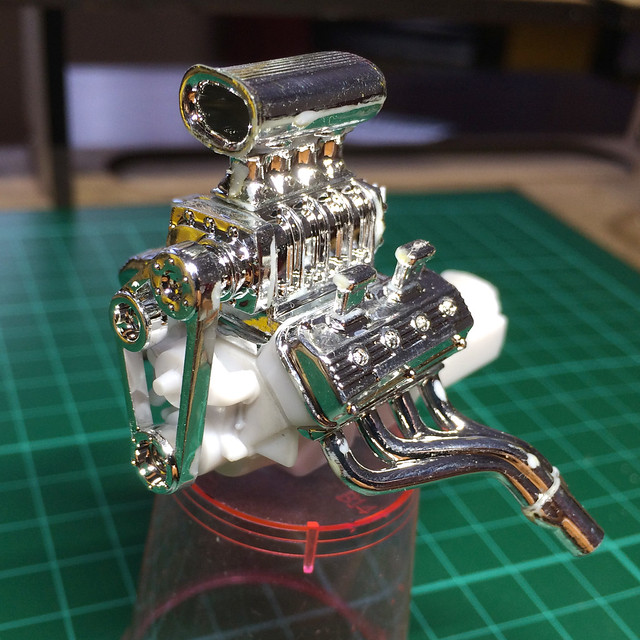
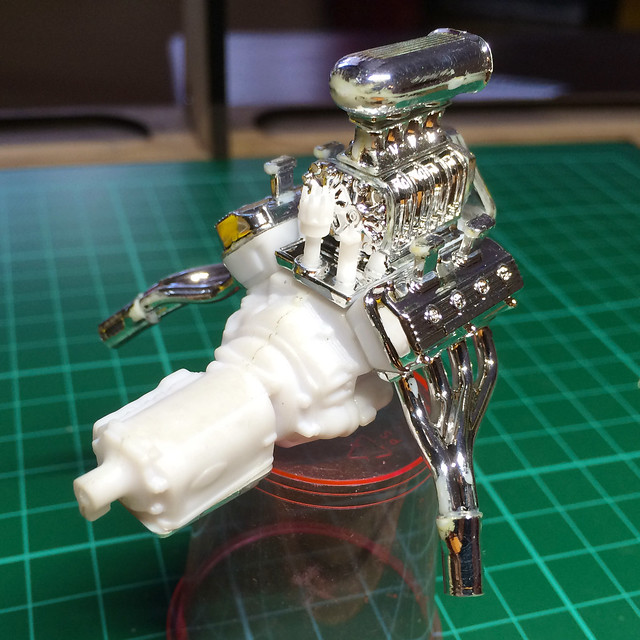
But while I let all that sink in - and do some planning - let's get on with the rest of the basic kit engine construction. It's a pretty simple and straight forward construction but with the issue of what effects I will eventually apply to the chromed parts I have only glued on these components using PVA glue.

In this way I can examine the finished engine and plane how to tackle the painting effects but still remove the chromed parts so I can paint the plain white plastic parts separately if I want (I will only glue the chrome parts on permanently when I decide on how I am painting the engine as a whole).


Well, that looks pretty neat doesn't it? Hope my painting can do this nice model engine justice.

One thing I noticed was that despite the nice chroming job done by Revell the small fly in the ointment is that when you cut these parts off the sprues you inevitably chip away at some of the chrome coating where you have to trim off the left over sprue. This is unavoidable and means that is you wanted the pristine chromed effect you would have to find a way to touch up these blemished with some sort of high shine metallic paint.

Luckily for me, if I do weather the chrome so it's pitted these slight imperfections can be easily camouflaged.

So that's it, stage one of the Willy's Coupe complete. Next I move onto what I believe the drag racers call the 'bucket' - the car's interior where the driver sits.

Tuesday, 15 January 2013

Wespe Models Opel Kapitan & Citroen 45

The postman has just just dropped off a parcel from Romania. Sadly it isn't a dragon egg, but happily it's a couple of Wespe resin models. They are a Opel Kapitan staff car and Citroen 45 3 ton truck.


These are wonderfully done resin models in 1/72 scale, but they aren't like any of the budget war gaming resin models I have bought so far. These are premium display quality moulds with a huge amount of fine detail.

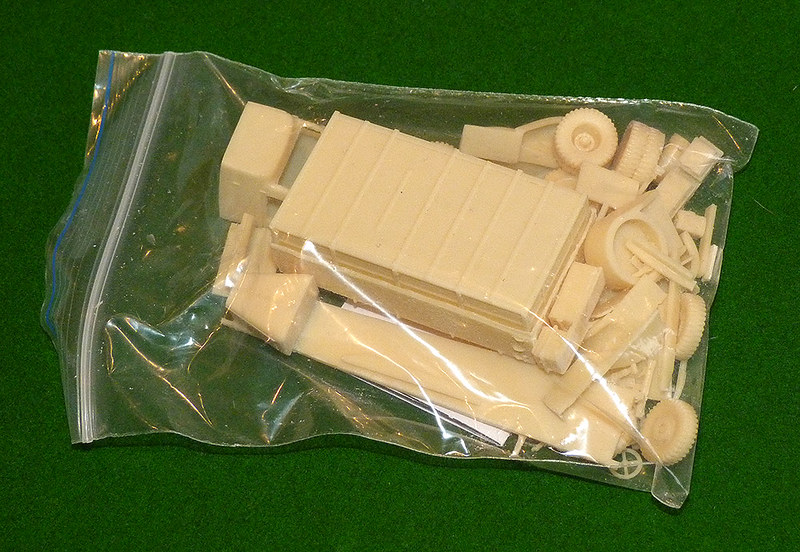
Above: Inside the box, protected by a layer of bubble-wrap, is a bag of
components - a lot of components! Here are the parts for the Citroen 45,
nothing like any of the resin models I have had so far.


These models were bought for my Finnish army HQ Battalion and represent my commanders staff car and my Engineer Company's truck. Finland received a large quantity of Citroen 45 trucks from their German allies (OK, we have all made bad friend choices at one time!) and the Opel will be converted into the similar looking 1940 4-door Sedan as the Finns made use of a large number of American cars of the pre and early war period (mainly Plymouth and Fords).

Above: The lovely 1940 Ford Sedan, suspiciously similar in design to the German
1939 Opel Kapitan. Handy for me as it means just some minor cosmetic
modifications to my Wespe model to turn it into this American classic car.


1939 Opel Kapitan. Photo source: Wikipedia
Above: The 1939 Opel Kapitan. Photo source: Wikipedia

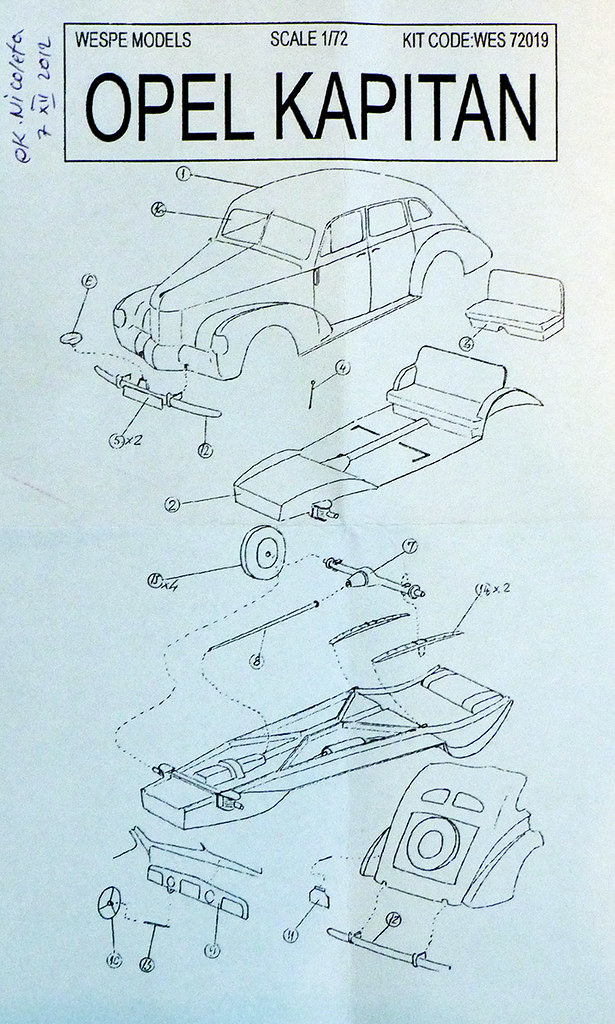
A quick look through the boxes and their contents is enough to impress me. There are a large number of finely made components in each box along with a photocopied inventory of parts and a sheet of 'instructions' (just a diagram of the orientation of parts really).

One thing I liked was that each instruction sheet was hand signed by a Wespe staff member to show that the kit contents had been checked before dispatch.


I can't see any downsides, other than perhaps hat there are no colour scheme suggestions except the one that's on the box, decals of windscreens cut to size (you get a rectangular sheet of transparent plastic instead). But I guess, if like me, you want to buy these niche vehicles you have a pretty good idea about how you want to paint them. Though I guess war-gamers might wince at the price of these models (I did try the SHQ Citroen 45, but this white metal model was so bad that I immediately assigned it to my scrap box).

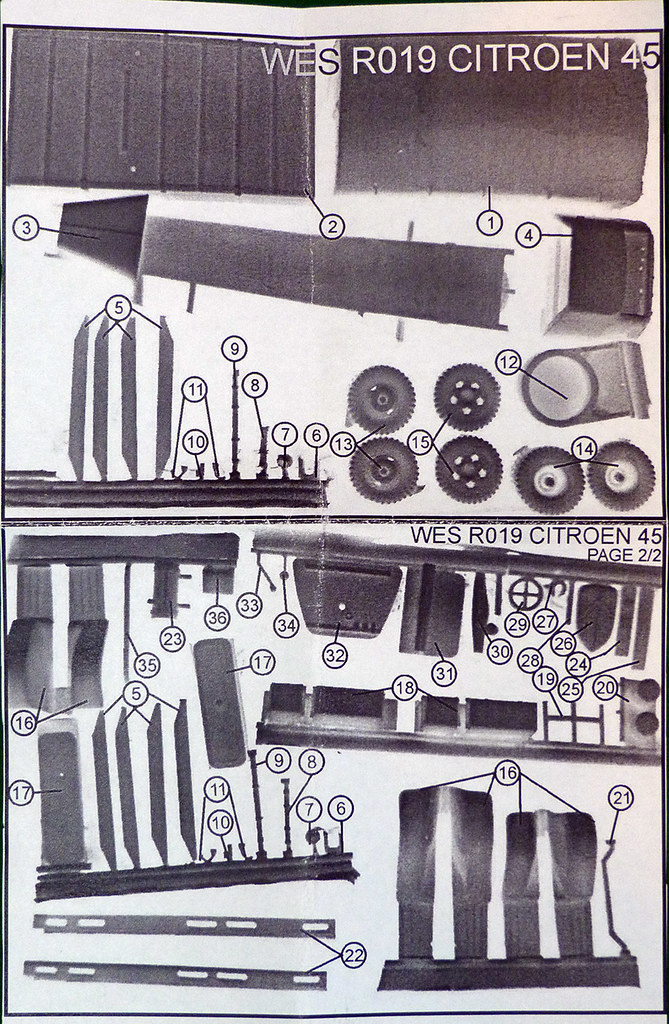
Above: Each kit comes with an inventory sheet, this being the sheet for the
Citroen. As you can see, some of the parts are quite delicate but there is
an welcome absence of flash.


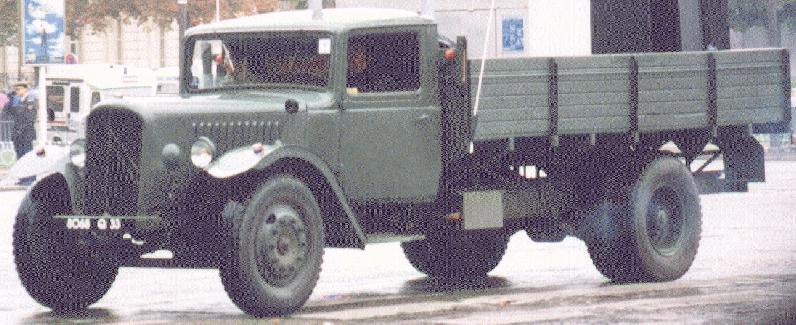
Interestingly the Citroen 45 has quite a wide variety of possible uses, from 1940 French army to North African Vichy or French colonial and also Wehrmacht (for which an estimated 15,000 vehicles were produced during the occupation), captured Soviet as well as Finnish.

Above: The Citroen 45 3 ton truck. Photo source: Denis Orlov, Moscow.

The delivery time to the UK from Romania took two weeks, but that was during the Christmas period, and I was supplied a tracking code by Wespe. So overall I am very pleased with this purchase