Showing posts with label French. Show all posts

Friday, 7 April 2017

28mm Buildings - Part 5

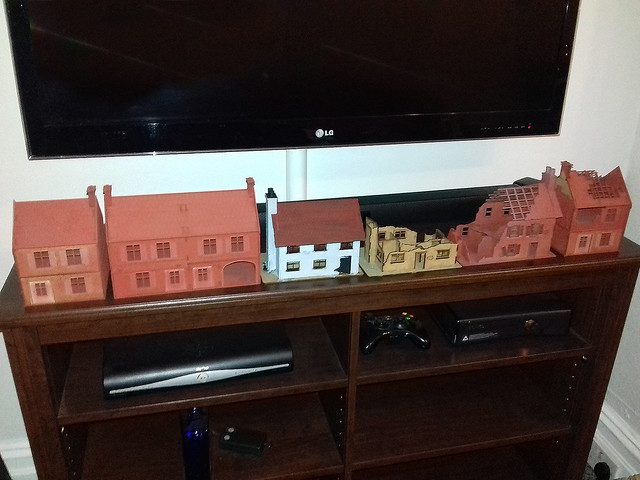
Well, I made it...Or them, rather...

I didn't managed to get any more than the just a basic paint job done (and even then I had cut some corners). But, I guess, they don't look too bad...If you half close your eyes!
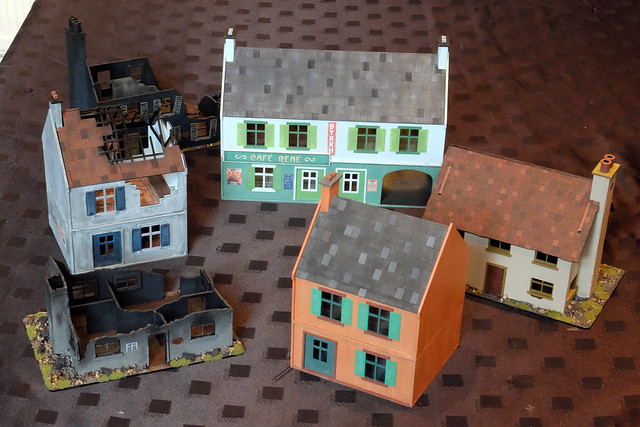

It was a useful experience and I learned a lot about these type of models. I still wish I had had more time so I could have weathered the models...Maybe next time.

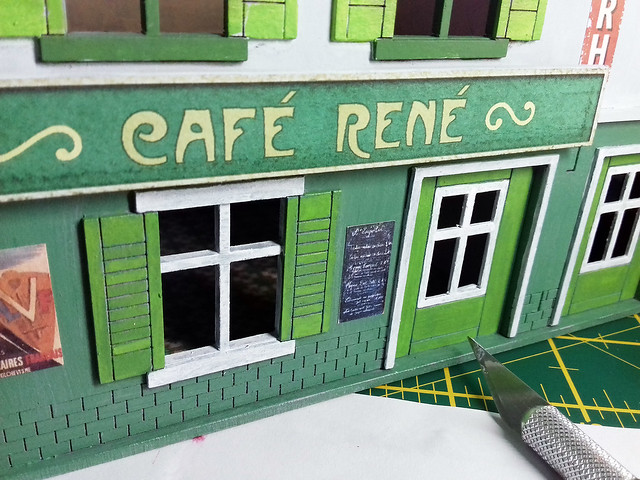
I think my favourite was the 'cafe' model, especially because we decided to have a bit of fun with it...
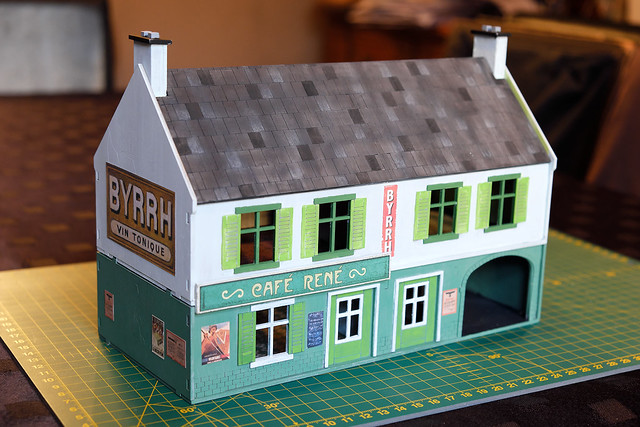

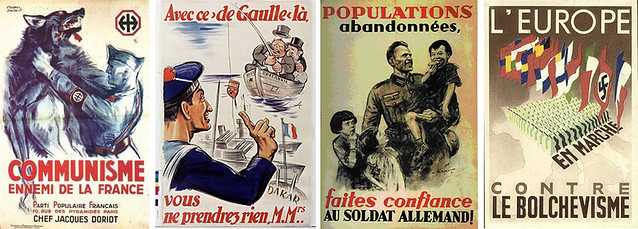
The printed signs and posters livened up the vanilla paint job, I downloaded some of these from the Rapid Fire website (they have a variety of WW2 signs and posters): Rapid Fire - Free Downloads. Others I found on the web by searching for WW2 French posters of the occupation.


I was rather pleased with this chalkboard menu image (I'm easily pleased). I also found some period maps and an aircraft recognition poster to make a 'French Resistance' room upstairs in Rene's Cafe!
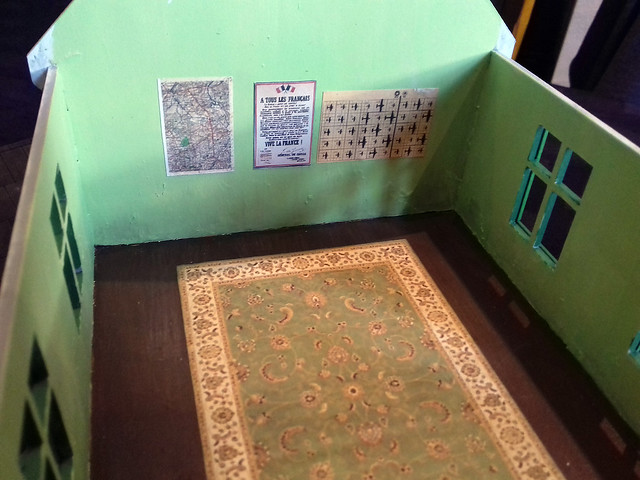

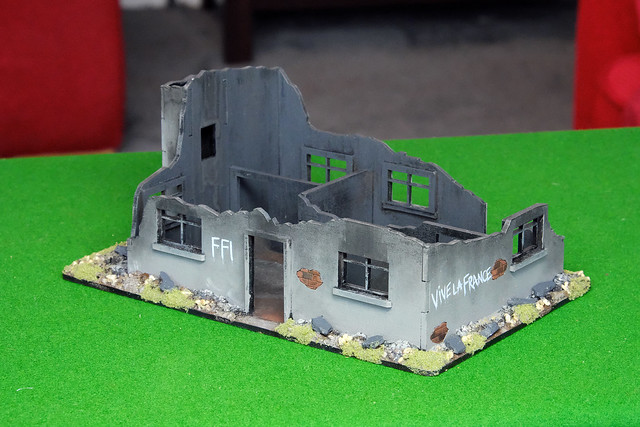
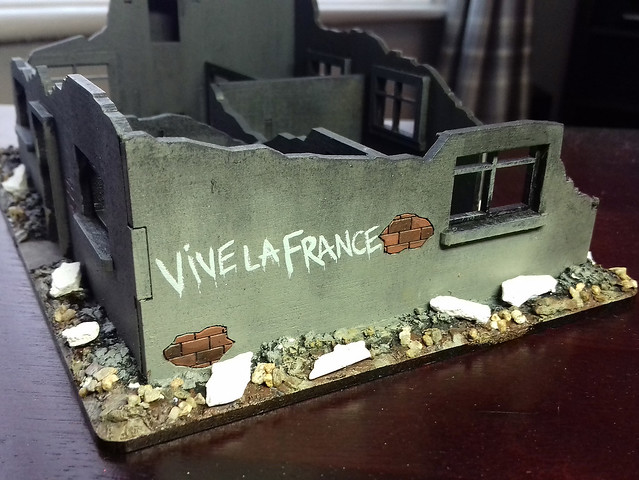
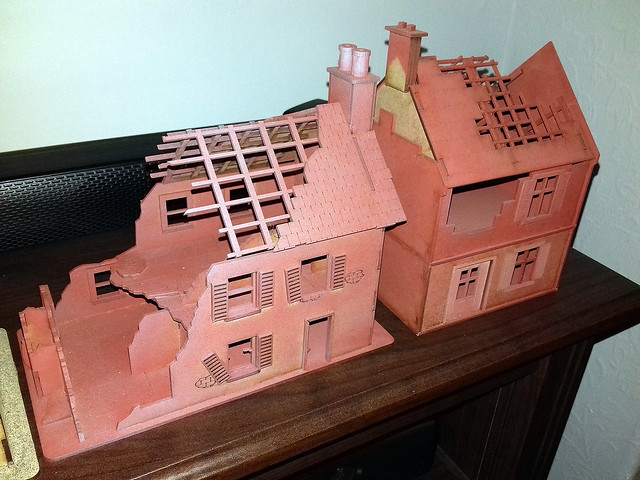
Little touches like this tickle me, so I thought I'd also like to add some resistance graffiti too. The bombed out cottage seemed to be an ideal canvas for some deviant artwork...


An earlier photo where I was still painting some of the 'rubble'.
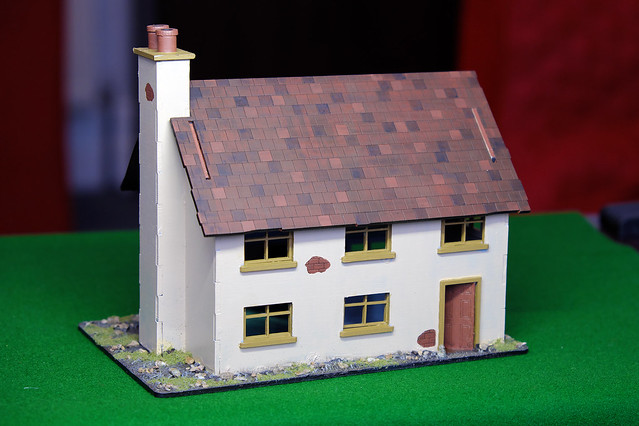
Not every house needed these extra embellishments, I thought this little farmhouse would like quite nice au naturel...


And, of course, there was the original test model I did for this project...
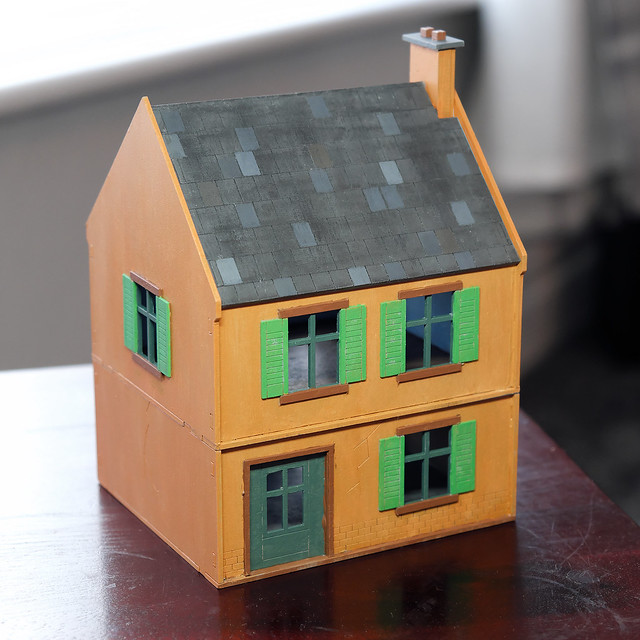

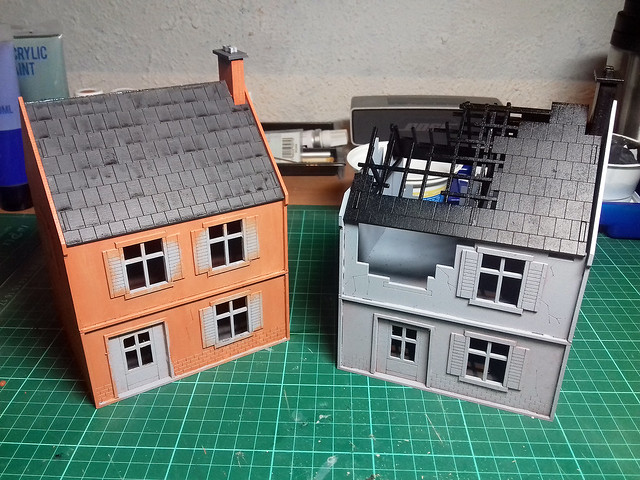
That was four down, two to go, but I was starting to run short of time by this stage. And this is where I started to take some short cuts, just to get the job done in time. So I wasn't altogether happy with these last two...
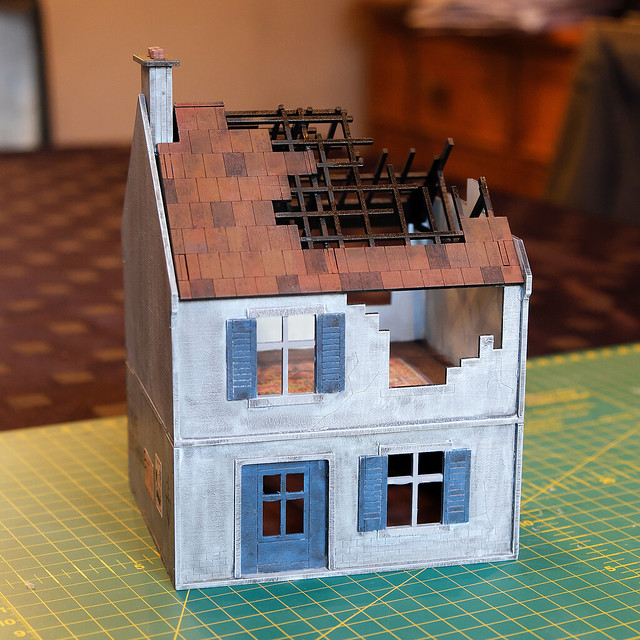

This burned out farmhouse is particularly hokey...I was really pushed for time and only just got this done. I didn't have time for the shading that I applied to the other bomb-ruined house...
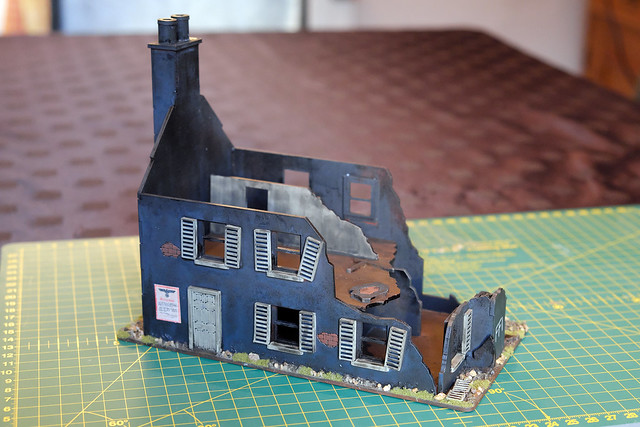

I could finish off this - and, indeed, any of the models - later, but, in the meantime, I delivered them as they are to the Scarborough Gaming Society for their demonstration games that they are doing at the Scarborough Science Fiction Festival over the weekend.

Conclusion - What I have learned...
MDF wargame buildings are fun! It's a nice change from 'display modelling' that takes liberties with realism (although I am sure more a 'realistic' job could be done than my hurried examples) and they do have their own challenges which are mainly to do with the way they are designed to be taken apart for play.

In fact, one of the main things to bear in mind when painting and decorating these type of models is that they are designed to be interacted with. Roofs and floors have to be detachable and floor space needs to be clear to allow miniature soldiers to be placed inside. So, there are certain restrictions to what you can do, for example, I couldn't add lots of 'rubble' on the floors of the bomb-ruined houses in case that obstructed play.

Ultimately, unlike display models, these houses are designed to be played with. So too many or too delicately detailed embellishments are perhaps not ideal. (I had to consider that these models are often transported, packed away and unpacked frequently so any ornamentation that could be knocked off probably would be knocked off!)

Painting wise, I learned that MDF is a bit of a paint guzzler! It has been suggested that I may need up to three coats of a primer - or to use a proper MDF sealer - to prevent further paint coats from being soaked up.

But, most of all, I learned that wargaming is a game and is meant to be fun. Obviously, some wargames are intended to be taken a little more seriously, but Bolt Action as a game system isn't necessarily one of them and there is plenty of opportunity for some tongue in cheek adornments.

Finally, the tight schedule for these - totally at odds with my usual tortoise-like work pace - was quite liberating as it took the pressure off me when it came to decisions about when something was finished (and replaced it with a 'that will do' attitude, which was sometimes a good thing and sometimes a bad thing).

I hope to do more of these type of models, in fact, from the client's reaction to these models I am sure there will be more coming my way!

Wednesday, 5 April 2017

28mm Buildings - Part 4

Satisfied with the work done on my test model, my production line can now swing into action. I am beginning with the floors...


Though, those with eagle eyes will have noticed that I've cracked on with my 'green cafe'. That was simply because I happened to mix up a very nice fawn green which I felt was a bit to waste! I had originally intended to do the cafe - the largest building - a lemon yellow, but I really liked the green when I saw it.

The most challenging buildings - in my opinion - will be the burnt out ones (the two primed with black), as these will demand weathering/effects applying to them no matter how quickly I need this project done.

Again, I feel I need to reiterate, I'm making this all up as I go along. It's one of those sink of swim situations.

Walls and roofs
Having established the pattern of painting with my test model, I simply adjusted the wall colours for variety. I tried to make each room a little different, but - basically - they were all permutations of magnolia, sky blue and a very light sea green. I did have a dark green and a dark blue which I could mix with white, and - of course - I could have any shade of grey I wanted by mixing my white and black...

I have four shades of brown, an orange-brown, buff, terracotta and a mahogany brown. So, I think I had nine colours in all to play with. BUT, having said that, I did delve into my Vallejo Model Color collection for small detailing jobs, like the window shutters, window and door sills and doors.

The cheap acrylic paints aren't great, but I am glad I went for this 'quantity over quality' option as the MDF - which the buildings are made from - simply drinks paint even after being primed (my brother has suggested that I should try a proper MDF sealant). As an example, the sky-blue needed at least three coats to get fairly opaque coverage, but even then it was still a little streaky in places.

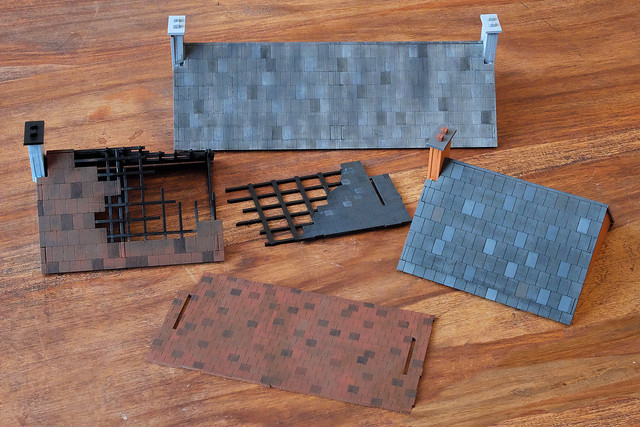
In varying states of completion and various styles, my roofs near completion.
Some I am happy with, others were less successful experiments.
One Frustration...
This will sound really obvious, but one thing became pretty clear early on and that was how much easier my job could have been if I had been able to do the painting *before* the MDF models had been constructed!


Unfortunately, because these were not my models they had already been assembled for use unpainted. This meant that painting ground floor walls became a little tricky, and there were plenty of nooks and crannies that were hard to get too.

(When it comes to painting my own 1/72 MDF buildings, I will do a lot of the base colours by spraying the unassembled walls. This will make things a lot less messy and time-consuming.)

Another building completed...
To meet my deadline I need to knock out a building a day this week, though because I am using a production line method chances are that the majority will be completed together later in the week. But, some of the buildings are more straight forward than others and were more easily finished...

Cafe Rene nears completion (just the roof to finish off).
The cafe model was very straight-forward, and the printed signs helped to decorate the scene!

Sunday, 2 April 2017

28mm Buildings - Part 3

Moving along...
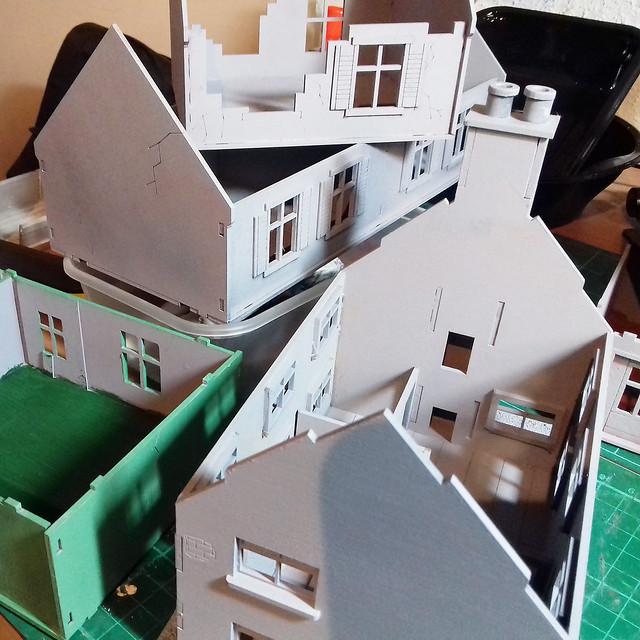
My test model proceeding well, the rest of the buildings are primed and ready to follow the same painting process. However, two of the buildings are of a slightly different construction and need some work on their integral bases...


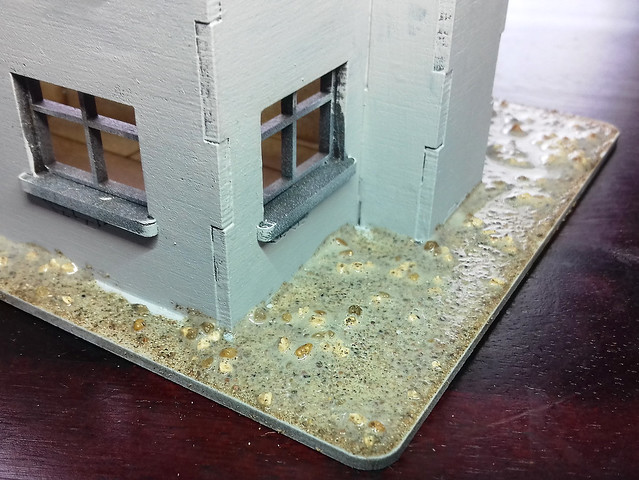
The bases on these models extended beyond the footprint of the buildings themselves, so I decided to add some grit and sand texturing...


This was simply a mixture of fine sand and fish tank gravel and PVA. Hopefully, it will look like rough ground once it's been dry brushed later.

Start at the top...
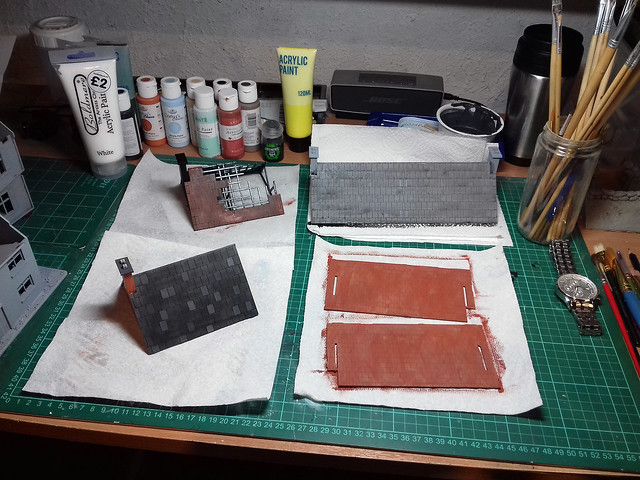
Well, you have to start somewhere, so I began with the roof components of the models. I've started a bit of a production line and I will work through the models floor by floor, inside and then out, as I did with my test model.


I am varying the colour schemes, and the colours are a little dazzling for a military modeller who is used to working with dull drab earth tones and olive greens. But, it's rather a fun change to be working with pastels, but to keep me right I am doing a lot Googling and referencing photographs.

Amusingly, because of this I have added a selection of paints and colours to my inventory that I probably wouldn't have otherwise thought of buying! (But they will be very handy, as I also have my own 1/72 French WW2 buildings to make...Eventually.)

Production Line
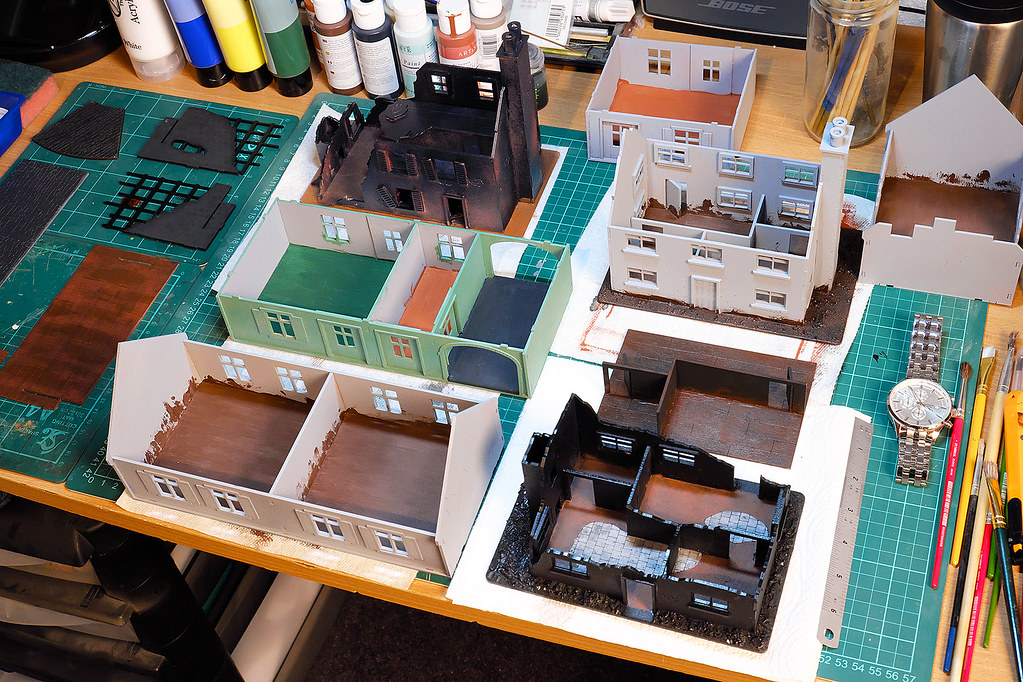
As you can see, I making this up as I go along as I am not a prolific wargame modeller. But, it's pretty obvious that the best way to tackle this project - because of the limited timescale - was to create a little production line, rather than trying to paint one house at a time...


Though, even my newly cleared workbench is struggling a bit with the scale and number of models in this current project. This causes some log-jams, occasionally, as I work through the various buildings with a colour I wish to apply to several of the models (like the floor or wall colours, etc).

Test Model Complete
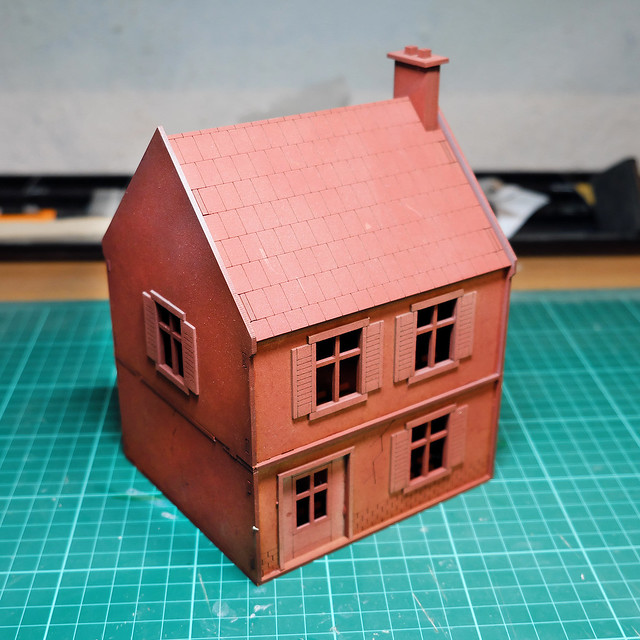
Meanwhile (there's so much going on at the same time), I have completed the basic painting of my original test model. No weathering has been done on this building as I want to get all the models to this same stage as it is the bare minimum acceptable state of completion that might do for the demo game. IF I manage to get all six buildings to this state by mid-week (at a push), then I will consider doing some basic weathering on them. I could, however, always add more intense weathering effects after the demo game has been completed.


Onwards, ever onwards...

Friday, 31 March 2017

28mm Buildings - Part 2

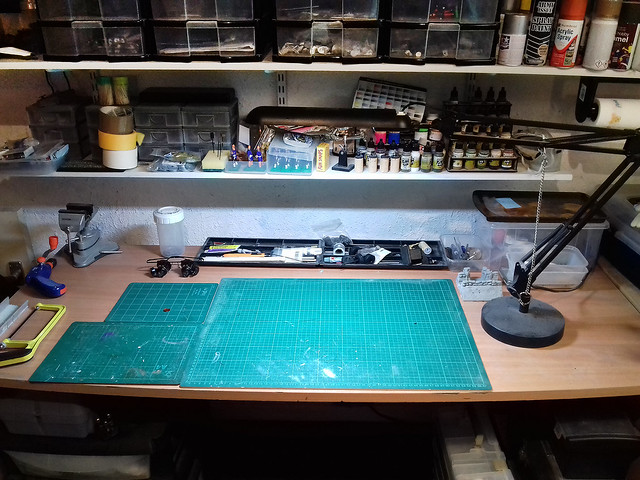
Before I do anything, I had one important job to do and that was to create some workspace for these larger models. My attic mancave has been out of action for some time, but now I can no longer put off the inevitable...I have to tidy my work bench!

This took a few hours...


First Test Example
As usual, when trying out something new, I begin with a test model. In this case, there is a lot that I am trying out for the first time, so there will be plenty of experimentation on my poor guinea pig!


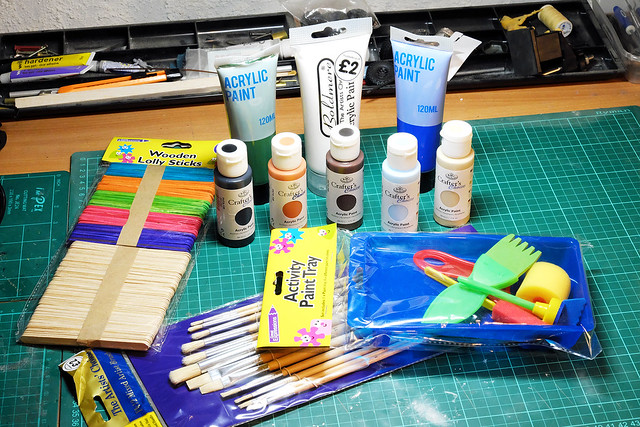
For starters, because these are pretty big models, I won't be using my normal Vallejo Model Color paints as these won't last two minutes with the amount of paint I will need. So, I am taking a bit of a gamble and buying some very cheap 'acrylics' (as I have to be careful with my budget as the club is paying). And while I was at it, I bought some very cheap and nasty brushes from my local low-cost crafts store...


There are a mixture of cheap acrylic paints here, some from Ryman (£1 each) and then a couple of large tubes from Poundland, and finally, a big tube of white from xxxxx. Honestly, I have no idea if these paints will be any good!

Obviously, spray can acrylics would have been the fastest way to do this, but I am really trying to keep costs down. So, I bought just one can of spray primer (Wilkos grey primer, £3.50) and will colour my buildings with the cheap acrylics.

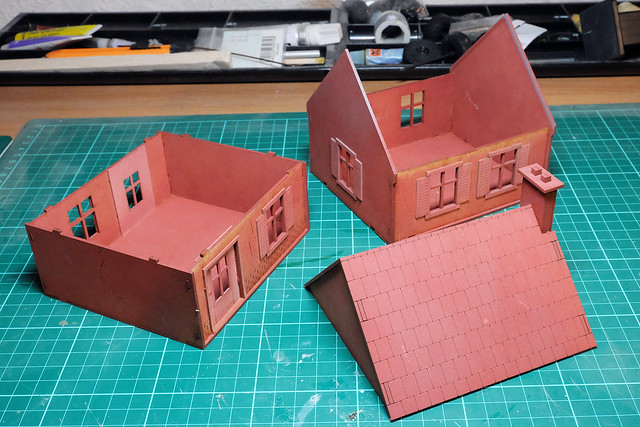
Because these are wargaming buildings, these models disassemble so that you can place figures on either floor inside the house. This is rather handy for painting purposes...


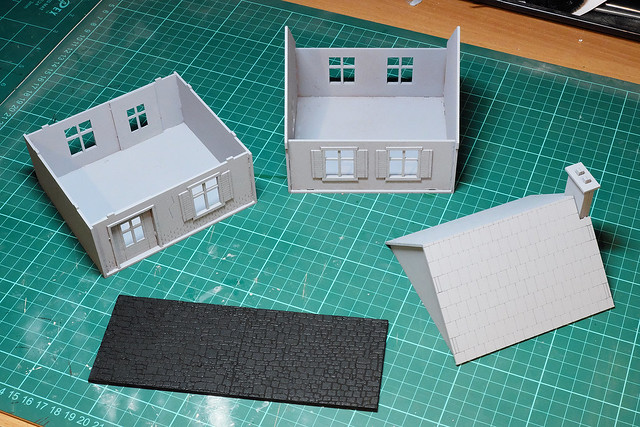
Priming is very easy, and the Wilko's grey went on beautifully...

I'm also painting some sections of cobblestone road!
Painting with cheap acrylics
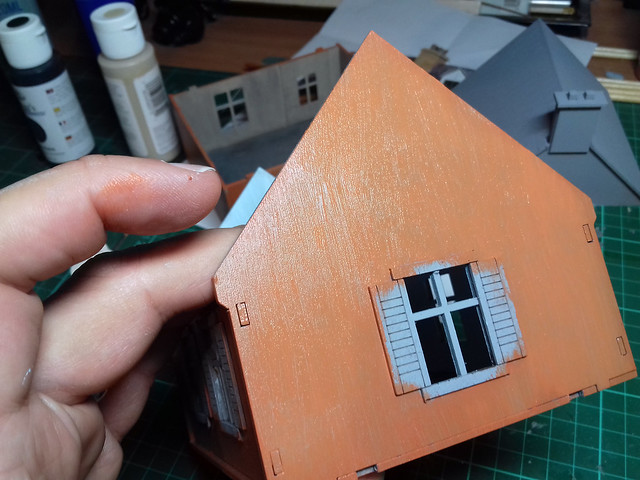
For once, I just launched myself into this and started to slap on some of the cheap acrylic paints. I knew I was going for a 'rustic' French rural look, so I wasn't too fussy about nice flat coverage...In this particular case, I thought streaky and patchy would be good...

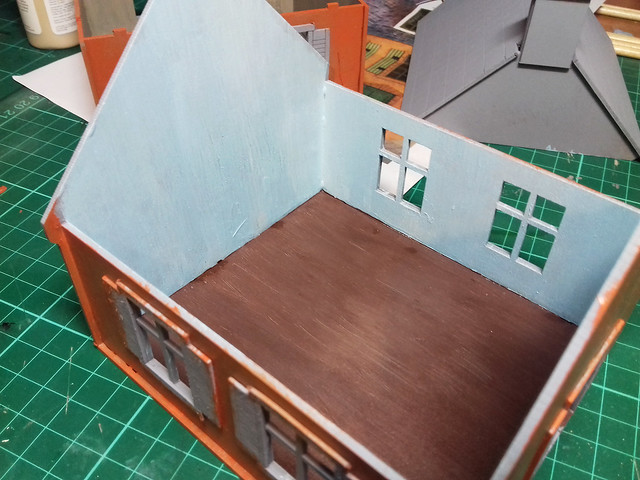
Straight in! I quickly laid down the inside walls before painting the ground
floor outer wall. Two coats are definitely needed.
This was just as well as the cheap acrylic paints were horrible. I guess they are really made for kids crafts so it's a case of quantity over quality with them. But these cheap paints also have an unpleasant 'oily' sort of texture to them so tend to be a little streaky, and this wasn't helped by the very cheap brushes I was using.

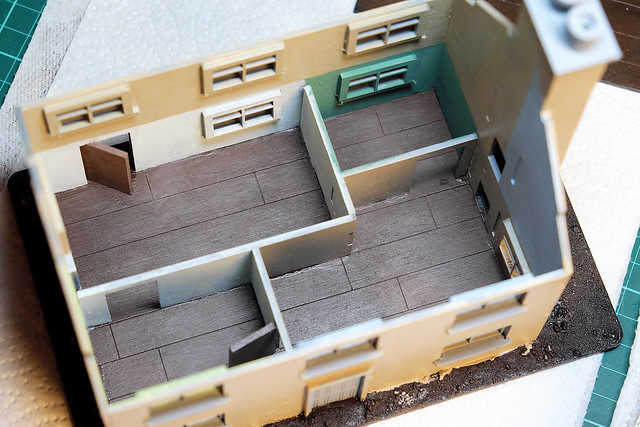
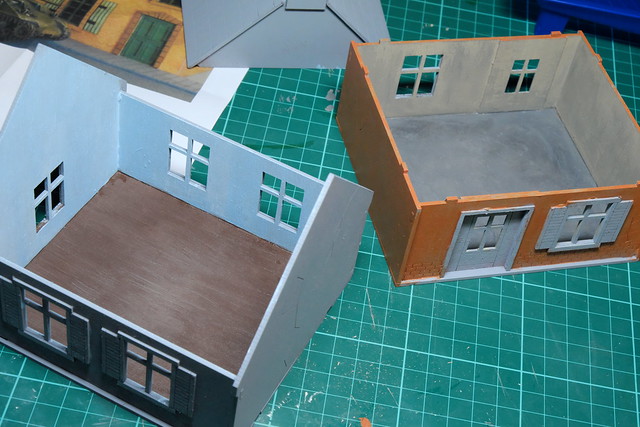
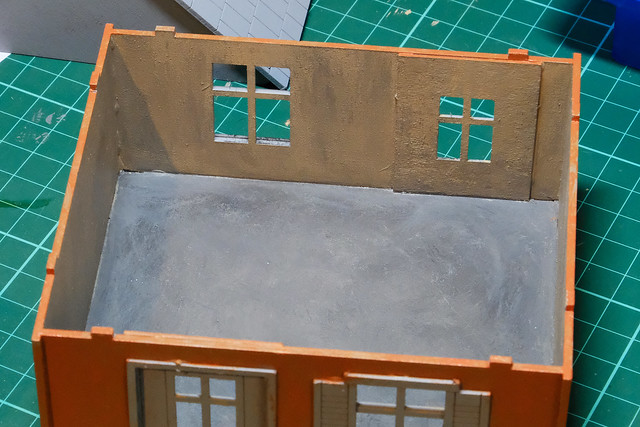
In fact, I found that the best way to treat these paints was as 'poor man's oil paints' and in this way I created some nice textured effects, like this 'wooden' floor...


The knack was to apply a first coat fairly loosely and not to worry about the streak BUT make sure that your brush strokes (and streaks) are in one direction. In the case of my wooden floor, I ran the streaks along the length of the house to create a sort of wood grain effect. And with my ground floor stone floor I applied the paint in blended streaks in a generally circular manner, creating a gradient effect in from the outer edges...


You can also see how patchy I have left the walls, hopefully, this will look intended and 'rustic' and not just like a bad paint job (on my part)!

Perhaps this picture gives you an idea about how gloopy and streaky the cheap paint is...


This 'faux-texture' with thick paint is great when the model doesn't have any surface detail in itself as it adds some interest to plain flat MDF walls and floors. Had the models included surface detail - like floorboards or bricks - I would have been tempted to do a nice flat base coat and then apply a wash over the top of that to bring out the detail.


My test is coming along nicely, and as I'm pushed for time I've decided I am confident enough to begin work on the other buildings. I quite satisfied with the approach that I've taken, so I'm getting a little production line going with the priming coats being applied to all the remaining models.

Sometimes, as in the case of the damaged building in the above picture, I am priming with black where I feel it is appropriate. And, as for my test example, it's on with the detail painting - things like the shutters and doors, etc.

At this stage, I'm feeling a little more happy with the time I have available to me. I'll just have to try very hard not to get bogged down with too much detailed work and adding supperfluous weathering and what not!

Wednesday, 29 March 2017

Emergency 28mm 'Normandy' Housing Project!

...Hold everything else! I have - rather madly - 'volunteered' myself to paint half a dozen 28mm buildings for my local club. There are holding a demo game - Bolt Action Normandy themed - in a weeks time!


...But that's not the bad news...The bad news is that I have *never* painted a model building before!

OK, I did that Berlin diorama facade, but that was in 1/72 and also I had all the time in the world to work on it. And as you all know by now - I am NOT the fastest modeller/painter in the world!

I didn't even know where to start with these models, but luckily - as usual - there is a YouTube tutorial that covers this sort of thing...


Lots of big brushes and plenty of dry brushing seems to be my only hope...I am really worried I have bitten off more than I can chew this time!


Edit: Here's another video that has some useful techniques for painting buildings fairly quickly. One of the things that has surprised me - and I have started doing some research on French village houses of the period - is the use of some quite bright pastel colours - lemon yellows, sky blues, peach reds, etc. It's not just all grey!
Tuesday, 23 September 2014

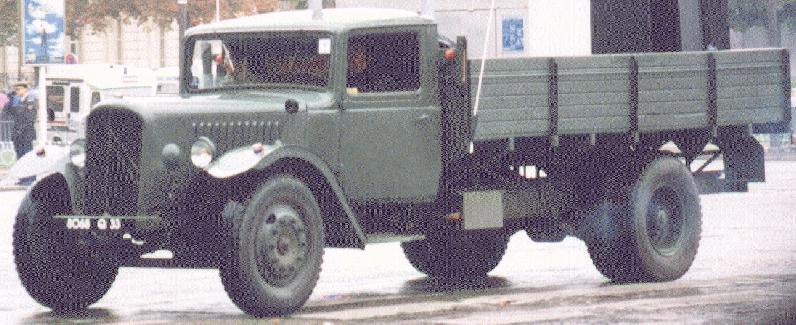
An unexpected arrival - MMS Citroen Type 23


Always nice to get unexpected parcels. I ordered this so long ago I had completely forgot about it - it's a beautiful white metal MMS Citroen Type 23 (c1939ish) light truck in 1/76 scale...

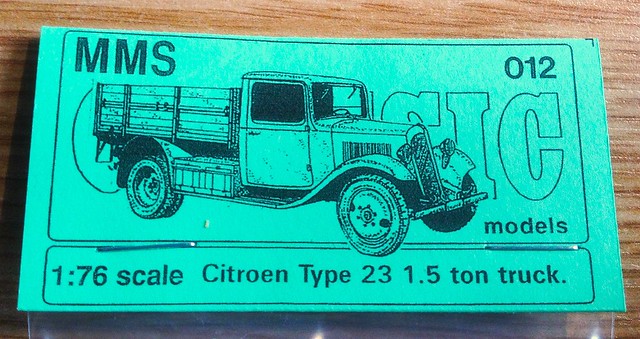
The 1/76 MMS Citroen Type 23 kit (source: MMS Models). A short review of this
kit is available over at www.mondo72.com
I could have just used models of captured Soviet GAZ AAs and ZiS-5s for my light truck inventory of my Finnish collection, but as usual I wanted to illustrate the diversity of vehicles deployed by the Finns. I spotted a Citroen 23 in a photo of the Finns at war (a civilian commercial vehicle pressed into military service) and so looked for a 1/72 model version.

It was a bit of a long shot, I didn't expect to find a 1/72 plastic kit for this French WW2 truck as it's a wee bit niche, but I did come across this very nice white metal kit from MMS Models of Folkestone, UK.


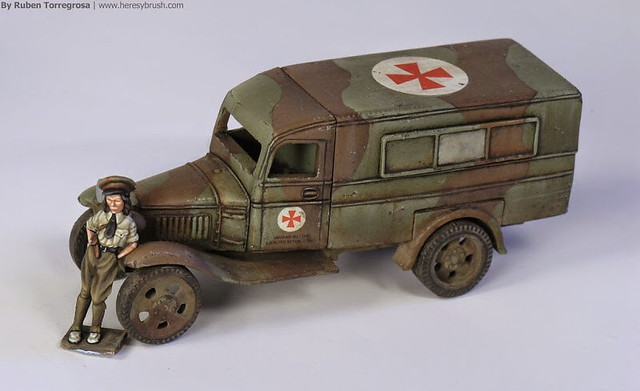
It is, of course, 1/76 scale so technically should have been a wee bit smaller than I would have liked, but I decided it was still worth getting as I had a 'cunning plan' to mate the front half of this with the back half and chassis of Minairon's new 1/72 Ford AA van (which comes out at the end of September). I was thinking it would make a lovely Citroen ambulance or radio car...

The soon to be released Minairon's Ford AA ambulance.
A French Citroen Type 23 ambulance. Mating the Citroen's bonnet to the
Minairons Ford body would have made a wonderful conversion.
Anyway, when I opened the parcel I was very pleased to notice that it's actually quite a large vehicle, easily compatible with my other 1/72 light [1.5 ton] truck kits (I compared it side-by-side with the parts of my Military Wheels GAZ AA kit and they matched perfectly). So, no need to modify, it'll make a nice little model for towing my Finnish HQ 20mm AA gun!
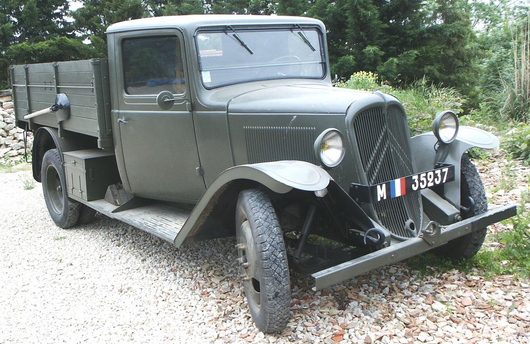
Beautifully restored example of the Citroen Type 23 truck in French army markings.
Large numbers of these were 'acquired' by The Germans after the fall of France and
were used by the Wehrmacht
Historical note: I have been unable to find the original photo showing the Type 23 in Finnish service again so cannot absolutely validate the authenticity of using the Type 23 for this project. However, the Citroen was a very popular and successful European commercial vehicle - produced in large numbers from 1936 - and so having it as an example of civilian vehicles in use by the Finns is more apocryphal than fact.

Update: Information I have received on the Axis History Forum points towards 40 Citroen Type 23 vehicles having been imported into Finland during World War 2. So that's nice as it makes my use of the type a little less suspect!

Tuesday, 25 February 2014

Why I don't like (most) white metal models!

...Is it white metal models I don't like, or just 'cheap' white metal models?

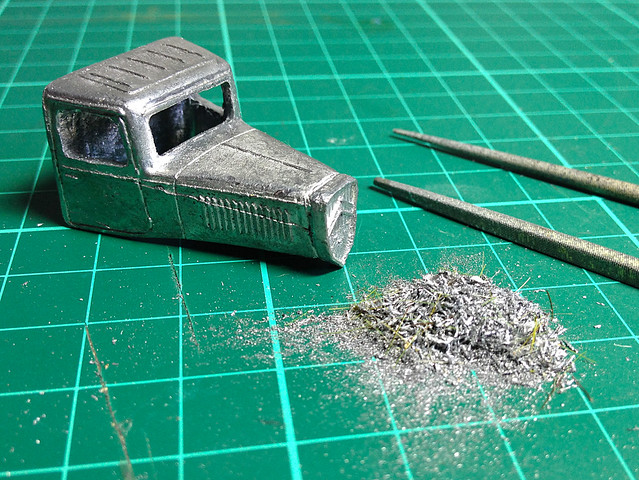
This snapshot shows why I get so grumpy when I have to deal with 'wargaming quality' white metal kits. Note the pile of metal filings...


This is *just* what I removed to 'clean up' the cab. And I haven't even finished yet!

I know it would be fair to say that if I don't like white metal models then I shouldn't buy them. But it's sometimes hard not to when you are looking for a rare vehicle. The other thing is that I simply can't seem to resist a challenge - I get a rabid determination to turn a mediocre model into a nice looking one.

Well, anyway...Maybe instead of moaning on about other peoples' attempts at making model vehicles I should have a go at scratch building my own. That'll shut me up! :)

Tuesday, 15 January 2013

Wespe Models Opel Kapitan & Citroen 45

The postman has just just dropped off a parcel from Romania. Sadly it isn't a dragon egg, but happily it's a couple of Wespe resin models. They are a Opel Kapitan staff car and Citroen 45 3 ton truck.


These are wonderfully done resin models in 1/72 scale, but they aren't like any of the budget war gaming resin models I have bought so far. These are premium display quality moulds with a huge amount of fine detail.

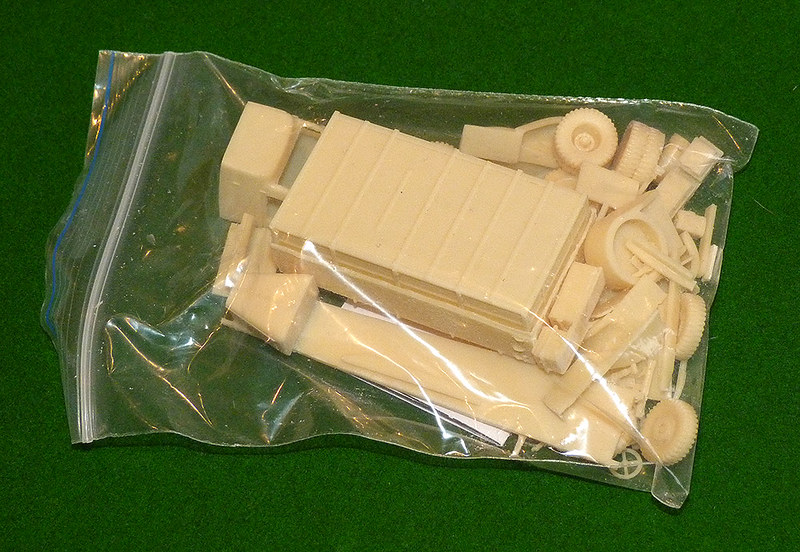
Above: Inside the box, protected by a layer of bubble-wrap, is a bag of
components - a lot of components! Here are the parts for the Citroen 45,
nothing like any of the resin models I have had so far.


These models were bought for my Finnish army HQ Battalion and represent my commanders staff car and my Engineer Company's truck. Finland received a large quantity of Citroen 45 trucks from their German allies (OK, we have all made bad friend choices at one time!) and the Opel will be converted into the similar looking 1940 4-door Sedan as the Finns made use of a large number of American cars of the pre and early war period (mainly Plymouth and Fords).

Above: The lovely 1940 Ford Sedan, suspiciously similar in design to the German
1939 Opel Kapitan. Handy for me as it means just some minor cosmetic
modifications to my Wespe model to turn it into this American classic car.


1939 Opel Kapitan. Photo source: Wikipedia
Above: The 1939 Opel Kapitan. Photo source: Wikipedia

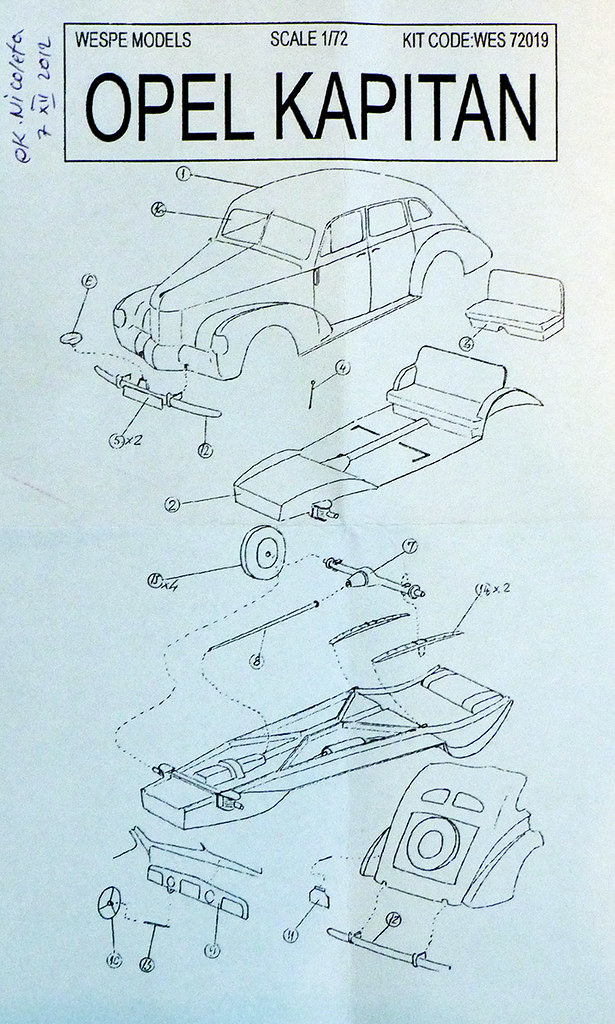
A quick look through the boxes and their contents is enough to impress me. There are a large number of finely made components in each box along with a photocopied inventory of parts and a sheet of 'instructions' (just a diagram of the orientation of parts really).

One thing I liked was that each instruction sheet was hand signed by a Wespe staff member to show that the kit contents had been checked before dispatch.


I can't see any downsides, other than perhaps hat there are no colour scheme suggestions except the one that's on the box, decals of windscreens cut to size (you get a rectangular sheet of transparent plastic instead). But I guess, if like me, you want to buy these niche vehicles you have a pretty good idea about how you want to paint them. Though I guess war-gamers might wince at the price of these models (I did try the SHQ Citroen 45, but this white metal model was so bad that I immediately assigned it to my scrap box).

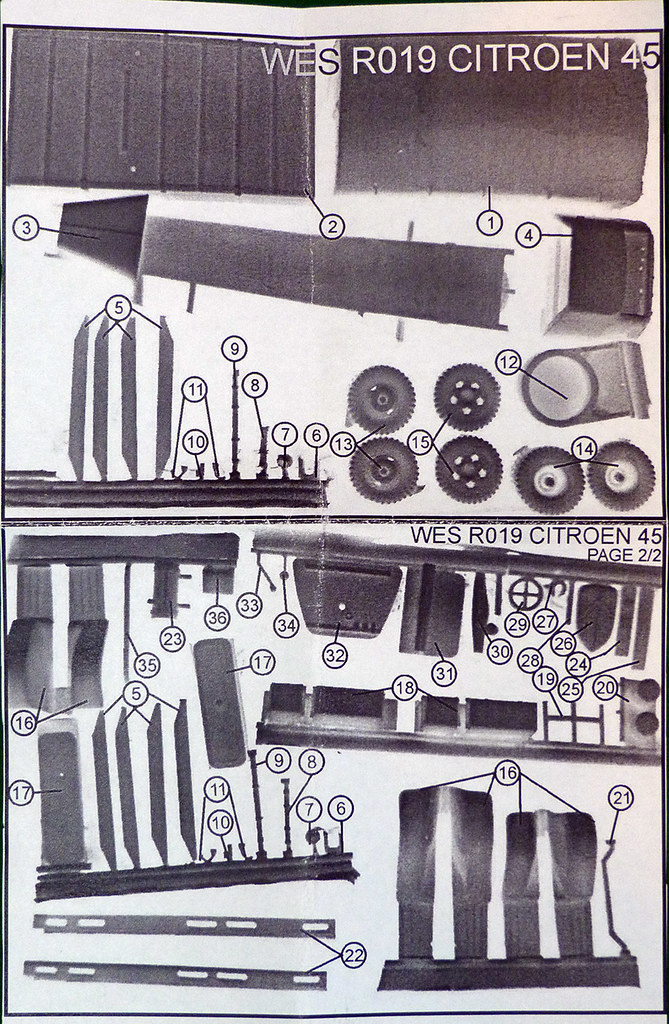
Above: Each kit comes with an inventory sheet, this being the sheet for the
Citroen. As you can see, some of the parts are quite delicate but there is
an welcome absence of flash.


Interestingly the Citroen 45 has quite a wide variety of possible uses, from 1940 French army to North African Vichy or French colonial and also Wehrmacht (for which an estimated 15,000 vehicles were produced during the occupation), captured Soviet as well as Finnish.

Above: The Citroen 45 3 ton truck. Photo source: Denis Orlov, Moscow.

The delivery time to the UK from Romania took two weeks, but that was during the Christmas period, and I was supplied a tracking code by Wespe. So overall I am very pleased with this purchase

Tuesday, 10 January 2012

What's going on?

If you have found the Kit Noob blog then it will be obvious that this is a work under construction (unfortuately you can't build a Blogger blog off-line prior to launch). This blog will is an off-shoot of my Milgeek blog but will entirely focus on my model making projects in detail.

Until I get my first real posts up here you can refer back to my Milgeek blog where I do have some of my early stuff or check out the photos on my Flickr account:

> Milgeek.co.uk - military related hobbies blog

> Milgeek's modelling Flickr galleries