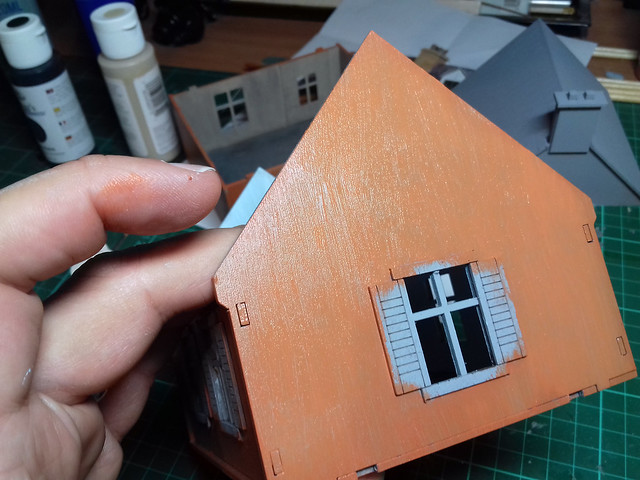
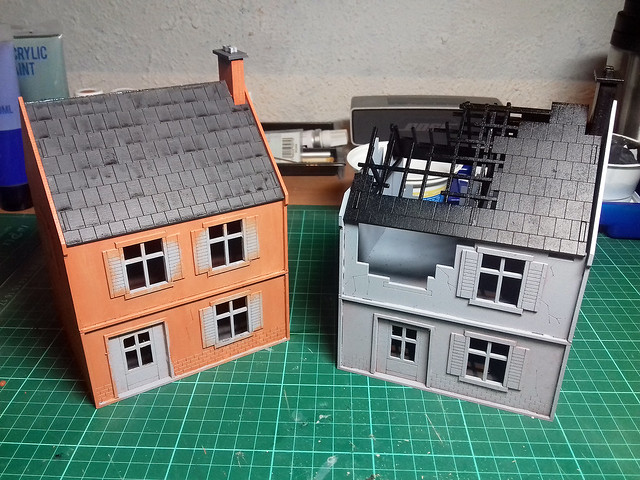
Moving along...
My test model proceeding well, the rest of the buildings are primed and ready to follow the same painting process. However, two of the buildings are of a slightly different construction and need some work on their integral bases...
The bases on these models extended beyond the footprint of the buildings themselves, so I decided to add some grit and sand texturing...
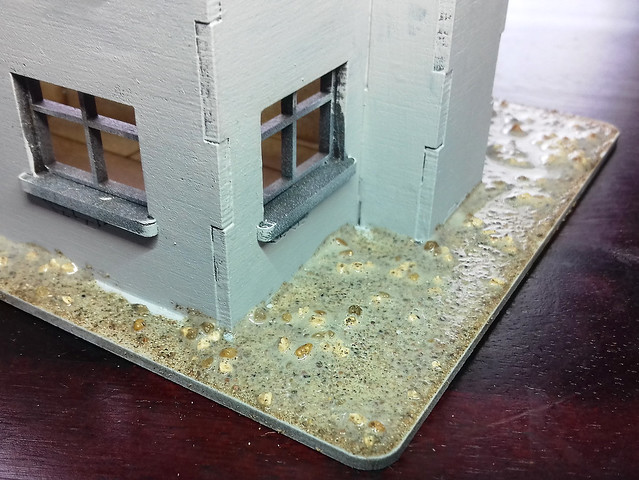
This was simply a mixture of fine sand and fish tank gravel and PVA. Hopefully, it will look like rough ground once it's been dry brushed later.
Start at the top...
Well, you have to start somewhere, so I began with the roof components of the models. I've started a bit of a production line and I will work through the models floor by floor, inside and then out, as I did with my test model.
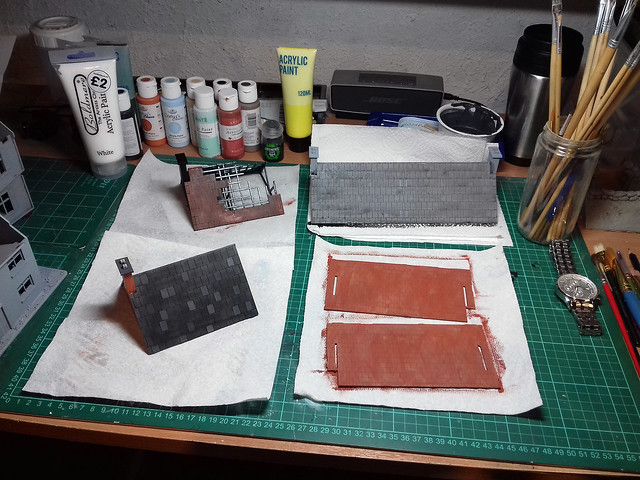
I am varying the colour schemes, and the colours are a little dazzling for a military modeller who is used to working with dull drab earth tones and olive greens. But, it's rather a fun change to be working with pastels, but to keep me right I am doing a lot Googling and referencing photographs.
Amusingly, because of this I have added a selection of paints and colours to my inventory that I probably wouldn't have otherwise thought of buying! (But they will be very handy, as I also have my own 1/72 French WW2 buildings to make...Eventually.)
Production Line
As you can see, I making this up as I go along as I am not a prolific wargame modeller. But, it's pretty obvious that the best way to tackle this project - because of the limited timescale - was to create a little production line, rather than trying to paint one house at a time...
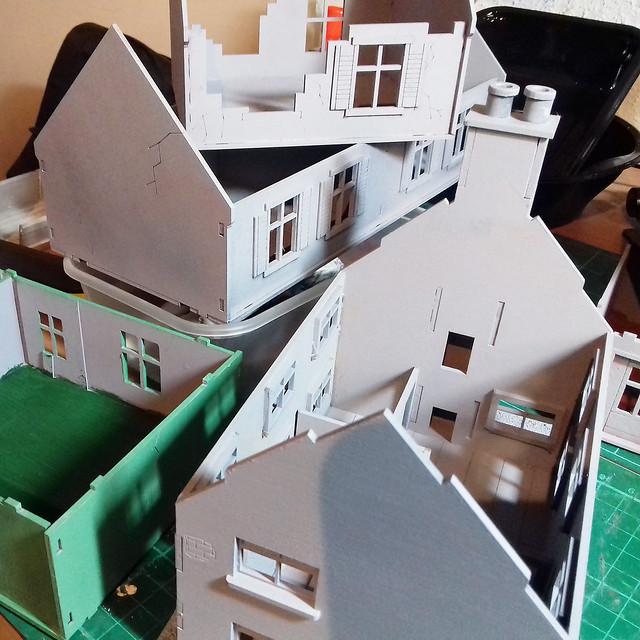
Though, even my newly cleared workbench is struggling a bit with the scale and number of models in this current project. This causes some log-jams, occasionally, as I work through the various buildings with a colour I wish to apply to several of the models (like the floor or wall colours, etc).
Test Model Complete
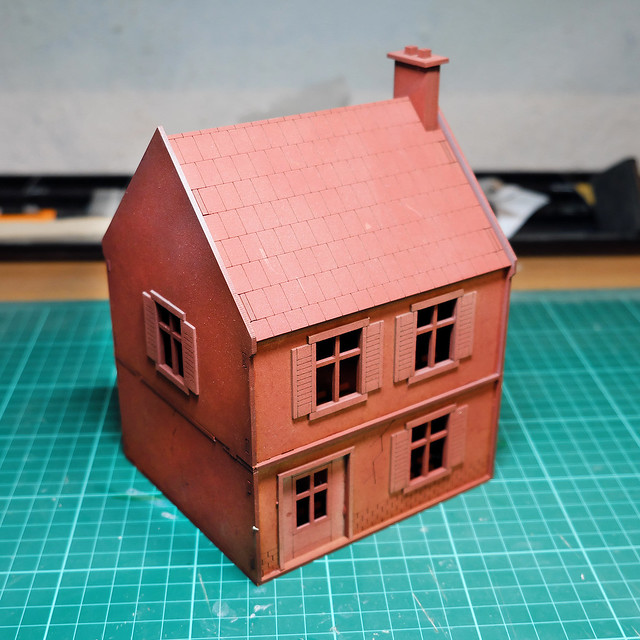
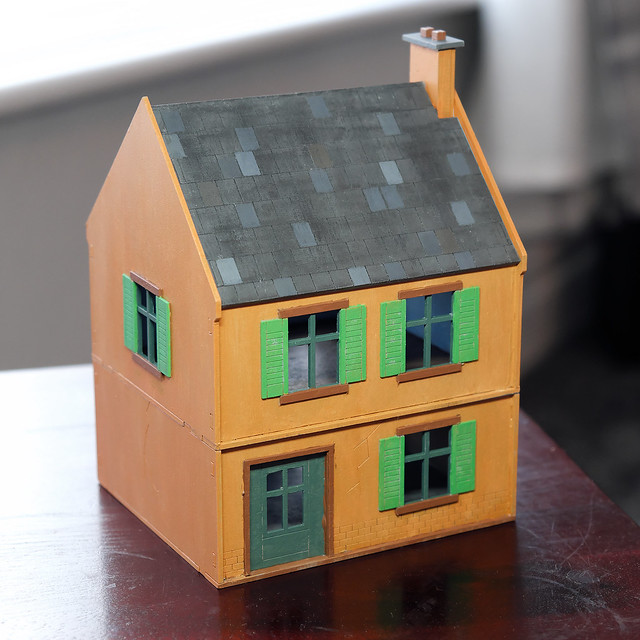
Meanwhile (there's so much going on at the same time), I have completed the basic painting of my original test model. No weathering has been done on this building as I want to get all the models to this same stage as it is the bare minimum acceptable state of completion that might do for the demo game. IF I manage to get all six buildings to this state by mid-week (at a push), then I will consider doing some basic weathering on them. I could, however, always add more intense weathering effects after the demo game has been completed.
Onwards, ever onwards...
Diary of a novice scale model maker and his adventures in the wacky world of Braille Scale.
Showing posts with label Normandy. Show all posts
Sunday, 2 April 2017
Friday, 31 March 2017
28mm Buildings - Part 2
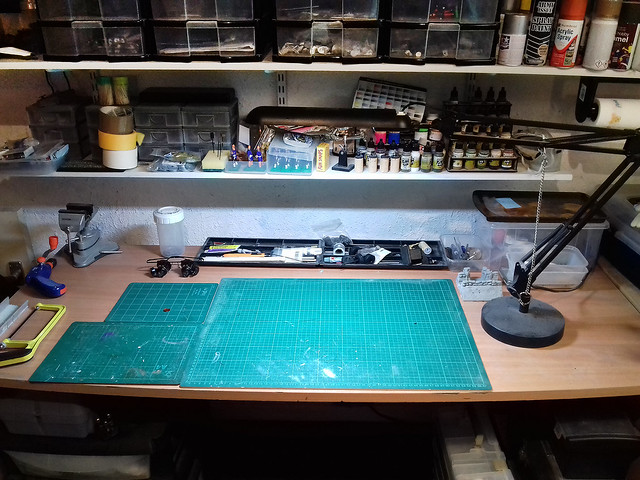
Before I do anything, I had one important job to do and that was to create some workspace for these larger models. My attic mancave has been out of action for some time, but now I can no longer put off the inevitable...I have to tidy my work bench!
This took a few hours...
First Test Example
As usual, when trying out something new, I begin with a test model. In this case, there is a lot that I am trying out for the first time, so there will be plenty of experimentation on my poor guinea pig!
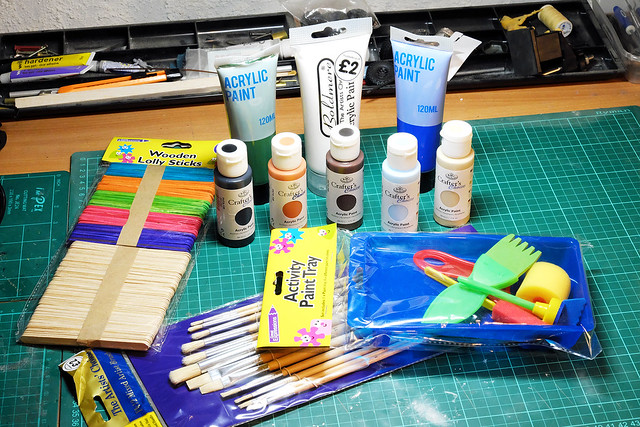
For starters, because these are pretty big models, I won't be using my normal Vallejo Model Color paints as these won't last two minutes with the amount of paint I will need. So, I am taking a bit of a gamble and buying some very cheap 'acrylics' (as I have to be careful with my budget as the club is paying). And while I was at it, I bought some very cheap and nasty brushes from my local low-cost crafts store...
There are a mixture of cheap acrylic paints here, some from Ryman (£1 each) and then a couple of large tubes from Poundland, and finally, a big tube of white from xxxxx. Honestly, I have no idea if these paints will be any good!
Obviously, spray can acrylics would have been the fastest way to do this, but I am really trying to keep costs down. So, I bought just one can of spray primer (Wilkos grey primer, £3.50) and will colour my buildings with the cheap acrylics.
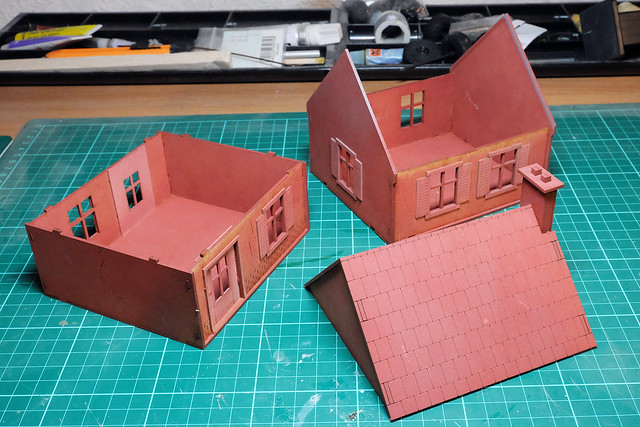
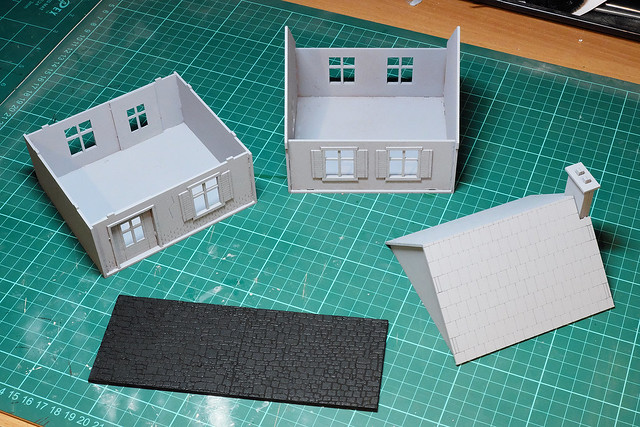
Because these are wargaming buildings, these models disassemble so that you can place figures on either floor inside the house. This is rather handy for painting purposes...
Priming is very easy, and the Wilko's grey went on beautifully...
Painting with cheap acrylics
For once, I just launched myself into this and started to slap on some of the cheap acrylic paints. I knew I was going for a 'rustic' French rural look, so I wasn't too fussy about nice flat coverage...In this particular case, I thought streaky and patchy would be good...
This was just as well as the cheap acrylic paints were horrible. I guess they are really made for kids crafts so it's a case of quantity over quality with them. But these cheap paints also have an unpleasant 'oily' sort of texture to them so tend to be a little streaky, and this wasn't helped by the very cheap brushes I was using.
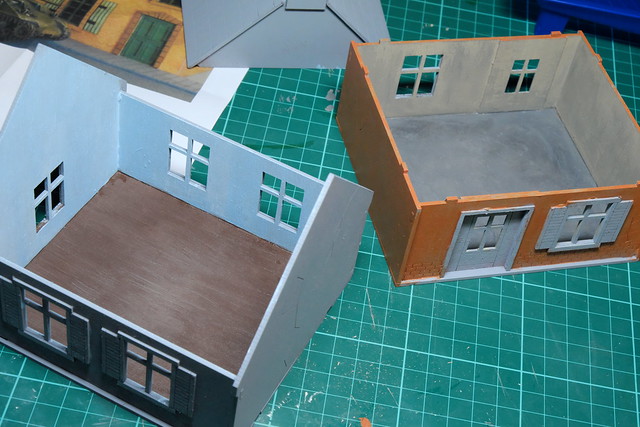
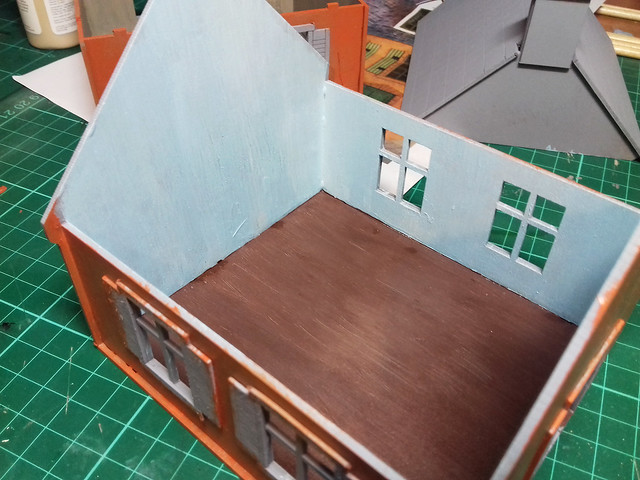
In fact, I found that the best way to treat these paints was as 'poor man's oil paints' and in this way I created some nice textured effects, like this 'wooden' floor...
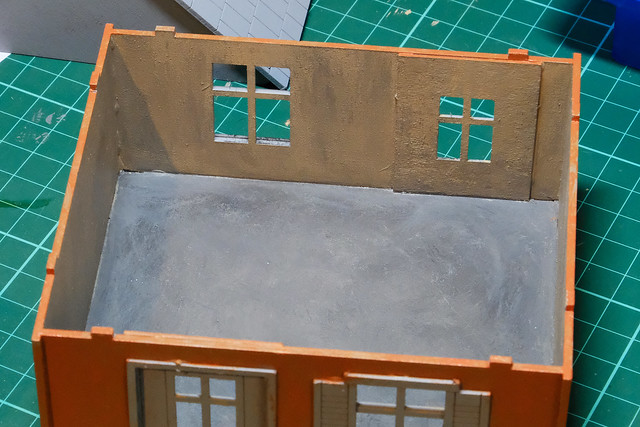
The knack was to apply a first coat fairly loosely and not to worry about the streak BUT make sure that your brush strokes (and streaks) are in one direction. In the case of my wooden floor, I ran the streaks along the length of the house to create a sort of wood grain effect. And with my ground floor stone floor I applied the paint in blended streaks in a generally circular manner, creating a gradient effect in from the outer edges...
You can also see how patchy I have left the walls, hopefully, this will look intended and 'rustic' and not just like a bad paint job (on my part)!
Perhaps this picture gives you an idea about how gloopy and streaky the cheap paint is...
This 'faux-texture' with thick paint is great when the model doesn't have any surface detail in itself as it adds some interest to plain flat MDF walls and floors. Had the models included surface detail - like floorboards or bricks - I would have been tempted to do a nice flat base coat and then apply a wash over the top of that to bring out the detail.
My test is coming along nicely, and as I'm pushed for time I've decided I am confident enough to begin work on the other buildings. I quite satisfied with the approach that I've taken, so I'm getting a little production line going with the priming coats being applied to all the remaining models.
Sometimes, as in the case of the damaged building in the above picture, I am priming with black where I feel it is appropriate. And, as for my test example, it's on with the detail painting - things like the shutters and doors, etc.
At this stage, I'm feeling a little more happy with the time I have available to me. I'll just have to try very hard not to get bogged down with too much detailed work and adding supperfluous weathering and what not!
This took a few hours...
First Test Example
As usual, when trying out something new, I begin with a test model. In this case, there is a lot that I am trying out for the first time, so there will be plenty of experimentation on my poor guinea pig!
For starters, because these are pretty big models, I won't be using my normal Vallejo Model Color paints as these won't last two minutes with the amount of paint I will need. So, I am taking a bit of a gamble and buying some very cheap 'acrylics' (as I have to be careful with my budget as the club is paying). And while I was at it, I bought some very cheap and nasty brushes from my local low-cost crafts store...
There are a mixture of cheap acrylic paints here, some from Ryman (£1 each) and then a couple of large tubes from Poundland, and finally, a big tube of white from xxxxx. Honestly, I have no idea if these paints will be any good!
Obviously, spray can acrylics would have been the fastest way to do this, but I am really trying to keep costs down. So, I bought just one can of spray primer (Wilkos grey primer, £3.50) and will colour my buildings with the cheap acrylics.
Because these are wargaming buildings, these models disassemble so that you can place figures on either floor inside the house. This is rather handy for painting purposes...
Priming is very easy, and the Wilko's grey went on beautifully...
![]() |
| I'm also painting some sections of cobblestone road! |
For once, I just launched myself into this and started to slap on some of the cheap acrylic paints. I knew I was going for a 'rustic' French rural look, so I wasn't too fussy about nice flat coverage...In this particular case, I thought streaky and patchy would be good...
![]() |
| Straight in! I quickly laid down the inside walls before painting the ground floor outer wall. Two coats are definitely needed. |
In fact, I found that the best way to treat these paints was as 'poor man's oil paints' and in this way I created some nice textured effects, like this 'wooden' floor...
The knack was to apply a first coat fairly loosely and not to worry about the streak BUT make sure that your brush strokes (and streaks) are in one direction. In the case of my wooden floor, I ran the streaks along the length of the house to create a sort of wood grain effect. And with my ground floor stone floor I applied the paint in blended streaks in a generally circular manner, creating a gradient effect in from the outer edges...
You can also see how patchy I have left the walls, hopefully, this will look intended and 'rustic' and not just like a bad paint job (on my part)!
Perhaps this picture gives you an idea about how gloopy and streaky the cheap paint is...
This 'faux-texture' with thick paint is great when the model doesn't have any surface detail in itself as it adds some interest to plain flat MDF walls and floors. Had the models included surface detail - like floorboards or bricks - I would have been tempted to do a nice flat base coat and then apply a wash over the top of that to bring out the detail.
My test is coming along nicely, and as I'm pushed for time I've decided I am confident enough to begin work on the other buildings. I quite satisfied with the approach that I've taken, so I'm getting a little production line going with the priming coats being applied to all the remaining models.
Sometimes, as in the case of the damaged building in the above picture, I am priming with black where I feel it is appropriate. And, as for my test example, it's on with the detail painting - things like the shutters and doors, etc.
At this stage, I'm feeling a little more happy with the time I have available to me. I'll just have to try very hard not to get bogged down with too much detailed work and adding supperfluous weathering and what not!
Subscribe to:
Posts (Atom)