Showing posts with label white metal. Show all posts

Tuesday, 27 February 2018

Skyrex 1/100 SU-122 - Part 3


Moving on from the priming, I've applied my now standard wash procedure for WW2 Soviet armour. A dark staining wash of Citadel Agrax Earthshade, followed by a light dry brushed highlighting of Vallejo Model Color Yellow Ochre.

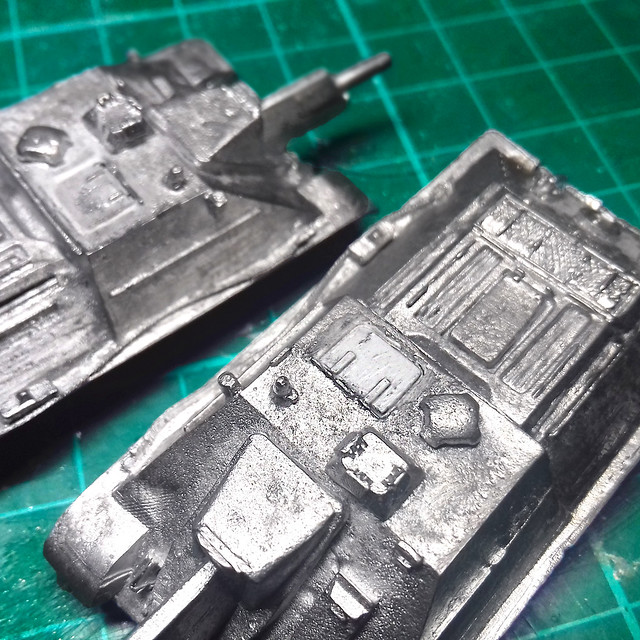
It's a subtle process, but you might just be able to tell the difference if you study this photo. The unhighlighted SU-122 is on the left and the one with the yellow ochre dry brushing applied in on the right...
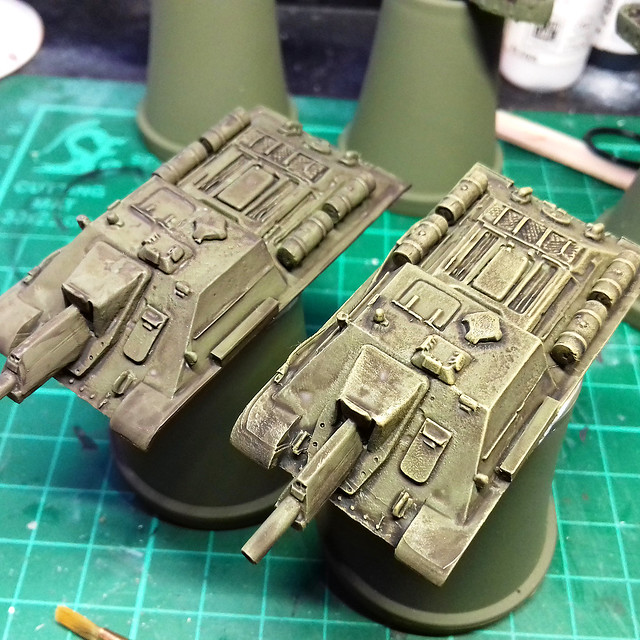

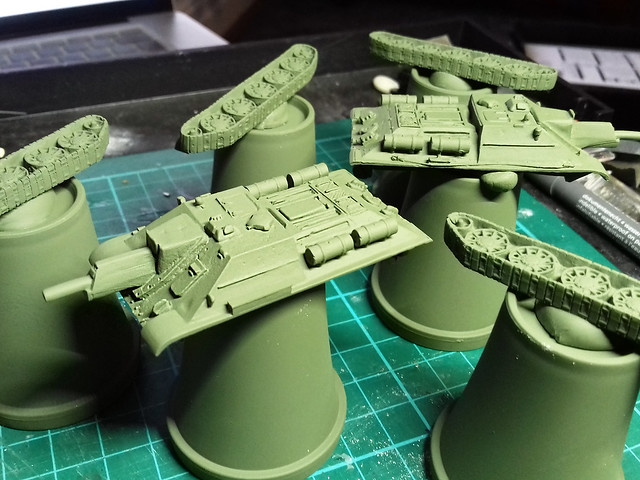
It just picks out the raised edges and corners and gives some small amount of 3-D tonal contrast on raised detail. At this stage it does look a little in your face (though I have seen some war-game modellers who like 'high contrast' stop at this point), so I prefer to take a step backwards - of sorts - and smooth out this contrasty highlighting with a overall modulating wash of diluted Vallejo Model Air Russian Green.

This - to me - ties together the underlying high contrast coats and flattens them out again with a rich semi-glaze (no it isn't actually a glaze, but the Russian Green is a rich colour that gives seem transparent jewel-like coating that tones down the contrasty undercoat). It's kinda hard to explain and - again - is subtle...But I am kinda liking the effect...
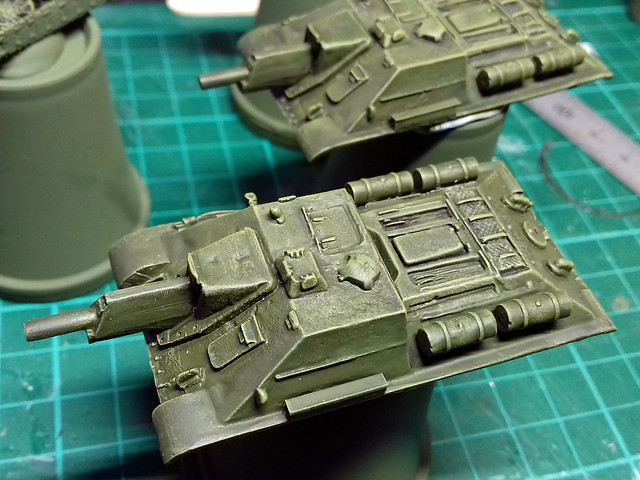
The underlying contrast of the shadow wash and highlighting dry brushing
is modulated by the overall wash of Russian Green. But, you still get the
faint mottling of the darker shades showing through.

In a way I am sort of a fan of the opposite of the airbrushed 'panel shading' effect that you see on a lot of models these days, where the modeller highlights areas of panels with lighter tones to give a '3-D effect'. I prefer to work the other way, with a darkening underlying effect as I never feel comfortable with military vehicles being too bright.

Decals - We Don't Need No Sticking Badges!
Being a Soviet tanks less is more regarding markings. As far as I can see, the SU-122s in particular - being something of a stop-gap - was one of those Red Army vehicles that only got the most    expedient of identifications...Principally a vehicle number.
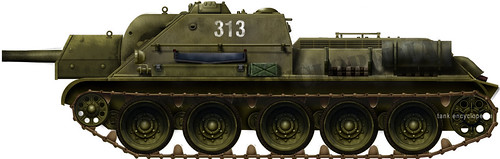
Not exactly exciting markings but this seems to have been as complicated as it got for the
SU-122s around the time of the Battle of Kursk. Source: Tanks-Encyclopedia.com

I searched through my decal stash and found a couple of numbers that looked the right size (though they are not historically correct and are really meant for other Soviet vehicle types)...
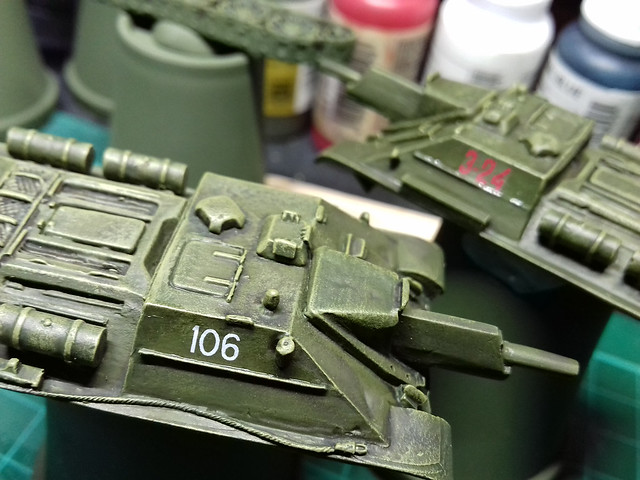
My chosen decals - '106' went on nicely, but 'Red 3-24' had a very heavy film
and silvered despite my use of MicroSet. This particular decal was made by
ACE (for one of their kits) and they are generally of poor quality, sadly.

Because these are just for wargaming and indicate examples of types I don't think we have to be too fastidious when it come to markings (they are not intended to be models of specific vehicles from specific units at a specific time). So long as they look the part I'm happy.

Next: Tracks and Mud

Monday, 19 February 2018

Skyrex 1/100 SU-122 - Part 2


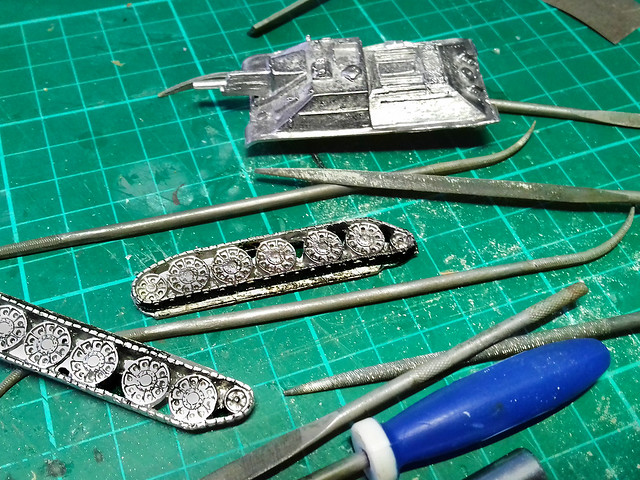
On with the prep work...This is the downside of white metal models and I find it a little tedious.

My main grumble about white-metal models is the inherent volatility of molten metal and it's propensity to distort and 'boil' (for want of a better word) during the moulding process. This effervescence of the molten metal during its transition into it's hardened state invariably results unpredictable flaws and blisters...And, sadly, such is the case with my SU-122.

I don't know why, but 'flash' always seems to form right at the most obvious point on a component, rather than at a point that is easily hidden or not seen...

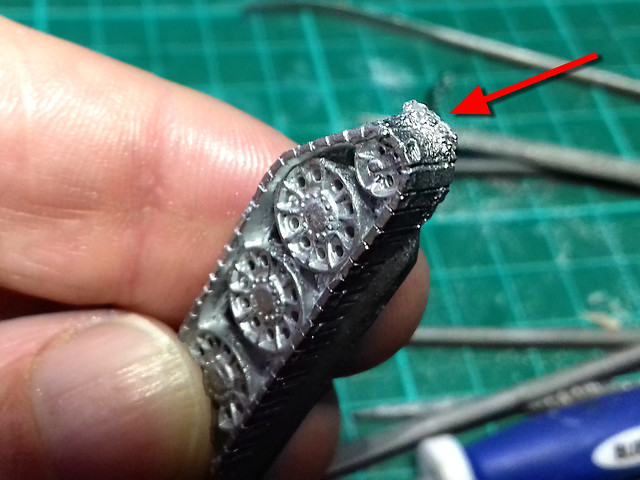
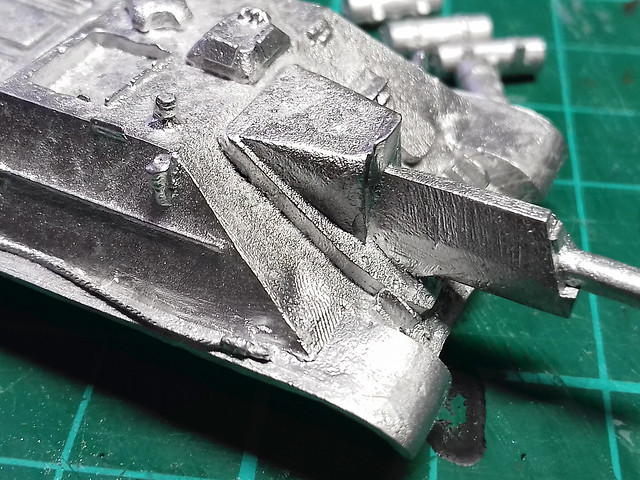
This carbuncle of metal 'flash' had to form *right* on the front of the track!
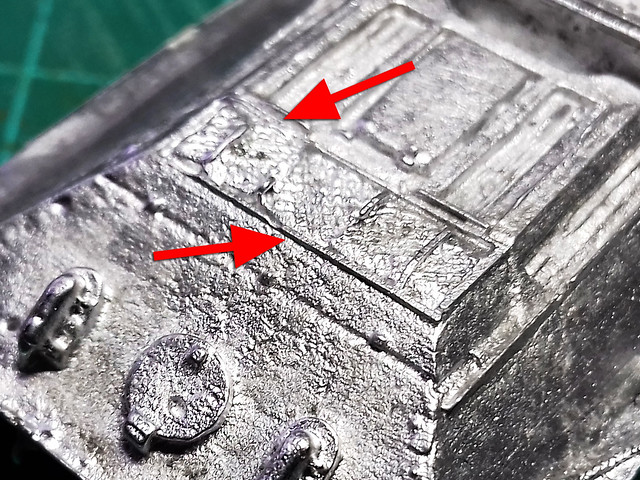
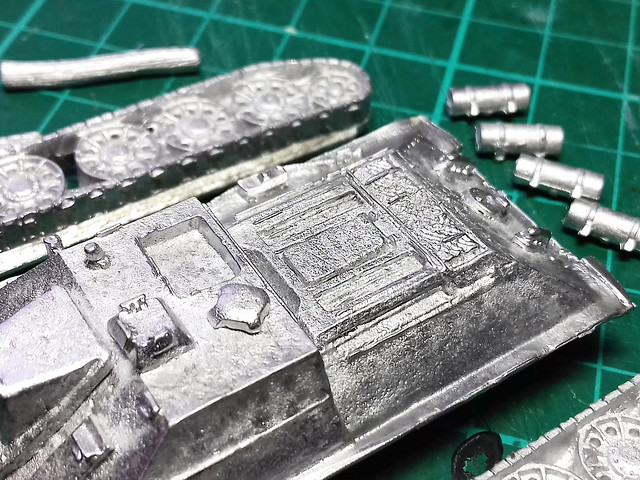
Other blemishes on the model - and there are a few - I can deal with but the imperfections on the tracks and the engine deck are very, very frustrating. All I can do is smooth the flaws down with a bit of filing and hope for the best (rebuilding the detail again with something like Milliput might be possible, but whether it is worth it when this isn't a display model is debatable).

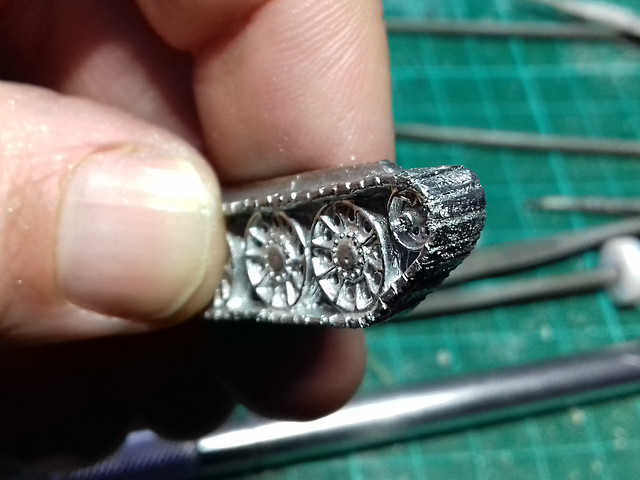
Simply removing the unsightly protuberances and neatening up may suffice for a war-game model...

Sadly, in filing down I have also lost some of the track pattern detail. :(
Though, the engine deck repair is a little more tricky and immediately noticeable (no hiding this)...


It's the same on both models and is very disappointing. As I said, I don't want to try and rebuild flaws like this using Milliput or styrene strips and filling down in preparation to rebuild might actually do more harm than good. Perhaps a bit of judicious painting might help camouflage the broken detail.

On piece of work I did have to do, though, was on of the commander's hatches which I lost to the infamous Carpet Monster! However, it was a very simple job to cut a new rectangular hatch from a piece of styrene sheet and then to glue a couple of thin hinges on...

My replacement commander's hatch.
All that's left now is to attach the external fuel tanks and any other stowage I fancy adding. I'd like to attach the unhitching logs to both tanks, but they look identical so I'll make a new 'log' myself...

Priming
Having got everything prepared (there was LOTS of labourious filing) I started to add the extras to the hull using superglue. I was a bit disappointed that the external fuel tanks had to be just glued directly to the surface of the hull - without any guide pins or holes - and the side mounted tool boxes did not fit at all (I had to make my own out of plastic). Also, it turned out that the metal unhitching logs were a bit oversized and looked a little odd so I ended up leaving them off completey.

You do have the option to leave off the fuel tanks (reference photos show the SU-122 with and without them) and if you do that there is enough space for adding an unhitching log. But I would still recommend that you make your own log out of thinner diameter plastic rod.

All that done, I primed with Humbrol's Light Olive acrylic spray, just as I have with the rest of my Soviet armour for this project...


Well, they don't look quite as bad as I had imagined that they might when I looked at these model in the raw metal. Hopefully, as I apply more painting effects they will look even better!

I do have to keep reminding myself as these models are intended to be seen at tabletop distance (say, at least two feet away - don't ask me what that is in centimeters). So, we shall see.

Next: Operation 'Disguise the shoddy detail with paint' begins!

Sunday, 11 February 2018

Skyrex 1/100 SU-122 - Part 1

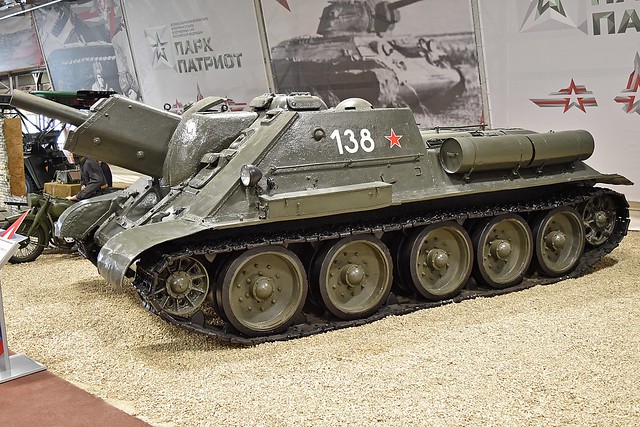
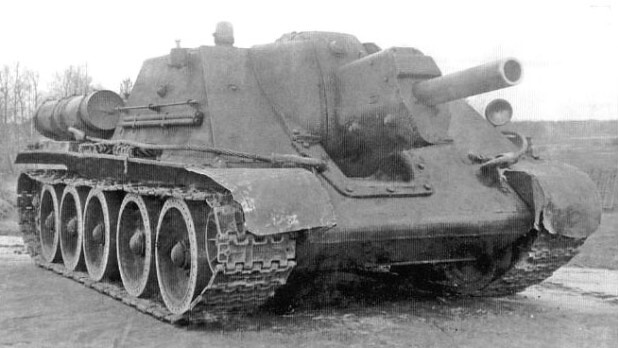
SU-122 in Kubinka Tank Museum. Source: Wikipedia.
While I wait for some decals I have ordered for my 1/100 T-34s to arrive, I thought that this would be a good opportunity to get started on the last of my mid-war Soviet tank force. While the Skyrex white-metal wargaming models don't require a lot of putting together, they do need some extra prep work to get them ready for painting.


The SU-122 was the Red Army's answer to the highly successful German Stug III assault gun/tank destroyer. This design of fixed gun housing on a medium tank chassis suited the Soviet's need for large numbers of quick to build and cheap fighting vehicles. The chief advantage of this design was that you could shoe-horn a larger gun into the housing than you could get in the equivalent vehicle with a rotating turret, thus - while normal T-34 designs were mounting a 76mm main gun - this gun carriage could mount a hefty 122mm howitzer!

The Skyrex Model Overview
While I would have preferred to have stuck with plastic models for my 'Battle of Kursk' project, sadly none of the main 1/100 plastic kit manufacturers make a SU-122 (and I didn't fancy taking on a T-34 conversion project). So, as I only required two of these models, I dug deep and splashed out on a pair of Skyrex metal models (£6.50 each plus postage).

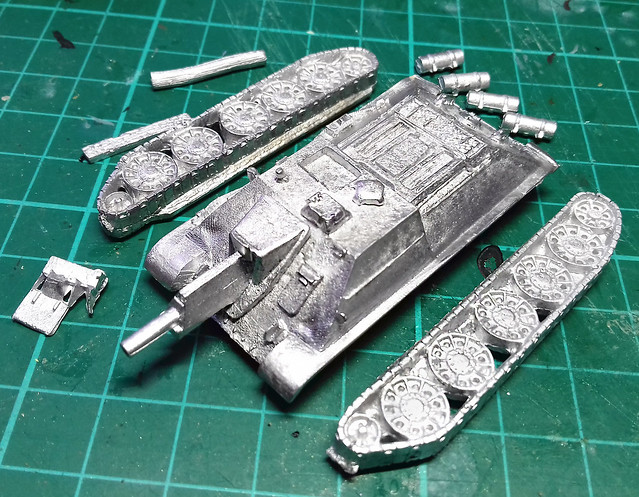
There are only four main parts (main hull, 2 x tracks and commander's hatch) plus four external fuel tanks, a tool box and a 'unditching log'. [Apologies for the lack of clarity of the photos, but bare metal is quite difficult to photograph.]


As usual, for a white-metal model, there is a little flash and a tiny bit of deformity so 'cleaning up' mainly involves smoothing out any pitting, bits of flash and scratches with some mild filing and shaving. Additionally, I've been told that it's good practise to give all surfaces a quick rub down with some 'wet and dry' paper to remove any of the moulding medium residue.

Detail wise, it's a mixed bag, but this is the compromise you make when having to resort to a low run metal moulding compared to a high volume plastic injection kit. The crispness of detail you get with plastic just isn't there, but - again - there isn't a plastic SU-122 model in this scale...So, be content! ;)


Because of the lack of definition with some of the detail (particularly the engine deck) I'm a bit worried about how the painting will pan out.

😬 <--- My worried face!

Well, I better get my file and 'wet and dry' out and get going...

Next: Priming, where I should get a better idea about how some of that detail might turn out.

Thursday, 8 February 2018

Featured Work - Carsten's 'Object 704'

It's been a while since I posted a 'featured work' and I think that's possibly because I've been working in 1/100 scale recently. There are some terrific examples of beautifully painted 1/100 scale armour around if you Google them, but not so many tutorial examples (at least, not as many as - say - 1/72 scale tutorials anyway).

So, it was great to come across this wonderful example of what can be done at this diminutive scale. Particularly so as the modeller - Carsten - uses a lot of techniques and medium that are more usually associated with larger scales...


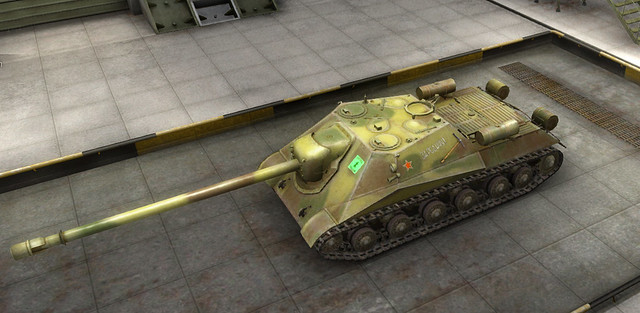
Another delightful aspect of this video is that Carsten's subject if the 'Object 704', which is a late WW2 prototype Soviet tank destroyer. I'm quite familiar with this monster as it's a tank which is available in the PC game 'World of Tanks'. Indeed, it's one of my favourite tanks to play in this game...


Computer games aside, though, this is a very useful tutorial on with some very interesting pointers about advanced painting techniques for 1/100 armour. I'll undoubtedly be trying out some of these tips in the various tanks I'm just producing.

Wednesday, 31 January 2018

The 'Cat Killers' Are Here!

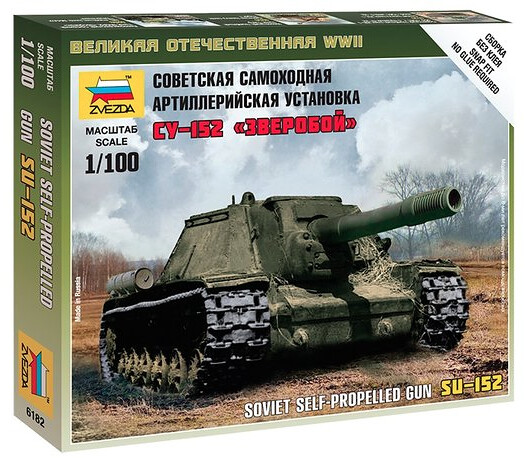
New to my stash for my 'Battle of Kursk' themed wargame are three lovely 1/100 Soviet tank destroyers. The plastic Zvezda SU-152 and two Skyrex white metal SU-122s...


Although I call them 'Cat Killers' I believe the nickname really translates from Russian as 'Animal Killers' - referring to their intended victims, the German Tigers, Panthers and Elephants - and it really was only applied to the SU-152 and it's massive gun. Still, the SU-122's big gun was nothing to be sniffed at either and had the same function - to get rid of those pesky Kraut Heavies!

These will make up the core of my Soviet force for my planned game of GF9 'TANKS!', as the Soviets fought more defensively in this battle.

Monday, 20 October 2014

Lancer Miniatures 1/72 T-20 Armoured Tractor

Feeding my minor obsession with getting the 'perfect' Komsomolet armoured tractor I took the advice of Greebs (a reader of this blog) and bought a Lancer Miniatures T-20. It wasn't a big outlay - especially compared to the North Star T-20 kit I featured in my last post on the subject - so I was easily able to sneak it under the wife's spending radar!

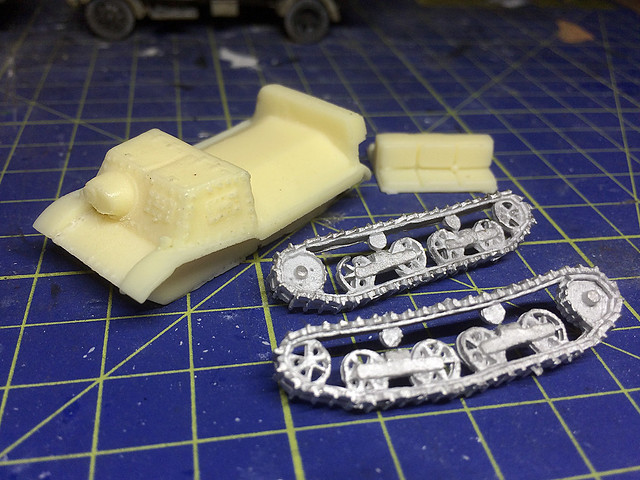
It arrived very promptly and here are some snaps of it...


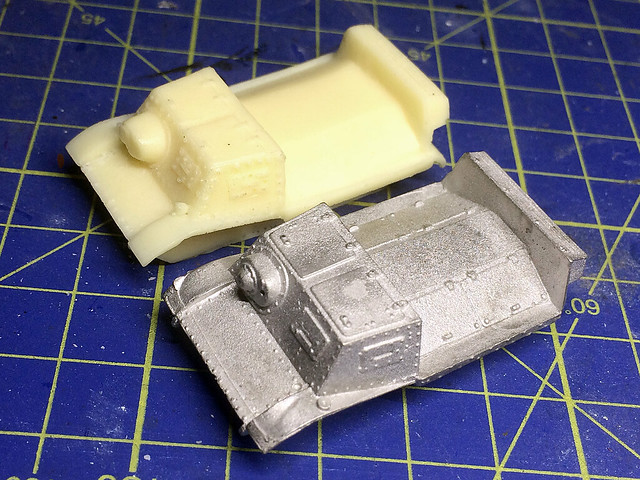
The Lancer resin T-20 hull compared to the white metal MMS T-20.
Excuse the muddy looking photos - but generally I was quite pleased with the product when you consider it was just £5.50. It is certainly better quality that the Shellhole Scenics T-20 (review here) and is about on par with the SHQ version of this little vehicle (review here). In the accompanying photo I have placed the resin Lancer T-20 hull component next to that of the MMS T-20 hull for comparison.

The Lancer is a gnat's hair larger than the MMS - which is understandable as the Lancer T-20 is supposed to be true 1/72 scale while the MMS is 1/76 scale - but as you can see the difference is barely discernible. As far as I can tell the Lancer's dimensions are just a tiny bit small for this scale which is why it seems compatible with the 20mm MMS model, but with such a small vehicle we are talking about fractions of millimetres differences here.

I know I keep including this reference photo, but this picture really does give an
excellent sense of just how small this 50hp armoured tractor was.
I am now of a mind that - really - any differences in scale from 1/76 to 1/72 are going to be negligible so I am going to clean up and paint both the Lancer and the MMS T-20s to see what they look like next to one of my finished trucks and some infantry figures. I only need three of these vehicles for my Finnish collection anyway so if they look OK I will probably complete the unit by making up the SHQ model.

T-20 Dimension comparisons:
1/1 Scale: Length: 3.45m | Width: 1.86m | Height: 1.58m
1/72 Scale: Length: 4.79cm | Width: 2.58cm | Height: 2.19cm
1/76 Scale: Length: 4.54cm | Width: 2.45cm | Height: 2.07cm


The general quality of the model is OK, there are a few bubbles on the resin component and the metal tracks have some gaps where the metal casting has failed. But for a Fiver I'm not moaning. I have to say that I had never heard of Lancer Miniatures before, so an additional thank you goes to Greebs for introducing me to a new source of interesting WW2 vehicle models.

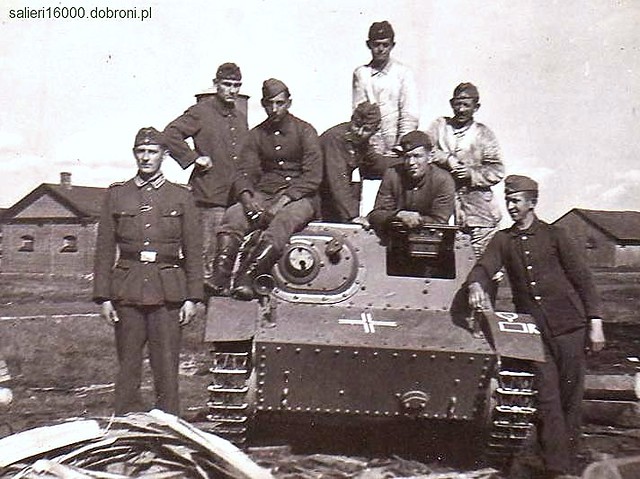
Another photo which gives you an idea of how small these vehicles were in
reality. These Germans stand beside a captured Soviet T-20, this will allow
me to make a good comparison with some 1/72 scale figures.
(Picture credit: Adam Salieri - salieri16000.dobroni.pl)

Link to the Lancer Miniatures website.

Tuesday, 23 September 2014

An unexpected arrival - MMS Citroen Type 23


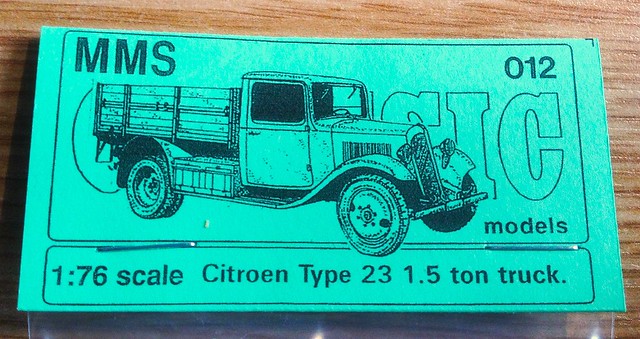
Always nice to get unexpected parcels. I ordered this so long ago I had completely forgot about it - it's a beautiful white metal MMS Citroen Type 23 (c1939ish) light truck in 1/76 scale...

The 1/76 MMS Citroen Type 23 kit (source: MMS Models). A short review of this
kit is available over at www.mondo72.com
I could have just used models of captured Soviet GAZ AAs and ZiS-5s for my light truck inventory of my Finnish collection, but as usual I wanted to illustrate the diversity of vehicles deployed by the Finns. I spotted a Citroen 23 in a photo of the Finns at war (a civilian commercial vehicle pressed into military service) and so looked for a 1/72 model version.

It was a bit of a long shot, I didn't expect to find a 1/72 plastic kit for this French WW2 truck as it's a wee bit niche, but I did come across this very nice white metal kit from MMS Models of Folkestone, UK.


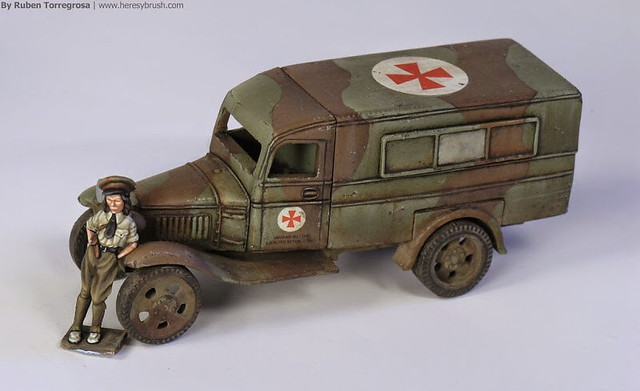
It is, of course, 1/76 scale so technically should have been a wee bit smaller than I would have liked, but I decided it was still worth getting as I had a 'cunning plan' to mate the front half of this with the back half and chassis of Minairon's new 1/72 Ford AA van (which comes out at the end of September). I was thinking it would make a lovely Citroen ambulance or radio car...

The soon to be released Minairon's Ford AA ambulance.
A French Citroen Type 23 ambulance. Mating the Citroen's bonnet to the
Minairons Ford body would have made a wonderful conversion.
Anyway, when I opened the parcel I was very pleased to notice that it's actually quite a large vehicle, easily compatible with my other 1/72 light [1.5 ton] truck kits (I compared it side-by-side with the parts of my Military Wheels GAZ AA kit and they matched perfectly). So, no need to modify, it'll make a nice little model for towing my Finnish HQ 20mm AA gun!

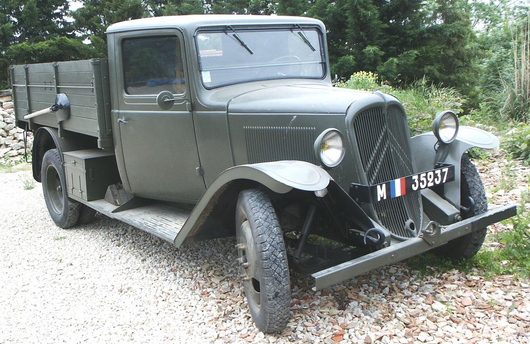
Beautifully restored example of the Citroen Type 23 truck in French army markings.
Large numbers of these were 'acquired' by The Germans after the fall of France and
were used by the Wehrmacht
Historical note: I have been unable to find the original photo showing the Type 23 in Finnish service again so cannot absolutely validate the authenticity of using the Type 23 for this project. However, the Citroen was a very popular and successful European commercial vehicle - produced in large numbers from 1936 - and so having it as an example of civilian vehicles in use by the Finns is more apocryphal than fact.

Update: Information I have received on the Axis History Forum points towards 40 Citroen Type 23 vehicles having been imported into Finland during World War 2. So that's nice as it makes my use of the type a little less suspect!

Monday, 28 July 2014

Scotia Grendel 1/300 LAGG-3 - Part 3

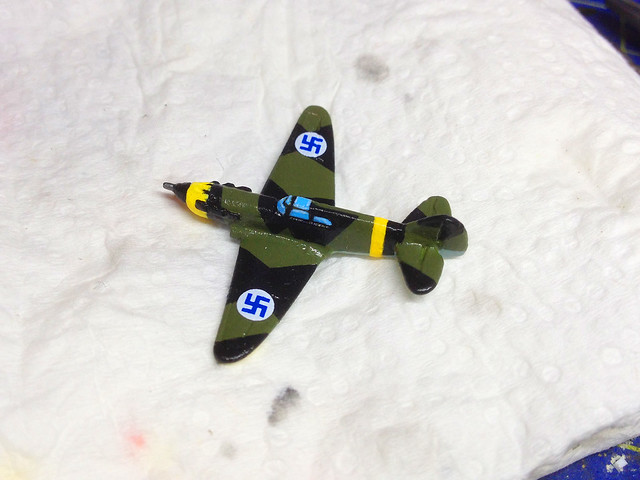
Funnily enough this is the part of the project I haven't been looking forward to - applying the decals.


I suppose it should be one of the easier parts of the job - maybe - but I find the Finnish emblems quite tricky to apply so they look 'straight'. The Finnish hakenkreuz never seems to line up properly (for me anyway), and no sooner do I get one of the 'arms' of the swastika lining up with one part of the wing or whatever than it you notice it looks out of line with another part.

The painting was very enjoyable. Though one of the foibles of working with a white metal models seems to be that there is no such thing as a smooth flat surface!

No matter how hard you try to paint a straight line the imperceptibly undulating metal surface causes your line to look 'wobbly'! In the end you learn to compensate by painting counter wobbly lines, which seems to even things up nicely.


I'm also pleased with the olive green colour - which is Revell's 361 Olive Green - as it isn't as flat as some of Vellejo's olive greens. It's nice and rich.

The windows turned out OK, I went for the simple option and just outlined a Vellejo's (961) Sky Blue with some plain white. I didn't even bother blending the white in for a gradiated look.

Finally, I hate yellow! I've been using Valleho's (953) Flat Yellow but it's a horrible consistency and takes a few thin layers to build up a decent rich yellow. I found myself continually going back and touching up parts of the yellow theatre panels. Worst bit of the job.

Hey ho. Nearly there - and as I said, on the whole it's been a really nice relaxing little diversion. Next I have to decide if I am adding a transparent plastic 'propeller' disc and attach the stand.

Friday, 18 July 2014

Raiden '1/300' Finnish fighter aircraft arrive

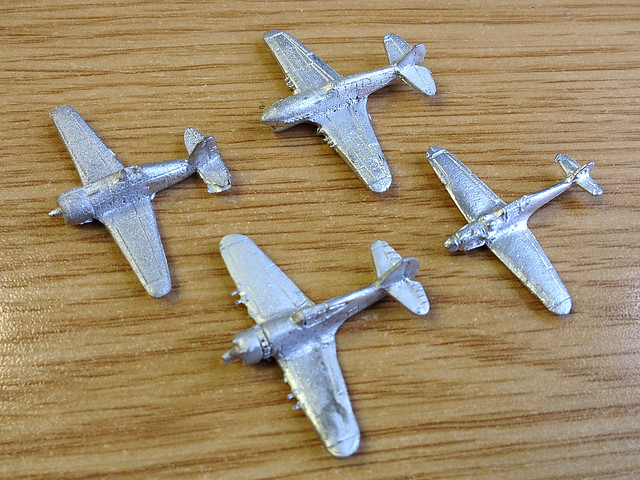
Part of the order for '1/300' aircraft models I made at the start of the month was to the Raiden company of America. They have finally winged their way across the pond and landed on my door matt yesterday. So let's have a look...


The order was for a F2A Buffalo, a Fiat G.50 and a P-40F Warhawk - all candidates for my little Finnish air force. Of all of these aircraft it is perhaps the Buffalo which is most closely associated with the Finn's dogged defence of their country. Indeed, they did far better in this much maligned obsolete American fighter that did any of it's other users (particular the RAF) scoring a good number of 'kills' with it.

"The Brewster Buffalo earned a reputation in Finnish Air Force service as one
of their more successful fighter aircraft. In service from 1941 to 1945, Buffalos
of Lentolaivue 24 (Fighter Squadron 24) claimed 477 Soviet Air Force warplanes
destroyed, with the combat loss of just 19 Buffalos, an outstanding
victory ratio of 26:1." Source: Wikipedia

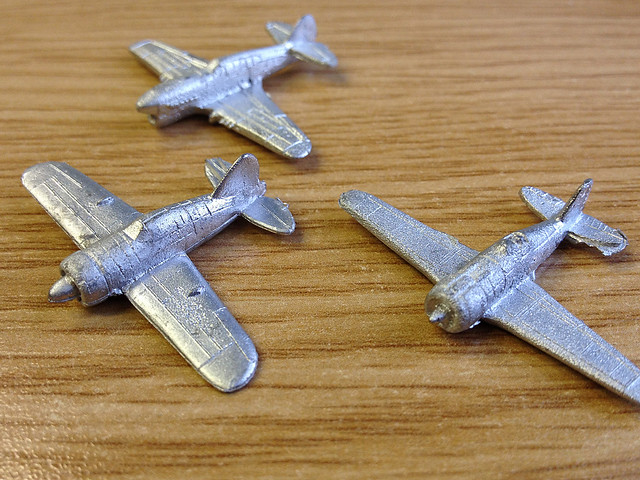
The Raiden models are actually 1/285 scale and I'm afraid - unbelievably - you can tell the difference between these and the 1/300 aircraft I got from Scotia Grendel, Raidens being somewhat larger. A shame really as I was hoping the difference would be negligible.

Quality wise I think the Raiden planes may just have the edge with a lot more fine panel-line detail. The amount of flash and quality of white metal used is about on par with the UK firm's models.

Raiden's 1/285 scale planes (top) compared with a couple of Scotia Grendel's
1/300 aircraft. It's hard to tell, but the Raidens are just a tad larger.

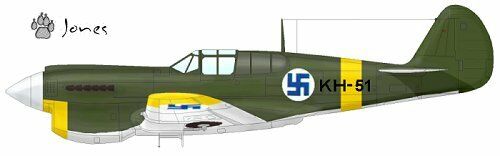
I was particularly looking forward to receiving the P-40 Warhawk as the P-36/P-40 Hawk family of fighters is one of my all-time favourites.

Piloted by Sub.Lt.V.A.Ruevin form 191st IAP on 27th December 1943 a P-40M
made a forced landing on the frozen Lake Valkjarvi, Karelian Isthmus. Finns
captured it in perfect condition. It was overhauled at the Mechanics' School
and delivered to HLeLv32 on 2 July, 1944. It was used till 12th February 1945.
Artist: © Jouni Ronkko 'Jones' - Source: Wings Palette web site

The last little plane is a very cute little Italian Fiat G.50. Once again the Finn's squeezed every last drop of effectiveness out of this obsolete design gaining a unprecedented kill/loss ratio of 33/1 [Wikipedia].
Source: Wikipedia

As with my earlier Scotia Grendel delivery these little models are just a whim on my part and not really part of a serious project. They are just something fun to do when I need a rest from my current 1/72 models!

Sunday, 13 July 2014

Scotia Grendel 1/300 LAGG-3 - Part 2

Ok, I couldn't bear it...I just had to tinker!
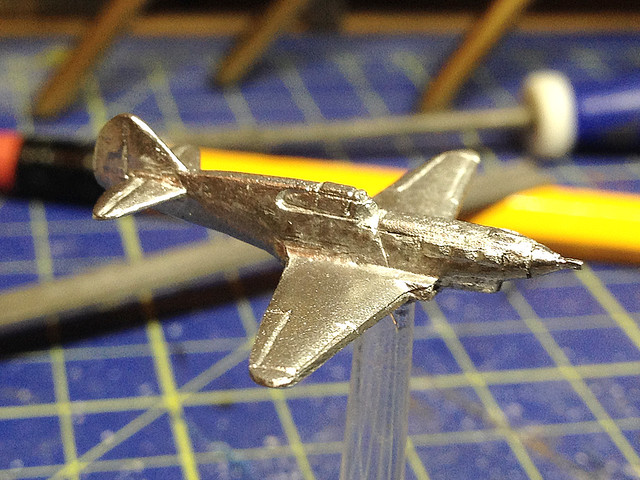
I decided to correct the wing profile with just a tiny bit of Milliput. I'm not sure how hardy this modification will be for wargaming, Milliput can dry quite hard but having it so thin on trailing edges like this might be asking for a chip if handled roughly. I won't be using my models for gaming though.


Next was the nose profile. As it was it was a bit too P-40 Warhawk looking, so I added some Milliput on the chin to round out the area between the prop boss and the intake.


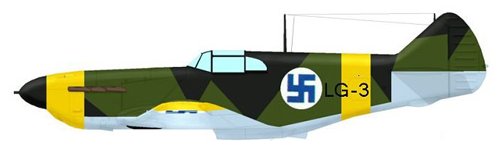
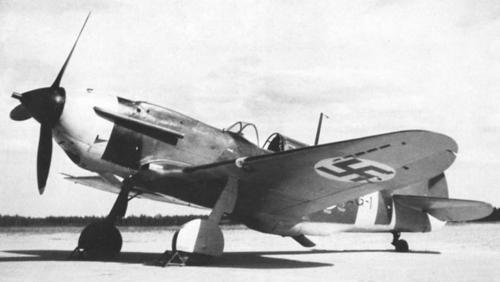
LAGG-3, Nurmoila, Finland, March 1943. Artist: © Rick Kent.
More Finnish LAGG-3 schemes at Wings Palette.

Finally, I smoothed out the lower body from the intake to the tail to make it more like the version in use by the Finns. I'm not really that familiar with the numerous versions of this plane but the shape of the fuselage between the tail and center intake seems to be one of the things that differentiates them.


Finally, I smoothed out the lower body from the intake to the tail to make it more like the version in use by the Finns. I'm not really that familiar with the numerous versions of this plane but the shape of the fuselage between the tail and center intake seems to be one of the things that differentiates them.

The aircraft became LG-3 in Finnish service, and was assigned to LeLv 32 during
winter 1942/43; this unit was based based at Nurmoila, on the Olonets isthmus.
Source: mig3.sovietwarplanes.com

At this point should say that this model will never be perfect - I am carrying out these small amendments simply to satisfy my own peculiar obsessive nature. For wargaming this 'marker' is quite adequate to represent this type of aircraft - doing this sort of fiddling about will not improve it's ability to act as a 'piece' in a game. (I perhaps should have put this paragraph at the top of the post.)

But in a strange way this sort of fiddling about is what I enjoy most about modelling and why I continually buy cheap wargame models and spend so much time trying to make them look better than they perhaps ought to be. In short, were we talking houses I would be the guy that likes 'fixer uppers'!

Anyway - back to the LAGG-3.

The new 'improved' wing shape - symmetrical and more accurate.

It's the next morning now, I like to give Milliput a whole night to cure properly. This extra time really makes the material quite solid and it sands better in my opinion. I suppose the ideal is that you would have a couple of jobs on the go so you could set one aside to cure while you get on with another (and indeed that is what I did in this case).

The finished profile - a little more like the real aircraft (hopefully).
Now, preparation work done it's time to start the painting process. Again, I am just guessing the best way to do this - I haven't found a 1/300 model tutorial online - so I am going to approach this as I would a larger scale kit and prime it grey to begin with. As this model is white metal this seems to make sense to me.


Now, finally, to the big question. Hand brush or airbrush?

At 1/300 scale I am far more tempted to have - at least on this test model - a go with hand painting the model. An airbrush or aerosol spray seems overkill (unless you were doing a batch of these for a wargame).

As for the paint scheme, well as you have seen with some of the reference photos I've included there is very good historical information on the exact colour schemes to be applied to the Finnish LAGG-3s. In fact, as there were only 3 of these fighters in service with the Finns there is exact schemes for each of these specific aircraft - AND, my favoured example of 'LG-3' (see above photo) there are two specific schemes, one for up to 1944 and one after 1944. SO no problem there!

For more information on these Finnish LAGG-3s go to mig3.sovietwarplanes.com/lagg3/

Next: Painting the LAGG-3.

Oh! PS...The little transparent plastic stand doesn't come with the model. This has to be bought separately. I got mine from Scotia Grendel at the cost of £1.50 for a pack of five.

Friday, 11 July 2014

Scotia Grendel 1/300 LAGG-3 - Part 1

Owing to a really annoying problem with my current project I decided to switch over to one of the little white metal aircraft models that I bought from Scotia Grendel. I am hoping that by the time I finish this mini-project that I might have solved the issues I am having with my larger 1/72 scale model. We'll see.


Anyway, of the half-dozen aircraft I got from Scotia Grendel I decided that the LAGG-3 would have the dubious honour being my very first 1/300 scale victim. The Lavochkin-Gorbunov-Gudkov LaGG-3 was a Soviet design constructed almost entirely from wood-laminate and in 1941 it was considered to be one of the Red Air Force's most advanced fighters. Unfortunately it seems that that didn't mean all that much in the face of opponents like the Me-109 and it proved unpopular with pilots.

My interest in this plane is derived from the fact that Finland operated 3 captured examples of this fighter. Though as far as I was able to determine the captured LAGGs didn't particularly distinguish themselves as I can only find one mention of a 'kill' made by one of them (which is particularly poor considering some of the impressive talleys scored by the tenacious Finns in even older and technically obsolete aircraft).

Source: Wikipedia


The Scotia Grendel model
At 1/300 scale I don't suppose I was expecting much in the way of detail, much less so as the model is made using my nemesis medium - white metal! And - quelle surprise! - this model didn't change any preconceptions I had.

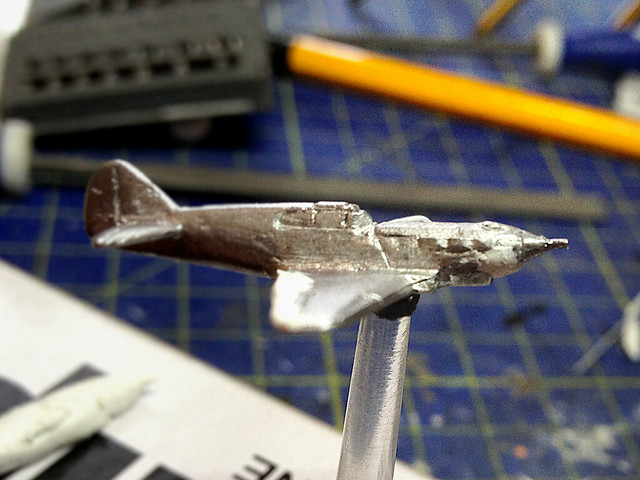
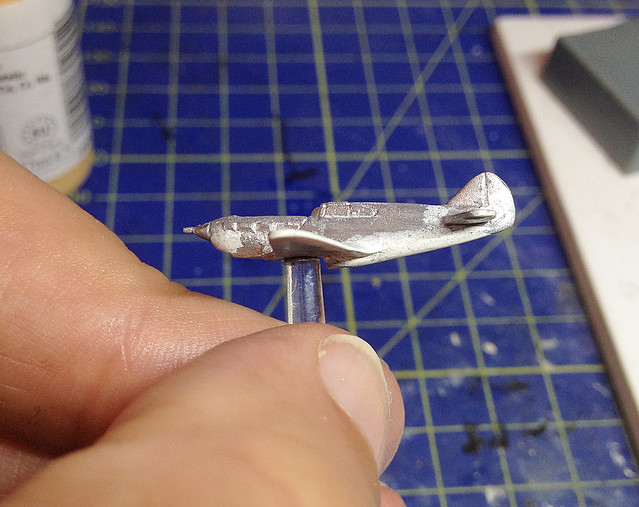
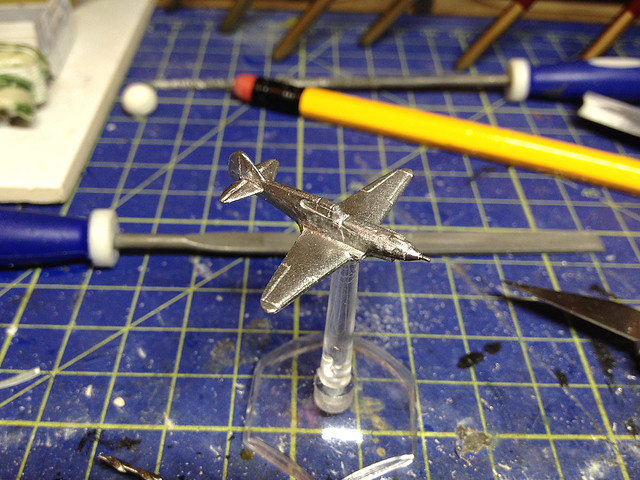
Looking decidedly more P-40 than LAGG-3 I think this plane has been on a diet!

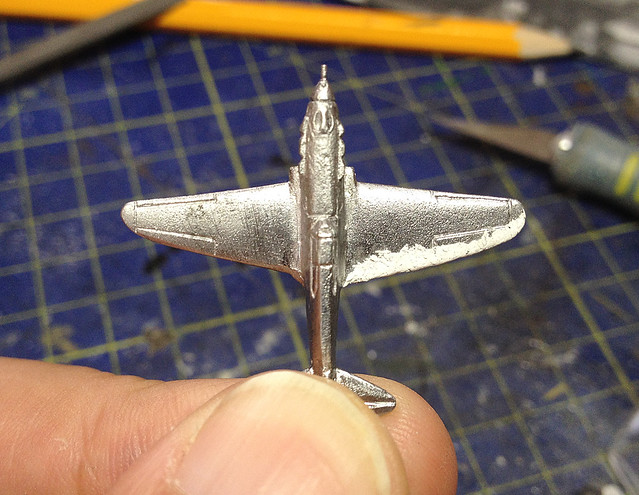
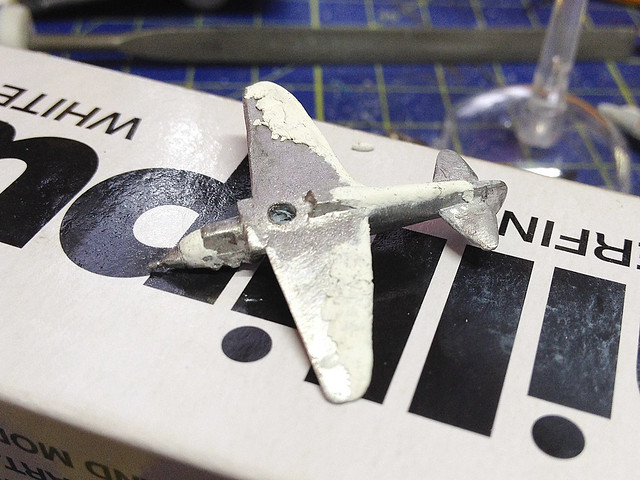
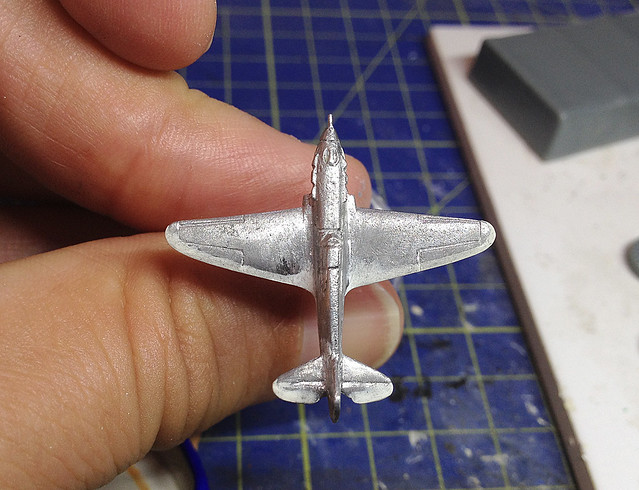
Even though it is small I was still a little disappointed in some of the apparent inaccuracies. For example, one of the most noticeable features is the wing shape, here Scotia Grendel just seem to have got it plain wrong. Though this may, in part, be to do with the amount I ended up filing off the trailing edges in order to make the overall shape of the main wings symmetrical. (So you will have to decide - fatter asymmetrical wing profile, or thinner symmetrical profile!)

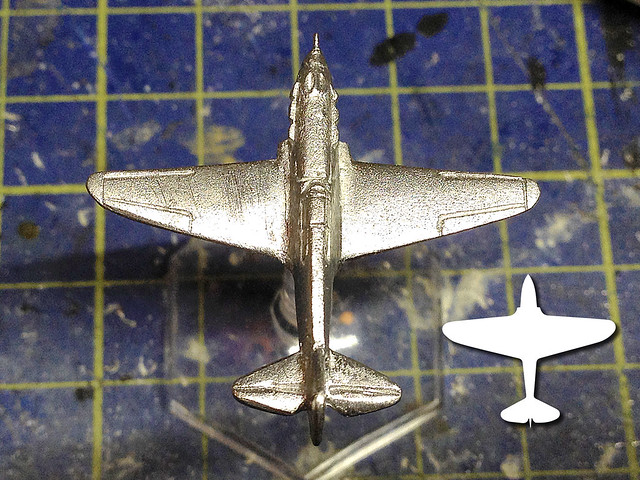
As a tabletop wargame marker I think it's quite important that the wing silhouette is as accurate as can be - given that is the most readily identifiable feature of these tiny models as you look at them from above and at a distance.

The top-down profile. Inset is the correct profile, having cleaned up the model's
wings for symmetry they are now too straight and narrow towards the tips.
Source: Wikipedia

There were other tiny gaffs too, which I could list but I'll let the accompanying photos - and the reference pictures - speak for themselves. I don't really want to start out my 1/300 scale enterprise by heaping a load of criticism onto a type of model I have very little experience of - after all, as these are my very first examples of the scale I have no idea if the quality is the 'norm'. (Not for the first time recently I have had to remind myself that a model I am dealing with was made with wargaming - and not display - in mind).

Anyhoo. As I am really using this particular aircraft model as a test model - as I work out strategies for working with the scale - I am prepared to wright this one off to a certain extent. I got to work doing what cleaning up there was with a fine file. There wasn't a lot of flash and the amount of pitting was acceptable and neither destroyed much detail so it doesn't take long to complete.

Here's the original shot I took of the newly arrived 1/300 fighter. As you can
see the LAGG - left - has some flash on the nose and tail and you may be able
to make out the fatter right wing compared to the thinner/straighter left wing.

Next: In the next part I begin the painting of the model.