Showing posts with label X-ref: V3000/1212. Show all posts

Thursday, 20 November 2014

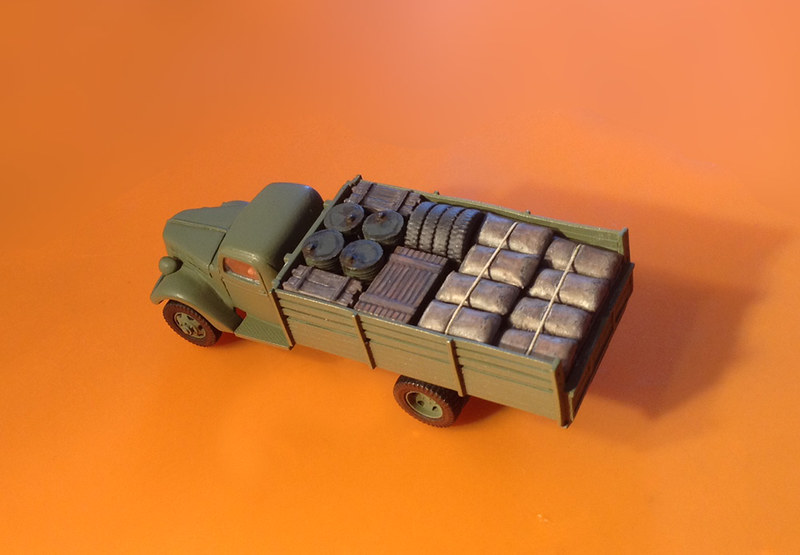
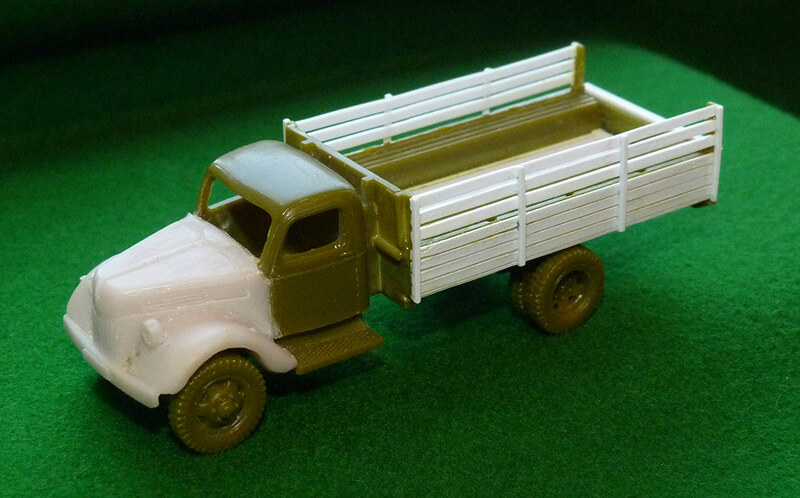
Cheap Ford V3000 (Pt.14) - Finished!

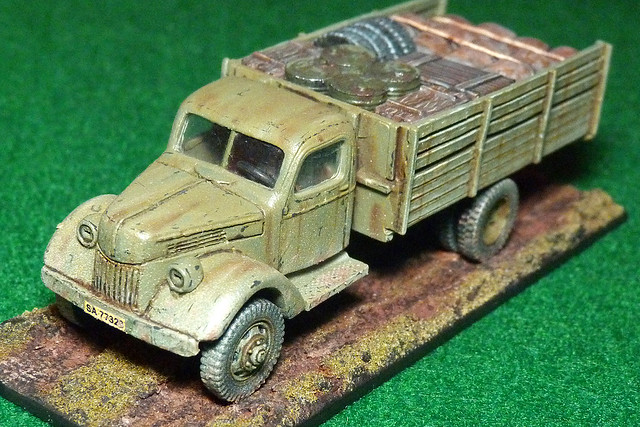
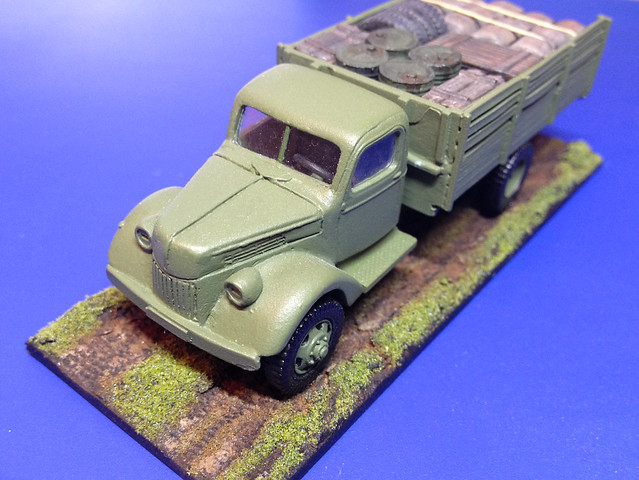
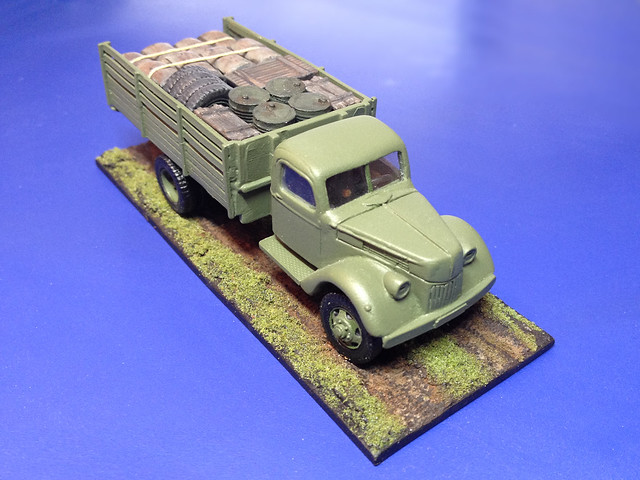
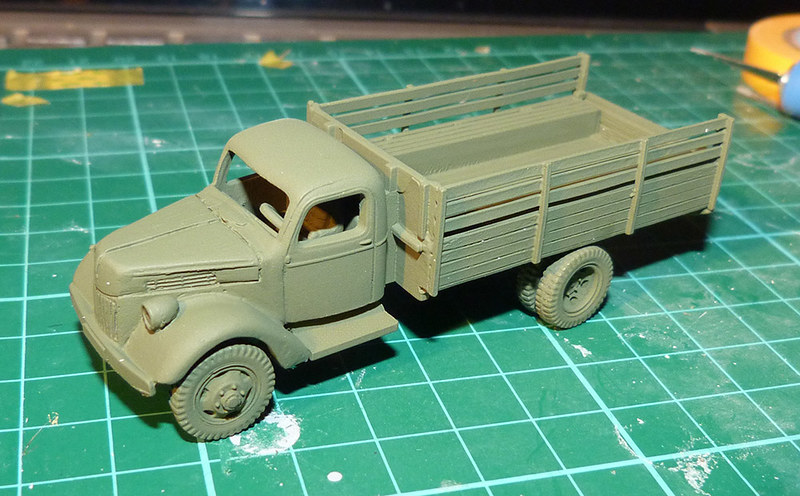
Here's a blast from the past. This Ford V3000 was actually a very early attempt of mine at a conversion, but although I managed the construction part of the project I was - at that point - completely clueless about the painting side of things. So I shelved it (until I thought I could handle the weathering and finishing).

Well, I feel I am moderately adequate at painting now so I finished the project off!


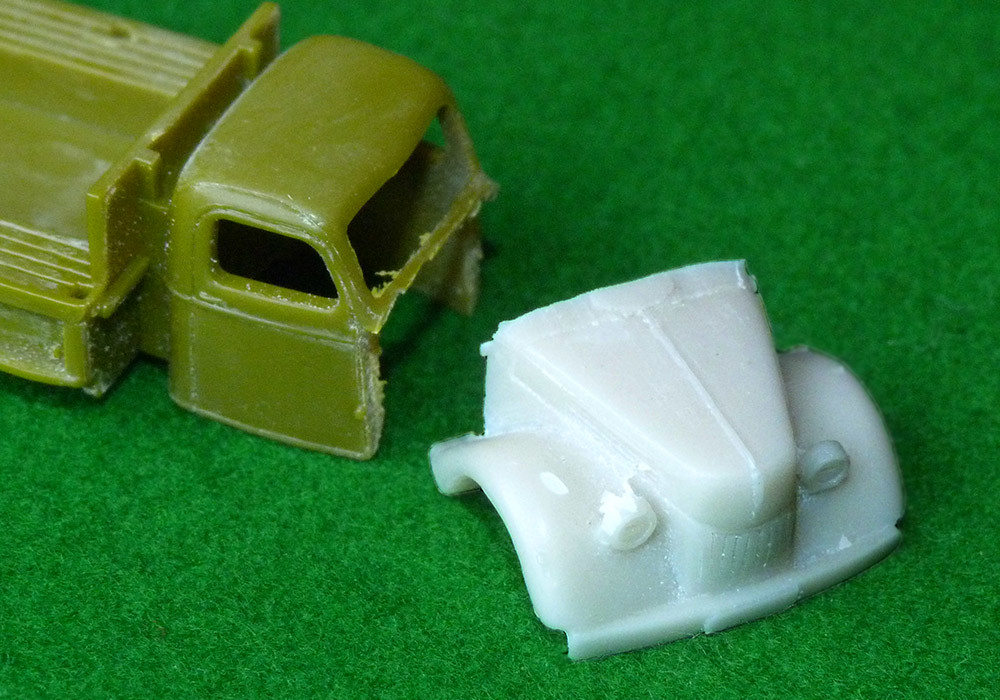
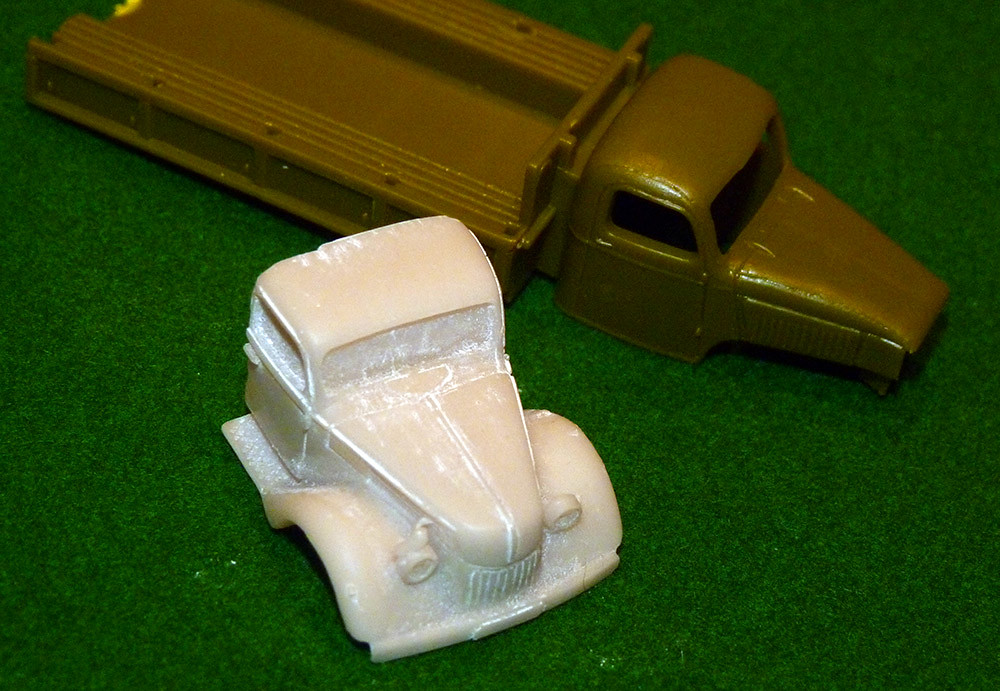
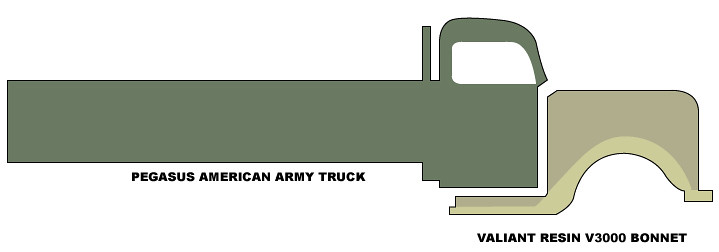
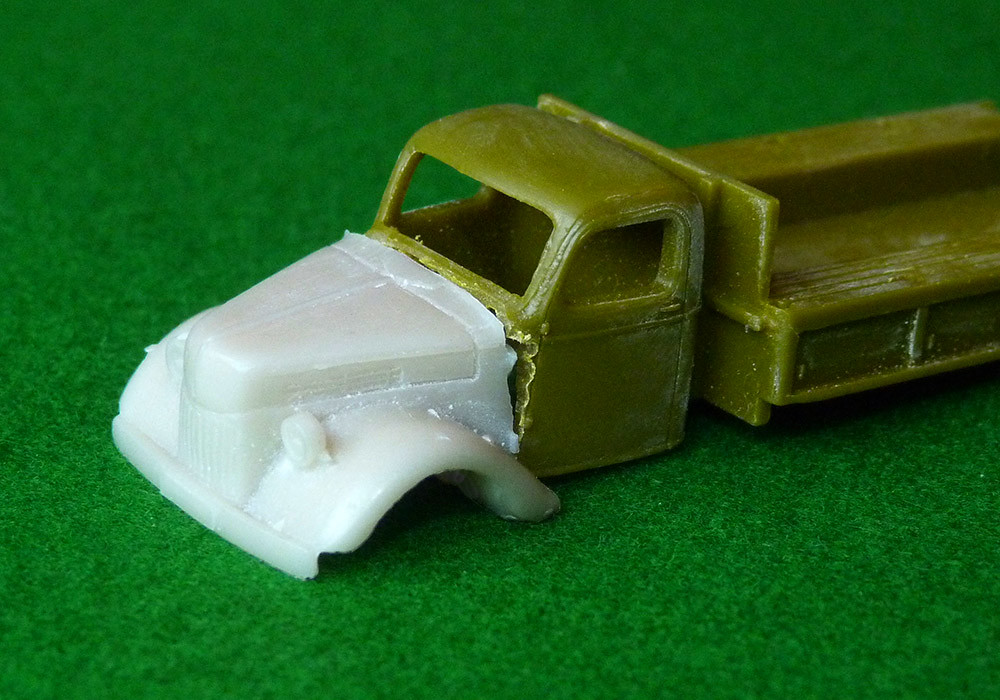
To recap; this conversion was my very first 'cut & shut' attempt, with the bonnet being from that old favourite the Valiant resin V3000 and everything back of that being from the Pegasus 'American Army Truck' kit.

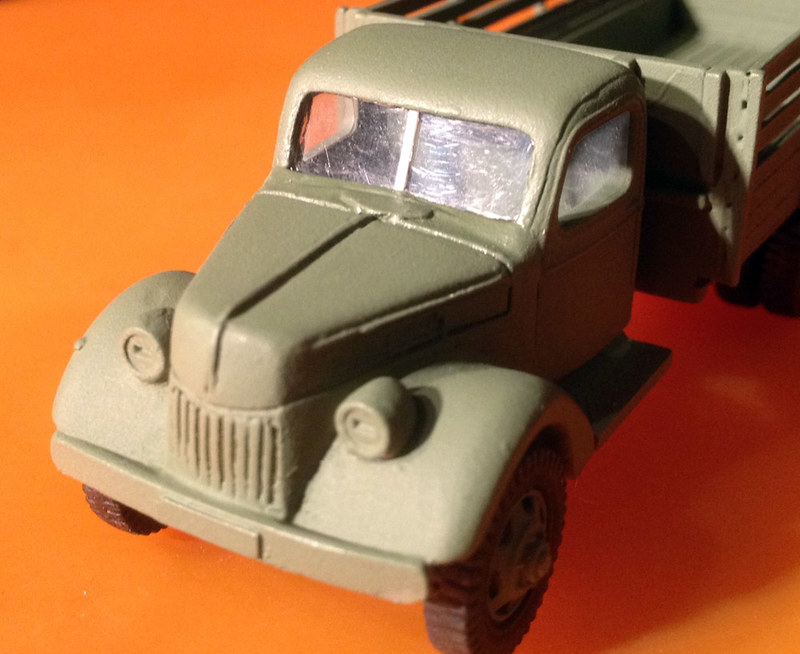
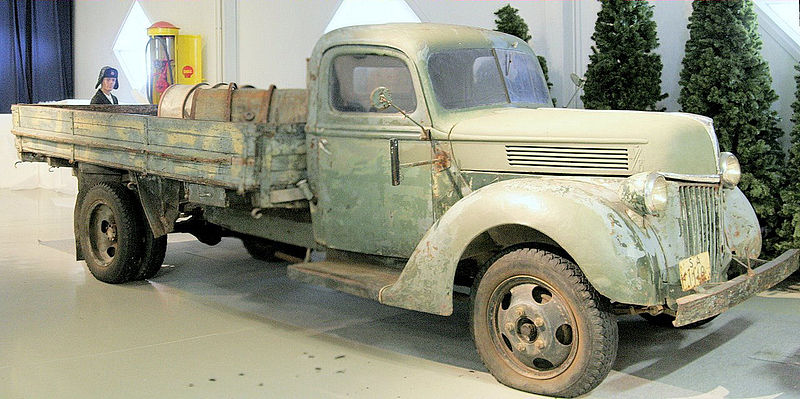
It's supposed to be the Ford American model V3000 in a long-base 'stake truck' format (the difference between this and the German V3000 being the split windscreen). The fenders aren't quite right, but for my first conversion attempt I was quite pleased.


From the point of view of this being part of my 'Rapid Fire' Finnish Continuation War collection this truck represents the HQ Company supply truck.

...Phew! Slowly working through my back-log of stalled projects! :)

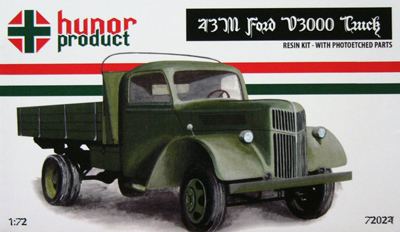
Afterthought! Oh I forgot to add...The reason this project came about and is called 'Cheap Ford V3000' is because there is no reasonably priced plastic injection kit of this vehicle on the market in 1/72. The only kit available is an expensive short-run resin kit by Hunor (though there are a couple of resin conversion options, like the MT conversion that I have also built.)

Wednesday, 24 September 2014

ModellTrans Modellbau Ford V3000 conversion kit - Part 6

Weathering - Stage 1: Oils.
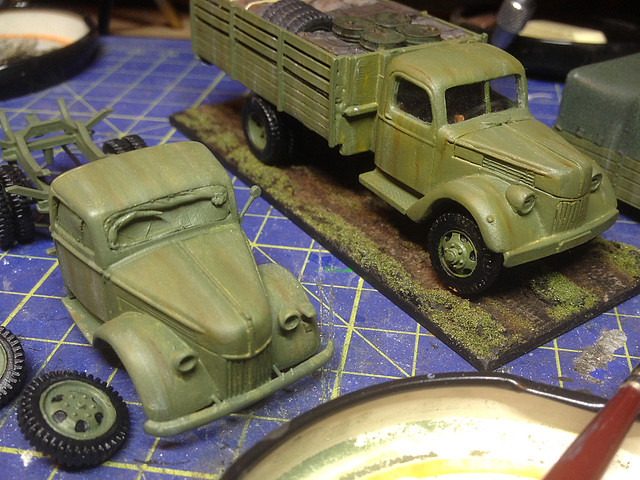
I'm slowly improving I think, or at least I am feeling a little more confident about my painting. So much so that I thought I would finally get around to weathering my 'Cheap Ford V3000' conversion. This was one of my early projects which was put on hold until I felt I could do a adequate job of the weathering, which I think I can now.

Weathering with oil paints. A cheap and cheerful but effective technique. Don't
bother with expensive artists oils, I bought mine from a discount store.
So I decided to weather my first V3000 along side my latest V3000 and in doing so I think I am starting to develop a strategy for my weathering.

Having base coated my truck with the usual Humbrol Light Olive I then gave it a light varnish with a satin coat (I always feel that vehicle paint has a slight sheen to it which I think satin varnish captures nicely). The model is now ready to weather, and here's my process (for Olive vehicles):

1. Streak and stain - using oil paints.
2. Dust - with a light airbrushing of an appropriate dust colour.
(Also, mud effects on structure or hard to get places like the chassis or under mud-guards.)
3. Pin-washing - using AK Interactives Dark Brown Wash for Green Vehicles.
4. Chip & scratch - using dark grey or metallic grey.
5. Rust and oil fuel streaks - using AK Interactives washes.
6. Highlighting.
7. Graphite powder and pencil - to give metallic scratches and sheen.
8. Finishing off with surface mud streaks.

-- I tend to varnish between stages to protect the work I already done. --

I quite enjoyed adding oil weathering to my toolkit of techniques, it's quite a forgiving and can be corrected with a quick wipe with a spot of white spirit. Here's a nice video which explains the procedure if you are a beginner like me...

Tuesday, 18 March 2014

Cheap Ford-Werke V3000 (Pt.13) - Revisited


It been a long, long time since I updated this project but as I am in the midst of a flurry of truck projects at the moment I thought it was time I revisit this conversion.

In short, this model has been on ice while I got some much needed experience with my painting and weathering techniques. And I'm very glad I did this as I have learned a lot over the past year and I do feel that if I had completed the painting last year then it wouldn't be quite as competent a job as I feel I can do now.

What I intend to do with this model is to wait a little longer until I have my current 1939 Chevrolet truck conversion to the same stage as this V3000 and then pin wash and weather them together.


Monday, 6 May 2013

Cheap Ford-Werke V3000 (Pt.12) - Gloss coat

Tiny jobs while I sort out my man cave! This time I had just enough time to spray on a light gloss coat (Humbrol Acrylic Gloss) prior to pin washing and weathering...


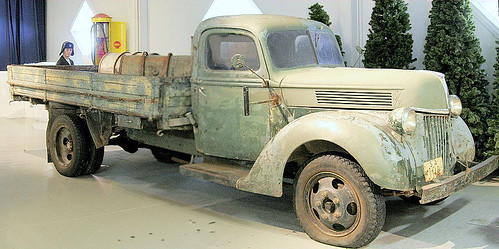
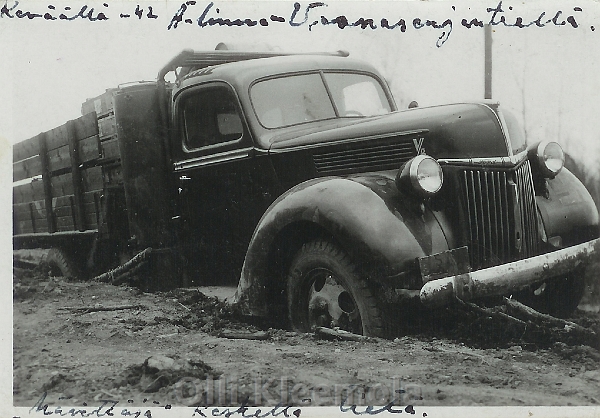
This is the most creative phase of the work, do I want a pristine truck fresh at the front or do I want a war weary veteran. It's rhetorical really as I want to create something that is worthy of the V3000's nickname in Finnish use - "Hävittäjä" ('fighter').

Luckily I have a nice reference photo to work from...


Next: The pin wash

Tuesday, 30 April 2013

1/72 Finnish Ford V3000 - quick repair

Everything is a bit of a muddle while I carry out my man cave reorganisation  and bit of the projects I was working on are scattered all over. But in any case, I keep finding little bits and pieces to work on including my Ford V3000 truck which was in need of some repair.

The 'planks' that form the 'stake bed' had deformed, this is in part because of the poor choice of material with which I made the planks - very thin plasticard strips - and also because of the glue I used melted the plastic, weakening it. The strips ended up wrinkling and warping.

Repairing the warped plastic strips by gluing on thin brass ones.
Anyway, while tidying up I came across a sheet of thin brass and I wondered if I could reinforce my plastic planks by gluing thin strips of the brass to the inside. Hopefully the metal strips would straighten out my warped plastic ones.


I couldn't use anything thicker or the planks would then look odd. The brass strips did the job and straightened up the planking again. I'll give these a quick spray and then I can continue with this project once again.

Sunday, 17 February 2013

Cheap Ford-Werke V3000 (Pt.10) - Cargo Pt.3


(Building a Rapid Fire! Finnish Army HQ Part 12)
Grabbed some of my dwindling free time to finnish off my V3000's cargo...


Not actually much left to do now really. I want to make a couple of tiny windscreen wipers, but that's a doddle even for me (famous last words).

The main event is the pin-washing and weathering of the truck itself. Really looking forward to this.

Sunday, 3 February 2013

Cheap Ford-Werke V3000 (Pt.9) - Cargo Pt.2

(Building a Rapid Fire! Finnish Army HQ Part 11)
Time to make a concerted effort to move this project on to a finished state (I'm so easily distracted)! I was working on the cargo for my supply truck, and my main problem was buying some scale oil drums that I wanted.

In the end I found a nice little cheap set of 12 HO/00 (1/76) oil drums made by Model Scene which cost just £2.48. But the main feature of this post is how I integrated my cargo into the truck which making the troop carrying ability still available should I want it.

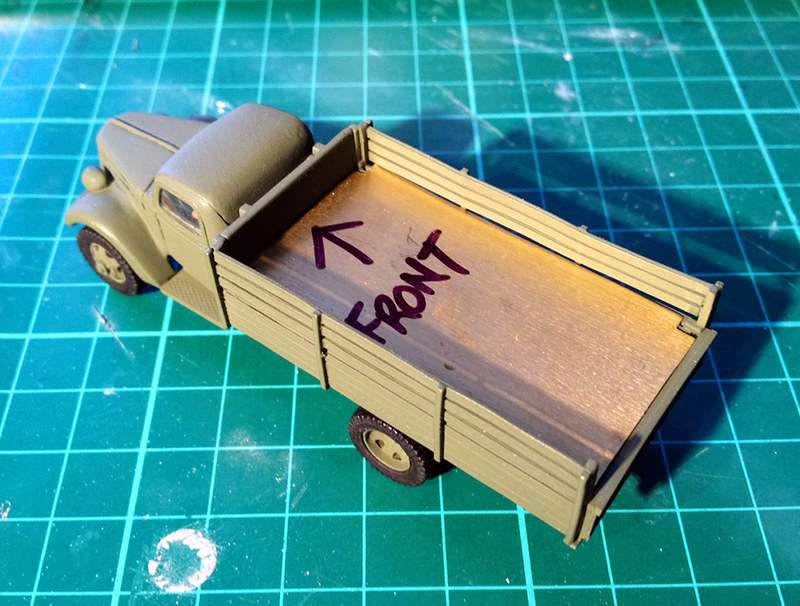
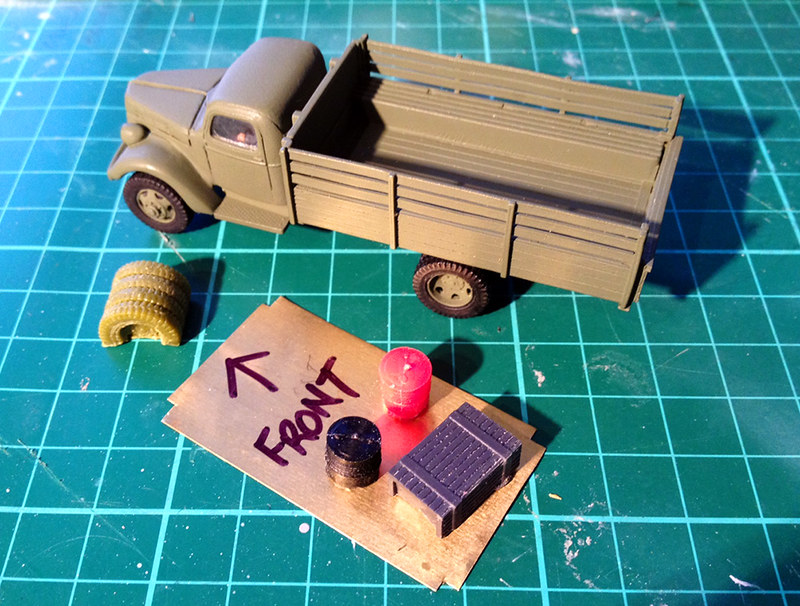
I went for a simple 'palette' - making a piece of metal sheet that sits on the troop benches to provide a false bottom for my cargo...


I did try a plastic false bed, but that tended to warp and wasn't thin enough. Metal is more ridged and wafer thin. Next I had to collect my cargo items and where necessary cut the items down so they look like they are sitting in the cargo bed itself and not on top of on a higher false bed...


Hopefully my choice of cargo looks authentic enough, I did check out some reference photos and the Finns did seem to 'pile 'em high' and shift about everything from mail to food stuffs to spare parts and ammunition. I've just made a bit of a mix...


Well, there you go. Now to the painting of the cargo and the pin-washing of the truck itself.

Wednesday, 23 January 2013

Cheap Ford-Werke V3000 (Pt.9) - Cargo Pt.1

(Building a Rapid Fire! Finnish Army HQ Part 10)
As this is my HQ Battalion's supply truck I suppose I better start thinking about making some cargo. However, I like the idea that I might be able to keep the troop benches available for a secondary use, so I have been also thinking about how I can manage this.

I decided that if I make a sort of palette - rectangle of card - that would sit on the troop benches and then I could then glue cut down items of cargo onto this as if the cargo bed were full of supplies. I would then be able to lift out the 'palette' when I wanted to use the truck as a troop carier.


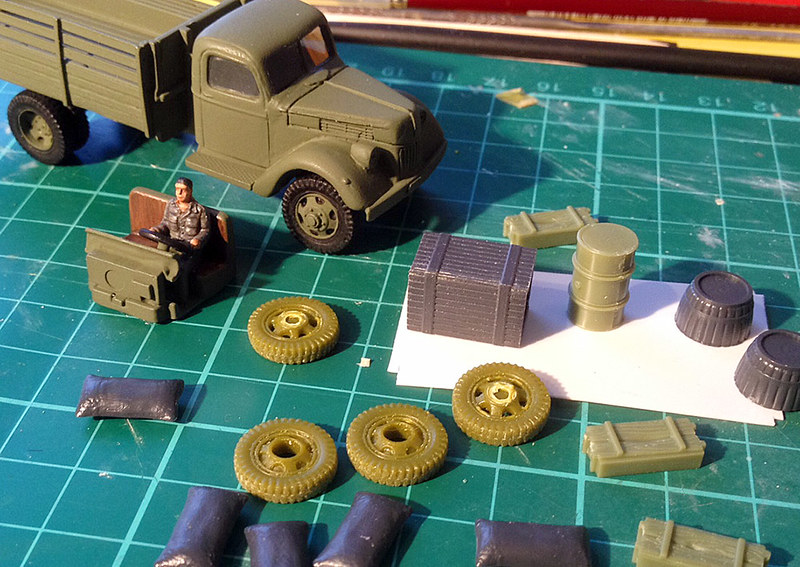
In the above photo you can see my motley collection of cargo bits and pieces. There is also my finished cab interior with - roughly - painted driver and seating (I haven't glued the truck cab and flatbed to the chassis yet). The piece of white plasticard is my palette, cut to the shape of the truck's cargo bed.

The extra tyres are the spare rear wheels from the Pegasus American Army truck which I didn't use, I guess spare tyres are a good cargo? I have some ammo boxes and an oil drum (from the trusty Airfix Jeep kit) and some HO/OO railway crates, sacks and barrels.

Could use some more oil drums, may have to visit the local railway model shop at lunchtime. :)

NEXT: Put them all together and paint them!

Tuesday, 22 January 2013

Cheap Ford-Werke V3000 (Pt.8) - Windscreens

(Building a Rapid Fire! Finnish Army HQ Part 9)
Another tiny step forward with the installation of my homemade windscreens and the rudamentry painting of the cab interior...


As you may know, this was the first time that I have made clear plastic wind shields for a  model so forgive me if I am a wee bit pleased with myself. Everything went well and the canopy glue worked exactly as advertised, drying crystal clear.

I was surprised when I squeezed this 'special' glue out as it looked just like PVA and smelled just like PVA...Can't say whether it tasted like PVA but I have my suspicions! But it worked and it stuck the plastic bits together fine.

Best of all though - and my biggest worry - the canopy glue did not stain or mark my base coat of paint. Even when I wiped away some excess glue with a wet brush it completely vanished when dry. So perhaps the money was well spent after all.

Obviously trying to photograph transparent plastic is something of a challenge, but I assure you the windows are now there!


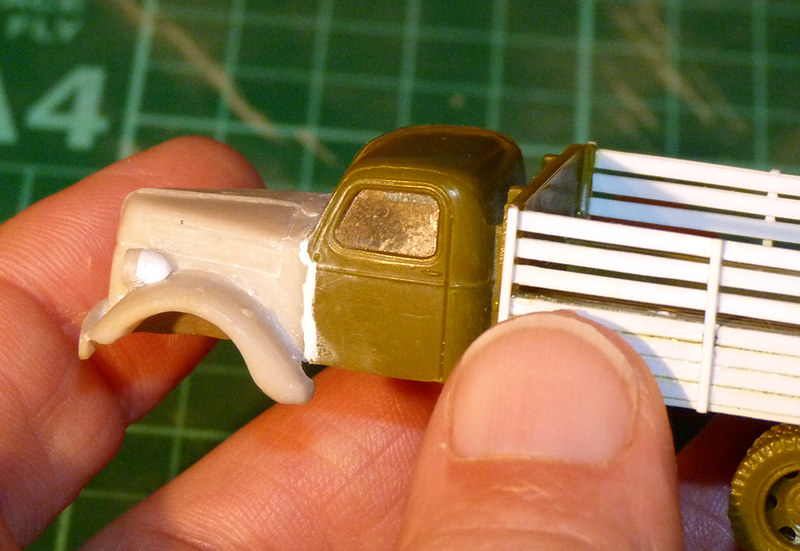
An additional bit of plastic was glued in place for the American style split windscreen (which still has to be painted) and I am considering whether to glue on some tiny wipers too.

The split windscreen is an interesting feature and is not present on all model V3000s. The German made versions of this truck seem to only have a single piece glass windscreen. I am guessing, from what scant information I have read, that the split screen was a feature of the American made or commercial models of this truck. In any case the Finnish V3000 photo I am basing my model on does have this split screen.

Next: A light spray of varnish before I start the pin wash and weathering.

Saturday, 19 January 2013

Cheap Ford-Werke V3000 (Pt.7) - Base coat

(Building a Rapid Fire! Finnish Army HQ Part 8)
This is more like it, I always feel I am making some real progress when I start to get the paint on. In this case a quick spray with Humbrol's No. 86 Light Olive aerosol, which I think is a reasonable match for the colour on the truck in the reference of the Finnish V3000 I am using.

Base coat applied to my V3000 model

Next I have to paint some of the other base areas like the tyres and I have the cab to interior to paint fully before gluing in the windows. I am playing this one by ear really.

Edit: Looking at this in the cold light of day I should add that this looks a little lighter than the olive green actually is due to the harsh flash on my camera (it's actually a shade darker).

Friday, 18 January 2013

Building a Rapid Fire! Finnish Army HQ Part 7

Supply truck conversion - cheap Ford-Werke V3000 (Pt.6) - Windscreens
Well, this is the bit I haven't been looking forward to - making the clear plastic windscreens for my truck. This is the first time I have done this, though apparently I will have to get used to it as even some premium models - like my recently purchased Wespe kits - don't come with fitted window parts, just small sheets of transparent plastic. So, how to accurately cut out my windscreens?

In short I did the sensible thing - I asked more experienced modellers how to do it. I posted a question up on the Airfix Tribute Forum and quickly got several suggestion which solved quandary. The procedure goes like this...

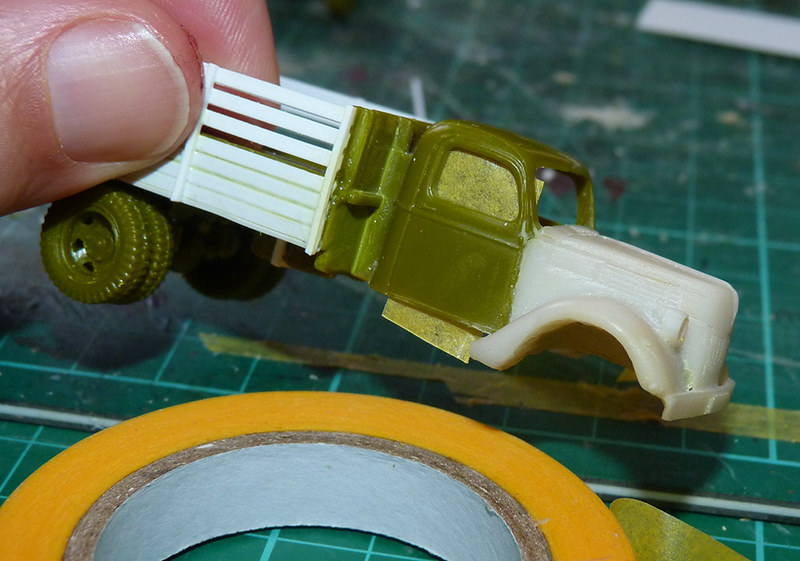
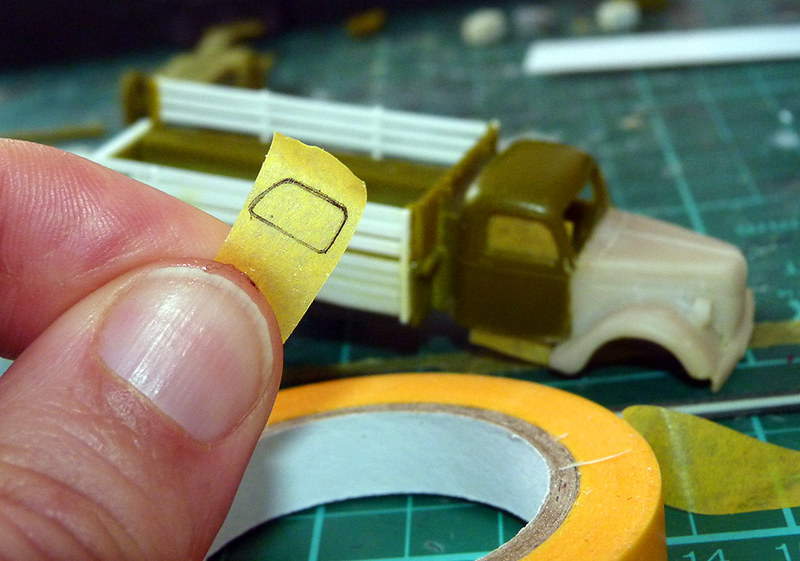
First of all you cut some small strips of masking tape and stick them onto the inside of your vehicles windows...


Then you use a fine pen to trace the shape of the window onto the masking tape...


Remove the tracings and stick them onto the back of your transparent plastic sheets...


You can cut out your windows - I cut outside the line to make my windows a tiny bit bigger than the tracing. I then dry fitted the windows, sanding the edges down until they fitted...


Windscreens ready! However I don't glue them in yet, another couple of tips from the Airfix Tribute Forum were the suggestions that I should only glue the windows in after I had sprayed the base coat of paint on my vehicle and that I should use a special clear glue.

The glue I was recommended to use was a special 'canopy glue', intended specifically for plastic model canopies and windscreens. This glue is something akin to that white woodworking PVA glue you buy for DIY, and it dries completely clear and does not melt the plastic that you are gluing (it also should not - I am told - melt your paintwork).

(There are several makes of this sort of glue, I bought the Pacer Formula '560' canopy glue. Though there is some opinion out there that seems to think that canopy glue is actually nothing more than ordinary PVA‽)

SO...We shall see, once I have sprayed my base layer on my truck I shall install my finished windscreens. Fingers crossed.

Wednesday, 16 January 2013

Building a Rapid Fire! Finnish Army HQ - Part 6

Supply truck conversion - cheap Ford-Werke V3000 (Pt.5)
Moving onto the chassis. This was perhaps the biggest bit of work because the Pegasus American Army Truck model is a long 6x6 (triple axel) truck - based on the GMC CCKW-352 - while the Ford V3000 is a medium length 2x4 (double axel) chassis.

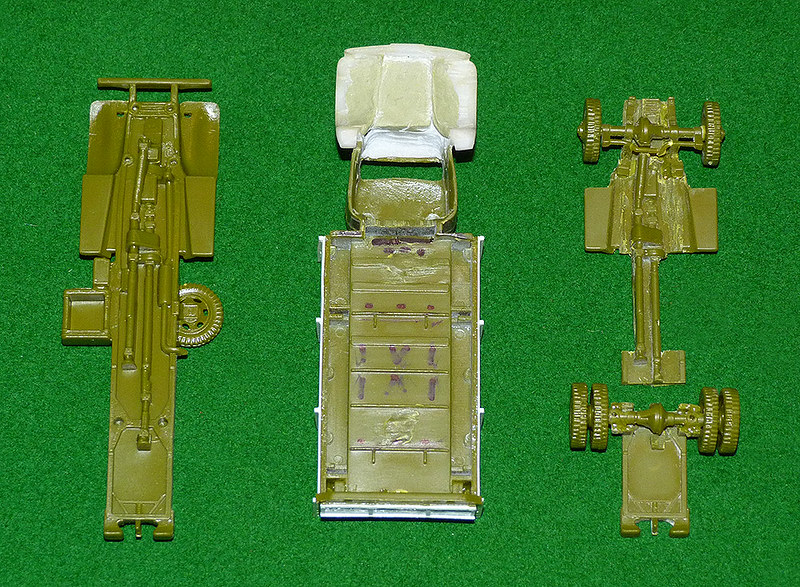
As you can see from the following photo I had to cut the Pegasus chassis up quite a bit. Part of this was so it would fit into a space I made in the resin Valiant cab and part was because the GMC was a lot taller than the Ford V3000 so there was some trimming of the chassis thickness so it now sits lower.

Above: On the left is the original Pegasus American Army Truck chassis and
on the right is my cut-down version. In the middle you can see the work I have
done on the bottom of the cab and cargo bed.

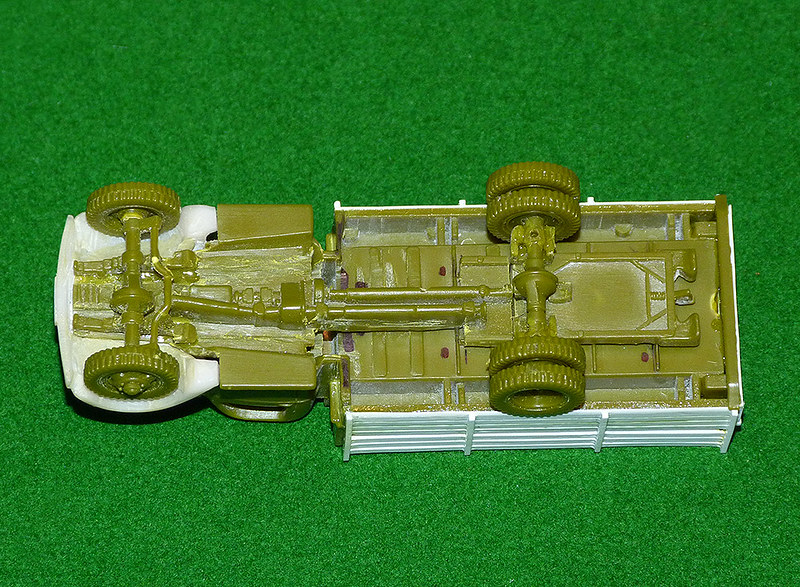
Another modification was the removal of both the GMC's fuel tank and spare wheel so I could refit them on opposite sides of the chassis. I will also have to make a basic frame on which the chassis will sit, joining it to the cab/cargo bed.

Finally, I had to cut the chassis into two in order to shorten the length a little and to allow me to re-centre the new single rear axel on the cargo bed.


The last part of the chassis conversion is to rebuild my chopped up frame. This will provide the little space I need between the top of the rear wheels...


At this point I decided less was more. Having checked over a great many original photos of wartime V3000s I found that a great many of the commercial Ford based models were bereft of the chassis furniture that the military versions were equipped with. Things like extra 'Jerry can' fuel cages and tool boxes and even the rear mud guards were missing on a lot of the well used trucks. So I stopped here...


The last part of construction will be the cab - adding the windscreens and tidying up some of the joins, etc. I have been putting off the construction of the clear plastic windscreens as I haven't done this before, but I got a good tip for making these over at the Airfix Tribute Forum.

NEXT: THE LAST (CONSTRUCTION) LEG - FINISHING THE CAB.

Sunday, 13 January 2013

Building a Rapid Fire! Finnish Army HQ - Part 5

Supply truck conversion - cheap Ford-Werke V3000 (Pt.4)
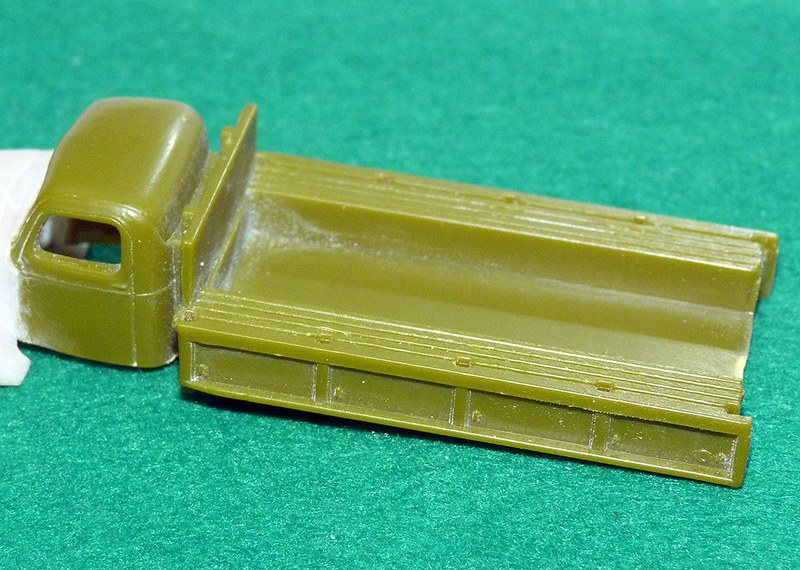
I said that I was going to finish off the cab conversion next...I lied! I love working with plasticard and couldn't resist building the new truck flatbed instead.
Basically the Pegasus US Army Truck model has a completely different flatbed arrangement than the Ford V3000. It's slightly longer, has a different design for the sides of the cargo bed and doesn't have the additional wooden side-planks that are indicative of a 'stake truck' design.

The original Pegasus American Army Truck cargo bed before conversion

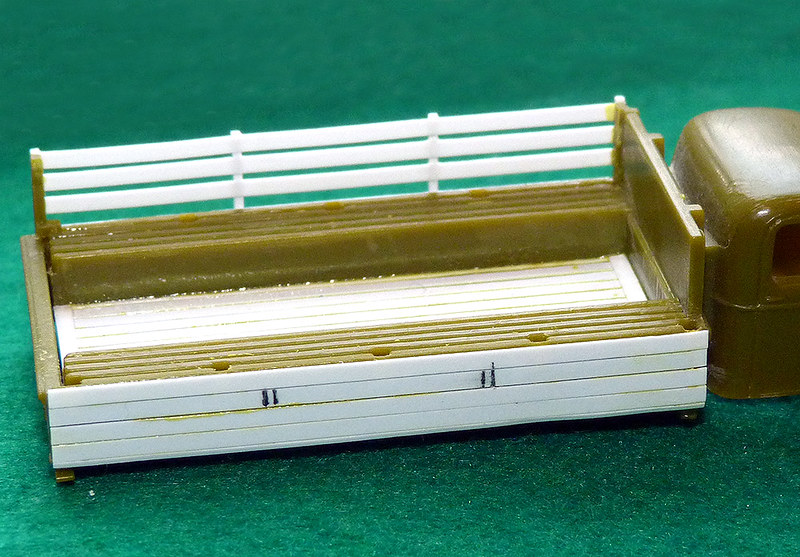
Luckily it's a very simple build to convert the GMC type truck to a stake truck type, I simply sanded down the original flat-bed side detail so the sides were flat and then added four plasticard strips on each side. I next added the four vertical side supports and then added three wider spaced strips at the top for the stake sides.

Converting the Pegasus American ARmy Truck into a mock Ford V3000
Above: One side of the stake truck design complete, here you can see
my mark up for the next side.

The stake truck feature seem to be mostly a design that is indicative of commercial trucks of the time. Pre-war designs by Ford, Chevrolet, Dodge, etc were pressed into military service by the Finns and these seemed to be identifiable from specialist military trucks because of their lack of 'tilt covers' (canvas covered cargo beds).

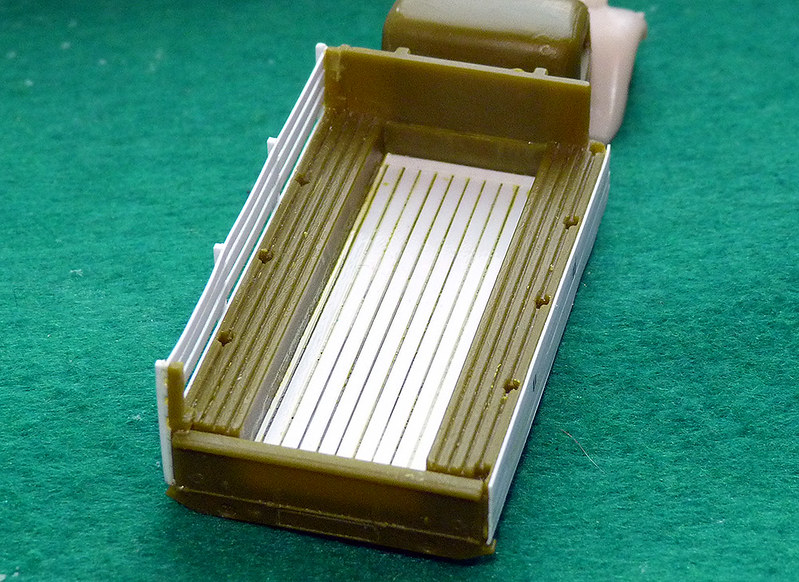
My stake truck build is - like everything in this build - a bit of a fudge, but bears a passable resemblance to the real thing hopefully. As said one of the main differences is the length of the GMC cargo bed and also the inclusion in the Pegasus kit of troop benches on either side of the cargo area. I thought about cutting these out as my truck is supposed to be a cargo truck and not a troop carrier, but these benches are integral to the design of the GMC kit design and would result in my having to completely rebuilding the sides of the flat bed.


Above: Here you can see the original Pegasus troop benches (with holes for the
original side struts). I decided to leave these but I added some floor planking and
am using the original tail gate (but may add plank cladding to this).

Finally, to give a bit of character to the flat bed floor, I added some plastic strips to resemble floor planking. Easy. To roughen up all of the plasticard strips used in order to give them a 'wood' texture I coated them all with some thin coats of liquid poly cement, this slightly melted the surface plastic to give it a mottled effect.

Turning my Pegasus army truck model into a Ford V3000 design

Wednesday, 9 January 2013

Building a Rapid Fire! Finnish Army HQ - Part 4
Supply truck conversion - cheap Ford-Werke V3000 (Pt.3)
Just a little update so I can convince myself that I am making some headway with this model. Short story, as usual my idea that this would be 'quick and easy' was way off the mark as the chassis of the Pegasus GMC needs lots of shaping to fit the V3000 cab...


The 'GMC' American truck sits quite high on it's chassis and has a suspension that has to be modified so my mock V3000 looks realistic. So it hasn't been the straight forward conversion I imagined - when are they ever?

Still, I'm slowly getting there as you can see, the next stage is to fit out the cab with a dashboard, steering wheel, seats and driver (all from the Pegasus American Truck kit). These will all have to be painted before fixing permanently inside and - perhaps hardest of all - I will have to make some windscreens out of some spare clear plastic. Never done this before.

Sunday, 6 January 2013

Building a Rapid Fire! Finnish Army HQ - Part 3

Supply truck conversion - cheap Ford-Werke V3000 (Pt.2)
OK, got the basic surgery done! It’s a bit rough and ready and so some filing and filling will have to be done, but I expected that…


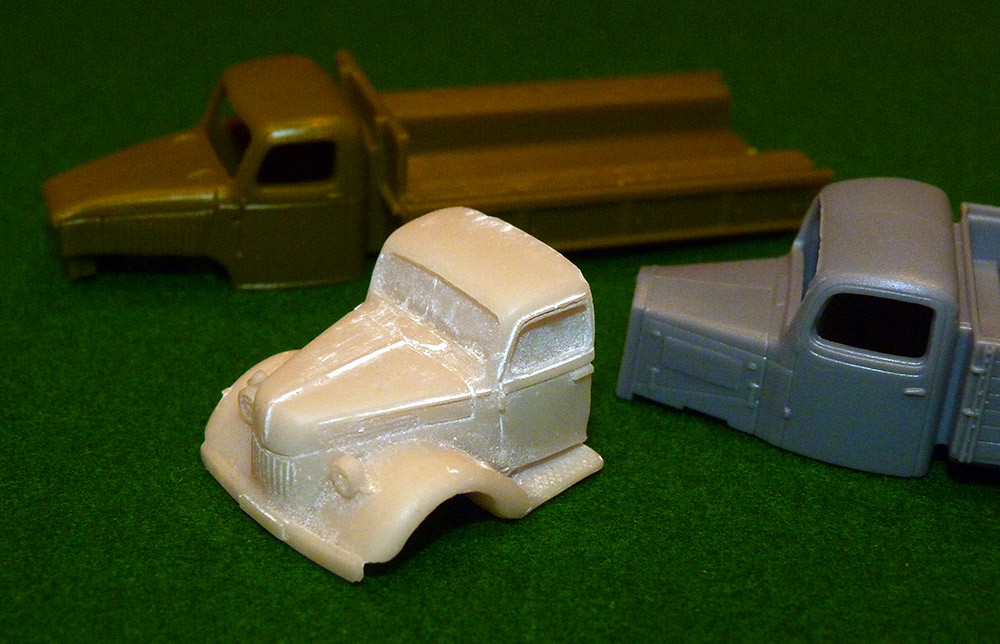
The good news is that the Pegasus cab fits the Valiant bonnet (or hood if you are one of our colonial friends) quite well. I am going to have to shorten the doors just a bit and I may still have to work on the underneath of the resin front end to allow the Pegasus chassis to fit.


Worth mentioning is a new web resource I have found called Pala Suomen Historiaa, it is a Finnish web site so you may need Google’s translation feature to navigate it but it have loads of original photos showing the Finn’s endeavours during the war.

There are lots of nice shots of the V3000 "Hävittäjä" (or the ‘fighter’ as it was nicknamed by the Finns) that show just how important this truck was.


NEXT: FITTING THE CAB, INSTALLING THE INTERIOR

Friday, 4 January 2013

Building a Rapid Fire! Finnish Army HQ - Part 2

Supply truck conversion - cheap Ford-Werke V3000 (Pt.1)
I know this is a bit of a complex post, being as it is documenting my HQ build and detailing the construction of each model in this unit, but I wanted to keep everything together. Today I am starting my cheap and cheerful V3000 truck build.


To recap, the idea here is to produce a cheap(ish) German Ford 3 ton truck suitable for wargaming. But wanting something that would match the rest of my plastic kits I have chosen to chop up a resin V3000 and stick the cab onto the chassis of a Pegasus truck model.

First off (in case you decide to try this yourself) please ensure you work in a well ventilated area and wear a dust mask. I am not sure about the chemical make up of resin, but cutting and sanding it produced a very fine dust which can't be healthy!

I used my trusty Dremmel and it's cutting wheel to, first of all, chop the resin cab off the rest of the truck model and then to sand down the remaining base and wheels.


In the above picture you can see my chopped down resin cab and placed it next to the two likely chassis donors  On the left is the Pegasus 'US Army Truck' and on the right is their 'German Army Truck', although I had planned to mate the cab to the Opel Blitz look-alike I now think the US truck is a better size and shape. Remember, I am using the cab roof of the plastic kit and mating it to the resin lower cab - the German cab is a bit too large and square-shaped.

The real challenge is where to cut the resin cab roof off. Obviously if I can find a convenient natural join - like the door seam - that would hide my hack'n'slash surgery.


Again, I think the Pegasus US Army Truck has the most compatible cab and I think I see where I shall make my cut - down the door seam and up through the roof supports.


The down side of using the US Army Truck kit is that it is a 6x2 (3 axle) chassis and the flat bed is the wrong shape, so a little bit of scratch building will be needed at the back. But as I wanted a specific shape of flat bed anyway - what's called a 'stake bed' - I knew I would be getting the plastic card out eventually anyway.

Sorry if this is a lot of post for not much action, but the cutting and sanding of the resin cab was enough for today (and it took me ages to dust down the kitchen)!

NEXT: I WILL CUT THE RESIN CAB TO SHAPE AND MATE THE PLASTIC CAB ROOF TO  IT...

Monday, 31 December 2012

Building a Rapid Fire! Finnish Army HQ - Part 1

As some of the more unique models are still on the way (some from abroad) I am starting my HQ build with what I have handy. The transport. My organisational inventory includes three trucks in my HQ formation – two medium (up to 3 tons) and one light (a 1.5 ton).

Above: A Finnish army Ford-Werke V8 1940 V3000 3-ton, 4x2 cargo truck. Some 24,110 V3000 trucks were produced by the German Ford factories at Cologne and Berlin between 1941 and 1946. Photo source: Wikipeda

Historically, WW2 Finnish army transport provision was eclectic. Ever short of transport vehicles the Finnish army took into use many commercial vehicles, but there were a few makes that were especially purchased for military use. Perhaps the truck which is most associated with the Finns – among war gamers at least – is the German made Ford-Werke’s V3000 3 tonner, and this is were I am starting my fleet.

The V3000 is reasonably easy to get hold of in Braille Scale form, mainly because it was also a pretty common vehicle in the Wehrmacht as well, and there are versions available whatever your budget might be.


Although you can buy an ‘out of the box’ model of this truck - from Hunor (#HUNO72024) for example, pictured above – these are quite niche and therefore quite expensive and so probably not appropriate for the average war gamer. However, there are a few more modestly priced options designed for the gamer that won’t break the bank.

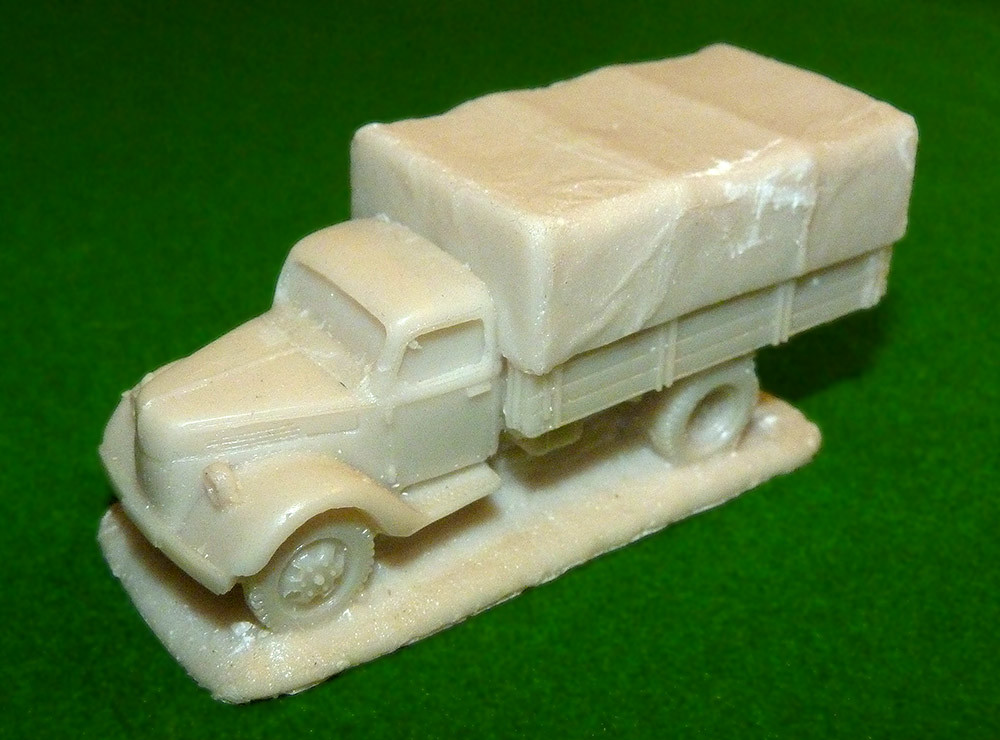
Let’s start at the bottom (cost wise), if you go onto the Rapid Fire! web site and check out their own range of ‘ready to roll’ resin vehicles you will find a very nicely priced one-piece V3000 in ‘1/72’. At just £5.95 you can get a very good looking representation of the German Ford, but this is not a kit and has filled in windows and a rather unattractive central resin support joining the base to the chassis.

Above: This is the one-piece Rapid Fire! V3000, and it looks very neat for a solid resin moulding. When I received this I noticed that it was marked as being made by Valiant Models (although you will not find these for sale on the Valiant web store). Were it not for the fact that this ‘solid’ format model doesn’t match the rest of my multi-part plastic kits I would be very happy with the look of this model. 

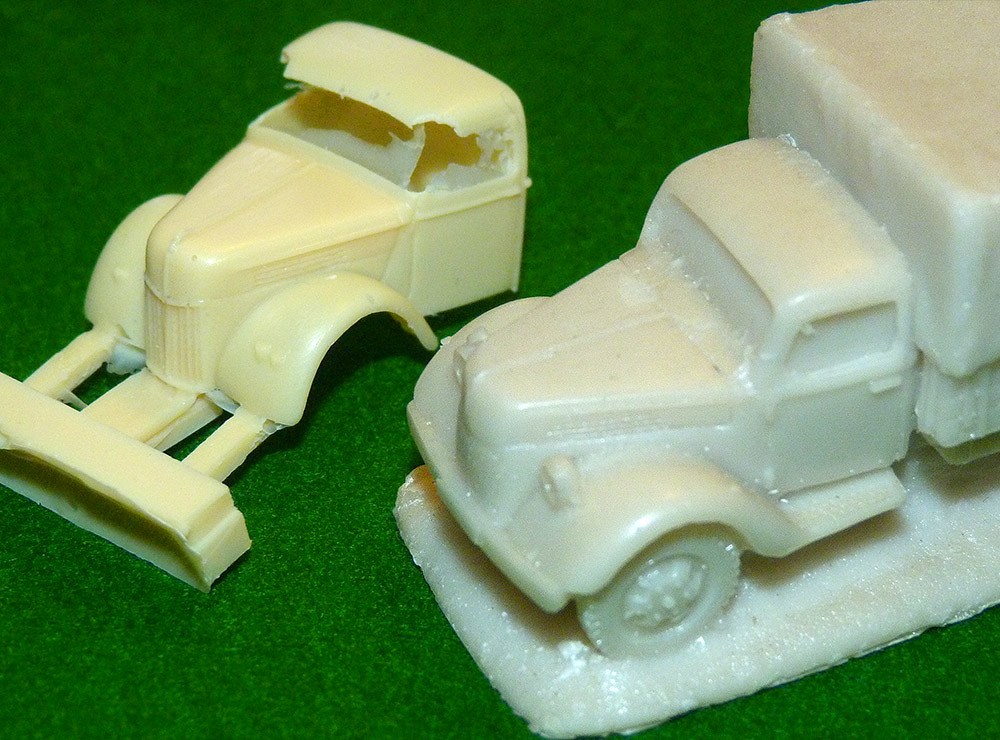
If, like me, you are building you army from plastic kits then you may not appreciated the solid one-piece make up of this model, you’ll maybe want something that matches the rest of your kits. To get round this I am trying out the idea of chopping off the distinctive front end of the resin V3000 and mating it to one of my cheap Pegasus ‘German Army Trucks’.

It may sound a bit of a convoluted exercise, but if I do this I get the best of both worlds and it will just cost £10.45 – but, if you are clever and can make resin moulds you can copy your V3000 front end and create a small fleet of mock versions for a budget price.

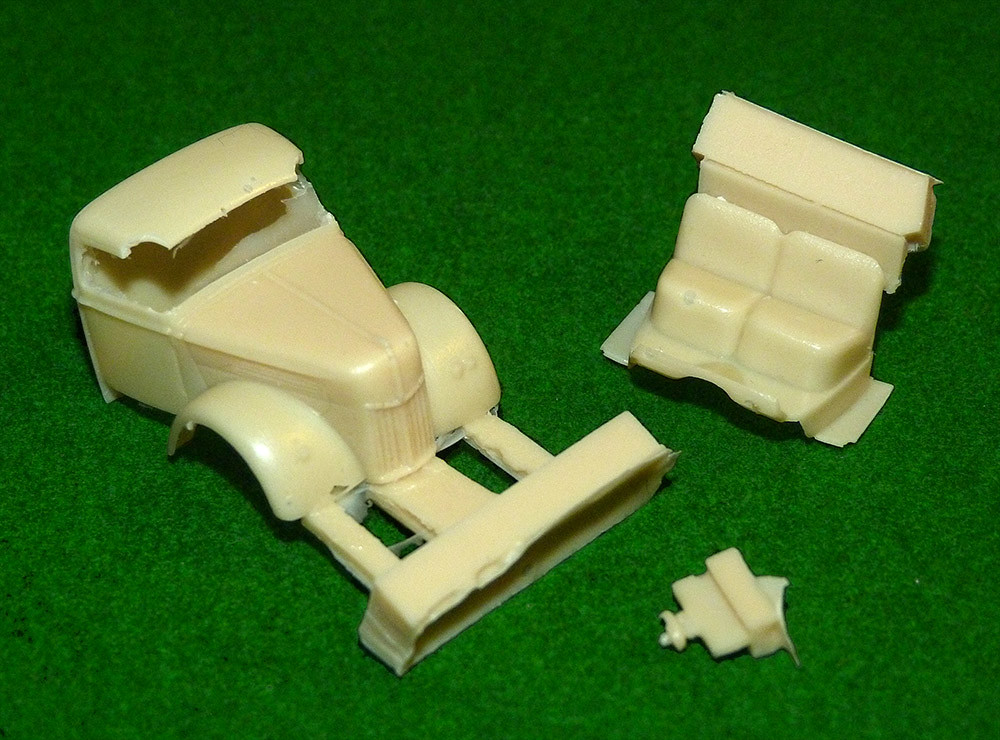
Finally, my other option for making a (relatively) cheaper V3000 is to buy the Model Trans resin cab kit (6.10 Euro). This is actually a better-conceived take on the ‘cut and shut’ idea mentioned above. The cab kit is designed to fit onto the front end of the Roden or Italeri Opel Blitz, with a combined price of about £16+ this is still a little pricey but still cheaper than the Hunor kit.

Above: Here is the Model Trans Ford V3000 cab kit. I was a little disappointed that both of the cab roof supports were broken off and missing. I opted to buy the Italeri Opel Blitz (as it was on sale) to use as the chassis for this conversion kit and that means I will have to do some chopping about to make it fit.

So there you have it, three price options for the V3000. I can’t wait to compare my budget build idea to the more expensive Model Trans hybrid model.

This icon of the Finnish army should look great – hopefully – and provide the mainstay of my medium truck fleet. But aside from this I can build up my fleet with models of Citroen 45 and some Opel Blitz for the medium haulage and captured Soviet Gaz AA or Zil 12 trucks for the light transport. But for variety I can throw in some less well known commercial models, like the Citroen 25, Chevrolet or Dodge. But I will discuss my choices for additional trucks in a later post.


NEXT: In part two I will try putting together my cheap 'cut and shut' V3000. Fingers crossed!