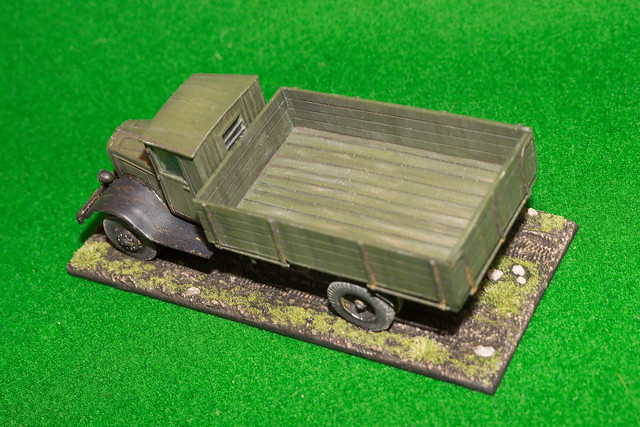
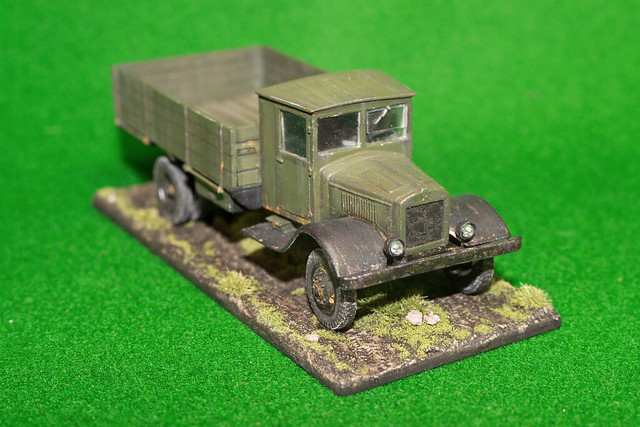
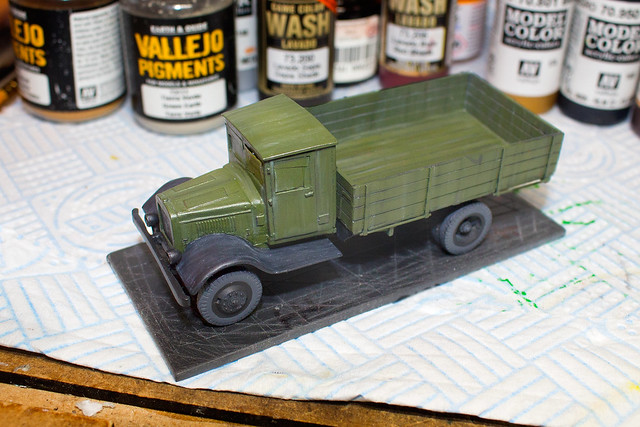
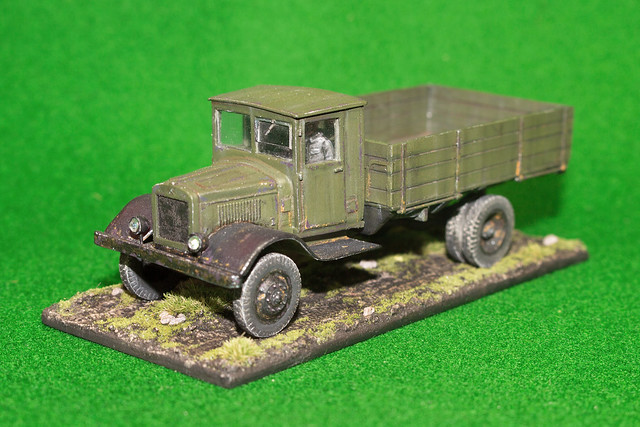
I mentioned my YAG 6 model in yesterday's post and while looking back on my posts on this horrible model I realised that I never did a 'completion post' for it! Now, I suspect this was because it was such a traumatic build and because I was just so pleased to finish it that I subconsciously blocked out any idea of showcasing the final model!
So, to rectify this, here is the finished Zebrano YAG 6 Soviet Heavy Truck (Finnish Army, 1943)...
So, there you go. The completion shots for what was undoubtedly the most horrendous kit build I have made so far! (I still shudder just thinking about it.)
If you really want to know just what was so bad about this Zebrano model - and why I will never buy another - you can look back over the build journal by following this link (posts in reverse order, last first): Zebrano 1/72 resin YAG-6 Soviet Heavy Truck.
And now, let's never talk of this model ever again!
Diary of a novice scale model maker and his adventures in the wacky world of Braille Scale.
Showing posts with label X-Ref: ZEB/YAG6/0814. Show all posts
Wednesday, 17 August 2016
Sunday, 14 June 2015
Yag-6 final touches...
Hooray, the end is nigh! I am literally just putting the final touches to my troublesome Zebrano Yag-6 model. And that suits me just fine.
I still wanted to do some tinkering with the rust effects that I had applied. I had - until now - only used one rust weathering medium which was AK's 'Light Rust', which is very orange. It seemed to me to be a bit extreme on it's own as there was no variation in rust tones - no 'old rust' or metal about to rush - which I think would be subtler tones in darker or more restrained rust red colours.
A technique I had used in the past which I thought worked exceedingly well with Olive Green or Russian Green vehicles was a plum red colour...
This replicated a dark surface rust colour where bare metal was just starting to discolour but wasn't quite a fully orange shade of rust yet. I first tried this out on a 1/72 Pegasus KV-2 practise model that I did some time ago...
I know this is a very small detail on which to linger but I guess this is the difference between a beginner and an intermediate scale model maker, the addition of these small touches which enhance basic painting effects.
Anyway, onto the base...
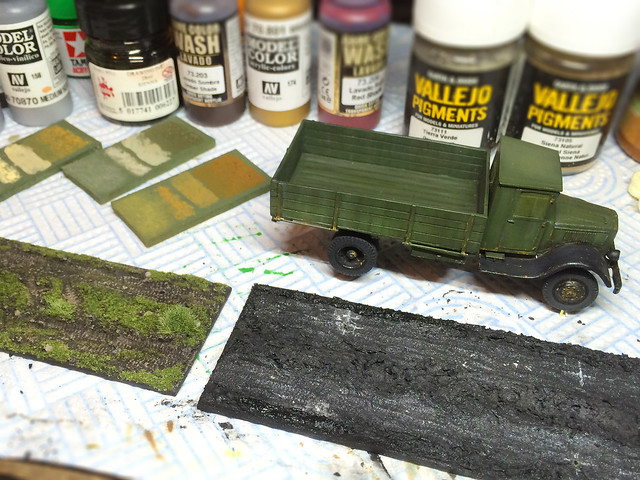
I've been through the description of just how I do my war gaming bases for my Finnish project vehicles so I won't elaborate, and I think I have perfected my technique for this element as much as I want to. I've maintained a fairly simple formula so that all the vehicle bases in the collection look similar...
I have a small selection of weathering powder colour swatches that I have made to help me maintain consistency of colours between models (and I also try to record colours that I use in these blog entries so I can refer back to them at a later date).
Well, that's about it - both the truck and it's base are just a few touches away from completion. The next time you see this Yag will be when I publish the final photographs...
I'm really sorry this has been a project of endless moaning - I'm not satisfied with this model on so many levels (and I certainly cannot recommend it to you). If I ever wanted another Yag-6 I am fairly certain that I could make as good a job - if not better - scratch building one. I certainly feel that I have done so much scratch work on this model to 'fix it' that I might as well as well as started from scratch from the beginning. What a shame - I was so looking forward to making this truck too. :(
Next: The completion photos.
I still wanted to do some tinkering with the rust effects that I had applied. I had - until now - only used one rust weathering medium which was AK's 'Light Rust', which is very orange. It seemed to me to be a bit extreme on it's own as there was no variation in rust tones - no 'old rust' or metal about to rush - which I think would be subtler tones in darker or more restrained rust red colours.
A technique I had used in the past which I thought worked exceedingly well with Olive Green or Russian Green vehicles was a plum red colour...
![]() |
| A mixture of several Vallejo colours - purples and reds plus dark grey - make this dark plum. I use this for chipping touches on green vehicles to give the impression of mild surface rusting. |
![]() |
| Added in tiny spots over dark grey on this KV-2 the plum colour adds a very subtle impression of metal which has been exposed to the elements. |
Anyway, onto the base...
I've been through the description of just how I do my war gaming bases for my Finnish project vehicles so I won't elaborate, and I think I have perfected my technique for this element as much as I want to. I've maintained a fairly simple formula so that all the vehicle bases in the collection look similar...
![]() |
| On the left is one of my previously completed bases so I can check to make sure my colouring of the new base is consistent which the ones I have already done. |
Well, that's about it - both the truck and it's base are just a few touches away from completion. The next time you see this Yag will be when I publish the final photographs...
I'm really sorry this has been a project of endless moaning - I'm not satisfied with this model on so many levels (and I certainly cannot recommend it to you). If I ever wanted another Yag-6 I am fairly certain that I could make as good a job - if not better - scratch building one. I certainly feel that I have done so much scratch work on this model to 'fix it' that I might as well as well as started from scratch from the beginning. What a shame - I was so looking forward to making this truck too. :(
Next: The completion photos.
Monday, 8 June 2015
Bad weather ahead? Yag saga continues
Well, nearing the final straight with my troublesome Yag. Today I did a lot of the weathering using some cheap artists oil paint. I stress cheap because I am finding the budget set I got from Rhyman office store (£3.99) perfectly adequate - they appear to be doing just what the tutorials on oil weathering models say they should be doing (no expensive Windsor & Newton oils for me).
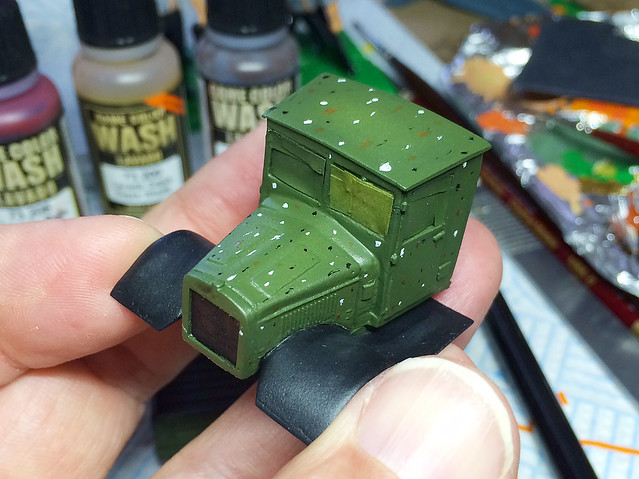
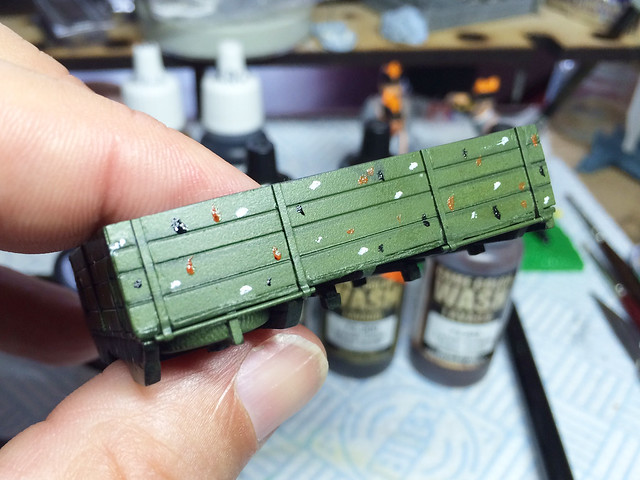
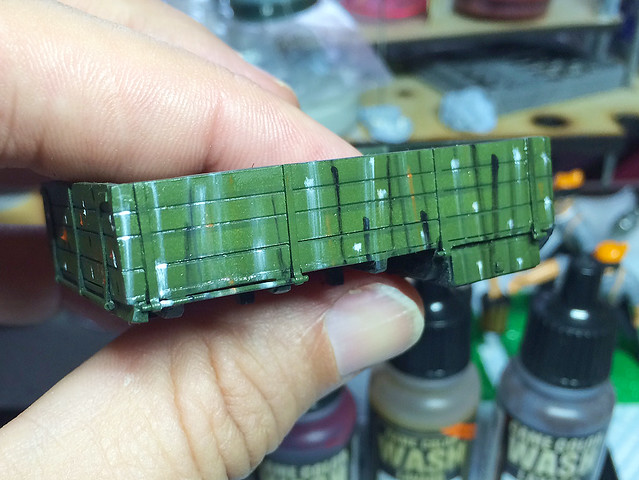
Although I describe the process that I am doing as 'weathering' I think it should be more correctly called 'steaking'. The kind of effects you are looking for are streaks of muck, dust and oil running down vertical surfaces and smeared across horizontal ones. Today I am using a mix of three different colours and am applying them in a random pattern across the various parts before beginning the actual smearing...
I use black for an aged or dirty patches, mid-brown for dust and oil smears and white for bleached patches (not very sophisticated I admit, but I will save the more complex subtleties for when I am a more advanced modeller).
One of the interesting things about oils is that they remain 'active' for a very long time (remember that and try to avoid touching or brushing your model accidentally until the oils have dried or have been sealed). Therefore I have developed a technique of dabbing on a pattern of oil dots all over the model before I start the real work. (When I say 'I' have developed a technique in this blog I merely mean I have just discovered it for myself - I am sure this sort of stuff is all 'old news' for experienced modellers).
What I have learned is that you need to lay down a satin of gloss varnish base coat and you do not need to use a brush loaded with too much thinners in order to streak your oils. The varnish - of course - protects the paintwork you have already done and also allows the oils to slide and smear across the surface of the model.
The slightly damp brush is critical to get the right effect - too wet and you risk washing away your oils completely (and then you have to start again). It's a bit trial and error but honestly I have been surprised with just how little thinners I need to have on the bristles to do this job.
However, the best thing about this 'streaking' technique is that you can play with it - it doesn't matter if you don't get it right the first time, just wipe it off and try again!
You can move the oil about, blend it and go back a bit later and change your mind and fix anything you don't like (because - remember - the oils stay wet). So it's a very forgiving technique - great for novices like myself.
I finished off todays work by applying some pin-washing using AK's Enamel wash. This in itself added an extra touch of grim as well as the definition to the shadow areas and panel lines.
![]() |
| The oil 'streaking' complete, a nicely 'aged' effect. |
I use black for an aged or dirty patches, mid-brown for dust and oil smears and white for bleached patches (not very sophisticated I admit, but I will save the more complex subtleties for when I am a more advanced modeller).
One of the interesting things about oils is that they remain 'active' for a very long time (remember that and try to avoid touching or brushing your model accidentally until the oils have dried or have been sealed). Therefore I have developed a technique of dabbing on a pattern of oil dots all over the model before I start the real work. (When I say 'I' have developed a technique in this blog I merely mean I have just discovered it for myself - I am sure this sort of stuff is all 'old news' for experienced modellers).
What I have learned is that you need to lay down a satin of gloss varnish base coat and you do not need to use a brush loaded with too much thinners in order to streak your oils. The varnish - of course - protects the paintwork you have already done and also allows the oils to slide and smear across the surface of the model.
The slightly damp brush is critical to get the right effect - too wet and you risk washing away your oils completely (and then you have to start again). It's a bit trial and error but honestly I have been surprised with just how little thinners I need to have on the bristles to do this job.
However, the best thing about this 'streaking' technique is that you can play with it - it doesn't matter if you don't get it right the first time, just wipe it off and try again!
You can move the oil about, blend it and go back a bit later and change your mind and fix anything you don't like (because - remember - the oils stay wet). So it's a very forgiving technique - great for novices like myself.
I finished off todays work by applying some pin-washing using AK's Enamel wash. This in itself added an extra touch of grim as well as the definition to the shadow areas and panel lines.
Tuesday, 2 June 2015
Yag-6 continues (after long hiatus)
I hate Zebrano. That's what I've learnt from making this short run resin kit of the WW2 era Soviet heavy truck in 1/72. In fact this project was a gnat's hair from being a 'tactical withdrawal'!
However, having had a bit of time away - a 'cool down period' if you will - I now felt ready to dive back in and see if I could finish off this model without - hopefully - any more problems.
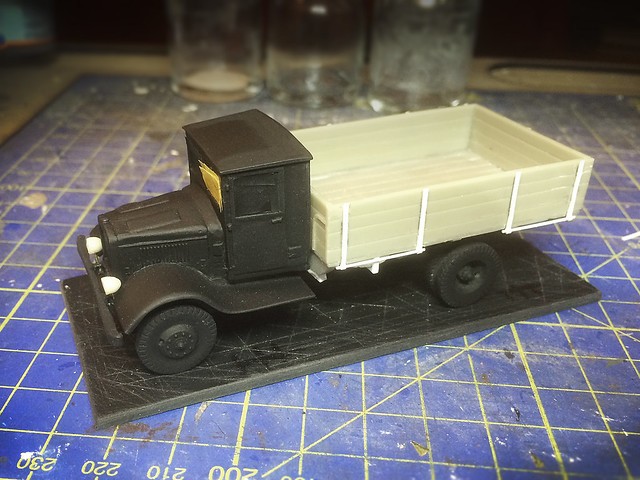
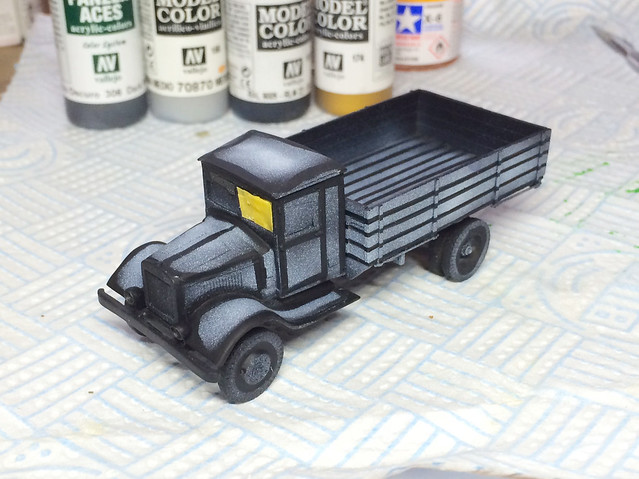
I decided - fool that I am - to experiment with some rudimentary 'pre-shading', nothing complex - but just a simple and elementary bit of preliminary highlighting before I apply the base coat of Russian Green. So I did some very rough and ready masking (as my beginner's airbrush is not fine enough to do pre-shading freehand at this scale)...
I protected the areas that I wanted to retain the flat black undercoat and left exposed those areas I wanted to treat with some light touches of matt white. The idea is that once the green is sprayed on over the top there should be some variation in the tone of the green that is intended to indicate a gradient of tones between the centre and edges of the vehicle's panels...
A bit sharper edged than I had intended, but I am hoping it should become more subtle after the top coat of green is applied. We shall see...
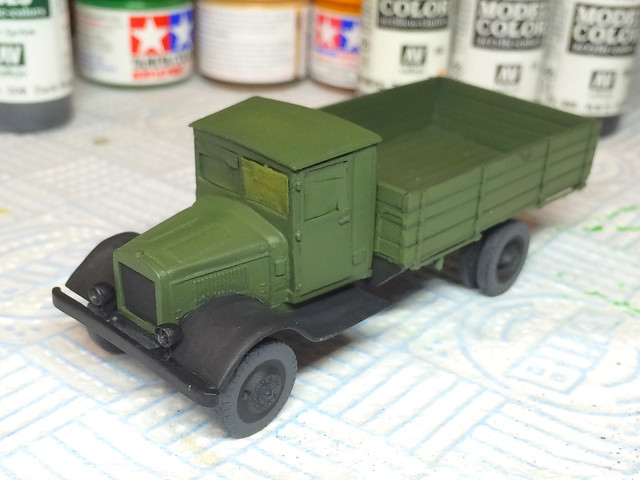
Well, things didn't go exactly to plan. Once again I have found that my attempts to pre-shade in 1/72 have been disappointing. The effect is so subtle as to be almost not worth the bother - I could have created variations in tone on the panels just as well and easier by 'post-shading' using powders and washes (or if I bought a better quality precision air-brush that would do as well).
I am beginning to come to the conclusion that pre-shading suites larger scale models with expansive flat panels. At least, it suits me to post-shade rather than pre-shade. Still if you don't try these things you don't know.
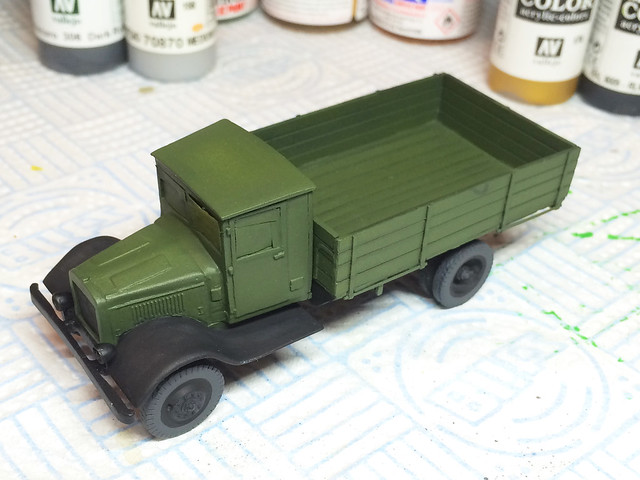
The one positive is that the Vallejo Russian Green is a lovely colour. It's very deep and rich. Unfortunately now the base colours are one you can see some of the flaws in Zebrano's design of this model - there are a lot of rough lines and edges.
Next: Satin varnish coat followed by some streaking and pin-washing.
![]() |
| This is where I left off my Zebrano nemesis! It took a long time and a great amount of modelling to get this kit to this state (where things actually looked like they fitted)! |
However, having had a bit of time away - a 'cool down period' if you will - I now felt ready to dive back in and see if I could finish off this model without - hopefully - any more problems.
I decided - fool that I am - to experiment with some rudimentary 'pre-shading', nothing complex - but just a simple and elementary bit of preliminary highlighting before I apply the base coat of Russian Green. So I did some very rough and ready masking (as my beginner's airbrush is not fine enough to do pre-shading freehand at this scale)...
I protected the areas that I wanted to retain the flat black undercoat and left exposed those areas I wanted to treat with some light touches of matt white. The idea is that once the green is sprayed on over the top there should be some variation in the tone of the green that is intended to indicate a gradient of tones between the centre and edges of the vehicle's panels...
A bit sharper edged than I had intended, but I am hoping it should become more subtle after the top coat of green is applied. We shall see...
Well, things didn't go exactly to plan. Once again I have found that my attempts to pre-shade in 1/72 have been disappointing. The effect is so subtle as to be almost not worth the bother - I could have created variations in tone on the panels just as well and easier by 'post-shading' using powders and washes (or if I bought a better quality precision air-brush that would do as well).
I am beginning to come to the conclusion that pre-shading suites larger scale models with expansive flat panels. At least, it suits me to post-shade rather than pre-shade. Still if you don't try these things you don't know.
The one positive is that the Vallejo Russian Green is a lovely colour. It's very deep and rich. Unfortunately now the base colours are one you can see some of the flaws in Zebrano's design of this model - there are a lot of rough lines and edges.
Next: Satin varnish coat followed by some streaking and pin-washing.
Monday, 23 February 2015
Zebrano Yag-6 re-ignited!
Having had my Zebrano Yag-6 on ice for a while (I'd had enough of bodging for the time being) I suddenly picked it up again today for some bizarre reason. I had thought it would take me longer to get over my initial encounter with this kit. Anyhoo, the irony was that this model was more than half-way complete.
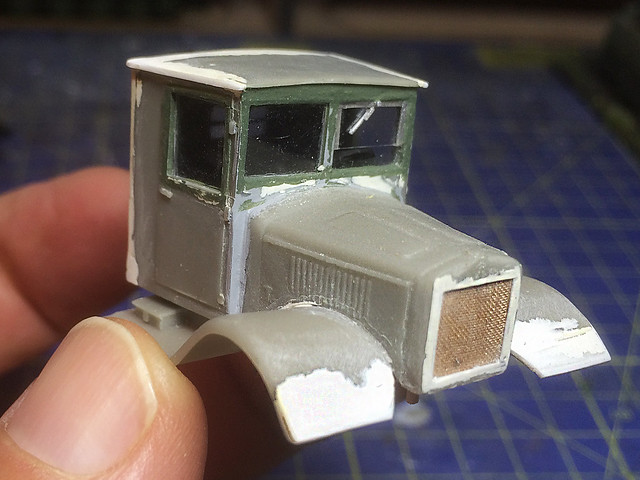
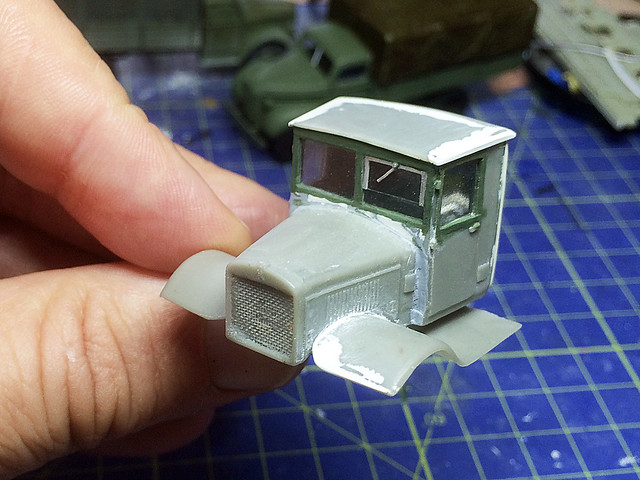
So, just to recap, I was working - at long length - on getting the cab into some sort of acceptable level of completion...
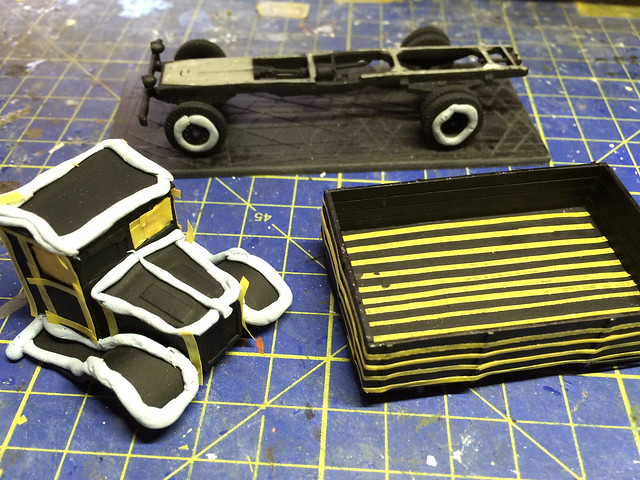
The photo illustrates quite vividly - by the amount of filler on display - the amount of renovation the Zebrano kit requires to bring it up to a reasonable condition. So, what, you might ask, would this model look like without all this additional work? Well, Zebrano have produced a finished example of their Yag-10 (the Yag-6's 3-axle variant) which may give you some clue...
Next: Finishing the black primer coat and then onto the base coat of Russian Green.
So, just to recap, I was working - at long length - on getting the cab into some sort of acceptable level of completion...
![]() |
| Note that I opted to remove Zebrano's original grille texture and replace it with some nicer mesh material. |
It's quite astounding that this is a publicity shot done by Zebrano themselves. Even at my modest level of modelling expertise I think I could make a better job. It doesn't really do much to sell the kit to a potential model maker, especially at the asking price! (Unfortunately I hadn't seen this photo before I bought the kit.) Anyway...Let's put the Zebrano bashing to one size and move on...
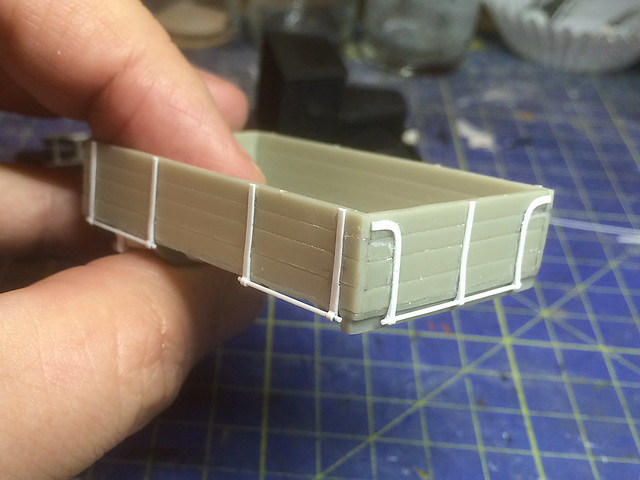
One of the annoying faults with the Zebrano kit was the missing flatbed hinges - these are the long rod-like hinges which allow the cargo-bed sides to drop down to allow easy loading. Of the five hinges that should have been part of the cargo-bed components all but one had broken off and mysteriously disappeared.
So, using the one remaining hinge as a template I had to make some simple replacement parts...
![]() |
| The hinge on the left is finished, the one on the right needs trimming down to size. |
![]() |
| The finished hinges. Not brilliant but about in keeping with the level of detail on the rest of the Zebrano model. |
The next job was to start base coating/priming the model. I have decided to start with a black primer for a change as a lot of people swear by this method and I thought I'd try out a top coat of Vallejo's 'Russian Green' airbrushed over this.
![]() |
| As usual priming makes a model look neater. Hopefully painting will help improve what is a mediocre model. We shall see. |
Thursday, 13 November 2014
YaG-6 cargo
The YaG-6 kit does not come with a tilt cover. This is sort of inconvenient if you are using a vehicle for war games as a canvas cover over the flatbed can disguise the fact that the cargo area is either empty or full. But anyway, while there are ways around this (or you can ignore this) I decided that I wanted to include some cargo, mainly so the vehicle didn't look so 'bare'.
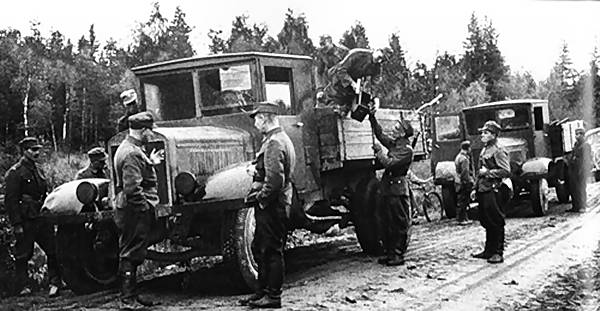
Historical note: I've been through quite a few period photos of the YaG-6 (and YaG family) and to be honest I have not seen one example of this large truck that included a tilt cover. So while it might be tempting - and easy - to add one on so you avoid any war-game issues regarding 'empty or full' it really doesn't seem appropriate to add a canvas cover to this particular truck.
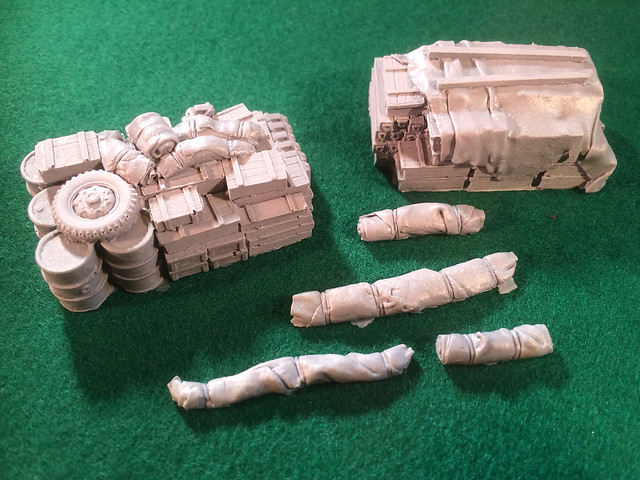
My YaG will be a heavy artillery tow, so - naturally - I will want to include a cargo that matches this purpose. Luckily for me the Value Gear truck cargo 'blobs' set I just relieved does have a very nice load that includes artillery ammunition crates. The only down side is that these loads were really intended for a medium weight truck and so aren't big enough to fill the YaG's cavernous flatbed.
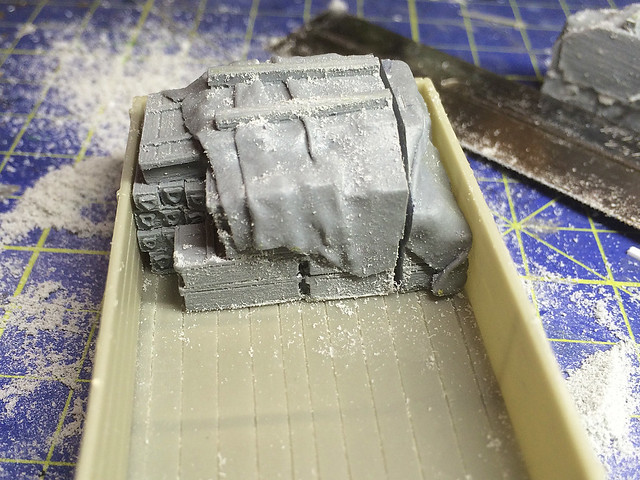
...No problem though. I also wanted to have a partially loaded truck as I wanted to leave space for a 'theoretical' gun crew. So I realised I would have to do some creative re-sizing of the Value Gear 'blob'. After some measuring up I reached for my mini-saw...
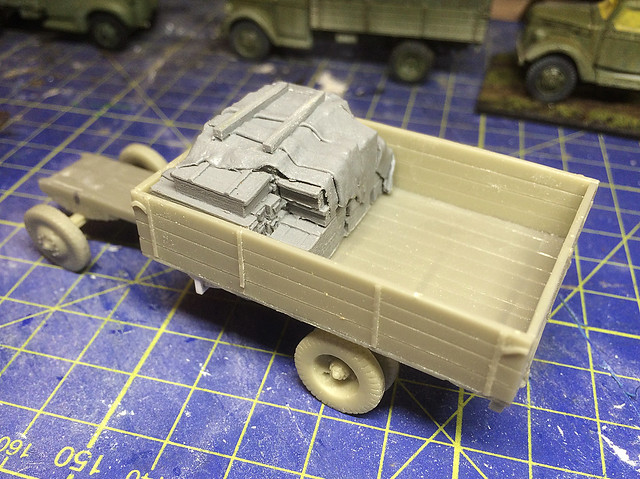
I decided that the cargo would look nice in a cross-wise orientation hard up against the front of the flatbed, just behind the truck's cab. I found a nice logical place to dissect the load - right where a stack of crates met another - and removed a section keeping the larger load and a nice 'end cap'.
Checking the fit I was very pleased with how the load looked. I'll rejoin the two parts of the load and fill the gap with - you guessed it - Milliput.
While giving the truck a suitable 'artillery' look there is enough space to - theoretically - accommodate the gun crew, though I could add some additional personal equipment or tools if needs be.
While I could have created this cargo myself the Value Gear 'blobs' are very nicely crafted and do save me a lot of time (there isn't much joy to be had out of modelling small crates)! Though, I might be tempted to add some rope ties around the load.
This moves my YaG one step on and all the major components are complete (now all my tweeking has been done). So the next stage is the actual base coating.
![]() |
| Source: 'Engines of the Red Army' web site. Source: © www.o5m6.de |
![]() |
| Deciding on cargo. I opted for the load stack on the right for my YaG. It's an ammo box heavy load with a very nice tarp...The problem is it's too big! |
...No problem though. I also wanted to have a partially loaded truck as I wanted to leave space for a 'theoretical' gun crew. So I realised I would have to do some creative re-sizing of the Value Gear 'blob'. After some measuring up I reached for my mini-saw...
I decided that the cargo would look nice in a cross-wise orientation hard up against the front of the flatbed, just behind the truck's cab. I found a nice logical place to dissect the load - right where a stack of crates met another - and removed a section keeping the larger load and a nice 'end cap'.
Checking the fit I was very pleased with how the load looked. I'll rejoin the two parts of the load and fill the gap with - you guessed it - Milliput.
While giving the truck a suitable 'artillery' look there is enough space to - theoretically - accommodate the gun crew, though I could add some additional personal equipment or tools if needs be.
While I could have created this cargo myself the Value Gear 'blobs' are very nicely crafted and do save me a lot of time (there isn't much joy to be had out of modelling small crates)! Though, I might be tempted to add some rope ties around the load.
This moves my YaG one step on and all the major components are complete (now all my tweeking has been done). So the next stage is the actual base coating.
Sunday, 9 November 2014
I hate you Zebrano!
(Bear with me...) I was just watching Will Wheaton play a game of Dungeons & Dragons with Acquisitions Inc. on YouTube, and the party's magician repeatedly threw terrible saving throws on every one of his turns...This, to me, seemed to be exactly what it was like building this Zebrano YaG-6 resin kit!
I hoped with each new stage of the build that the process would go well, but the Gods of Resin peed mightily on me every time!
This stage - the test fitting of all three main truck components (cab, chassis and flatbed) - should have been a walk over. Were this an Italeri or Airfix plastic kit the likelihood that it would have been and all there parts would simply slot together in a very satisfying way. But not with a Zebrano resin kit, on no - dear me no!
Everything is warped.
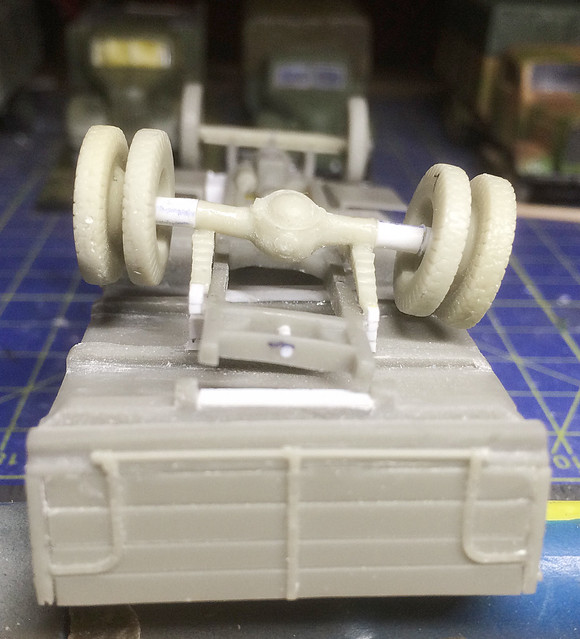
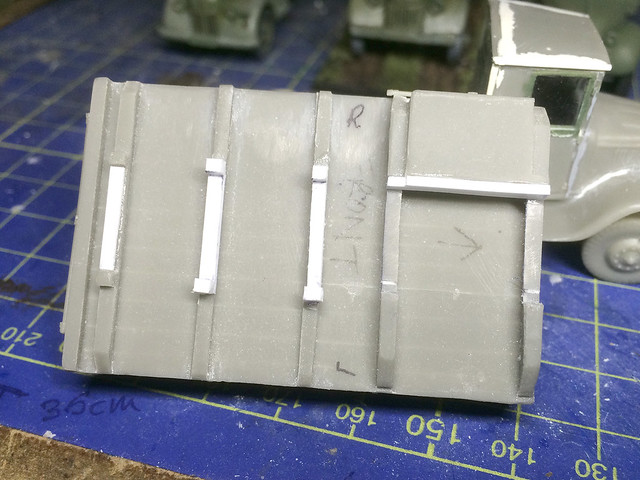
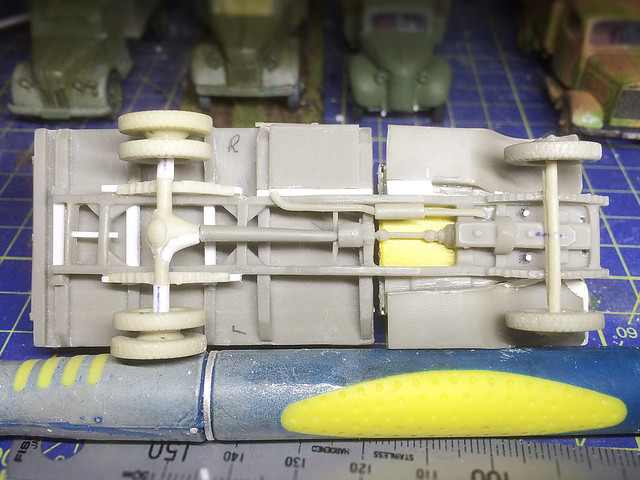
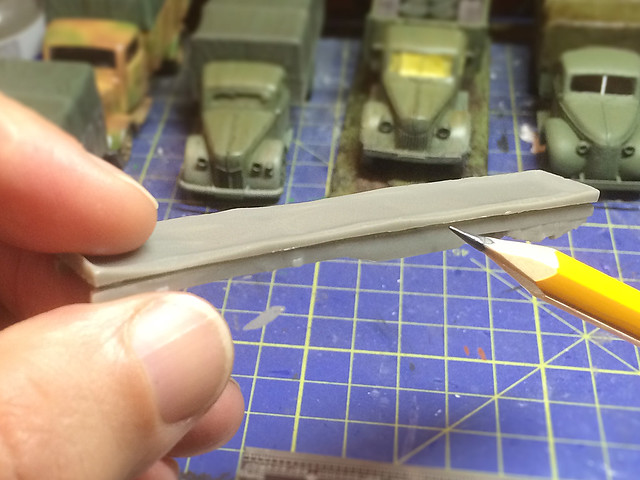
The chassis is bent through either plain. The guiding track down the bottom of the flatbed that the chassis is supposed to slot into is mis-aligned. The cab has no positive seating points and sits askew on the chassis AND will not sit flat on the chassis anyway. So all I've done this weekend - in the bit of modelling time available to me - is sort out these problems.
What I have had to do is make the means of attaching the parts together more positive by building on better 'slots' using bis of plasticard strips...
You do have to do a lot of dry-fitting and measuring of the relative positions of the three major components to ensure they fit together - roughly - how they should. The lack of 'pin and hole' guides leaves a lot of this work to your judgement so you have to constantly be comparing the kit's composition to reference photos.
In this case the main reference point was that the centre of the rear wheels was suppose to be in line with the mid-point between the second and third flatbed support spars. Everything else worked around this.
However, there was a lot of 'shoving and pushing' as each part jostled for 'best position', so the end result is a compromise. Everything is nearly in the correct position - but nothing actually is!
By using small bits of plastic as wedges I straightened up the alignment of the flatbed and cab along the chassis - which wanted to bend in both the vertical and horizontal - and all the parts sort of look straight now.
I had to drill holes through the chassis into the cab and glue plastic 'pins' into the cab. This helped the cab 'clip' into position on the chassis and keeps it sitting straight. (And by the way - I still have to make a new spare wheel to fit on the bottom of the flatbed!)
Ah well. I can't believe that one simple job turned into a post on it's own. But there you go...I give you Zebrano models. Sheesh!
![]() |
| Du-oh! God damn you Zebrano! |
This stage - the test fitting of all three main truck components (cab, chassis and flatbed) - should have been a walk over. Were this an Italeri or Airfix plastic kit the likelihood that it would have been and all there parts would simply slot together in a very satisfying way. But not with a Zebrano resin kit, on no - dear me no!
Everything is warped.
The chassis is bent through either plain. The guiding track down the bottom of the flatbed that the chassis is supposed to slot into is mis-aligned. The cab has no positive seating points and sits askew on the chassis AND will not sit flat on the chassis anyway. So all I've done this weekend - in the bit of modelling time available to me - is sort out these problems.
What I have had to do is make the means of attaching the parts together more positive by building on better 'slots' using bis of plasticard strips...
![]() |
| This new 'track' helps straighten out the warped chassis and helps it seat the flatbed better onto the chassis. |
In this case the main reference point was that the centre of the rear wheels was suppose to be in line with the mid-point between the second and third flatbed support spars. Everything else worked around this.
However, there was a lot of 'shoving and pushing' as each part jostled for 'best position', so the end result is a compromise. Everything is nearly in the correct position - but nothing actually is!
By using small bits of plastic as wedges I straightened up the alignment of the flatbed and cab along the chassis - which wanted to bend in both the vertical and horizontal - and all the parts sort of look straight now.
I had to drill holes through the chassis into the cab and glue plastic 'pins' into the cab. This helped the cab 'clip' into position on the chassis and keeps it sitting straight. (And by the way - I still have to make a new spare wheel to fit on the bottom of the flatbed!)
Ah well. I can't believe that one simple job turned into a post on it's own. But there you go...I give you Zebrano models. Sheesh!
Friday, 31 October 2014
Zabrano YaG-6 - Chassis
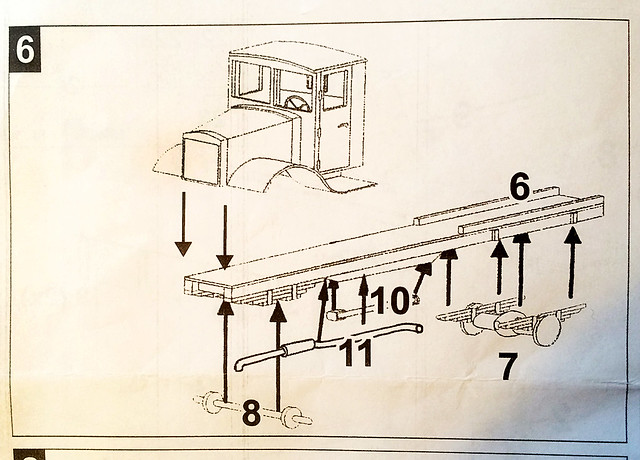
The irony is that the Zebrano YaG-6 kit isn't actually all that complicated - as you can see from the example of the assembly instructions that I have included above. And yet I feel mired in a succession of annoying little extra jobs just to get the kit to conform to the basic instructions.
One of the minor irritations related to a short-run resin kit like this seems to be how the manufacturer chooses to cast his parts. Obviously this is a complex process and they are dealing with delicate components, so the kit makers tend to attache parts to sections of resin - the resin equivalent of plastic sprues - to protect them and to help in the casting process.
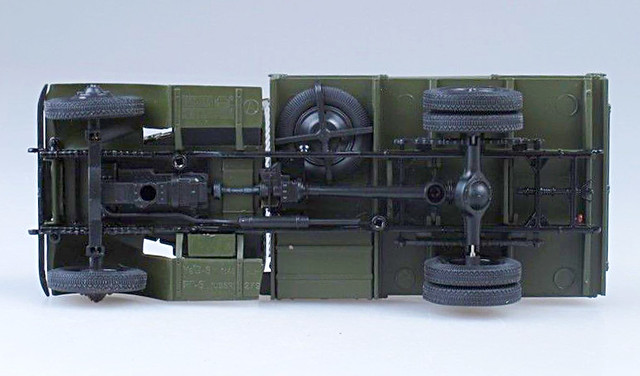
As you can see there is some nice detail on the chassis component - with the bottom of the engine block and front suspension moulded in between the front of the chassis frame.
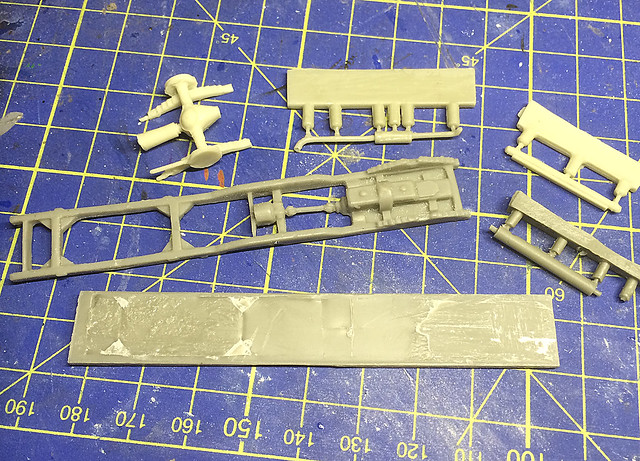
But as you can see in the accompanying photo the supporting resin slab is quite thick and fairly well attached to the frame, which means some careful but determined sawing or cutting to separate the two.
Having done that it's time to check all the various components that make up the chassis assembly...
![]() |
| Note the large slab of resin at the bottom of the photo - this was the supporting resin 'sprue' for the chassis frame! |
By means of deduction I managed to identify the front axel and the drive shaft. But Zebrano's drawing still leaves you scratching your head about the precise placement of parts. You can just about make out where the rear suspension is supposed to rest on the chassis frame, but the exhaust pipe will have you trawling the internet for any YaG-6 photos so you can work out where it goes.
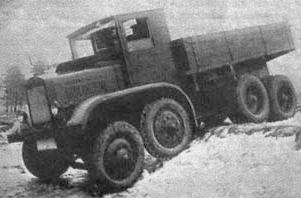
Unfortunately the best picture of the underside of a YaG-6 that I could find was a dodgy shot of the underneath of another YaG model...
Still, this is quite useful as it shows that the exhaust pipe runs on the right side of the engine and down the inside of the chassis frame. It also shows the position of the spare wheel - which will be useful even though the Zebrano spare wheel is missing from my kit! [Also note where the front wheels lay in relation to those huge mud guards.]
I couldn't resist dry-fitting the main parts together to get an idea of what the finished model would look like (and to check fit and dimensions). This did indeed highlight a problem - the rear wheels are supposed to come out to align with the edge of the flatbed, so I will have to make a longer axel.
![]() |
| Note the front fender over-hang. |
Left: Illustration reproduced with the kind permission of Oliver Missing of the 'Engines of the Red Army' web site. Source: © www.o5m6.de
Now, you might think that the same was true of the front axel and wheels, but actually these are in the right position and the huge fenders are supposed to over-hang to this degree. (But, yes, it does look strange.)
Well, it's getting there. There are a few things to sort out and some cleaning up and adding of little details. But the next post on this topic should be - fingers crossed - the base coating of the model.
Tuesday, 28 October 2014
Zabrano YaG-6 - Cargo flatbed
This kit continues to be an aggrevation, there's not much pleasure in the construction process at all. Everything needs work and thus I am only making very small amounts of progress (which is a shame as I was so looking forward to making this model).
Despite thinking I had finished the construction of the cab I still ended up tinkering with aspects of the assembly that I just wasn't happy with.
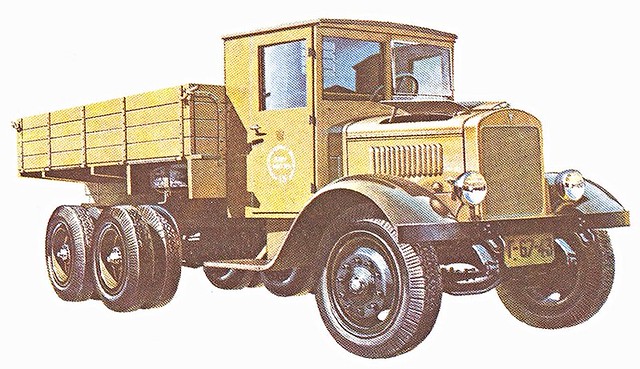
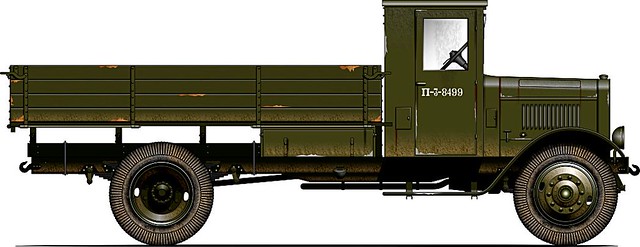
Left: Illustration reproduced with the kind permission of Oliver Missing of the 'Engines of the Red Army' web site. Source: © www.o5m6.de (Note: These illustrations may not be re-published without permission.)
Aside from simply smoothing out lumps and bumps and filling gaps I also wanted to add a nice feature of the YaG-6's windshield - the driver's side split screen and window-wiper. So before I move on to the cargo flatbed I finished off the things about the cab that niggled me.
I'm not entirely convinced that Zabrano have captured the shape of the fenders correctly but I certainly did not want to go to the trouble of making completely new ones from scratch. So I settled for making both left and right mud-guards the same size as they didn't get that right either!
I finished off the planking on the rear cab - made with strips of metallic sticky-tape - and made a slightly better rear window, including some metal cross-bars. I don't think this is strictly authentic but I think it adds some nice decoration and looks right.
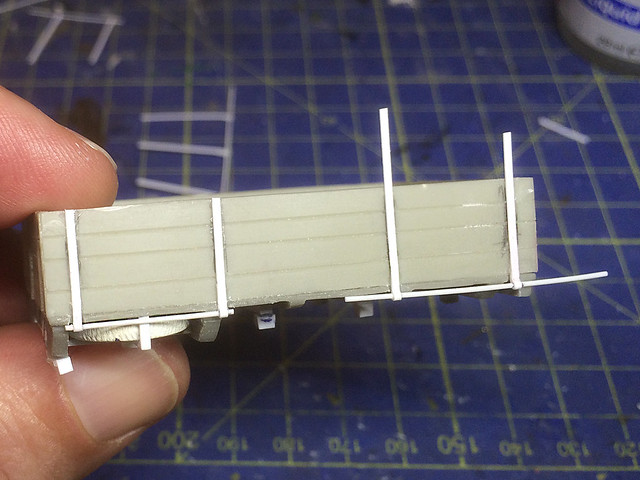
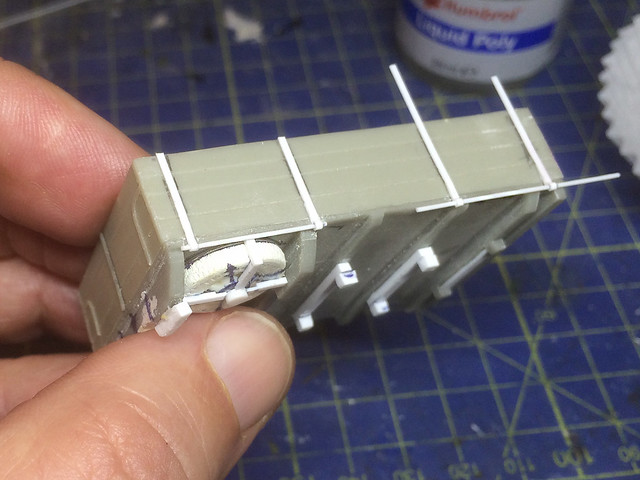
That done to my satisfaction it's time to move on to the cargo flatbed. Now according to the instructions this is the simplest of jobs, just gluing together the 5 components which are made up of the flatbed itself and the four walls of the cargo section.
...But guess what? It ain't that simple. All these parts need some sort of attention and are in one way or another the incorrect size. Additionally the fine details - such as the drop-side hinge-bars - are broken or completely missing in some cases.
The cargo bed took some amount of sanding to get things to go together neatly, and I will have to make new hinge bars (easy enough). It just all more work.
Another aggravating thing is that the spare wheel - which is supposed to fit underneath the cargo bed - is missing! Because the YaG's wheels are a non-standard and larger size it's not something I can simply rectify by rummaging through my spares box. I may have to make a replacement, the hardest part of which will be replicating the distinctive tyre tread.
...Moan, moan, moan!
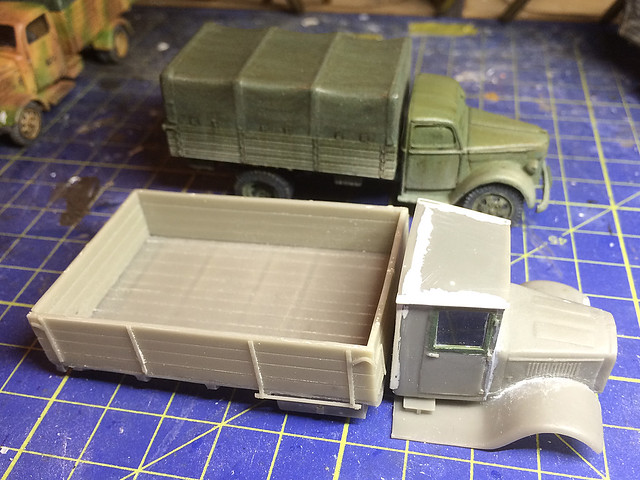
Anyway, let's try and end on some sort of positive note. Having made the cab and cargo bed I can now get some sort of idea about what size the finished model will be - and oh is it going to be a whopper!
I compared it to one of my medium trucks and it dwarfs my Ford V3000 by a good amount. A good job really as I intend this as one of my three heavy artillery towing vehicles (the real YaG-6 had a 5 tonne load capacity).
The model doesn't come with a tilt canvas cover but, actually, the two examples of this big truck that the Finns captured didn't have tilt covers fitted...
I guess I could make some cargo - ammo boxes, tarps and tools - to go in the cargo bed. But I haven't decided about that yet. It might be a bit bare if I don't put something in there.
Next: The chassis. (Any guesses how much work there will to be done on that?)
Despite thinking I had finished the construction of the cab I still ended up tinkering with aspects of the assembly that I just wasn't happy with.
Left: Illustration reproduced with the kind permission of Oliver Missing of the 'Engines of the Red Army' web site. Source: © www.o5m6.de (Note: These illustrations may not be re-published without permission.)
Aside from simply smoothing out lumps and bumps and filling gaps I also wanted to add a nice feature of the YaG-6's windshield - the driver's side split screen and window-wiper. So before I move on to the cargo flatbed I finished off the things about the cab that niggled me.
I'm not entirely convinced that Zabrano have captured the shape of the fenders correctly but I certainly did not want to go to the trouble of making completely new ones from scratch. So I settled for making both left and right mud-guards the same size as they didn't get that right either!
I finished off the planking on the rear cab - made with strips of metallic sticky-tape - and made a slightly better rear window, including some metal cross-bars. I don't think this is strictly authentic but I think it adds some nice decoration and looks right.
That done to my satisfaction it's time to move on to the cargo flatbed. Now according to the instructions this is the simplest of jobs, just gluing together the 5 components which are made up of the flatbed itself and the four walls of the cargo section.
...But guess what? It ain't that simple. All these parts need some sort of attention and are in one way or another the incorrect size. Additionally the fine details - such as the drop-side hinge-bars - are broken or completely missing in some cases.
![]() |
| Source: © www.o5m6.de |
The cargo bed took some amount of sanding to get things to go together neatly, and I will have to make new hinge bars (easy enough). It just all more work.
Another aggravating thing is that the spare wheel - which is supposed to fit underneath the cargo bed - is missing! Because the YaG's wheels are a non-standard and larger size it's not something I can simply rectify by rummaging through my spares box. I may have to make a replacement, the hardest part of which will be replicating the distinctive tyre tread.
...Moan, moan, moan!
Anyway, let's try and end on some sort of positive note. Having made the cab and cargo bed I can now get some sort of idea about what size the finished model will be - and oh is it going to be a whopper!
I compared it to one of my medium trucks and it dwarfs my Ford V3000 by a good amount. A good job really as I intend this as one of my three heavy artillery towing vehicles (the real YaG-6 had a 5 tonne load capacity).
The model doesn't come with a tilt canvas cover but, actually, the two examples of this big truck that the Finns captured didn't have tilt covers fitted...
![]() |
| Source: SA Kuva archive |
Next: The chassis. (Any guesses how much work there will to be done on that?)
Subscribe to:
Posts (Atom)